How to refurbish old wooden furniture
How to restore wood furniture: clean, repair and refinish
Real Homes is supported by its audience. When you purchase through links on our site, we may earn an affiliate commission. Here’s why you can trust us.
We show you how to restore old wooden furniture back to its greater glory.
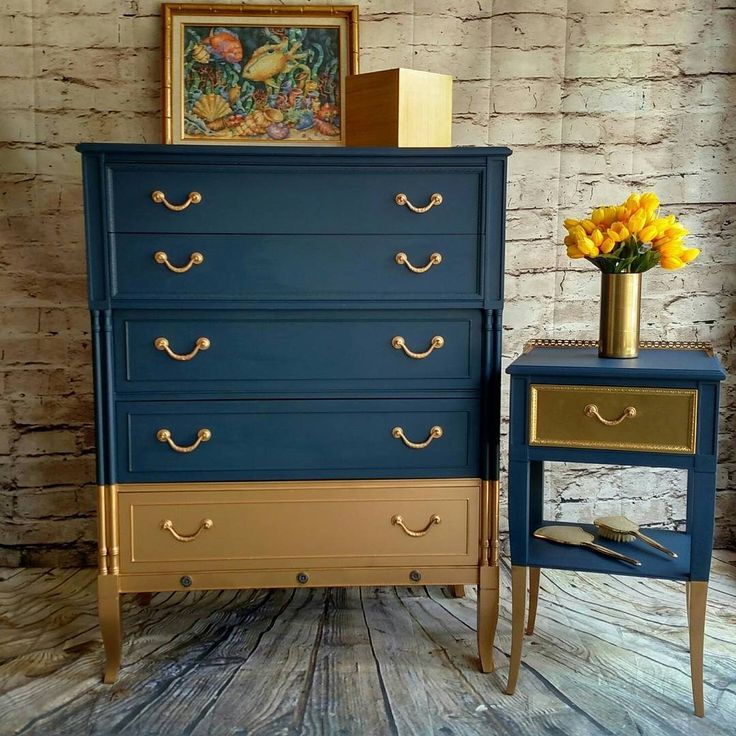
(Image credit: Colin Poole)
Join our newsletter
Thank you for signing up to Realhomes. You will receive a verification email shortly.
There was a problem. Please refresh the page and try again.
By submitting your information you agree to the Terms & Conditions and Privacy Policy and are aged 16 or over.Looking for practical advice on how to restore wood furniture? You've come to the right place. Neglected old wooden furniture often suffers from a build-up of dirt and grime, with the diminished colour and lustre resulting in a dull appearance. With this in mind, owners of antique furniture are often left wondering how to restore old wood furniture (often much treasured pieces) to their former glory.
Thankfully, restoring wood furniture is quite easily done and we've created this easy to follow guide so that when you come to restore furniture, you'll know what to do for ultimate success. What's more, with restoration furniture seemingly always at the forefront of home trends – in both period and contemporary properties – and therefore, more costly to purchase, now you can save on something beautiful by simply creating your own.
- See our guide on caring for, cleaning and polishing wood furniture if you've more modern pieces around the home.
More from Period Living
(Image credit: Period Living)
Period Living is the UK's best-selling period homes magazine. Get inspiration, ideas and advice straight to your door every month with a subscription .
The mahogany writing desk in this project below had ugly watermarks that marred the top that also needed attention. While it’s easy to restore old wooden furniture on a DIY basis, we'd always recommend ensuring you use the correct products.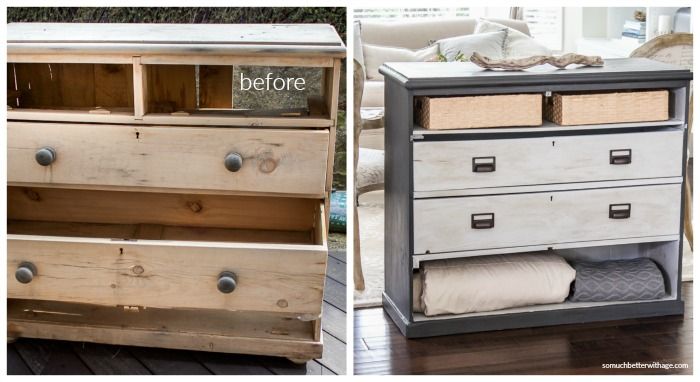 Our guide below talks you through furniture renovation and cleaning done professionally.
Once you're done, see all our cleaning buys, how-tos and hacks to help keep the rest of your home sparkling. Looking for more expert advice on antique furniture restoration perhaps, and all things period properties – both interior and exterior? Head over to our Period Living hub page.
Everything you will need to restore old wooden furniture:
- Work gloves
- Dust mask
- Paintbrushes
- Proprietary chemical stripper and stripping tool
- Wax and polish remover and fine steel wool (0000 gauge)
- Fine glasspaper and sanding block
- Wood dye
- Wood restorer/ finishing oil
- Wax polish
- Tack cloth and lint-free cloth
Eveything you need to restore old wooden furniture...
87 Amazon customer reviews
☆☆☆☆☆
Low Stock
£3
View Deal
Low Stock
£9
View Deal
£13.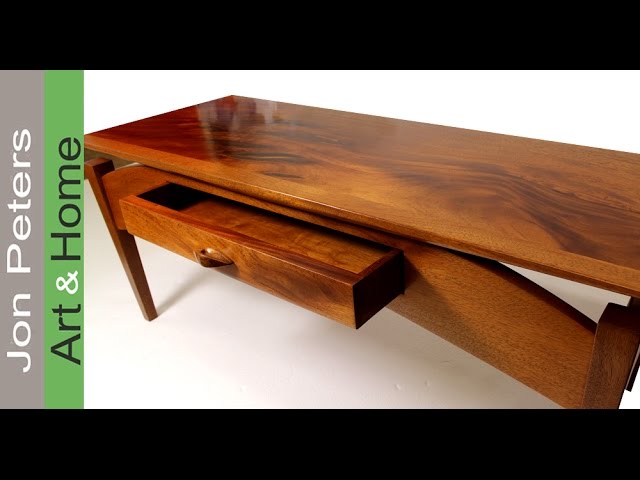 03
03
View Deal
How to restore old wooden furniture: step-by-step instructions
1. Prepare for stripping back
Stripping furniture is messy, but key to wood restoration, so work outside if possible. If working indoors, protect the floors and any furniture nearby and ensure good ventilation. To avoid damaging the finish on the body of the table, cover it in a plastic sheet so that only the top is exposed. Apply stripper liberally with an old brush.
2. Allow layers to dissolve
For a good result when refinishing wood, leave the stripper on for between five and 30 minutes until the finish – a mix of old varnish and polish – has dissolved. The length of time will depend on the composition and thickness of the coating. If the stripper hasn’t removed all the layers just re-spread the paste and it will continue to work.
Refinishing wood furniture may seem like an art but is easily done.
- How to lime wood
3. Neutralise the chemical stripper
Neutralise the wood with a pad of steel wool soaked in white spirit or proprietary wax and polish remover, following the grain of the wood. Before using any chemical always read the label carefully as different strippers require different neutralisers. Failure to neutralise stripper can allow it to reactivate and your wood restoration may not go to plan.
- How to paint furniture
4. Clean off the rest of the table:
The next step to refinish furniture is to wipe away residues with cotton rags and leave for 24 hours. Meanwhile clean away dirt and old polish elsewhere by applying wax remover to a steel wool pad or coarse cloth and working in small areas at a time. Leave for a few minutes to soften the wax and wipe away with a clean cloth before it solidifies.
5. Return to the tabletop
24 hours after stripping the tabletop, use a sanding block and very fine glasspaper to smooth over the wood fibres raised during the stripping process – work with the grain.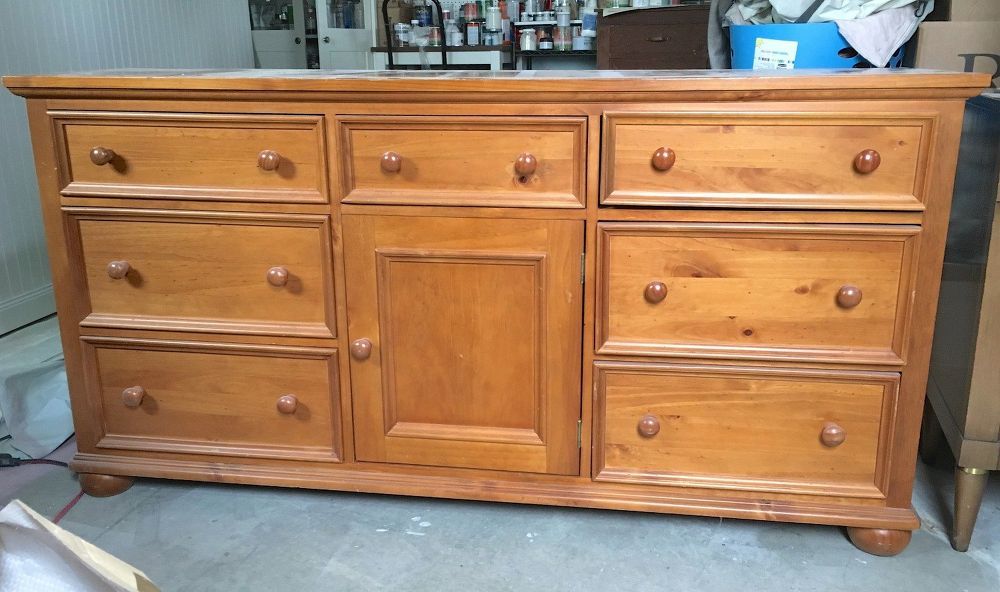 Shake and vacuum the protective sheet to get rid of dust that could spoil the finished piece. Finally wipe the top with a tack cloth.
6. Tackle areas of bleached wood
When you restore furniture, you'll notice that every piece is different to tackle. Here for instance, for many years the table was sited beneath a window and the sun has bleached part of the wood, so applying a mahogany wood dye will make the top a uniform colour. Apply generously with a brush and allow stain to penetrate; wipe away excess with a cloth. Ensure an even finish by working in a good light.
Restoration furniture is a the perfect way to introduce something timeless to both period and modern properties.
7. Improve the sheen and finish when refinishing wood
Once dry, apply a coat of finishing oil using a brush or lint-free cloth. Allow oil to penetrate for 10 minutes and wipe away the surplus before it goes sticky. Wait for at least five hours and gently rub with 0000 gauge steel wool before applying a further coat; repeat again – the more coats the greater the durability and sheen.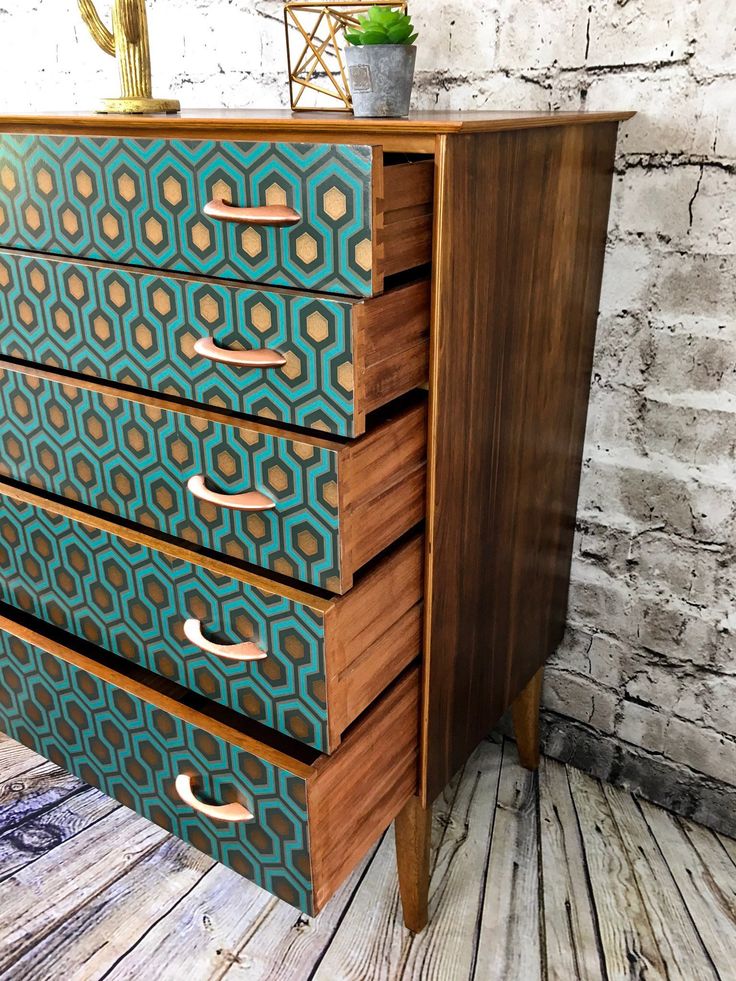
8. The final spruce up with wood restorer
Finally, sparingly apply a thin coat of good furniture wax over the whole table. Leave for an hour at least and polish with a lint-free cloth. To avoid warping caused by drying out of the wood, position furniture away from radiators and fires. Sunlight will bleach the wood, so ensure it’s not placed beneath a window
Home remedies for restoring old wooden furniture
There are a couple more tricks you can use to restore furniture at home. You can remove surface dirt and old layers of wax polish with a home-made mix of four parts white spirit to one part of linseed oil. If the finish is still looking a bit lifeless, pour some proprietary wood reviver onto a cotton cloth and buff vigorously.
One such remedy which works when refinishing wood furniture is:
- 1 part linseed oil
- 2 parts meths
- 2 parts turps
- 2 parts distilled vinegar
Finally, refinish furniture with some beeswax polish and that should bring it back to life.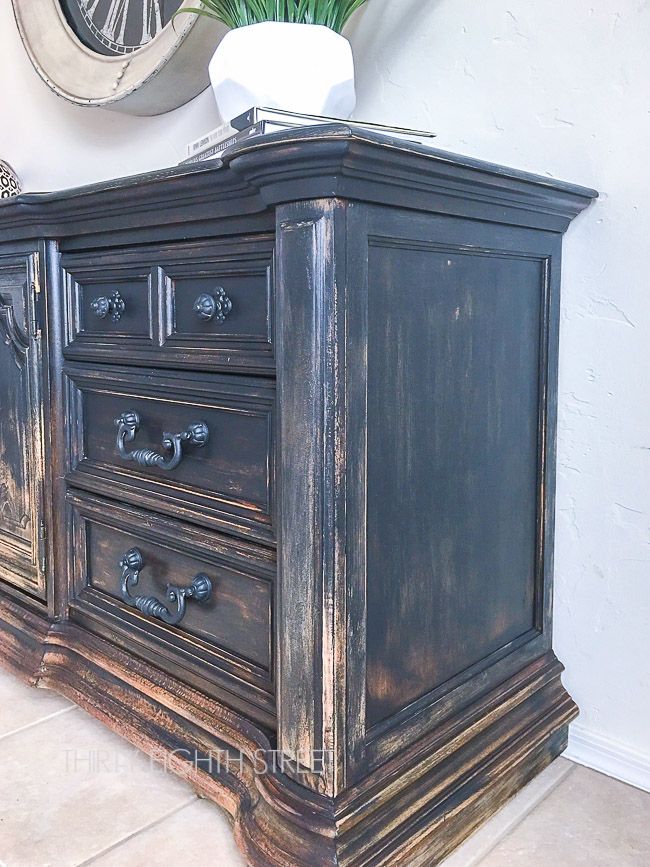
Furniture refinishing: How to Refinish Furniture
Learn how to refinish furniture faster and easier by avoiding stripping. A seasoned pro tells you how to clean, repair and restore old worn finishes without messy chemical strippers. Furniture refinishing will be easier from here on out!
1 / 12
Family Handyman
How to Refinish Furniture Without Stripping: Benefits
Stripping furniture is a messy, time-consuming process. And sometimes the results aren't as great as you had hoped. Fortunately, you don't always have to resort to stripping to restore your furniture to its original luster. To show you an easier alternative, we enlisted Kevin Southwick, a furniture restoration specialist. Kevin Southwick specializes in the conservation and restoration of antiques and in custom wood finishes. He also consults in these areas. Kevin's expertise is the result of more than 20 years' experience working with and learning about wood finishes and furniture repair and furniture refinishing.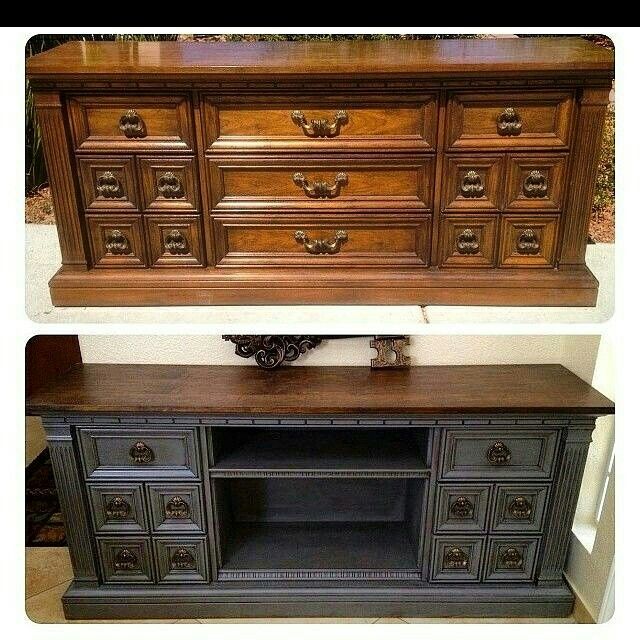 We'll show you Kevin's tips for cleaning, repairing and restoring finishes without all the messy chemical strippers and tedious sanding. You'll save tons of time. And since you'll preserve the patina and character of the original finish, your furniture will retain the beauty of an antique. One word of caution, though: If you think your piece of furniture is a valuable antique, consult an expert before you do anything.
Staining or painting outdoor furniture helps it stand up against the elements.
2 / 12
Watch this video to see how easy it is to restore furniture yourself
3 / 12
Family Handyman
Assess the Finish with Mineral Spirits
Before you start any repairs or touch-up on your furniture refinishing, wipe on mineral spirits to help you decide what your next steps should be. The mineral spirits temporarily saturates the finish to reveal how the piece of furniture will look with nothing more than a coat of wipe-on clear finish.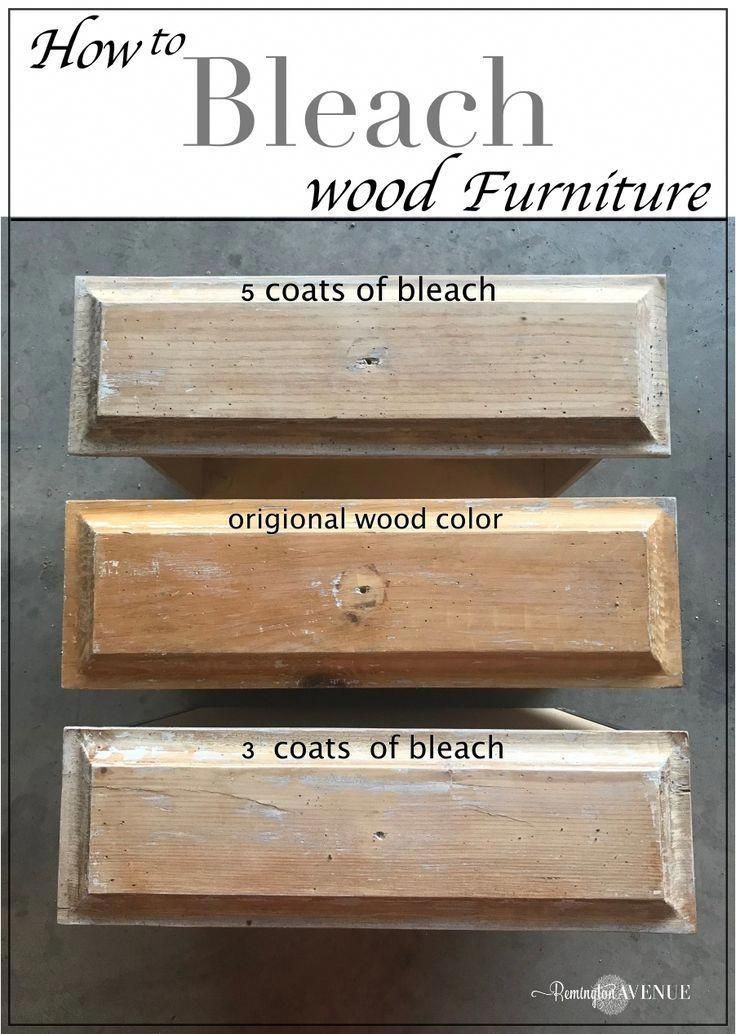 Don't worry; this won't harm the finish. If it looks good, all you have to do is clean the surface and apply an oil-based wipe-on finish. If the surface looks bad even when wetted with mineral spirits, you'll have to take other measures to restore the finish. We show some of these in the following steps.
4 / 12
Family Handyman
Clean it Up
A thorough cleaning is an important first step in any furniture refinishing renewal project. Removing decades of dirt and grime often restores much of the original luster. Kevin says it's hard to believe, but it's perfectly OK to wash furniture with soap and water. Kevin recommends liquid Ivory dish soap mixed with water. Mix in the same proportion you would to wash dishes. Dip a sponge into the solution, wring it out, and use it to gently scrub the surface. A paintbrush works great for cleaning carvings and moldings. When you're done scrubbing with the soapy water, rinse the surface with a wrung-out sponge and clear water.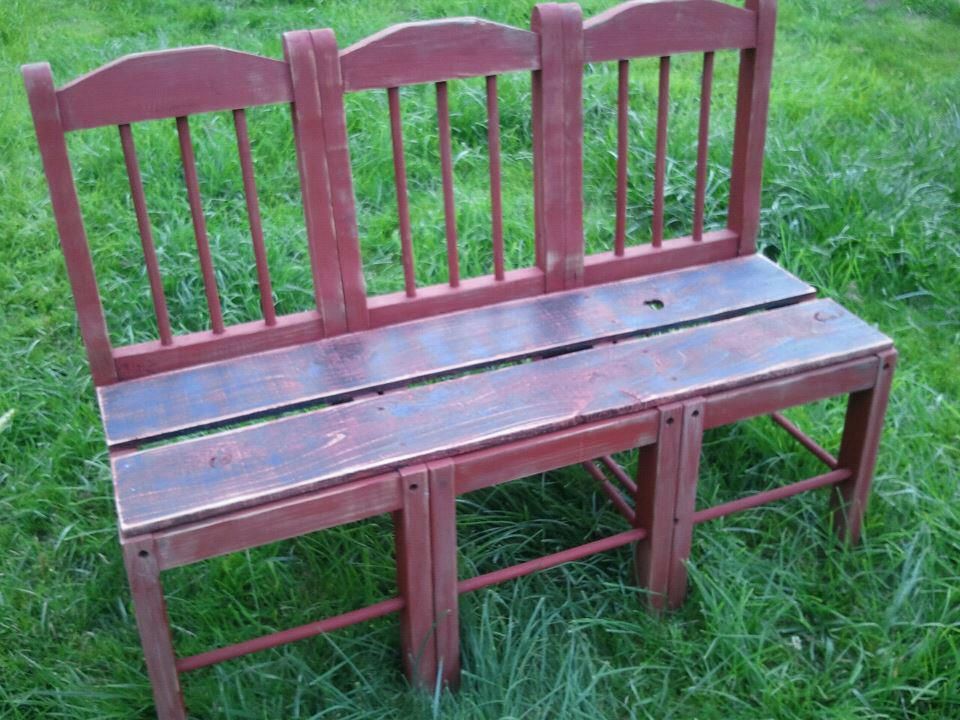 Then dry it with a clean towel.
5 / 12
Family Handyman
Fix White Rings
White rings can be easy to get rid of, or they can be a real nightmare. First, slather the ring with petroleum jelly and let it sit overnight. The oil from the petroleum jelly will often penetrate the finish and remove the ring or at least make it less visible. If that doesn't work, you can try a product such as Homax White Ring Remover or Liberon Ring Remover. They often work but may change the sheen. If these fixes don't work, consult a pro to see what your other options are for your furniture refinishing project.
6 / 12
Family Handyman
Scrape Paint Without Damaging the Finish
Paint spatters are common on old furniture, and most of the time you can remove them easily without damaging the finish. Here's a trick we learned to turn an ordinary straightedge razor into a delicate paint scraper.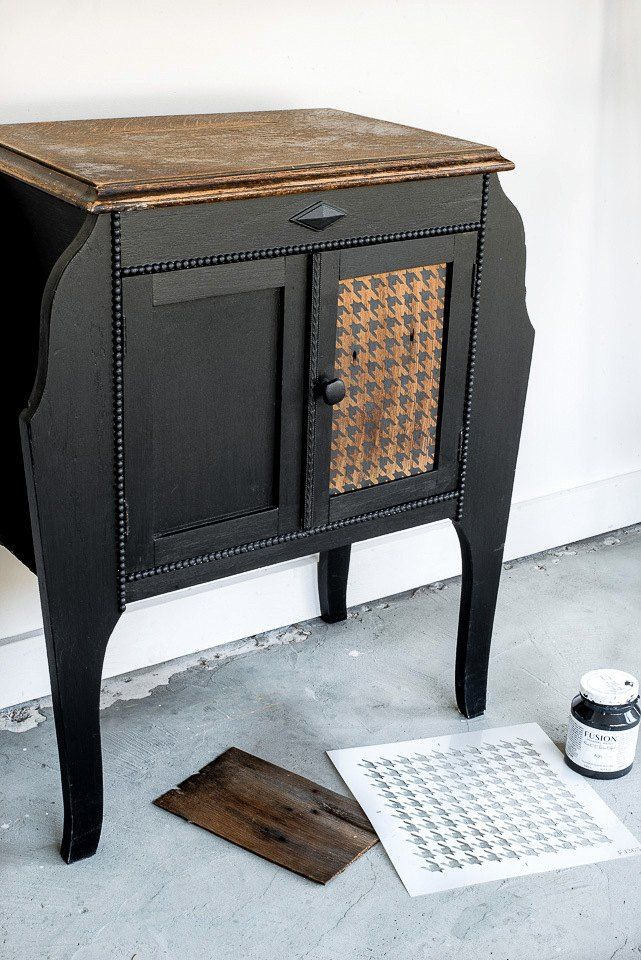 First, wrap a layer of masking tape around each end of the blade, and then bend the blade slightly so it's curved. The masking tape holds the blade slightly off the surface so you can knock off paint spatters without the blade even touching the wood. Hold the blade perpendicular to the surface. The tape also keeps you from accidentally gouging the wood with the sharp corner of the blade. The curved blade allows you to adjust the depth of the scraper. If you tilt the blade a little, the curved center section will come closer to the surface to allow for removing really thin layers of paint for your refinishing furniture project.
7 / 12
Family Handyman
Replace Missing Wood: Apply Epoxy
If you discover missing veneer, chipped wood or a damaged molding, you can fix it easily with epoxy putty. Kevin showed us the process he uses (watch a video of him patching a piece of chipped veneer with Quickwood), and the resulting repair is so realistic that it's hard to spot. When it's hardened, the epoxy is light colored and about the density of wood. You can shape, sand and stain it like wood too, so it blends right in. Quickwood and KwikWood are two brands of this Tootsie Roll?shaped epoxy. You'll find it at home centers and specialty woodworking stores for about $9 a tube.
To use this type of epoxy, you slice off a piece with a razor blade or utility knife and knead it in your gloved hand. When the two parts are completely blended to a consistent color and the epoxy putty starts to get sticky, it's ready to use. You'll have about five or 10 minutes to apply the epoxy to the repair before it starts to harden. That's why you should only slice off as much as you can use quickly.
See photo for how to replace missing veneer. Here are a few things you can do before the putty starts to harden to reduce the amount of sanding and shaping later. First, smooth and shape the epoxy with your finger. Wet it with water first to prevent the epoxy from sticking.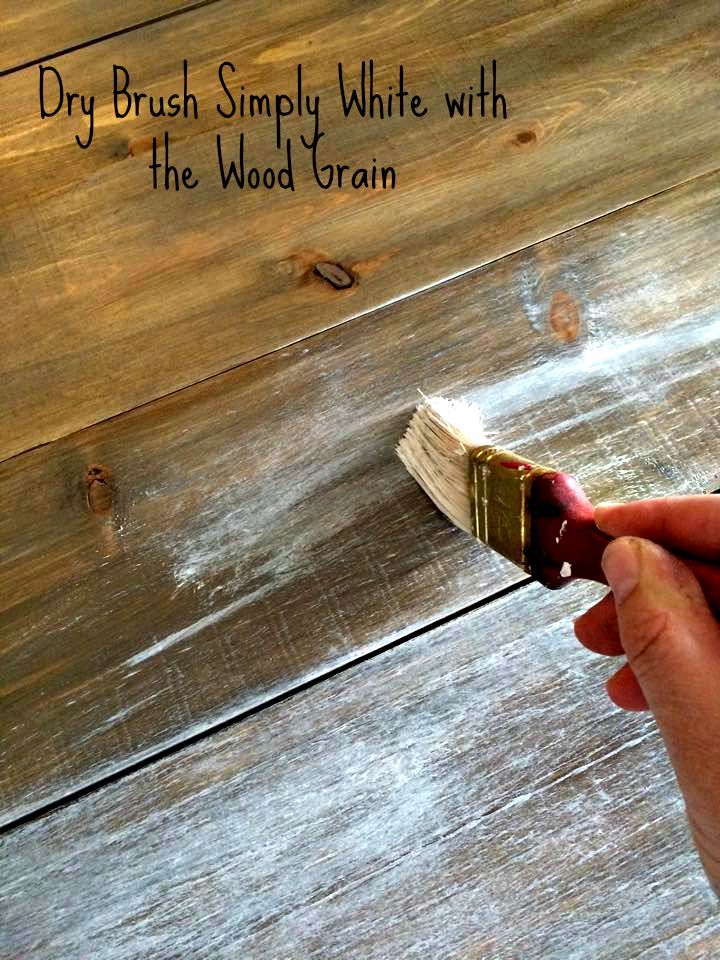 Then use the edge of a straightedge razor to scrape the surface almost level with the surrounding veneer. If you're repairing wood with an open grain, like oak, add grain details by making little slices with a razor while the epoxy is soft.
8 / 12
Family Handyman
Replace Missing Wood: Finish the Epoxy
After the epoxy hardens completely, which usually takes a few hours, you can sand and stain the repair. Kevin sticks self-adhesive sandpaper to tongue depressors or craft sticks to make precision sanding blocks. You can also use spray adhesive or even plain wood glue to attach the sandpaper. Sand carefully to avoid removing the surrounding finish.
Blend the repair into the surrounding veneer by painting on gel stain to match the color and pattern of the existing grain. You could use stain touch-up markers, but Kevin prefers gel stain because it's thick enough to act like paint, and can be wiped off with a rag dampened in mineral spirits if you goof up or want to start over.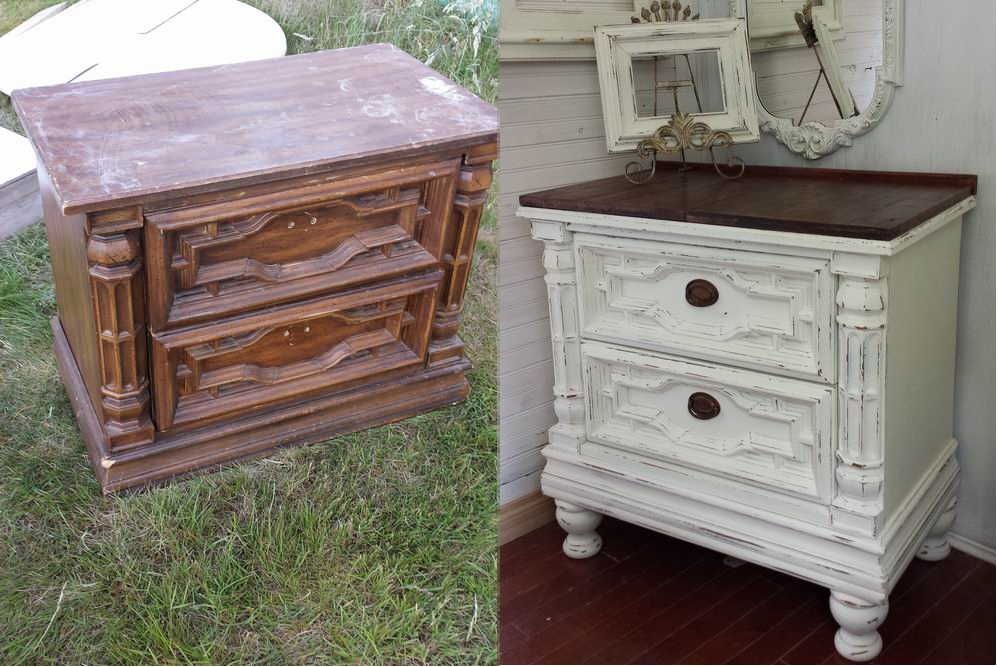
Choose two colors of stain that match the light and dark areas of the wood. Put a dab of both on a scrap of wood and create a range of colors by blending a bit of the two. Now you can use an artist's brush to create the grain. If the sheen of the patch doesn't match the rest of the wood when the stain dries, you can recoat the entire surface with wipe-on finish to even it out.
9 / 12
Family Handyman
Restore the Color with Gel Stain
It's amazing what a coat of gel stain can do to restore a tired-looking piece of furniture. The cool part is that you don't need to strip the old finish for this to work. Kevin demonstrated the tip on this round oak table. The finish was worn and faded. He loaded a soft cloth with dark gel stain and worked it into the surface. Then he wiped if off with a clean cloth. It was a surprising transformation. Of course, gel stain won't eliminate dark water stains or cover bad defects, but it will hide fine scratches and color in areas where the finish has worn away.
There are other products, but Kevin prefers gel stain because he finds it easier to control the color and leave a thicker coat if necessary. Also, since it doesn't soak in quite as readily as thinner stains, gel stain is somewhat reversible. Before it dries, you can remove it with mineral spirits if you don't like the results. Gel stains offer some protection, but for a more durable finish or to even out the sheen, let the stain dry overnight and then apply a coat of wipe-on finish as shown below.
10 / 12
Family Handyman
Fill Small Cracks
If you find nail holes or tiny cracks after applying the final finish, fill them with colored wax fill sticks, wax repair sticks or fill pencils, found at home centers and paint stores.
The directions tell you to rub the stick over the defect. But Kevin recommends breaking off a chunk and warming it up in your hands. Then shape it to fit the flaw and press it in with a smooth tool. He uses a 3/8-in. dowel with an angle on the end. For cracks, make a thin wafer, slide it into the crack and then work the wax in both directions to fill the crack. Buff with a soft cloth.
11 / 12
Family Handyman
Get Rid of Dents
You can often get rid of small dents by wetting them. The moisture swells the crushed wood fibers back to their original shape. (You can't fix cuts or gouges this way, though.)
Moisture must penetrate the wood for this to work. Finishes prevent water from penetrating, so Kevin suggests making a bunch of tiny slits with a razor blade to allow the water to penetrate. Use the corner of the blade, and keep the blade parallel to the grain direction. Next, fill the dent with water and wait until it dries. If the dent is less deep but still visible, you can repeat the process. As with most of the repairs we talk about here, the repaired surface may need a coat of wipe-on finish to look its best.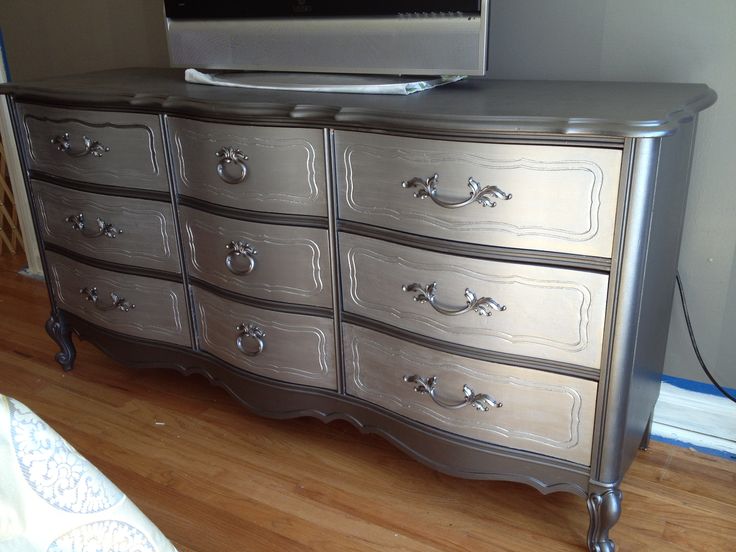
12 / 12
Family Handyman
Renew the Luster with Wipe-On Finish
The final step in your restoration project is to wipe on a coat of finish. After you clean your furniture piece and do any necessary repairs and stain touch-up, wiping on a coat of finish will restore the sheen and protect the surface. Any wipe-on finish will work—Minwax Wipe-on Poly is a common brand. But Kevin prefers a wipe-on gel finish like General Finishes Gel Topcoat Wipe On Urethane. It's thick, so it's easy to put on with a rag. One coat is usually all you need to rejuvenate an existing finish. To apply wipe-on finish, first put some on a clean rag. Apply it in a swirling motion like you would with car wax. Then wipe off excess finish, going in the direction of the grain. Let the finish dry overnight and you'll be ready to proudly display your furniture restoration project after you've learned how to refinish a table.
Originally Published: October 17, 2018
How to restore old furniture at home, tips - Do-it-yourself furniture restoration
Restoration of old furniture is an expensive service.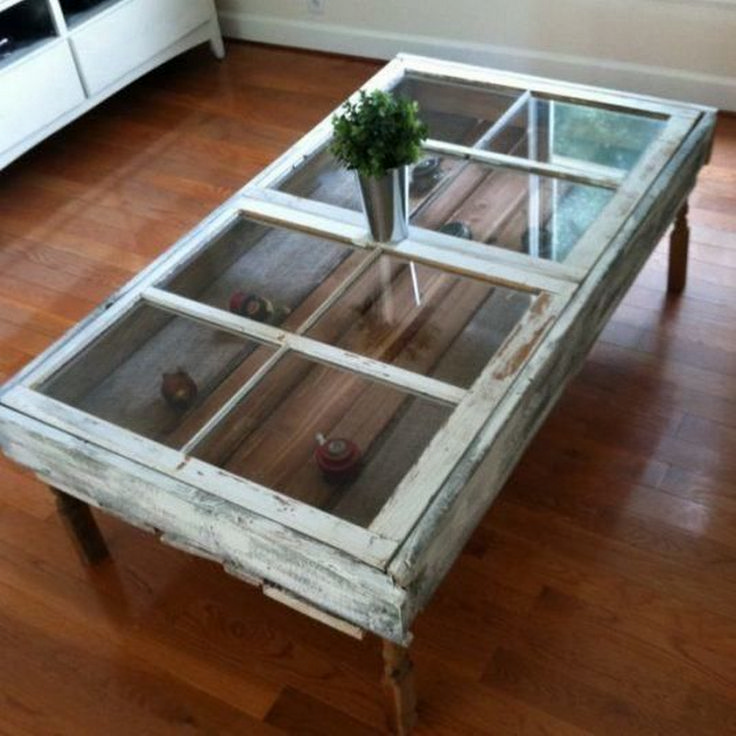 Is it possible to save money and do everything yourself at home? Or is it not worth trying? Looking ahead, I’ll say that doing furniture restoration with your own hands is difficult, but real. Subject to a number of conditions.
David Bader Photography
First, let's figure out whether you need to restore the furniture yourself or is it better to entrust this work to professionals? What are the good and not so restoration in the workshop:
+ The quality is excellent. Agree, there is no point in experimenting with the "home" restoration of antiques. Only professionals will be able to recreate the original shapes and finishes. At home, you can not "guess".
+ Save time and effort. It only seems like one-two-ready - the craftsmen with your chest of drawers will have to tinker with for several weeks. Imagine that you need to do this in the evenings after work and on weekends: it may happen that work will be a burden.
– Complex logistics. Cabinets and sideboards will most likely have to be dismantled in order to be taken out of the apartment for delivery to the workshop. As a result, additional expenses for delivery to the restoration workshop.
– If there is no elevator in the house, you will have to call movers and hire a Gazelle. Of course, all these efforts can be taken over by the workshop staff, but additional services will be included in the cost of restoration work.
Stahl Antiques & Antique Furniture Restorations
Place is the deciding factor
When renovating old wooden furniture, dust and odors are almost inevitable. For example, you can remove the old paintwork either by grinding (dust) or by chemical compounds (smell). Many protective and covering compositions for wood also have a pungent odor. If possible, move furniture restoration work to non-residential premises.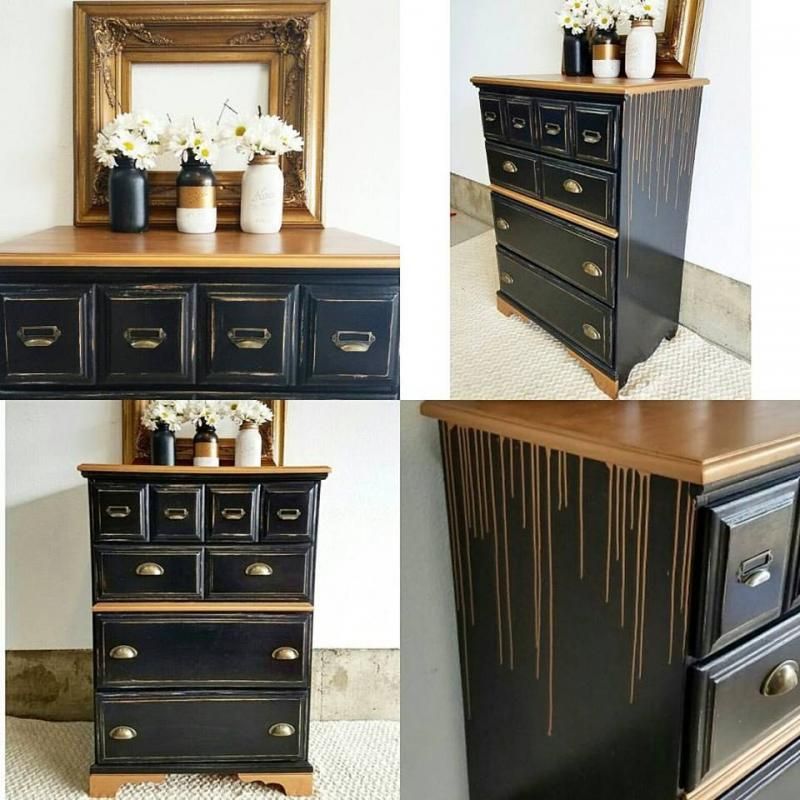 It can be a garage, utility room, loggia or balcony.
If you live in a private house, then in good weather you can work in the yard. But in this case, pay attention to the conditions for using the paint and varnish compositions specified in the instructions: minimum and maximum temperatures, air humidity and reaction to direct sunlight.
Tip: if the only possible option is a room in an apartment, cover all other furniture with a protective film, remove textiles and carpets for a while. Also cover the floor with a film to avoid stains from chemical compounds.
Ian Wall Furniture Restoration
Tools and Materials Needed
Depends on the size of the piece of furniture and your understanding of comfort. If the table is small, you can get by with only a hand tool. If you don't want dust when sanding, washes can be used. Do not tolerate strong odors - use water-based varnishes and paints to cover. The list of materials and tools in each case will be individual.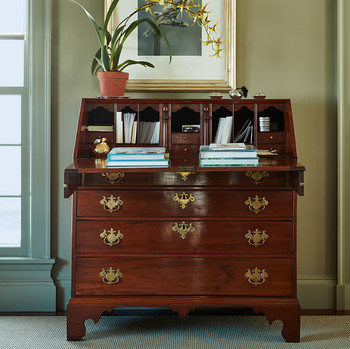
Ian Wall Furniture Restoration
You will need different grits of sandpaper, a spatula, brushes and rollers. But, in order to properly sand even a small coffee table or stool by hand, it will take several hours. Professionals use an eccentric (orbital) grinder for these purposes, which is not available in every household. In addition, you may need a screwdriver, electric jigsaw, building hair dryer. It is more convenient to remove dust immediately - with a construction vacuum cleaner.
Tip: it is advisable to buy a power tool only if you have a lot of old wooden furniture that needs restoration or you plan to do it regularly. At the same time, all these tools are universal and are often used in other repair work. There is a construction or major renovation ahead - purchase it, it will come in handy on the farm. If your plans include the restoration of only one piece of furniture, ask your friends for the tools for a while, or rent them.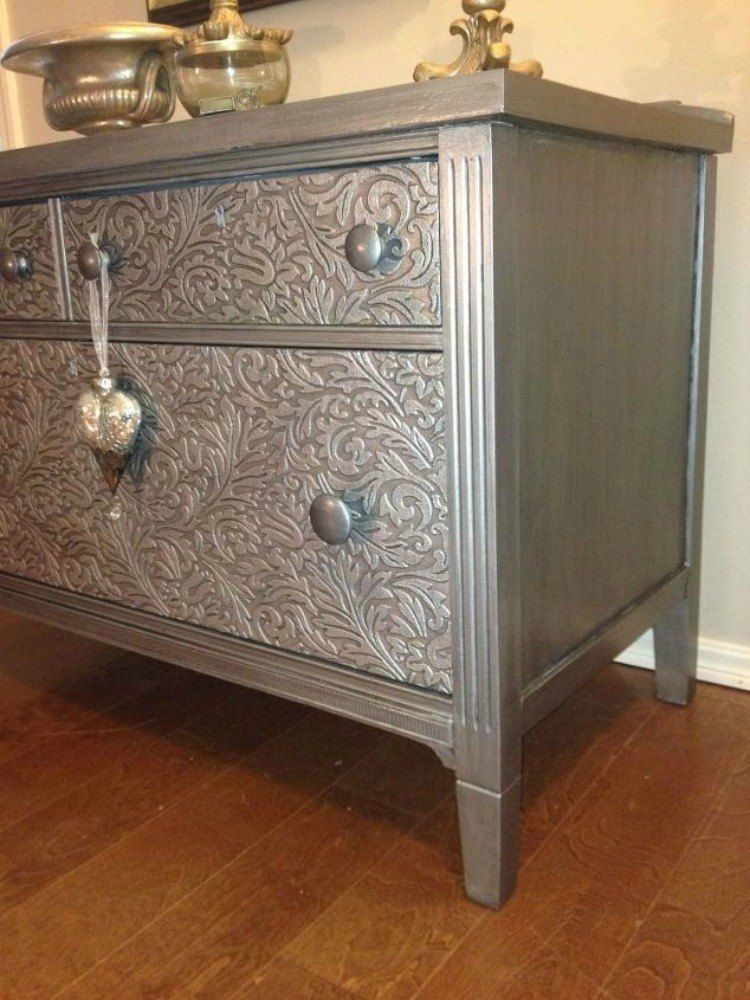 With a good tool, things will go faster, and the result will look neater and more professional.
Cardona Antique Furniture Restoration Co.
Where to get materials for restoration
For restoration work you may need: paint removers, compounds for filling chips and scratches (wood putty, furniture wax, furniture sealant), paint and varnish materials (paint, enamel, impregnation, oil). Finishing is easy to buy at any building materials store, but I advise you to order goods exclusively for furniture restoration (furniture waxes, pencils, sealants, furniture edges) in online stores that deliver / send goods throughout the country.
Advice: look for ads from private individuals on websites. It is not uncommon for people to sell surplus material, or the color doesn't fit, and they list the items on the internet flea markets. On the Internet, you can also find recipes for making some materials for restoration at home.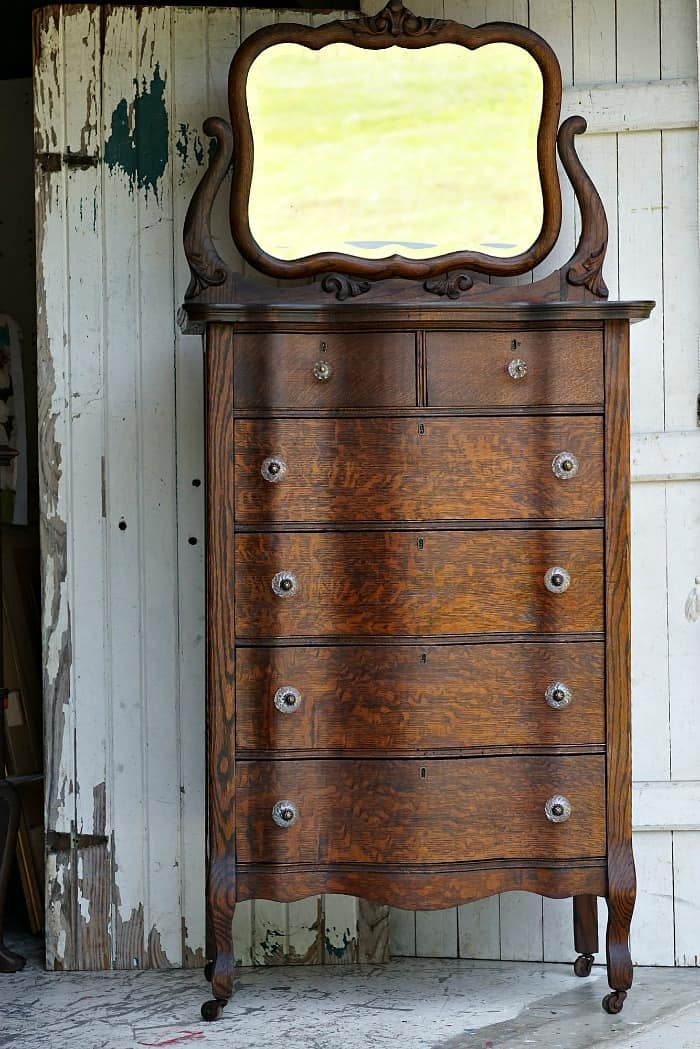
DOXA Home
How long will it take
Furniture restoration at home is not a quick process. Everything about everything can take from a few days to a whole month. And the point is not only in painstaking work, but also in the peculiarities of the use of paints and varnishes. Putties, primers, paints, varnishes require a certain drying time before applying the next layer: from several hours to a whole day.
If you don't have much free time, but you take the process seriously, carefully plan the stages of work. Often the delay occurs due to the fact that there is no certain product or tool - you will not run around the shops before each next stage.
Tip: For , to speed up the process, choose products that dry quickly. For example, water-based paints and varnishes dry faster than alkyd-based counterparts. One of the "fastest" coatings is Danish oil. It does not require pre-priming and interlayer grinding at all, and the second layer can be applied after 30 minutes.
Stahl Antiques & Antique Furniture Restorations
Restoration steps
hard-to-reach places. Often it is enough just to remove the fittings and hinged doors, remove the drawers. Whether to disassemble the frame completely - look at the situation. Glued elements such as a box in the photo are definitely better left assembled.
Tip: Before starting work, take a picture of the object and the attachment points of its elements. Arrange the fasteners in small bags and sign what elements it is intended for. This will make it easier for you to assemble the parts after restoration.
Aleksey Bereznyak
2. Removing the old paintwork
There are three ways to remove old paint, varnish or enamel: sandpaper, paint remover or using a blow dryer. Choose the method that is most convenient for you and best suited for your piece of furniture.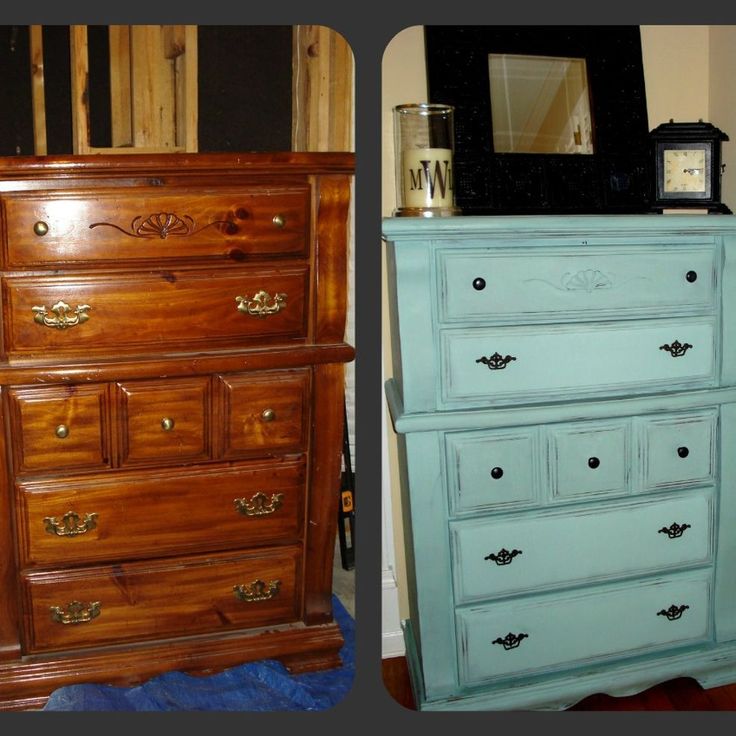 You can combine methods: for example, peel off a layer of paint heated by a hairdryer with a spatula on even surfaces and sand it with sandpaper on uneven, rounded areas.
Important: Be sure to use personal protective equipment - work with gloves and a respirator. In the case of using a building hair dryer, be especially careful not to burn the wood under the paintwork.
Cardona Antique Furniture Restoration Co.
3. We eliminate external damage
Scratches, cracks and chips on furniture are masked with the help of special means. Volumetric damage can be puttied with putty on wood, applying it in several layers. Cracks and scratches - fill with furniture wax.
To work with wax, a wax melter or a portable gas burner is used, but wax can be melted without special devices, for example, on a stove or a building dryer. Small scratches are well masked by a furniture touch. To ensure that the restored areas are not visible, the color of the materials used should be close to the shade of the wood from which the furniture is made. The texture of wood can be artificially recreated using a furniture marker.
SashaDOIT
4. Preparing for the final coat
Before applying paint coatings, the surface of the product should be carefully leveled, excess waxes and putties should be removed. To do this, consistently use fine-grained sandpaper (P180-P240). Wipe off the dust build-up after sanding with a damp cloth and allow the surface to dry before the next step. Some paints and varnishes require a coat of primer before painting.
Kelly Nelson Designs
5. Applying the topcoat
What will be the new look of your chest of drawers (stool, coffee table, etc.) depends on the selected paint material. If you want to preserve the natural look of wood, use transparent varnishes and oils for wood. Give preference to water-based varnishes, as alkyd and polyurethane tend to give the wood a yellow tint.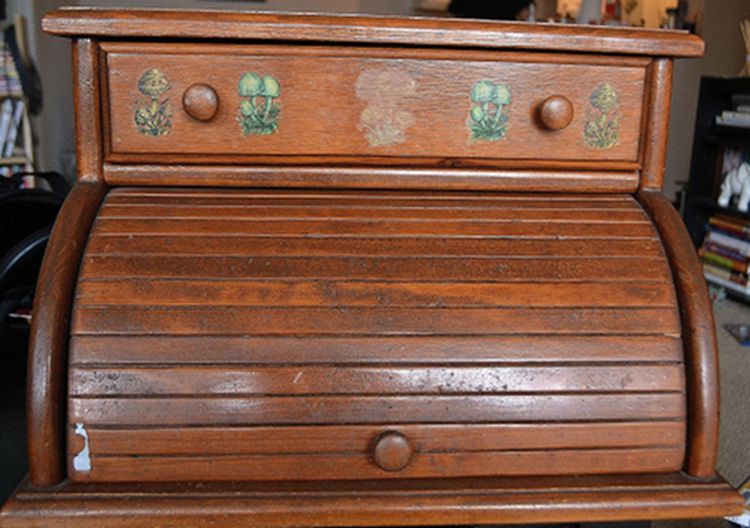 If you want to slightly tint the tree, give it a shade of noble wood species, choose the so-called glazing compositions: colored varnishes, stains, oils and waxes.
If you see your chest of drawers in color, use enamel or furniture paint. On sale you will find both colored paints and white bases that can be tinted in any chosen shade. Please note that many varnishes and stains require intermediate sanding, because after applying the first layer, the pile of wood is lifted.
Tip: With , start applying the top coat on the interior of the furniture, backs, sides, and finish on the front. It is difficult for beginners to avoid small smudges of paint and varnish, but they want the front side to look perfect.
Ekaterina Liberman
6. Installing hardware
After restoration, you can return the old hardware to its place or replace it with a new one. It all depends on the condition of the details and your desire: either to preserve the authentic appearance of the furniture, or simply to “refresh” it.
As you can see, all furniture restoration problems can be solved, and everyone can master the process. But even if the case still seems long, complicated or costly, do not rush to abandon the idea. It can be made even easier.
RELATED…
Good question: What to do with old furniture?
SashaDOIT
Ideas for a "quick" furniture restoration: a layer of adhesive primer and two or three coats of paint. It may not come out as perfect as with a full restoration - be prepared.
RELATED…
How to paint a wooden chest of drawers with a gradient - step by step instructions
Daria Nazarenko
Do it casually
Of course, not every style will tolerate this, but sometimes such “antics” are welcome. Especially if you are repainting brand new furniture without damage.
RELATED…
28 ideas for those who want to redo an IKEA chest of drawers
perfectly imperfect
Coat with "white" varnish
This is usually done with dark wood - after sanding it is processed using the dry brush technique - the surface is not completely painted over, but deliberately leaves traces and a visible base.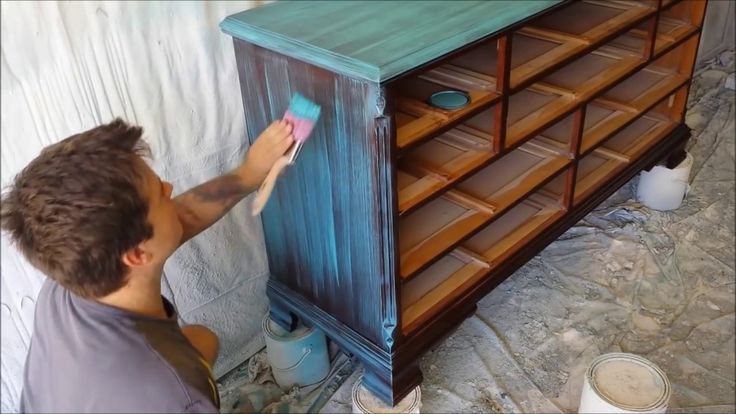
Important: may not turn out as perfect as in the case of factory "bleached oak". Might have to be redone.
Daria Trebol
In the photo: the kitchen doors are finished using decoupage technique
Paste using decoupage technique
Choose images that will blend well with each other and fit your interior. It can be wallpaper, geographical maps, old newspapers, decoupage napkins, or even inscriptions, as in the photo. Carefully stick on the surface and secure with clear varnish to make the furniture resistant to moisture.
Janna Makaeva/Cutting Edge Stencils
Apply an ornament
It is difficult to see scratches, roughness and irregularities in the diversity of patterns and ornaments. Using this technique, you can effortlessly turn even the most ordinary piece of furniture into the central art object of your home.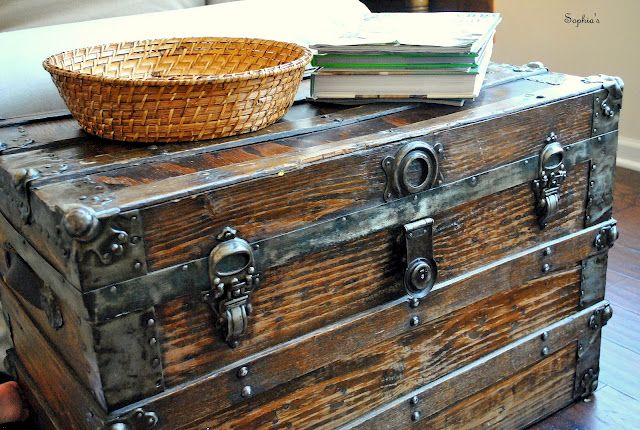 The easiest way is to order a stencil and apply a drawing through it - then it is not necessary to have artistic skills.
Design Studio INTERIKA
Leave as is
This is definitely the easiest way to give a chest of drawers a second life. Old things are good without restoration. After all, all these chips, scratches and scuffs are evidence of their rare antiquity. Perhaps it is enough just to wipe the dust off the chest of drawers and find a good neighbor for him.
RELATED…
- How to restore an old chair - step by step instructions
- DIFFICE Restoration - Detailed Guide with photo
In your city ...
Trust your furniture - repair and restoration of furniture on Houzz
Your turn ...
WHAT I DIY furniture? Are you satisfied with the result? Share your experience in the comments.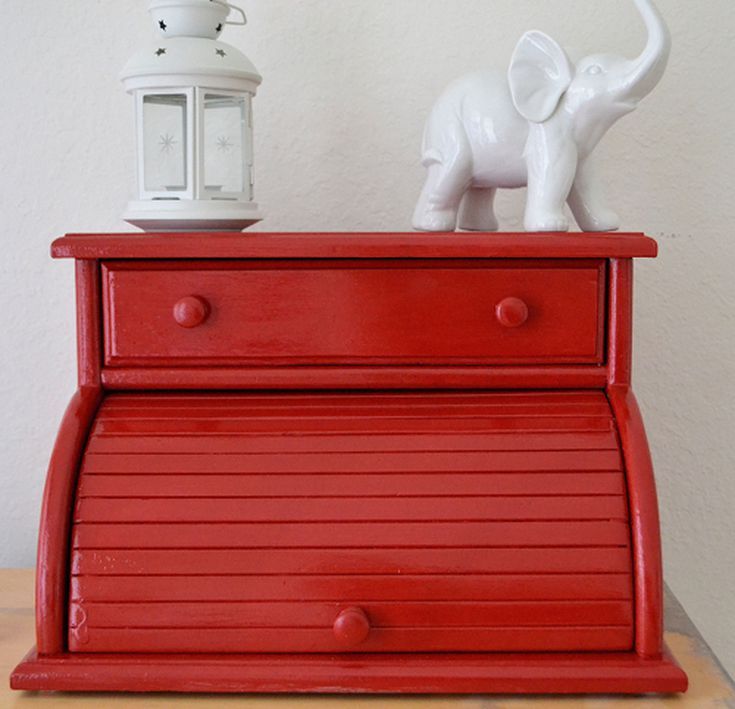
How to restore old furniture with your own hands: restoration at home
Furniture is not just a part of the interior. Often it is more than just a table, wardrobe or sofa. These common objects often hold memories dear to our hearts. Your grandfather sat on this chair, and your grandmother brought this chest of drawers from Europe, you always gathered at this table with the whole family. Remember? There are thousands of such examples, for sure, in the house of each of us there is a similar “museum exhibit”. It does not fit into the design concept at all, it looks bad, but it is a pity to throw it away, the hand is not understood.
That is why it is so important to try to preserve the life of furniture, to prolong its age. In addition, restoration is a great way not only to preserve nostalgic feelings, but also to update the look of your house or apartment, save money on buying new interior items, try yourself as a designer and try to bring something new into the familiar look of familiar things.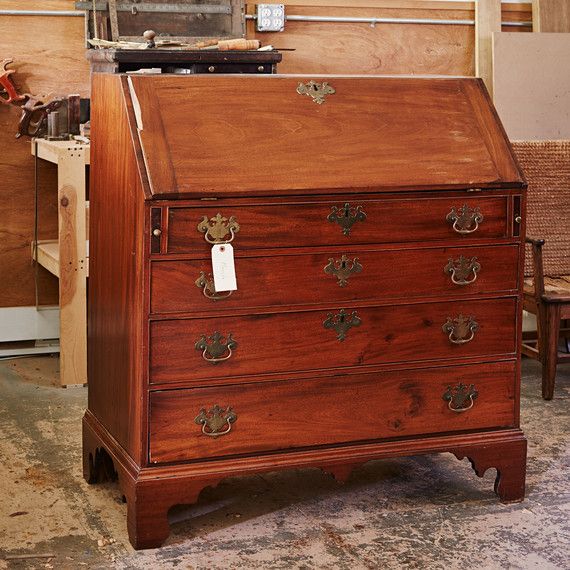
Today we will talk about how to restore or restore old wooden furniture at home with your own hands, update furnishings without the help of professionals. In addition to general points and descriptions of all stages of work, we will offer you some bold ideas that you can adopt to give new life to things that seem to have become obsolete.
Do-it-yourself wooden furniture restoration: how to create a masterpiece
What if the old Soviet chairs and sideboards are not pleasing to the eye and do not fit into the overall concept of the interior of your home? Of course, the easiest way is to throw them away and buy something new and modern, but what if it is impossible to get rid of these strange but dear things? In this case, it is necessary to reanimate them and turn them into the main decoration of the whole house.
We tell you how to do it.
Preparatory phase
Let's start with preparation. The restoration process itself is not rushed, so it is especially important to thoroughly rinse all parts for the upcoming work.
The first step is to carefully clean all furniture surfaces. This can be done with a simple sponge, which is best moistened with ordinary soapy water. I advise you to use thermal water, and natural soap.
FOREST GROUP advises you to devote a lot of time to this stage and carefully process every corner. Especially if the piece of furniture has carvings, curly fittings and intricate shapes. To easily get rid of dirt in hard-to-reach places, use a toothbrush or a hard brush. If there are hard-to-remove stains on the surface, then take sandpaper, preferably zero, and wipe the spot with it as carefully as possible. Don't rub too hard, as you will only damage the tree and compromise recovery.
Your rarity is now almost ready for the upgrade process. Leave the tree alone for a few hours so that it dries well. Then start restoration. First of all, pay attention to the old parts.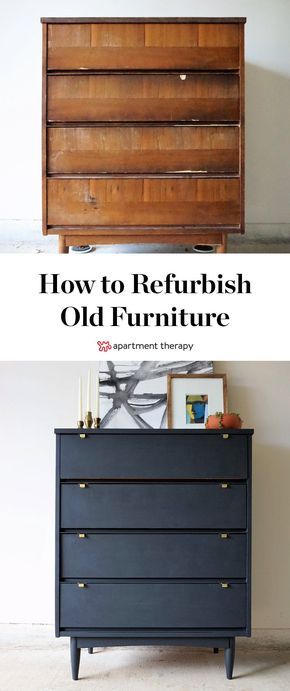 Do you need to replace any items? Get ready for the fact that finding a replacement for a broken cabinet handle will not be so easy. Most likely you will either have to change all the accessories, or make the missing one yourself. This may require you not only time and effort, but also practical skills in handling various tools and materials. Therefore, in this case, it is best to seek help from real cabinetmakers.
Then check the connections carefully. If you find rusty nails or loose bolts, replace them with new ones. All cracks and openings must be filled with special glue, which is designed for wooden products. In addition to it, you can use specialized putty.
The next step is to get rid of the old surface coating and apply a new one. To remove varnish and paint, use chemical-based solvents and sandpaper. It will take a long time, but do not rush things.
Painting and varnishing
When the problem of removing the old finish is solved, it is worth considering how the new one will look. Use paint or stain, film or painting - it's up to you. Let's just say that today there are many types of stains for wood of different species, be sure to consider this point before dwelling on one or another option.
If you prefer paint, it is best to purchase one that has an acrylic base. It is this type of coating that will not only give a beautiful shade to your new piece of furniture, but will help protect the wood from which it is made from destruction. Alkyd enamel is also a good option, but it is best to apply it with a sponge, so it will penetrate deeper and faster into the structure of the wood.
Padding and upholstery
If you decide to give new life to a closet or chest of drawers, we have already covered everything you need to do.
But if your goal is to update a sofa, easy chair or armchair? A natural question arises, what about the parts that are not made of wood? What about upholstered seats, fabric backs and armrests? Everything is simple.
You will need to remove the old packing and replace it with a new one. As a material, you can use cotton wool, synthetic winterizer or foam rubber. Moreover, the last type of packing can be used both independently and in combination with others. For example, as the top layer after cotton wool.
The thickness of the filling and its quantity is a purely subjective factor. You are free to define these parameters based on your personal wishes.
FOREST GROUP recommends following the general recommendations, according to which the most acceptable thickness for the backs and seats is approximately 40 mm, and for the sides 20 mm is considered ideal.
Finding the right upholstery material is now very easy. Focus on your own wishes: someone likes velvet, someone is crazy about silk, and someone likes more practical and simple fabrics.
After this, you will need to make a pattern of the covers and securely fasten the new upholstery with a furniture stapler.
We've looked at the general steps involved in remodeling furniture with your own hands, now let's take a closer look at the different ways to turn old pieces of furniture into a real highlight of your home.
How to update wooden furniture at home: basic techniques
It is not necessary to repaint an old chair, chest of drawers or wardrobe, you can use other techniques to bring your ideas to life. They can update an object and emphasize its rarity, fill it with aristocracy and nobility, turning minuses into pluses.
- Decoupage
It is a method of decorating surfaces using appliqués. This method is perfect for hiding defects in the surface of wooden furniture. All you need is special three-layer napkins, glue, varnish and your own imagination. Having cut out any image from paper, you can attach it with a simple PVA glue, fix it with varnish and update the facade of any piece of furniture.
- Craquelure
The ideal solution for those who want to emphasize the country style of their interior.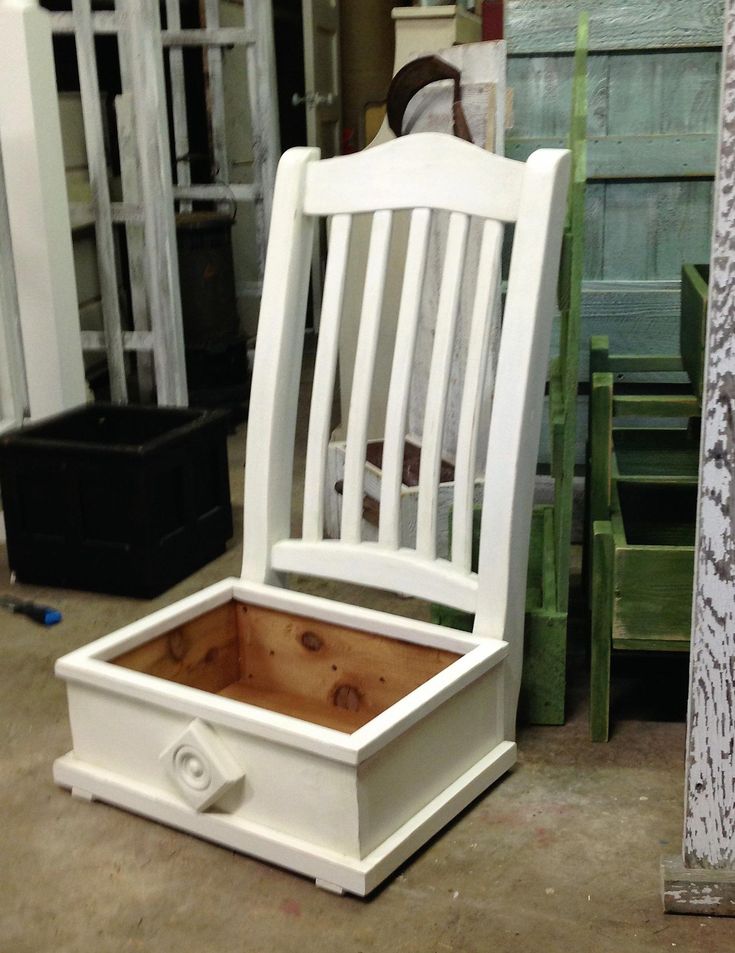 For this method, a special coating is used, which perfectly imitates an aged tree.
- Painting
Beautifully painted furniture will not only improve the atmosphere of your house or apartment, but also tell about your fine artistic taste and creative abilities. All you need is paint, brushes and imagination.
- Veneering
Rather time-consuming, but very effective way to transform interior items. You will need to glue the new veneer surface and fix it well.
We have presented the main types of decoration, now we will look at them in more detail and try to implement some ideas.
An easy way to renovate wooden furniture: decoupage
Beautiful pictures glued to the surface and fixed with varnish can transform both the table, and the cabinet, and the table. To transform your furniture yourself, choose the most suitable image, apply a little glue on its back and attach it to a wooden surface.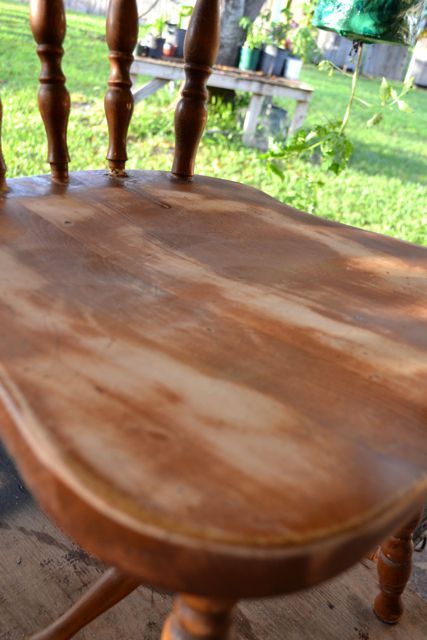 Try to smooth the appliqué so that there are no bubbles or voids under the picture. Calculate the forces and do not tear the thin paper. Let it dry and seal with clear varnish.
In this way, you can transform an old cabinet or turn a Soviet coffee table into an exquisite and sophisticated work of art.
You can find more details about the restoration process on the video.
Artificial aging as the basis of style: craquelure
This method can be combined with the previous one. Craquelure is based on the use of a special composition that gives the surface a cracked and aged look. But not unsightly and sloppy, but on the contrary, sophisticated and aristocratic. It is this varnish, applied to a slightly damp surface, that will help you get a real antique instead of an old chair or stool.
Pay attention to the photos and video of a master class that will teach you how to restore wooden furniture with your own hands at home.
An elegant and creative solution: paint painting
Painting furniture is the easiest and at the same time one of the most difficult ways of restoration.
First, decide on the shades and colors of paints, then select the pattern. If you do not have artistic talents, then use stencils. It is not necessary to buy or order them on the Internet, you can make such templates yourself.
Print the design, transfer it to heavier paper or card, then carefully cut out the outline.
Acrylic paints are the most suitable, but car paints can also be used. They are available in spray cans, which greatly facilitates the process of their application.
How to professionally restore old furniture: veneering method
The most difficult and time-consuming way. A new veneer sheet is applied to the old surface and adheres well. As a result, you get completely new-looking items. It often happens that old chairs and other items look even better after rework. Everything from the fact that veneer can imitate different types of wood and turn a simple chipboard stool into an exquisite one made of ash or oak.
However, not everything is so simple. To carry out such a transformation, you will need to have a special machine and experience. There are two ways to stick a layer of veneer: hot and cold.
The first one requires an iron. It will be necessary to walk them on the surface with glued and slightly dried material. After that, it is necessary to process the furniture with a special press.
The second method is almost identical to the first, only in this case heat treatment with an iron is not required.
A few tips to help you get rid of minor damage on the front of old wooden furniture
If you do not pursue the goal of radically changing the appearance of antique interior items, but only want to make sure that small chips and scratches are not visible, then FOREST GROUP is ready to offer you several effective methods to make your dreams come true:
- Try covering up a scratch on brown furniture with plain iodine. Then cover the area to be restored with a plain clear varnish. Even the one with which nails are painted is suitable (if the defect is small).
- If the crack is large enough and deep enough, use wood wax. It is very easy to purchase at any hardware store.
- If for some reason you cannot afford the above-described product, then do not despair, you can make a special mastic for grouting yourself. Mix a little wax with turpentine and, after mixing, let it brew a little. That's all. With this composition, you can walk over chips and scratches.
- To restore the damaged layer of varnish, it is necessary to thoroughly clean the surface, and then fill everything with a new layer of coating. Remember that the highest quality and most reliable compositions are acrylic or cellulose. But polyurethane-based varnish will turn yellow over time.
- Sometimes it happens that veneered furniture undergoes a very unpleasant and aesthetic defect - swelling. If this happened to your furnishings, then do not worry, just pierce the swollen place and put some glue into the resulting cavity. This can be done with a syringe and a thin needle. Cover the treated area with a soft towel and press down. It is best to use a load, such as a stack of books.
- To remove hot white spots on wood, use automotive wax polish. Dip a soft cloth in the composition and wipe the stained area.
- To make the drawers slide out effortlessly, lubricate the edges and grooves with plain soap or a candle.
As you can see, there are many ways to transform old furniture: hide imperfections or completely update its appearance. Reconstruction will require from you not only artistic thinking and a flight of fancy, but also time, effort, professional skills and abilities. When thinking about how to restore an old chair or chest of drawers, do not lose sight of this.
If you appreciate not only the sophistication in the interior, but also your time, then there is no better option than ordering new furniture from FOREST GROUP.