How to prepare wall for wallpaper
How To Prepare Your Wall For Wallpaper • Milton & King
Smooth
The first thing you will want to do to prepare your wall is make sure it is smooth. Start by removing any hooks, nails and light switch plates. This will invariably leave holes and raised areas where these items were. Any bumps or craters in your wall may be visible through the wallpaper and could affect the way the print looks. Prepare your wall by filling in any holes or craters with spackle and sanding any bumps. You will be left with a smooth and even surface. Most of the time a light texture isn’t a problem, but deep textures in your walls should be smoothed. A smooth wall will ensure that every inch of wallpaper surface area is being held against the wall. This will help prevent issues of lifting over time as well as eradicate hiding areas for moisture which can lead to mold.
Wallpaper with a white background or very light colors can sometimes reveal the wall’s texture through the paper. Darker colors tend to cover up any imperfections. You can see here, Traci Sheppard from Phoenix And The Ocean testing a sample of the Huddy’s Dots design. In this case, she is wallpapering over a painted concrete wall, not the easiest thing to smooth. If you look closely, you can see the texture peeking through. Fortunately, it wasn’t enough of a problem to discourage her from moving forward with her wallpaper plans.
Your wallpaper will have its best look on a flat wall. You can prepare your wall for wallpaper by a process called mudding. This is where you apply a skim coat of joint compound to your wall. Once you smooth it onto your wall, you allow it to dry and sand it smooth and then apply a primer. You can learn more about textured walls and what to do about them by visiting our blog called Textured Walls: Are They A Problem For Wallpaper.
Clean
The second step will be to clean your wall. This step should not only happen now, but also again right before installation. After you have sanded your wall, there may be all sorts of small dust particles that you don’t want to paint over nor install over. It is recommended that on the first pass, you use a strong cleaner like sugar soap or TSP (trisodium phosphate) to get rid of grease and other build up. If you already have paint on the wall, then using a solution of hot water with a small amount of vinegar will do the trick. Then, you’ll also want to revisit this cleaning step with just a soft wet cloth around 24 to 48 hours before you install your wallpaper. Thanks to Bud from White Sparrow Farm, we can see just how it’s done.
Paint & Primer
Paint can be a problem. The presence of and the lack thereof. Eggshell, satin, or semi-gloss paints seem to do best with wallpaper. You don’t want to apply wallpaper to a latex paint as it will likely tear when you want to remove the wallpaper. You also don’t want to install any wallpaper directly to drywall. For paste-the-wall wallpaper, the drywall can soak up the paste not leaving much for the paper. It is best to apply a primer to seal the wall before applying the paste. This also stops moisture from absorbing into the wall preventing the growth of mold and fungus.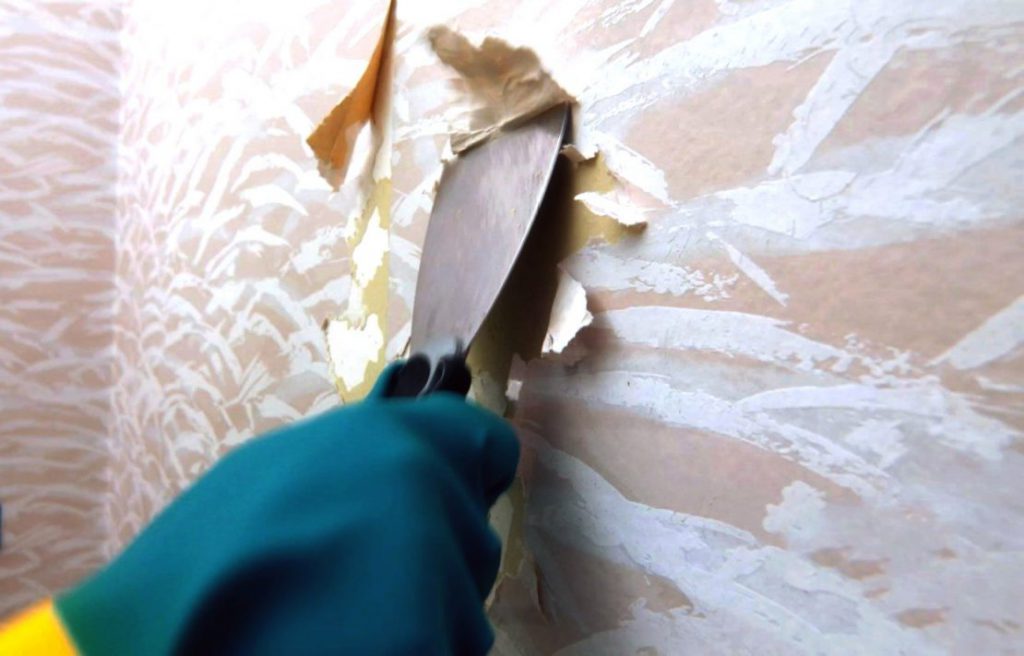
Primers will usually come in white. This is fine if you are using a light colored design. Milton & King wallpaper is a butt-join wallpaper. This means the seams of two joining wallpaper strips will go right up against each other. There is no need for overlap and there should be no expanding or contacting of the wallpaper in a stable environment. However, unless you do a perfect install, (and let’s face it, how many of us are perfect?), it’s always a good idea to paint or primer the wall in a color that is similar to your wallpaper. Having a white wall underneath your darkly colored wallpaper creates the risk of seeing white seams between strips of wallpaper. You can avoid this by having the person at the hardware store tint your primer in a similar color to your wallpaper.
If you are applying wallpaper to a freshly painted wall, it can take some paints up to 30 days to fully set. So you will want to make sure you wait a month before applying wallpaper to a newly painted wall. Primer, however, dries very quickly and you will only need to wait a day or so.
Moisture
Side Note: Can I put wallpaper in a bathroom? I have seen this question asked many times. Nobody’s bathroom is the same. And when you say bathroom, do you mean a room with a toilet? Or a room with a shower? These details will determine much about whether the wallpaper will have trouble adhering to your walls and will also indicate how you can prepare your wall so that it is suitable for wallpaper.
The non-woven aspect of the wallpaper means that it is breathable, making it suitable for normal humid environments. So, your wallpaper will work but is not meant to come into direct contact with water. If the wallpaper does get wet, you will want to immediately wipe it down with a soft-cloth. Any sitting water will eventually soak through, weakening the paste underneath and causing the wallpaper to lift over time. If your bathroom is a more extreme environment, like if the walls tend to get soaked with water, you can take steps to waterproof your wallpaper.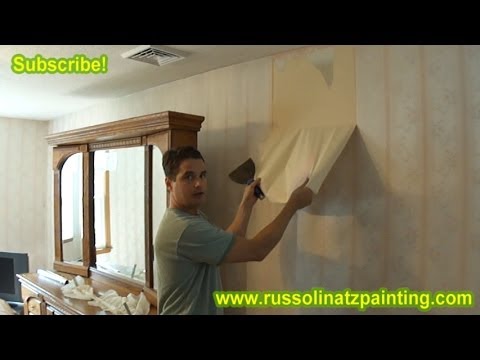 Read more about that on our blog How To Waterproof Your Wallpaper. However, keep in mind that once you waterproof your wallpaper, it is no longer breathable or nor easily removed. In that case, you’ll also want to use a mold/mildew inhibiting paste like Roman Pro-543. Under normal circumstances though, as long as the door stays open and there is ventilation, installing wallpaper in the bathroom is fine.
So Let’s Recap how to prepare your wall for wallpaper
- Smooth the wall. Fill holes and “mud” over texture and sand any bumps.
- Clean your wall. For best results use sugar soap or hot water with cleaning vinegar.
- Apply primer to seal the wall. (If painting, use an eggshell, satin or semi-gloss paint).
- Wipe down your wall with a damp cloth 24 hours prior to installing.
- Install your wallpaper and make your interior dreams come true.
Knowing how to prepare your wall for wallpaper is important to make sure that you get your money’s worth out of your purchase. The more precautions you take beforehand, the more bulletproof you will be against all the things that can go wrong. So when you get the opportunity to buy your dream wallpaper, prepare your walls first, and luck will follow.
How Do You Prepare A Wall For Wallpaper?
Preparing your room for wallpaper can be a simple or more complicated process depending on the current condition and surface type of the walls. Painted drywall is fairly easy to prepare with a quick wash and a coating of primer/sealer. Older walls, or walls that have wood paneling or other types of alternative surfaces, may take a little more work. Follow the right steps, however, and just about any wall can be effectively prepared for your new wallpaper.
The best way to ensure your wallpaper will adhere nicely to your wall is to finish any preparation with a coating of acrylic primer or sizing. Applying acrylic primer or sizing to your wall is like creating an entirely new surface to which your wallpaper can adhere most effectively. It also protects the wall from the moisture of the wallpaper adhesive which can cause the wall to weaken or be exposed to mildew growth.
See Also: Homeowner’s Guide to Paint Primer
Painted Drywall
To prepare painted walls that are already in good condition, simply wash them with a multi-surface soap and then let dry. Add an acrylic primer, and allow that to dry fully before hanging wallpaper.
If the painted walls have holes, dents, or cracks, be sure to fill them with vinyl spackle. After the spackle has dried completely, smooth it with wet sandpaper before applying an acrylic primer. If your walls are lightly textured, you’ll need to sand the entire surface lightly before washing and priming.
See Also: How Soon Can You Wallpaper Over Freshly Painted Walls?
New Drywall
If your drywall has not yet been painted or primed, your best bet is to use a alkyd (oil) primer followed by an acrylic primer. Alkyd primer is excellent at protecting drywall from mold and mildew, which is important for such an absorbent surface like drywall.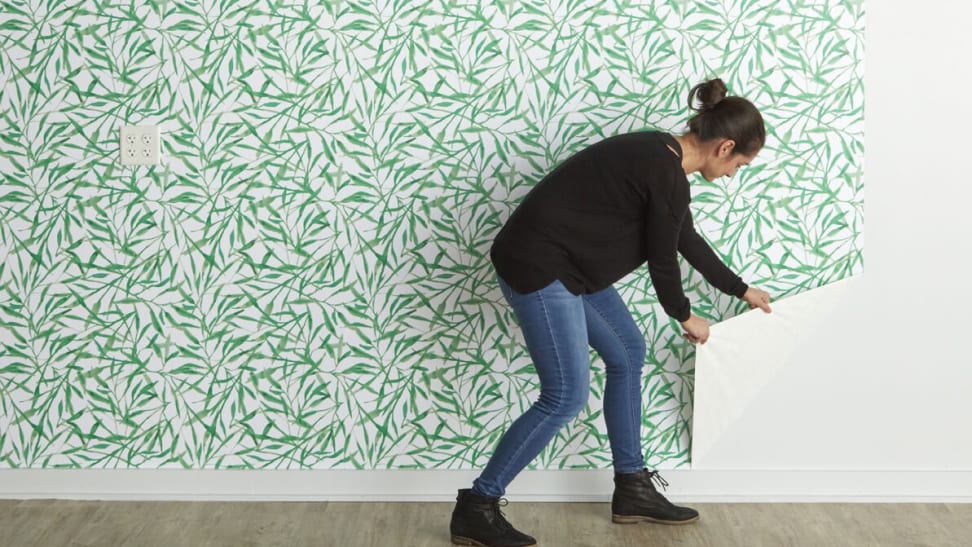 Follow that up with one coat of acrylic primer, and your drywall will be ready for wallpaper.
See Also: How To Prep New Drywall For Wallpaper?
Wood Paneling
Wood paneled walls may take a little more work, but in the end you won’t believe the paneling is even underneath the paper if you do it right. You’ll need to wash the walls with a de-glossing solution. Then the grooves between each panel need to be filled with spackle and sanded even. Wash the walls and let dry, and your walls are ready for primer and wall paper.
See Also: Can I Hang Wallpaper Over Wood Panels?
Plaster Walls
Older homes typically built before the mid 20th century often have plaster walls. Alkyd (oil) primers or good to use if there are repairs to the wall you’ve had to make. Follow one coat of alkyd primer with a coat of acrylic primer before wallpapering.
See Also: How To Wallpaper or Paint Directly On Plaster?
Existing Wallpaper
The best way to deal with old wallpaper is to remove it by stripping it away. You can use a wallpaper remover solvent, or a wallpaper steamer for hard to remove paper. Once your wallpaper is removed, fill in holes and smooth damaged areas out with a good sanding. Apply the appropriate primer based off the type of wall that’s underneath.
See Also: Can I Hang Wallpaper Over Existing Wallpaper?
Heavy Textured Walls
If your walls are especially textured, and sanding is not sufficient, you can use lining paper to create a smooth surface for your wallpaper. Prepare the wall in much the same way before hanging your liner paper. Hang the wall liner and then hang the wallpaper over the liner. This is your only option for surfaces that you cannot smooth out by other means.
Preparing walls for wallpapering
Preparing walls for wallpapering is not an easy task, but it can be done, even without the help of professionals. To make the process not so time-consuming, some rules should be taken into account before starting work.
One of the main conditions is the creation of a working space. It is necessary to free up more space, protect the floor from pollution with a film. To avoid drafts, it is recommended to close the room. It is also desirable to maintain the temperature in the room at +18…+20°C. In addition, you may need the following tools and supplies:
| Tools | Materials |
|
|
Wall preparation steps for wallpapering
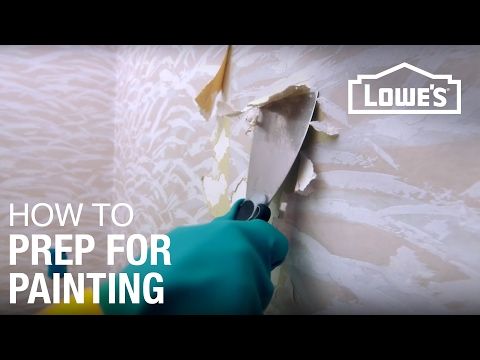
1. Removing wallpaper
In order for the new coating to serve you faithfully for many years, the wall must be thoroughly cleaned. Practical advice from our masters will help to cope with this, you will find them in the article “How to quickly remove old wallpaper”.
What to do with stains? After removing the wallpaper, look for spots. Determine their nature, and then determine how to eliminate them. Black-gray stains from fungus and mold can be removed by repeated application of a deep-penetrating primer. Their appearance may be caused by poor-quality waterproofing or a facade that is not well protected from external influences.
Use a special antibacterial fungicide to clean and kill bacteria, fungus, algae, moss and lichen from wall surfaces. The fast-acting composition will not only remove stains, but also help prevent their occurrence in the future.
Code: 515000123
Antifungal agent Ceresit CT 99 1 l
Code: 700000505
PROSEPT mold remover 500 ml
2. Priming
After cleaning the surface, the walls are primed. The solution is applied with a roller, the corners are treated with a brush. The purpose of the primary treatment is to disinfect the walls, clean the base from small debris, and also prevent the absorption of moisture. Strengthens the surface layer, evens out the absorbency of the base for better adhesion to plaster mixtures. When choosing a soil mixture, be guided by the properties of the surface. You can choose the right primer in the catalog of our online store by reading the product description, or with the help of a sales assistant in a hypermarket.
Code: 515001216
Deep penetration primer Ceresit CT 17 Concentrate, 1 l
Code: 5116
Deep penetration primer Ceresit CT 17 PRO, 10 l
3. Troubleshooting
If there are holes, cracks, holes from screws or nails on the wall surface, they must be repaired. Stucco will help to cope with irregularities greater than 1 cm. Fill the cracks with the mixture, level the surface with a spatula, after drying, sand it with sandpaper.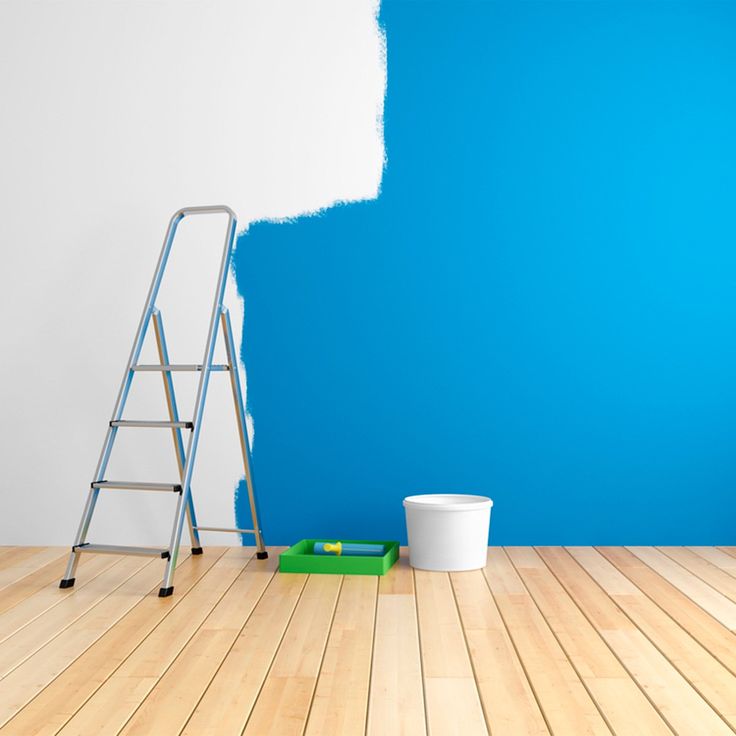 If the scratches are small, they can be puttied at the stage of leveling the walls. This item can also be skipped if the wall to be glued is dry, without bumps.
Code: 511050191
Cement plaster and repair putty Ceresit CT 29, 5 kg
Code: 511001209
Light cement plaster Ceresit CT 24 Light 20 kg
4. Surface leveling
Dilute the putty, level all surfaces with a mixture and a spatula. Wait for it to dry, sand the surface until smooth with sandpaper.
Code: 5988
Polymer putty Knauf-Polymer Finish 20 kg
Code: 515000894
Finishing putty Knauf-Rotband Paste Profi 18 kg
5. Reprimer
Provides good adhesion of wallpaper to the surface. The primer solution, when applied to the wall, forms a protective film, has an antiseptic and disinfecting effect.
Please note: work on preparing the walls for wallpapering is carried out strictly in the above sequence. It is not recommended to swap stages, since the result of the work depends on it.
Code: 515001123
Universal primer Ceresit IN 10 Interior, 5 l
Code: 515001124
Universal primer Ceresit IN 10 Interior, 10 l
Specifics for preparing different types of walls
Gypsum board - puttied with a thin layer, paying special attention to the joints. Puttying is necessary so that in the future there will be no difficulties with replacing the wallpaper. It will be extremely difficult to remove wallpaper from an unprepared cardboard surface without damaging it.
Concrete and brick - the problem of processing such surfaces is the unevenness and dark color of the base. Help out plaster and applying several layers of putty. After that, sand the surface and treat with a primer solution.
OSB and chipboard boards - the preparation of this type of base is similar to the method described above.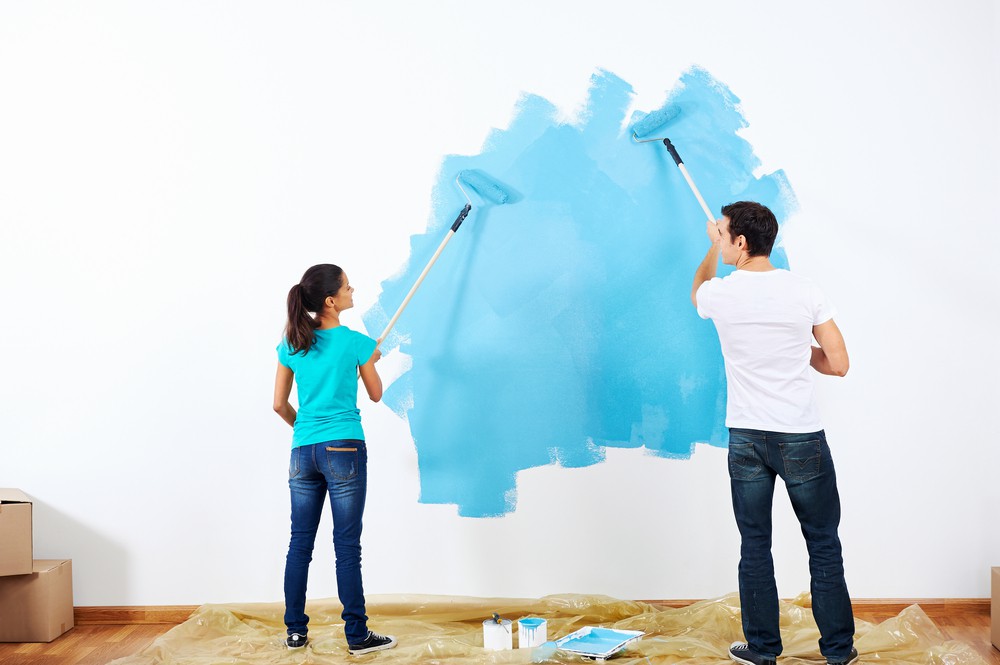 The main difference is that a special type of putty is used to level such walls.
When preparing walls in new buildings, the primer is applied in several layers, and the plaster is applied together with the mesh in order to prevent cracks in the future.
Please note: At the end of the wall preparation, it is worth removing all the pencil marks that were made at the preliminary stage of work. If you skip this step, then the arrows and inscriptions may be visible under light wallpaper.
As a result, the walls should be even and uniform in color. Once you are convinced that you have achieved this particular effect, you can glue the wallpaper. If you have questions about this step, take a look at our advice.
Now you know how to make your new wallpaper hold up well and be pleasing to the eye. Read more about their types, design and features of choice in our article.
And you can see your new interior using 3D visualization on our website.
Preparing the walls for wallpaper - 3 stages, which you can't do without
Previously, all wallpaper was glued to the newspaper, only with an overlap. Today, the pasting process is simpler, but requires preliminary surface preparation - cleaning, leveling, priming. How to carry out all the work, what materials are needed? Let's figure it out.
Contents:
- Is it necessary to prepare the walls for wallpaper?
- Wall preparation steps
- Removing the old finish
- Plaster
- Finish primer
Is it necessary to prepare the walls for wallpaper?
Have you also asked this question? After all, I don’t want to turn the replacement of the finish into a major overhaul, but you never know what surprises are hidden under the old coating. But any neglect at the preparation stage inevitably leads to a strong deterioration in the quality of the repair. Preparation ensures:
- The quality of gluing the sheets.
- Removal of visible defects.
- Careful repair of cracks - which means that the new finish is not in danger of damage due to condensation or fungus.
The better prepared the surface, the easier it will be to glue the canvases and the longer they will stay on it
Wallpapering tools
Preparation steps
primer. Depending on the initial state of the walls, their material and type of finish. Let's take a closer look at each of the stages.
Removing the old finish
If the wallpaper is old and peeling off by itself, you can remove it with a spatula. If you can’t peel them off in this way, you need to make small cuts on the canvases, moisten them with warm water using a spray bottle or sponge.
Cleaning the walls from the old coating
Important: do not wet large areas at once, as the moisture dries quickly and by the time you finish a small area, the rest will already dry and you will have to start all over again.![]()
Wallpaper removal with a spray gun
If you have a steam generator in your household, use it on the canvases, then the old coating will be removed without difficulty. You can buy a special liquid for removing wallpaper - it is absorbed very quickly, which compares favorably with water.
Paint removal is more difficult. There are three ways:
- Mechanical - beat the paint with a hammer. You can also remove the trim with a drill with a special nozzle, but then there will be a lot of dust.
- Chemical - the painted surface is wetted with a special solution, left for 5-7 hours. After this time, the paint soaks and is easily removed.
- Thermal - with a building hair dryer. The method is bad because when heated, the paint emits a smell.
Wallpaper removal with a steam generator
Plaster
After removing the old finish, the wall must be cleaned of dust and primed.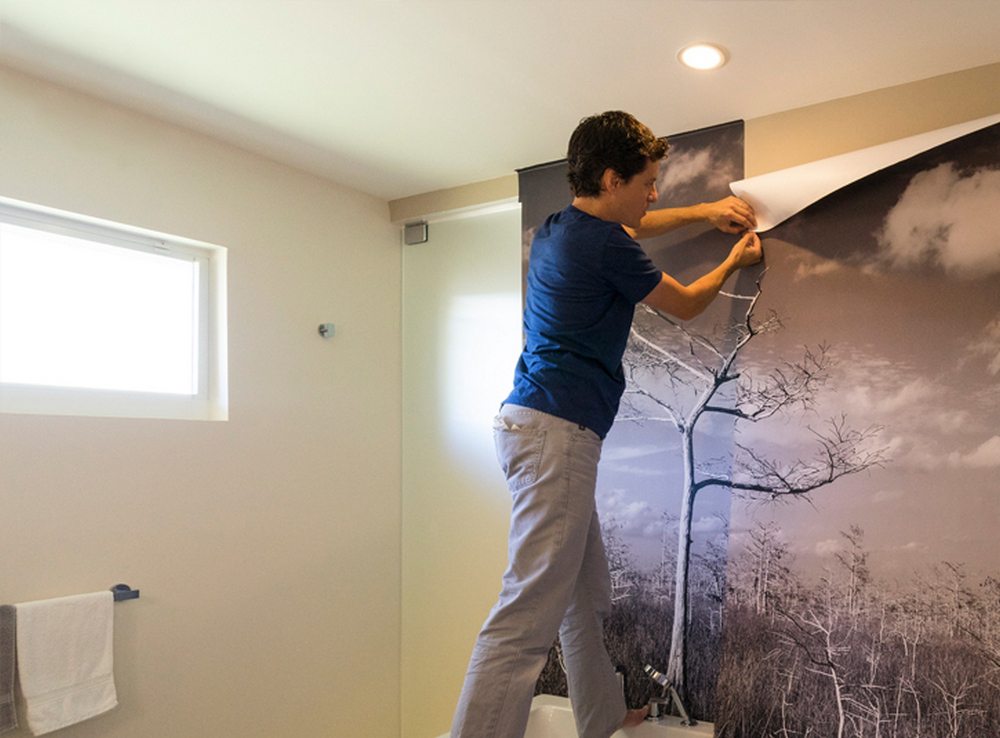 Then all defects are smeared with a gypsum mixture. The primer at the intermediate stage is needed for better adhesion, if it is neglected, the gypsum mixture after a while can move away from the wall, spoiling the entire repair.
Covering the walls with base putty
After leveling the defects, the entire surface is primed again, then covered with a thin layer of putty (if the layer is thick, it will quickly crack). Finally, the putty layer is carefully polished.
Sanding the walls from the dried layer of putty
Finishing primer
The primer is needed for three reasons:
At this stage, you can use both a ready-made primer (most often universal - acrylic), and wallpaper glue in a liquid consistency.
Important: not every adhesive is suitable as a primer.