How to paint top of wall
How to Paint Walls, a Step-by-Step Guide
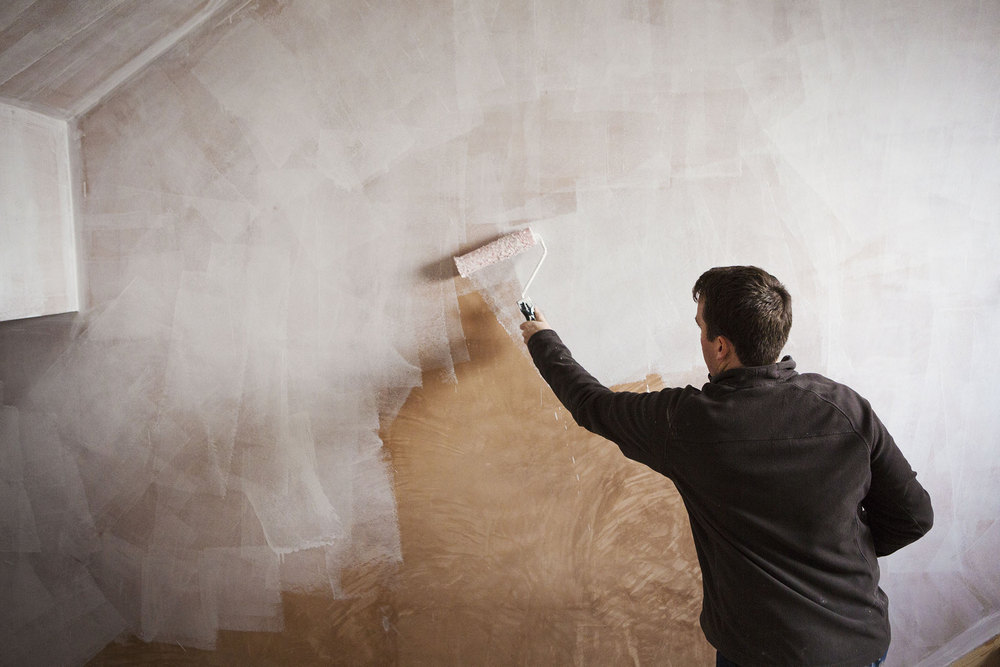
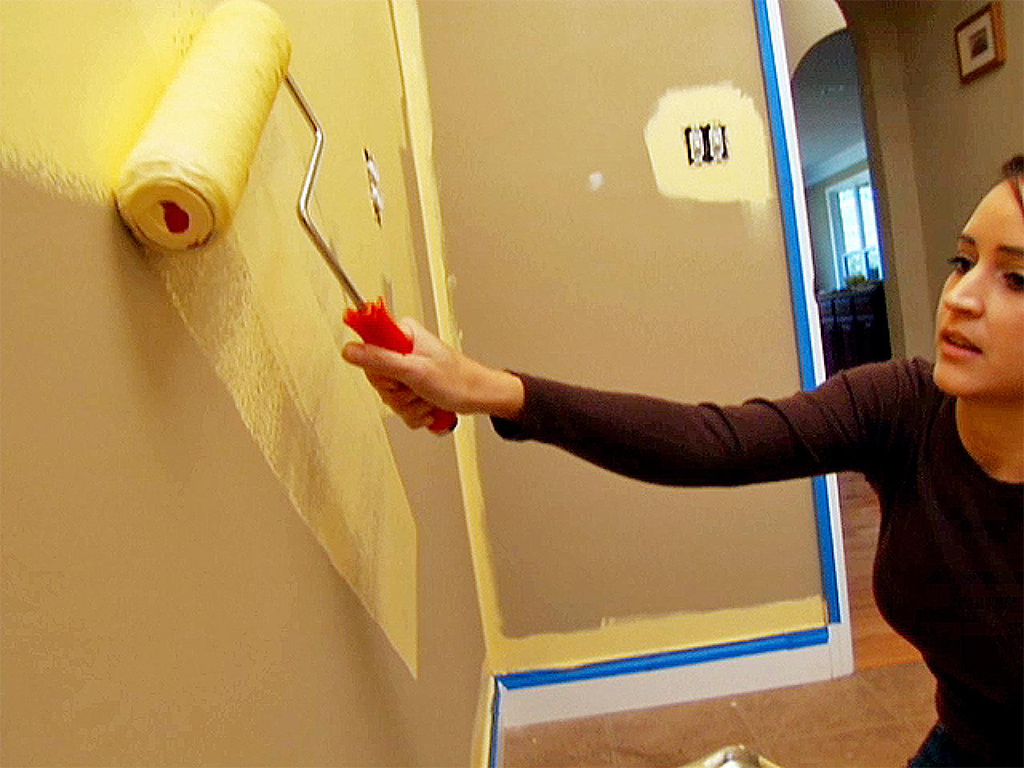
Start by painting the trim with a brush, then move onto the ceiling and walls with a roller.
By Ariel Scotti Updated September 07, 2022
roller brush wall paint
Credit: Janelle Jones
- Materials
- Preparation
- Painting
- Drying
Unlike retiling your kitchen floor, painting a room is a doable task that even renovation novices can tackle in one weekend. But before you grab your brush and dive right in, it's important to learn a few basics—like how to prep the walls and the tools you'll need—so you avoid any painting mishaps.
Necessary Materials
Like any home project, there are a few things you'll need in your arsenal in order to get the job done.
- Spackle (if you need to fill in holes)
- Spackle knife
- Sandpaper
- Tack cloth
- Primer
- Painter's Tape
- Drop cloths
- Paintbrushes
- Shedless Rollers
- Paint tray
- Paint
prepping wall for painting hole
Credit: Janelle Jones
Prepare Walls for Painting
If your walls are in need of a fresh coat of paint, it's likely they haven't been touched up in a while. Fill in holes and clean up stains or marks before adding more paint to these imperfections.
Check for Imperfections
Before you open a paint can, inspect your walls for cracks, holes or stains. "First, look at the wall and see if there are repairs that need to be made," says Chris Richter, senior paint merchant at The Home Depot. "Fill holes from things like pictures and peel away areas of chipping paint."
Sand Patched Areas
If you found any flaws that needed to be repaired prior to painting, you'll need to sand those areas down. If you don't, it's possible ridges from spackling will be left behind and your paint job may look uneven. After sanding, use a tack cloth to clean up any dust from sanding. "You can spot prime those patched or repaired areas, but a primer on its own is generally unnecessary," says Richter. He adds that priming an entire wall is only necessary if it's in bad shape or stained.
Clean Wall Marks
If your wall has a few marks, Richter says to use a rag and a household cleaner to wipe the area. For tough grease stains, he suggests using a trisodium phosphate cleaner—a non-toxic cleaner like Simple Green ($5.28, homedepot.com) is a good choice if you need to lightly wipe down the wall and remove any dirt or oils.
painters tape
Credit: Janelle Jones
How to Paint a Wall
1. Cover Areas You Don't Want Painted
Once your wall is in good shape, use painter's tape to protect baseboards and other areas like moldings, door and window casings, light fixtures, and switch plates. "I'm a big fan of ScotchBlue Painter's Tape ($4.49, amazon.com), it's great for every person to own," says Richter. Also cover nearby valuables. Move furniture out of the room, or place in a centralized location in the room, and cover with plastic or a canvas tarp. Protect the floors with a drop cloth.
2. Pour Your Paint
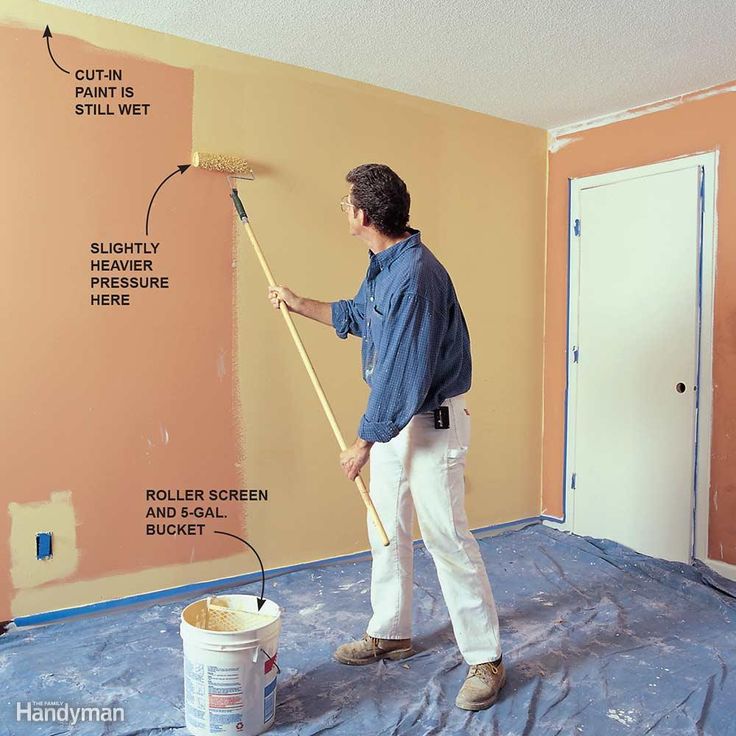
Now it's time to open up your paint can and pour it into a tray. "The ramp of the tray helps distribute paint evenly on the roller," says Richter. "And trays can also be a good way to work faster if you have more than one person painting." For bigger jobs he recommends using a roller screen combined with the 5-gallon bucket for an even more efficient system.
4. Paint Along the Trim
Known by professionals as "cutting in" Richter recommends using a paint brush—he likes Wooster Pro ($18.06, amazon.com)—to paint the top and bottom areas of your wall along the trim. When painting, move the brush in a smooth, side-to-side motion. According to Richter, you should paint the trim before moving to the ceiling or middle sections of your walls. However, he notes that you should only work in small, 4-foot sections of the trim at a time.
3. Paint the Ceiling
If you're painting an entire room including the ceiling, Richter recommends tackling the ceiling before the walls. "It's really a personal preference but I like to work from top to bottom," he says. "I start with the ceiling and work my way down."
5.
 Paint the Walls
 When you're done with the ceiling, move onto the walls. Dip you roller in paint and move your roller in a vertical motion, going from the top of your walls to the bottom.
6. Leave a Wet Edge
When painting the ceiling and walls, you want to keep a "wet edge." This means that the "cut in" sections of paint need to stay wet and not dry before you go back in vertically with your roller. This is why it's best to work in small sections. "If the cut in paint dries before the rest of the wall is done, you'll see those sections through the rest of the paint," he says.
Drying Time
When you're finished painting, Richter recommends not touching the walls for at least two hours. Instead, focus your energy on preserving your brushes and any remaining paint. "Rinse your brushes and rollers with warm water and maybe a little bit of mild soap," he says. "Most paints are water-based so they clean off easily. Keep rinsing until all the paint is gone and then it's ready to dry and store. " For the cans of paint, just hammer the lid back on and store in a cool, dry place.
How to paint a wall: 15 steps for painting walls for beginners
When you purchase through links on our site, we may earn an affiliate commission. Here’s how it works.
(Image credit: Little Greene)
Painting a wall is one of the easiest and most affordable ways of updating any room. And you don't have to get professionals in to do an aesthetically pleasing job of it.
But, before you start to paint a room, it is a good idea to learn a few tips from top experts on how to paint a wall like a pro before you start.
After all, you're going to be looking at those walls for a long while to come. We've consulted experts from the likes of Benjamin Moore, Lick and Dulux for their insight into how to paint a wall to perfection – so that you can bring your paint ideas to life yourself.
How to paint a wall
Here, we tackle the basics of painting a wall – using the expert tips we've added will ensure you get a professional finish.
1. Measure your room and determine how much paint you need
If you've been browsing living room paint ideas and are wondering whether you could work the transformation yourself – and how much it costs to paint a room – the first thing to get to grips with is paint quantities.
'There is no "average room", so it’s important to roughly work out how much paint you will need to avoid buying too much,' says Helen Shaw, Director at Benjamin Moore . 'As a guide, it’s key to bear in mind that most paints will cover about 10-12sq m per litre. '
She continues: 'Firstly, we recommend starting by measuring or estimating the length of the room. A loose and easy guide for this is step it out – one step for an adult is about 1m, so start by standing against one wall and pacing out to the opposite wall. You can then do the same to estimate the width. Then add two times the length and two times the width together to get the perimeter.
'Most rooms have a standard 2.5m high ceiling, so if you simply multiply the perimeter by 2. 5, you will have the total in meters squared. Although we would recommend that if you have particularly tall ceilings, it’s best to measure this rather than use the 2.5m estimate. If you have large windows or many doors or built-in cabinets, you can deduct this from the total to avoid buying too much. Finally, double the overall meter square total to account for doing two coats.'
2. Choose your color and get the right finish
Whether you're looking for organic, neutral or bold, statement living room color schemes, picking up a selection of sample pots is always a good idea to see how the hue reacts to the light in your space.
And don't forget the finish. 'The right paint finish for different surfaces and specific results is the key to a perfect result,' say the experts at Dulux . 'For example, mid-sheen and gloss finishes reflect light, while kitchen and bathrooms require moisture and stain-resistant qualities.'
3. Buy the right tools
When painting a wall, there's nothing worse than realizing too late that you haven't got all the tools and materials you'll need to do the job properly.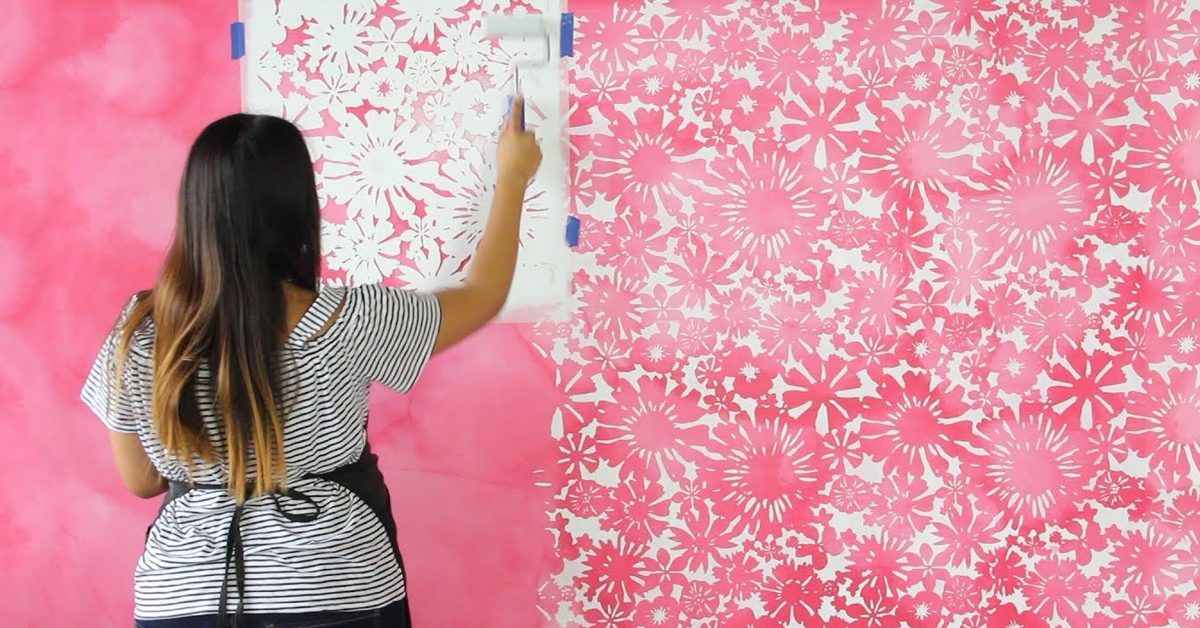 You will need: a pot of paint; a paint brush and paint roller; primer; soap and water for cleaning; a painting tray; a dust sheet; painter's masking tape; and, if you have high ceilings, a roller extension pole is a good idea.
Benjamin Moore's Helen Shaw says: 'When it comes to the must-have tools, a firm favorite amongst consumers is to use a roller for painting walls and a 2in brush for cutting in around the edges. To ensure a smooth finish, a microfiber roller sleeve is best.'
4. Paint in natural light
For best results, always paint in natural, not artificial or low, light.
A Dulux expert advises: 'Whether you're rushing to get the job done just as the sun goes down or it’s dark and stormy outside, it’s always better to wait for bright, natural light to paint your rooms. Painting in dim or harsh artificial lighting can easily result in patches and imperfections that only show up in glaring natural light.'
5. Clear the area
Now you've got the right amount of paint in the correct finish and color of choice, you're ready to take the next step in painting a wall.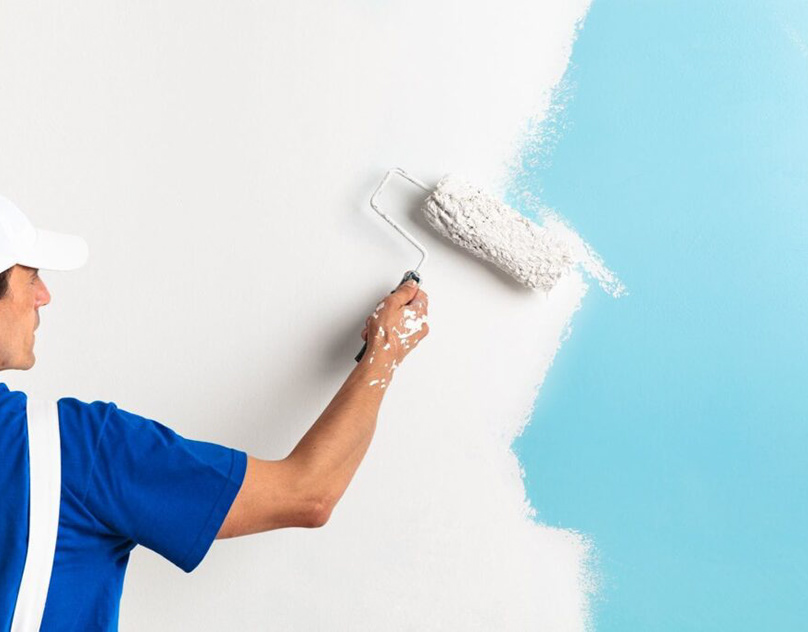
'Start by clearing your working area to give yourself ample painting space,' says Lick’ s Interior Design and Colour Psychologist, Natasha Bradley. 'Put away your favorite furniture items and anything you don’t want to get splatters or splodges on.
'Put a protective dust sheet down to save your flooring and any furniture that’s too heavy to move. Newspapers and bedsheets won’t be sufficient here, but either a canvas or a plastic drop sheet should work equally well.'
Helen Shaw, UK Director of Benjamin Moore adds: 'Before you jump in with your paint brush, make sure the space around you is prepped and cleared – you don’t want to be spilling paint over your new sofa! If there’s not enough space to clear the room entirely, push everything to the centre of the room and cover, don’t forget to also cover the flooring.'
6. Prep your walls
'Once everything is cleared and covered, you can then make a start on preparing the walls for painting,' says Helen Shaw. 'A key factor in ensuring you have a smooth finish is having a clean surface to paint on, dust, cobwebs or grime can stop your paint adhering and having the perfect finish.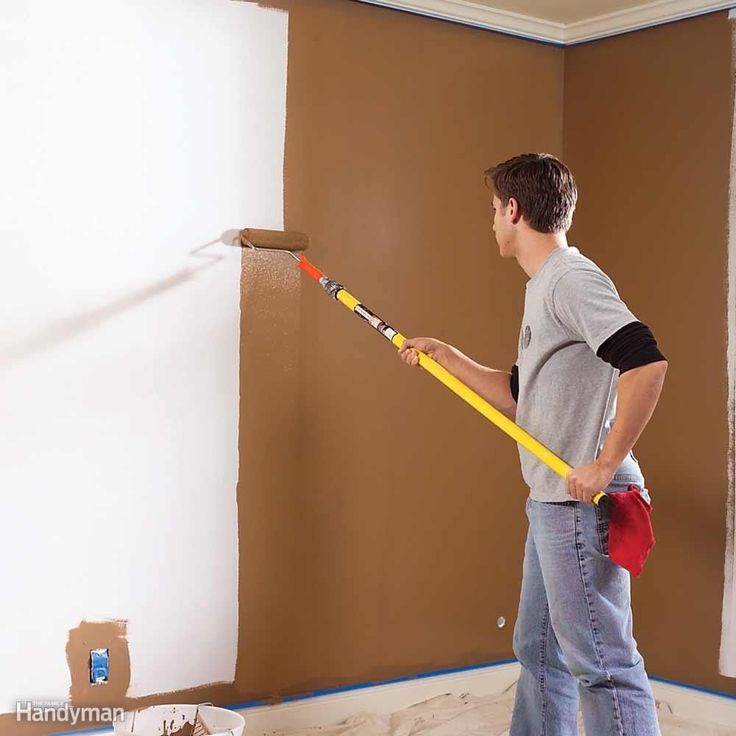 Most walls can be washed with a soft sponge and warm water, but if you’re painting in the kitchen then you’ll need something to help cut through the grease before rinsing with warm water.'
Speaking to H&G, a Dulux expert says: 'It’s very tempting to skip this crucial first step, whether it’s to save time or because you think your walls look fine to paint over. But, it’s often hard to see dirt, dust, scratches and cracks, until they rear their ugly heads through your new paint. Before you do anything, give your walls a good clean with warm, soapy water, fix any cracks or holes with filler and wait until the surface is totally dry before painting.'
Be ultra-vigilant about this step, says Lick's Natasha Bradley. 'Examine your wall for any flakey areas or little bumps. Use filler and sealant to fill up any cracks or holes or a scraper to even bumps and flaking paint. Don’t skip this step if you want to achieve a smooth and professional finish.
'Next, get your painting surface ready. Clean your walls thoroughly but gently using a soap and water mixture. Wipe clean and leave to dry.'
7. Apply your painter's tape
Once the surfaces are dry, use painter’s masking tape or good, old-fashioned masking tape to cover any sockets, switches and skirting boards in the area.
Helen Shaw says: 'You’ll need a roll or two of painter’s tape to protect any mouldings or switches from any drips and ensure a neat finish. Make sure you apply the tape carefully to get a good seal to avoid paint getting underneath and running.'
8. Time to prime
Using a primer will ensure a more professional finish and help you get the most from your paint color. 'Apply a smooth and even base coat of primer using a roller,' says Lick's Natasha Bradley. 'Work into smaller crevices using the tip of your paintbrush. Leave to dry for a few hours before starting to paint.'
She adds: 'Avoid the temptation to skip the priming stage if you want a vivid and consistent finish, especially if you’re painting over a darker color. '
'
9. Stir and decant your paint
After opening a paint can, stir the paint thoroughly for an even texture, before pouring some into your painting tray.
A Dulux expert says: 'As colors can vary slightly from can to can, it pays to decant paint into a smaller container or tray to mix it before you start painting. In terms of how to decorate while making the least amount of mess, this tip might just save your sanity. Imagine accidentally knocking over a 10 liter can of paint?'
Kathryn Lloyd, of Crown Studio , offers her top tip: 'Pour the paint into the roller tray and, for ease, you can use some aluminium foil within the tray to save you cleaning it out afterwards. Once you’ve finished with the paint you need, pour the residual paint back into the can and you can dispose of the foil without using tons of water.'
10. Cut in the edges
Before you start painting the walls, cut in the edges with a one or two-inch brush. This means first painting the areas that are too tight for rollers, like the ceiling line, corners and trim.
Benjamin Moore's Helen Shaw advises: 'To cut in with ease, a low-tack tape around the ceiling edges or skirting will help to get a sharp line and a clean finish. Gently remove the tape when the paint is still wet to ensure there is no bleed through or peeling.'
Kathryn Lloyd's top tips on cutting in while painting a wall? 'Apply some paint onto the brush, providing any excess has been removed to guarantee you have control when using the brush and keep the paint looking neat along the edges.
'With your paint brush in hand, start a little bit away from the edge of the wall, so that you have the right amount left on the brush to create a very sharp edge so that it’s nice and neat. Repeat this for the top, bottom and sides of the wall.'
From preparation to painting, work from the top of your room down, for best results. Start with the ceiling and the architrave. Then, paint your walls from the top down with your roller. Finish the job with woodwork and skirting.
12.
 Use this painting technique for best coverage
'If you’re flinging your roller around, you might not achieve the best coverage,' say the experts at Dulux. 'Instead, apply your paint in a W shape on the wall. Go over the W with an M shape to fill in the gaps, then reload your roller and move onto the next section in the same way.'
Lick's Natasha Bradley agrees this is a good technique for painting a wall, saying: 'Dip your roller into the paint tray and start to paint your wall in W or M motions for even distribution.'
13. Apply another coat of paint
Leave the first coat to dry for a couple of hours before you apply another coat.
'Most walls shouldn’t require more than two coats of paint,' says Natasha Bradley. 'Remove the painter's tape from the wall whilst the second coat is still drying.'
14. Don't forget ventilation
To make the experience more pleasant for you, open the windows and let some air in.
Natasha Bradley advises this will also quicken up the wait: 'Keep your work area well-ventilated to minimize drying time.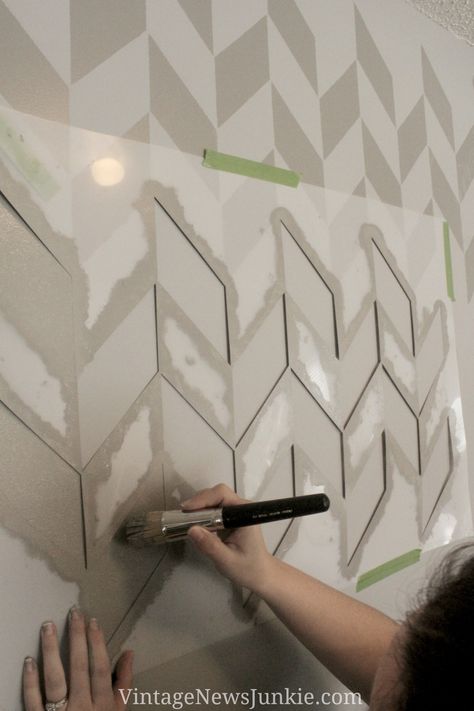 '
'
15. Clean up ready for the big reveal
Leave to dry for at least 24 hours and remove your dust sheets to reveal your brand new wall. Keep your brushes in good condition by cleaning them before you put them away. If you've used a water-based paint, a clean with soap and water will suffice.
Keep the colors you’ve used so you can touch up paint on walls as necessary and make sure to dispose of paint safely when you do finally come to changing to a different wall color.
Now it's time to step back, admire your own handiwork, and give yourself a well-deserved pat on the back.
Ruth Doherty is an experienced digital writer and editor specializing in interiors, travel and lifestyle. With 20 years of writing for national sites under her belt, she’s worked for the likes of Livingetc.com, Standard, Ideal Home, Stylist and Marie Claire as well as Homes & Gardens.
Wall painting: instructions for those who are not painters at all
27 August Likbez Do it yourself
A simple instruction will help you completely transform the interior in just a few hours.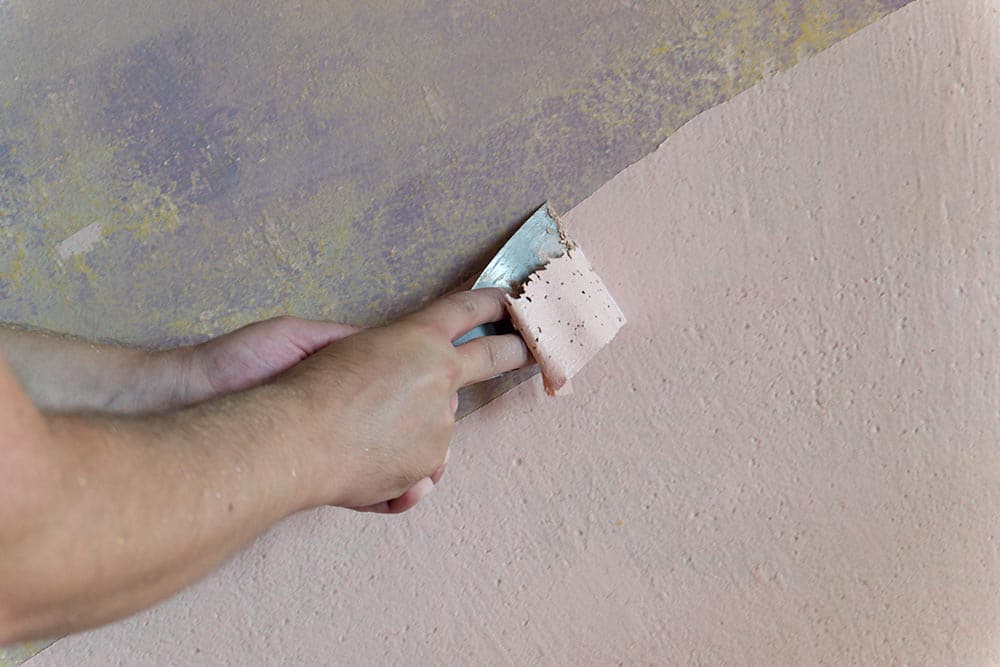
1. Prepare your tools and materials
Here is a list of what you will need:
- paint;
- wide roller;
- narrow roller;
- roller extension;
- brush;
- wide brush;
- paint tray;
- paddle;
- masking tape;
- film;
- gloves;
- screwdriver.
Reading now 🔥
- 9 easy ways to save money without stress
2. Calculate the amount of paint
In order not to run to the store for the missing can, it is important to immediately estimate the right amount of material. To do this, it is necessary to divide the area of \u200b\u200bthe walls by the paint consumption, multiply by the number of layers and add 10–15% in reserve. As an example, let's calculate how much paint is needed for a room (4.5 x 3 m) with one window (1.4 x 1.6 m) and a door (2.1 x 0.7 m). Ceiling height - 3 m.
First, find the total surface area. To do this, we calculate the perimeter of the room and multiply it by the height of the ceilings:
(4. 5 + 4.5 + 3 + 3) × 3 = 45 m²
Now we determine the net painting area. To do this, we calculate the area of window and door openings, and then subtract it from the total area of the walls:
45 - (1.4 × 1.6 + 2.1 × 0.7) = 41.29 m²
And, Finally, find out how much total paint is needed. To do this, divide the net painting area by the paint consumption per square meter (indicated on the label), multiply by the number of layers (usually two) and add 15% in reserve:
(41.29 ÷ 10) × 2 + 15% = 9.5 liters
will not be dyed.
Remove furniture and all other items, and what cannot be removed, put in the middle of the room and cover with foil. Wrap the heating radiators with it or remove them. Cover the floors with a thick film or several layers of newspapers.
Illustration: Artyom Kozoriz / Lifehacker De-energize sockets and switches, remove covers from them and cover with masking tape. Also paste over skirting boards, platbands, slope edges and other adjacent surfaces so as not to splatter them.
4. Prepare the walls
Illustration: Artyom Kozoriz / LifehackerWhen painting, the surface must be perfectly even. Otherwise, the paint will lie unevenly and all the flaws will then appear even more strongly.
Remove layers of old paint and wallpaper with a spatula and clean the surface well. Putty all the smallest cracks, dents and bumps, and after complete drying, carefully sand with a fine-grained sandpaper.
5. Apply primer
Illustration: Artyom Kozoriz / LifehackerBefore painting the walls, be sure to prime them: after such treatment, the paint will lay down more evenly and will hold better. In addition, by reducing the absorbency of the surface, paint consumption will be significantly reduced.
Using a wide, medium pile roller, prime the walls. Make sure there are no untreated areas. Don't rush and don't let it run. Let the soil dry completely. It usually takes about 2 hours, the exact time is indicated on the label.
6.
 Prepare the paint Illustration: Artyom Kozoriz / Lifehacker
 Stir the paint thoroughly with a wooden spatula for several minutes. You can use the mixer, but at the lowest speed to prevent the formation of bubbles.
Fill the tray with paint about a third: if you pour more, it will be inconvenient to dip the roller. Close the jar tightly immediately so that the paint does not dry out.
If you wrap the tray with a layer of foil, then after use it will be enough to remove and discard it. The bathroom itself will remain clean.
Do not fully dip the roller. Roll it a few times over the surface of the paint and then over the top of the tray to distribute the material evenly. Pre-moisten the roller in water and wring it out: this way the paint will better saturate the fur coat and will be well applied to the wall from the very beginning.
7. Finish the corners
For better results and faster work, all corners and junction contours are carefully painted over first, and then the main surface. There are two main options for performing layering.
First: using a small brush, slowly paint 5-7 cm wide stripes along ceiling moldings, in corners, at baseboards, and around radiators, sockets and switches. To protect the ceiling, you can seal the blade of the spatula with masking tape and, applying it to a corner, calmly paint with a brush.
Second option: Tape the joints to the ceiling and other surfaces with masking tape, smoothing the joint well with a spatula so that the paint does not flow there. The entire surface of the tape does not need to be smoothed, otherwise the adhesive tape will then be difficult to remove.
Adhesive tape on the ceiling can additionally be painted along the edge with white paint: this way it will immediately fall into the gap and after painting the wall with a different color, the border will be perfect.
8. Apply the first coat of paint
Illustration: Artyom Kozoriz / Lifehacker Before starting work, close doors and windows to prevent drafts and retain moisture - this way the paint will dry more slowly and evenly. Additionally, you can spray water with a spray gun, as well as seal the windows with a film to protect from direct sunlight.
If the paint is thick, then for the first layer it can be thinned according to the instructions on the can - usually 5-10% pure water is added to the total volume. To avoid streaks, do not skimp and get enough paint on the roller.
Cut the pile at the edges of the roller at a 45° angle so that the seams between adjacent strips are less visible.
Start staining from the corner. Use the roller extension to roll continuous strips from ceiling to floor without stopping. Each subsequent strip should overlap the previous one by 3–4 cm.
Spread the paint evenly, being careful not to make the layer too thick. Gradually move from one corner to another. Don't stop until you finish painting the wall, and only then move on to the next one or take a break.
9. Apply the second layer
Illustration: Artyom Kozoriz / Lifehacker You can start painting the next layer only after the previous one has dried, otherwise the roller will tear off the paint and all work will go down the drain. In the warm season, it usually takes about 2 hours, see the instructions for the paint for the exact time.
The second coat should be painted in exactly the same way as the first, the only difference is that the paint does not need to be thinned.
10. Remove masking tape
Illustration: Artyom Kozoriz / LifehackerAfter everything is painted, it is important to remove the adhesive tape that protects the contours and adjoining walls. This should be done 15-20 minutes after applying the second layer. If you hesitate, the paint will dry out and the masking tape will tear it off. Be careful not to damage the paint edges.
It takes about 24 hours to completely dry, depending on the temperature in the room and the type of paint used.
Read also 🧐
- How to glue wallpaper: detailed instructions with photos and videos
- How to choose linoleum
- Which wallpaper to choose for different rooms
- What to do with leftover paint
- How to lay wall tiles
10 golden rules - INMYROOM
Paint is the most versatile finish material. With its help, you can radically change the look and atmosphere of any premises. Gone are the days when paint was associated with plain corridors. schools and hospitals: tinting systems offer thousands of colors to choose from the one that will help make your dreams of an ideal interior come true, combine different textures and degrees of gloss.
And the painting process itself rooms is a very creative occupation: it’s nice to imagine yourself as an artist, pick up a brush and add new colors to your home on your own.
Gold rules for painting rooms
So you arm yourself with a roller and paint to transform the interior. What else is needed to get the result pleased and aroused pride from the fact that all this was done with your own hands? In coloring walls have their own subtleties. Today we will share some of them.
Rule #1: choose your paint color last
Many begin repairs with a choice colors for the walls - and they are wrong. If you want your interior to look harmoniously, start with the selection of shades for the floor and furniture, and leave the paint on after. Why is that? The point is that the quantity shades of furniture, parquet and accessories are always limited, and paint can be tinted in thousands of different colors.
For example, in the Symphony system, according to which Tikkurila paints are tinted, There are over 25,000 color options to choose from. Agree, much it is more difficult to find out that in order to “support” the selected shade of the wall, you need exactly dark turquoise lamp, and go off your feet in search of such a color.
Rule #2: Live with your chosen color before you buy
This rule is especially true for bright hues. However, psychologists have repeatedly proven that long-term neighborhood with bright colors is tiring and a bright orange wall after a couple of months can cause only one desire: to close it with the highest possible cabinet.
What if dreams of bright orange the wall is still haunted? Colorize in store and pick up home, many salons or building hypermarkets provide such possibility.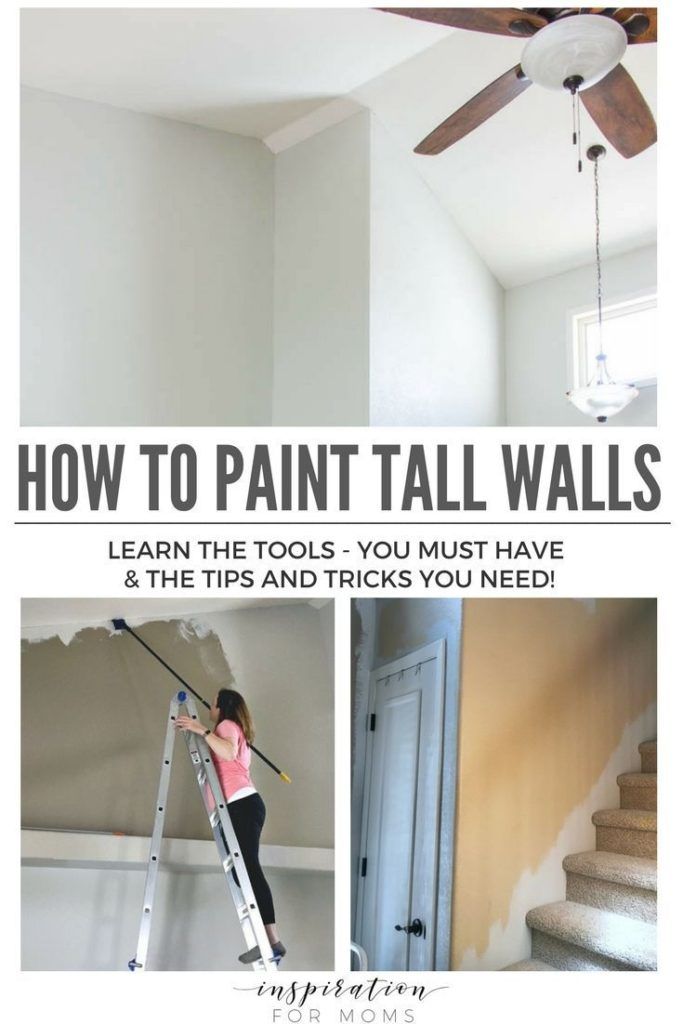 See how the selected color behaves under the lighting of your rooms and make your decision. And don't forget that high grade paint gloss will enhance the perception of color, and matte will make it calmer.
Rule #3: Plan your job carefully
Painting requires a certain preparation. It is necessary to calculate the amount of paint using expense calculator.
Next, determine how much you will need time. Most often, to achieve the desired shade intensity must be painted in two layers, respectively, it will take time to give let the first layer dry. For water-thinned acrylate paints, the time drying is usually 2-3 hours. For alkyd paints and enamels, this period is higher – up to 24 hours.
Rule #4: Don't skimp on tools
If you've chosen a good paint, then the accompanying materials should match its quality. A bad tool can spoil the result, no matter how expensive the paint you choose.
When working with alkyd and oil paints, choose brushes from natural hair as well as artificial hair.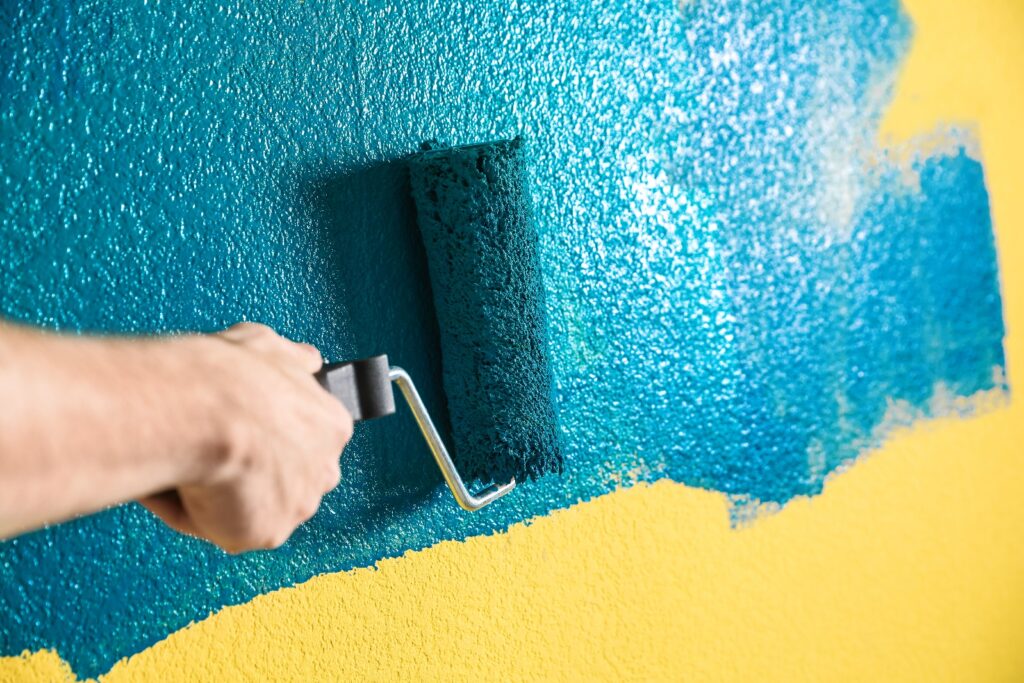 Latex (acrylate) paints should only be applied with artificial fiber brushes. Any brush should be 1.5 times longer in length than in width.
As for rollers, then, as in the case of brushes, for applying latex paint, they must be made from synthetic material. Oil and alkyd paints apply both with a natural fiber roller and with a synthetic one.
Rule #5: Protect yourself and surfaces
Many modern paints are harmless and environmentally friendly, but do not forget about special protective clothing. Cover your head with a scarf, bandana or use a simple Soviet invention - a hat from a newspaper.
Shoes should also be chosen which is not a pity to get dirty in the paint. At the same time, it should protect your legs from spray. Put on latex gloves on your hands.
Cover floors and furniture with protective film - it is sold in any building market. If the paint did get there, where it shouldn't be, try to remove it as soon as possible. Acrylic paints are washed off with water, but if the enamel has already dried on the surface, then you need white spirit.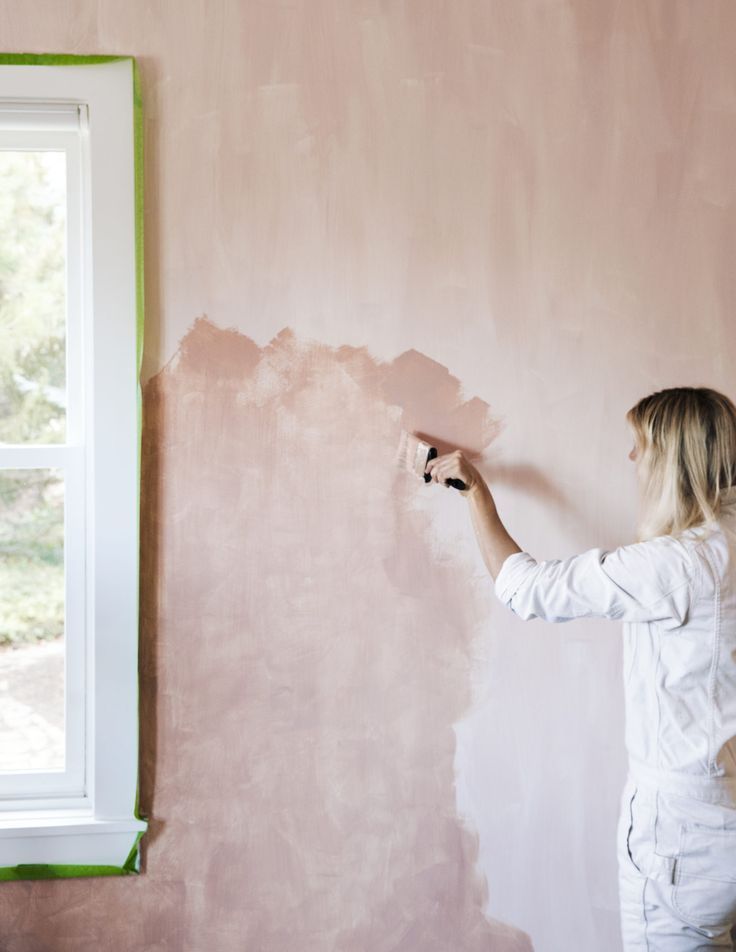
Rule #6: Prepare the wall surface
Walls must be prepared: they should not have obvious scratches and bumps. To make the surface smooth use a leveling putty. It is recommended to apply on top primer: it will improve adhesion and prevent the paint from soaking into the surface, which means significant product savings for you.
Rule #7: Create the Right Conditions
Consider the conditions under which you are about to color. Make sure the room is not too hot, humid, or cold as the paint may dry or harden in such conditions.
After painting, to ensure reliable drying of the paint, room temperature it is recommended to increase and decrease the relative humidity. Excellent the remedy for this is a conventional room heater.
Rule #8: Start painting from the corners and from above
Correct painting order help avoid unpleasant surprises and double work. First paint the top and the lower parts of the walls and corners, using a brush or a narrow roller. Thereafter proceed to painting the remaining surfaces, while painting the top first part of the wall, and then the bottom to avoid drips.
Rule #9: Don't try to do everything quickly
You need to paint the room in good mood and leisurely. Haste does not lead to good - quickly applied layers on top of each other will look unaesthetic (remember that for drying water-based paint requires a minimum of 2 hours). It also does not need to be applied too thick a layer of paint at a time. As the Scandinavian fairy said character, calmness, only calmness - this is the key to successful painting.
Rule #10: Clean your tools
After finishing the staining process, do not forget to clean the tools - they may still be useful to you. Waterborne the paint can be washed off with water or use special detergents, like Pensselipesu from Tikkurila.
If the paint is completely unused, carefully close the jar. To achieve this effect, for a short time the jar can be turned upside down - the lid close hermetically. Do not forget: during long-term storage in incomplete or If the container is not tightly closed, the paint becomes unusable.
Professionals always have their own secrets of success. Today, Klavdiya Lovchinovskaya, a leading training specialist at the Tikkurila Training Center, will share with us some of the nuances of wall painting.
1. If you are not 100% sure that the wall surface is perfectly flat, then choose a matte paint. A high gloss finish will only accentuate possible imperfections.
2. Immediately after painting, it is recommended to start raising the room temperature and lowering the relative humidity. An excellent tool for this is a regular room heater.
3. If you are right-handed, it is more convenient to start painting from the upper right corner, left-handers, respectively, start from the upper left side of the wall.
4. If you are painting in the cool season, you can slow down the drying of the paint by turning off the heating a few hours before starting work and opening the windows.