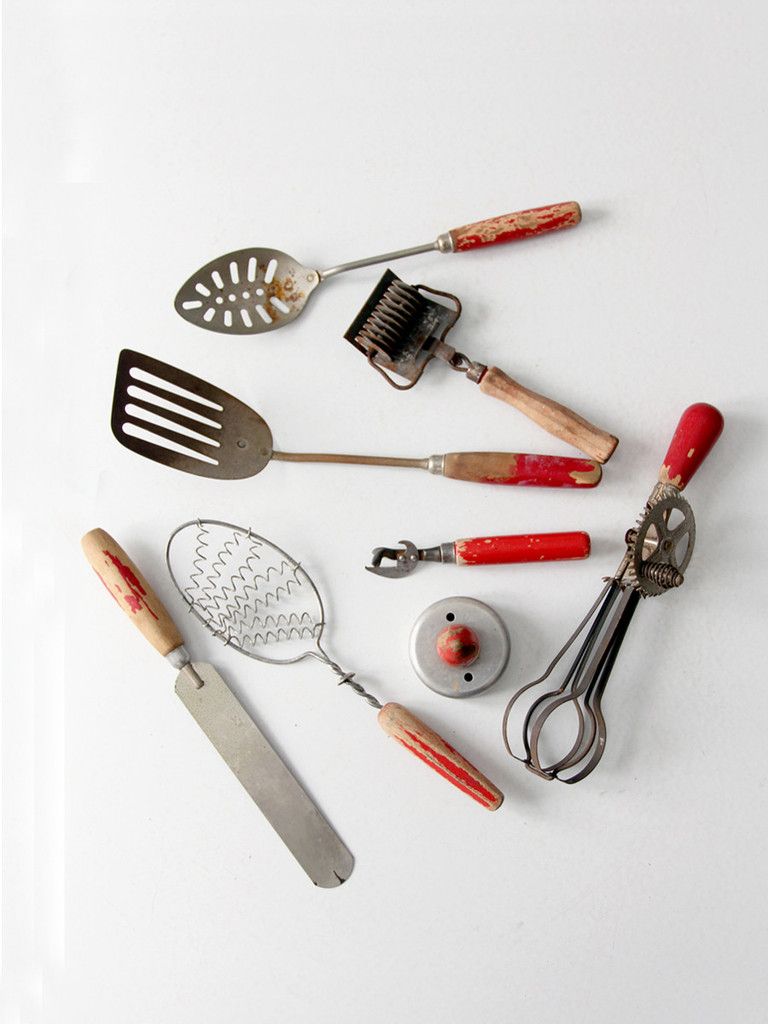
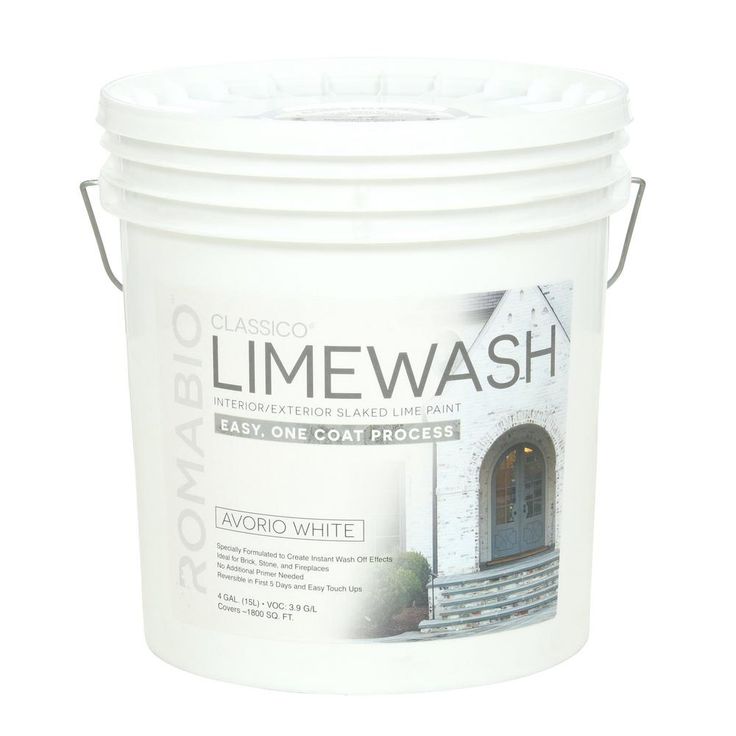
How to limewash
How to apply Limewash | What is Limewash used for
What is limewash used for?
Traditionally limewash was the principal finish applied externally and internally to historic buildings, quite often applied directly to the masonry or brickwork and more commonly to pre-applied lime coatings (i.e. harling, plaster, render etc;).
Although often thought of as a decorative coating, the limewash was first of all a protective layer to the lime coatings and masonry substrate. On new lime renders and plasters it unifies and protects the surface particularly while strength is developing within the new plaster.
As with all lime coatings, limewash is a breathable coating allowing evaporation of moisture and water vapour. Limewash is also a repairing material, being used to fill small shrinkage cracks on the lime coverings. Limewash can also be used in conjunction with various aggregates to make shelter coats for friable masonry and will act as a sacrificial protective coat.
In its simplest form, limewash is lime putty diluted by water to turn it into a milky consistency.
Additives for Limewash
How long does limewash last?
When used externally limewash requires regular renewal, usually every two years. The addition of a binder such as casein, tallow or linseed oil will improve its durability.
Casein is an animal deriative and can be added to a limewash to act as a water repellent and to prevent dusting.
Tallow is the refined fat of a cow, pig or sheep and serves a similar function but is more commonly found.
Both casein and tallow should be incorporated in the lime slaking process.
LINSEED OIL is a traditional vegetable-based additive which is used as a binder and weatherproofer. Its water shedding properties are considerable, generally a one per cent solution is all that is required i.e. 50ml to 5 litres of wash. It is worth remembering that although a greater quantity of additive will increase the protection against the weather, it will also inhibit moisture movement within the wall.
Using Limewash Internally
Limewash is ideal for internal use as it is unaffected by rising damp which continually breaks down most other paints. However, it is best not to use additives such as casein, tallow or linseed oil as this will reduce absorption and hinder the evaporation of moisture within the wall.
Plain Limewash
Plain un-coloured limewash will take on the colour of the lime used; this can range from pure white through to gray or buff coloured.
Coloured Limewash
Generally earth PIGMENTS were used to colour the limewashes, most commonly ochre’s, but also siennas and umbers, which produced a range of yellows, reds and oranges. Broadly speaking these produced pastel shades, although deeper colours are not uncommon. Coal dust, ash, blood and ground stone dust have all been found as additives in historic limewashes to achieve the desired colour.
How do you apply limewash?
Application of Limewash - Preparation
Surfaces to be limewashed must be clean, free from grease and they must be porous.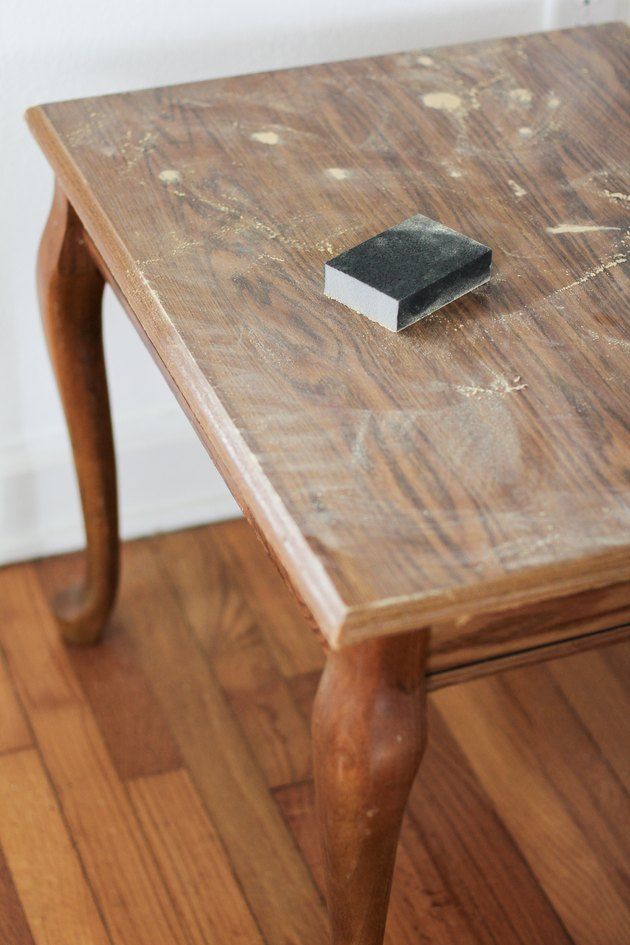 Previously limewashed surfaces must be well brushed down and any loose limewash scrapped off. Any mould should be treated with fungicide and thoroughly washed off with clean water. Do not use fungicides, which contain silicon.
Damping Down
Limewash should never be applied to a dry surface, as this will cause rapid drying out of the limewash and result in dusting. SPRAY about 3 sq/m of the surface to be limewashed with water until the surface is damp but not running with water. Do not try to damp down the whole wall or ceiling at one time, as most of the area will be dry before it can be limewashed. Dry joints must be avoided as these will result in the limewash gaining a patchwork appearance.
Application
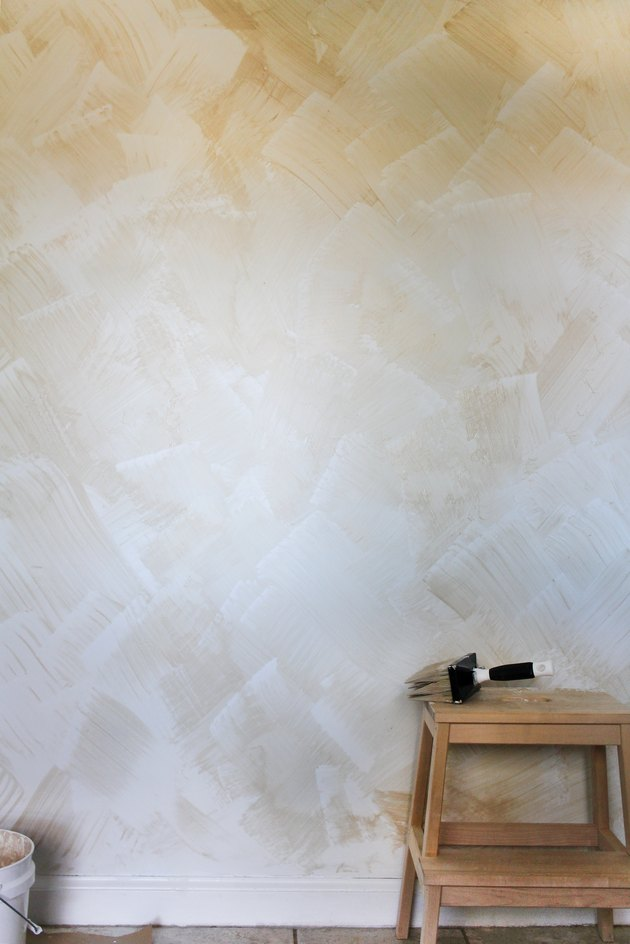
Limewash is best applied by using a flat brush or masonry paintbrush. Stir the limewash well before and during application, apply working the wash well into the surface. The limewash should be applied in several thin coats.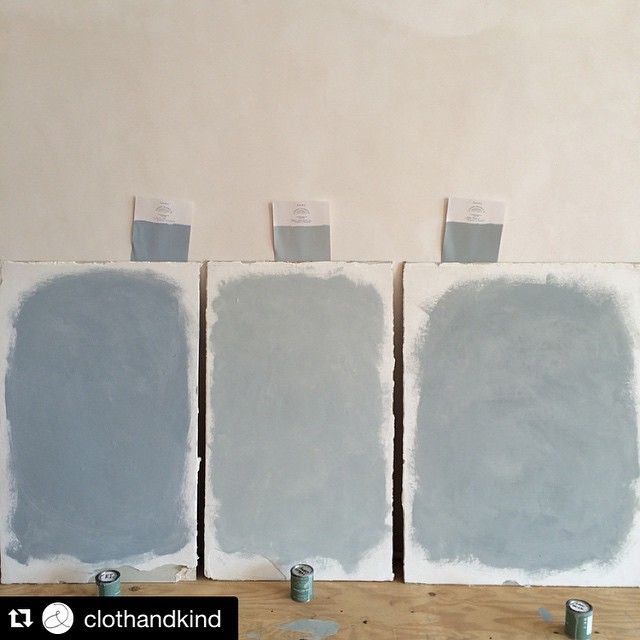 Avoid runs or drips running down the face of the work.
How many coats of limewash do I need?
The limewash will appear transparent when first applied so care must be taken not to build up the limewash too quickly as this will craze on drying. Each coat should be allowed to dry before the next coat is applied. We recommend 24 hours between coats. It is very important to rewet the previous coat before applying the next coat. At least 4 coats will be needed to cover new work. Each coat will need to be burnished into the surface with a dry brush as it starts to ‘gel’. This will give a surface free from brush strokes and leave a unified finish.
As earth pigments are a natural product slight variations in colour do occur. We highly recommend when ordering coloured limewash order the whole amount required plus 15%, this should then be mixed together in a large container and will avoid variation in colour over the job.
Common Mistakes when applying limewash and Solutions
Limewash dry but powdery: Dried too fast, spray with water and re coat with limewash.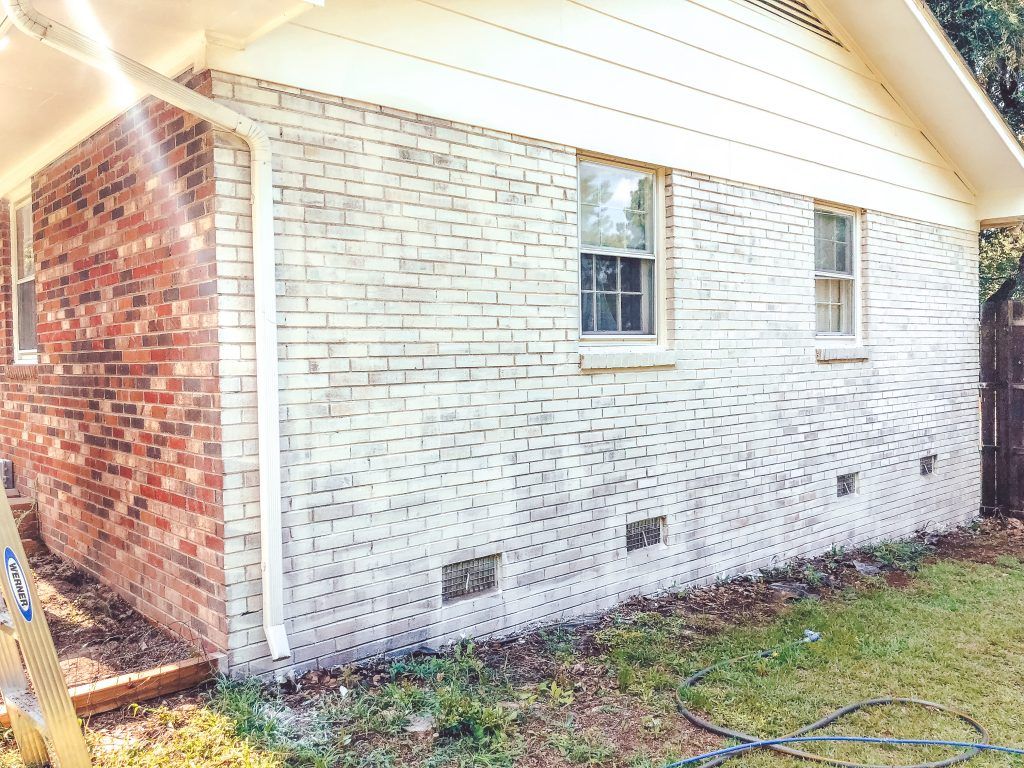
Limewash not absorbed: Unsuitable non-porous surface remove and use alternative product.
Limewash patchy: Insufficiently mixed, mix following coat thoroughly.
Limewash dries too quickly: Remove flaky limewash and damp down the background.
IT IS VERY IMPORTANT THAT THERE IS NO DANGER OF FROST FOR SEVERAL WEEKS AFTER THE LIMEWASH HAS BEEN APPLIED.
How to Master This Intimidating Wallcovering
We may earn revenue from the products available on this page and participate in affiliate programs.
The only singular consensus on limewash is that there is no singular way to use it.
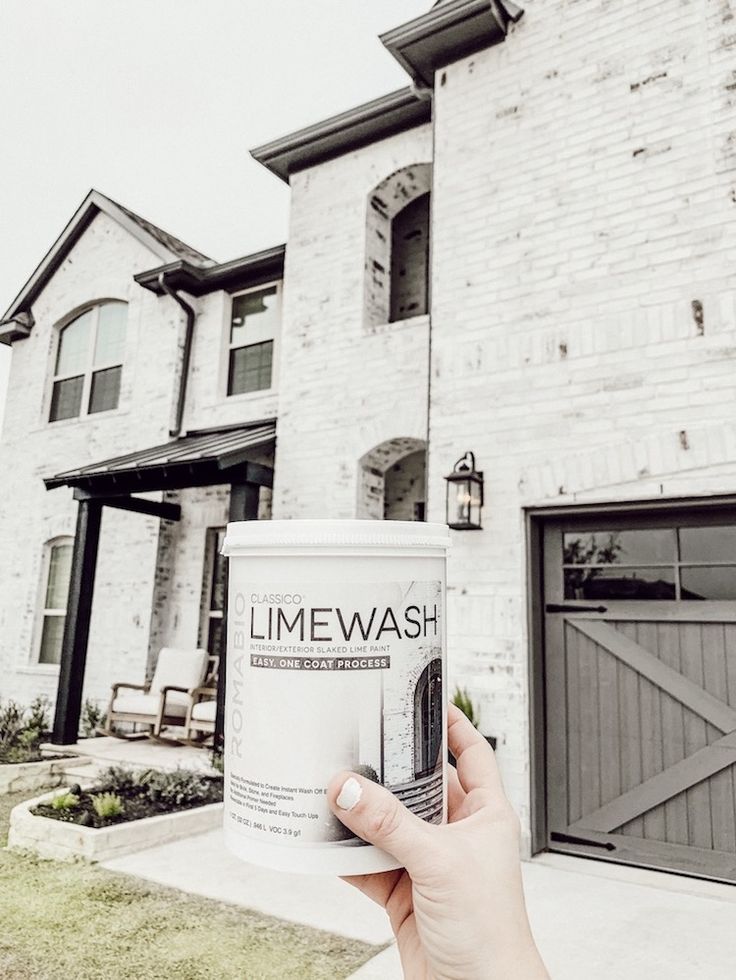
One of the most versatile, environmentally friendly, and charming paint types, limewash has been around for hundreds of years. Chances are that even if you weren’t sure what it was called, you’ve seen it—and maybe even saved it to a Pinterest board or Instagram folder. Limewash’s chalky, organic texture makes it a mainstay of rustic design. It’s in old Italian villas and charm-ridden French country homes; it’s coating the facade of Greek island homes and brick walls in the trendiest NYC lofts.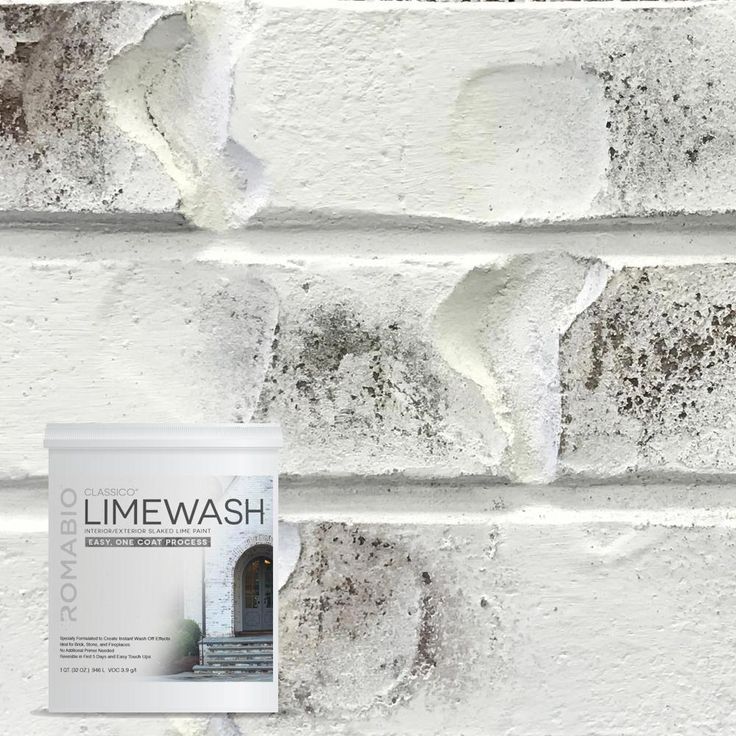
“Limewashing has recently become a little more mainstream, and there are now companies that sell all kinds of beautifully colored limewash paint,” says Shannon King, limewash aficionado and owner of a beautiful Pennsylvania Airbnb. “It gives your walls an old-style plaster look.”
advertisement
A great budget alternative to the plaster look, limewash is the perfect solution to anyone lamenting their uber-modern home. It’ll instantly infuse old-school charm into any space. That said, given that it’s not quite the same as regular paint, the idea of limewashing your home can be a little daunting, so we tapped four experts to get the lowdown on this classic look.
What is it?Limewash is essentially a lime-based finish. It’s created from crushed limestone that’s been mixed with water and then further diluted so it has a thin, milk-like look. Contrary to popular belief, it’s not a style of painting—it’s a whole different type of paint. The good news is that it’s actually a more environmentally friendly type of paint than your average product.
“Most paints are made from plastics and other chemicals, such as biocides and formaldehyde,” explains Bronwyn Riedel of Bauwerk Paints, a company specializing in limewash. “Our paints are VOC-free.”
Limewash is most frequently found in a sheer white hue, though several companies make pigmented paints as well. If you have a favorite color of regular paint you want to zhuzh up, Jolie Paint CEO Lisa Rickert recommends opting for a more translucent wash to layer over the regular variety.
advertisement
“Traditionally, limewash is brushed on to create texture and will reflect light in a different way than if you used a roller,” explains Rickert. One common mistake people make with limewash? Choosing the wrong finish for their base. “Avoid selecting a paint with a sheen to it, as limewashing creates a more matte finish.”
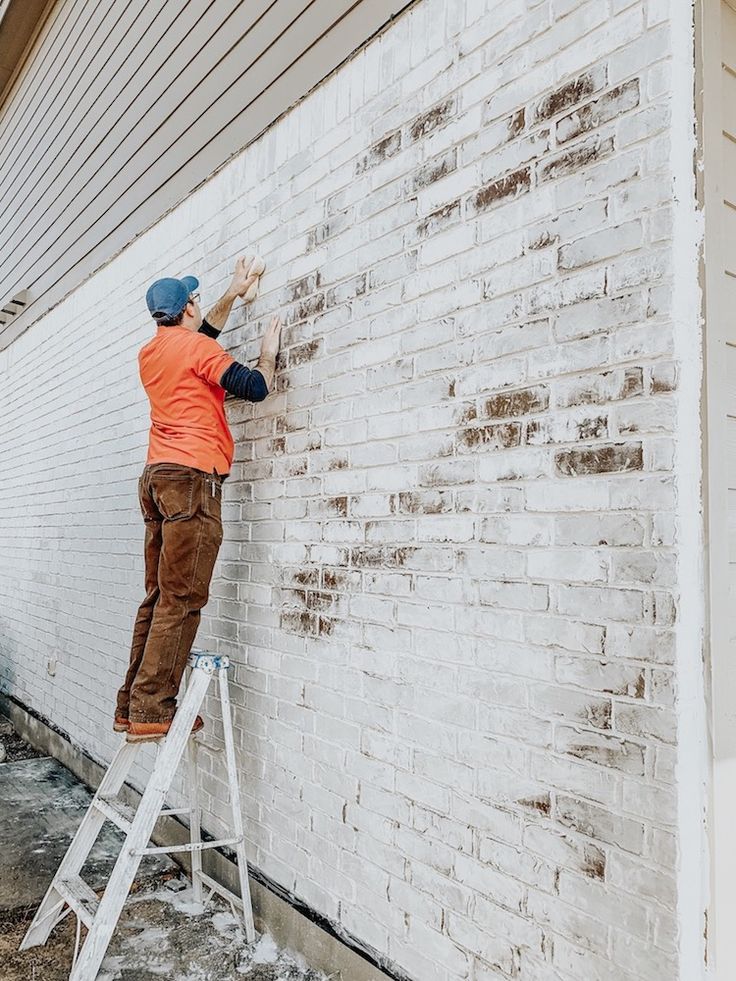
Where can you use it?While most people in the US will recognize limewash from white-painted bricks, it’s a lot more versatile than you might think.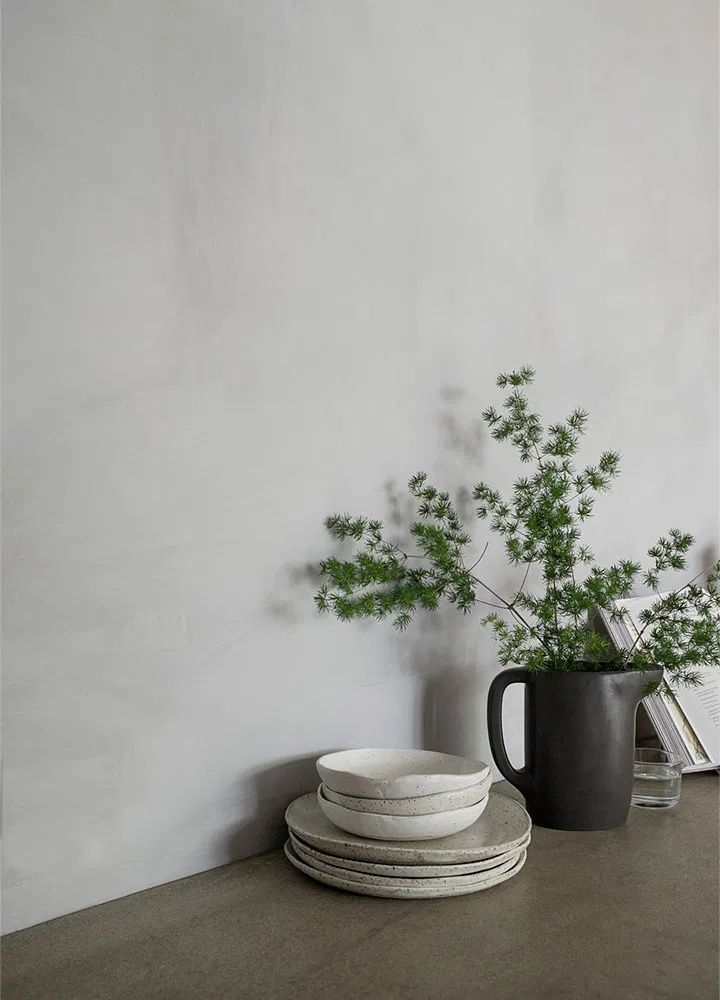 It can be applied both to exterior and interior walls—though, fair warning, the material of the wall in question is important to consider.
“Traditional lime paints could only be used on raw masonry surfaces, like plaster, cement, stucco, and brick,” says Jamie Davis, cofounder of Portola Paints. Since most interior spaces don’t feature any of those materials in abundance, Davis says renters and homeowners wanting to give their living rooms a revamp will need to use a primer on nonporous spaces. Portola’s primer is made specifically for limewash.
Once you have your primer, you’re good to go. Use limewash in your living room to bring a luxe feel to your most-frequented space or try it in a powder room to add depth to a smaller, generally overlooked part of the home.
advertisement
How do you apply it?
“The most important rule is that thin layers are best. If you overpaint it, it can look too powdery,” says Riedel. “It’s important to paint each coat in one go.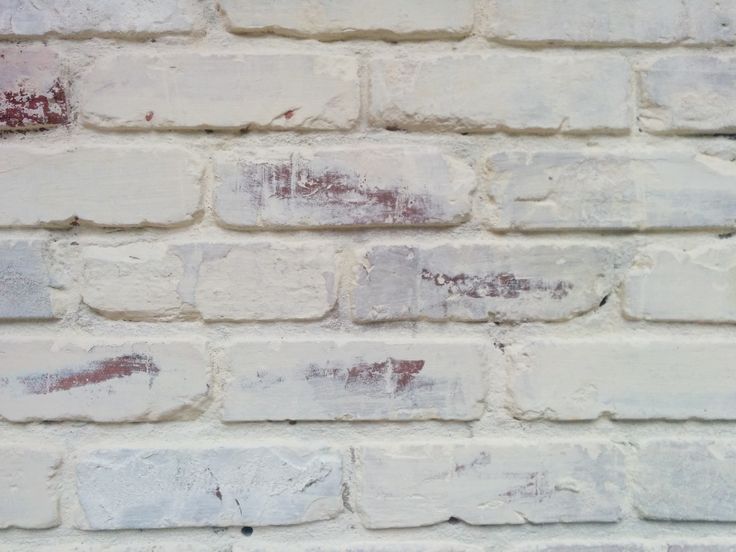 We recommend cranking the music up and grabbing a glass of wine and some friends to help; it’s a fun process, one you can bring your own personality to by how you pattern the paint with your brush.”
Davis recommends testing out your color and pattern on a smaller surface before fully committing to an entire wall. Thin your paint down with water for a more whitewashed effect or go bold. If you’re painting over a porous surface like brick, one coat will do; otherwise, there are a few basic steps for applying limewash to your interior walls:
- Apply your primer coat, which can be done using a regular paint roller.
- Using a five-inch box brush, start at the top corner of your wall and work your way down, cutting in as you go. Use a criss-cross “X” pattern to create natural texture; don’t go over the same spot twice.
- Let it dry completely—don’t panic at the initial color, as limewash looks darker when it’s wet.
- Paint a second coat over the top, repeating the same “X” pattern.
If you really want to take your DIY up a notch, King has a method that painting pros might want to try. “I like my walls to look softer and more watercolored, so I apply a color wash on top of my limewash,” she says of the mixture, which is really just latex paint and water. “I choose the color I want to bring out in my limewash, and then wipe the color wash on top of the lime wash. It’s a very simple thing, but it takes some practice and experience working with limewash to know color ratios and how to apply it.”
What colors should you buy?advertisement
El Coyoté, Portola Paint
Shop
An orangey terra-cotta hue feels like a natural fit for this rustic paint style.
Aqua, Kalklitir Paints
Shop
Create a calming space with textured walls coated in pale aqua. This shade would look gorgeous in a bedroom, paired against neutral decor and furniture to really drive home that coveted zen vibe.
Amethyst, Bauwerk Color
Shop
A far cry from the purportedly trending Ultra Violet, this subdued shade of purple offers just a hint of color.
advertisement
Petrolio, Kalklitir Paints
Shop
If you want to make a statement, go bold with a deep teal hue. For those who love the drama of an all-black room but aren’t quite ready to go that dramatic, this color is a great stepping stone.
Merida, Portola Paint
Shop
Rosy pink is anything but sticky sweet. You might imagine this saturated color dressing up the walls of a chic Italian bed and breakfast. Try it out at home in your dining room for an unexpected twist.
Squid Ink, Bauwerk Color
Shop
Confine this statement-making hue to a small space, like your entryway, to really make an impact.
See more paint trends to know: The 18 Most Popular Paint Colors of All Time 5 Ways to Get More Creative With Wall Paint How to Use One of the Trickiest Colors in Your Home
advertisement
quicklime, dolomite flour, hydrated lime, planting, pest control, step-by-step instructions, video But only on condition that the work is done correctly, the appropriate composition is selected and all recommendations for its application are followed.
 Moreover, the use of lime or its analogues is far from always justified; it is necessary to determine the acidity of the soil in advance in order to decide on the need for processing.
 Dear readers! For you, we have created communities in social networks, in which useful articles and interesting ideas are published several times a day! Subscribe and get useful content in a convenient format!
- VKontakte
- Odnoklassniki
- Yandex.Zen
Contents
- What is soil liming
- Advantages and disadvantages of autumn liming
- The need for liming the soil
- How to determine the pH level in the soil
- What kind of lime should be applied to the soil
- When is the best time to lime the soil in the fall of 2021
What is liming the soil with chemical chalking acidity in order to normalize the indicator and bring agricultural land to neutral indicators.
 The meaning of the procedure under consideration is the introduction of various lime compositions. It can be dolomite flour, various limestones, calcites, sugar beet processing products. But most often lime is used in personal plots, it can be both slaked and quicklime.
By the way!
Liming can increase the number of nitrifying bacteria in the soil by 5-9 times.
And important microorganisms that decompose organic matter and thereby increase yields increase by 2-3 times.
Thanks to liming in the soil absorbing complex, aluminum and hydrogen ions are displaced by calcium or magnesium ions from the introduced composition. This increases the mobility of some useful trace elements, simplifying their absorption by plants. Moreover, the effect of the introduction of lime and other compositions is preserved for a period of 5 to 15 years, so the process does not need to be carried out annually.
Appropriate formulations can be applied in autumn or spring.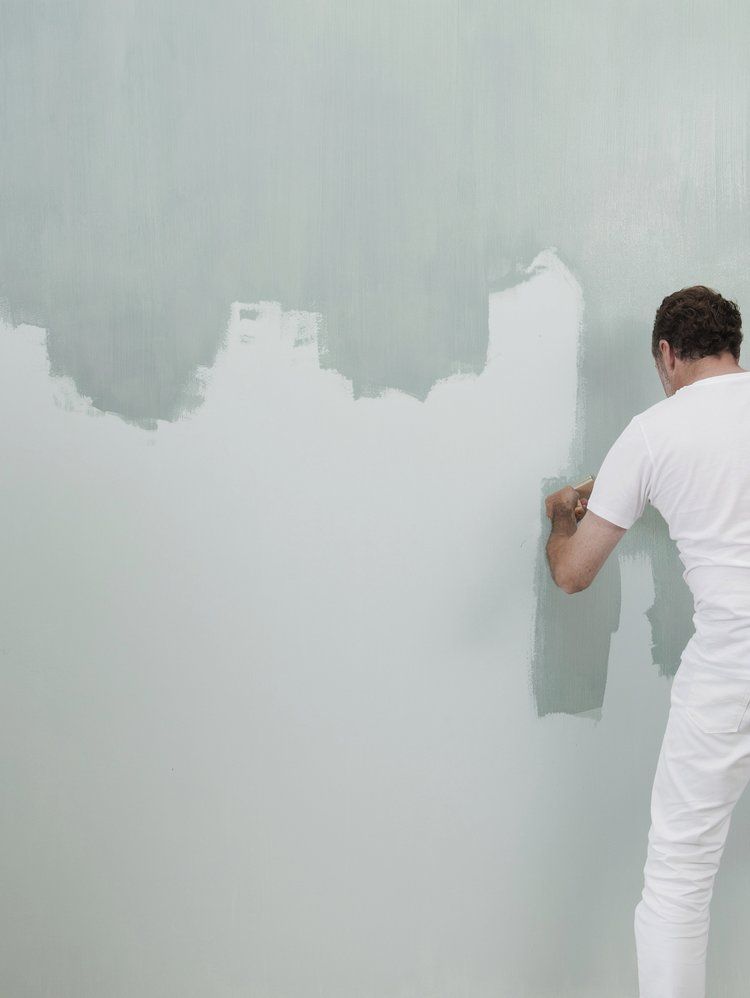 The first option is considered more preferable in the garden for a number of reasons:
- Lime or analogues just need to be distributed before digging and plowing, after which the soil is treated and the composition starts to work. By winter, the soil structure improves, the processes also take place in the cold period, although not so actively. And in the spring, acidity will already return to normal, there will be more beneficial bacteria and trace elements.
- When applying in the spring, you will have to dig or process the site at least 3 weeks before sowing so that the seeds and seedlings do not get burned. There are no such restrictions in autumn.
- Since lime begins to act only when incorporated into the soil, it is convenient to combine its application with cultivation. In the spring, this should not be done because of the application of nitrogen fertilizers, which are not combined with liming.
As for the shortcomings, the following aspects can be distinguished here:
- If prolonged rains are charged in the autumn, the efficiency will be an order of magnitude lower, since the process proceeds best in dry soil.

- Another limitation is that lime cannot be used together with organic fertilizers, which are often applied in the autumn.
Important!
Liming in the spring is justified only in situations where the acidity values are greatly exceeded and urgent measures need to be taken. In all other situations, it is worth planning work for the autumn period.
The need for liming of the soil
It doesn't matter if a plot is being prepared for potatoes, tomatoes, legumes or strawberries and other berries - the acidity of the soil should not be lower than 5.5. If the value is less, then the growth and development of most crops is deteriorating. In addition, a crust forms on the surface, the air permeability of the soil deteriorates, substances harmful to garden crops begin to accumulate, and the number of microorganisms and earthworms decreases.
If you figure out how to properly apply lime to the soil in autumn, you can achieve the following effect:
- Significantly improves the intercellular metabolism of most cultivated crops.
- The soil becomes looser and lighter, sprouts break through an order of magnitude faster.
- Magnesium and many other trace elements necessary for the normal development of plants are released.
- Soil aeration becomes much better, which is especially important for the development of the root system and when growing root crops and tubers.
- The number of beneficial microorganisms increases many times - the efficiency of organics grows by more than a third.
- Due to the normalization of the soil composition, the content of toxins in the crop decreases by an order of magnitude.
The work is worth doing from time to time. It is best to check the acidity using special devices or folk methods. All possible methods are described below.
See also
How to prepare your greenhouse in autumn 2021 for the next season
With the onset of autumn cold weather, summer residents begin to think about what work needs to be done in the greenhouse, how to properly prepare it for the next season.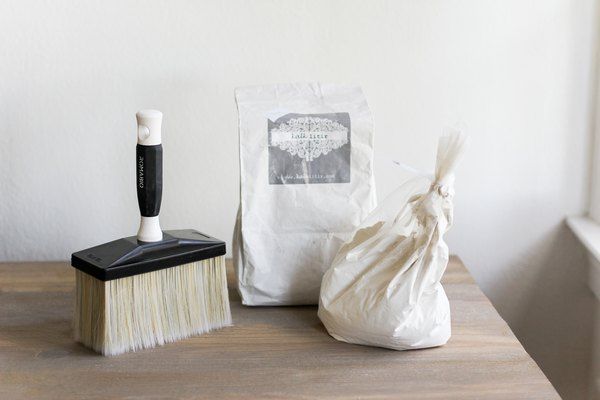 This is very important, because from the correctness ...
How to determine the pH level in the soil
There are many methods, first you need to pay attention to some signs that indicate that you need to carefully check the soil:
- After water has been absorbed into the soil, a grayish coating appears on the surface as it dries.
- In pits and depressions, the accumulated moisture acquires a reddish tint, iridescent stains can be seen on the surface.
- Mullein, dandelion, horsetail and other weeds with powerful rhizomes spread across the site at great speed.
You can use one of the popular methods for determining acidity. They do not give clear indicators, but they suggest the state of the soil:
- Pick up a handful of earth from different parts of the garden, pour it onto the film.
 Add a small amount of table vinegar to each. If a violent reaction is visible or a hiss is heard, the acidity is normal and no need to add lime. When nothing happens, the indicators are most likely exceeded.
 - Gather a few currant or cherry leaves. Place in a glass and pour boiling water over it, then let stand for about 20 minutes. Throw a lump of soil into the container. If the liquid has become greenish, then the acidity is neutral or the level of alkali has been exceeded. When a bluish tint is observed, the soil is acidic.
- If you have some natural grape juice on hand, you can pour it into a container and throw a clod of earth from the garden. When everything is fine with the soil, bubbles will begin to appear and the color will change. The lack of reaction speaks of excess acidity.
- Take a handful of earth, mix with water until a slurry (it is better to use distilled liquid). Sprinkle generously with baking soda. If a hiss is seen and heard, the acidity indicators are increased.
But in order to accurately determine the indicators, you need to use either a special device (it is not charming to buy, you can use the services of a specialist or rent equipment). But a simpler solution is litmus papers, which are sold in stores for gardeners and gardeners. The packaging has detailed instructions for use, most often they make an aqueous mixture with soil, after which they lower the strip and compare its color with the scale, determining the exact acidity.
It is equally important to determine the application rate of lime per square meter. For simplicity and accessibility, the data is presented in the form of a table.
| Acidity index (pH) | Norm for loamy and clay soil (gr.) | Norm for sandy and sandy soil (gr.) |
| Very high (4 and below) | 500-600 | 350 |
| High (4.1 to 4.5) | 400 to 500 | 250 to 300 |
Medium (4.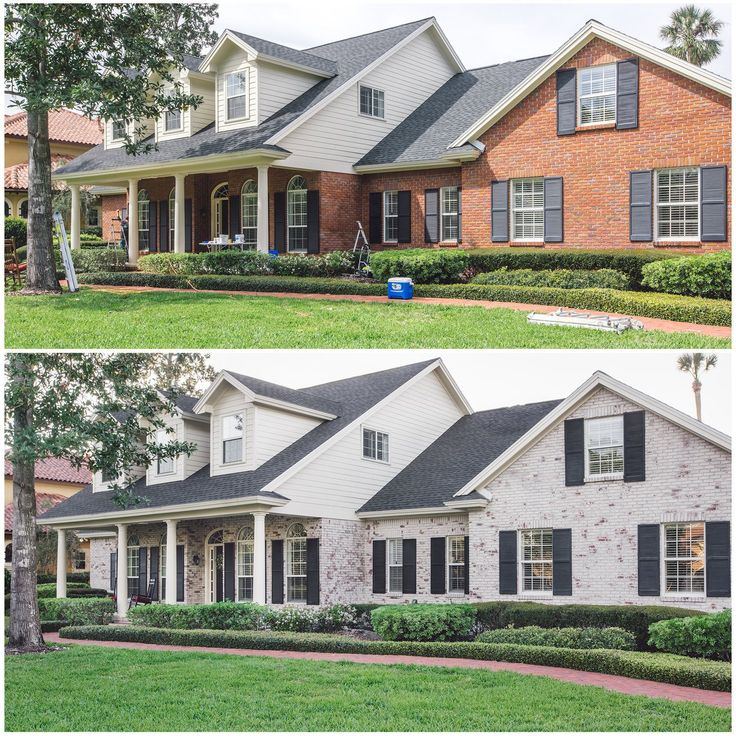 6-5.0) 6-5.0) | 350 | 300 |
| Weak (5.1-5.5) | 250-300 | Do not deoxidize |
| Close to normal (5.5-6.0) | Do not deoxidize | Do not deoxidize |
Read also
When to plant raspberries in the fall of 2021 according to the lunar calendar
Planting raspberries in the fall of 2021 should be done by gardeners, taking into account several recommendations. If you follow simple rules, you can achieve a good result, even if you have no experience in conducting ...
What kind of lime should be applied to the soil
Once the acidity level and application rate have been determined, it is necessary to figure out what and how to apply. The fact is that all volumes in the table are given for ground limestone. When using other compositions, it is necessary to recalculate in accordance with this information:
- fluff (slaked lime) - 135%;
- chalk - 90-100%;
- dolomite flour - from 70 to 110% (exact data is indicated on the package).

As far as application is concerned, it is best to use slaked lime. It is completely ready for use, it remains only to evenly scatter it over the surface. A similar method is used for chalk, dolomite flour and ground limestone.
It is worth considering separately how to lime the soil in the fall with quicklime, since there is a specificity here. The main thing to understand is that you cannot use the composition as it is, as it will destroy beneficial microorganisms in the upper layers of the soil. In addition, the quick-cooked version is clumped and it is impossible to distribute it evenly. Therefore, you need to follow a simple instruction:
- Pour in quicklime and pour in water to extinguish it. Leave for about an hour for the reaction to pass and the composition to extinguish.
- Then use the lime as usual, spreading it evenly over the surface.
By the way!
Lime is best purchased shortly before use and should not be stored in open containers.

Often the soil is limed when planting potatoes, it is better to do this in autumn or spring at least 3 weeks before the main stage. This rule also applies to all other cultures. As for the use of lime from pests, whitewashing of tree trunks is most often used. Moreover, this should be done both in autumn and in spring and copper sulfate should be added to the solution to increase efficiency.
When is the best time to lime the soil in the fall of 2021
As for this year, you need to do the work on time so as not to make mistakes with the deadlines, you should follow a few simple recommendations:
- Be sure to remove all plant debris from the garden and prepare the soil for processing.
- Determine application rate as described above and purchase lime or other compound in required quantity.
- Work should be carried out about a month before the onset of frost. In accordance with this, select the optimal time.
- It is permissible to lime the soil ahead of time, but not later. The minimum time after application to negative temperatures is 3 weeks.
- Select a period without precipitation. It is desirable that no rain is predicted for the next week.
- After spreading the lime, it is imperative to plow or dig up the ground, as the optimal placement depth is 20 cm.
Important!
If you sprinkle the composition and leave it on the surface, there will be practically no benefit from the treatment.
Liming of the soil is a mandatory procedure when the acidity level is exceeded. It is best to carry out work in the fall, determining the soil indicators and calculating the application rate.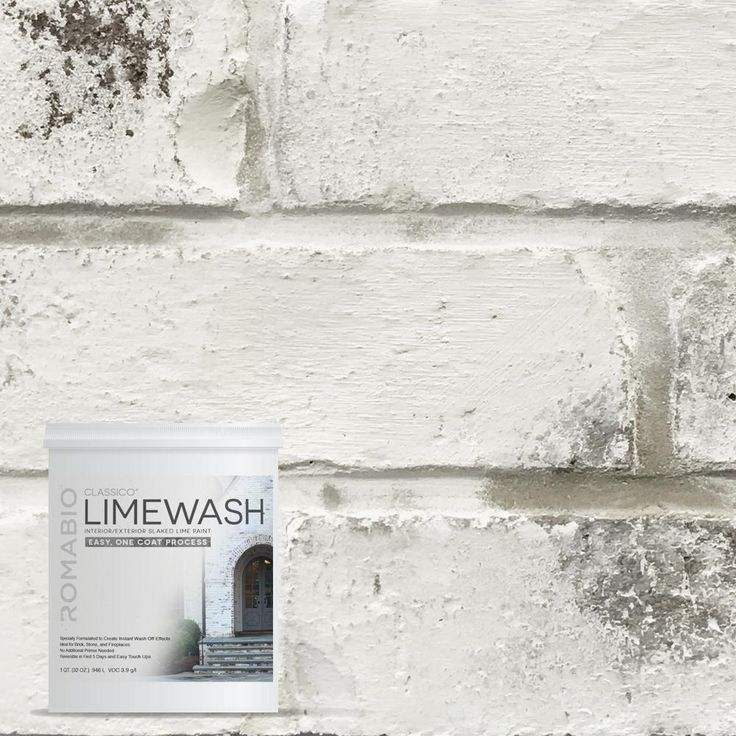 The main advantage is that you need to make the composition every 5-15 years. You can watch training videos to understand all the nuances even better.
when and why, how to do it right, application rate in autumn + video
Increased acid content in soil reduces crop yields Optimum acidity is achieved by liming. The most effective chemical reclamation is carried out in autumn. The application rates of lime material can be calculated independently. When and how to lime the soil can be found by watching the video.
Contents
- Liming technology, substances used for liming
- Optimal acidity, types of liming
- Dosing of liming substances depending on the acid content in the soil
- Soil deacidification: video 4 Liming technology liming
- slaked lime;
- Dolomite flour;
- wood ash;
- peat tuffs;
- sugar production waste;
- blast-furnace slag.
- 3-4 - very acidic;
- 4-5 - sour;
- 5-6 - slightly acidic;
- 7 - neutral;
- 8-9 - alkaline.
- Cabbage, as well as beets, do not grow well on soils with high acidity.
- Tea and lupine grow well in acidic soils.
- Legumes, as well as corn, lettuce, onions and cucumbers, prefer neutral soil.
- strawberries - 5;
- raspberry and gooseberry bushes - 5.5;
- various types of currant - 6;
- pear and apple - 6.5;
- plum -7.
- 500-600 g per 1 m² with high soil acidity (pH less than 4).
- If the acid content in the soil is high (рН=4) add 400-500 g per 1 m².
- If the acidity index varies from 4 to 5, apply 300-400 g per 1 m².
- In slightly acidic soils (рН=5-6) add 200-300 g per 1 m².
- slaked lime - 130%;
- chalk -100%;
- dolomite flour - 90-95%;
- crushed chalk - 90%;
- lake lime -80%;
- cement dust 75%;
- marl - 70%;
- peat ash - 50%.
- determine the rate of slaked lime for the site;
- multiply this figure by 100;
- then divide by the percentage of lime in the substance.
Learn more
To a large extent, the yield and quality of crops depends on the acidity of the soil. The increased content of acid in the soil prevents the full absorption of trace elements by plants.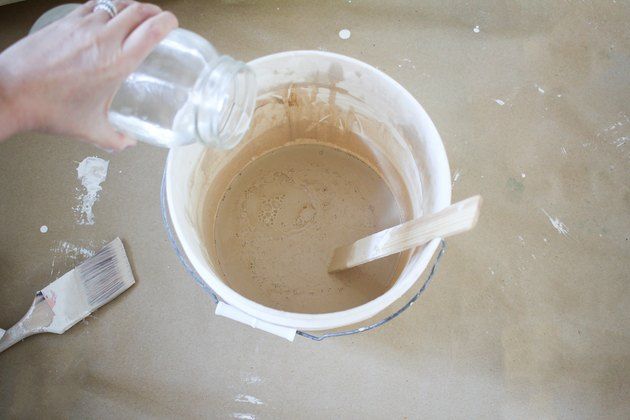 Such essential substances as potassium, magnesium, phosphorus, calcium do not enter the plants, even if fertilizers are applied. Plants grow poorly, do not bear fruit. Acid levels can be reduced by adding acid neutralizing agents. These substances include:
Attention! It is impossible to lime the soil with gypsum, it crystallizes salts in soils, which leads to an increase in acidity.
It is possible to determine the increased content of acid in the soil by folk methods. If horsetail, sorrel, plantain, heather, mint grow well on the site, then the soil is acidic. A more accurate scientific method for determining acidity can be done in the laboratory. An easier way to determine the acid content in points is possible with the help of an indicator that is sold in flower shops. To do this, we wrap a handful of soil in a cloth, lower it into water for a couple of minutes.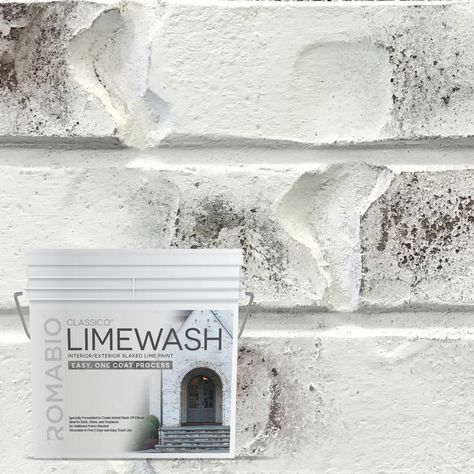 We lower the indicator into cloudy water. The change in the color of the indicator is compared with the color of the scale:
The acidity and composition of the soil are interdependent. The greatest amount of acid is found in clay, sandy soils are considered less acidic.
Optimum acidity, types of liming
Each plant reacts differently to the acid content:
Liming the soil can lead to improvement or deterioration of its quality. First you need to determine what crops will be grown on the site. It is possible to carry out partial liming of individual beds intended for certain crops.
Examples of optimum acidity for horticultural crops:
Liming can be basic or supporting. The main gardeners spend 1 time. Maintenance liming procedure - once every 4-5 years. For deoxidation of the soil, choose the autumn or spring period. Conducting chemical reclamation in the fall is most effective. We evenly distribute the required amount of lime material over the surface of the soil. At the same time, we apply fertilizers with a high content of magnesium and potassium.
Tip. The soil must be dug up to a depth of 15-20 cm. The introduction of lime material on the surface without loosening reduces the effectiveness of liming.
Spring deoxidation is carried out before the application of chemical fertilizers. Lime material is spread over the surface, then fertilizers are applied and the soil is dug up to a depth of 4-6 cm. .
.
When applying fluff (slaked lime), the norms are distributed as follows:
These figures are only valid for slaked lime. Chalk, cement dust and other substances are added in different proportions, since their calcium content is different:
To calculate the required amount of lime material, you need to: