How to install sliding glass doors
How to Install Sliding Glass Doors
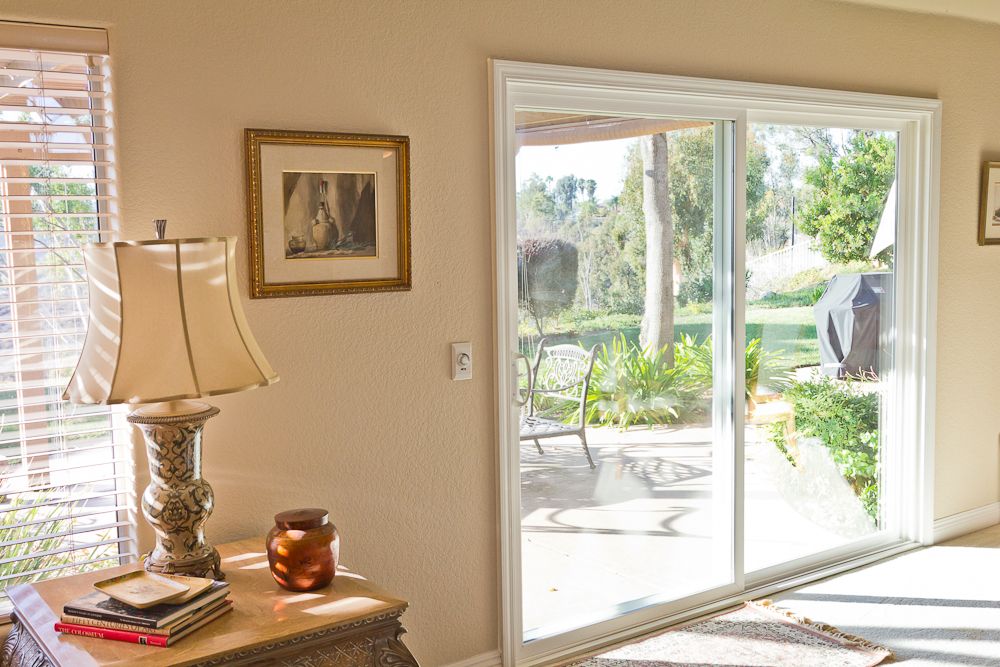
Replacing an old patio door with a more modern one that has double glazing, UV coatings or other energy-saving features can make your home more comfortable year-round. It may be time to replace your exterior sliding glass doors if they steam up easily, or if they tend to stick and cleaning the rollers hasn't solved the problem.
This May Also Interest You: How Much Value Does a New Front Door Add to Your Home?
If you’re simply removing and replacing an existing door, you should be able to install sliding glass doors on your own. Here’s how.
How Do You Install a Sliding Glass Door Frame?
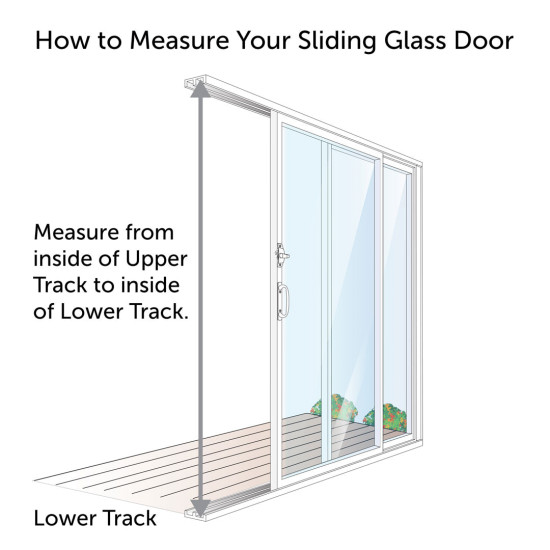
One of the most important things is measuring to make sure the new door will be a perfect fit for the opening. Take extra care over this step to avoid unnecessary frustration down the line. Remove any trim and measure the rough opening and the height. Double-check the measurements to ensure a perfect fit.
Installing a sliding glass door frame is a relatively simple process — assuming you're replacing an old frame and the rough opening is already cut. It's vital to clean the opening and install flashing for weatherproofing before you insert the new frame. Then, carefully screw the frame into place, checking that it's square and level as you go. Full instructions for installing a door frame are provided as part of the step-by-step guide below.
Sliding Glass Door Installation
Things You’ll Need
First, gather your supplies:
- Spirit level
- Screwdriver set
- Clamps
- Drill
- Pry bar
- Tape measure
- Table saw
- Reciprocating saw
- Nail gun
- Miter Saw
- Hammer
- Utility knife
- Flashing
- PVC Cement
- Silicone caulk
- Shims
Step-by-Step Guide
The process of sliding door installation is similar to standard door installation. However, because sliding glass panels can be delicate, it's important to work carefully.
- Latch the door and remove the head stop from the inside.
- Unlatch the door and tip the top end of the panel inwards. Carefully lift it out of the track.
- Locate any angle brackets at the top and bottom of the stationary panel and remove them.
- Pry the panel free from the frame. You may need to cut the caulk or paint using your knife to work the panel free when you do this.
- Pry away any exterior trim and cut the jambs free.
- Tip the top of the door frame outward to remove it.
- Clean the area around the frame so that it's ready for the next step.
- Apply leakproof flashing around the door, making sure to cover the whole surface.
- Fit a sill pan for extra weather protection.
- Check the floor level and fix it if necessary.
- Apply caulk to any areas where there are gaps to reduce drafts keep water from coming in.
- Assemble your new door frame and test the fit in the opening.
- Once you're satisfied the frame is a perfect fit, apply silicone caulk to the threshold and carefully insert the frame into the opening.
- Screw the frame into place, checking that it's square and adjusting as you go.
- Tip the stationary panel into the frame opening and anchor the panel with brackets.
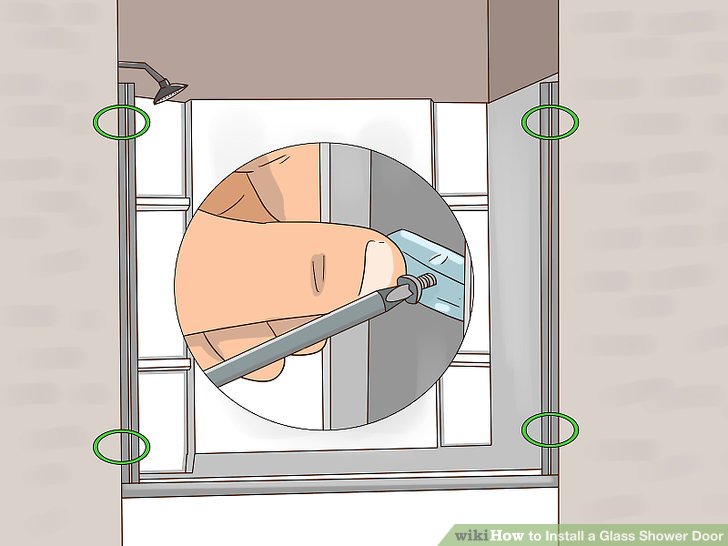
- Tip the sliding glass panel or screen door into the frame and screw the stop into place.
- Slide the door until it is slightly open and tweak the roller heights until they're level and the door moves smoothly.
- Install any locks and hardware.
- Add insulation. Fiberglass is preferable to foam due to the risk of foam damaging the jamb. Then, replace the interior trim.
- Fill any gaps on the exterior with strips and caulk and replace the exterior trim.
Take care when removing and inserting doors. Glass panels can be deceptively heavy and are easily damaged. For that reason, it’s a good idea to recruit a second person to help with lifting and moving the doors.
After removing the old frame, you'll need to dispose of it. Depending on the material the frame is made of, you may wish to cut it into sections for ease of transport and recycling.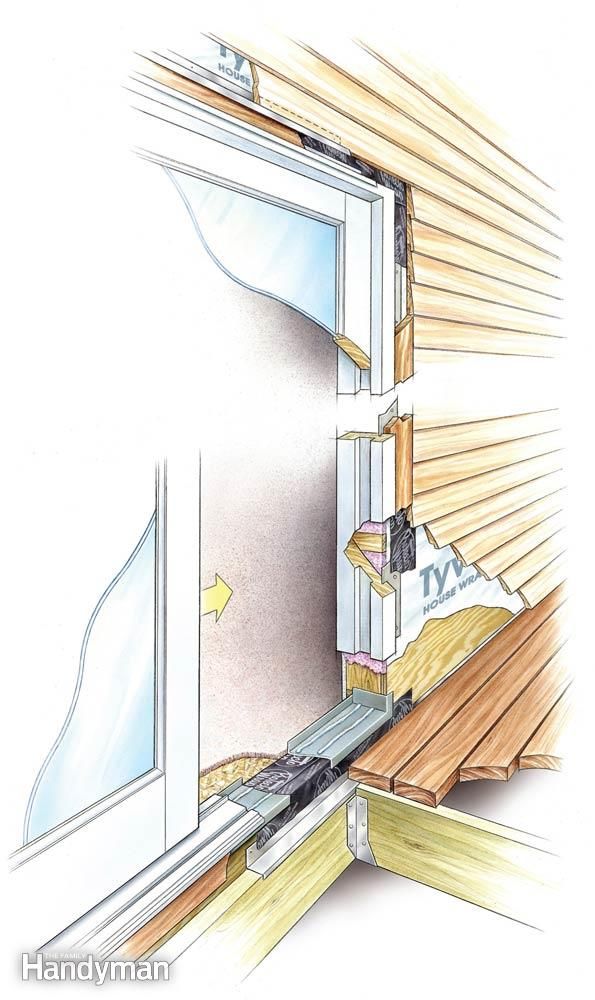
More Related Articles:
- How to Install or Replace a Door Frame: An Open-and-Shut Guide
- The Frame Game: Here’s How Much It’ll Cost to Install or Replace a Door Frame
- Bifold and Your Billfold: How Much Does It Cost to Install Bifold Patio Doors?
- How to Install a Storm Door: Your 5-Step Instructional Guide
- Holey Door Damage! How to Repair a Hole in Your Door
How Long Does It Take to Remove and Install a Sliding Glass Door?
If you have all the tools and materials required on hand, you should be able to complete a sliding door replacement job in a day, including the time required to clean up and dispose of any waste materials. Pre-hung glass doors are the easiest type to install but are also slightly more expensive.
If you're not confident in your ability to do the job well, consider hiring a professional, especially if the doors you're replacing are exterior doors. Unlike a simple decorating job, working with exterior doors carries some risk both in terms of security and weatherproofing, so it's crucial that the job is completed properly.
How to Install a Sliding Glass Door
By
Lee Wallender
Lee Wallender
Lee has over two decades of hands-on experience remodeling, fixing, and improving homes, and has been providing home improvement advice for over 13 years.
Learn more about The Spruce's Editorial Process
Updated on 11/03/22
Reviewed by
Deane Biermeier
Reviewed by Deane Biermeier
Deane Biermeier is an expert contractor with nearly 30 years of experience in all types of home repair, maintenance, and remodeling. He is a certified lead carpenter and also holds a certification from the EPA. Deane is a member of The Spruce's Home Improvement Review Board.
Learn more about The Spruce's Review Board
Justin Paget / Getty Images
Project Overview
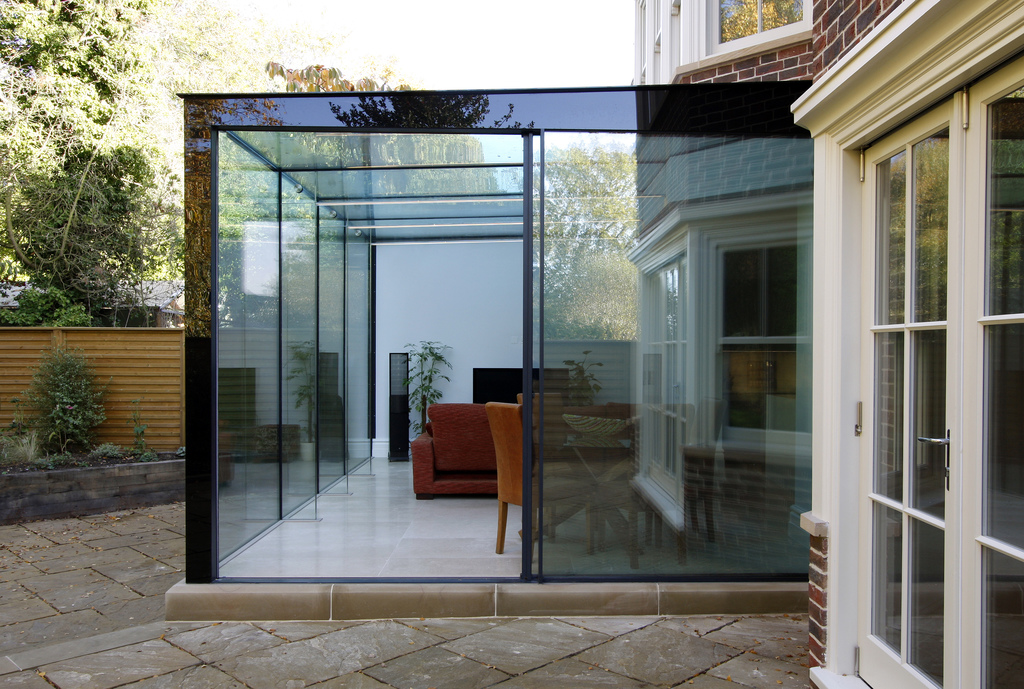
A sliding glass door helps you create a bright, cheerful room with plenty of fresh air and natural light. A wonderful addition to any home, a sliding glass door extends the living space to an adjacent outdoor patio or deck.
Installing a sliding glass door can be a challenging project, even for an experienced do-it-yourselfer. But with enough advance work and careful planning, you should be able to install a sliding glass door within a day.
When to Install a Sliding Glass Door
A large section of the house will be open and exposed to the elements when installing the sliding glass door. Plan the project for a season with warm, temperate weather. Check the weather to make sure there will be no rain on the day of installation.
Safety Considerations
Always work with an assistant with moving or placing the sliding glass door as it is large, unwieldy, and can weigh between 200 and 400 pounds.
For home security, make sure that you complete the job within one day. If you're unable to do so, make provisions for sealing up the house at night with plywood.
The 9 Best Miter Saws of 2023
Equipment / Tools
- Caulking gun
- Tape measure
- Utility knife
- Staple gun
- Hammer
- Bubble level
- Electric miter saw
- Hand saw
Materials
- 1 double sliding glass patio door, 78-inch by 80-inch
- 1 sloped PVC sill pan, 78-inch (optional)
- Silicone sealant, clear or matching door frame
- Roofing nails, 1-3/4-inch
- Building wrap
- Self-adhesive flashing tape, 6-inch wide
- Plastic shims
- #10 - 2-inch pan head screws
- 1 can of low-expansion insulating spray foam
- Exterior pre-cut brickmold trim
-
Check the Door Rough Opening
Visually inspect the rough opening header, sill, and each side to make sure that they are straight, level (for header and sill), plumb (for the sides), and that all wood is in good condition.
-
Measure the Door Rough Opening
Measure the width and height of the door's rough opening.
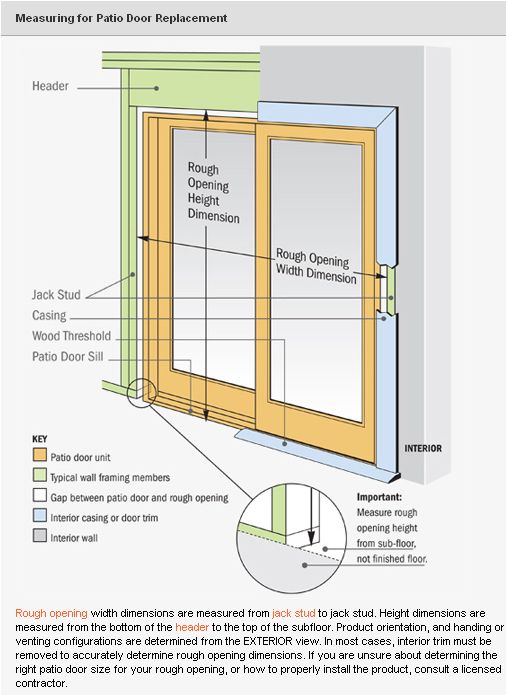 Width and height must be between 1/2-inch and 3/4-inch more than the sliding glass door's maximum frame dimensions.
 Measure the rough opening's diagonals in both directions. The two measurements should match if the door opening is square, with a maximum deviation of no more than 1/8-inch to 1/4-inch.
-
Prepare the Sliding Glass Door
After removing the outer packaging from the sliding glass door, remove corner covers, protective boards, and cardboard. Leave the protective film on the glass for now.
-
Prepare the Building Wrap
For a door opening that previously had a patio door, remove enough siding to expose 9 to 12 inches of house wrap around the door frame exterior. If the building wrap is still in good condition, it can be reused. Otherwise, continue the project by preparing new building wrap and flashing tape.
- Apply building wrap across the rough opening.
- With the utility knife, cut the wrap across the bottom of the header horizontally from side to side.
- Cut the building wrap vertically down the center, from the header to the sill.
- Fold the side flaps inside and staple them in place.
- Make a 10-inch-long diagonal cut at the top-left corner and top-right corner of the building wrap.
- Fold the top flap up and tape it against the exterior side of the house.
-
Apply the First Strip of Sill Flashing Tape
- Cut a length of flashing tape 1-foot longer than the width of the rough opening (or, in this case, about 100 inches long).
- Center the flashing tape on the door sill with the adhesive side down. The tape should extend about 6 inches up each side of the door. Leave the adhesive backer on the tape for now.
- Slide the tape toward the exterior so that 1-inch of the tape hangs over the edge of the door sill.
- While holding the tape in place, have an assistant slowly pull off the adhesive backer.
- Fold the tape overhang down against the front of the sill.
- At each of the lower corners, slice back the tape 1-inch.
- With the corners free, finish folding the lower tape overhang against the front of the sill.
- Fold the sides of the flashing tape back against the side of the house.
-
Apply the Second Strip of Sill Flashing Tape
Repeat the previous step with a second strip of flashing tape, with two differences:
- The second strip will be placed on top of the first strip but will be stepped back toward the interior so that its outer edge is flush with the outer edge of the sill.
- Because this second strip of flashing tape does not overhang the sill, it does not need to be cut back 1-inch at the corners.
-
Install the Sill Pan (Optional)
For sliding glass door installations that will experience a high degree of exterior moisture, you may decide to add a sill pan under the door to help channel away water.
- Dry-fit the sill pan in the patio door's rough opening.
- Make sure that the pan's front lip overhangs the sill and that its sides fit in the rough opening.
- Remove the pan and turn it over.
- Apply three or four beads of sealant along the length of the sill pan bottom.
- Turn the sill pan over and press it into place.
What Is a Sill Pan?
A sill pan or sill flashing is a sloped door base that collects and channels exterior water away from the interior and back to the exterior. Though a sill pan can be built from scratch from roll sheet metal, for do-it-yourselfers it's usually easiest to purchase and install a pre-built PVC pan.
- Dry-fit the sill pan in the patio door's rough opening.
-
Add the Drip Cap to the Patio Door
Depending on your type of patio door, you may need to install a drip cap to the door before it is in place. You may need to apply silicone sealant to the back of the drip cap to attach it to the top of the patio door.
What Is a Drip Cap?
A drip cap is an L-shaped piece of continuous flashing over a door that prevents water from leaking into the door from above.
 Not all doors will have a separate drip cap. On some models, the drip cap may be integral to the door.
 -
Add Sealant to the Door Sill
Add three or four continuous beads of sealant across the width of the sill and up each side, stopping at the ends of the flashing tape.
If using a sill pan, run a continuous bead of sealant along the back fence of the sill pan.
-
Add Sealant to the Nailing Fins
On the interior-facing side of the patio door, apply generous beads of sealant to the back of the nailing fins.
What Are Nailing Fins?
Nailing fins, sometimes called mounting flanges, hold the patio door against the exterior side of the house and provide a convenient nailing area. Nailing fins may be integral (rigid fins molded into the patio door frame) or non-integral (flexible fins that are delivered folded back and which need to be folded outward before installation).
-
Place the Patio Door in the Door Opening
- From the exterior, lift the patio door with an assistant and rest it bottom-first onto the sill.
 Do not slide the door.
 - Tilt the top of the patio door back into the opening until the nailing fins make contact with the side of the house.
- Use the hammer to run nails through two of the nailing fin holes at the top corners to hold the sliding glass door in place.
- From the exterior, lift the patio door with an assistant and rest it bottom-first onto the sill.
-
Add the Shims
Place shims into the sides of the door, between the door frame and the rough opening. Do not shim the sill.
-
Nail Patio Door in Place
On the exterior side, nail the sliding glass door against the house with the roofing nails. Do not nail the top edge yet.
-
Screw Door Frame Sides Into Place
After drilling pilot holes, drive the 2-inch pan head screws into each of the sliding door sides. Drive screws through every available hole on the sides.
With the hand saw, cut off any shim ends that extend beyond the wall.
-
Screw Door Sill Into Place
With the caulking gun, inject sealant into the door frame's sill screw holes.
 Follow by driving screws into the holes. Wipe away excess sealant.
 -
Test Doors
If the doors were not in the door frame when the frame was installed, add the doors now. Once the doors are in place, slide the doors back and forth to check for smooth operation.
-
Secure Door Header
If the doors slide smoothly, with no binding from the header, nail the top fin into place. Follow by screwing the top of the door frame into the door opening with 2-inch screws.
-
Add Flashing Tape to Exterior of Door
- Cut two strips of flashing tape as long as the height of the door, plus another 4 inches. In this case, the flashing strips will be 84 inches long.
- Center the two strips of flashing tape vertically on each side of the door, with 2 inches of excess at the top and at the bottom.
- Apply the two strips to the sides of the sliding glass door, directly on top of the nailing fins.
- Cut one strip of flashing tape the width of the door, plus the widths of the two side strips (12 inches) and plus another 2 inches.
 In this case. cut the strip to 92 inches.
 - Apply the tape across the header, directly on top of the header nailing fin.
- Fold down the top flap of the building wrap.
- Cut two strips of flashing tape about 16 inches long.
- Apply the two 16-inch strips of flashing tape to the diagonal cuts in the building wrap.
-
Add Insulating Spray Foam
Attach the plastic straw extension on the can of foam insulation. From the inside of the house, apply foam insulation between the door and the rough opening. After the foam has dried, cut away any excess with a hand saw.
-
Install the Exterior Trim
Miter-cut the brickmold trim to fit around the door on the exterior. Install the trim either by hand with a hammer and finish nails or with a power nailer. Caulk between the sliding glass door frame and the trim, as well as between the trim and the house siding.
-
Add the Door Lock
Per the manufacturer's instructions, install the door lock on the door.
When to Call a Professional
Even for experienced do-it-yourselfers, installing a sliding glass door can be a difficult project. Call a door installation company for help if you don't feel confident that you can install the door within a day or two.
Installation of sliding glass doors by specialists
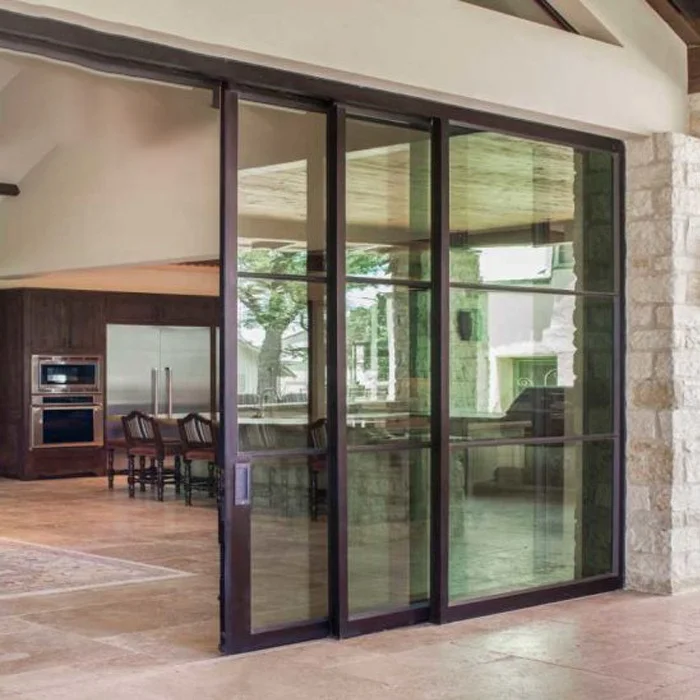
Sliding glass doors are increasingly used in modern interiors. And if the doors are mounted without using an aluminum profile, then the interior takes on an ultra-modern look.
Contents
- Glass sliding door installation features
- It is better to order glass door installation to order from the manufacturer
Glass sliding door installation features
The invisible glass door is particularly impressive. The installation of sliding glass doors requires certain skills, so it is advisable to call a specialist. Before installing the frame for the sliding door, the old one is dismantled, and the doorway itself is expanded to the left and up.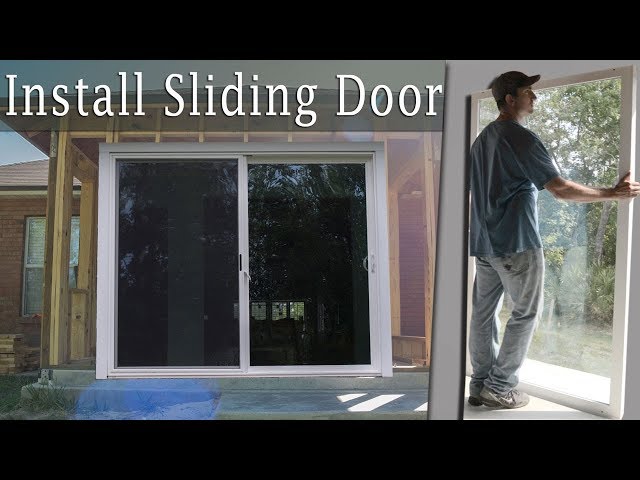 To expand the opening, the wall masonry will need to be partially disassembled. Here are step-by-step instructions for installing sliding glass doors :
- on the floor, mounting glue is applied to the place where the removed part of the wall was located;
- a wood board is then placed in this place. The plate is fixed until the glue dries completely;
- further, a threshold is made from larch. Threshold thickness should not exceed 22 mm;
- U-shaped jambs are fixed to the opening with mounting adhesive;
- fix the vertical parts of the jamb with a thicker layer of mounting adhesive;
- gaps between wall and frame are filled with acrylic sealant;
- An aluminum profile is attached to the ceiling beam. It will take over the entire load of the glass door;
- with the help of special metal hexagon bolts, the metal rail will be installed with an exact indent;
- Use a chisel to make a groove at the bottom of the jamb.
 Such a groove will make it possible to bring the rail as close as possible to the frame;
 - rail adjustable for glass thickness. The rail is then inserted into the groove;
- One person cannot install a sliding door. You will need an assistant;
- fix the front cornice for rail 9 with bolts0008
- the parts at the bottom must be carefully adjusted. This will ensure smooth movement of the sliding door;
- adjust the final position of the door and put special stops;
- special adjustment of the upper rail will allow the door to stop softly both on the right and on the left;
- handles are mounted in pre-drilled holes in the glass.
It is better to order a custom glass door from the manufacturer
The customer can use the service glass sliding doors to order . The cost of such a door will be slightly higher than the standard one. Nevertheless, the customer will be able to satisfy all his requirements regarding the interior of the apartment.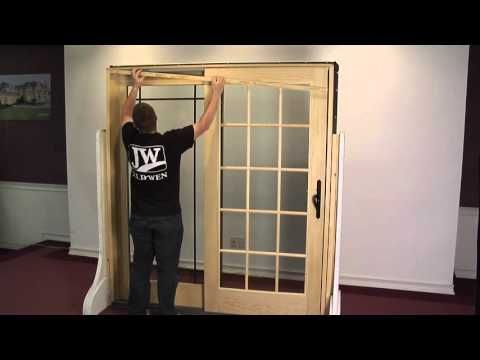 Naturally, for the manufacture of glass sliding doors to order, additional time will be required. Yes, and installing them requires additional effort, and therefore costs. Surprise your friends and relatives, radically change the interior of your home. 9Ol000 railings
Start calculation
Product line 2023
Installation of a sliding glass door - "Priorglass"
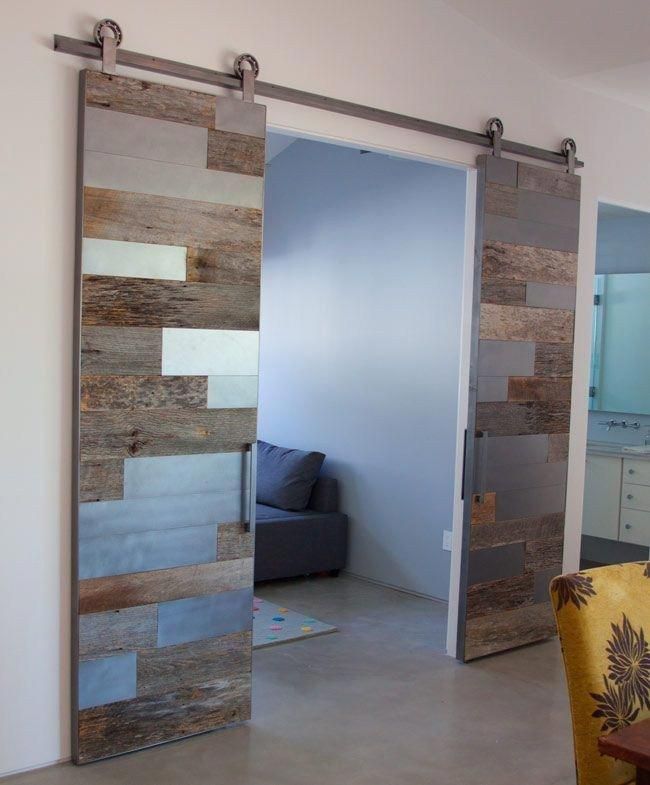
Glass is one of the most relevant ways of interior decoration nowadays. Without glass products it is difficult to imagine office and residential premises. Installing a sliding glass door is a very profitable way to add originality and practicality to your interior. The most important plus is the relatively low price, ease of use and, of course, a very beautiful view. You can use them to divide space. Sliding glass doors perfectly zone the rooms and fit perfectly into the interior. Thanks to the use of these types of sliding doors, you can choose different options for decorating your room.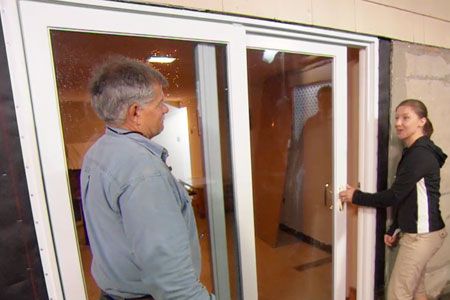 They are tinted and transparent. The glass transparent door is safe and fits perfectly into the style of the room. Installation of a sliding glass door can be made in any openings. It must be borne in mind that space will be required so that the doors can freely roll back. It is most advantageous to install sliding glass doors in narrow corridors, small-sized rooms, since ordinary doors take up too much space, it is difficult to fully use the space of the room with them. Also, the installation of a sliding glass door is carried out in cafes, various shopping centers, in many apartments. Such a door makes the room unique, creating the impression of a single room.
Prioglass company - why you should order a sliding glass door from us
Our company is engaged in the production and installation of glass products, glass and building glass products. Including sliding glass doors. We have a variety of materials for manufacturing, which are suitable for absolutely every consumer. Our products will be able to satisfy absolutely every visitor. If necessary, we can consult the buyer to make it clear what is better to choose. We have very reasonable prices. We do our best to make cooperation with us beneficial for both parties.
Sliding glass door installation
Sliding doors have one or more sections that will move parallel to the profile that guides them. This design allows you to use the space of the room to the maximum. The structures that determine the movement are of two types: floor, suspended. When choosing a floor option, you will need to constantly monitor the cleanliness of the groove, otherwise debris can cause the roller to block. The door can be straight or slightly rounded.
Installing a sliding glass door: process
Installing a sliding glass door is not an easy process. Even if you are an expert in this matter, it is better not to take everything into your own strong hands, as you can make a mistake, albeit a small one. If you make some kind of oversight, then there may well be consequences due to which you will have to change the entire door. The worst kind of consequences is the deformation of the frame, damage to the glass. You need to determine exactly where the door will be located, whether there is enough space for installation, you need to take measurements that will determine which door you need to install.
You shouldn't do it yourself, because it's a jeweler's work. It would be much wiser to resort to the help of measurers and installers who will do this job without any problems. Prioglass company - why it is worth ordering the installation of a sliding glass door from us Our company is engaged in the production and installation of glass products, glass and glass building products. For us, the desire of the client comes first. Our range will please any buyer. If you don't want to waste your money, then you are definitely welcome to us. We are a company that stands firmly on its feet, our goods are checked, defects are not allowed.