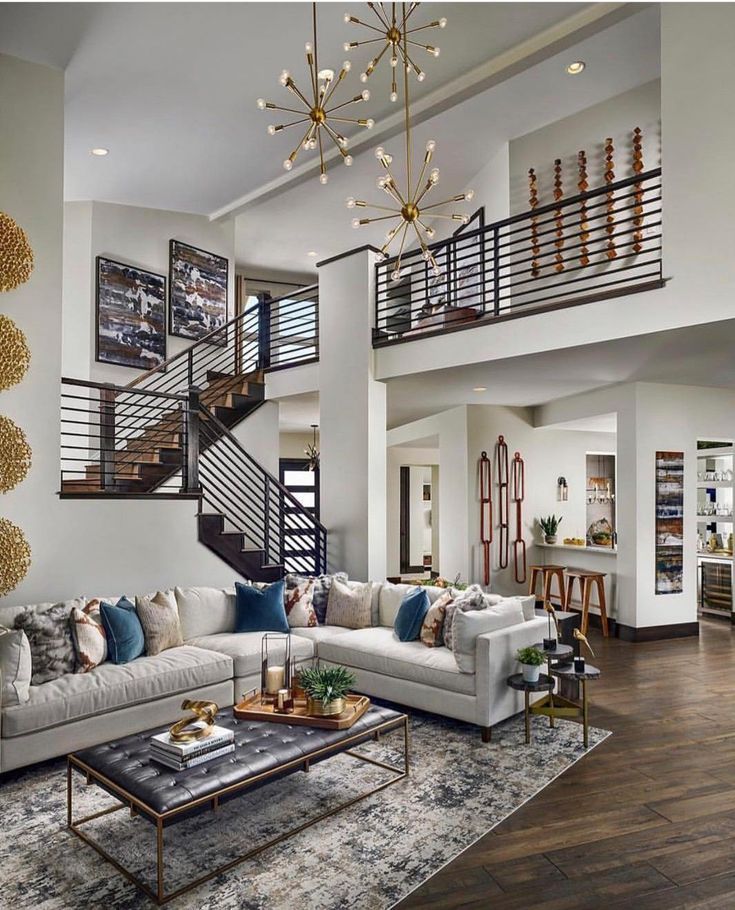
How to do interior designing at home
How To Design A Room Like An Interior Designer [Step By Step] — Greenhouse Studio
Does overwhelm and paralysis set in at the thought of how to even start decorating your space? A living room, bedroom, let alone your entire home? It can be (almost) enough to make you dive back under the covers and just say “forget it - I’ll live with it the way it is!”
I feel you and I’m here to help with a methodical, step by step process that will break down how to design your room into doable parts.
Even though it’s my design process, the whole point is to make it adaptable so it serves YOU, your home, and your loved ones. If you follow these guidelines, you will create a room that is comfortable, cohesive, functional for you and yours, and reflects your own personal style.
It also doesn’t need to cost a fortune. I firmly believe that design constraints, whether budgetary or otherwise, often result in a more interesting project, and not the other way around.
With some clever ingenuity and a little extra legwork, you can save money and your end result will be a richer and more compelling reflection of your personal style. I really do believe this.
Ready? Let’s get to it!
This post contains affiliate links. Click here to read my full disclosure.
Interior design by Fletcher Rhodes, Sonoma CA. Photo: Thomas Kuoh
Ready? Here goes:
1. Make A Budget
2. Create A Mood board
3. Choose Your “Springboard" (Inspiration) Object
4. Make A Room Layout Plan
5. Choose Foundation Furniture
6. Pick Paint Colors
7. Scale Up
8. Don’t Over-Source Any Single Source
9. Inject Your Own Style And Individuality
Budget for your design project
A budget is a must if you want to keep your remodel/redesign under control. Decide up front what you can spend on your project. Prioritize your expenditures into “must haves,” “nice to haves,” and “not a priority.” Then pencil out approximately how much those items will cost. (More on this below.)
I start off by creating a spreadsheet where I input line items for each and every element of a project. Any fixed costs go in along with cost estimates that are replaced by hard numbers once I have them.
If you’re planning on sourcing any of the materials yourself, you’ll need to calculate square footages to estimate your materials costs.
Keep your spreadsheet updated so you know where you are budget and cash-flow wise.
Always add in an additional 10% for cost overruns. Some would say 20% is more appropriate. For a landscape overhaul, 10% should be sufficient. For a gut kitchen remodel in an old house - better to go with 20%.
Once you’ve set your budget, stick to it. Don’t be tempted to deviate from your budget mid-project with “Iit sure would be nice if (insert expensive upgrade). This is how budgets get blown. Unless you can really and truly afford it, don’t do it.
Here’s a full post on funding a home remodel or design project.
Pro Tip: Get 3 bids for any work that needs to be done. You’d be surprised at the variation in cost sometimes, but of course, this also needs to be closely compared to your assessment of the contractor’s quality of the work being done and project management skills.
If your contractor is only going to show up every 3 days or so to work while squeezing you in between other jobs, that’s going to delay your overall project timeline which may have cost or scheduling consequences elsewhere. Be sure to discuss project management expectations up front.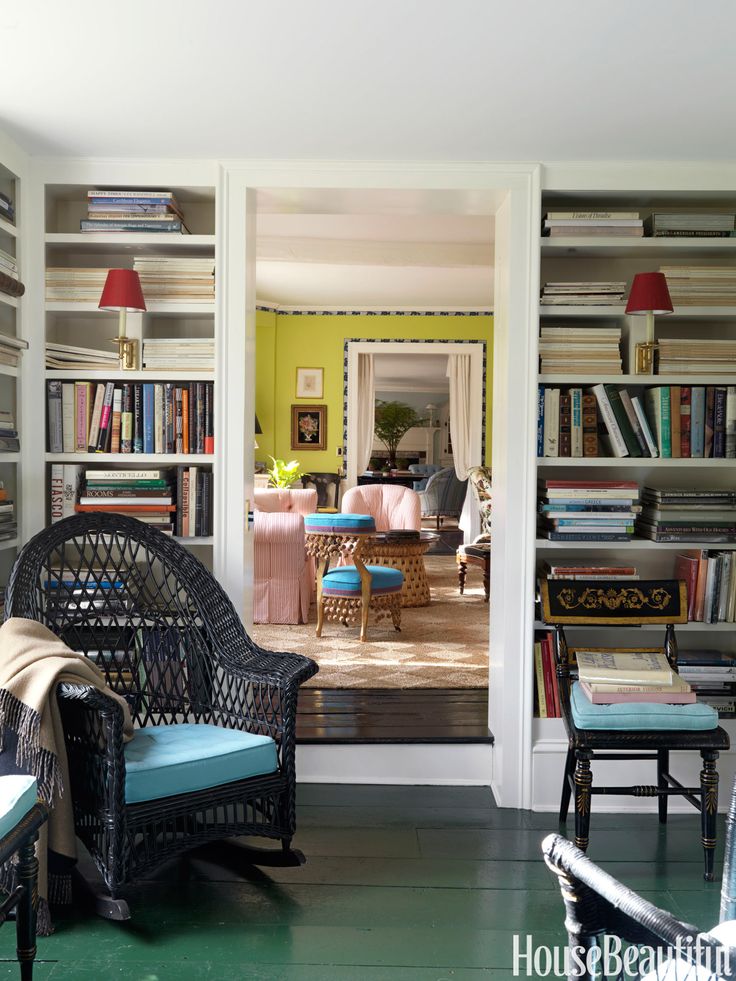
Read the full post on how to budget and fund your design or renovation project.
Kitchen design and source: deVOL Kitchens
Create a mood board
Before you spend any of your hard-earned money, the first step in the design process is to create a mood board, and then take a step back to see what the common threads are.
Having a plan ahead of time before you jump in is always smart. A mood board and subsequent plan of attack can help you avoid ending up with a piecemeal look and making costly mistakes.
Some questions to ponder:
What’s the purpose of the space you’re working on? Does it need to be practical for families and groups or is it more of a private space where you want to relax?
What do you want the overall feel or mood of the room to be about? Come up with a few descriptor words if that helps.
What styles, themes, colors are you drawn to? It’s worth noting that sometimes we think we know what we like, but then we find out otherwise. More on that shortly.
[Want more design inspo and helpful plant tips? Let's hang out on Instagram!]
Mood-project board image by The Home Index, Napa CA.
Mood Board, Round 1 - Pinterest
Click here for a complete post on easy ways to create your own mood board. My favorite quick and dirty way is to make a Pinterest board. Start pinning rooms, color schemes, furniture and accessories that you like.
If you don’t already have a definite style preference or even if you do, try to avoid having preconceived ideas. Just start pinning what appeals to you.
Tip: When pinning furniture, look for the individual shots with only the plain white background so you can see the furniture piece alone in conjunction with your other items without the “visual noise” of a staged room scene.
Once you have about 50 pins, take a step back and look at the board overall.
For example, are you finding you’re consistently drawn to soft, off-white walls or do you crave the vitality of stronger color?
Are your pins fitting what you originally thought you were after? If so, great! If not, don’t be afraid to consider these new ideas that are emerging from your pinning.
Do a gut check! Up above where I asked if you really know your style? At times I’ve discovered that just because I thought I knew what I wanted ahead of time, my pins don’t lie. I recently realized that I’m more of a soothing neutrals and contemporary design person than I used to be, and don’t laugh - Pinterest helped me figure this out!
After pinning many rooms that individually resonated with me, I looked back over them all collectively and realized “Hey - I seem to be drawn to a lot of light-neutral walls and clean-lined decor (with black windows) and lots of plants!” OK the plant part wasn’t exactly a shocker, but I had always thought I was more into color than I actually am.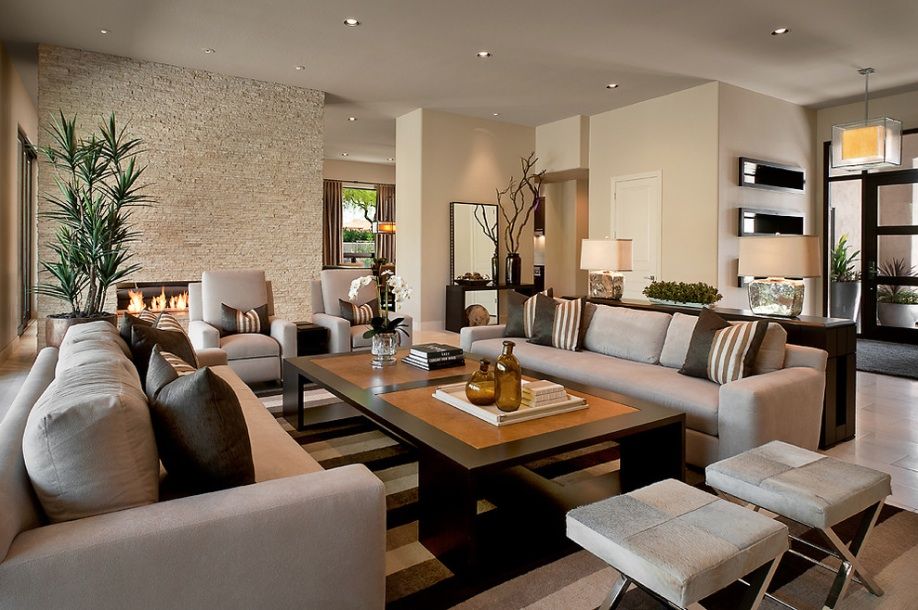
Just as the camera doesn’t lie, neither do your pins when taken in as a whole. It’s possible that Pinterest can facilitate your style gut check for you.
A collection of imagery inspiration as well as specific objects, furniture, and paint for my home office remodel project.
Mood Board, Round 2 - refine your ideas
If you want, after doing a Pinterest mood board, (quick and easy requiring no graphics skills) you can drill down a bit further and create a board like I did below. It’s not absolutely necessary but it does provide a clearer picture of what you’re considering.
Again, here’s a link for easy mood board options.
You could also create a second Pinterest Mood Board with your refined ideas. Be sure to keep the first one though where you save all your original ideas and save source information from a pin representing anything screen shot and brought into Pinterest by you.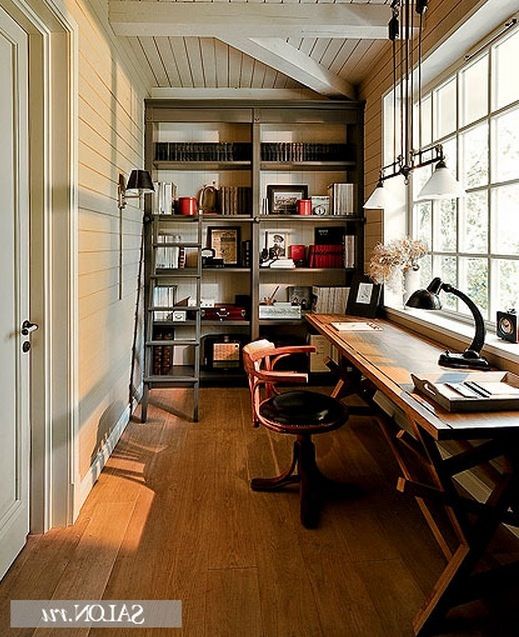
Be sure to try out different options for each of your pieces - more than one sofa, pillows, rugs, coffee tables, lamps etc. See how they work together comparatively. Too much contrast or too little? Too much pattern? Too much blue? Practical enough to stand up to your family? Take a good hard look and evaluate.
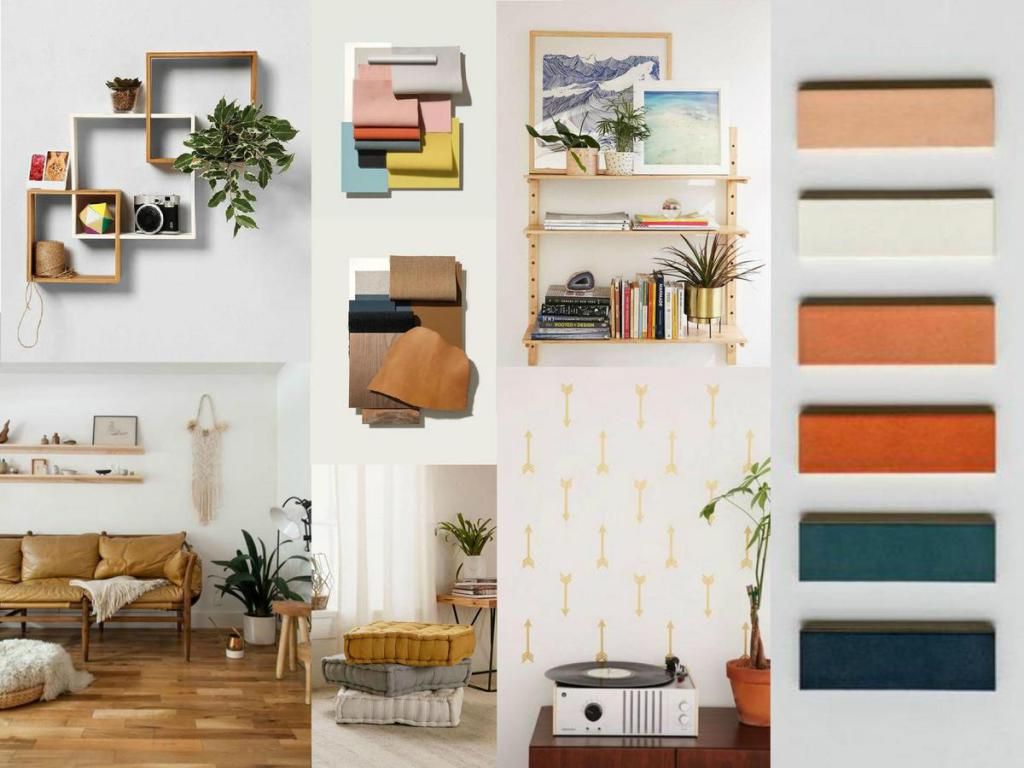
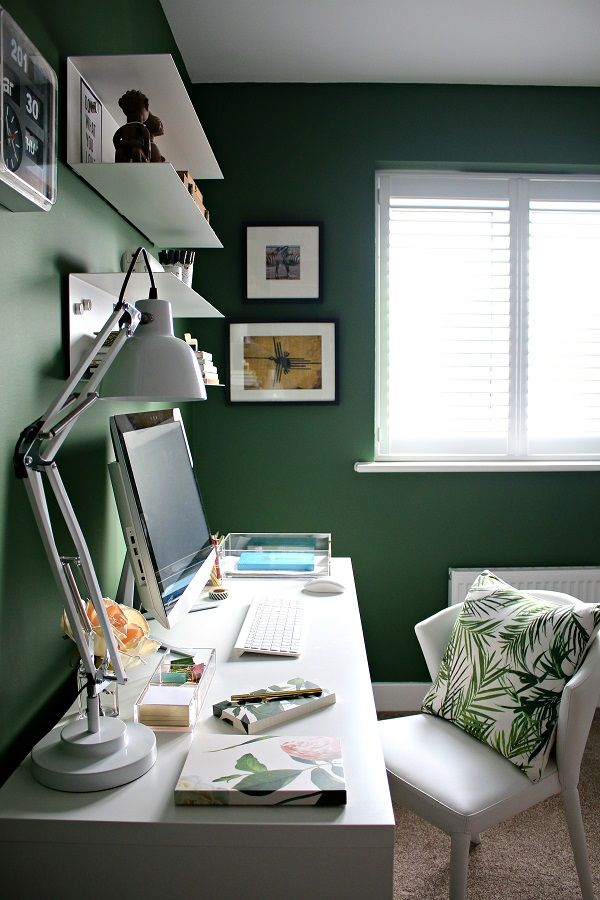
Greenhouse Studio home office mood board. Photo credits - upper left inspirationsdeco.blogspot.com, bottom left, @melissamlo via Instagram, bottom right, Margo Hupert - margohupert.pl.
Choose a "springboard" (inspiration) object
A “springboard object” is a term I came up with that evolved from my own design process. (I picture the vault springboard from gymnastics days.)
In addition to your unifying elements discussed above, you can select an object, artwork or decor piece that you use to help organize and propel the direction of your design project.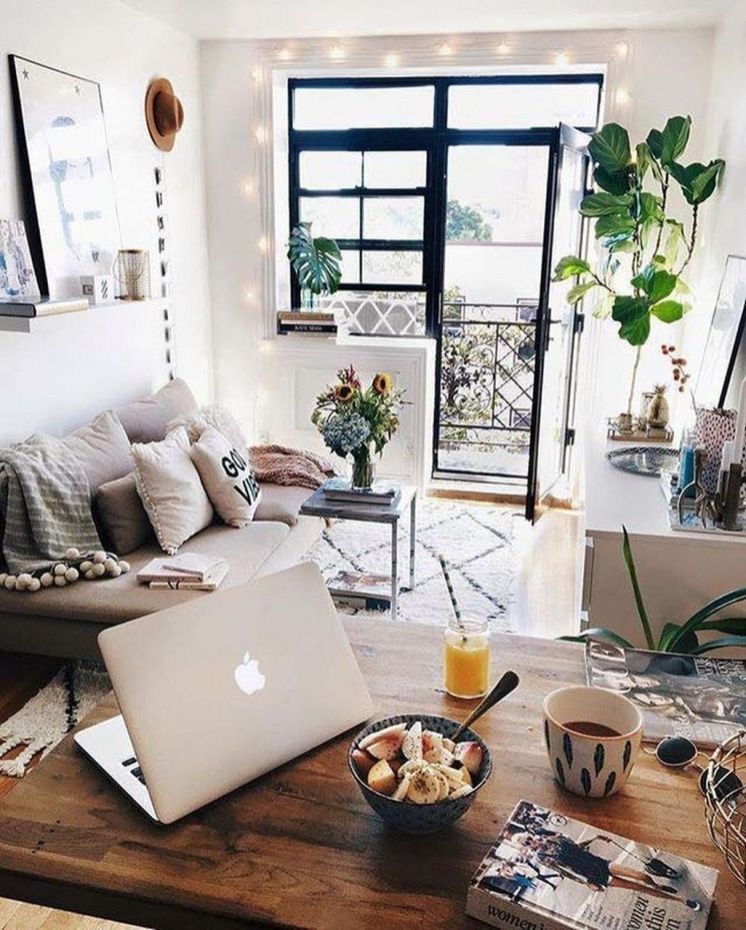
A painting or a rug for example, might inform the color scheme you work with. Or if you fall in love with a quirky thrift store find or antique, it could set the tone, style, or mood for your entire room if you want.
As always though, do a gut check. Just because you have a cool vintage painting with some purple in it doesn’t mean you need to dogmatically take up that color and incorporate it elsewhere if it doesn’t feel good or “right” to you to do so.
It wouldn’t surprise me if the quirky painting were the springboard object in this beautifully moody deVOL Kitchen design.
It also doesn’t have to be an object but could instead be a particular image that inspires you. For example, for my home office redesign, my “springboard” was images of the fabulous studio of Polish artist Margo Hupert. The wonderful imagery of her eclectic nature-inspired studio in greens, whites, and gray-browns had me swooning and became my main source of inspiration.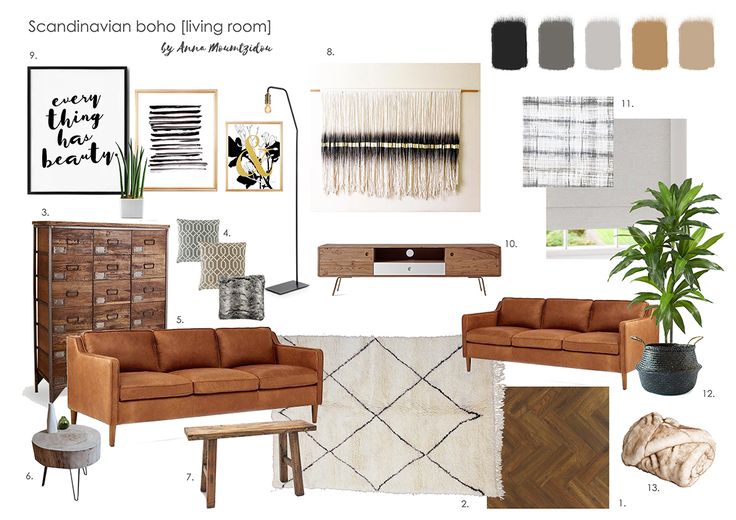
Create a scaled plan (ie - make sure your furniture fits)
This is a bit of a chicken or egg scenario and can be done either before or after the next section on picking foundation furniture. Which ever order, you MUST take measurements and make a simple drawing of your space and layout your proposed furniture and any other room elements before purchasing.
To get to the point where you’re motivated to make a plan, you probably have your eye on a few furniture pieces you’re excited about. To know if they realistically fit or not, you need to lay them out on paper (virtual or not) and see.
You can get out the graph paper, pencil, and eraser and lay out your scaled plan if you like, using 1 square = 1 foot and interior design furniture placement cut-outs (this can be a lot of fun and works fine - don’t get me wrong!).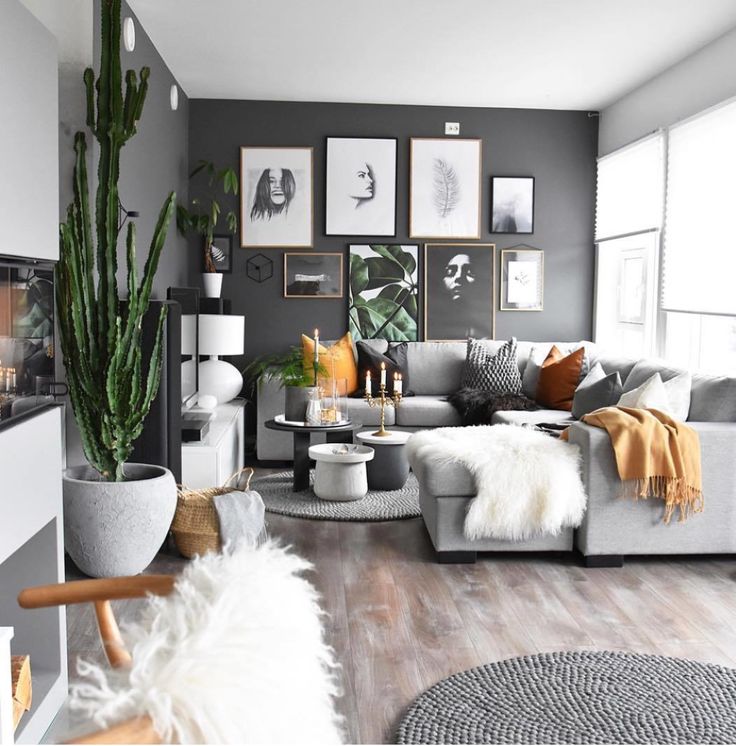
Or you can use a free floor planner app to lay out your furniture and see how everything works in your space.
I have a post reviewing free floor planner apps including video demos. AutoCAD and SketchUP are my go-to software for 2D and 3D respectively, but roomstyler.com was the first simple, user-friendly free option I found. To get started:
After making a plan view, another important step is to take some blue painter’s tape (or I lay out a few intersecting tape measures in a pinch) on the floor (or wall) and see how different objects fit irl. Again, laying it out on paper is important, but so is a second check of how it might feel in your actual space.
Research interior design dimension standards on how much space is needed between dining room chairs and walls for comfortable passage or a sofa and coffee table for example.
After all, laying out your furniture possibilities is important, but if you unknowingly only leave 12” to walk between your virtual sofa and a wall, you’ll find it’s a tight squeeze IRL!
Take this time to consider outlet locations and wall elements like mounting a TV, wall sconces, and ceiling lights with associated wiring needs.
Seeing your ideas laid out to scale provides an important reality check to the ideas and inspiration of the mood board. The last thing you want is spend a lot of money on something that doesn’t fit well in your space, no matter how much you like it.
Start with foundation furniture
Again, which comes first, picking some furniture possibilities and measuring them in our space, or measuring our space to determine rough sizes for furniture. Realistically, I know which I would do - I’d find things I love first and then determine if they fit, and if not, find something similar that does.
Either way, we can now move onto the furnishing basics. If we’re talking about a living room, this might be a sofa and coffee table for starters, or a sofa and a couple armchairs.
To get going here, I’d recommend selecting a neutral couch and a simple cocktail table, or the neutral couch and a couple of leather armchairs - whether midcentury, club chairs, or whatever, so long as they’re streamlined and classic overall. The point is to choose foundation pieces that are versatile and can work with a variety of styles, color schemes, and accessories.
7 years from now, you may be over modern farmhouse, or at least over it in the way you love to style it now.
Before you get out the torches and pitchforks for that comment though, let me just say I’m speaking from personal experience here. It’s amazing how much my tastes have evolved over the last 10 years. It’s not that I now dislike what I loved back then, it’s just that it’s not what I would choose to go with now.
That’s all. Just sayin’
The neutral sofa, chair, and coffee table would allow the client to dramatically change out the rest of this interior if they wanted. Interior design by Fletcher Rhodes, Sonoma CA. Photo: Thomas Kuoh.
So I would encourage you to consider giving yourself the gift of future flexibility. If you have simple foundation pieces that can go with a variety of decor styles, these big ticket items can continue to work for you if your style changes over time. This allows you to go nuts and have lots of fun expressing your style preferences du jour with the smaller things like occasional tables, lamps, accessories etc, without breaking the bank.
On the other hand….there’s the very real possibility that your kids and menagerie will trash whatever sofa or soft furnishings you purchase regardless.
I can certainly relate. After having twin toddler boys and a couple cats contained in a yard-less condo, by the time I finally jettisoned that olive-colored wannabe Pottery Barn couch back in the day, the thought of what running a black light over it would reveal was truly horrifying.
So at risk of completely contradicting myself above, this could also be license to throw caution to the wind and go for that tangerine sofa. It might not last much beyond the babyhood-thru-elementary years anyway.
The struggle is real. Kids, pets, and whatever else can wreak havoc on your soft furnishings. Source: Crypton
Pro tip: With this in mind, don’t blow your budget on super expensive soft-furnishings or think of them as “investment pieces.” I’ve learned to buy relatively inexpensive sofas and upholstered furniture, and I’ve been more than happy with that strategy. Regardless, they still cost a lot, because they’re sofas and chairs, right?
First of all, they’re rarely statement pieces anyway. (Unless you do go for that tangerine sofa.) A neutral sofa often doesn’t look or feel all that different from a less expensive model, especially considering the sometimes jaw-dropping price differentials. That being said though, frame construction, fabric quality, down vrs synthetic cushions etc certainly makes a difference.
FYI just in case you entertain fantasies of reupholstering that investment sofa when needed, or like me, you found a “fabulous bargain” mid-century Asian style sofa at Goodwill and drug it home thinking “I’m gonna reupholster this sucker and surpass it’s original glory!” Let me share some truth - reupholstery almost always costs more than buying new.
Yes, sadly that mid-century sofa eventually made it’s way to the curb with a big '“FREE” sign on it.
So between kids, pets, and your clumsy uncle clutching a big glass of red, you don’t want to completely freak out when (not if) your couch suffers damage.
These mental images are what pushed me to go with my Bomar sofa from Joss and Main versus the pricey one that was on sale for 4.5 times the price at a local boutique in town. (Those down cushions were dreamy though!)
I’m very happy I did. I don’t want to be the mom or hostess who breaks out in a sweat every time food/drink/small and-or furry creatures get near my stuff.
I also believe that an upholstery/carpet spot cleaning vacuum with a wet-vac brush can be an excellent investment and sanity saver. I might not have survived toddler twins without mine.
Potential foundation furniture options:
1) Leather is great for kids - if they or the cats throw up on it, you can simply wipe it down, unlike upholstery. Do be sure it’s a durable finish though, specifically, aniline dyed leather which combines a protective treatment with a durable part of animal hide.
My TV room with a 12’ long leather sofa where my boys can eat greasy snacks without worry.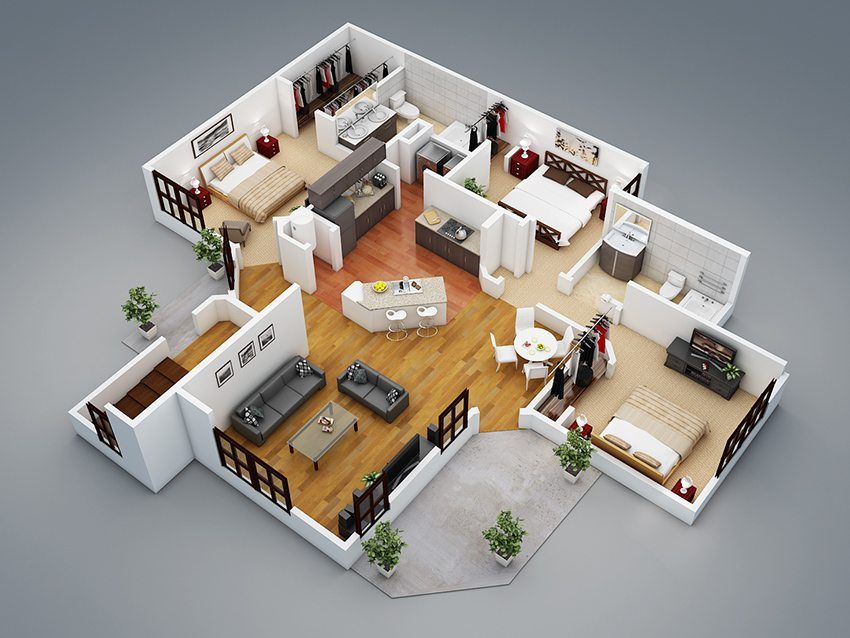 It’s actually two pieces of a Thomasville sectional sourced through Ebay. I placed them end to end to create a “custom” sofa to fit this narrow room. Photo | TDW Media
In contrast is top-grain leather. Ever sat on one of those lovely, supple sofas or chairs that feel more like soft kid gloves or an expensive handbag than a piece of furniture? Most likely it’s top grain leather. The top layer is removed by sanding to get rid of surface imperfections. Because of that, the leather is very soft but isn’t durable and will stain easily. This is the kind of leather most handbags, wallets, and other expensive leather goods are made from as well.
Run your fingernail over leather furniture you’re considering. If it leaves a mark, run away. It won’t hold up to whatever your kids, pets, and red-wine slinging family and friends dish out.
2) Spill and stain resistant fabrics like Crypton or Sunbrella. They are sometimes indoor/outdoor as well, and they’ve come a long way in terms of how they feel, look, and perform since first hitting the home decor scene in the 90s.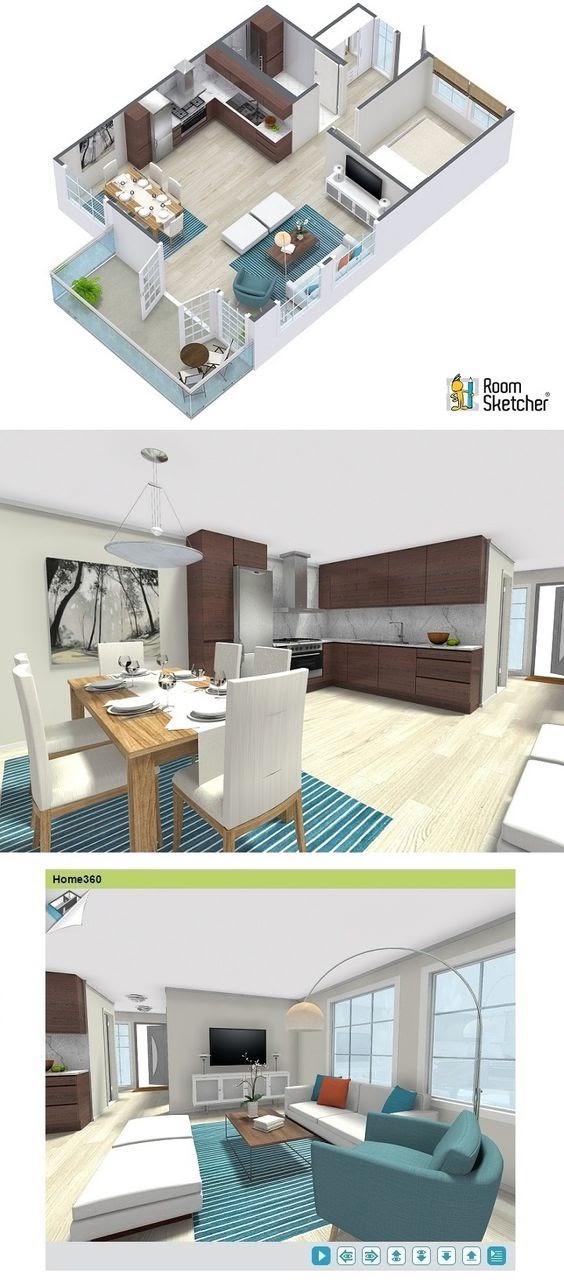
Arhaus sectional sofa upholstered in Crypton stain resistant performance fabric. Source: Crypton
3) Slipcovers. Although I’ve never tried them, slipcovers also work so long as they come out of the wash in the same shape and size as they went in and don’t require 3 hours of ironing. (Not gonna happen.) Many who prefer light colored upholstered furniture swear by them.
4) Another stain defense strategy I deployed back in the day on my old Pottery Barn wannabe sofa was to put a large piece of fabric across the main seating area for a casual, boho vibe.
Ideas: a throw blanket, tailored bedspread, (I used a basic white cotton duck IKEA bedspread), a simple cotton tab-less drapery panel or 60” wide (upholstery width) fabric can all work.
- Drapery tabs can be cut off fabric and fabric hemmed without sewing using Stitch Witchery fabric adhesive) .

- You can even tuck the cloth behind any loose-back cushions for a tidy look and that helps keep it in place.
When liquid lands, hopefully the covered seat part bears the brunt of it and can be quickly thrown in the wash.
This slipcovered sofa from Serena & Lily comes in dozens of stain resistant fabrics.
Picking a paint palette
So after you’ve settled on the overall mood and style and thought about colors based on your mood board, and chosen any inspiration objects, it’s time for wall paint.
I’m the first to admit that choosing paint can drive me and everyone around me batty. (Read about my latest paint selection side-show here.) I really recommend reading the post and the other posts linked from it.
Paint is important and an expensive process and needs to be chosen carefully to avoid costly mistakes.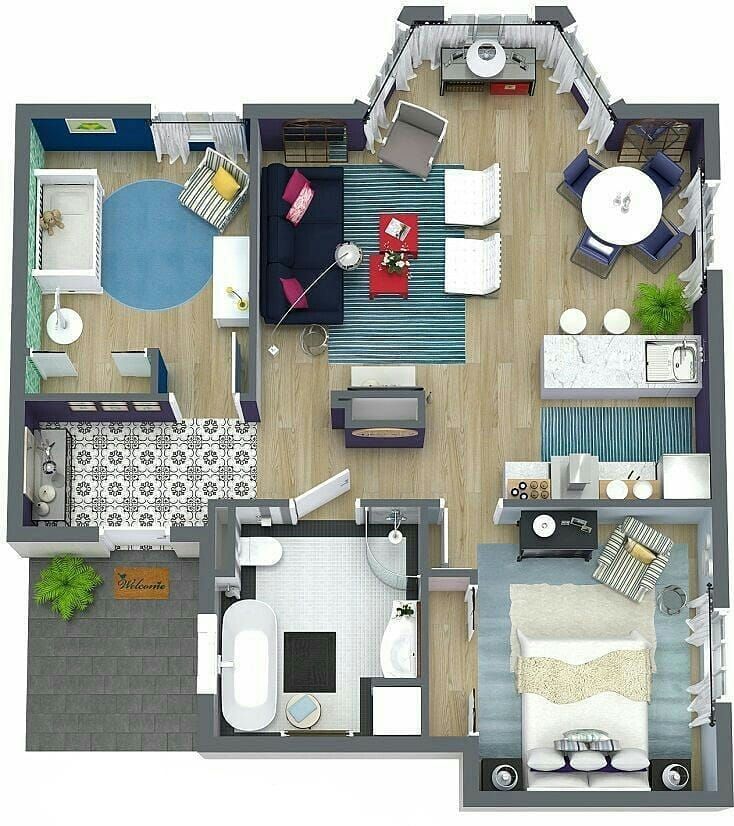 Here’s the abbreviated version:
Going back to that Pinterest board, decide on what generally works for you; neutral or color.
If it’s neutral shades you’re drawn to, what kind? White? Gray? Taupe? Greige? (greige is a warm gray-beige combo) Then, consider the undertones: do you want a cool white/gray/taupe vrs warm white/gray/taupe, etc.
Photo: Shutterstock
Important note: neutral and color aren’t mutually exclusive. My living room is painted Benjamin Moore’s Richmond Gray, which is much more of a neutral green than a gray. Same in my bedroom - it’s painted Benjamin Moore’s Sea Haze, which is a neutral blue.
Perhaps you want a mostly pale neutral with a subtle undertone of a color such as a white with a touch of green or a gray with just a hint of lavender. The same principals apply here as with stronger color.
You don’t have to choose between neutral and color if you don’t want to!
I’m not going to lie to you though, this can get tricky (and expensive) fast. What appears on a color chip to be the most subtle warm gray can be not so subtle lavender gray once it’s up all over the walls, especially where the corners intersect or where light hits it directly causing underlying tones to “glow” (not necessarily in a a good way).
My bedroom is painted in Benjamin Moore’s Sea Haze, which is a neutral blue on the walls but on the chip looks gray. Photo: Greenhouse Studio
Some tips to guide your paint selection process
Do some research on paint color palettes - once again, Pinterest is your friend. Lots of blog posts with titles like “10 best whites for interiors” for example, recommending paint schemes. Then go down the paint store and choose some chips.
Bring them home and stare hard at them during different times of the day and determine which ones might be contenders.
 Then go back to paint store and buy samples of ones you like plus some white primer.
 I always just paint directly on the wall, but you could also go to a craft store and buy some poster board. Either way, paint the white primer so it creates a border around your sample and then paint large samples and observe in different light at different times of the day.
Pro tip: Paint color will look more color-saturated on an entire wall than on the chip. Much more saturated. In other words, if you desire a hint of lavender to warm up your mostly gray paint choice, your paint chip that looks like a nice subtle French lavender gray might look a lot more like a purple Barney nightmare when covering an entire wall. ALWAYS paint a large sized sample including intersecting corners where color undertones reflect on each other. Trust me.
Pro tip: The color of your existing walls can really, really affect how the potential new color looks.
 (Really!!)
 I said this above but it’s so important I’m saying it again: After my last round of painting, my solution is to put up primer so I can paint samples on a white wall. At the very least, go with large white poster board and leave a border around the sample.
Pro tip: Interior designer or paint-expert vetted paint palettes exist for a reason! The shades they recommend generally work for most spaces, or at the very least, stand a greater chance of working than a random shade that looks pretty on a chip and then produces a hideous undertone once you get it on the walls.
Honestly, choosing paint can be so fraught with potential disaster, that perhaps the best piece of advice I can give you is to pick a designer recommended color (look for cross-references between recommendations) and thoroughly test it rather than “going rogue” with one of the bazillion other options out there.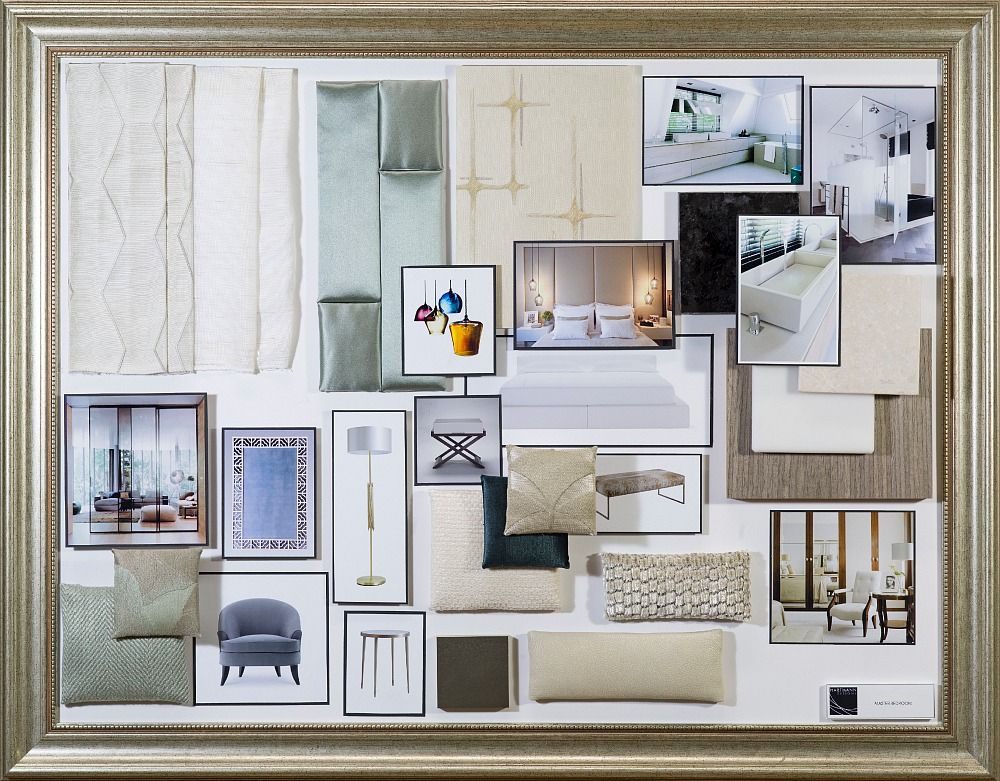 I hate to sound so conventional about this, but it really can be just that difficult choose a color you not only can live with, but actually love.
Again, I recommend reading the full post on paint color selection with the expert color recommendation links, and then doing additional research and sample testing on your own.
Scale up
I debated including this because I don’t want this taken as a blanket recommendation. However, in general, choose larger and fewer over smaller and numerous.
Too small and numerous = too fussy oftentimes. (Remember your elderly neighbor’s collection of ceramic miniatures?) More often, “too small” results in not making much of an impact and may create a feeling of clutter.
I would also say, “scaling up” applies more to accessory type objects rather than say, a sofa. The last thing you want to do is decide carte blanche to “go big or go home” and purchase a ginormous reclining sectional complete with drink holders only to have to shoehorn it into your space. If this is your temptation, please re-read the Scaled Plan section above.
In the garden, it’s better to have 2 or 3 statement containers (depending if you’re going for symmetry vs. asymmetry) with large plants or small trees rather than 6 small containers huddled together.
This may seem more expensive initially, but often I find that I end up spending more on numerous small things over time than on a thoughtful, larger up-front investment.
Instead of many small objects, the bedside table has a large lamp and a few carefully chosen accessories. Interior Design - Fletcher Rhodes, Sonoma CA. Photo - Rebecca Gosselin.
Just like clothes, it’s often better and ultimately more economical (and environmental) to buy a few quality pieces rather than numerous mediocre items that are hardly worn and get quickly donated/discarded. (Guilty as charged on that one, but mucho better than I used to be at re-calibrating my notion of what is or is not a “deal!”)
Speaking of containers though, if you do have a group of smaller objects like a collection, decorative trays and platters can be used to corral and make visual sense of them. Example - decorative trays that house a collection of succulents in small pots.
A wood tray corrals decorative accessories. Source: The Home Index
This can also apply to wall art. If you have numerous smaller framed pictures, group them into a gallery. When done correctly, the overall effect is that it looks like one large cohesive installation. (This concept reminds me of big schools of silvery sardines. They move in a giant group together because it fools predators into thinking they’re one big fish, but I digress..)
For tips on how to hang a gallery, refer to your interior design dimension standards mentioned in the “Create A Plan” section above and check out this gallery wall post by Pottery Barn.
A beautiful green, white, and black gallery wall in an artist’s studio. Interior design + artwork: Margo Hubert
This is a pretty simple concept. What I’m getting at here is you don’t want your house to look like a Pottery Barn catalog for example. Using some items from Pottery Barn is great, but if the entire space is overly sourced from any one style or brand, it can create a flat, homogeneous look.
A good example of not overusing a single source or style is Magnolia Home - mecca for modern farmhouse, right? However, if you look closely at many Magnolia style shots, they often incorporate items that would be classified as something other than modern farmhouse.
Magnolia library & conference room renovation. Interior Design: Joanna Gains, Source: Magnolia
Note how Joanna Gaines has skillfully incorporated mid-century-style into the Magnolia Home corporate library and conference room through the mid-century classic Tulip table and Cherner side chairs.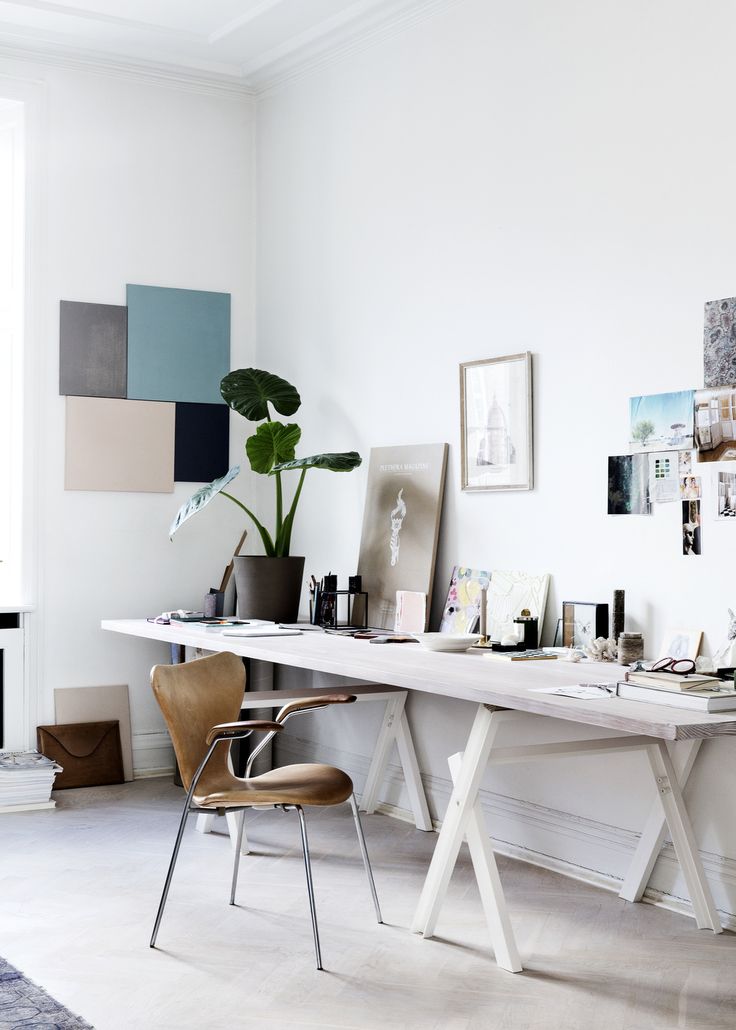 (LOVE Cherner chairs! Check out how to get your own Cherner side chairs for less.)
Mix it up: Back to modern farmhouse - if that’s your style through and though, that’s great, but within that, there are still style subsets you may want to play with and bring together.
If you love the shabby chic, chippy furniture pieces that look rescued from the back of a barn, create a more layered look by incorporating more streamlined elements of French, Scandinavian, or coastal farmhouse style. I would still encourage you to consider bringing in a few pieces from a different style or period altogether that compliments your design for a richer look.
So how in the heck do I “mix it up” you say? Go back to your Pinterest mood boards and look for unifying features like color, texture, and form like we talked about in the beginning. Then find pieces from a complimentary yet different style which at first pass may seem too different, but actually add harmony and depth to your overall design.
For example, say you have a mid-century room but you found this industrial side table you love with a black wrought-iron base. Use the black color in the base to tie the two styles together by incorporating midcentury pieces that have a bit of black in them as well. You’ve instantly created more depth and interest in the look of your space over a “one liner” type of design scheme.
Your rooms will love you for it, and you will love them back.
Pro-tip: Speaking of black, a common interior designer truism is that every room needs a touch of black. I know there are spaces that look amazing without any black, but 85% of the time, I agree. I think it adds drama while providing a grounding effect.
I would modify though by saying a brush stroke of charcoal, deep navy, or blackish-green will do just as well. Hey, if you don’t believe me, just look again at Joanna’s dramatic, moody conference room all done in that deep peacock blue-green.
The black in this living room provides a grounding effect in an otherwise light atmosphere. Pamela Hope Design, Houston, TX.
Inject your own personal style and individuality
Now we get to the really fun part! You’ve done the heavy lifting of choosing foundation furniture and paint. With the smaller and usually less expensive pieces like accessories, accent tables, lamps, pillows, plants etc, you have all the freedom to express yourself about what ever makes your heart sing or speaks to your soul. This is your reward for suffering through the trials of paint selection!
Quirky, thrifted, found, natural, metallic, rustic, old, new.
A bowl that held a dessert bought at a school fundraiser is repurposed to hold a Moroccan astrolabe and brass beads lined with fabric samples. A thrifted brass snail sits on an Ebay limestone cocktail table.
This is your chance to experiment! Do it without fear, have fun with it, and I guarantee you’ll learn something in the process.
Try mixing old with new, high end with low end, rustic with streamlined, large with small, and just see what happens.
Read here for tips on how to decorate with natural and found materials and objects. See what interesting and eye-catching combinations and arrangements you come up with. Best of all, they will be a unique reflection of you and your personal style.
House of Harvest antiques does a brilliant job of incorporating eclectic objects together for a one-of-a-kind-curated look. Source : House of Harvest
So that’s my “manifesto” on how to design a space. I hope you got some helpful tips that you’ll be encouraged to try out in your own home.
It’s a lot of work to design a space but it’s also a lot of fun, and the end result is worth it. There’s nothing better than coming home to a place you love.
[Want more design inspo and helpful plant tips? Let's hang out on Instagram!]
Be sure to sign up below so we can stay in touch!
Enjoy the post? Pin it for later!
DIY, Home DecorTina Huffman15 Comments
How to Decorate Your Home - Real Estate Guides
By Tim McKeough
Header photography by Yasu + Junko; styled by Elizabeth Press
Moving into a new home can be one of life’s great joys, but it can also be a time of uncertainty, especially when it comes to decorating. How do you make your space look its best while reflecting your personal sense of style? Do it well and you’ll end up with a comfortable, happy home.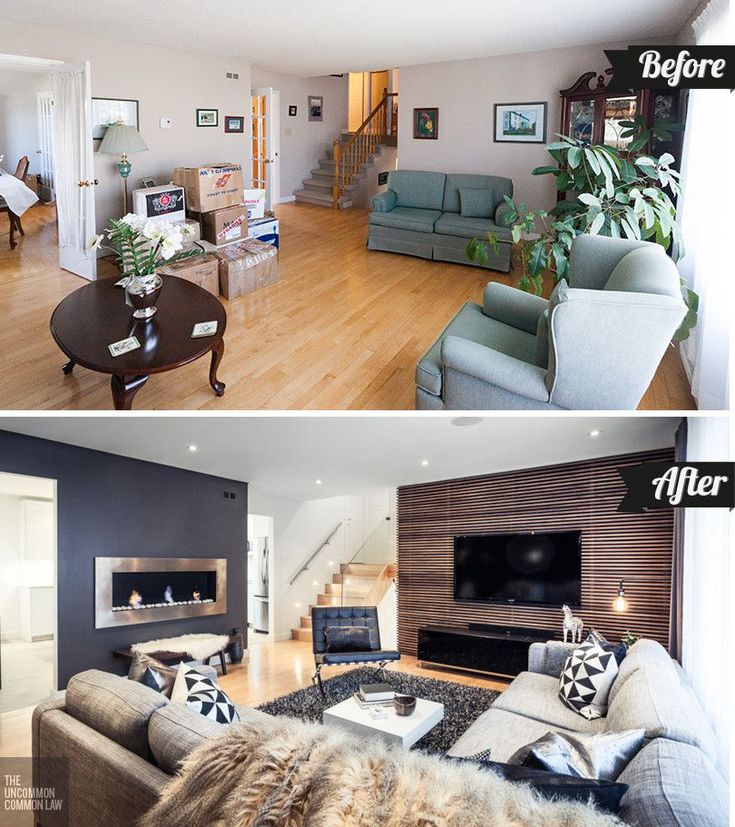 Do it poorly and you’ll end up with a hodge-podge of furniture, fabrics and paint colors that never congeal into a pleasing whole. With a little planning, and by following the same steps used by professional interior designers, you’ll have a much greater chance of success.
Interior Decoration: Laying the Groundwork
To reach the finish line, you first have to know where you’re going.
Don't Start in the Furniture Store
Many have heard the advice to avoid grocery shopping when you’re hungry, because it leads to poor choices. The same holds true for furniture stores – don’t go shopping in a panic, just because you have an empty home. Yes, you need a sofa. But if you pick the pink-striped sectional just because you like it in the store, without taking measurements or thinking about the rest of the room, you’re stuck with it. The rest of the room will have to be built around that sofa, and if it’s too large for the space it will look forever awkward.
Start in the room you’re looking to furnish, armed with a measuring tape and a notepad.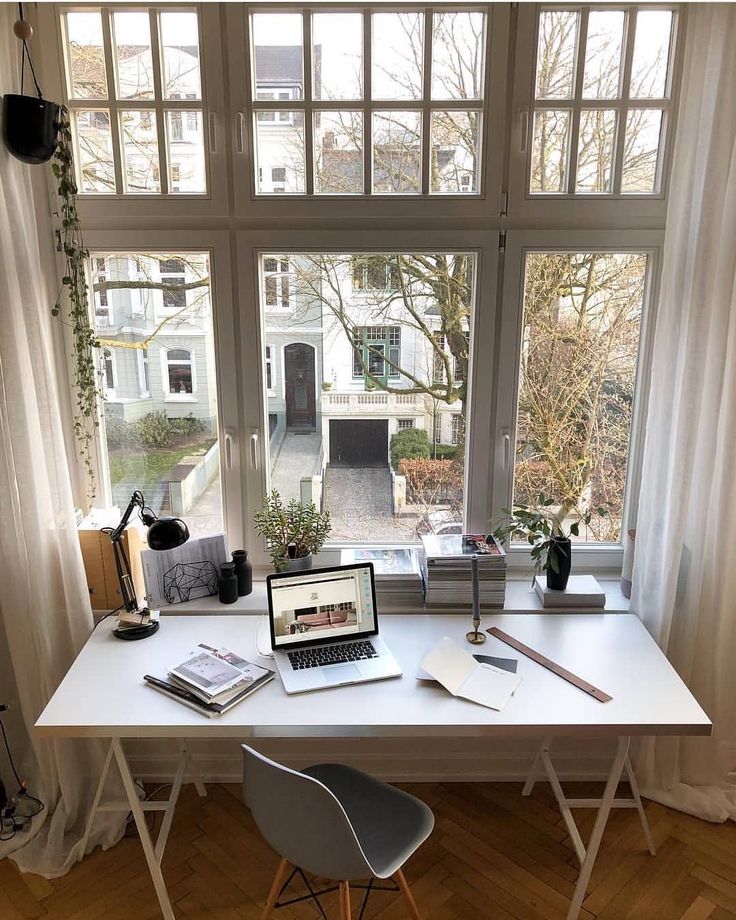
Know Your Measurements
Matching the scale of furniture to the scale of a room is critical. A deep sectional sofa can easily overpower a small room and svelte chairs can get lost in a wide-open loft. Before you start designing, measure the length and width of each room you intend to decorate, along with the ceiling height and elements that could get in the way – stairs, columns, radiators and other obstructions. It’s also a good idea to measure window openings, along with the wall space below, above and to the sides of each one, to get ready for window coverings.
“The first mistake most people make is that they buy things that are the wrong size – sofas that don't fit in the room, sofas that don't fit through doorways, tables that are too small, desks that are too big, nightstands that hang into the doorway,” said David Kleinberg, founder of the New York interior design firm David Kleinberg Design Associates. Carefully measuring your space can help avoid such problems.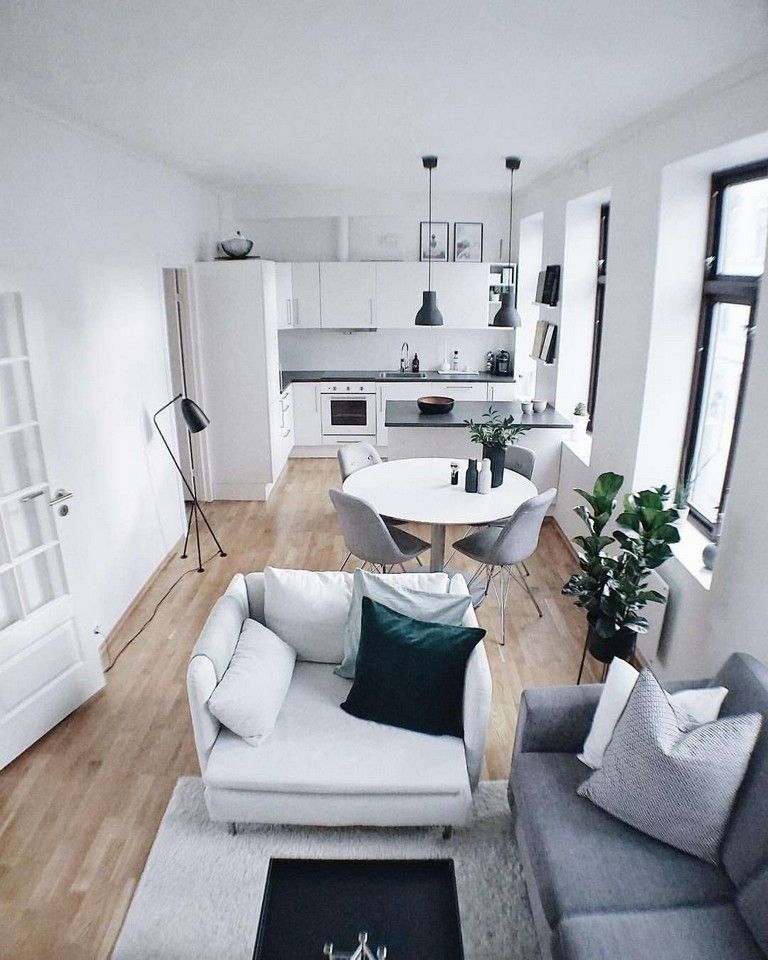
Create a Floorplan
Once you have the measurements of your room, it’s time to put them to use with a floor plan that gives you a bird’s eye view of the entire home. “Every job should start with a floor plan,” said Alexa Hampton, the president of Mark Hampton, the New York interior design firm founded by her father. “You need to know the space.”
One option is to draw a floor plan the old-fashioned way, with paper, a pencil and a ruler. However, most professional designers use drafting software like AutoCAD. In between those two extremes are apps that aim to make it easy for homeowners to create simple floor plans (some even automate measurements with your smartphone’s camera, but double-check those numbers), including Magicplan, Floor Plan Creator and RoomScan Pro.
Once you have the outline of the space, start experimenting with the placement of furniture, making sure that the footprint of each piece is scaled to match the size of the drawing.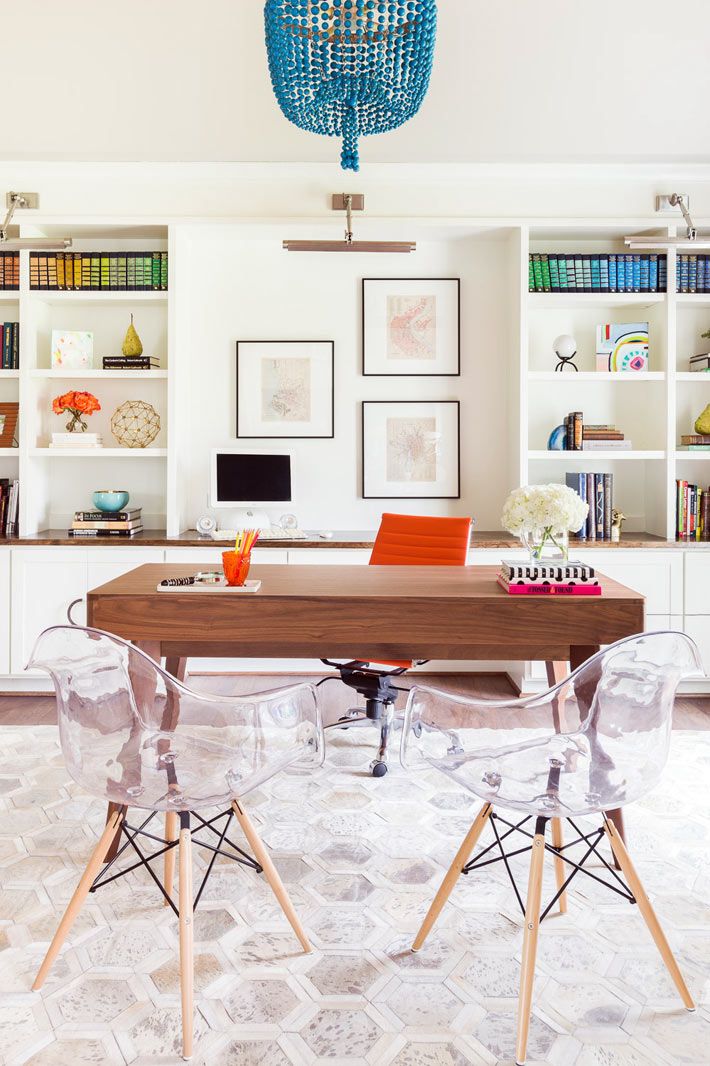
Decide How You Want to Live
This is the tricky part, and there are no right or wrong answers. Rooms can be traditional or modern, formal or relaxed, and visually warm or cool. “To the best of your ability, you have to try to discern how you would like to live in a given space,” said Ms. Hampton. “What will you be doing? How many people live there? Are there children? What are your ambitions for how you would like to live?”
The decoration of a home for someone who regularly hosts large dinner parties, for instance, should be different from a home for someone who eats out at restaurants every night. The person who plans to host lavish fundraisers should have a different living room than the person who dreams only of crashing in front of the TV.
Copy the Pros
Look in design books and magazines, as well as at online resources like Houzz, Pinterest and Instagram to sharpen your personal style. “Figure out the style that you respond to most,” said Brad Ford, an interior designer in New York City, and develop a dossier of favorite images.
Once you have images you like, study the details, advised Mr. Kleinberg. “See where pattern is used versus where solids are used, and where color can be used successfully or not,” he said. It will also help inform everything from the type of furniture you might like to a potential strategy for window coverings.
Tape It Out
To take ideas on a floor plan one step farther, use painter’s tape in the real space to outline where furniture will be placed on floors and against walls.
“We use blue tape on the floor to box out different elements,” said Anne Maxwell Foster, an owner of the New York interior design firm Tilton Fenwick. “Where will the rug be? Does it need to be cut? How far is the coffee table coming out? Even though we have everything down to a sixteenth of an inch on a furniture plan, there's something helpful about visualizing it in the space, and being able to walk around.”
Develop a Budget
There’s no getting around the math: If you splurge on an unexpectedly expensive chair, you’ll have less money available for the rest of the home. “You want to make sure you're being strategic about how you spend your money,” said Mr. Ford. “A budget gives you a roadmap for how to divide the costs of things between rooms.” You can still make an exception if you find a one-of-a-kind dining table, he noted, but in order to pay for it you have be thoughtful about where else you can cut back.
Plan the Phases
Finishing drywall, refinishing hardwood floors and painting ceilings is all messy work. If at all possible, it’s better to have this type of work completed before moving any furniture or accessories into the space.
If it can’t be avoided, seal large furniture under plastic drop cloths and accessories in boxes with tape to protect them.
Read More About Planning Your Decor
Entryway Ideas
The foyer or entrance hall creates the first impression, so make it count.
Make a Statement
Don’t hold back. “That room is the power moment when somebody walks into your home,” said Suysel dePedro Cunningham, an owner of the interior design firm Tilton Fenwick.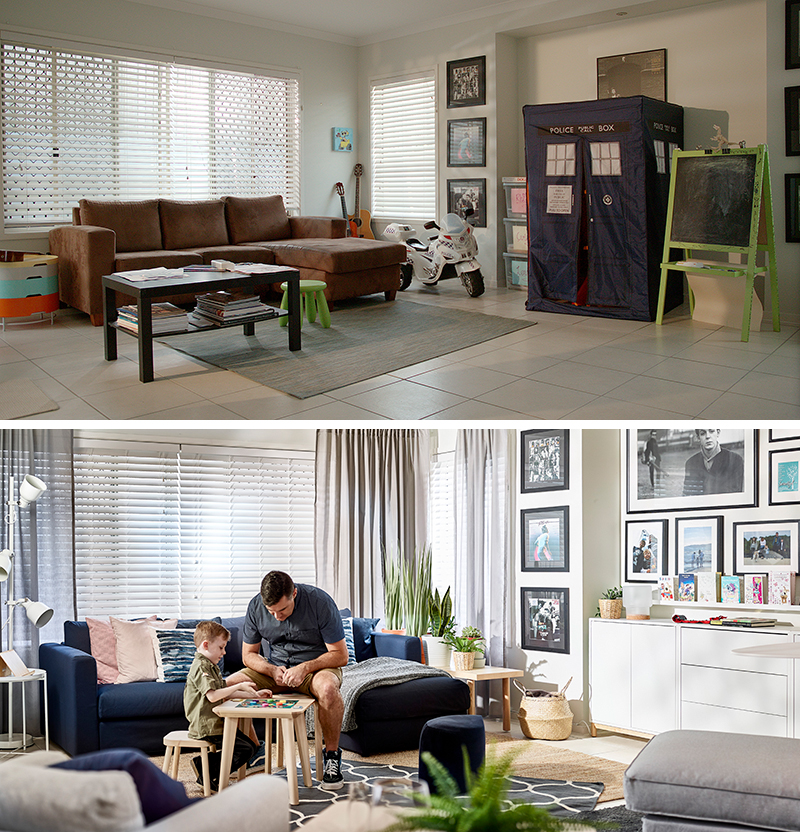 “It can say so much about your personality and design taste.”
For that reason, a wall finish that might seem like too much for a living room or bedroom may be ideal in a foyer. “It’s a place where you can do a bold color, a lacquer or a wallpaper for a ‘Wow’ moment that you might be scared of in a large living room,” she said.
An added benefit? Statement-making wall coverings and finishes tend to be expensive, but because foyers are usually small, these products can often be installed without breaking the bank.
Design to Your Routine
With a few key furniture pieces and accessories, you can make your daily arrival and departure sequence a breeze. “Typically, it's not a huge space, so you're working with a limited number of pieces,” said Mr. Ford. If you’re the kind of person who likes to drop everything when you walk in the door, “a console with drawers is great, because it’s a nice place to hide your keys and mail,” Mr. Ford said. Or, in the absence of drawers, a bowl, tray or other sculptural container can serve as a catchall to help keep things organized.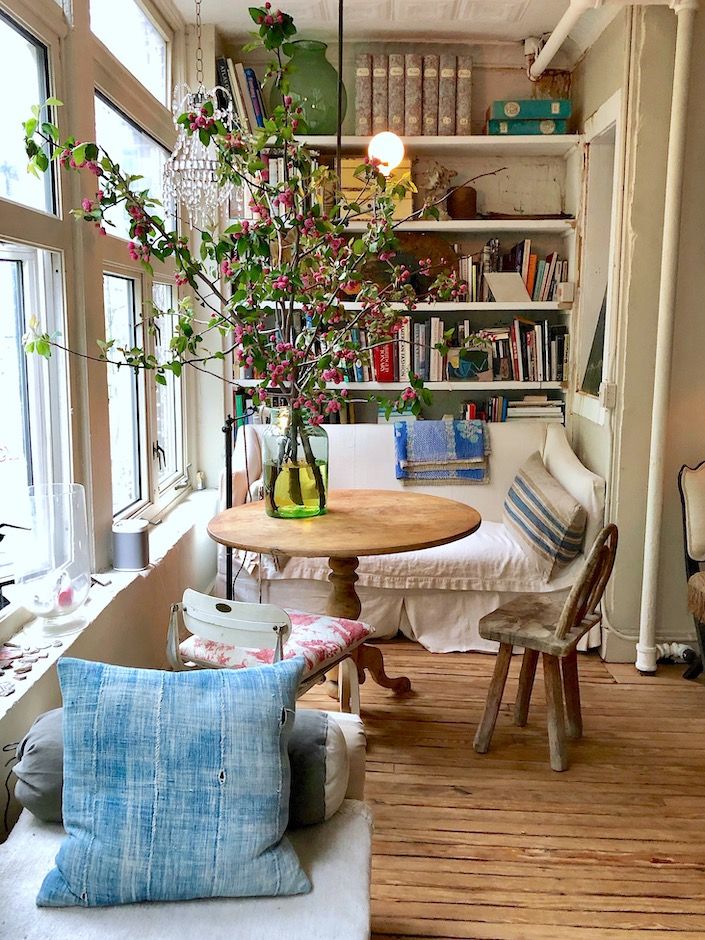
A bench or a stool or two that slide under the console can provide a place to sit while lacing up shoes while taking up minimal floor space.
Another helpful element is a wall-mounted mirror, said Mr. Ford. “It gives you one last chance to check yourself before you walk out the door.”
Plan for the Weather
As the first space people enter when coming from outside, the foyer has to deal with a lot – ice, snow, rainwater, mud and whatever else Mother Nature decides to deliver. To avoid having these things creep into the rest of the home, you need to deal with them at the front door.
The effort begins even before you cross the threshold. “I like to have a mat outside the door, so people can wipe off their feet before even stepping inside,” said Mr. Ford.
Inside, you can follow up with an indoor-outdoor rug. An umbrella stand not only keeps umbrellas handy, but also prevents wet ones from draining on the floor.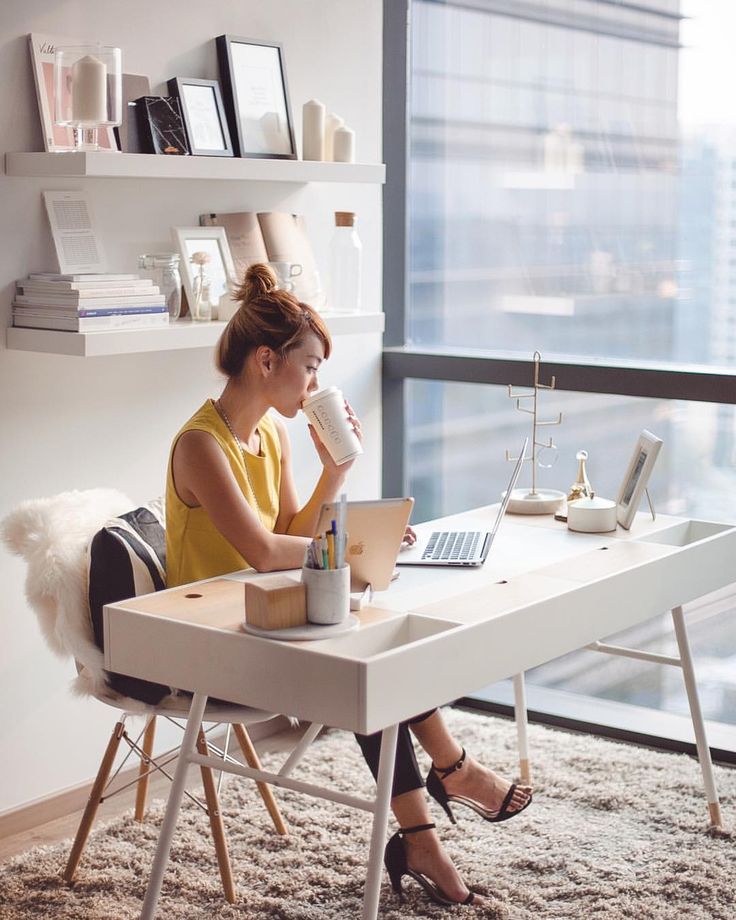 Storage bins or baskets, which can be stowed under a console (if the space isn’t taken by stools), can contain soggy hats and mitts. If your foyer doesn’t have a closet, buy coat hooks or a rack. These are all functional pieces that can serve double-duty as decorative elements as well.
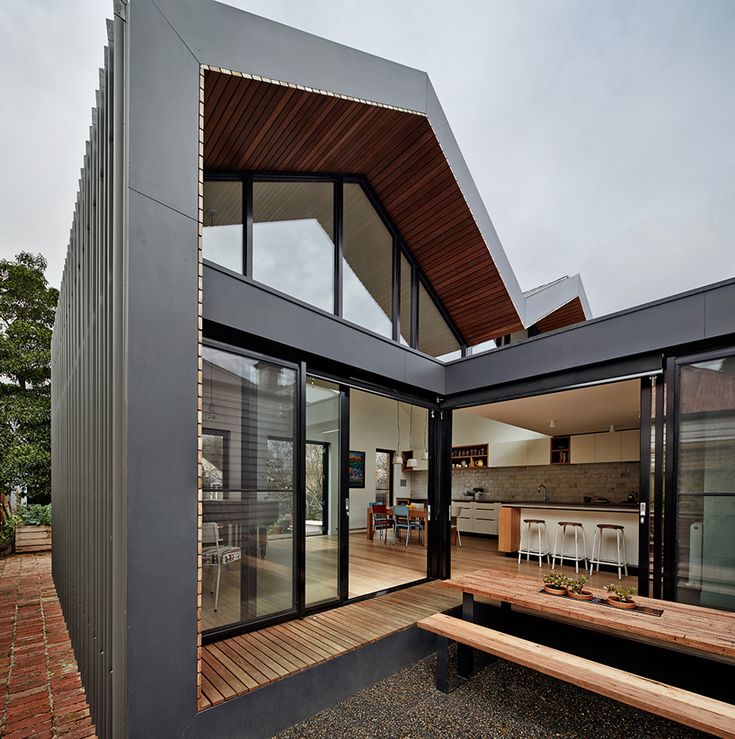
Dining and Living Room Decor Ideas
The main living areas, whether they are separate rooms or combined in an open-concept space, set the stage for life with family and friends.
Create the Palette
You can see colors, patterns and metal finishes online, but digital images are mere approximations of what the real things look like. Wherever possible, order color chips, fabric swatches and material samples to be sure finished products will meet your expectations. “You can order samples from most vendors, and it’s always best,” said Mr. Kleinberg. “Some colors blend together,” when viewed on a screen, he added, and it can be difficult to differentiate cool and warm tones.
Don’t just look at the samples in isolation. Pin them to a board or put them in a tray to see how well they work together. “All greens play nicely together,” said Mr. Kleinberg. “All blues fight.” Putting samples side by side is the way to see if different colors and patterns will live in harmony or tension.
Ms. Hampton sometimes goes one step farther. “When we’re working on a fabric scheme, we’ll put the fabric on the copier, reduce it, cut it into the right shape for the floor plan and paste it down,” she said, “so we can see how the various fabrics spread through the room.”
Treat the Walls
Paint colors are notorious for appearing different hues in different light conditions (and seeming to change between the paint store to home). This effect is only amplified once you slather it on four walls. For that reason, it’s never a good idea to commit to a paint color when you first see the chip in a store. Look at the largest chip you can get in the room you plan to paint, at a minimum. Better yet, paint large sample patches on walls or on boards that can be moved around and view them at different times of day.
Note: As long as you test the color before painting the entire room, there’s no reason to be scared of bold, saturated colors.
Once you have a color selected, choose the sheen. Matte or flat paints offer a pleasant gauzy appearance that also hides wall imperfections, but can be difficult to maintain, clean and touch up. “I tend not to do matte walls, in general,” said Ms. Hampton, who prefers paint with an eggshell or satin finish that is just slightly glossier and easier to scrub.
Baseboards, moldings, doors and other trim can be painted the same color as the room to make them visually recede, or a contrasting color — usually an off-white in a room with colored walls — to make them more of a feature. Trim can also be painted with a different sheen than the walls. A semi-gloss sheen will bring more attention to moldings while adding durability.
You should also decide how you want to treat the ceiling. You can paint it white for a crisp feel, or the same color as the walls for a cocooning feel. It’s safe to use a matte or flat sheen because the ceiling is rarely touched by dirty fingers or smudge-creating objects. If the surface is perfectly smooth, it can also be painted with a glossy finish as a design feature that reflects light down into the living space. (If your ceilings aren’t smooth, don’t do it — the glossy sheen will only highlight imperfections.)
For something unexpected, consider looking beyond paint. Manufacturers offer a multitude of alternatives, including patterned wallpaper, grass cloth, upholstery fabrics, wood paneling and even stone and brick veneer.
Choose the Furniture
Working from your floor plan and inspiration images, choose the specific pieces of furniture — the sofas, chairs and tables — that will make the space livable. Depending on the desired vibe, you can go in wildly different directions.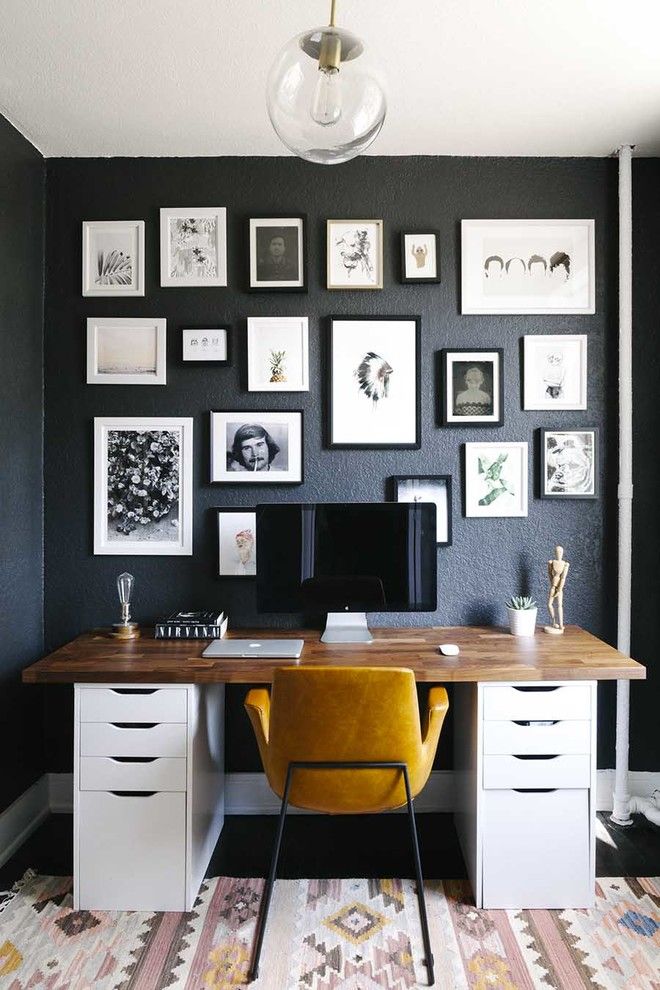
For a traditional room, focusing on a symmetrical layout often helps — for instance, installing a sofa and coffee table centered on a fireplace, with matching armchairs on either side. “A very symmetrical space can be beautiful and formal,” said Ms. Hampton. On the other hand, “if you choose a sectional sofa, it’s probably going to be a less formal space,” she said, with an asymmetrical layout.
Seat height is also important. Sofas and lounge chairs in the same room should have seats that are at similar heights to avoid some people sitting much higher than others. In general, lower seats offer a casual, laidback feel, and higher seats come off as more formal.
Whether the space is casual or formal, there is a rule of thumb to keep in mind: The number of dining chairs should roughly match the number of spaces for lounging. “That’s an old truth my father shared with me,” said Ms. Hampton. “If you’re planning to have 12 people at a dining room table, you should have 12 seats in the living room,” for entertaining before and after the meal.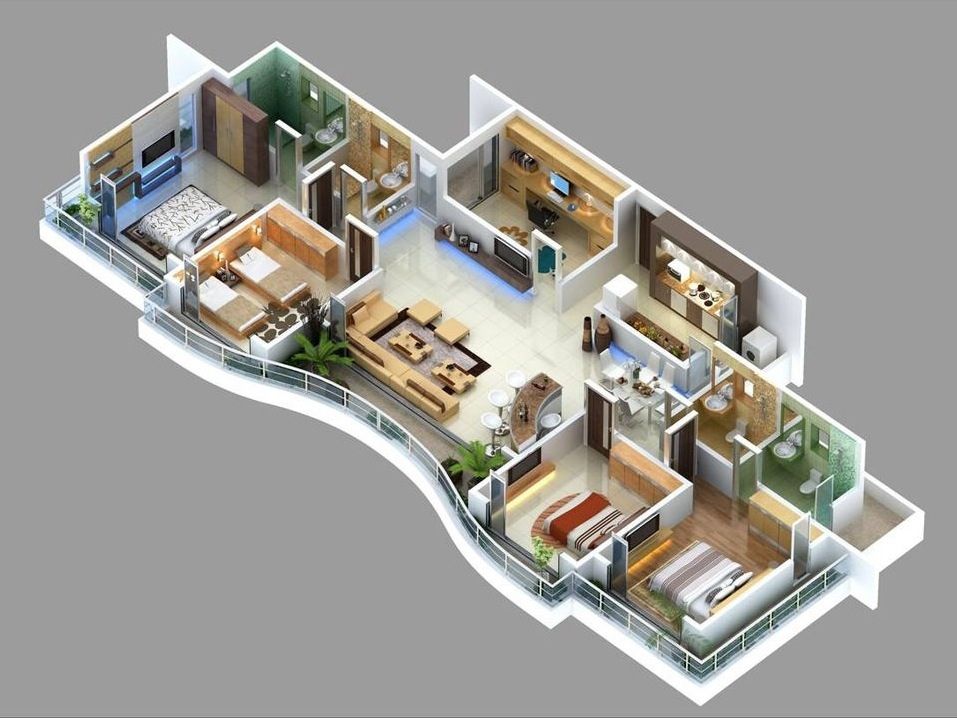
How Things Flow
No living room sofa or chair should be an island of its own. When people sit down, they almost always need a place to put a drink or book, as well as light to read by. Place a coffee table or end table within easy reach of each seat, along with a table or floor lamp.
No one wants to stub a toe on a chair leg, so you’ll also want to ensure there are clear walking paths through the living room, and that no furniture blocks part of a doorway or makes it necessary to squeeze by.
Will your living room have a TV? If so, plan for a wall mount or a media unit to hold it, as well as a path for cables that won’t be unsightly.
Do you plan to host buffet-style dinners? If so, a credenza or sideboard near the dining table will allow you to serve in one space rather than having guests traipse through the kitchen.
Add Rugs
A living room with hardwood floors but no rug looks naked. For visual and literal comfort, add a rug.
There are three common strategies for doing so:
- A room-filling rug.
 Install a rug that covers almost the entire floor of the room, leaving a border or just a foot or two at the edges. This usually works best in smaller rooms.
 - Seating area rugs. Break a larger room down into multiple seating areas by using rugs to visually hold each group of furniture together. Or, in an open-concept space, use a rug to hold the living area together, while allowing the dining area to sit directly on the wood floor.
- Layered rugs. Pile smaller rugs on top of a larger one to create extra visual interest while reinforcing the layout of the room.
Be generous when selecting sizes. A small rug under the coffee table that doesn’t reach the legs of sofas and chairs will look like a raft lost at sea. The rug should extend about halfway, or fully, under the furniture at its edges.
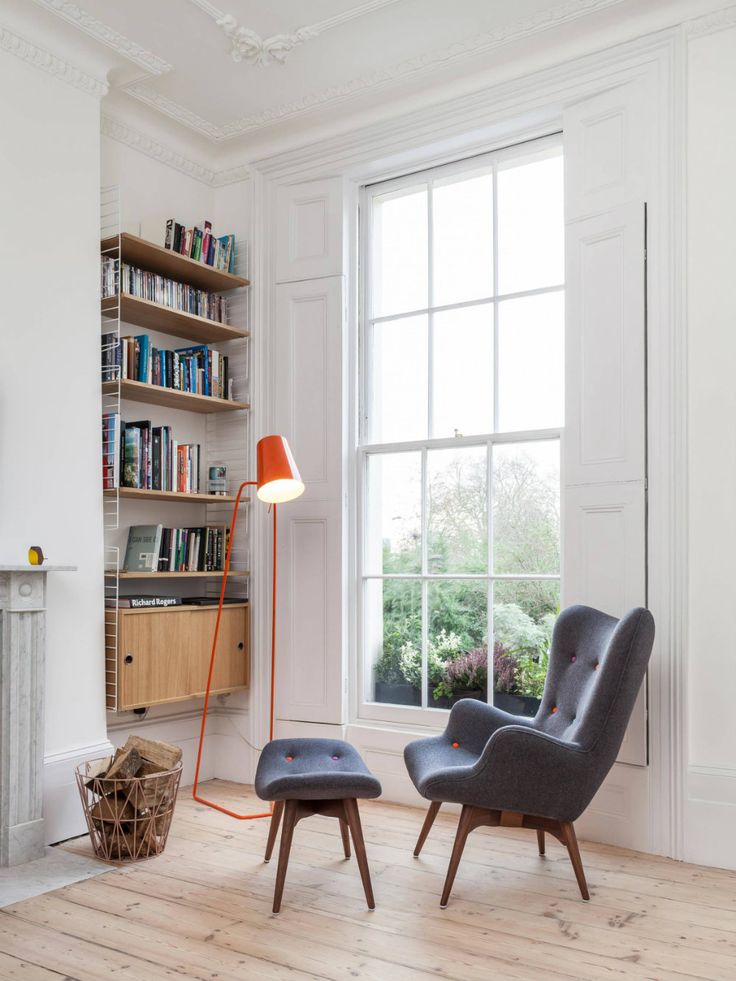
Finish With Art and Accessories
The last step to finishing any room is to add art and accessories, but there is no one-size-fits-all approach.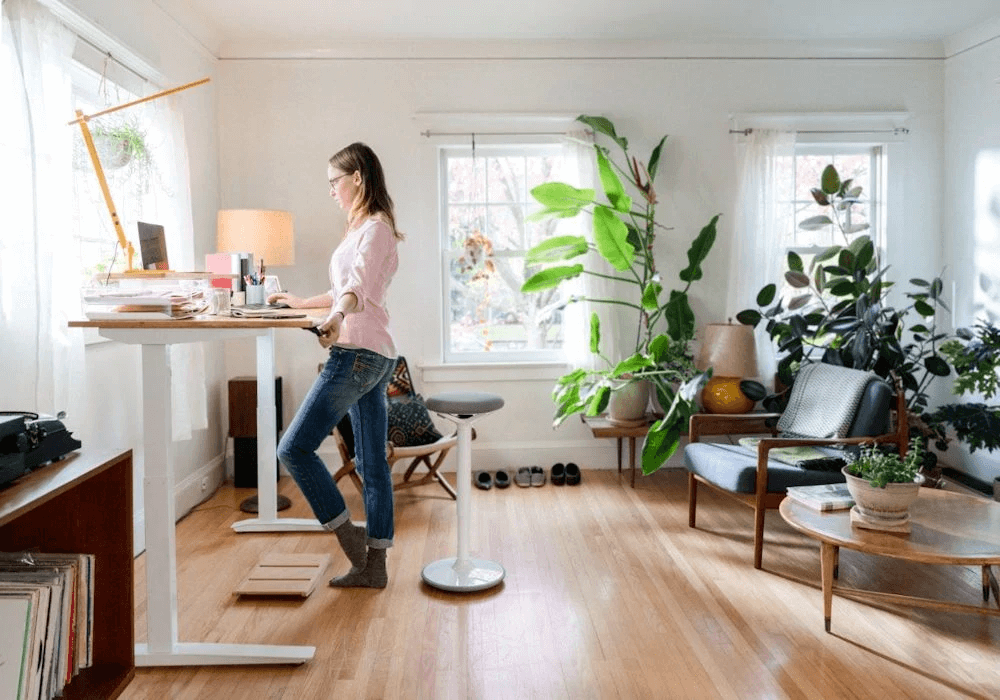 In a minimalist space, it might be just a few objects; in a maximalist space, it could involve displaying entire collections and layers of objets d’art.
Go back to your original inspirational images and study the way those rooms are accessorized. Do they mix candles, boxes, bowls and books together, or is there just one vase on a table? Is there a single artwork above the sofa, or a freeform gallery wall?
Be sure to consider your functional needs. A tray on an ottoman can contain remote controls. Throw pillows provide extra back support for deep sofas and chairs. A magazine rack can keep reading materials out of the way. Attractive baskets are ideal for tidying up children’s toys in a hurry.
Bedroom Decor Ideas
Designed correctly, a bedroom can serve as your nightly sanctuary.
Plan the Furniture
It’s called a bedroom for a reason: the bed is the key piece of furniture. As such, it should be given pride of place in the room, most likely with the headboard positioned against one wall and paths for walking on both sides.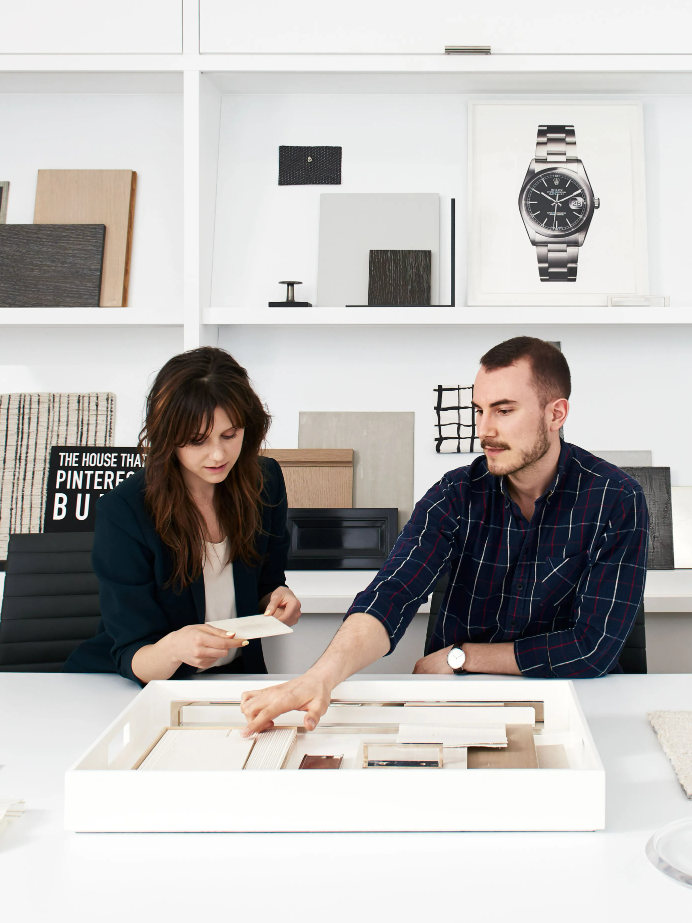
“Don’t shove a bed in the corner,” if at all possible, said Nick Olsen, a New York City interior designer. “They’re impossible to make, and uncomfortable for two people to use.”
One exception: children’s bunk beds. Because they already have safety rails that usually only allow access from one side, there’s no reason not to have one in a corner.
If there’s space, install nightstands on both sides of an adult bed for convenience. They could be simple small tabletops, tables with a single drawer for storing essentials, or something larger. “Consider whether you need extra storage space,” said Mr. Olsen. “You can use two dressers for nightstands,” to provide space for folded clothing.
Do you like to watch TV in bed? If so, you’ll want a dresser, cabinet or console table near the foot of the bed that can hold the TV while providing additional storage (unless you plan to mount it on the wall or spring for a motorized stand).
Many designers also like to put a single chair in the corner of a bedroom, not only as a place to rest but also as a landing pad for tossed clothing and personal accessories when you’re in a hurry.
Make It Soft
Because the goal is to create a space that feels calm and inviting, a bedroom is probably not the place to use bold colors or graphic wallpaper. “I would avoid anything that feels aggressive,” Mr. Olsen said. “Even though I like bold colors in my decorating, I like paler tones in the bedrooms: gentle blues, greens and yellows.”
Some designers even upholster bedrooms walls for a literal soft touch.
Underfoot, Mr. Olsen advocates adding some kind of textile to warm up cold, hard floors – either wall-to-wall carpeting, a large rug that extends underneath the bed or smaller rugs on either side of the bed, and perhaps at the foot of the bed.
Make the Bed
There are many different ways to make a bed, and the subject of whether or not you should use a top sheet has been the subject of fierce debate in recent years. Much comes down to personal preference and whether you desire a bedroom that feels casual or formal.
It’s possible to make a bed with nothing more than a fitted sheet over the mattress, a nice duvet and a couple of pillows. But for something a little more formal, you need more layers.
Mr. Olsen has a very specific way of making a bed, which he says was passed down to him from the designer Miles Redd, who learned it from the doyenne of decorating, Bunny Williams. “I do a fitted sheet, a top sheet, and some kind of blanket, which varies in weight based on the season – a cotton blanket for summer or a wool blanket for winter,” said Mr. Olsen. “Then, four standard-sized pillows, usually down, which I stack. Then a decorative pillow stacked against the standard ones. Then, I do a down duvet with a cover folded at the foot of the bed.”
Mr. Olsen recommended keeping the sheets simple – perhaps hotel-style white linens with a subtle embroidery detail at the edge – and bringing in color and pattern with the top two pillow shams and decorative pillow.
Wirecutter productThe Best Sheets
L.L.Bean 280-Thread-Count Pima Cotton Percale Sheet Set
If you like a cool, crisp feel to your sheets, these are comfortable, very breathable, and reasonably priced.
More Wirecutter sheet picksRight Arrow IconRight Arrow Icon
Wirecutter productThe Best Bed Pillows
Xtreme Comforts Shredded Memory Foam Pillow
Moldable and adjustable, with excellent support for back-, side-, and some stomach-sleepers, this is also one of the most affordable pillows we tested.
More Wirecutter pillow picksRight Arrow IconRight Arrow Icon
Wirecutter productThe Best Comforter
L.L.Bean Baffle-Box Stitch Down Comforter, Warm
Sleeping under this comforter was a delight: It felt lofty and warm, but breathable and includes L.L.Bean’s excellent satisfaction guarantee.
More Wirecutter comforter picksRight Arrow IconRight Arrow Icon
Control the Light
The ability to control light – both natural and artificial – is important.
If you’re sensitive to sunlight when sleeping, you want to have the ability to eliminate it completely. The best way to do so is with a blackout roller shade or a Roman shade with a blackout lining.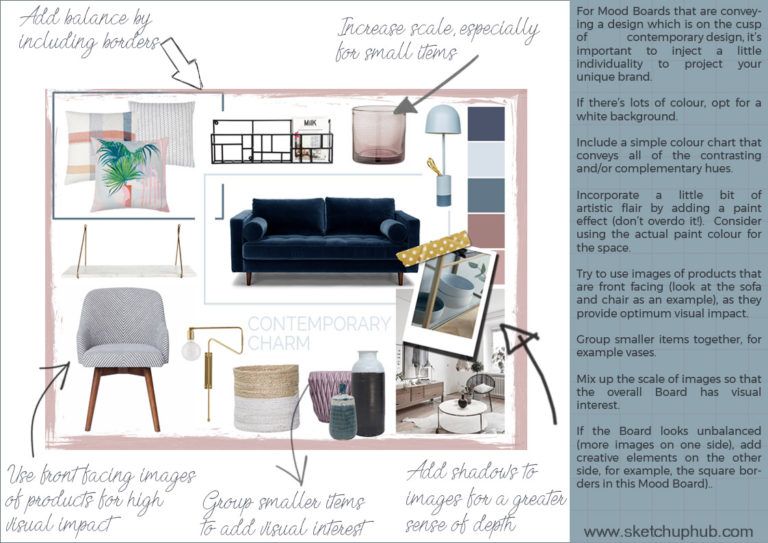 However, sunlight will still usually leak into the room at the edges of the shade. To block it, add curtains with a blackout lining.
At night, it’s helpful to have layers of lighting. An overhead light allows you to illuminate the whole room quickly, but may not do much to set the right mood.
A pair of lamps on bedside tables usually offers a more appealing glow. Many designers use table lamps as well as wall-mounted lamps, either hardwired or plugged into an outlet, on either side of the bed. The table lamps provide an ambient glow, and the wall-mounted lamps provide directional light for reading. “It’s nice to have both, but they shouldn’t compete for attention,” said Mr. Ford. “You want a super simple table lamp and a really decorative sconce, or vice versa.”
In terms of control, “Every light should be on a dimmer,” said Mr. Olsen – good advice for every room of the home.
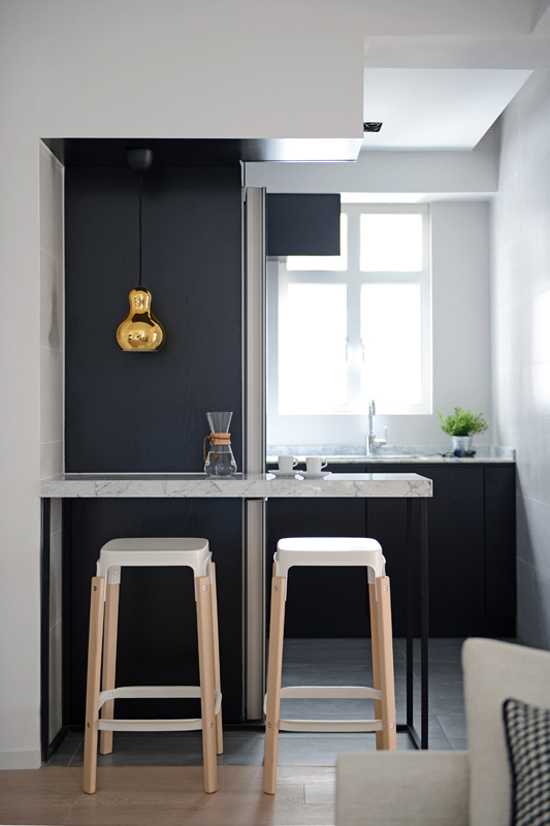
Kitchens and Bathrooms
Customizing these spaces can add personality without requiring a gut renovation.
Evaluate Cabinets and Counters
Changing kitchen counters is no small undertaking, but switching from an inexpensive material, like laminate, to a luxurious one, like marble, granite or quartzite, can significantly change the overall appearance of a kitchen or bathroom.
The kitchen backsplash is another area ripe with opportunity. Even if you leave the existing counters in place, you can add or replace an existing backsplash using a favorite tile made from ceramic, glass, metal or cement.
If kitchen cabinets and the bathroom vanity cabinet are simple and in good shape, it’s often possible to paint them a new color for a different look. If the cabinet doors have a design that looks dated, you can sometimes keep the existing cabinets carcasses, and replace the doors only.
In the case of a cheap bathroom vanity, it’s often economical to replace the whole thing. Many companies offer prefabricated vanities, complete with matching tops and sinks.
Focus on Things You Touch
Simply replacing cabinet pulls with new hardware can significantly change the look of a kitchen or bathroom. The kitchen and bathroom faucets are also no place to skimp – you touch them every day, so choose models that not only look good, but also have handles that feel reassuring when you turn them, and heads that offer the functionality you desire.
In a bathroom, this line of thinking extends to accessories as well – quality towel bars, robe hooks and toilet roll holders can all give the room an upgraded appearance at minimal cost.
Refresh With Textiles
There’s no point in having nice towel bars if they’re holding frayed or mismatched towels. Recycle your old ones and buy new towels and washcloths in a single solid color (you deserve it). For a decorative accent, add patterned hand towels.
If there’s a mildewed shower curtain around the tub, replace it with one made from a pleasing material like linen, or a glass panel.
If the bathroom or kitchen floor leaves something to be desired, but you don’t want to go to the trouble or expense of tearing it out, you can cover it with a large woven vinyl rug or mat from a company like Chilewich or Bolon.
Wirecutter productThe Best Bath Towel
Frontgate Resort Cotton Bath Towel
This is the softest towel we tested—it feels like a plush towel from a luxury hotel and comes in a wider variety of sumptuous colors than any other we found.
More Wirecutter towel picksRight Arrow IconRight Arrow Icon
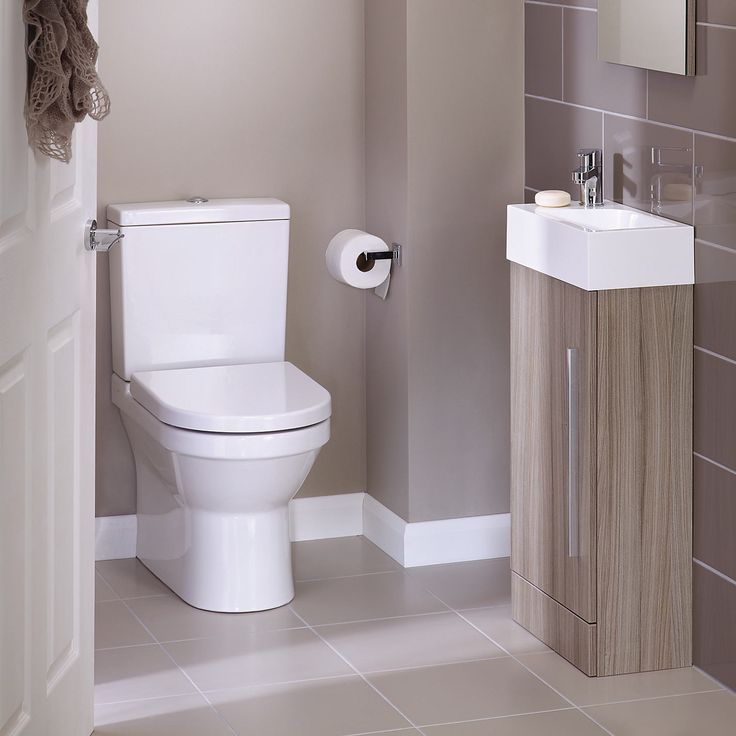
Don't Forget the Powder Room
Because it’s so small and used infrequently, a powder room is the perfect place to let your inner decorator run wild with bold colors and wall coverings.
“If you entertain, it’s so much fun to make it an unexpected, cool element,” that will surprise guests, said Mr. Olsen, who has designed powder rooms with wild wallpaper and mirrored wall panels.
That sentiment was echoed by Ms. Maxwell Foster: “Find a wall treatment you love, and just go for it.”
Finally, remember that decorating should be fun. By starting out with a plan, and following the same steps used by the pros, you’ll make the experience significantly less stressful that going at it in a haphazard fashion. And, hopefully, you’ll end up with the ultimate prize: the home of your dreams.
How to make a design project yourself: step-by-step instructions - INMYROOM
Tips
Can renovation become not a disaster, like many others, but a calm and even pleasant stage of life? Yes! Professionals assure that the main thing is to plan everything correctly and not deviate from the planned one step
Not only a person with a professional education in the field of architecture and design, but also an amateur can create a competent interior.
It is enough to be able to draw and read blueprints, perform work consistently, moving from the general to the particular, says Ekaterina Salamander from the General Square bureau, and everything will work out.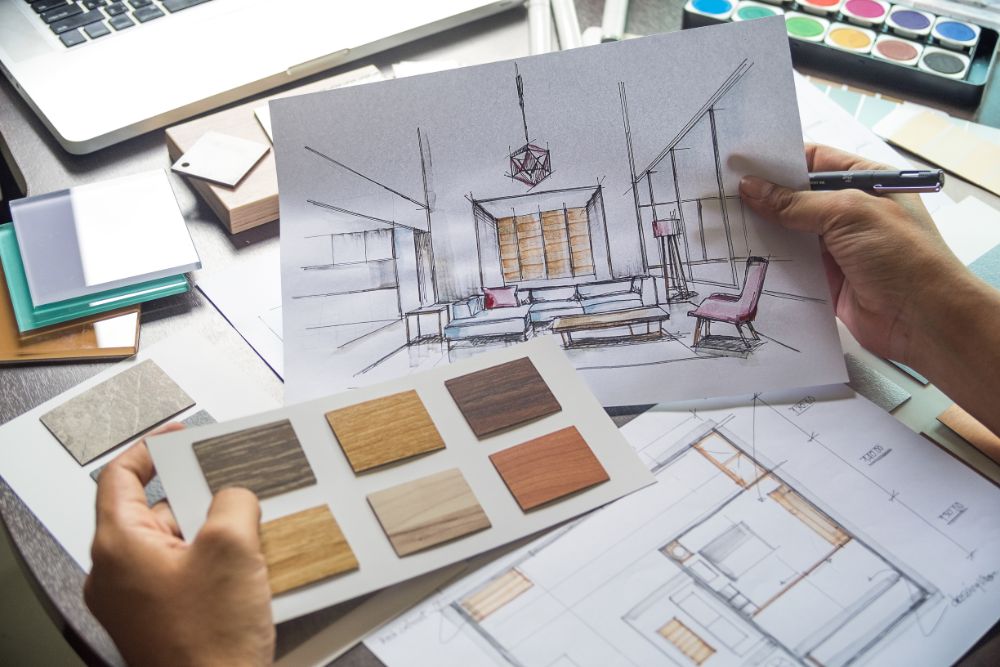 Remember the sequence of actions! nine0003
Ekaterina Salamandra
Designer
Co-founder of the Obshchaya Ploshchad bureau, which designs individual houses and creates private interiors
Let's note right away that the first two stages require maximum attention from a novice designer. Even a small mistake can eventually turn into a headache during the repair process.
Measurement
Any fantasy may face the impossibility of fitting it into the existing dimensions of the apartment. Therefore, competent measurement of premises is the basis of the future project. nine0003
Draw or print out the layout of your apartment and indicate on it all the actual dimensions of your premises. Mark communications, openings, heights on the plan. Use the compass to point to the cardinal directions.
Plan on a scale
Now you should draw the layout of the apartment on a scale, for example, 1:50. This can be done the old fashioned way, with rulers and pencils.
Or you can make a plan in special programs on a computer, for example, in the excellent Remplanner application, where you can draw not just a layout for free, but create a full-fledged design project for the entire apartment. nine0003
Remplanner Online Planner
INMYROOM tip: is absolutely right! Unlike all programs and solutions that exist today, Remplanner is the only repair planner in Russia that completely replaces a technical project. All information is divided into 16 sheets in the project - any, even inexperienced team, will be able to make repairs according to these drawings.
The functionality of Remplanner is impressive: an unlimited number of options for redevelopment and furniture placement, 3D visualization, calculation of the cost of materials and even the calculation of the estimate and scope of work for builders! Plus, free professional help at all stages. nine0003
And by the way, Remplanner has been tested and approved by real engineers and designers - try it yourself!
Remplanner Online Planner
Terms of Reference
The Terms of Reference is your blueprint for how to proceed with the project.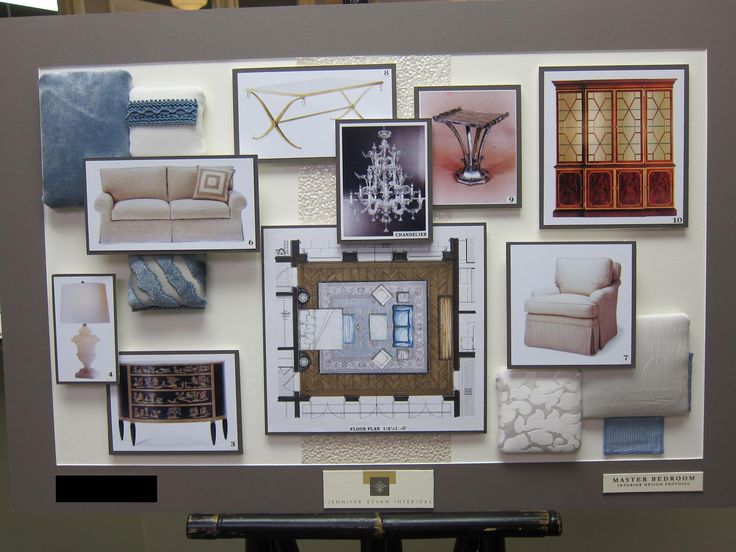 In it, you indicate your wishes for the style, composition and content of the premises and other information that will help make the interior as logical as possible and meet all your requirements.
In addition to the text part, select photos of interiors that you would like to be inspired in the process of work. This can be done even before the measurements of the room. nine0003
Design project of the Obshaya Ploshchad bureau
Planning solution
It's time to take the plan of the apartment and try to place on it your wishes described in the terms of reference. If redevelopment is required, learn how to do it legally first. In the resulting premises, designate functional areas and arrange the necessary furniture.
For an ergonomic layout, we advise you to study the "Bible of the apartment designer" - the work of Peter Neufert and Ludwig Neff "Design and construction". nine0003
Three-dimensional model
It's time to turn the flat layout of the apartment into a three-dimensional model and take a thoughtful walk in it! I am doing such a model in SketchUp.
As a result, there is an understanding of how “flat” ideas will be comfortable in life, an understanding of the competent use of various types of finishing materials comes, furniture details are worked out and much more. On the resulting "frame" you will then, without hesitation, be able to pick up finishing materials and everything you need. nine0003
Design project of Obshchaya Ploshad bureau
Stylistic solution
Before starting this stage, you have a clear functional and ergonomic understanding of your future interior. Now it's time to reread the terms of reference, review the pictures of inspiring interiors, and start designing in the narrow sense of the word.
When choosing finishing materials, furniture, lighting items, decor elements, do not forget about the parameters of your apartment. Low ceilings, lack of natural light, and other factors can prevent your ideas from being beautifully realized. By the way, the selected materials will then be easy to translate into an approximate budget for their purchase.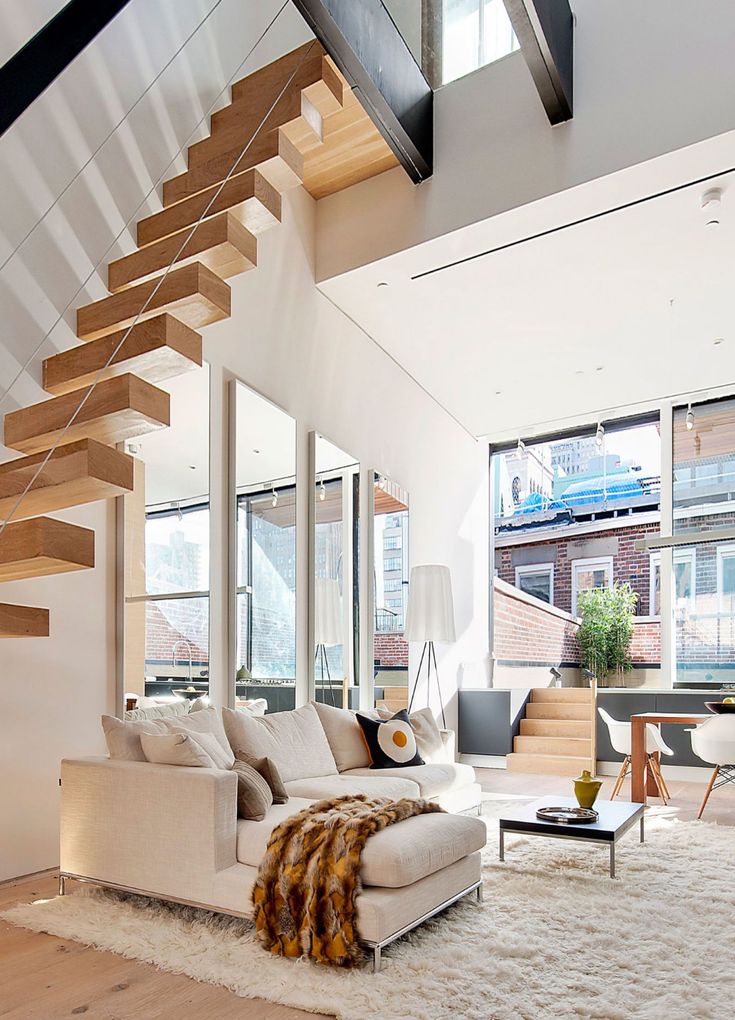 nine0003
Design project of Obshchaya Ploshad bureau
Drawings
It's time to translate your ideas into a competent work plan for their implementation! On copies of the apartment layout, you need to create drawings for dismantling, installation, placement of finishing materials, designate the points of lighting fixtures, arrange sockets and switches, and draw the layout of tiles in bathrooms.
You must create a clear work plan that will allow you to calmly transfer the repair process and be satisfied with its result. Yes, with working drawings, repairs have their end! nine0003
On the cover: Korneev Design Workshop design project
How to make a renovation design project yourself
Two years ago, my husband and I bought an apartment of 56 m² in a new building.
Olga Bystrova
made a design project
Author profile
We had no repair experience, and the phrase “epoxy grout” caused horror and awe. The design project of an apartment by professionals cost 3,000 R per square meter, and it took three months to wait for it, continuing to pay for a rented apartment all this time. nine0003
Armed with Google, Excel and our own head, we made a design project on our own. I will share my experience.
How to make a design project for an apartment yourself
- Take measurements
- Understand what exactly should be in an apartment
- Decide on the style of repair
- Make drawings
- Make an estimate
Yes, we did the design project ourselves, but this does not mean that we did it better than a designer would. After that, we did not become room designers. We do not recommend that everyone urgently repeat our experience, but simply talk about it. nine0003 Our apartment before renovation AND after
Why do we need a design project
A design project is a set of drawings, collages and visualizations that a designer prepares for a particular apartment.
Usually the project is issued to the customer in the form of an album. It not only shows what the room will look like after the repair, but also provides technical calculations. For example, how many bathroom tiles, paint or wallpaper will be needed for walls, where electrical wiring will be laid, where sockets will be brought out, and so on. The owner of the apartment sees the future result, and the builders understand what to do. nine0003
A professional designer creates drawings in special programs on a computer. We drew everything by hand - it took a ruler, graph paper, colored pencils, a gel pen and a tape measure. For notes and calculations, a separate document was created in Google Spreadsheets. In general, all information related to the repair was entered into it, including drawings and pictures from the Internet with interiors that we liked. I also advise you to download all the drawings to your phone so that they are always at hand.
Our table with notes and calculations
In addition, my husband and I created a separate chat in WhatsApp. So I didn’t have to constantly look for dialogues about construction among other personal messages.
Step 1
Take measurementsThe first thing a design project starts with is measuring the apartment. All angles, length and height of walls, openings and window sills are measured. In the cadastral plan, an error of half a centimeter does not play a role, but in a design project such an error can lead to the fact that a desk or a custom-made countertop does not fit into the planned place. nine0003
5000 Р
average cost of measuring an apartment in Moscow
Of course, everything can be measured independently, armed with a level and a tape measure, but I advise you to call a professional measurer at this stage. It is easy to make a mistake out of habit, and these mistakes are then fraught with unnecessary expenses and alterations.
The services of a specialist cost 5000 R, he was recommended to us by a friend.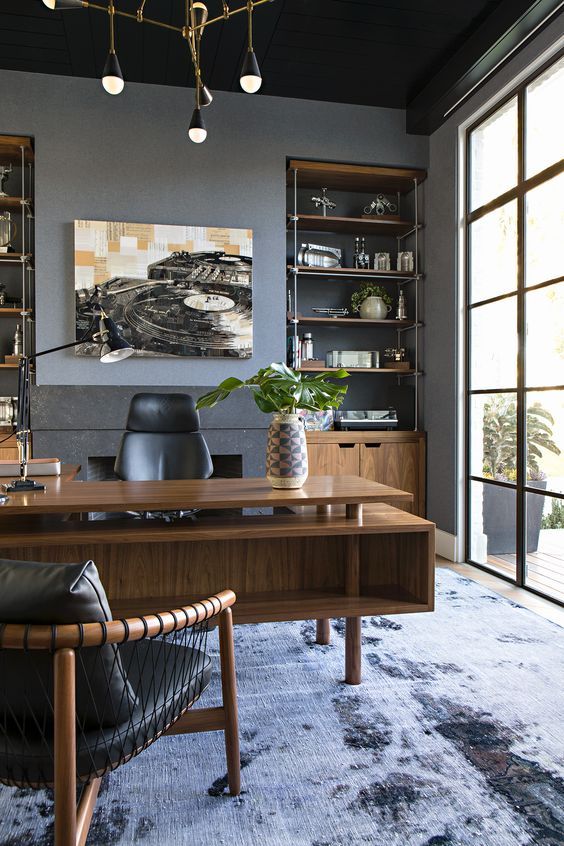 The measurer arrived, measured the apartment in half an hour and gave the results in a week. nine0003 The drawing that the measurer gave us
Step 2
Understand what must be in the apartmentAfter a long life in rented apartments, we knew for sure that we wanted to leave small closets, a bar in the kitchen, a glass shower screen and a hard folding sofa in the past. This helped us decide what must be in our apartment: a large bed with a mattress, a bath instead of a shower, plenty of storage space and a full dining table. We had to place all this on 56 m². nine0003
Having decided on the obligatory things in the apartment, we sat down at the computer and rewrote absolutely all our property, from furniture and appliances to bed linen and a cat. The list was made up like this: my husband opened cupboards and chests of drawers and listed all the things, and I filled out a document in Google Spreadsheets. The inventory took a whole evening.
/remont-brigada/
How to repair an apartment
I advise you not just to list all the things in a row, but to break things down into categories: bathroom, hallway, kitchen, living room, bedroom, office.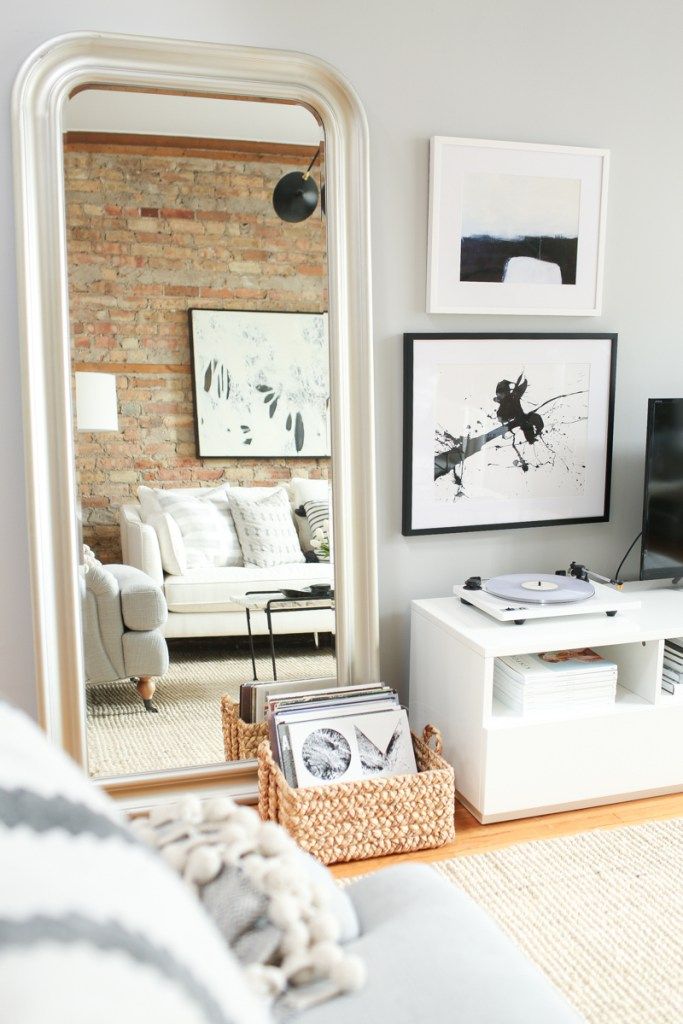 It doesn’t matter what area the apartment is and how many rooms there are. The main thing is to systematize everything. nine0003 For the inventory of property, we have added a separate tab "Storage" in the main table
Step 3
Decide on the style of repairIf you do not fully understand what you want, I advise you to focus on ready-made interiors. I collected photos of all the interiors that I liked and sorted them into the "Bathroom", "Living Room", "Kitchen" folders and so on. I was looking for ideas in several places at once.
Pinterest - an endless gallery of images for your request. I advise you to watch even those interior projects that seem too expensive to you. There you can peep successful solutions for storage, layout and simple design. So I found a great idea for the bathroom - to make three hanging baskets for different types of laundry. nine0003
I found the idea of such a sofa on the balcony in Pinterest.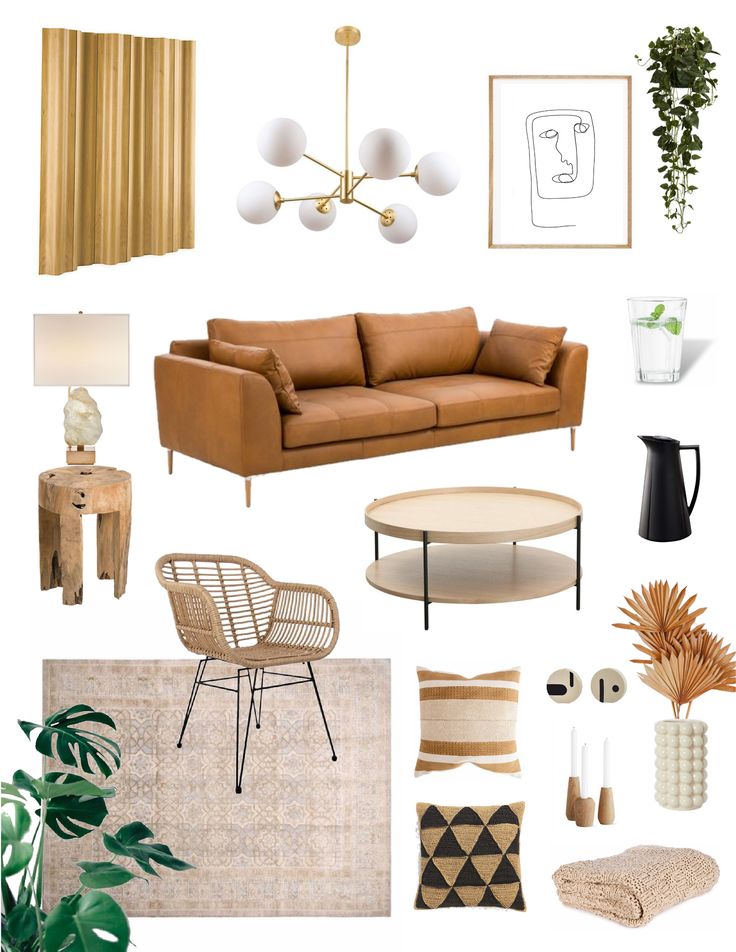 Photo: Pinterest Photo: Pinterest | Here is how I implemented it |
| I also saw this idea for storing linen on Pinterest. Photo: Pinterest | Here's how I implemented it in our repair |
Instagram is another resource for inspiration. I searched for blogs using the hashtags "layout", "renovation", "design project". The authors post repair plans, visualizations and drawings, and also give advice. You can find good solutions or remake something for yourself. In one design project, I saw a chandelier, which I then found in an online store and bought for our apartment.
I read these blogs:
@pavelalekseevdesign,
@inc_design_pro,
@olesya_shlyakhtina,
@nadyazotova,
@stalinka_v_izmailovo
On Instagram, you can find not only pictures, but also a lot of other useful information related to repairs: users describe their mistakes and findings, share suppliers, stores, and team contacts. Once I read a story about how a man bought a tile, but there was not enough of it. He had to urgently buy more tiles in another place - and it turned out to be of a different shade. I remember the incident, so we bought tiles with a margin for our apartment in advance.
The Instagram social network belongs to Meta, an organization whose activities are recognized as extremist and banned in the territory of the Russian Federation
Large furniture centers assemble finished interiors from exhibition samples. My husband and I went to Ikea, Grand and Rumer. I advise you to take pictures not only of exhibition samples, but also price tags, as well as the dimensions of the furniture on them. Also take business cards: when it's time to buy furniture, you won't have to go to the store again.
Choose stores that are close to each other. So you can visit several points in one day. Be prepared to walk a lot
Sites with ready-made interiors are not only a lot of photos, but also articles with useful tips for those who make repairs. I actively used the House and Inmiroom websites through their mobile applications. It is convenient that these resources allow you to choose a certain style, and the system will select a suitable collection of photos and articles about such interiors. Here are my selections in the House mobile application with the interiors I liked:
Step 4
Make drawings nine0020The main part of the design project is drawings made on the basis of measurements. I advise you to draw a plan of the apartment on graph paper and make several dozen copies from it. Then you won't have to draw it again every time.
Drawings in our design project
- Planning solution
- Collages
- Scheme of demolition and erection of partitions
- Scheme of binding lighting and switches
- Scheme of binding sockets and 120 90 conclusions0112
- Floor and wall finishing map
- Estimate
/remont_prodolzhenie/
Apartment renovation with a team of foreigners
Drawing
Planning solution First of all, I advise you to decide whether you will do redevelopment - to separate the bathroom, combine the kitchen and living room, fence off the dressing room in the bedroom.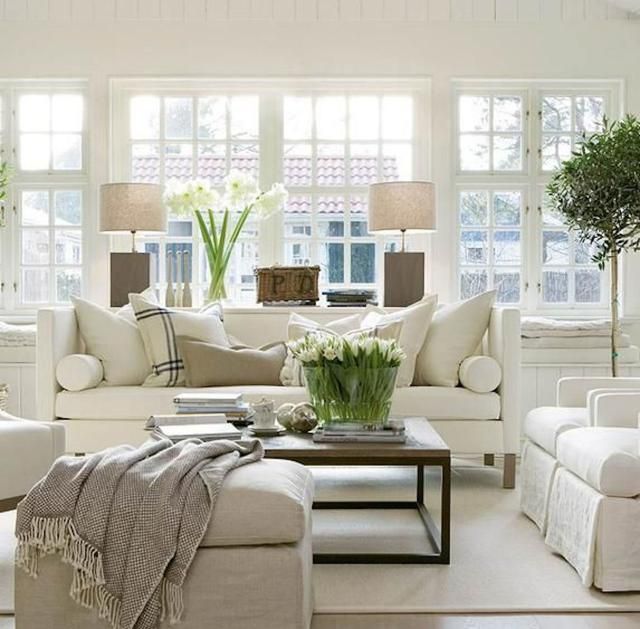 You have to understand that redevelopment needs to be legalized, and it's not so easy. About redevelopment in T-Zh they wrote more than once, so I will not delve into the topic of its coordination. nine0003
When it becomes clear how the rooms in the apartment will look like, you need to decide where the furniture will be placed. We acted simply: we found the standard sizes of furniture on the Internet - a table, chairs, a bed, a sofa - and transferred them to graph paper on the same scale as the measurement of the apartment. Then they cut out the "furniture" and simply moved it according to the plan on graph paper. There are special programs that allow you to do all this on a computer - for example, free Sweet Home 3D or Magicplan, but you need to understand them. It was more convenient for us to arrange paper furniture. nine0003
After the renovation, the total area of the premises will decrease slightly - for example, plaster can add up to five centimeters to the walls. And there will also be curtains, skirting boards, cornices - you also need to leave a place for them. It is necessary to plan in advance in which direction the doors will open: they should not block the switches.
/replan/
How to legalize redevelopment in a new building
We photographed the final layout and uploaded the image to our spreadsheet, creating a separate "Planning" sheet. nine0003 This is how our planning work looked like. On the drawn plan of the apartment, we arranged paper furniture
Drawing
collagesAfter planning, we began to choose furniture and interior items. The main thing to be determined is the exact dimensions, colors and texture of the surfaces. To understand how different things would fit together, we made collages. They helped to collect the picture in my head and transfer it to paper. After that, it became easier to build on the actual dimensions of furniture and prices for it. nine0003
The easiest way to do this, of course, is in Photoshop, but Word was enough for us. I simply copied images of furniture on a white background from furniture store websites, cropped them and moved them around the page. In the same way, it is convenient to try on and choose floor coverings, wall colors, wallpapers and lamps.
A special service on the Ikea website helped us to plan wardrobes for the dressing room and kitchen. But keep in mind that IKEA furniture has non-standard sizes. nine0003
I found a lot of interesting interior items from sellers on Instagram. For example, beautiful and inexpensive lamps. True, I do not recommend buying through Instagram: the markup is too high. I decided to see if there are the same lamps on Aliexpress, and I found them four times cheaper.
At this stage, we had to go shopping a lot. Before buying something over the Internet, I wanted to see things live. In stores, I asked for samples of materials so that at home I could see how shades and colors combined. By the end of the renovation, we had a whole collection of samples - tiles, wallpaper, paint, furniture wood and textiles.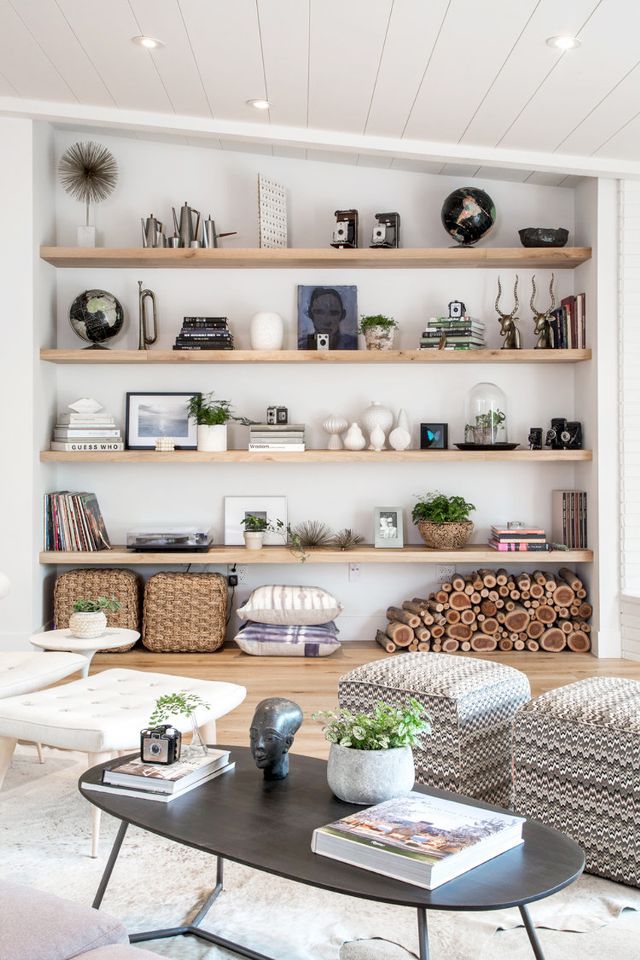 Some stores provide samples of goods for rent. It's not free, but if you're in doubt about whether the sconce will match the wallpaper, it's better to pay, bring it home and check it out than buy it and then return it. nine0003
If you can't find some of the furniture, you can order it at the carpentry workshop. The prices will be more expensive than Ikea, but exactly your size and color. We needed a tabletop of certain dimensions - we had to order it in the workshop. I also searched for Stolyarov on Instagram. There are many such blogs, and it is difficult to choose among them. I asked the masters for customer contacts and followed their recommendations.
/fake-review/
How to recognize fake reviews on the Internet
Having decided on the interior and furniture, we drew the final planning solution, where all the furniture was placed in its place. The picture was photographed and loaded into the main table. nine0003 This is the final layout we got After the renovation, we have accumulated a whole collection of samples of fabrics and other materials in our house
Drawing
Scheme of demolition and erection of partitions If you decide to do redevelopment, then the first thing repair work will begin with is the demolition and construction of partitions.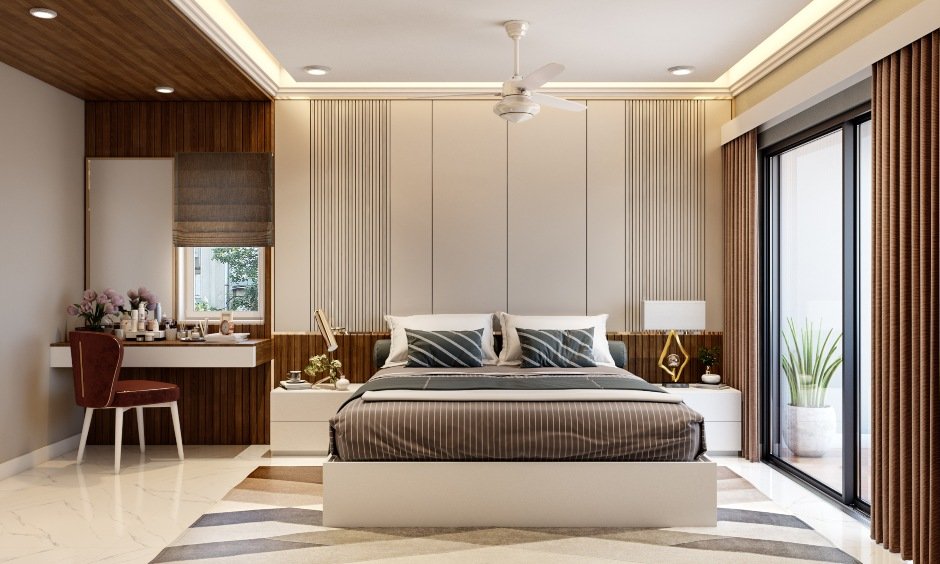 Having decided on the layout, we transferred the measurements to graph paper and drew the boundaries of the partitions that were supposed to appear in the future.
I recommend that you take measurements of the apartment again during the renovation process, when the new walls have already appeared. When building new walls or leveling existing ones, the dimensions of the rooms may change slightly. A couple of centimeters in one corner, a couple in another - as a result, the sofa will not fit into the room. nine0003
After building the new walls, we had to “move the furniture” on the bedroom plan, otherwise the open door would always hit the bed.
Our demolition and partition planDrawing
Lighting and switch binding schemeHaving decided on the walls and arrangement of furniture, we moved on to electrical wiring. This is the most difficult stage: you need to understand the lighting standards, lumens, lux and other subtleties.
How to properly organize lighting in an apartment, an article on the Cyan website
What are the standards for illumination of living space, analysis on the site "Electrician Himself"
For calculations, you need to know several parameters:
- We measured the area of the room and the height of the ceilings ourselves.
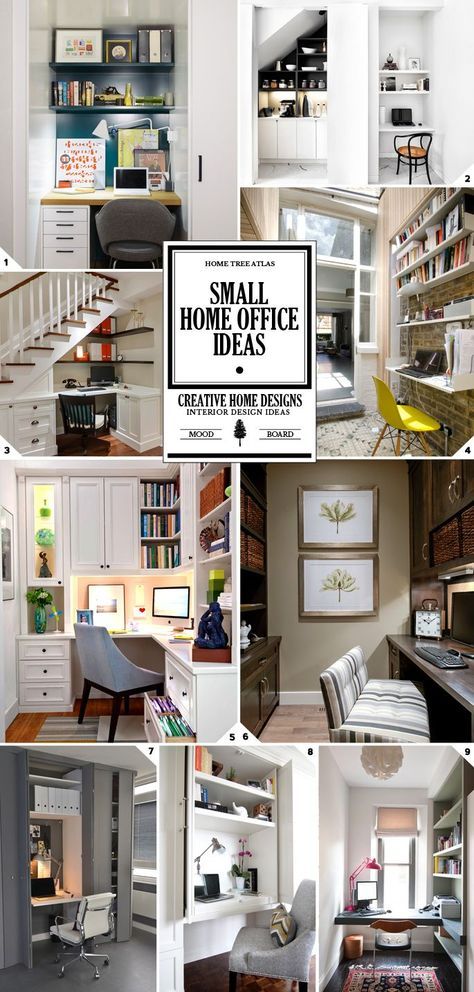
- The luminous flux of the lamps was checked on the package.
- Lighting standards and correction factors for ceiling heights found on the Internet.
The illumination rate must be multiplied by the area of the room and the correction factor. We divided the resulting number by the luminous flux of our light bulbs. The final value is the number of lamps that are needed for a particular room. nine0003
The more light sources, the more even it will be. If you are afraid of getting confused in the calculations, you can contact the store where they sell lamps, they will help you deal with the standards.
It is necessary to decide in advance what kind of main light will be in the apartment - built-in or overhead. It depends on what the ceiling will be - suspended, stretched or simply painted. Recessed lights are less visible: the main part of the lamp is hidden between the ceiling and ceiling. But you can make built-in light only if you have a stretch or false ceiling.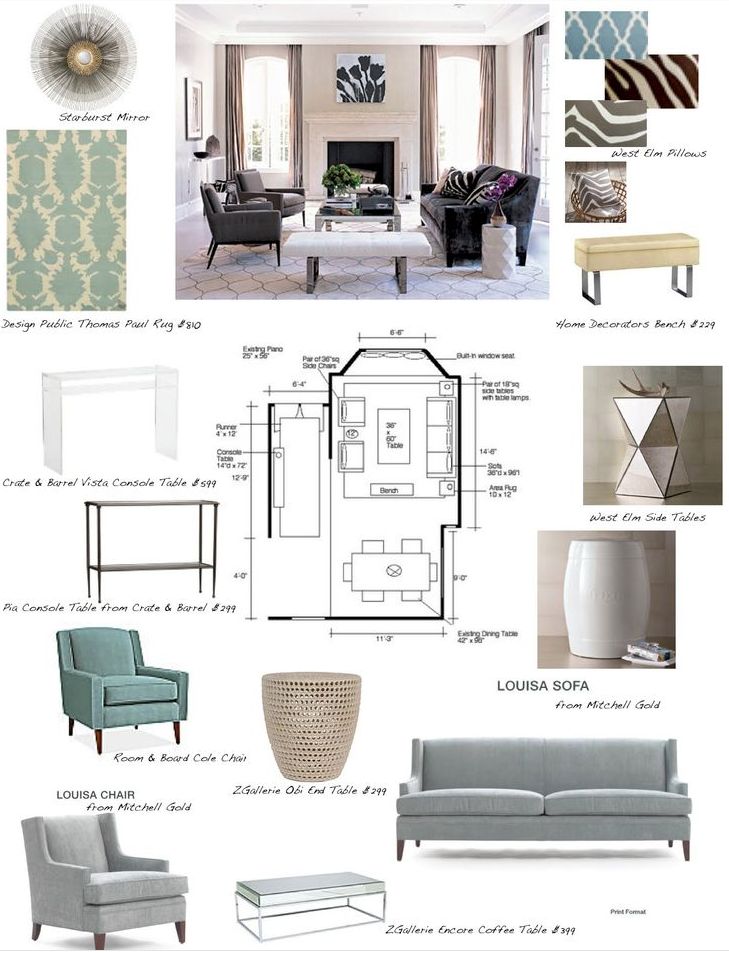 Overhead lights are simply attached to the ceiling and look more bulky, but for them you don’t have to sacrifice the height of the ceiling. nine0003
In addition to ordinary chandeliers and built-in light, we made the conclusion of electrical wiring for wall lamps and light pendants. To do this, we had to ditch the walls - this also had to be taken into account in the scheme.
We entered all light sources in the table, dividing them into zones. Light suspensions look like this| In the kitchen we have an overhead light | In the bathroom - built into the false ceiling |
Next, you need to think about how all the lights will turn on and off. Switches are single and double, conventional and through. Pass-through switches allow you to control one lamp from several places at once: for example, you can turn on the light in the corridor in the room, and turn it off already in the kitchen.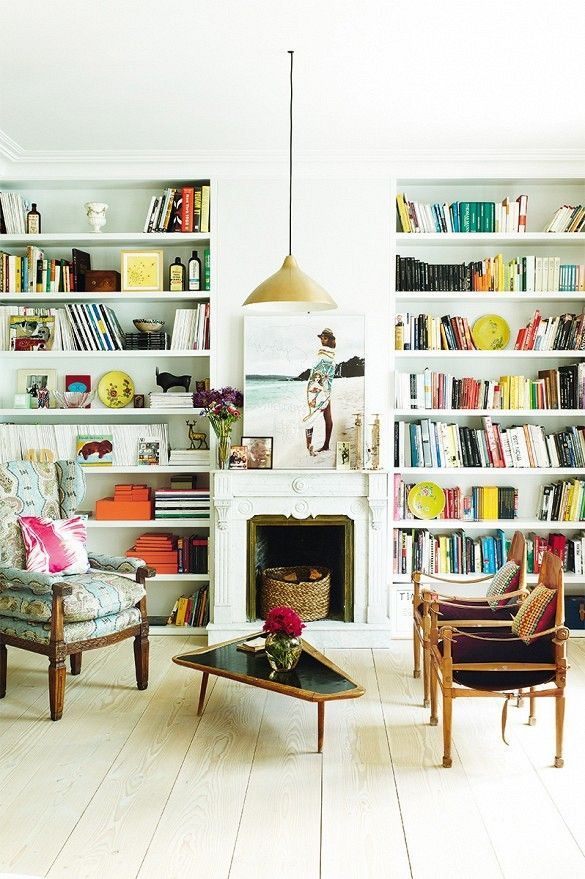
Another ingenious invention of electricians is a master switch that turns off all the lights in the apartment at once. These are often installed in hotels. We put one master switch in the bedroom so as not to check before going to bed if the lights are off everywhere. The second one was installed at the front door so as not to run around the apartment, turning off the lights in all rooms before leaving. If you like subdued light, you can put a dimmer - a device that allows you to control the brightness of the light. nine0003
If you plan to have underfloor heating in your apartment, then you also need to provide a switch for it.
/electricity/
How not to save on electricity
All distances from the floor, corners and other landmarks to the switches must be marked on the diagram so that the builders then understand where everything is located.
We did not indicate the height of the switches on our diagram, we had to explain everything to the workers in words laterDrawing
Scheme of binding sockets and conclusions nine0020 For this scheme, first of all, you need to make a complete list of sockets for each room and indicate which appliances they will be used for. The main thing that I understood is that there are no extra outlets. It is better to make at least one spare socket in each room, so that later it does not turn out that there is nowhere to plug the hair dryer in the bathroom while the washer is running, and there are not enough sockets in the bedroom for all charging devices.
Sockets are needed for all built-in appliances - microwave, oven, refrigerator in the kitchen, speakers, set-top box, Apple TV in the living room, and so on. nine0003 Before making the diagram, we made a list of all sockets in the table
Also, on the diagram, you need to indicate the conclusions for the Internet, TV cable and landline phone, if you have one.
It so happened that we were drawing electrical wiring at three in the morning. We really wanted to sleep, but everything had to be handed over to the foreman urgently, by six in the morning. While they were drawing, they argued over every little thing and almost quarreled, and they also made annoying mistakes. Ideally, such painstaking work should, of course, be done with a clear head and without haste. nine0003 Husband draws a wiring diagram for sockets at 3 a.m. Final diagram of sockets and pins
Drawing
Wall developmentImagine that the renovation is finished and you are standing in front of a finished wall in your bedroom or kitchen. This picture from the head must be transferred to paper. The image of all four walls in the room is the scan. Such a drawing must be done for each room.
When you make a sweep for the kitchen and bathroom, in addition to the material of the walls, you need to remember how the communications are located - water and sewage. The unfolding of the toilet walls helps to understand where the toilet will stand, at what height the sink will be installed. In the bathroom, you must not forget about the height of the shower. It is best to focus on the growth of family members. nine0003
An important point is the layout of the tile, how it will be assembled into a beautiful pattern. The tile must fit together correctly, especially if it is not monophonic, but with a pattern or ornament.
| The bathroom and kitchen have the same tiles. In the bathroom - diamond layout | And in the kitchen - zigzag |
A sweep helps to imagine the layout of the tiles in advance and calculate the required amount of material. You need to calculate with a margin, because the tile can break. nine0003
If it’s hard to make the layout yourself, you can go to a tile shop — sellers have special programs for this. But most often this is a paid service.
As a result, the bathroom looks like this We included cabinets, shelves, a tile backsplash, built-in appliances and lamps in the wall scan in the kitchen. Before ordering the kitchen in the salon, we rewrote all the items that will be stored in the cabinets: dishes, cutlery, food supplies, spices, and so on. It became clear how many cabinets and drawers we need. nine0003
When unfolding the walls in the kitchen, one should not forget about sockets for appliances, exhaust hood and communications.
This is how our kitchen project looked like after the first visit to the salon This is how the kitchen looks like after renovationDrawing
Floor and wall finishing mapFloor and wall finishing map - the same scan, only specific materials and their quantity are already prescribed here. We dealt with it the fastest, because we thought of everything even when we were making collages. The most difficult thing was to draw a floor plan: in some places the laminate was joined to the tile, and it was necessary to indicate exactly where and what kind of layout the tile should have in this place. nine0003
We didn't make a plan for finishing the walls, as we planned to paint them almost everywhere. I had to suffer with the choice of shades of paint. I advise you to make sure to paint - check the color on a real surface. To do this, you can order samplers with several shades in the store, bring them to the construction site and ask the workers to apply them on the wall next to each other. This makes it easier to compare colors and understand what really fits.
Step 5
estimateWhen the drawings were finished, we created the "General Estimate" tab in the table and began to count the costs. Information about all the works and materials that appeared at the previous stages of creating a design project was also transferred here. I had to fill in this tab very scrupulously and carefully: there was too much to take into account.
To make it easier, we divided all expenses into sections: bathroom, kitchen-living room, bedroom, balcony, hallway, dressing room. In each, standard subsections were created: the cost of finishing materials, appliances, plumbing, furniture, electrics, and light. In addition, there was another large general section, where we wrote down the costs of rough finishing and the wages of builders. It also took into account the cost of consumables - garbage bags, as well as plumbing services from the management company, garbage disposal, and the like. Each material was counted with a margin of 10-15%, and the cost of delivery was not forgotten. nine0003 This is how our total estimate looked like
As a result, we got a huge table with almost 200 lines. It almost completely reflected all our repair costs, including the purchase of small things like light bulbs and boxes.
Four months later, when the renovation was completed, we checked the planned budget with the actual one. There was an overrun of about 20%, mainly due to the fact that new ideas appeared in the process that were not taken into account in the estimate. After moving to a new apartment, we never regretted that we undertook to do the design project on our own, and we believe that we have got the perfect home for our family. nine0003
What I understood during the repair process
Everything must be done strictly according to the drawings.