How to clean the juicer
How to Clean a Juicer
By
Mary Marlowe Leverette
Mary Marlowe Leverette
Mary Marlowe Leverette is one of the industry's most highly-regarded housekeeping and fabric care experts, sharing her knowledge on efficient housekeeping, laundry, and textile conservation. She is also a Master Gardener with over 40 years' experience; writing for over 20 years.
Learn more about The Spruce's Editorial Process
Updated on 12/09/22
Reviewed by
Rhea Mehta
Reviewed by Rhea Mehta
Rhea Mehta, PhD, is an award-winning healthcare innovator and toxicologist who for the past decade has worked to empower people to lead healthier lives, starting in their homes. Rhea holds a PhD in Toxicology, with over 15 scientific publications, and a certificate in integrative health coaching.
Learn more about The Spruce's Review Board
Fact checked by
Emily Estep
Fact checked by Emily Estep
Emily Estep is a plant biologist and fact-checker focused on environmental sciences. She received a Bachelor of Arts in Journalism and a Master of Science in Plant Biology from Ohio University. Emily has been a proofreader and editor at a variety of online media outlets over the past decade.
Learn more about The Spruce's Editorial Process
The Spruce / Nanor Zinzalian
Project Overview
Juicing has come a long way in recent decades. While you can still squeeze citrus fruits the old-fashioned way — with your hands — the only way to extract juice from firmer fruits and vegetables like carrots, apples, and kale is with a juicer.
There are three basic types of modern juicers:
- Centrifugal Force: Fruits and vegetables are shredded by blades in a spinning container, The centrifugal force pushes the juice through a fine-mesh strainer and the pulp into a waste container. This is the fastest, loudest, and least expensive type of juicer.
- Masticating or Cold Press: Using a single spiral auger to masticate the produce, this juicer mimics the action of chewing.
 The juice is slowly extracted into one container while the pulp is extracted into another. This type of juicer is slower but extracts more juice from produce, especially leafy greens and grasses.
 - Triturating: Used by professional juice shops, this juicer has two augers that grind the fruits and vegetables into very small particles to extract the juice. It produces the most juice, leaving behind a very dry pulp. This is also the largest and most expensive type of juicer.
No matter which type of juicer you choose, cleaning is essential. Without regular cleaning, small bits of pulp can get trapped in the components and begin to decay, leading to bacterial and mold growth. Luckily, many of the components of a juicer are dishwasher-safe for easy clean-up, and using just a few pantry items can keep your juicer clean and healthy.
How Often to Clean a Juicer
Every type of juicer should be cleaned after every use. The tiny bits of pulp can quickly harden making them much more difficult to remove later.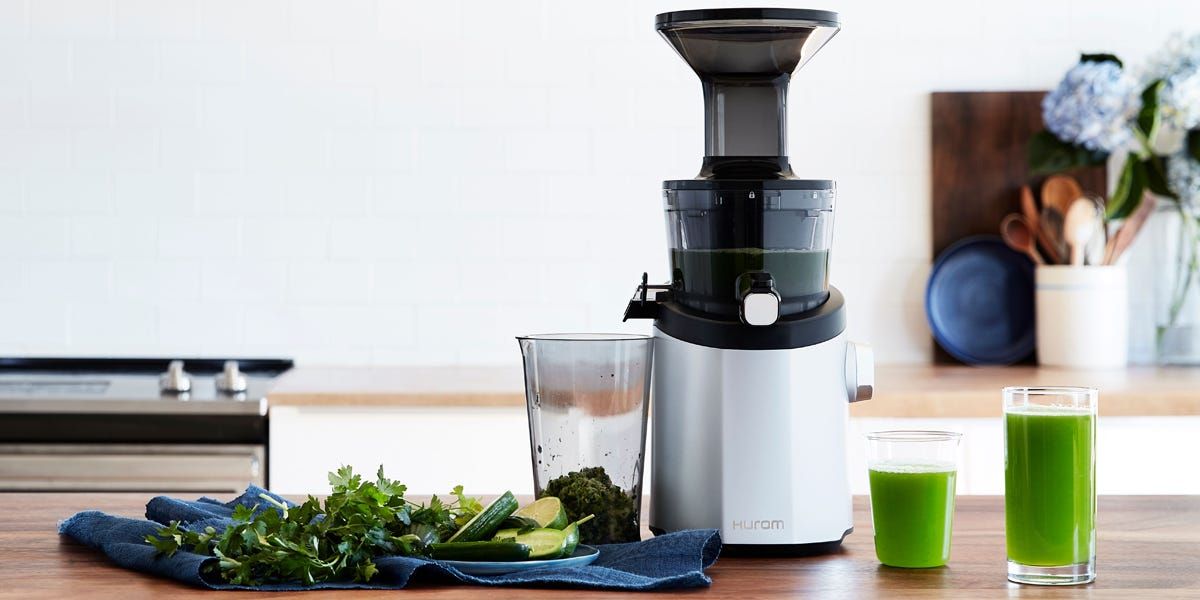 Prompt cleaning will also prevent the decay of food particles. Make a five-minute clean-up part of your daily juicing routine. Though even with daily cleaning, make sure to give the juicer a deeper cleaning weekly.
Warning
Always take the time to read the manufacturer's guidelines on how to clean your particular juicer model to prevent damage to components. While most juicers have dishwasher-safe parts, if hand-washing is recommended by the manufacturer, using the dishwasher for cleaning can void the warranty. If you have tossed or misplaced the user guide, you can usually find it online.
Equipment / Tools
- 1 Non-abrasive sponge
- 1 Soft-bristled bottle brush
- 1 Toothbrush
- 1 Spatula
- 1 Microfiber cloth
- 1 Dishwasher
Materials
- 1 Dishwashing liquid
- 1 Dishwasher detergent
- 1 Baking soda
- 1 Distilled white vinegar
The Spruce / Nanor Zinzalian
-
Power Down
Before you begin the cleaning process, turn off and unplug the juicer from the wall outlet.

The Spruce / Nanor Zinzalian
-
Disassemble the Juicer
Remove the juice and pulp collection containers. Disassemble the juicer to access the grinding mechanism, strainer, lid, and plunger.
The Spruce / Nanor Zinzalian
-
Empty the Pulp Container
Use a spatula to scrape out the pulp container. The pulp can be used in some recipes, composted, or placed in a trashcan.
The Spruce / Nanor Zinzalian
Tip
Line the pulp container with a plastic bag to make cleaning quicker and easier. If you plan to cook with the pulp, be sure to use a food-safe bag.
-
Wash or Rinse Components
Fill a sink with hot water and add a few drops of dishwashing liquid. Place the components in the sink and let them soak for two or three minutes. Use a non-abrasive sponge to wash the plastic containers. Use a soft-bristled bottle brush or toothbrush to clean the strainer and around the grinding components.
 Rinse the clean pieces well with hot water and allow to air-dry or dry with a microfiber cloth to help prevent water spots.
 Even if you plan to place the parts in the dishwasher, give them a quick rinse to flush out the pulp particles. This is particularly important for the fine mesh of the strainer.
The Spruce / Nanor Zinzalian
-
Clean the Juicer Base
Dampen a non-abrasive sponge with water and wipe down the base of the juicer. Never submerge the base that contains the motors in water! Dry with a microfiber towel.
The Spruce / Nanor Zinzalian
-
Reassemble the Juicer
Once every component is clean and dry, reassemble the juicer and you're ready for the next use.
The Spruce / Nanor Zinzalian
Weekly Deep Cleaning
Once a week, or if you have allowed food particles to harden on the components, do a deeper cleaning.
-
Remove Dried-on Particles
If pulp has been allowed to dry and harden in the juicer components, fill a sink with hot water and a few drops of dishwashing liquid, add the components and allow them to soak for 15 minutes.

Dip a toothbrush or bottle brush in dry baking soda and gently scrub the components. The baking soda will act as a gentle abrasive. Rinse the components often and continue scrubbing until they are clean.
The Spruce / Nanor Zinzalian
-
Remove Water Spots and Streaks
If the containers have streaks and water spots, fill them with distilled white vinegar and allow them to soak for 15 minutes. Pour out the vinegar and wipe them down with a non-abrasive sponge. Rinse well and dry with a microfiber cloth.
The Spruce / Nanor Zinzalian
How to clean a juicer: 5 tips to make juicing clean and easy
(Image credit: Hurom)
Wondering how to clean a juicer? Not every juicer is the same, but there are some steps that every person should follow after making a fresh juice.
Many turn to the best juicers to extract the nutrients and delicious flavor from fruits and vegetables, but one of the most common complaints is that juicers are difficult to clean, and that kitchen cleaning jobs that are that fiddly and time-consuming can put you off using them in the first place.
Here, we tell you how to clean a juicer the easy way.
How to clean a juicer
How do you clean a juicer? Well, while every juicer is different, we've got five tips for juice-lovers to make the process easier.
1. Clean your juicer regularly
It is important to clean your juicer after each and every use. Both centrifugal and the best cold press juicers can get bits of pulp and skin stuck inside juicing chambers, and if these are not removed after every use it can result in bacterial and mold growth.
After a long-term buildup of pulp, your juicer can even stop functioning completely, so knowing how to clean your juicer after every use is the best way of keep it functioning as it should.
Of course, as long as you keep buildup at bay, it is not necessary to do a deep clean after every use. Here are our top tips for cleaning a juicer.
2. Act fast when cleaning your juicer
(Image credit: Breville)
After every use, unplug your juicer and remove all key parts. You should act fast to clean your juicer after you've finished using it. Of course, enjoy your fresh drink beforehand, but then get set to work removing pulp and buildup before it dries.
Many of the juicers we've tested come with brushes to remove fibers from the centrifugal disc, or the cold pressing mechanism. If you do not have a specific brush on-hand, a simple toothbrush will suffice. Giving these mechanisms a good scrub and then rinsing under running water should remove most of the buildup.
3. Rinse everything
Some parts of your juicer will be suitable for dishwashing, but not all of them. Even the parts that can go through the dishwasher should be hand-rinsed first. Why? Well, unless you plan on switching on the dishwasher immediately after using the juicer, it will allow the residue to dry onto the mechanisms, which makes it far easier for them to be cleaned thoroughly.
Simply rinsing these parts under running water should remove any major juice and pulp that's left, which means there is less work for your dishwasher to do.
4. Don't forget about the base
(Image credit: Future / Tim Young)
The base of your juicer cannot be submerged in water, but it still needs cleaning. This prevents any sticky residues from forming, and keeps the machine looking fresh and new.
To clean the base, take a damp (not wet) cloth and wipe it over the exterior and around the mechanisms that connect to the juicing attachments. If there are any water marks, you can scrub some baking soda in with a damp brush and them wipe completely dry.
5. Soak to remove odor and discoloration
(Image credit: Hurom)
Does your juicer have plastic parts? These can discolor easily, and take on odor from prolonged use. To tackle this, soak any water-safe plastic parts in a solution of either 10% lemon juice, 90% or water, or the same ratio of white vinegar to water.
Soak these overnight to tackle deep-rooted odor and major discoloration. If you cannot leave overnight, just a few hours should suffice.
When you're finished soaking, dry with a microfiber cloth until these parts are dry to touch.
Do I have to clean my juicer after every use?
The short answer is yes, you should clean your juicer after every use. Much like you would wash your crockery and cutlery after each use, your juicer should also follow suit. Not doing so will allow germs and dirt to harbor within and could cause illness.
How to clean a juicer with stains
Getting rid of stains on a juicer is a tricky task, but not an impossible one. Cleaning with baking soda can be an easy, eco-friendly way to get a sparkling clean juicer, even one that has stubborn to remove stains, such as turmeric.
To clean your juicer with stains, mix one part baking soda, and one part citric acid with water and allow your juicer to soak overnight. Be careful not to soak anything electrical. This will cause the motor to stop working. Use a cleaning brush to scrub off any remaining stains, we recommend this one from Amazon.
Millie Fender is Head of Reviews on the Homes and Gardens Ecommerce team. She specializes in cooking appliances, such as the best kettles, and also reviews outdoor grills and pizza ovens. Millie loves to bake, so she will take any excuse to review stand mixers and other baking essentials. When she's not putting products through their paces in our dedicated testing kitchen, Millie's reviews are conducted at home, meaning she uses these products in her own day-to-day life.
Manual: how to properly clean the juicer
Many people have a juicer at home, but not everyone provides it with proper care. Today we will tell you how to properly clean this gadget so that it serves you for a long time and does not cause much trouble.
General recommendations
Proper operation of the juicer begins with the preparation of fruits and vegetables from which you will make juice. Be sure to wash them thoroughly in cool water. The fact is that particles of the remaining dirt do not go away with the cake - they can mix with juice and end up in your glass or settle on the elements of the device and degrade its performance. nine0005
If you don't have a powerful juicer, don't torture it with tough, fibrous fruit. The fibers block the rotating disk, so you have to constantly stop work, pull out knives to clean out stuck fragments. Carefully remove small hard seeds from the fruit - they can damage the centrifuge, and fragments of seeds will float in your juice.
The most important rule is to wash the juicer after each use (even if you have prepared a small amount of drink). To do this, it must be disassembled into its component parts. Getting to some elements can be difficult, so catch the advice for the future: if you are just going to buy a juicer, choose a model that disassembles and assembles easily and quickly. This will save you time and nerves. nine0005
Step-by-step instructions
The juicer should be washed immediately after juicing, before the residues and pulp have dried.
- Unplug the juicer first.
- Place all removable parts in the sink: bowl, lid with spout, pusher, pulp container, juice container, etc.

- Wash all parts in warm water with a soft sponge and soap or dish soap. Abrasives should not be used. nine0026
- Metal strainers and filters are the most contaminated. Usually, a juicer comes with a special brush for cleaning them. If you don't have one, use an old toothbrush.
- After you have cleaned all the elements, rinse them thoroughly under running water and let dry completely. Only then can you install them back.
- The part of the juicer where the motor is hidden can be wiped with a clean, damp cloth. The main thing is that moisture does not accidentally penetrate inside. nine0026
See also: Instructions for use: how to clean the toaster
Taking this opportunity, we would like to remind you that we have a useful video about juicers (relevant if you can’t decide which device to choose):
What should I do if the cake is already dry?
If you do forget to clean your juicer immediately after use, or find old, dried-on dirt, here's what to do.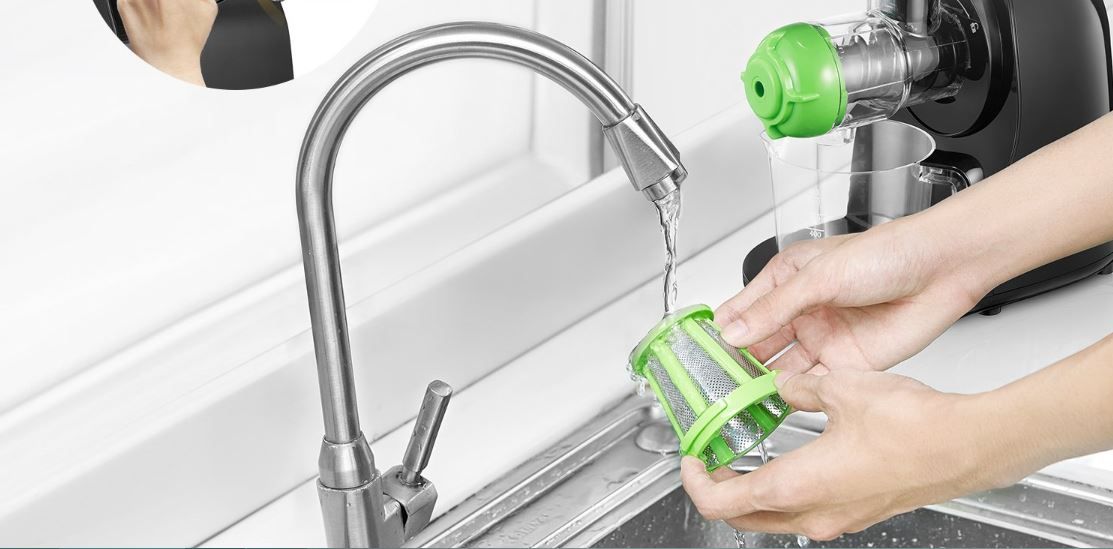 Type a bowl of warm water, dilute 2-3 tbsp in it. l. dish gel and soak the soiled parts for 15-20 minutes. After that, take them out, rub them with a brush, wash with soap, rinse well and dry. nine0005
Is it possible to wash the juicer in the dishwasher? If the manufacturer does not recommend doing this, it is better to listen to him. Although usually some parts of the device are allowed to be loaded into the dishwasher - first of all, these are metal and glass elements. But such water procedures are definitely contraindicated for plastic parts - from too high a temperature and pressure, they can become stained and deformed. Aggressive detergents are generally able to corrode them. So it is better to wash the plastic by hand. nine0005
How to remove plaque
Some fruits and vegetables contain a pigment that leaves a stubborn, hard-to-remove coating on juicer components. It is especially noticeable on plastic and glass. Here, the usual dish detergent will not cope, but folk remedies can do it.
Method 1: baking soda
Mix 2-3 tbsp. l. baking soda with a little water to make a paste-like consistency. You can take lemon juice instead of water or add a little citric acid to soda. Apply the cleaning paste to the sponge, rub the stained areas and rinse with water. If the plaque has not disappeared, try soaking the parts in a soda solution. To do this, dilute in 2 liters of warm water 5-6 tbsp. l. soda, leave the parts to soak in it for at least 2-3 hours, and then clean with a soft sponge. nine0005
Method 2: vegetable oil
Carrots and beets have the most persistent coloring effect. Experienced users recommend using vegetable oil to combat such stains (any will do). Thoroughly soak a thick cotton swab in the oil and treat the contaminated areas with it. Wash off greasy traces with soap and warm water, then rinse the parts of the juicer well under the tap.
Method 3: White
This folk method is also often found on the net. But we have doubts about its safety, because the juicer is designed to work with food. Such a radical method is used when all the others have failed. Dilute 2-3 caps of whiteness in 2 liters of water at room temperature, dip the contaminated parts into the solution and leave for 30 minutes, then rub them with a sponge and rinse thoroughly in plenty of water. For reliability, we recommend repeating the rinsing procedure several more times. nine0005
How to wash the juicer - folk methods and remedies
Like any household appliances used in the kitchen, the juicer has to be washed constantly. After making juice, dirt remains on the surfaces of the device, which must be washed off. It is not easy to disassemble the juicer and clean the surfaces on which the plaque remains. Some parts cannot be reached at all in certain models, making cleaning very difficult. Knowing how to clean your juicer and what will make it easier to maintain the machine will make it easier to operate the machine. It will be possible to prepare juice without fear that after that you will have to suffer with cleaning. nine0005
The ease of maintenance of the juicer depends largely on its type. The designs of the models are different - some are easy to disassemble and wash, others are more difficult. At the stage of choosing a juicer, not everyone takes this moment into account. A good tip here is: before buying, test how easy it is to disassemble your favorite juicing technique. Ask the salespeople to demonstrate sequentially the disassembly and collection of the juicer. This approach will greatly facilitate the care of the juicer.
Cleaning procedure
In many kitchens, juice is made using centrifugal models, so we will consider how to wash a juicer on this type of household appliance.
- After preparing the vitamin drink, unplug the juicer from the power supply.
- Disassemble the juicer following the steps in the user manual.
- Clean the removed parts from the remnants of the pressed fruit (cake) and put them in a sink filled with warm water.
 For cleaning efficiency, you can add dishwashing detergent to the water. nine0026
 - Let the juice extractor elements soak for half an hour. If there is only fresh deposits on the surfaces, soaking can be dispensed with.
- Removed parts are cleaned with a small brush without removing them from the water.
- Large elements (tanks for cake and juice, pusher) are washed with a sponge with the addition of dishwashing gel and rinsed with clean water. Stubborn dirt can be tried to rub with a cloth with the addition of sunflower oil.
- Clean the separator with a brush under running water. It is more convenient to clean the holes in the filter with a brush with infrequent bristles. If there is no such one on the farm, make it from an old toothbrush by thinning the pile. nine0026
- Place the washed parts on a towel to dry.
The detachable elements of the juicer are easier to clean than the main part with the motor. The surfaces of this component are cleaned by wiping them with a damp sponge or cloth. If there is a strong coating that is difficult to wash with just a damp cloth, you can use a popular cleaning agent - citric acid or vinegar. These folk remedies will also help wash the refrigerator, clean the oven, descale the electric kettle and care for other household appliances. Instead of acid, lemon juice is suitable, which can be pre-made in a juicer. nine0005
With a prepared cleaning solution based on vinegar or lemon, it is easier to clean the surface of the juicer and remove deposits. The solution copes well with heavy dirt on removable parts. After treating the removed elements with vinegar or lemon cleaner, rinse them again with clean water.
Stubborn deposits from beetroot and carrot juice can be washed off with a soda-based solution. To do this, baking soda must be diluted to a mushy state with lemon juice or vinegar. Apply the composition on the surface of the juicer and rub the formed plaque with a sponge. Soda effectively removes dirt, which allows you to use this product to clean the washing machine.