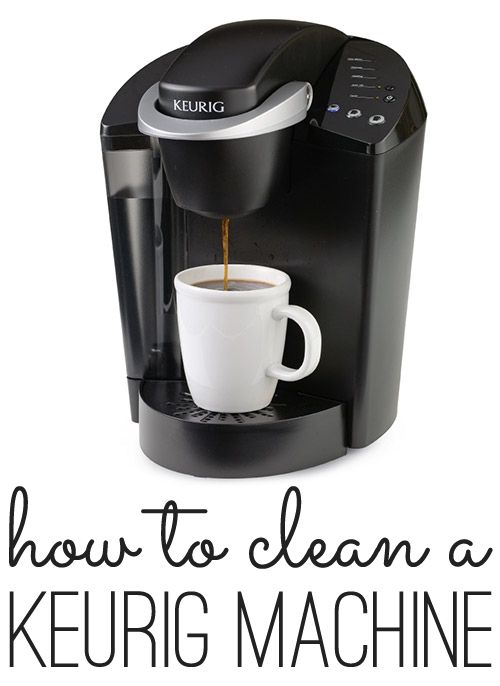
How to clean keurig coffee pots
How to Clean a Keurig Coffee Maker, With & Without Vinegar
Owning a Keurig means you no longer have to think about wrangling filters and ground coffee beans every morning. But many of us are guilty of not thinking about cleaning it often enough either — and that thing can get dirty. Like all coffee makers and single-serve coffee machines — as well as other home appliances like dishwashers, washing machines and ovens — Keurigs can serve as a breeding ground for harmful bacteria and mold if they are not regularly cleaned. Grossed out? Us too. Not only will regular cleanings extend the life of your appliance and protect your health, they'll also keep your coffee tasting great every day.
We asked Carolyn Forte, Executive Director of the Good Housekeeping Institute Home Care & Cleaning Lab, for advice on how to maintain your go-to morning machine. Start by buying the following cleaning cleaning essentials, then follow the timeline below for how often you should clean every part of your coffee maker.
How to clean a Keurig every week:
Ideally, you'll want to wash the removable parts of your machine on a weekly basis, inside and out.
What you'll need:
- Dish soap
- Cleaning cloth
- Sponge
Instructions:
- Unplug the machine.
- Disassemble the water tank, lid, mug tray and K-cup holder.
- Clean the mug tray and K-cup holder in warm, soapy water.
- For the water reservoir and lid, remove the water filter, then wipe the surfaces with a damp, soapy cloth.
- Rinse the reservoir and lid with water and let air dry (you don't want to dry it with a cloth since this could leave lint behind).
- Wipe down the exterior surface with a wet sponge.
- Replace all the removable parts and plug the machine back in.
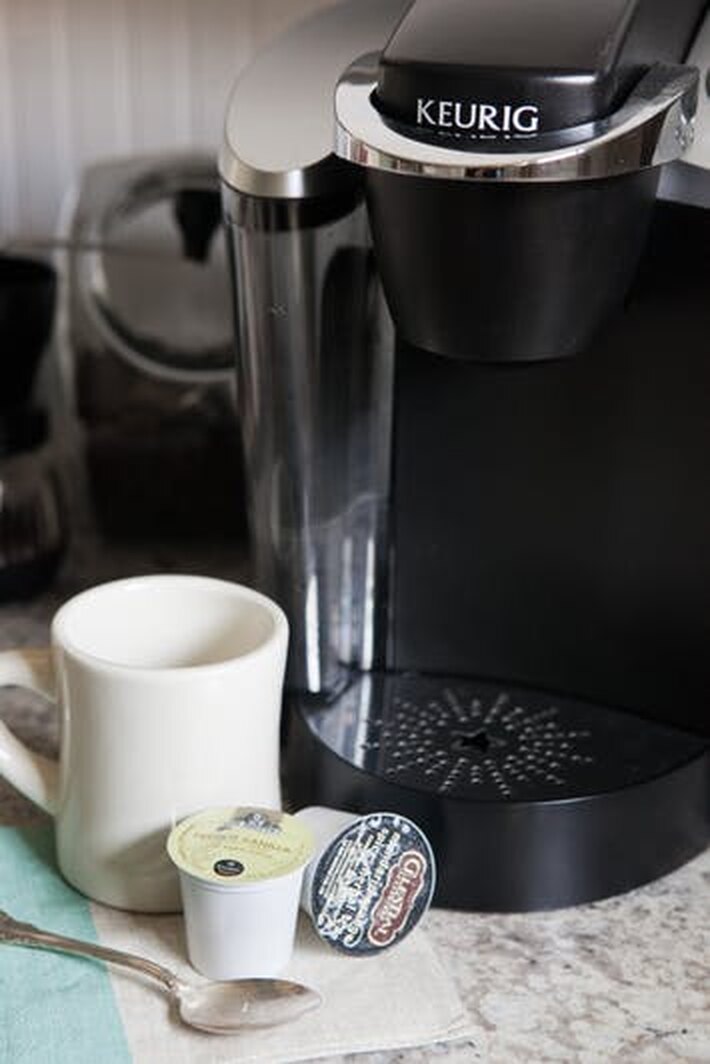
Flavor Tip: Use a Keurig rinse pod once a week or after brewing a flavored drink to keep your morning coffee from tasting like last night's hot chocolate!
Replace your water filter every two months:
Every other month, you'll want to replace the water filter cartridge to keep your coffee tasting fresh.
What you'll need:
- Water filter cartridges
Instructions
- Start by soaking a new water filter cartridge in fresh water for five minutes, then rinse it for 60 seconds.
- Wash the mesh of the lower filter holder.
- Insert the cartridge into the upper filter holder, and snap on the lid.
- Finally, put it back into your reservoir and lock it into place.
Descale your Keurig every three to six months:
Hard water minerals can build up in your machine over time, which could affect how well it works. To prevent this, you'll want to descale your Keurig at least twice a year.
What you'll need:
- Distilled white vinegar or Keurig Descaling Solution
Instructions
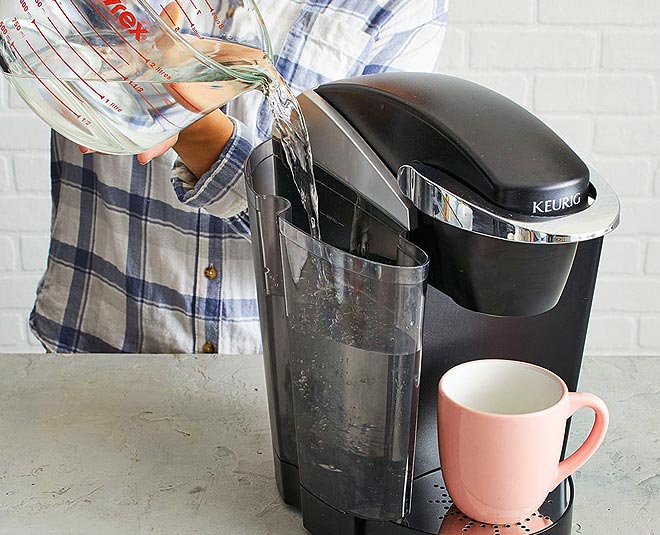
- Begin the descaling process by filling the reservoir with 16 ounces of white vinegar or Keurig Descaling Solution followed by 16 ounces of water.

- Start the largest brew size cycle without a K-cup and let the machine run as usual, using a mug to catch the liquid.
- Keep repeating this process until the ADD WATER indicator is illuminated.
- Let the brewer rest for 30 minutes.
- Empty and rinse the reservoir thoroughly. Fill it to the MAX line with fresh water and perform 12 rinsing brews using the largest brew size to remove any traces of vinegar or descaling solution.
- Brew coffee as usual.
Expert Tip: Simplify your Keurig coffee maker cleaning process further by scheduling your water filter cartridge replacement and descaling for the same day. Replacing the water filter cartridge immediately after de-scaling with vinegar will ensure that no vinegar taste remains for your next brew.
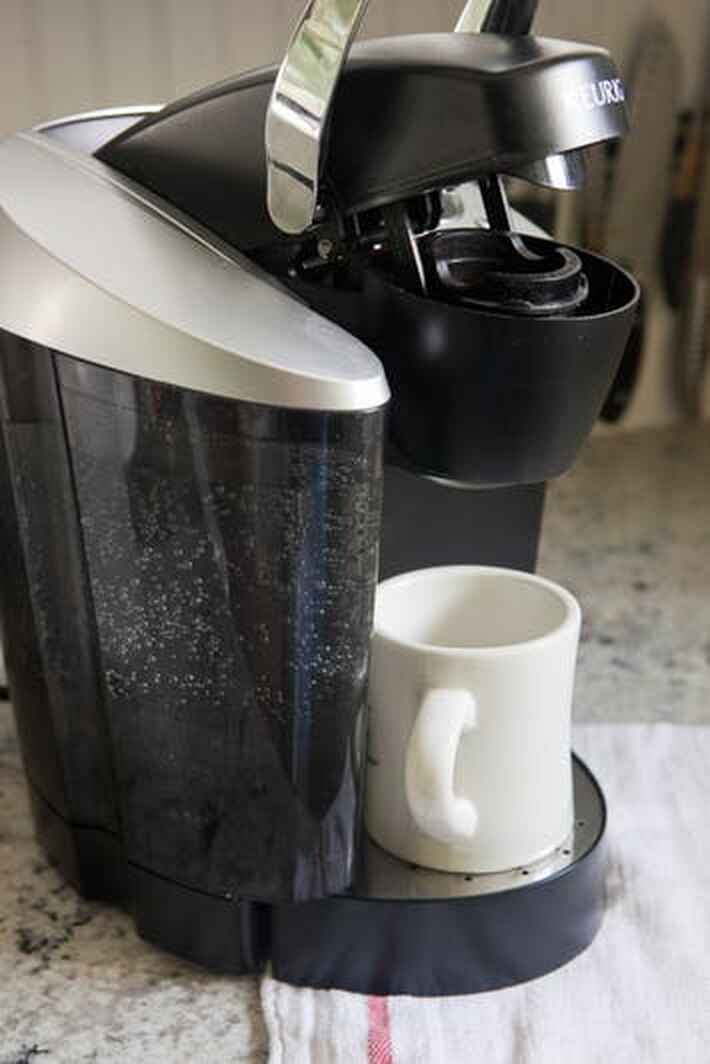
How to clean Keurig needles as needed:
When you see grounds in your K-cup holder, remove them with a sponge to prevent them from ending up in your beverage tomorrow morning.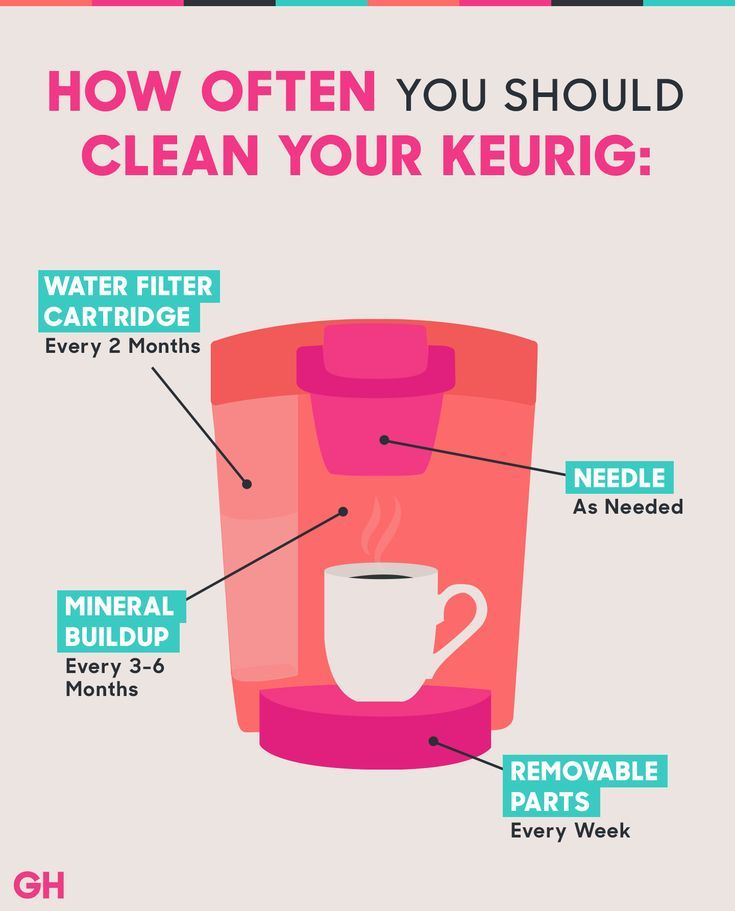 If you're still having trouble brewing, there may also be coffee grounds stuck in the needles, which punch the entrance and exit points where the water flows through the K-cups.
Instructions
- Unplug the machine.
- Separate the pod holder from the funnel and carefully use a paperclip to clear away any clogging debris lodged in the exit needle.
- The entrance needle under the brewer head can also be cleaned with a paper clip, but has two holes that need to be cleaned.
- Rinse the pod holder and funnel before reassembling.
If you own a Keurig Plus or 2.0 model, you can use the brewer maintenance accessory instead.
As long as you follow these steps, you won't have to worry about anything other than coffee being in your morning brew (well, unless you like yours with milk and sugar, that is!).
Lauren Smith McDonoughSenior Editor
Lauren is a senior editor at Hearst.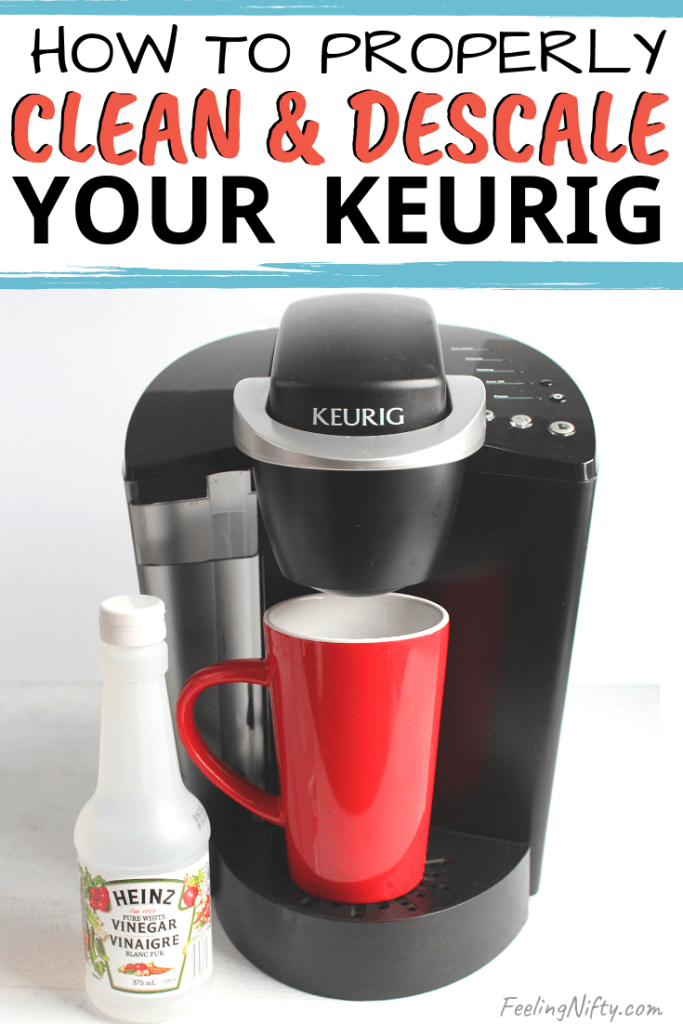 She was previously the senior editor at WomansDay.com and the home editor at GoodHousekeeping.com and HouseBeautiful.com. Her book club, ramen, and jean jackets are a few of her favorite things.
This content is imported from OpenWeb. You may be able to find the same content in another format, or you may be able to find more information, at their web site.
How to clean a Keurig coffee maker – for consistently tasty brews |
(Image credit: Keurig/Wreath London)
It’s a quick and easy way to make favorite brews, but it’s important to know how to clean a Keurig coffee maker to keep every drink tasty, and the machine looking its best.
While you might think you know how to clean a coffee maker, the Keurig requires little – but specific – attention. Add your Keurig into the routine for cleaning a kitchen so the task doesn’t get missed – both the interior and the exterior of the coffee maker need a little care. Limescale can build up inside the machine and compromise the taste and temperature of the coffee, so periodic descaling is essential, and other parts of the machine need regular attention as well.
Use our guide to cleaning a Keurig coffee maker to keep yours working just as it should for delicious drinks every time.
How to clean a Keurig coffee maker
Most Keurig machines are used for single-serve K-Cup pods, which are quick and easy to use. ‘Once you own a Keurig life becomes very simple,’ says Lucy Searle, global editor in chief of Homes & Gardens.
‘There’s no fuss or mess and it’s really quick and easy to use. To keep your coffee tasting its best, however, it’s important to clean your Keurig coffee maker regularly.’
And, of course, if you've invested in the best coffee maker, you'll want to keep it in good-as-new condition. This is how to clean a Keurig coffee maker.
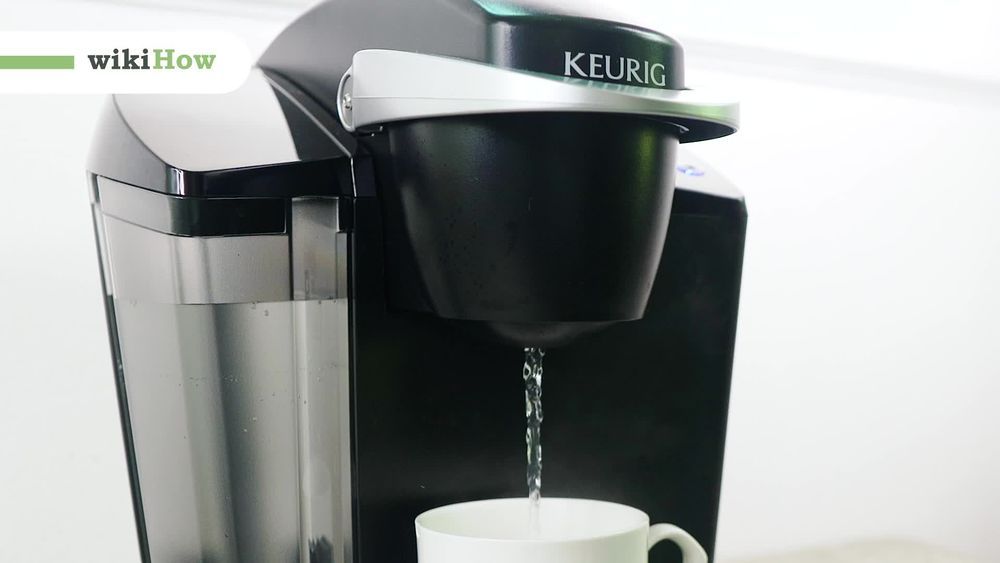
1. Descale a Keurig coffee maker
Owning a Keurig allows you to be your own barista from the comfort of your kitchen. Not only does it make the perfect coffee with everything from espresso to latte, but it can also make hot chocolate and tea, too. However, the coffee maker can build up mineral deposits inside which can affect the flavor of the drinks and their temperature, so descaling from time to time is essential.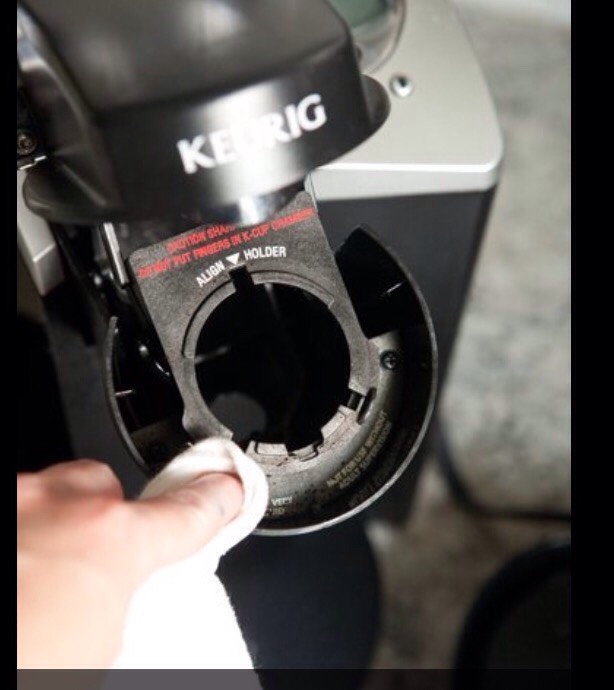
All coffee machines are different, so it is important to refer to the manufacturer’s instructions before descaling your coffee machine, advises Lynsey Crombie, Queen of Clean . ‘Some offer a cleaning solution specific to the brand,’ she says. ‘You can also purchase cleaning chemicals, which clean to an industrial standard. The most popular one is by a brand named Pulycaff.’
Aim to descale a Keurig every three to six months – or when the descale light comes on if your model has one. If the machine is noisy, the coffee isn’t as hot as it should be, or the taste is impaired, it’s also time to descale.
You can descale a Keurig using pantry ingredients. Start by getting all the descaling items together – white vinegar, water, and a cup to catch the drained solution.
First, turn off the Keurig coffee maker then empty its reservoir and remove any pods. Make a mix of equal parts water and white vinegar and run it through the machine just like you’d run a normal coffee process. Pour it into the reservoir, turn it on, press the cycle button and let the solution drain into a cup.
You might need to repeat this a few times, depending on how scaly the coffee maker is. Keep following this routine until the water runs clear. Next, flush through with clean water a few times to remove any taste of vinegar.
2. Clean the exterior of a Keurig coffee maker
While the descaling process will clean a Keurig coffee maker on the inside, you should also clean any removable parts and leave to dry.
You can take the water tank and lid, coffee pod holder and drip tray apart and wash them using dish soap and warm water.
Wipe the exterior of the coffee maker with a clean sponge or paper towels and make sure you wipe the needles that puncture the coffee pods. Leave them all to dry naturally.
How often should you clean your Keurig?
Keurig recommends descaling its coffee makers every three to six months. Any mineral buildup can otherwise affect the machine’s smooth functioning.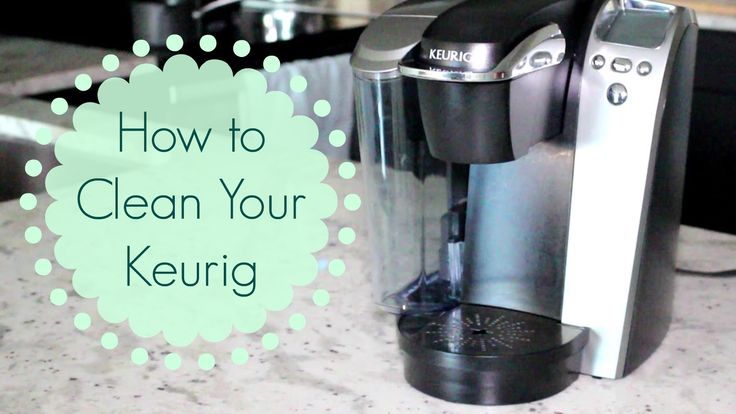
You should also try to clean all the parts once a month for optimum hygiene and working efficiency.
Alternative ways to descale a Keurig coffee maker
Keurig offers its own Descaling Solution , which we like using. It’s compatible with all Keurig K-Cup, Keurig 2.0, Rivo and Vue brewing systems.
If you don’t want to use vinegar or Keurig’s Descaling Solution, there are some other methods you can use. Surprisingly, denture tablets do the same job. Pop half a tablet in the K-Cup holder then run the coffee machine for three cycles and finish with a cycle or two of clean water until it runs clear.
Another idea is to use citric acid. Take a tablespoon of citric acid crystals to one gallon of water and run the Keurig a few times followed by clean water. Keep repeating until the water runs clear without any mineral or limescale deposits coming through.
What is the best way to clean a Keurig?
To clean a Keurig coffee maker on the inside, every three to six months, follow the descaling process and fill the reservoir with equal parts white vinegar and water or use Keurig’s Descaling Solution, following the instructions.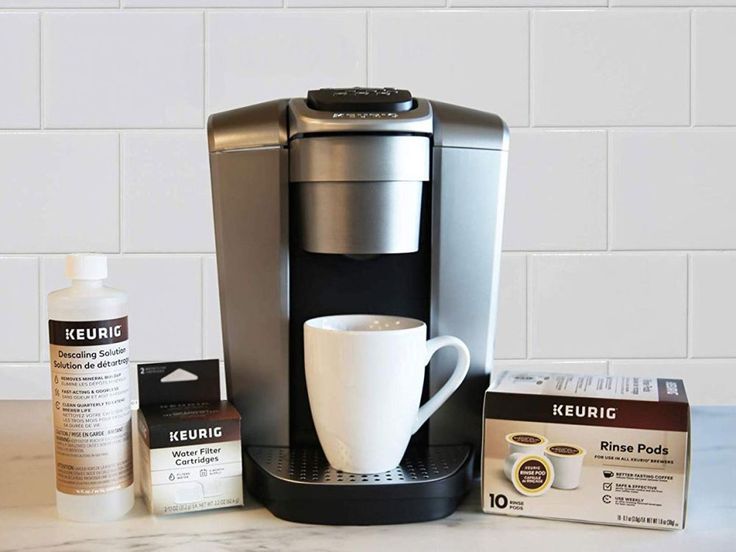
Start the brew cycle without a K-cup and let the machine run as usual, using a mug to catch the liquid. Keep repeating this process until the add water indicator is illuminated.
How do you descale a Keurig coffee maker with vinegar?
To descale a Keurig coffee maker with vinegar, run a mix of equal parts water and white vinegar through the machine. Pour the solution into the reservoir, turn on the machine, press the cycle button, and allow the solution to drain into a cup.
Hayley is an interiors journalist, content provider and copywriter with 26 years experience who has contributed to a wide range of consumer magazines, trade titles, newspapers, blogs and online content. Specialising in kitchens and bathrooms, she has twice won the CEDIA Award for Best Technology feature. Hayley writes for H&G about kitchens, bathrooms, cleaning, DIY and organizing.
How to descale your Keurig coffee maker
Keurig has a range of coffee makers that are very popular right now. But then, if you're reading this, you probably already know how simple, no fuss they are, not to mention the variety of delicious drinks they produce! Regardless of your model, you should descale your Keurig every three to six months to keep it super fresh and functional. Keurig of course recommends using their own descaling solution or liquid for best results, but we think you can opt for a more versatile descaling solution if you want to save money. And for the best cleaning, be sure to follow the amount of water solution indicated on your product. But when it comes to descaling Keurig coffee makers, there are different approaches depending on the type of coffee maker you have chosen for your machine. kitchen. Here, we'll show you how to keep coffee that tastes as fresh as the day you bought it. (Image credit: Keurig)0003
Keurig Traditional Brew Descaling
Includes K-Classic, K-Café, K-Latte, K-Elite, K-Compact, K-Select
- Add descaling liquid (or powder mixed with water) into the water tank.
- Place a large mug on the drip tray and check that there are no capsules in your coffee machine.
- To perform a cleaning cycle, raise and lower the handle making sure the largest brew size is selected.
- Repeat this process until the ADD WATER warning lights up.
- Leave the car for 30 minutes.
- After a rest period, rinse the tank and fill it with fresh water up to the MAX mark.
- Repeat the rinse cycle 12 times to remove all the descaling solution.
(Image credit: Keurig)
Keurig K-Supreme and K-Slim descaling
Includes K-Supreme, K-Supreme Plus, K-Slim
- Fill the tank with descaling solution and water as described on the product.
- Place the large mug on the drip tray, making sure there are no capsules in the machine.
- To activate the descaling mode, you must turn off the brewer and simultaneously hold the 8 and 12 oz buttons for 3 seconds.
- The light will flash to show that your machine is ready - press the Brew button at this point to start descaling.
- Repeat this step until the ADD WATER warning lights up.
- Rinse the tank thoroughly, fill with fresh water and press the preparation button to start rinsing.
- Repeat this process until the DESCALE warning clears or the ADD WATER light on the K-Slim lights up.
(Image credit: Keurig)
Descaler Keurig K-Mini Series
Includes K-Mini, K-Mini Plus
- Fill the tank with descaling solution and water as described on the product.
- Place a large mug on the drip tray and check that there are no capsules in the machine.
- Perform a cleansing brew by raising and lowering the handle and pressing the brew button.
- After the cleaning cycle, fill the tank with clean water and repeat the cleaning. However, this time you have to watch for when the water starts to flow and turn off the power quickly to stop it.
- Let the machine rest for 30 minutes.
- Press and hold the brew button until all the liquid has been poured out.
 Now there should be no scale on the dispenser.
 - For rinsing, fill the tank and brew two more times.
(Image credit: Keurig)
Descaling Keurig K-Duo Series
Includes two K-K-Two Plus Two K-Essentials
- Fill the tank with the mixture of descaling solution and water as described on your product.
- Place the large mug on the drip tray and make sure the K-cup holder is empty.
- Start making a cleansing drink by pressing the OZ / POD button, then the 12 button, and then pressing the brew button.
- Place the carafe on the heating plate, press CUPS / CARAFE and clean the carafe by pressing button 12 and pressing “brew” again.
- Empty the carafe and switch off the heating plate.
- Leave the car for 30 minutes of rest.
- Rinse the tank and fill with fresh water. Make four cleansing drinks without inserting the decanter. Turn off the heating plate and replace it with a large mug.

- Press the OZ / POD button and then the number 12 button and “boil” for another full rinse.
- Repeat this rinse three more times.
Still looking for more help? Keurig also has some helpful videos to help you through the process.
Remove the water tank cover, then lift the tank up to remove it. If you have a Keurig® water filter, install it now. See instructions in the water filter starter kit.
Rinse the reservoir with fresh water and fill to the MAX FILL mark.
Replace the water tank, making sure the tank is properly seated in the base. Close the lid.
NOTE: Do not use distilled water
Raise and lower the handle. Do not insert a recyclable K-Cup® capsule*.
The coffee maker will switch on automatically.
3 cup sizes will flash. Press the 8 oz button to start the cleansing drink.
 Pour hot water into the sink.
 Do not remove the water tank or raise the handle after pressing the brew button until brewing is complete.
The one-time setup process is now complete and you are ready to cook!
Place mug on drip tray. If you are using a travel mug, remove the drip tray and place the mug on the drip tray base. Raise the handle and place a recyclable* K-Cup® capsule into the K-Cup® capsule holder. Fully lower the handle to close the lid.
Do not remove the foil cap from the recyclable* K-Cup® capsule.
The 3 brew sizes will flash. Select and press the size of the drink. The light will be on while brewing. Cooking is complete when all sizes light up. Raise the handle and discard the recyclable* K-Cup® capsule (see instructions below).
WARNING: Very hot water in the K-Cup® capsule holder during brewing. To avoid injury, do not lift the handle while brewing.
Coffee maker features
FAST AND FRESH brewed: Coffee is prepared in minutes.
COOKING SEQUENCE: Brew the second cup immediately, no need to wait for reheat.
TRAVEL MUG FRIENDLY: Holds travel mugs up to 17.8 cm (7 inches) high.
EASY BUTTON CONTROLS: Simply insert any reusable* K-Cup® and use the control buttons to prepare a delicious cup.
MAINTENANCE ALERT: Reminds you to descale after every 250 brews.
COMPATIBLE WITH MY K-CUP® UNIVERSAL
REUSABLE COFFEE FILTER: Brew ground coffee (sold separately).
Automatic shutdown automatically turns off the coffee maker 5 minutes after the last brew to save energy, but will be ready to brew as soon as it is turned on again.
High Altitude To ensure proper operation of the coffee maker at high altitudes (1,500 meters/5,000 feet), set the coffee maker to High Altitude mode.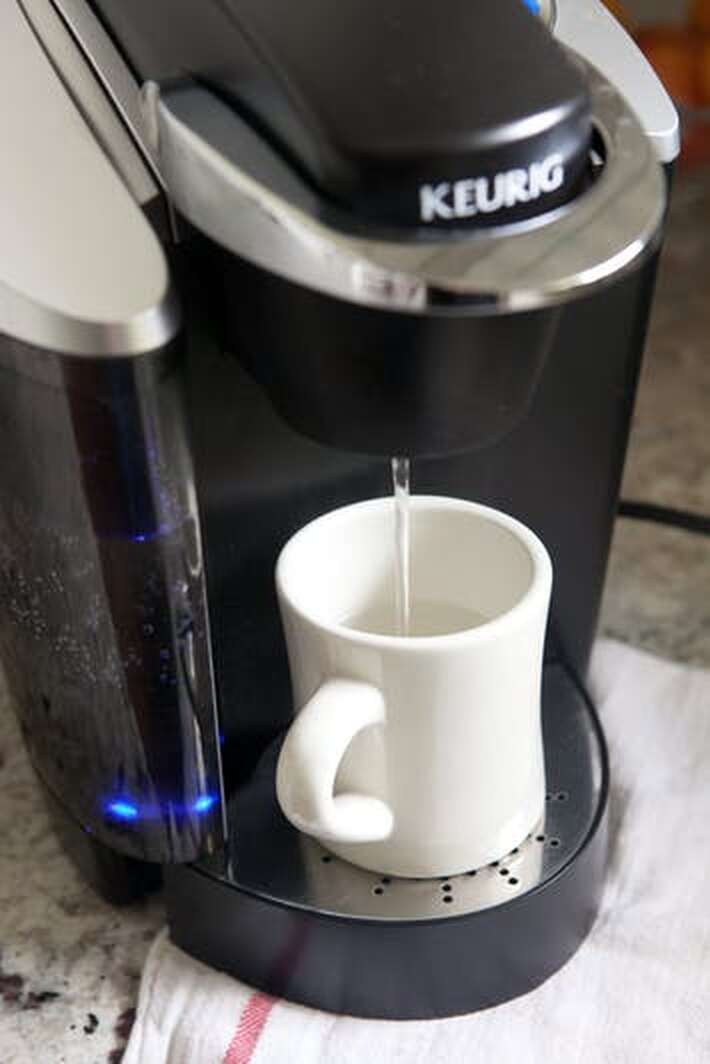
- Start with the coffee maker plugged in and off.
- Press and hold the POWER button and the 8 oz button for 3 seconds. The 10 oz button will light up to confirm that the high altitude brew mode is on.
- High Altitude Mode will remain on until steps 1-2 are repeated and the 10 oz indicator light turns off and the 6 oz indicator turns on to confirm that the high brew mode is off.
HIGH BREWERY: While holding the handle of the coffee maker up, slowly press the reprocessing* K-Cup® capsule in the holder until the bottom of the reprocessing* K-Cup® capsule is pierced by the exit needle.
Coffee machine maintenance
Regular cleaning ensures trouble-free operation of the coffee maker. Always turn off the coffee maker and unplug it before cleaning.
Coffee Maker Exterior
To keep your Keurig® coffee maker looking its best, clean the outside from time to time. Simply clean with a soap & lint-free non-abrasive cloth.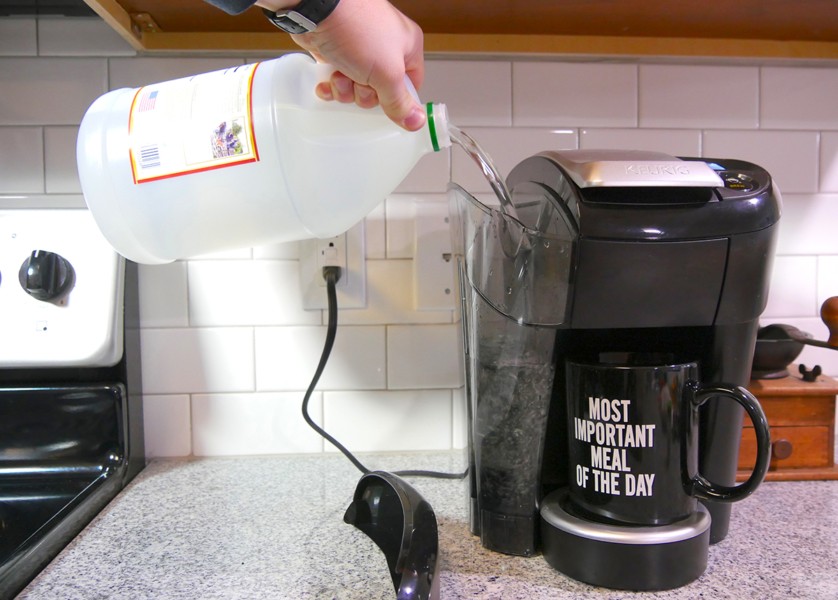
Never immerse the coffee maker in water or other liquids.
Drip Tray
The drip tray overflow must be emptied and cleaned from time to time. To remove, lift the base of the coffee maker, keeping it level so as not to spill. Rinse and clean with adamp, soapy, lint-free, non-abrasive cloth. Handwash only.
Water tank
The water tank should be cleaned periodically by wiping the inside of the tank and the bottom of the lid with a non-abrasive, lint-free cloth. Do not wipe the inside of the water tank with a cloth, as fluff may remain on it. Let the tank dry completely. Handwash only.
To disable the descaling notification, follow the complete descaling procedure in this manual.
If the coffee maker has been stored or has not been used for several days, run a cleaning brew before making a drink.
Periodically hand washing water tank, lid and drip tray with warm soapy water and rinse thoroughly.
CAUTION: Parts must not be washed in the dishwasher.
NOTE: Do not dry the inside of the water tank with a cloth as fluff may remain on it.
K-Cup® Capsule Holder Assembly
bottom of the K-Cup® pod holder from below with another until it comes free. After cleaning, align the K-Cup® capsule holder with the opening, using the two front ribs as a guide, and lock it in place at the top.
WARNING: There are sharp needles that pierce a recyclable* K-Cup® capsule above the K-Cup® capsule holder and at the bottom of the K-Cup® capsule holder. To avoid the risk of injury, do not insert your fingers into the K-Cup® capsule holder.
NOTE: Always remove and recycle used K-Cup® Recyclable Capsules* after brewing.
funnel
Rinsing the funnel guarantees a fresh drink. The funnel should be cleaned regularly and can be removed from the K-Cup® capsule holder by pulling on it until it pops out. To replace it, orient the latches to the notch and simply snap it onto the K-Cup® holder.
Exit needle
Remove the container holder assembly and remove the funnel. Locate the exit needle on the inside of the K-Cup® capsule holder. Insert a straightened paper clip into the exit needle to remove coffee residue.
Inlet needle
Lift the handle of the coffee maker and locate the inlet needle on the underside of the lid. To clear the holes in the needle, hold the handle of the coffee maker in the up position and, with your other hand, carefully insert a straightened paperclip into all the holes. Gently move it around to loosen the coffee grounds. Fully lower the handle and run the cleansing decoction twice. Do not insert a recyclable K-Cup® capsule*.
Descaling procedure
Note: it is necessary to complete the complete descaling procedure for the descaling indicator to turn off.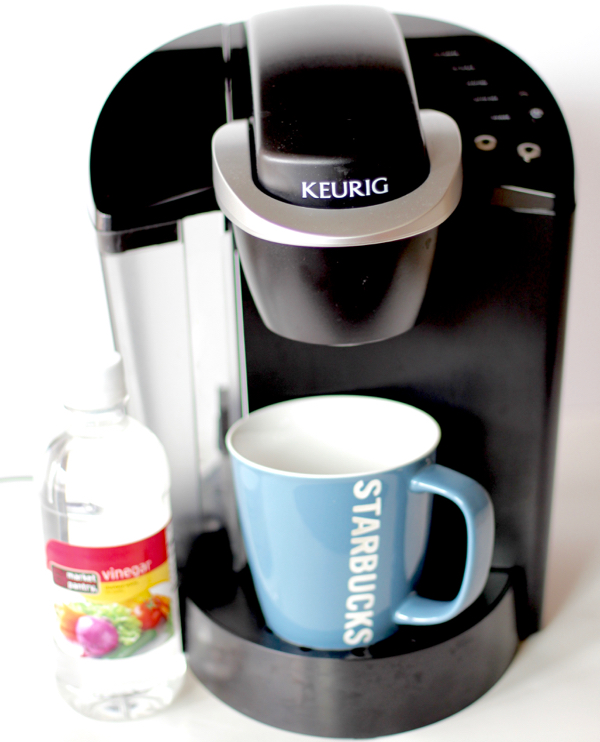
You will need: large ceramic mug (296 ml/10 oz minimum), fresh water, Keurig® descaling solution and access to a sink. Don't use a paper cup. Make sure there are no drink capsules in the K-Cup® holder. The descaling procedure takes about 20 minutes.
STEP 1: Prepare your coffee maker
Pour the entire bottle of Keurig® Descaler into the empty water tank.
Then fill the empty bottle with water and pour it into the water tank.
Do not insert the recyclable K-Cup® capsule*.
Place a large mug on the drip tray
STEP 2: Descale the coffee maker
To activate the descaling mode, turn the coffee maker on and off, then press and hold the 6 oz and 10 oz buttons together for 3 seconds.
When blinking, press the 8oz button to start the descaling process.
When brewing is complete, pour the hot liquid down the sink.
Continue brewing 8 oz until the ADD WATER indicator lights up.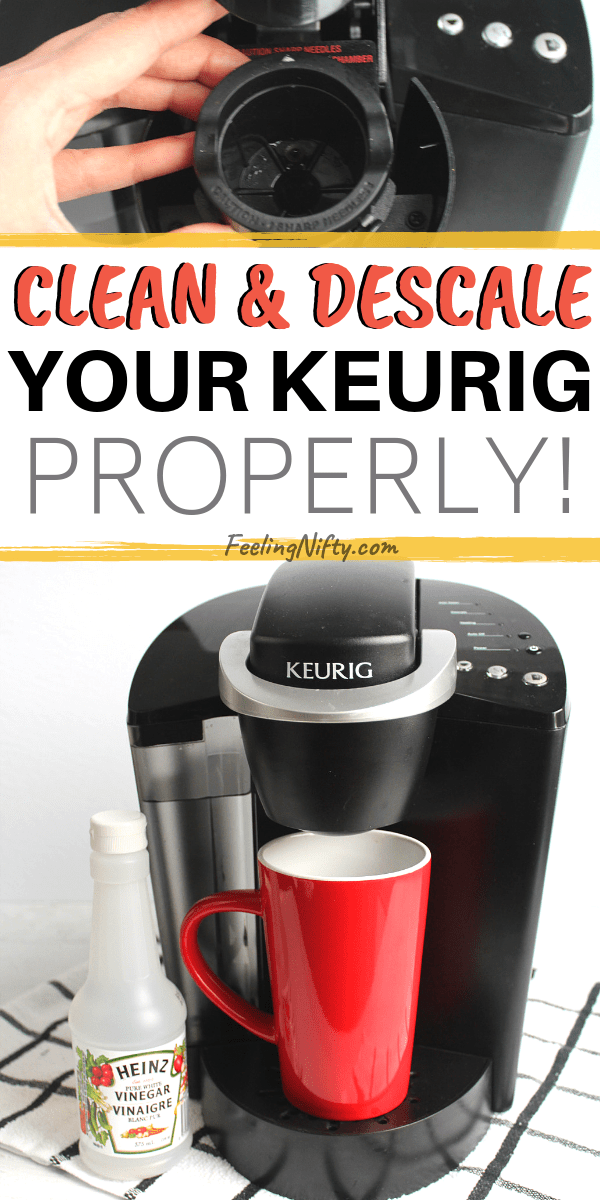
STEP 3: Rinsing with fresh water
Empty the water tank and fill with fresh water up to the MAX mark.
When blinking, press the 8oz button to start the flush process.
When brewing is complete, pour the hot liquid down the sink.
Continue brewing 8 oz until the DESCALING notification turns off.
The coffee maker is now out of descaling mode and is ready for use.
NOTE: The cleansing action of Keurig® Descaler Solution may cause “foam” to form in the coffee maker. This is natural, as the solution reacts with scale inside. A coffee maker with a lot of scale may not fill properly after adding a descaling agent. If this happens, you may only see little or no dispensing followed by a blowing sound. If this happens:
- Switch off and unplug the coffee maker.
- If the water tank contains Keurig® descaling solution, empty it, rinse the water tank thoroughly and refill with water.
- Plug the coffee maker back in, switch it on and repeat step 3 "Rinse with fresh water".
The coffee maker should start working properly when the solution is rinsed off and the scale is removed. If the problem persists, let the coffee maker unplug for at least 30 minutes before continuing with the flush.
Problem Solving
Ground in your coffee
Earth may accumulate in exit or entry needles and can be cleared with a straightened paper clip or similar tool.
- Clean the exit needle of the K-Cup® capsule holder. See Exit Needle Care Instructions.
- Clean the inlet needle of the coffee maker. See entry needle care instructions.
For optimal enjoyment and limiting the amount of grind in the cup when brewing with hot water or when changing from pod to brew without coffee (e.g. tea or cocoa), clean the exit and inlet needles according to the instructions provided and perform 2 cleaning cycles. brewing. .
The coffee maker does not brew
- The water level must be at the minimum level for brewing.
 Add 2 more ounces of water to the reservoir to meet the minimum fill level, then press the size button. Repeat until the coffee maker starts to brew.
 - Lift and replace the reservoir to ensure it is securely fixed to the base.
Partial cup preparation
- Switch off the coffee maker. Press and hold the 10 oz button for 5 seconds until water starts to flow. Then release and let the water drain. Pour the contents into the sink. Press the power button to restart.
- Exit needle may be clogged. See Exit Needle Care Instructions.
- Clean the K-Cup® Capsule Holder, see K-Cup® Capsule Holder Care Instructions.
- The coffee maker may need to be descaled. If you have repeated the descaling procedure twice and the coffee maker still does not produce a full cup, please contact customer service.
The coffee maker does not work or turns off
- Make sure the power button is on.
- Plug the coffee maker into your own socket. If the electrical circuit is overloaded with other appliances, your coffee maker may not work properly. The coffee maker must operate on its own circuit, separate from other appliances.
- To save energy, the coffee maker switches off automatically 5 minutes after the last brew. Press the power button to restart.
- If the coffee maker is still not powered, contact customer service.
Helpful Hints
Water quality varies greatly. If you notice an undesirable taste in your drink (such as chlorine or minerals), we recommend using bottled or filtered water. Do not use distilled water.
Service
In addition to these recommended cleaning and maintenance procedures, this coffee maker is not user serviceable. For service, refer to the Warranty section of this manual.
Memory
Empty the water tank before storing or transporting and make sure you store the coffee maker in a safe and frost-free place. When preparing for use after storage, we recommend that you rinse the water tank with fresh water and descale the coffee maker as described in the Descaling the coffee maker section.
If you plan to move the coffee maker to another location, turn off the coffee maker, unplug it and empty the water tank. If your coffee maker has been at temperatures below freezing, be sure to let it warm up to room temperature.
temperature for at least 2 hours before use.
Click or call!
Still have questions?
We are here to help. Visit keurig.ca/support_1 for step-by-step videos on cleaning, descaling, and more.
Still need help?
Call us at
1-800-361-5628
Warranty
ONE YEAR LIMITED WARRANTY
Keurig Green Mountain, Inc. (Keurig) warrants your coffee maker to be free from defects in materials or workmanship under normal domestic use for one year from the date of purchase.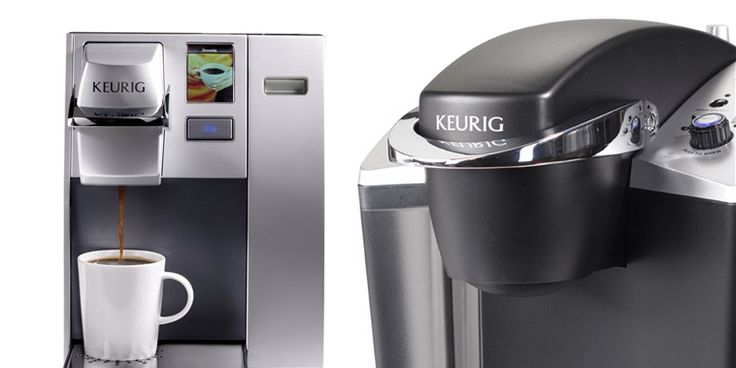 It is recommended that you register your coffee maker at keurig.ca/welcome so that your purchase information is stored in our system. Keurig will, at its option, repair or replace a defective coffee maker free of charge after receipt of proof of date of purchase. If a replacement coffee maker is required to service this warranty, it may be new or refurbished. If a replacement coffee maker is shipped, the new coffee maker will be covered by a one-year limited warranty.
This warranty only applies to coffee makers in the US and Canada. This warranty gives you specific legal rights, and you may also have other rights which vary from state to state and, in the case of Canada, from province to province.
Using only genuine Keurig® K-Cup® capsules and accessories will ensure the proper function and life of your Keurig® coffee maker. Any damage or malfunction to your coffee maker resulting from the use of third party capsules and accessories may not be covered by this warranty or may incur a service charge if it is determined that the damage or malfunction was caused by such use.
WHAT IS NOT A LIMITED WARRANTY?
THIS WARRANTY DOES NOT COVER CONSEQUENTIAL OR INCIDENTAL DAMAGES SUCH AS DAMAGE TO PROPERTY
DOES NOT COVER INCIDENTAL COSTS OR EXPENSES ARISING FROM ANY BREACH OF THIS WARRANTY.
Some states and provinces do not allow the exclusion or limitation of incidental or consequential damages, so the above limitation or exclusion may not apply to you depending on the state or province in which you purchased.
This warranty also does not cover damage caused by the use of third party capsules or accessories, services performed by anyone other than Keurig or its authorized service providers, use of parts other than original Keurig® parts, or external causes such as misuse , misuse, etc. inappropriate power supply or natural disasters.
OTHER LIMITATIONS
THIS WARRANTY IS EXCLUSIVE AND IN LIEU OF ANY OTHER LIMITATIONS
EXPRESS WARRANTY, WRITTEN OR ORAL. IN
SUPPLEMENT, KEURIG HEREBY DISCLAIMS ALL OTHER WARRANTIES REGARDING YOUR KEURIG® COFFEE MARK, INCLUDING ANY IMPLIED WARRANTIES OF MERCHANTABILITY OR FITNESS FOR ANY PARTICULAR PURPOSE.
Some states or provinces do not allow the disclaimer of such implied warranties or limitations on how long an implied warranty lasts, so the above limitation may not apply to you depending on the state or province in which you purchased.
HOW TO GET WARRANTY SERVICE?
Keurig® coffee makers are high-quality appliances that, with proper care, are designed to give years of trouble-free operation. However, should the need for warranty service arise, simply call Keurig Customer Service toll-free at 1-800-361-5628. Do not return your coffee maker for service without first contacting Keurig Customer Service to obtain a Return Material Authorization (RMA) number. Keurig® coffee makers returned without an RMA number will be returned to the sender unserviced.
K•Express Essentials™
Single Shot Coffee Maker
A. Handling
B. Capsule Holder K-Cup® B )
C.
Learn more