How to build a garden patio
How to Build a Patio in a Weekend
At the risk of compromising our job security, we’re willing to let you in on a little secret: You can build your own patio. If two guys from Massachusetts can learn, you can, too. Sure, it took us 30 years to perfect our craft, but we’re willing to share our expert techniques so that you can have instant success.
Any gardener with realistic expectations on size and material can create a solid space on which to sit and view his or her garden. The average home owner working with one or two other people should be able to install a 12-foot-square patio with stone-like pavers in one weekend. Maybe it’ll take you a little longer, but one thing is sure: You’ll take pride in a job done right.
Items Needed➔ Nylon masonry line ➔ Four 12-inch-long metal spikes ➔ Line level ➔ Shovel ➔ Wide metal rake ➔ Hand tamper, or plate compactor ➔ Two 1-inch-diameter metal fence pipes ➔ Trowel ➔ 4- or 6-foot-long level ➔ Rubber mallet ➔ Plastic or metal edging and ➔ Polymeric sand |
For a do-it-yourself patio, a simple square design with one size of pavers is a lot easier to install than one with various sizes and curves because you will not have to cut the pavers, which takes time and skill. Pavers are strong, inexpensive, and easy to install. Most pavers are also simple to repair. If you stain one of your pavers, all you have to do is take it up and flip it over.
When it comes to figuring out how much to order, the simplest way is to call suppliers, tell them what pavers you want, and give them your measurements. The only thing left is to decide whether to pick up the pavers or have them delivered. Expect to pay $40 to $100 per delivery depending on distance. Consider any access limitations before the materials arrive. Keep in mind low wires, telephone lines, and your septic system. Your day could be ruined in a hurry if the dump truck takes out a wire or drives over and sinks in your septic tank.
The proper BASE material is importantOur favorite material for a patio base is crusher run. Depending on what part of the country you live in, there are other names for it: hard pack, processed gravel, or road pack, to name just a few. Whatever it’s called, you want a base material that consists of crushed stone, usually ¾ inch diameter or less, mixed with ground aggregates, such as stone or concrete. This base material packs great and, more important, drains well.
You’ll need a 3-inch-deep layer of packed material for your base. Our rule of thumb is that a cubic yard of crusher run will supply 80 square feet at 3 inches thick unpacked. So for a patio measuring 12 feet long by 12 feet wide, or 144 square feet, order 2 cubic yards of base material. Keep in mind that this formula isn’t perfect, so be prepared to have a little less or more depending on how precisely you dug out the base. You also need a 1-inch-deep layer of coarse or concrete sand that goes between the base and the pavers. So add a yard of sand to your order, as well.
If you don’t have a truck, bribe a friend with a truck to help you pick up the material. (We found that food is a great motivator.) You might suggest sending your friend home with some plants from your garden if that person sticks around to help out. If you don’t have any friends with a truck, then the other option is to have your supplier deliver the material.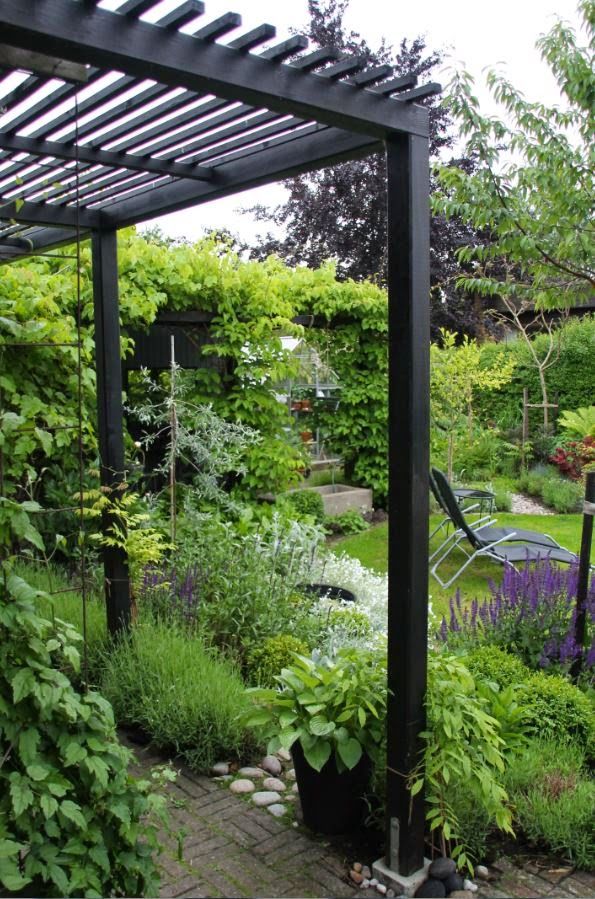 As with the pavers, expect to pay $40 to $100 per delivery. Make sure you are prepared for the delivery truck. The closer you can get the aggregate to the work site, the easier it will be to move later.
Set and level the line
To set the final height and pitch of your patio, it is essential to set a proper guide. It’s basically a giant plus sign with the cross at the middle of your square patio.
A. Run a taut nylon masonry line between two metal spikes 12 feet apart. Create another taut 12-foot-long line across the midway point of the first line. The line should be at the level you want the finished pavers.
B. Attach your line level to the line running out from the house; if your patio is not against a house, attach it to the line that runs in the direction you want water to run off. Using your level, create a pitch that will have approximately a quarter of a bubble pitch away from level. The perpendicular line should be level.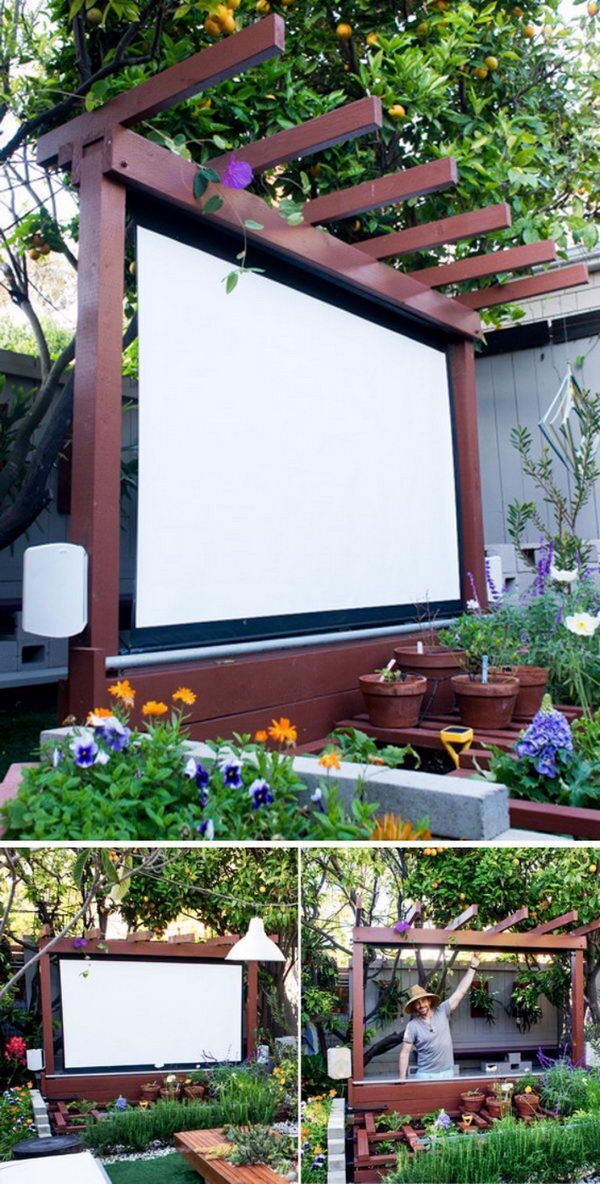 Periodically throughout construction, check the line to make sure it hasn’t moved.
Dig out the area, and compact the base
The patio foundation is important for the stability of the pavers. A solid base will reduce shifting and sinking.
A. Make a bed for your foundation by digging out 6 inches below your lines. Dig an extra 4 inches around the perimeter of your patio because you will need room for the edging. Shovel half the aggregate in, and spread it out evenly with a metal landscape rake.
B. Compact this first layer, and repeat with the rest of the aggregate. If you want to do this by hand, use a hand tamper. If you want to make it easier on yourself and get really solid pack, use a plate compactor; you can rent one for about $75 a day.
C. Check the depth as you compact by measuring down from your line to the base. You want 3 inches from the line to the base of compacted aggregate. After the base is evenly packed, you can remove the big plus-sign lines.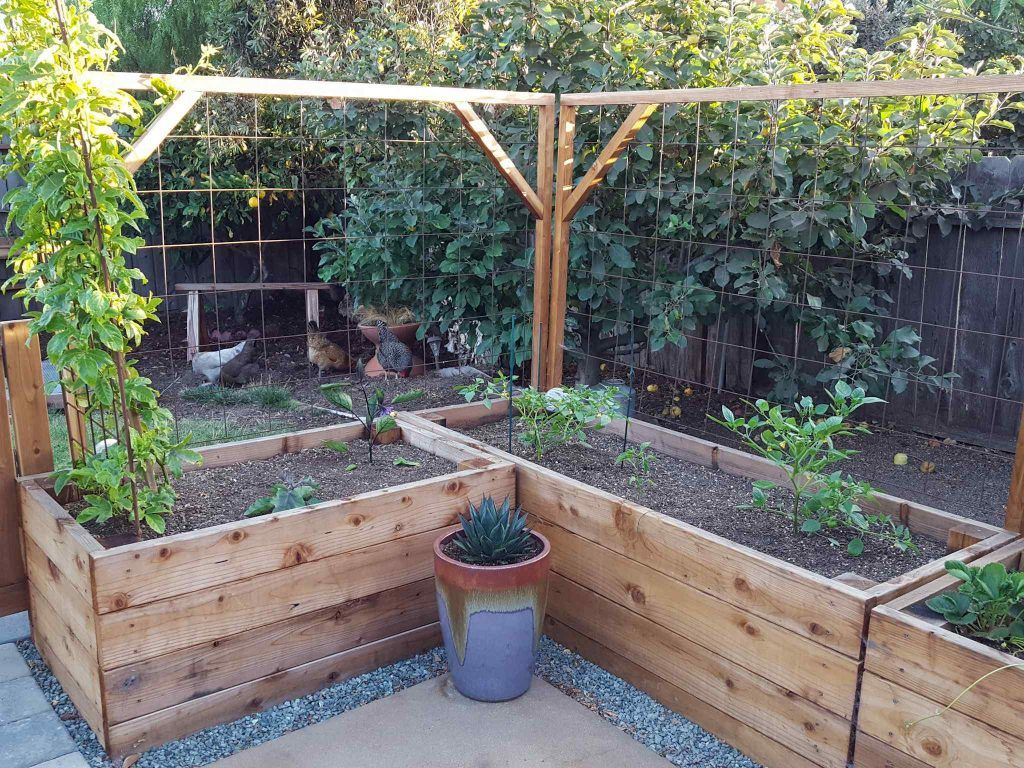
Screed the sand
Always top the base with an inch of coarse sand. This creates a secure bed that locks the pavers in place. The best way to get an even layer is to screed the sand.
A. Set the pipes, side by side, approximately 3 feet apart, to serve as a guide to the proper depth of the sand. Check that they are level across and, more important, that they follow the pitch away from your house. If they are too high, bang the pipes down until you get the correct pitch. If they are too low, add sand under the pipes. If you spent the time making the base right, setting the pipes shouldn’t take much effort.
B. Bring in the sand one small pile at a time. Using the landscape rake (or a board), screed—or spread—the sand evenly. Do this one section at a time for the entire patio.
C. Lift the pipes out, and fill in the space with more sand after you’ve screed each section. Smooth it out with a trowel to match the rest of the base.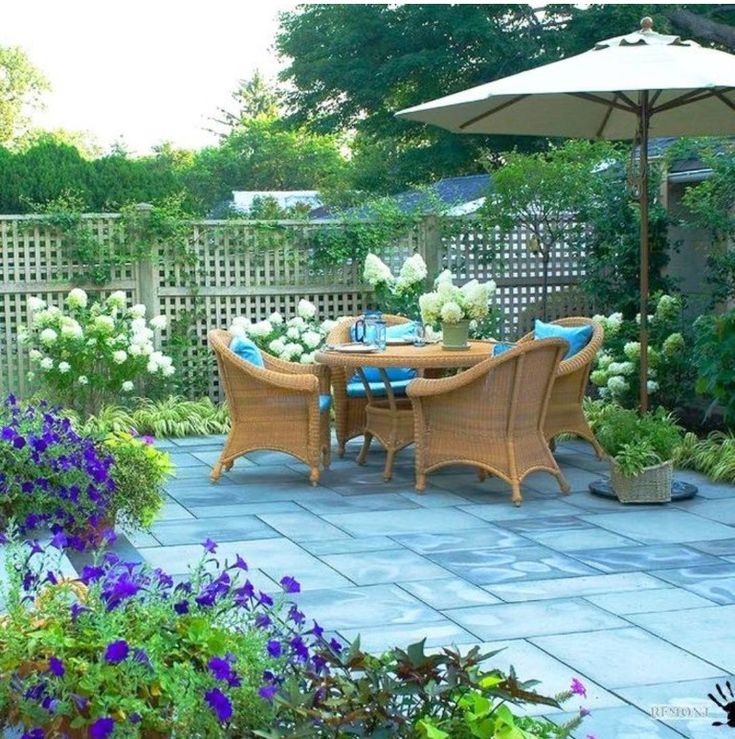
Set the Pavers
When your base is solid and smooth, it is simple to set and secure the pavers. These tips will make sure you stay on track.
A. Set up another square line to act as a guide when you set the pavers. Set the line at a right angle from the foundation of the house (or desired starting corner) down the outside edge of the patio. If you don’t start off square, the line could be off by the time you move it out, and your patio will be wider at one end. If this happens and you’re a perfectionist, like us, you’ll want to rip it up and start all over.
B. Lay the first row along the line, trying not to step on the sand. Once you get going, you can stand on the pavers that are in place to lay the rest of the patio. Move from one corner, building diagonally to the opposite corner. Make sure to place the pavers as close together as possible. Keep a level handy while you work to check that you are maintaining the correct pitch.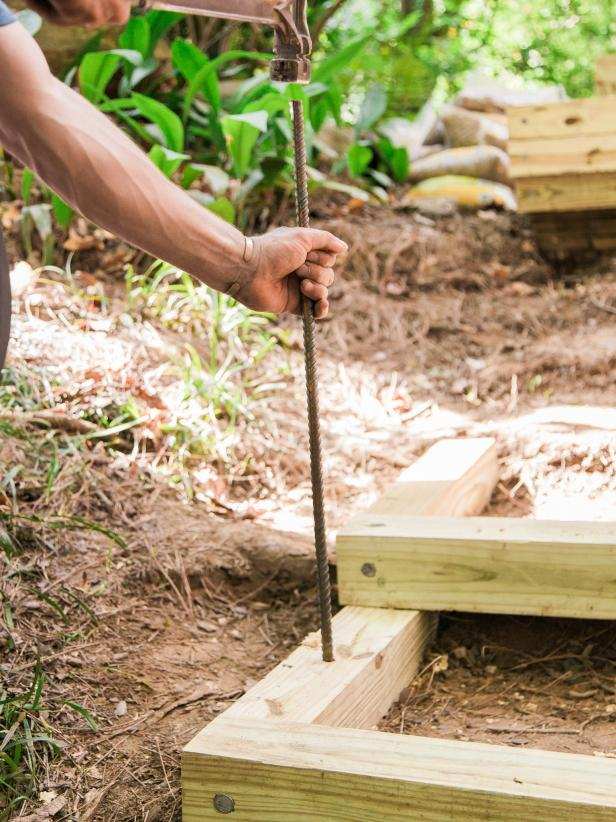 To make adjustments to the pitch, you may need to use a rubber mallet to tamp down the pavers, or you can add a little sand under them. When you reach the edges, it may be necessary to cut the pavers. The best way to make cuts is to rent a grinder with a 4½-inch-diameter diamond blade, or use a chisel and hammer to chip off the excess. Don’t forget the safety glasses (and they have to be cool—none of those dorky science-lab ones).
Finish your patio by compacting the pavers together. This will reduce the likeliness of shifting and settling.
A. Run a plate compactor or hand tamper over the pavers. Start at the outside edges and work your way in. Go over the patio a couple of times until the pavers are secure.
B. Sweep in coarse sand
or polymeric sand (a sand mixture that when activated with water hardens and helps prevent weeds).
C. Run the compactor over the patio one final time to get the sand in all the joints. Get some furniture on there, cook something up, and get the drinks. Don’t forget to call your neighbors over and brag, “Hey, look. I did this myself!” Then sit back, relax, and start planning your next project.
The finishing edge creates a boundary to keep the pavers from shifting out of place.
Option A: We purchase edging that comes in 8-foot-long plastic or metal pieces. Lay it along the edges, and secure it with metal spikes, keeping it a few inches below the pavers so that it won’t be seen.
Option B: The alternative to edging is to build a concrete berm. Purchase premixed concrete, add water, and mix it into a thick mud. We use a trowel to scoop some concrete and pack it on an angle along the outside edge of the pavers, starting thick on the bottom and tapering it to the top. This little concrete triangle wedge provides a strong border and is easily concealed by soil or mulch.
How to Build a DIY Patio for Less Than $300 -
Home
Posted by Katie-Rose Watson on
Wondering how to build a large patio that looks amazing for less than $300? Keep reading!
I am immensely proud of this project. I sit in my garden every morning drinking my coffee grinning from ear to ear looking at my patio. I’ve dreamt about this day for years. When I bought my house four years ago, there were two trees, an unsightly shed, and a basic concrete patio off the back door. I immediately put in a faux flagstone (stamped concrete) patio and replaced the falling down shed with my fire pit patio.
I have since added a large vegetable garden, an herb garden, tons of roses, trees, and flowers, and I redesigned my courtyard last spring. I always intended to finish out the back with another patio but I’m on a budget and my yard had to be done piece by piece. If you want a private oasis but don’t know where to begin: just begin! Transform your yard piece by piece, plant by plant. That’s what I did with my first yard too. Now, here’s how to build a DIY patio for less than $300. For your reference, here’s how bare the yard was before this project:
Old view from my fire pit patio.
Compared to now:
And that’s before the grass totally died under the shade of the tree. Trust me it did NOT look this cute the year before I did this project. It was a mud pit. So ugly that I don’t have a single photo of it and sadly, I didn’t think to take a true “before.”
Prep
Prep the area. I lucked out because my grass had died under the trees where I wanted the patio. Assuming you still have grass, use a shovel to clear the area of all grass and excavation. This project is definitely doable for beginners. No fancy tools are required, just a pick axe to loosen and remove the grass, and a steel garden rake to smooth the area.
Gravel
Buy gravel wholesale. This is my best tip! I was pricing out bags of gravel like an idiot until my dad insisted we check out Classic Rock Stoneyard. Alyssa was incredibly helpful. She quickly calculated how much gravel we’d need for a 40-square foot, 3″ deep patio.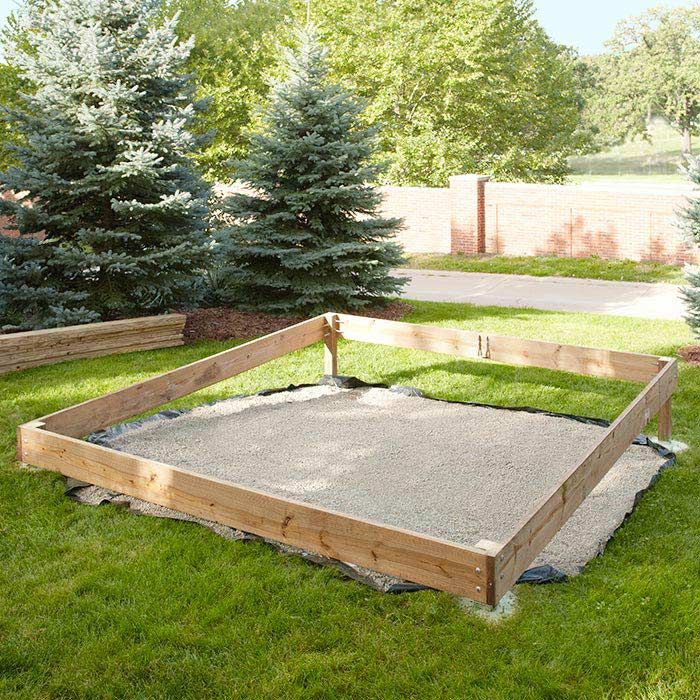 One and a half tons of gravel cost me just $160 – a fraction of the price had I bought it at a hardware store or nursery! Had I known that I could buy gravel for so cheap, I would have finished out my backyard ages ago.
There are certainly fancier gravel types than the pea gravel I chose if your budget allows but I loved how the pea gravel felt under my feet. Plus, I think it looks great! I sprung for delivery (at $45, it was worth it) so we just had to get it from the driveway to the patio.
Stone Edge
Now there are a lot of cheap options out there for trim such as the horrid green metal edging we’ve all stepped on by accident if you wanted to build a patio for less than $200, but I decided that Austin stone would really class up the pea gravel. Plus, my dad built the garden beds in my courtyard with Austin stone and I thought if I used it for the gravel patio, my yard would look more cohesive and less like someone built it piece by piece over four years.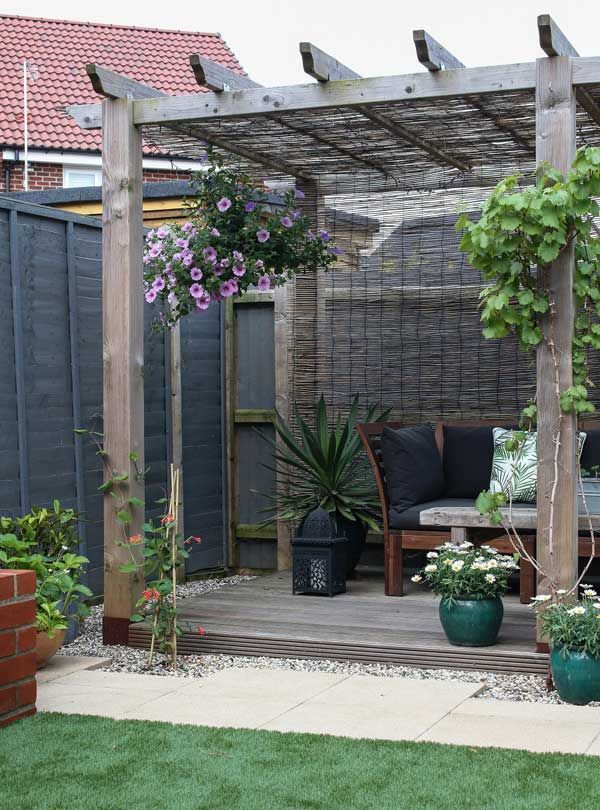
The Austin stone cost about $70 for 40 feet, enough for the edge of the new patio and my existing patios. That’s right, my fire pit patio had the horrid green edging and my stamped concrete patio had no edge at all. The edging goes all the way to the end of the fence and we put a shade bed on the other side of the existing patio.
New shade gardenTo get the curve around the tree’s roots, we wedged a few small rocks together. So far I’ve had no problem with grass getting in or pebbles getting out. My dad did an incredible job fitting the edging together perfectly!
Weed Cover
When you have the gravel on site (in this case, in my driveway), smooth a weed cover over the prepared patio site. Typically this is landscape fabric, but we actually used a giant painting tarp that cost about $15. I researched first to make sure that it can in fact go under a gravel patio. It absolutely can! We poked holes in it for drainage so that the ground beneath the patio wouldn’t harden under the patio.
Shovel, shovel, shovel
A wheelbarrow is your friend here. The delivery truck dumped the pea gravel onto my driveway in a giant heap. My dad and I then shoveled the pea gravel into a wheelbarrow, wheeled it to the patio area, dumped it, and spread it out. Since my patio was oriented against a fence, we dumped the gravel close to the fence, working our way back to the front of the patio. Lay about three-fourths of the gravel, then stop to work on the edging.
Edging
Lay the stones out the way you want them. We did quite a bit of stone swapping to get the edge just right. Use two spikes and a string to get a straight line for your edging. This is more critical than you would think! Then move the stones out of the way and use the pick axe to dig a shallow trench wide enough to nestle the stones into the ground. Set the stones into the trench one by one, taking care to make sure they are level with each other and are straight. They should fit snugly together so as to not let any gravel slip through.
Finish it off
Once you’ve got your stone set in the trenches, you’re ready to finish the patio! Simply wheel the gravel to the stone edge, dumping the gravel over the side and into the patio. Smooth the gravel so that it is evenly distributed.
That’s it! Just look at how much living space was gained in my yard. Can you believe this cost so little?! We could have gotten the patio project done in one day but my gravel was delivered pretty late in the day and we only had daylight until about 5 pm, since this project took place in November. If you started in the morning, I think you could definitely do this in one day. Certainly a weekend.
HUGE thank you for my dad for building this patio with me! I furnished the patio with a new hammock and a gorgeous six person teak dining set from Lowe’s. I added some potted plants, a concrete bench I’ve had for a decade nestled in the rounded area in front of the tree, and I (okay, dad) strung solar lights between the trees. The dining set matches the new teak chaise, love seat, and coffee table that I got for my stamped concrete patio last fall, which I think really ties the whole yard together. Here are some more photos of my refurbished backyard!
I hope this article inspired you to DIY a patio. Get outside and enjoy!
Happy gardening,
Don’t forget to follow/like The Rose Table on Facebook, Twitter, and Instagram! Sign up for The Rose Table’s emails here.
Like this:
Like Loading...
Patio in the country - installation instructions. Real photos of finished patios in the recreation area on plot
At present, the dacha has ceased to be exclusively a source of additional income in the form of vegetables and fruits.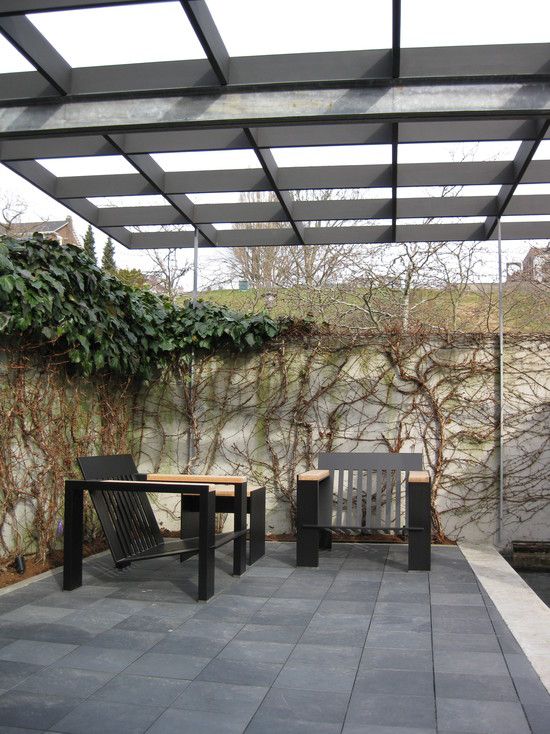 Most modern summer residents use suburban areas for cultural recreation and unity with nature. Increasingly, lovers of outdoor recreation decorate their sites with alpine slides and neat lawns, artsy pergolas and cozy gazebos. Recently, the patio area has become very fashionable.
What is a patio? A cozy place to relax in the courtyard or in the garden; under a canopy or open sky; with a small coffee table for intimate conversations or a meeting place for a noisy company. There is a huge variety of patio types in the landscape of suburban areas.
Brief content of the article:
Good location
It is very important to choose the right place to create a recreation area where both households and guests will feel comfortable.
The most common location is against the wall of the house. Best of all, if there is a door in this wall, you will not have to overcome the distance with treats for guests or hide from the weather.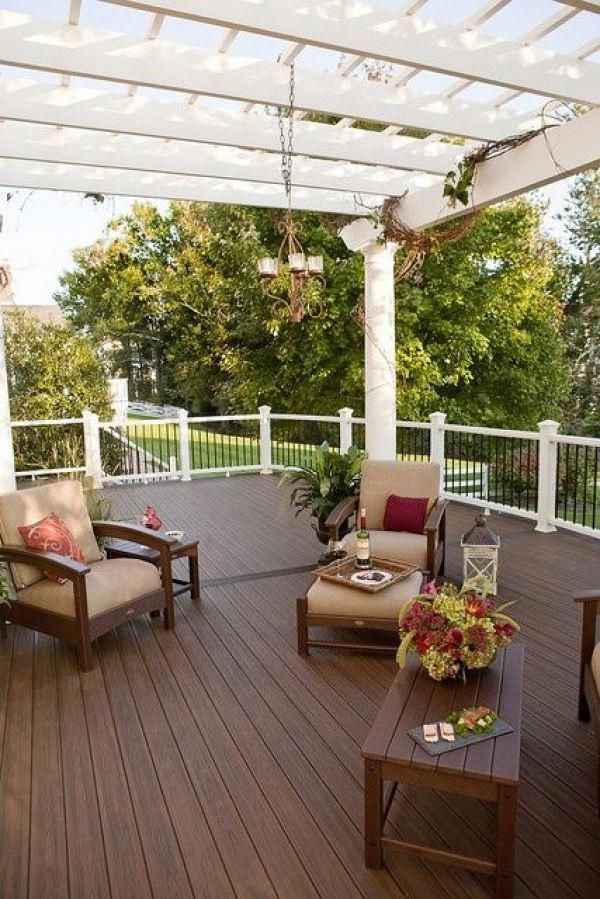 This version of the patio is the classic and most common.
But just as popular are garden patios shaded by spreading fruit trees with a small pond or pretty fountain. If there is no way to hide from prying eyes in the shade of the garden, you can build an artificial fence in the form of a screen.
Before deciding for yourself what should be the ideal place for relaxing in the country, you will have to look through any catalog of beautiful patios. It may not be possible to stop at any specific option, but several ideas will merge together, thus getting a unique project.
But even if you cannot come to a certain decision on your own, it is never too late to seek the help of specialists.
Patio steps
We decided on a place to create a cozy corner, we need to think over the dimensions. The dimensions of the patio for a summer residence depend primarily on the direct purpose. Namely, whether it will be a corner for two or for noisy gatherings of large companies, or maybe it will be your personal secluded place.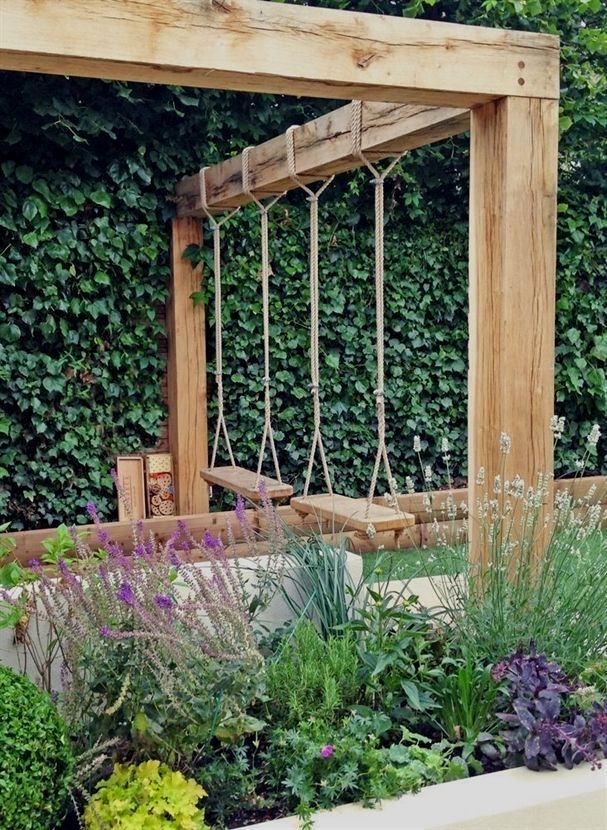
Foundation
One of the most important steps in building a patio is covering the area. As the basis, you can choose different materials:
- concrete slabs (lower cost),
- natural stone (looks original and original, but installation problems due to uneven shapes),
- paving decorative tiles (the most successful combination of price, quality, and in addition, a huge variety of combinations of shapes),
- garden parquet (made from waste wood and polymers, which makes this material more durable than natural wood, as it does not rot),
- decking (modern building material, visually indistinguishable from natural wood).
Regardless of which pavement option you choose, you must complete the following steps to prepare the site for laying the base:
- Mark site boundaries;
- Remove a layer of soil approximately 10-15 cm;
- Cover with sand;
- Compact by watering and leveling with a rake.
Proceed with laying the flooring. It is important to remember that tiles or natural stone should be laid closely so that each element fits snugly against the previous one.
When constructing the base for the patio, it is also necessary to provide for rainwater runoff, which is most practical to direct towards the garden or flower bed.
Canopy
A patio with a canopy will make your seating area even more cozy, protecting you from the scorching sun or sudden bad weather. The canopy can be made stationary, for example, from translucent polycarbonate. It is practical and modern material, besides it is very durable.
An interesting variant of thin wooden slats arranged either in a parallel way or in a grid way, creating an interesting play of light and shadows. The canopy can be made portable, for example, from a stretch awning or an umbrella.
Lighting
It's easy to make your patio a functional place to hang out at any time of the day.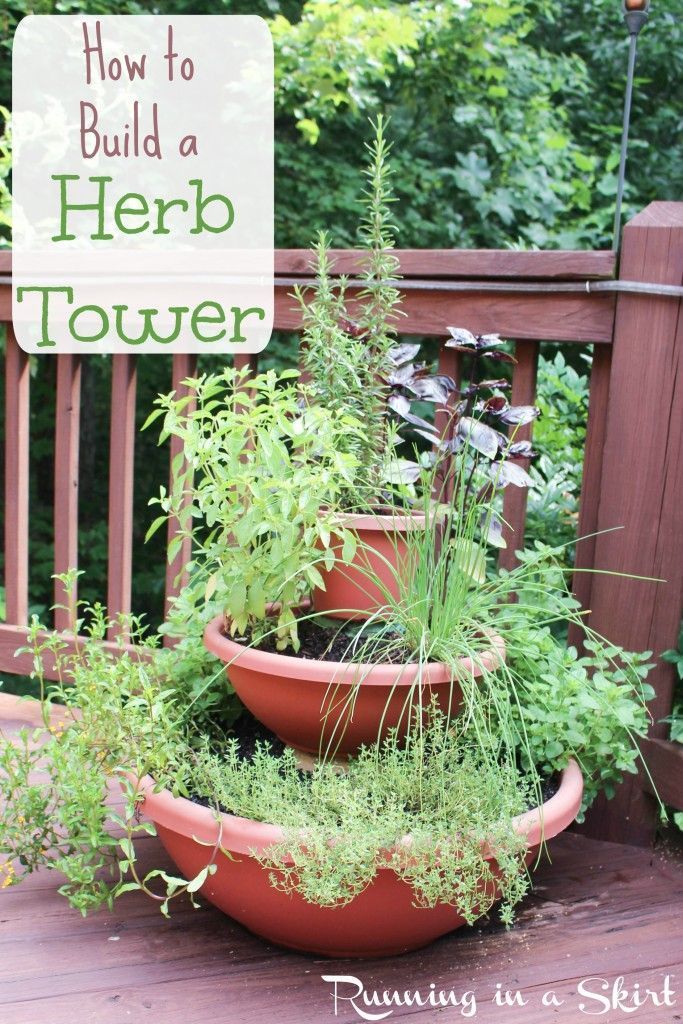 It is enough to place decorative lamps or garden torches around the perimeter. Lighting fixtures can also act as decoration.
Patio furniture
How to make your patio as functional as possible? The choice of furniture is of great importance, first of all, for the direct purpose of the patio - for relaxation. The main rule to follow when choosing patio furniture is its scarcity and practicality.
Patio furniture should be made of moisture resistant materials, especially if you decide to make it stationary. Not the best choice would be upholstered furniture in light colors, as it is extremely easily soiled. After all, the patio is a corner for relaxation, and not for constant washing and cleaning.
It is not recommended to clutter up a cozy corner with bulky tables and sofas. Give preference to light wicker chairs and coffee tables.
Wrought iron furniture will also look organic, and if you decorate it with bright pillows, then it is not at all usual.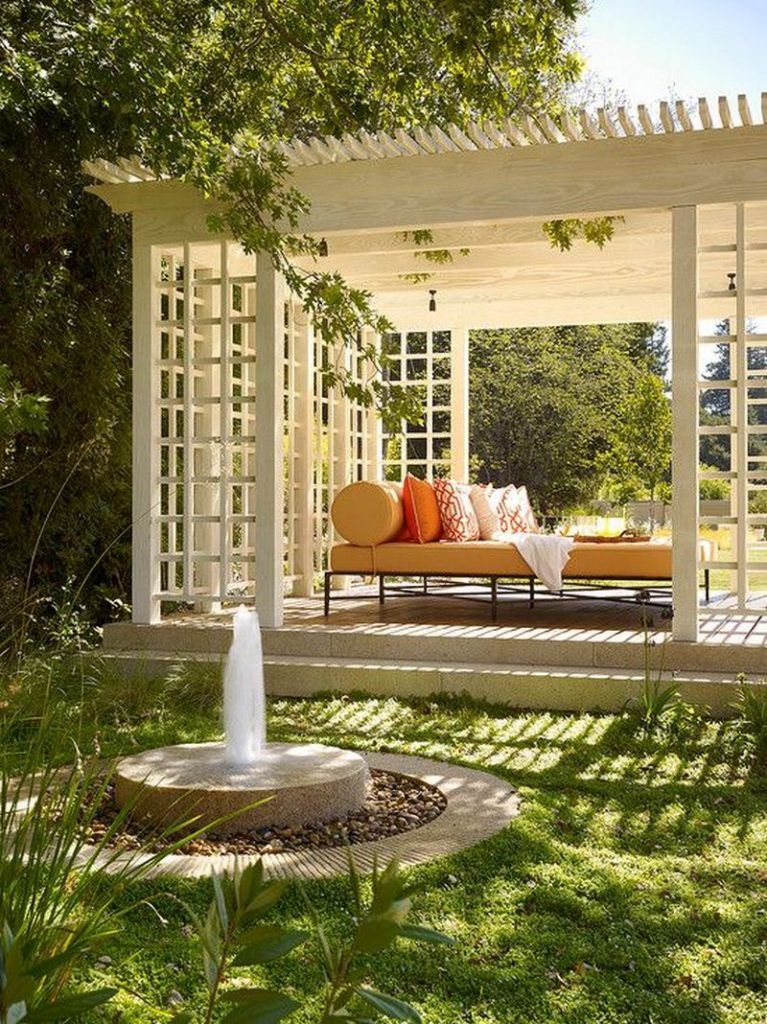 A cozy place for relaxation will also not do without a comfortable deck chair or swing.
If you are a fan of friendly gatherings in the open air, you need to consider the accommodation of the number of guests that you most often have. In this case, the brazier will be an integral part of the patio, and it does not matter whether it is stationary or portable, the main thing is that it fits into the overall concept of the patio.
Creation of comfort
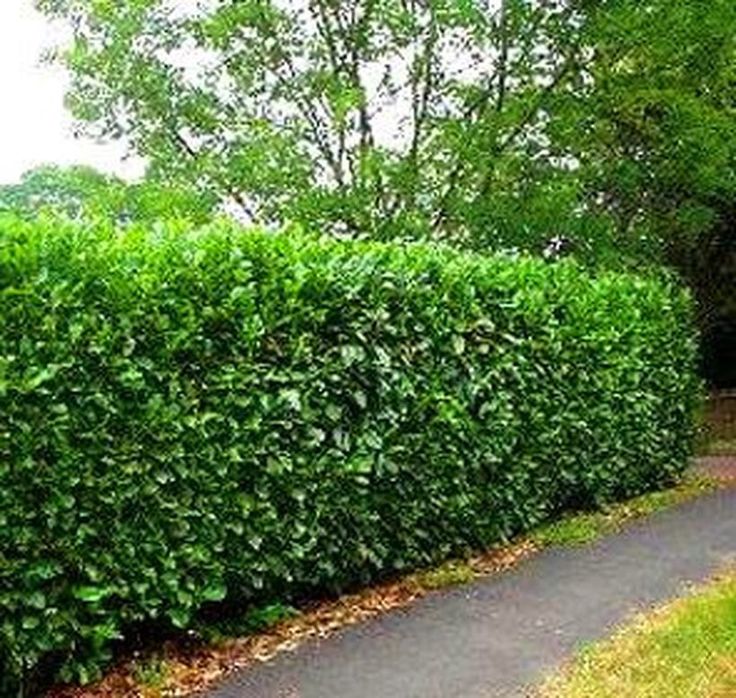
Few would dispute the fact that one of the main conditions for a comfortable stay is privacy. It’s not very pleasant to feel prying eyes on you during relaxation. A lattice or openwork partition, entwined with weaving roses or clematis, can become a protective and at the same time decorative design.
An excellent hedge can be a group of evergreen shrubs. In addition, conifers will add bright colors to your site all year round. Landscaping a patio is a very important stage of decor.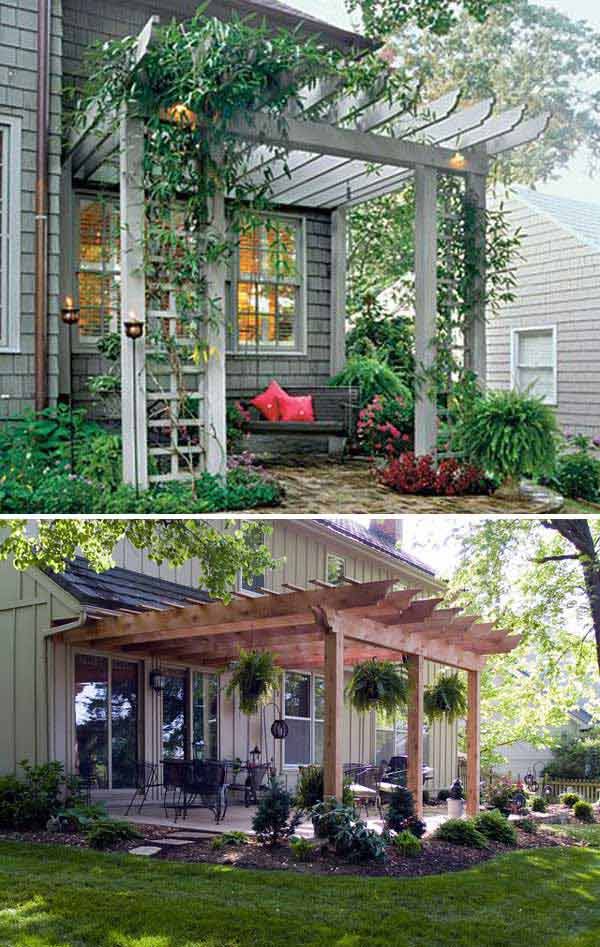 After all, a suburban area is a corner of nature that you create with your own hands. Photos of the patio in the country are striking in the variety of landscape design ideas.
Ornamental plants in multi-level mixborders or intricate flowerpots look spectacular. With the help of planting pockets, you can combine the garden and the patio area, planting annuals or bulbous plants in them, preferably.
By opting for fragrant rosemary or lavender, you can fill the countryside atmosphere with fragrant notes. Exotic orange or lemon trees in outdoor pots will bring the Mediterranean spirit to your home.
If the patio adjoins the wall, then it can be decorated with unusual pots with colorful begonias or nasturtiums. Climbing plants will also perfectly decorate an unsightly adjoining wall or emphasize the unusual design of an arch or pergola.
The design of the patio perfectly fits an artificial pond or fountain.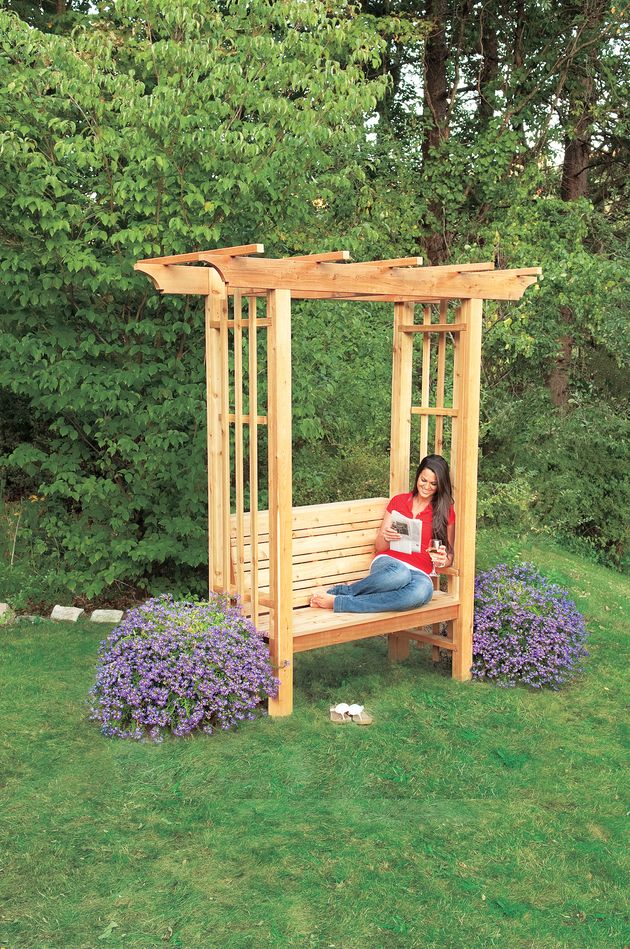 Of course, it is not so easy to make a fountain on your own, because it is necessary to lay communications: supply and discharge of water. To create such a decor, it is better to invite a specialist.
It's not that hard to deal with a small pond. It is enough just to dig a small container into the ground, fill it with water and decorate at your discretion. Unusual sculptures illuminated by garden lights will create a mysterious fairy-tale atmosphere.
Do not strive to create pretentious and ostentatious beauty in practice that is not comfortable and useless. When creating a patio in your summer cottage, remember that you are creating a cozy patio primarily for yourself and your loved ones, and not for the sake of surprising your neighbors.
Photo of the patio in the country house
Post published: 03.11
Join the discussion:
detector
Patio in the country, photos of examples of how to make a patio in the country with your own hands
The pleasure of living in a country house is associated primarily with outdoor recreation. Therefore, care must be taken to ensure that this place is well equipped.
However, you should not take on complex and grandiose projects - a cozy patio can be designed simply and at the same time beautifully, comfortably, harmoniously.
Patio at the dacha - a photo of the courtyard in Russian nature
Ketron Custom Builders
Without a roof over your head and does not require large financial investments.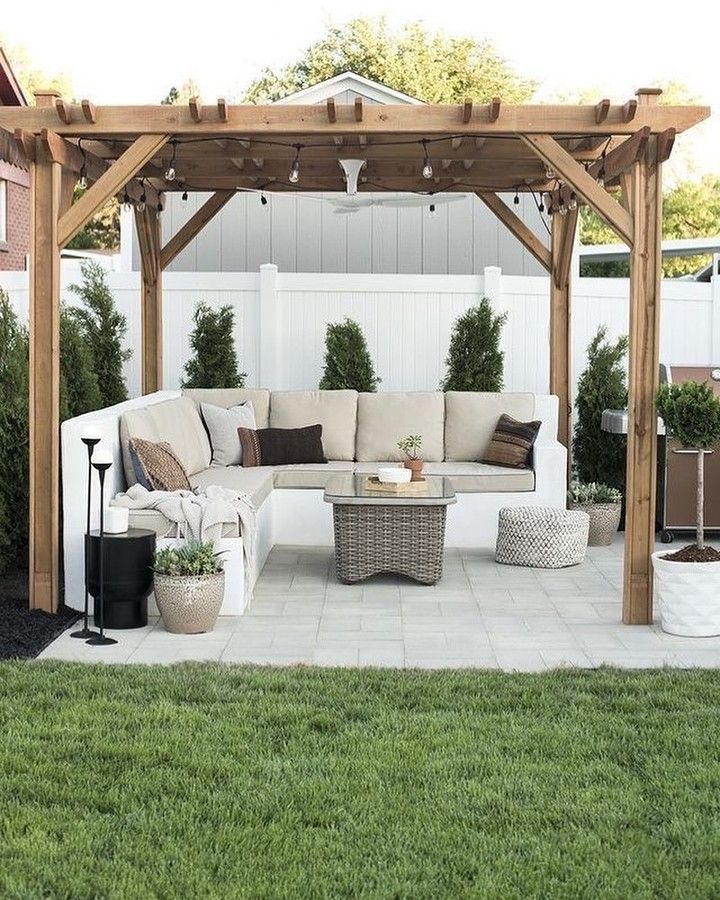
This option is especially good if you already have a veranda, terrace or gazebo where you can hide from the weather. Well, in case of a scorching sun, you can always open a large garden umbrella.
Alderwood Landscape Architecture and Construction
A more solid solution is to build a shed so you don't have to hide in the house during a sudden rain.
Shelter can be monumental: with a solid roof, electrical wiring and lighting; such a shelter is kept on solid pillars, which in a few years will be entwined with ampelous plants.
Paradise Restored Landscaping & Exterior Design
Or you can build a less complex canopy: use simple materials for roofing, such as polyurethane, corrugated board or even waterproof fabrics.
M Valdes Architects PLLC
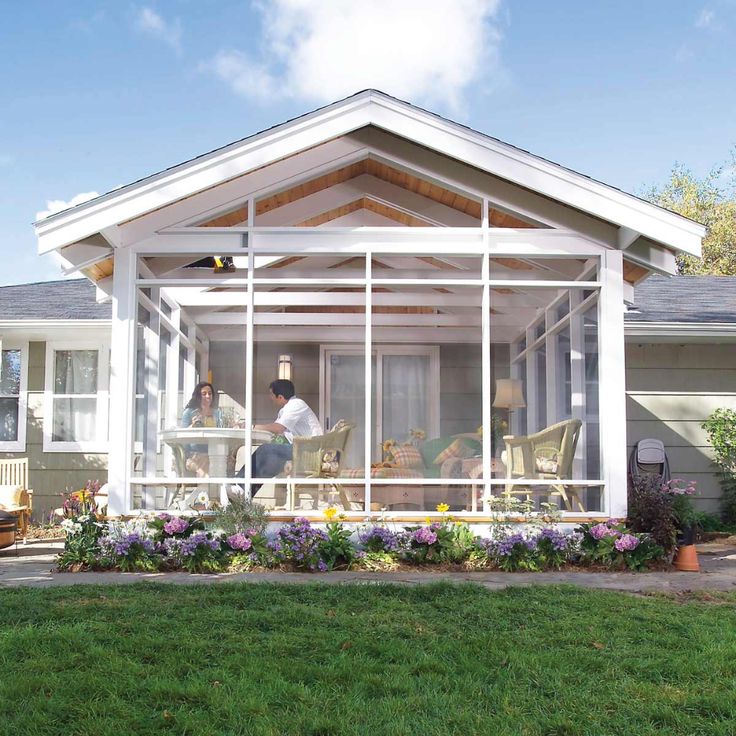
A more reliable and expensive option is a gazebo or, as they say now, a pavilion.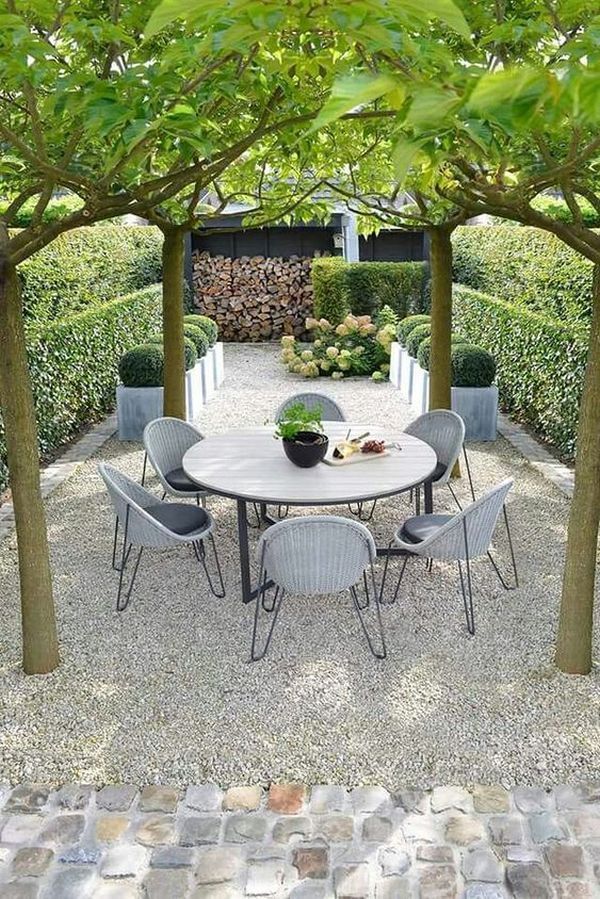 When planning such a building, try not to get away from the patio - that is, a kind of open-air room.
Let the building be light - use more glass. The maximum size windows, and ideally sliding ones, will allow you to achieve the feeling of being in the air.
Roof under your feet
When space is tight in your yard, think outside the box: find a rooftop that's suitable for relaxing and organize your own patio area on it. An impressive view and a quick tan are guaranteed.
I must say, personally, when I saw the patio on the roof of the forty-ton container-hozblok, I was simply delighted!
AD Design Inc
Site requirements
Let's try to find a suitable place for a recreation area. The site should be flat - it is quite possible that it will offer a wonderful view of your entire garden. If you are not a fan of sunbathing, choose a shady place that will shelter you on a hot afternoon.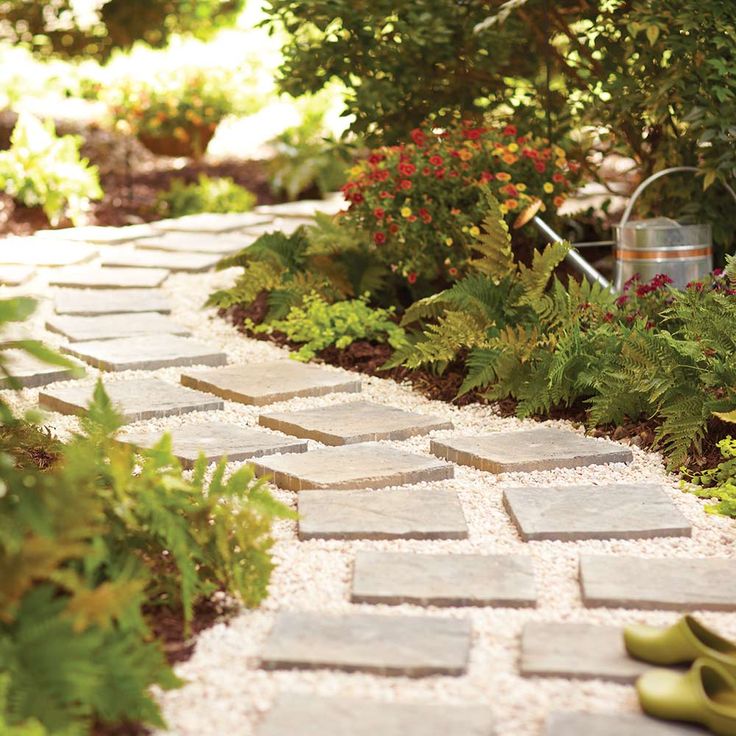
Tip: The space you have chosen for your patio is best separated by a hedge or a small stone or wood fence.
Amy A. Alper, Architect
Hold firmly
The floor will be properly designed with special materials: the floor must be hard, easy to clean and quick-drying at the same time.
Paving slabs come in different colors and can be used to make interesting ornaments. Natural wood is suitable - it is pleasant to walk on it barefoot.
Designscapes Colorado Inc.
Illustration: Patio area in the country house - photo from a country house
You can, of course, use natural stone, but it's expensive. An aesthetic and compromise design solution is to alternate stone with lawn: it looks organic against the general background of the garden.
Abloom Landscape Contractor
Furnishings
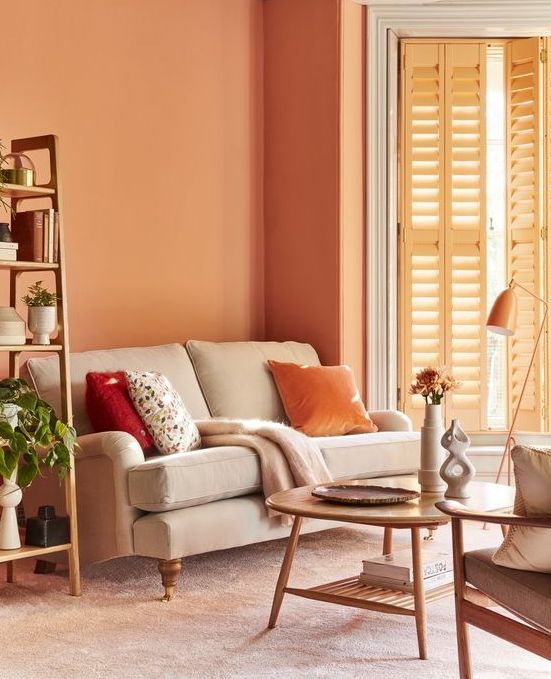
I love wood furniture on the patio, but this option is only appropriate if there is a roof.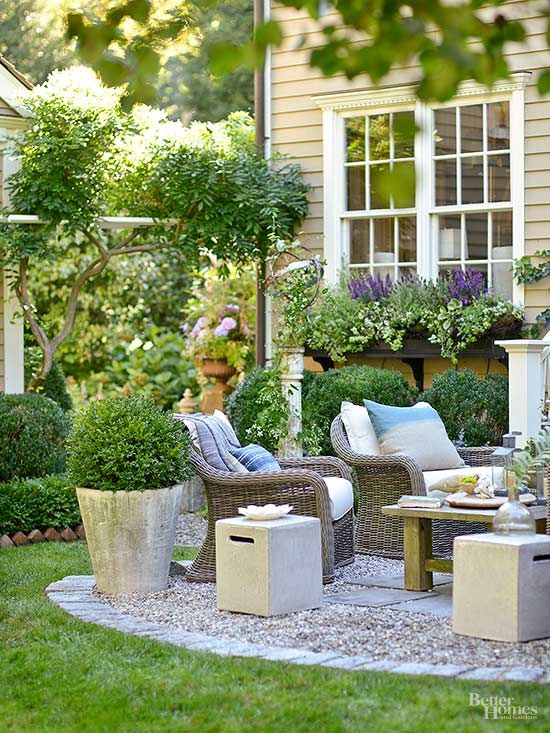
Wrought-iron furniture and sets made of artificial wicker look no less elegant. The main thing when choosing furniture for the patio is that the chairs, sofas, chairs and loungers are comfortable to sit on.
Today, manufacturers have learned to cover garden furniture in special fabrics with impregnations - they also have a soft layer of internal filler, as well as grooves for rainwater runoff. Therefore, the furniture will not suffer from the vagaries of weather and nature at all: it is designed for round-the-clock stay in the open air during the entire warm season.
Tim Barber Architects
Illustration: Setting up a country house patio with an outdoor fireplace
The hearth is the heart of the patio
If space and finances allow, build an outdoor fireplace or stove so you can gather around on chilly evenings.
Can't install a stationary oven? Be sure to buy a mobile grill or barbecue, always appropriate for a warm family dinner.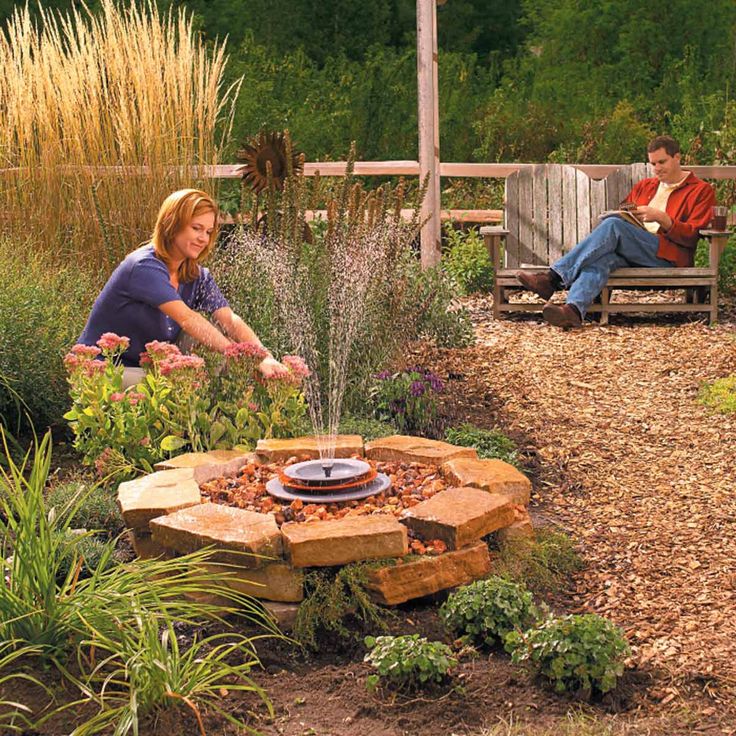
Alderwood Landscape Architecture and Construction
I would like to dwell separately on fire bowls. This is a very spectacular and romantic decoration of the "street room". You can arrange such campfire gatherings in your garden.
A fire pit can be built solidly using refractory stone. Pay attention to the photo - in my opinion, it will not be difficult for Russian craftsmen to lay out such a square box with their own hands.
Pennsylvania Landscape & Nursery Association
Fire bowls are also portable and compact, and no less beautiful for that. And you can also build them in the country with your own hands.
Stone bowls such as granite are popular; there are also metal and ceramic hearths.
Colorworks Studio
Outdoor Cinema
I want to share with you my personal "trick": I made a real outdoor cinema with my own hands.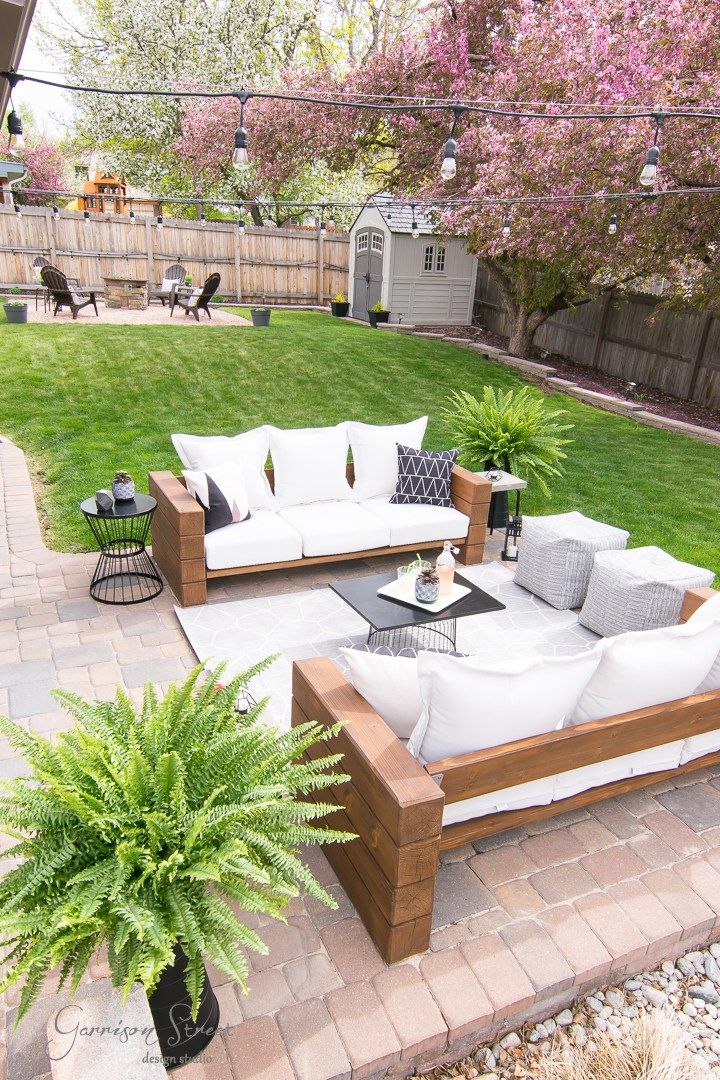 You can't even imagine what a stunning effect it has on my guests! But I just bought an inexpensive projector, which we connected to the receiver, and stretched a large white canvas-screen on a tripod.
You can watch all your favorite movies and series in the open-air garden! True, the time in front of the screen also had to be planned: it is possible to enjoy such a cinema only on those rare days when my husband's friends do not occupy our garden cinema hall to watch football matches.
Fusion Designed
Finishing touches
Each of us has our own understanding of comfort - so let your imagination run wild, make yourself happy. Vases with flowers (from largest to smallest), dwarf conifers in pots, any aromatic and spicy plants. Do not forget about decorative pillows, cushions, blankets for chairs, deck chairs and swing sofas.
Pedersen Associates
Illustration: How to make a patio in the country house with your own hands - a photo showing how you can decorate the patio with lanterns and garlands
time not only during the day, but also on warm evenings.