How to add a tile backsplash
How to Tile a Backsplash
Install a mosaic tile backsplash for a whole new look in just one weekend.
Every editorial product is independently selected, though we may be compensated or receive an affiliate commission if you buy something through our links. Ratings and prices are accurate and items are in stock as of time of publication.
Time
Multiple Days
Complexity
Intermediate
Cost
$101–250
Introduction
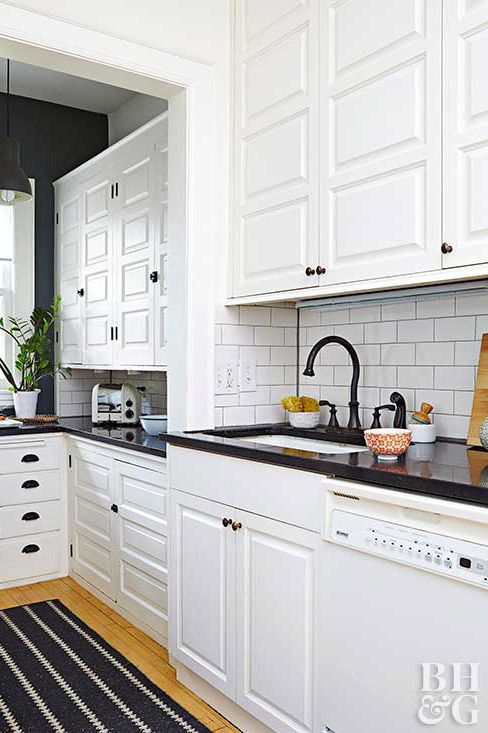
Tiling a backsplash above the counter is one of the easiest ways to upgrade an old, tired kitchen on a tight budget. You can choose from the vast array of handsome ceramic tiles available, including the easy-to-install one we show here—mosaic tiles.Tools Required
- 4-in-1 screwdriver
- Bucket
- Caulk gun
- Drill/driver - cordless
- Grout float
- Level
- Non-contact voltage tester
- Notched trowel
- Rubber mallet
- Self-centering drill bit
- Tape measure
- Utility knife
Materials Required
- Caulk
- Grout
- Grout sealer
- Mastic
- Outlet extenders
- Stone tile sealer
- Tile
- Tile spacers
Planning, Materials and Tools
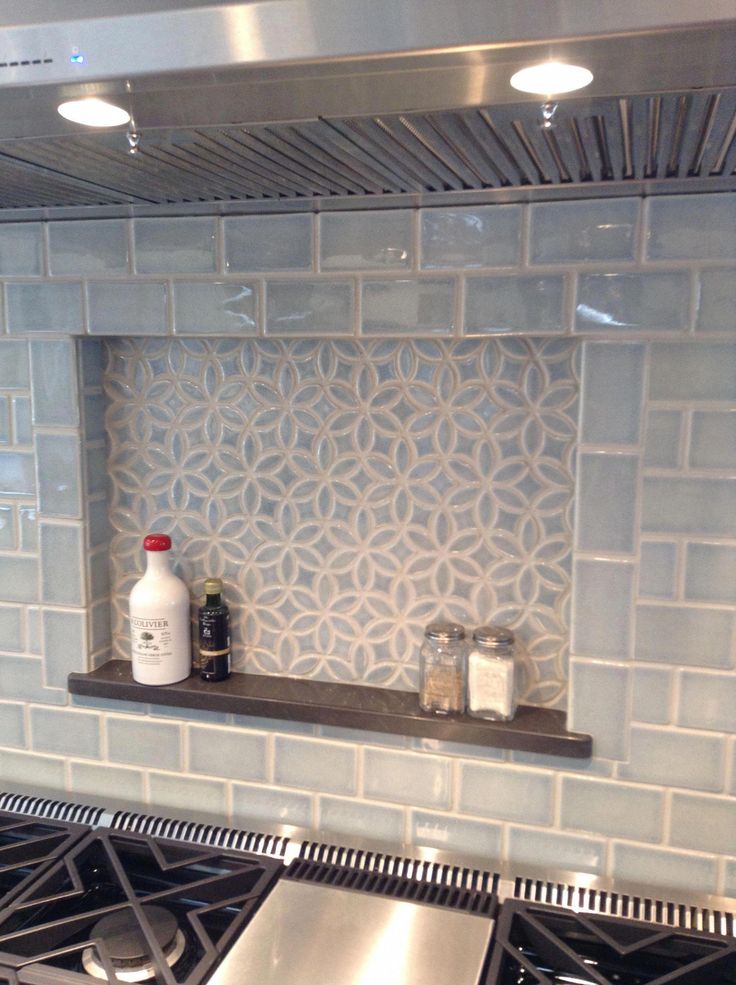
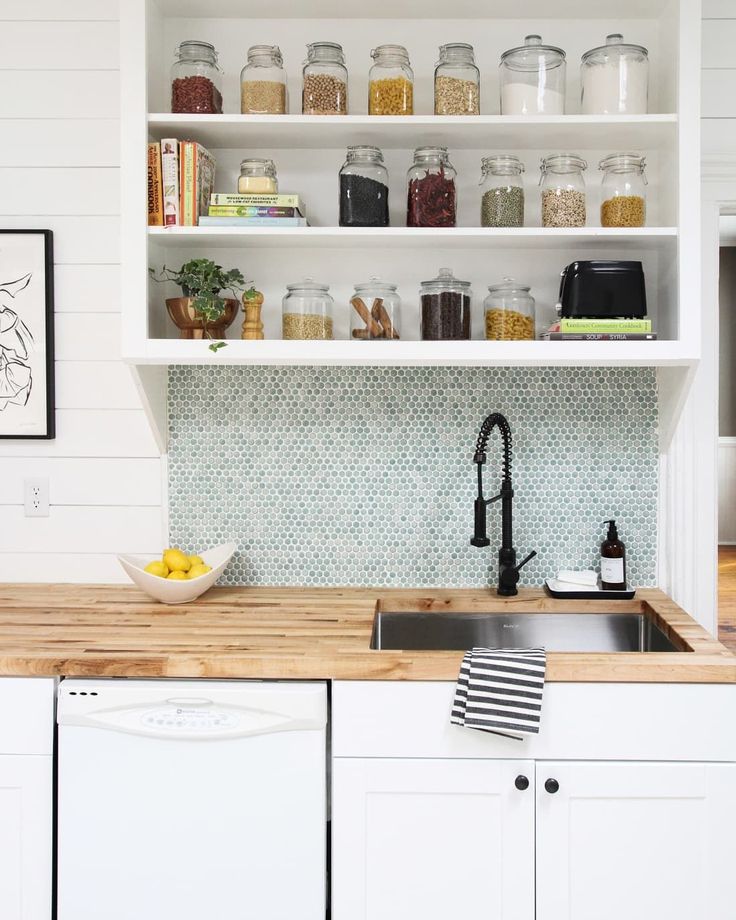
Nothing packs more style per square inch than mosaic tile for a kitchen backsplash. So if your kitchen’s got the blahs, this is an easy way to give it a quick infusion of pizzazz. We’ll show you how to tile a backsplash in a weekend! The small tiles are mounted on 12 x 12-in. sheets, so installation of a tiled backsplash is fast. You can install the tile on Saturday and then grout it on Sunday.
Family Handyman
Shopping for Mosaic Tile
Mosaic tiling sheets make it easy to achieve a great backsplash. Layout is a cinch—you can simply cut the mesh backing on the sheets to fit the tile along counters and cabinets. In fact, the hardest part of this or any other tiling backsplash project may be choosing the look—the tiles come in a variety of shapes and materials, and many sheets have glass or metallic tiles built in for accents.
To add to your options, strips of 4 x 12-in. tiles are available for borders. So you can match the existing look of your kitchen—or try something new!
Family Handyman
Project step-by-step (8)
Clean the Wall
Before installing the tile, clean up any grease splatters on the wall (mastic won’t adhere to grease).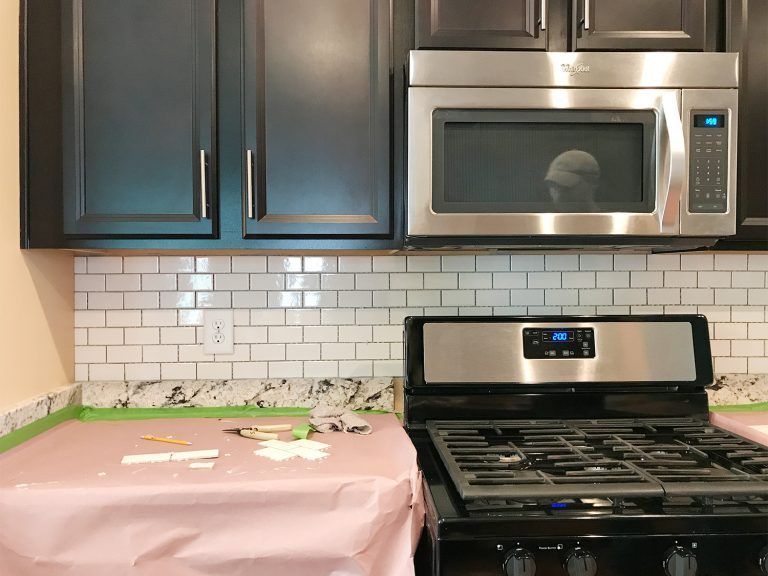
- Wipe the stains with a sponge dipped in a mixture of water and mild dishwashing liquid (like Dawn).
- If you have a lot of stains or they won’t come off, wipe on a paint deglosser with a lint-free cloth or abrasive pad so the mastic will adhere.
- Mask off the countertops and any upper cabinets that will have tile installed along the side.
- Leave a 1/4-in. gap between the wall and the tape for the tile.
- Cover the countertops with newspaper or a drop cloth.
Sign Up For Our Newsletter
Complete DIY projects like a pro! Sign up for our newsletter!
Do It Right, Do It Yourself!
Originally Published: November 15, 2018
Similar Projects
How to Install Backsplash the Easy Way
We show you the right materials and techniques to use to put up a tile backsplash in one afternoon.
By Tom Silva
Share this story
Project details
Skill
1 out of 5 Easy
Cost
$100
Estimated Time
2-3 hours
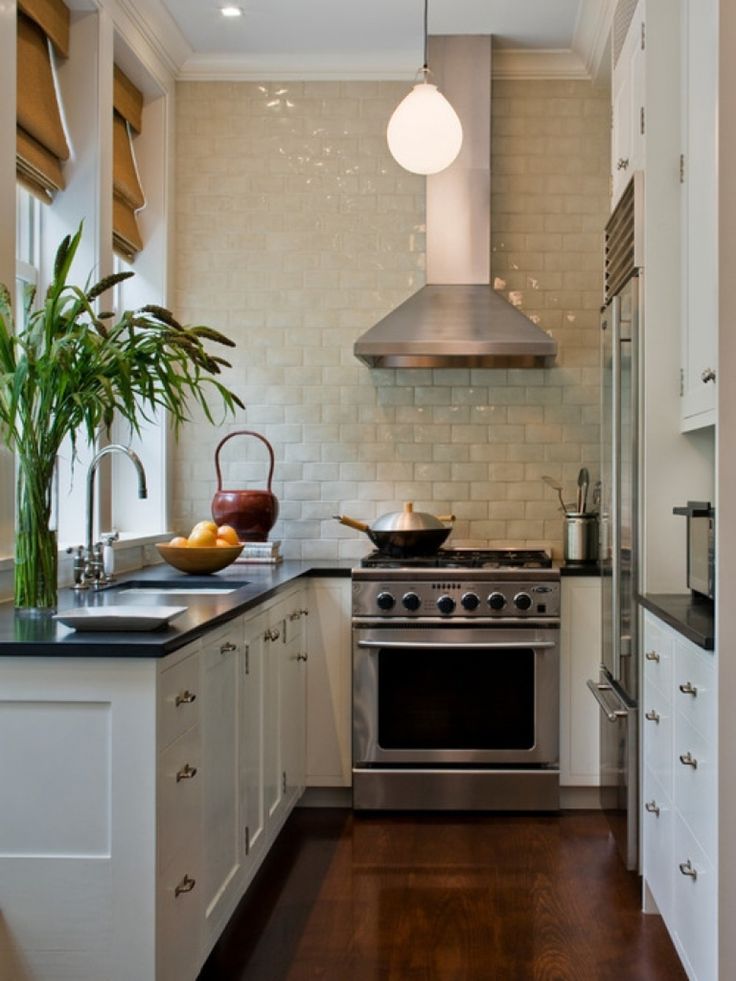
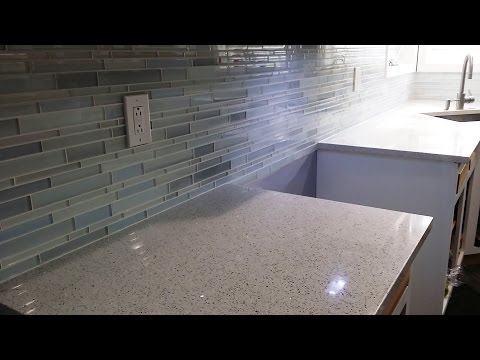
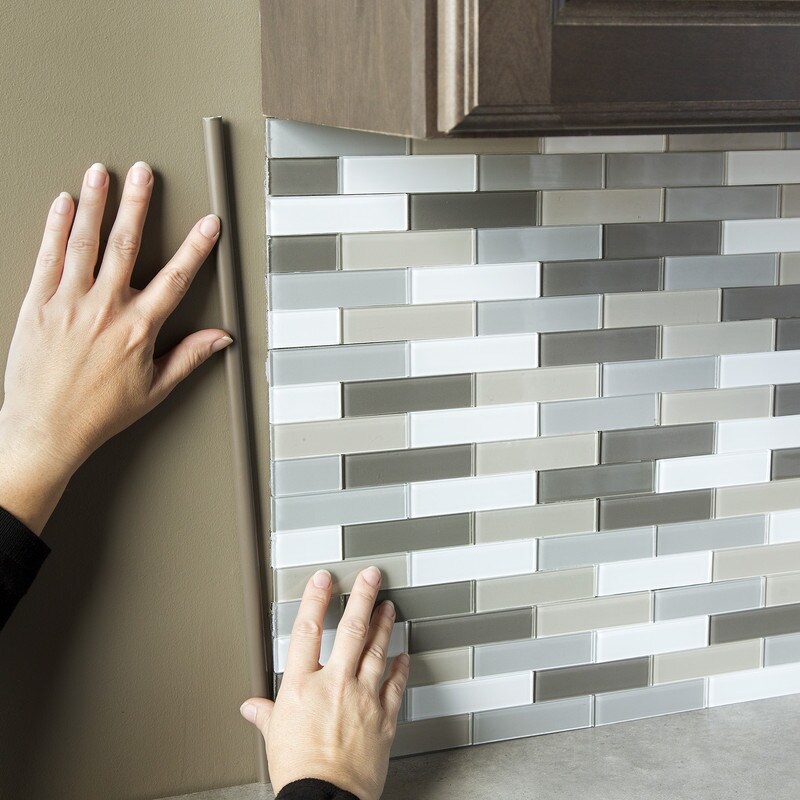
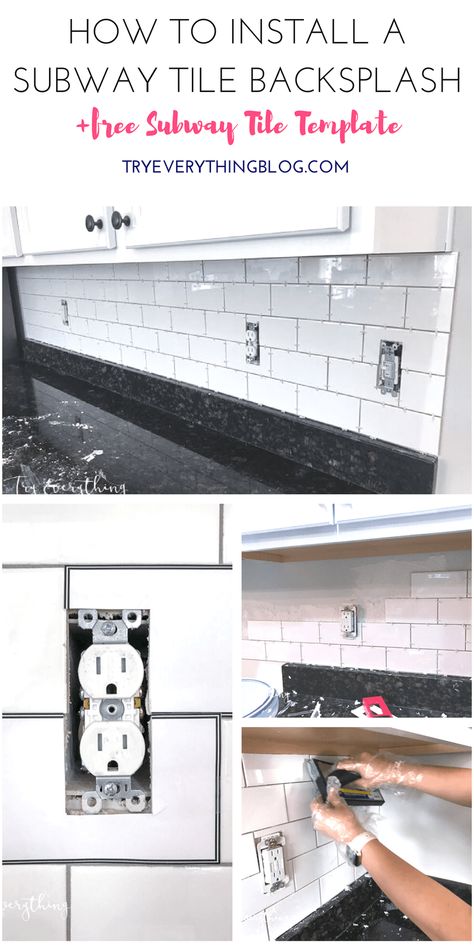
The easiest way to install a backsplash is to use tiling, two-sided adhesive mat, and pre-mixed grout. Using the adhesive mat helps you quickly and accurately put up your tiling. With tile, there are a range options from square tiles to subway tiles, in many different colors, so you can also create the exact look and feel you want in your kitchen. We recommend square tiling for beginners because it’ll be the easiest to cut and align together.
In the video, and the steps below, we walk you through how to decide how big your backsplash should be, selecting your tile, and how to install it from start to finish.
Backsplash Installation in 15 Steps:- Clean the wall thoroughly with the cleaner to remove any grease or other debris.
- Secure the drop cloth on the counter using the painter's tape, covering the entire work area.

- Mark the two sides of the wall using the painter's tape where the backsplash should start and stop.
- Measure the space you plan on tiling. Transfer the measurements to the tile adhesive mat and cut to size using scissors.
- Peel one half of the back off of the adhesive mat, and align the unexposed section to a straight surface like the existing countertop. Ensure the side with the thicker gap between glue dots is aligned to overlap the next sheet.
- Once the sheet is in the correct position, stick it to the wall. Then peel the bottom half and stick that to the wall.
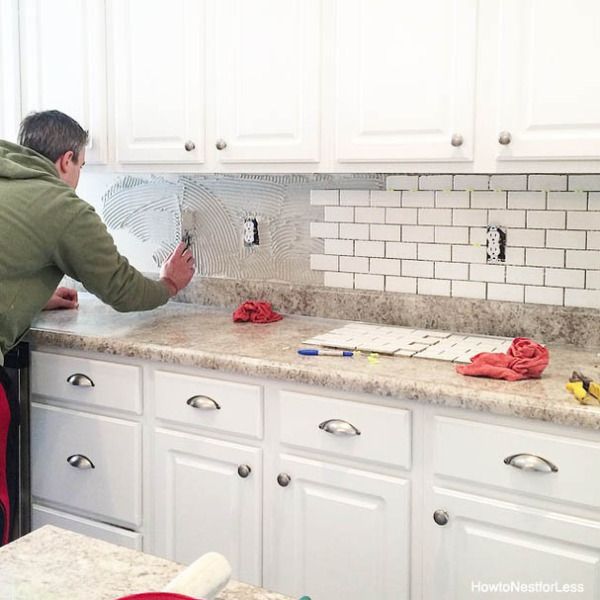
- Repeat this process until the desired area is covered. Use the rubber float to push the adhesive mat to the wall for a permanent bond.
- Hold the tile up to the wall to determine where it will need to be cut to size.
- Use the utility knife to cut the mesh behind the tile.
- Peel the plastic coating off of the adhesive mat, and carefully place each tile section onto the adhesive.
- Once the tile is in the correct position, push it in place with a rubber float.
- Repeat this process until the wall is covered with the tile.
- Fill the gaps between the tile with the premixed grout and the rubber float. Apply it diagonally until all of the spaces between the tile have been filled with grout.
- Fill the bucket with water and using a clean sponge, wipe the excess grout off the tile, again diagonally. Be careful to only wipe the grout off the face of the tile, not the grout in between the tiles.
- After 24 hours, a haze may appear on the tile. To remove it, wipe the tile with a rag.
Shop Tile at Home Depot
Related
Installing Decorative Tiles
All About Ceramic Subway Tile
Tools:Do-it-yourself kitchen apron made of tiles: laying master class
The main purpose of an apron in the kitchen is to keep the walls pristine clean and easy to wash them from the inevitable splashes of grease and water.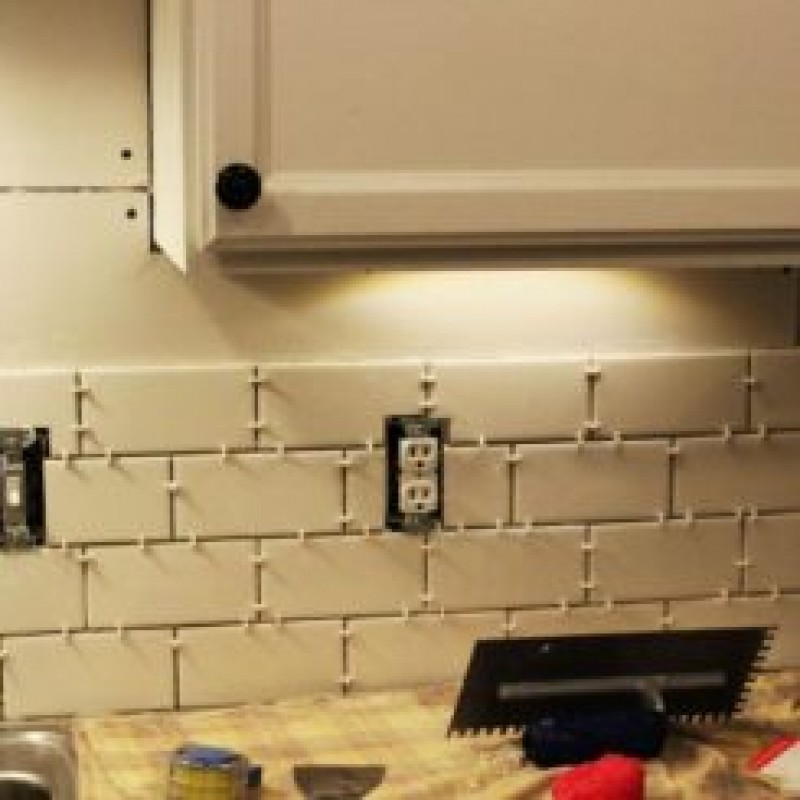 There are several options for making it, but in this article we will focus specifically on a tile kitchen apron, since it is easiest to do it yourself.
The apron should cover the area of the walls above the work area from the worktop to the wall cabinets (usually at least 60 cm), and go slightly under the worktop. Above the stove, it must be done to the level of the hood. nine0005
Plan ahead for the design and dimensions of the apron
If you have not bought a kitchen set yet, make the calculation directly from the marks on the wall. Knowing the dimensions of the selected tile and the area of \u200b\u200bthe apron, it will not be difficult to calculate the required amount by drawing up a drawing. But you need to buy material with a margin of 10-15%, in any case there will be marriage, uneven undercuts and cutouts for sockets.
Quick Article Navigation
- Tile Apron Features
- Preparatory Step
- Applying adhesive
- Laying tiles
- Holes for wires and sockets
Tile backsplash features
First of all, familiarize yourself with the features of this material.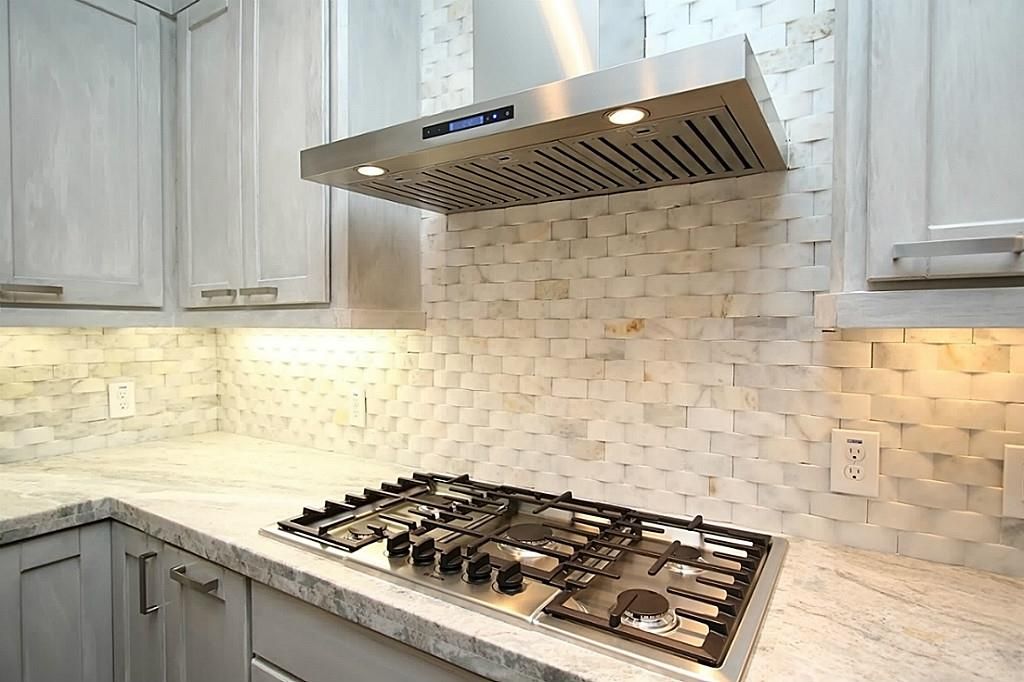 Many would not use tiles for an apron if they knew all its pros and cons in advance.
Dirty apron in the kitchen made of tiles cannot be washed just like that
- The tile itself is quite easy to clean from grease using special products. But since after laying seams of 1.5-2 mm are formed, dirt will constantly get into them, which will be very difficult to get out of there. At the same time, wall tiles cannot be laid without seams, so you are guaranteed problems when washing the apron. Based on this, the main recommendation is to use only smooth glossy tiles without relief for the apron, and try to make the seams small (the minimum thickness of the crosses that are on sale is 1 mm). nine0015
- The next minus is that the tile backsplash is the most time-consuming of all the other options. You need to have experience in laying and think in advance how to close the pipes, where to make sockets.
- The main advantage of this option is low price and durability.
 But given the cost of work and additional materials for preparation, this is not the most profitable option.
Preparatory step
As you can see in the photo, a 27*40 cm tile was chosen.0005
Two rows of tiles 27*40 cm and one row of decor of the same size between them
The decision on how to position the apron - from the level of the countertop or below, must be made depending on the pattern of the tile so as not to disturb it. In our case, a collection was purchased with a decor that has a horizontal stripe. Therefore, the size of the offset will depend on how this strip divides the space of the apron. For human perception, it is best to divide the space in half, or according to the law of the golden section (take the total height and multiply it by 0.618). nine0003
We will assume that you have already leveled the walls with plaster or drywall in advance. This is also an important step that cannot be ignored and rely on the fact that the glue will save you from curved walls.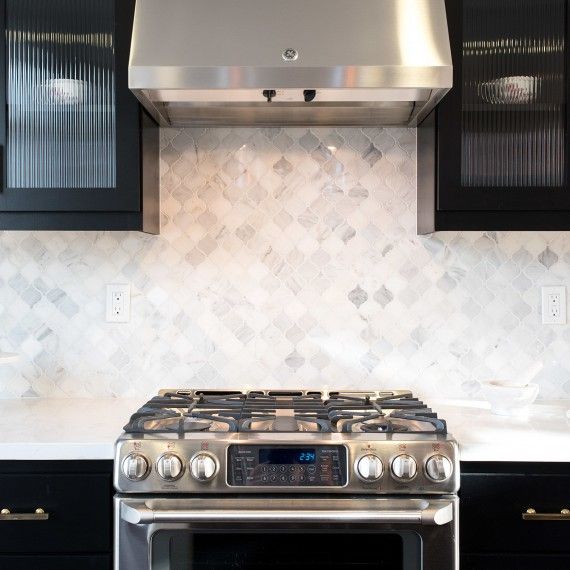
Some people think "I'll put a tile on thick glue, and it will stand up straight for me." You may be able to do this, but any tile adhesive tends to dry out when it hardens. And if the layer size is uneven, when drying, the tile can lead, tear off, tension will be created on its surface. nine0003
If the wall is whitewashed, it must be completely removed. It is not necessary to remove ordinary oil paint, it will be enough to make notches on it (up to 100 pieces per square meter). They are easily made by a grinder with a concrete disc or a chisel.
Since the tiles are quite heavy, remove all old plaster that does not adhere well.
When you mark the bottom row, the profile is set on it. It is needed to support the tile - otherwise the glue will not have time to harden, and it will slide off. Use a laser or water level to fix it perfectly level. nine0005
The profile must be clearly leveled
Applying adhesive
- Before starting work, the wall must be treated with a deep penetration primer to increase adhesion.
- Glue is best applied first on the wall, and then in a small layer on the tile itself, and then peel off from it, leaving it only in the factory recesses (for better adhesion).
- Use a notched trowel to spread the adhesive evenly on the wall. The size of the teeth must be selected depending on the format and weight of the tile, in this case an 8 mm comb is used. nine0015
- After applying to the wall, you will have no more than 20 minutes to correct the result - then the adhesive will begin to harden. In total, in a bucket, it can stand for a maximum of a couple of hours.
The adhesive layer must be thin and even. After pressing - no more than 2-3 mm.
Buy 5 kg tile adhesive per square meter.
Laying tiles
- The first tile is laid in the most visible place, and the undercuts are left at the end. nine0014 With the two meter rule, you can control that all tiles are in the same plane relative to the wall.
- We check vertical deviations with a level, in this case it will be most convenient to use a bubble 60 cm long, well, or a laser one - for those who have one. nine0015
- When you press the tile evenly against the wall and tap it, the thickness of the adhesive should be approximately 2-3 mm.
- When you install the second tile, you will need to remove the temporary beacon and clean it and the wall itself from glue. The remaining elements will be aligned relative to those already installed.
- If you bought a cheap domestic tile for an apron, then with a 99% probability you will encounter the problem of unevenness of its geometric dimensions by 1-2 mm.
 Such errors can be compensated for by the width of the seams.
 - A profile bolted to the wall will give you a perfect horizontal line, but the top line may be crooked due to size differences. To avoid this, in advance, under the first row, place special plastic wedges under the tiles, which allow you to adjust its level, depending on their immersion. nine0015
- When you lay a tile, control its evenness relative to neighboring elements and the overall horizontal. If necessary, adjust the size due to the width of the seams and wedges at the bottom.
- Laying the second row is done in a similar way, but to control the desired indentation between the tiles, you need to use plastic crosses. You should not take them with a thickness of more than 2 mm on an apron, in this case, 1.5 mm crosses are used. When they are completely immersed, a seam of the same width will be obtained. If the cross is not fully immersed, then the seam becomes smaller. With the help of them we correct the evenness of horizontal and vertical seams.
 nine0015
 - If necessary, use a manual tile cutter or grinder to cut tiles. If neither one nor the other is available, you can do it with any sharp object: a nail, a knife, a drill, etc. Read more in the article on how to cut tiles correctly.
 To do this, you first need to install a temporary beacon tile on the opposite side of the kitchen, on which you will watch the deviations of the rest.
 Laying beacons and first rows
Do not forget to pay attention to the direction of the pattern when laying, usually there are arrows on the reverse side for this, they must point in the same direction for all tiles. nine0003
Holes for wires and sockets
Making cutouts for sockets and switches in the apron
- When you get to the wire outlet, you can make a hole with a tile drill. Since wall tiles are much softer than floor tiles, one drill is enough for at least 15-20 holes. nine0015
- Larger socket holes are made with a diamond-tipped drill bit. But if you have a grinder with a diamond disc on the tile ( the disc should be without holes, and the coating on it should be without notches ) and a little experience, then you can make holes with it.
- When you glue the tile next to the outlet, it is more convenient to apply the glue not on the wall, but on the tile itself.
Be careful not to leave adhesive on the tiles and inside the joints, otherwise it will be difficult to remove when it dries.
It's easier to wipe it off with a damp cloth. nine0003
Conclusion
The next day you will need to remove the crosses from the seams with a flat screwdriver and clean the seams from glue residue. After that, you can unscrew the profile and start grouting.
comments powered by HyperComments
Tile kitchen apron: how to make it yourself?
And indeed, why lay a tile on the entire wall, spending a lot of money on material and work, if it is possible to economically, aesthetically and, most importantly, practically put a tile backsplash in the kitchen. In addition, you can do it yourself. And don’t be afraid of work that you have not known before, we are here to teach you how to lay out an apron in the kitchen from tiles. nine0003
Content
- The advantages of the apron of tiles
- Disadvantages
- Which design to select
- tools and consumables
- Preparation of wall
- Installation Installation
- Control 9001
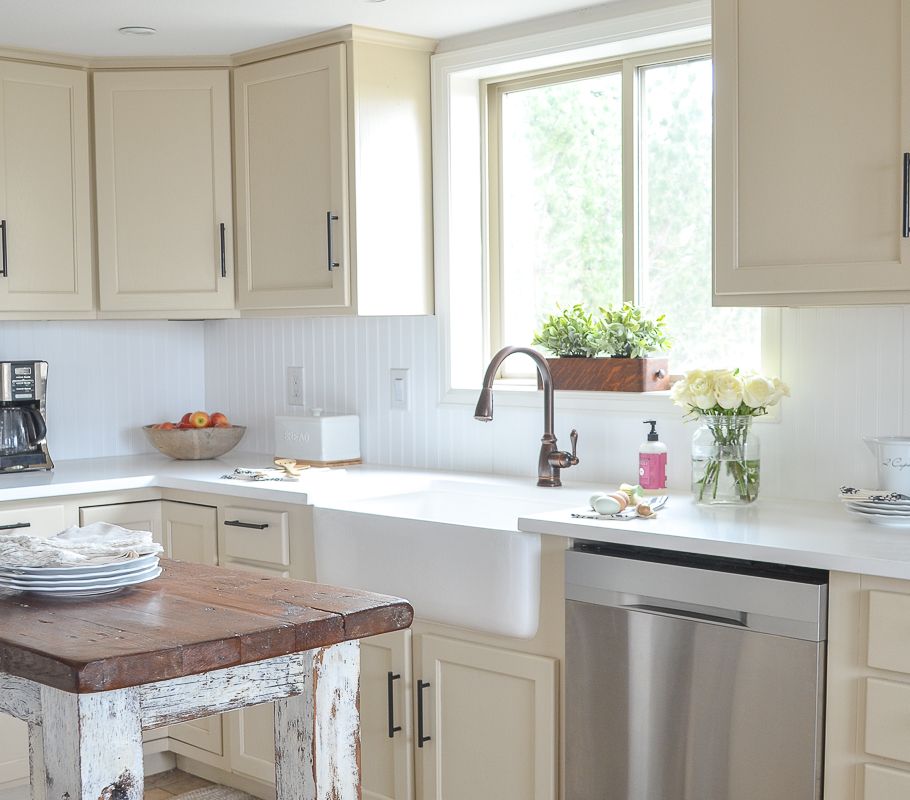
The main function of the apron, in addition to being decorative, is to protect the working wall from grease and other stains that may appear during cooking in the kitchen.
 The height of the apron can be different 50-60 cm, but it will be correct to choose the height according to the size of the tile. They have an apron between the kitchen table (countertop) and hanging cabinets. nine0003
 The design of the backsplash in the kitchen is simple, but it requires care when laying
There are several materials from which you can make an apron in the first place - this is of course tile, glass, various plastics, artificial stone and other materials are also used. Each of the above materials has its own individual characteristics in installation, maintenance, price. The most common material, as we have already said, is tile, the advantages and disadvantages of which right now ...
Benefits of a tile backsplash
- High-quality protection of the wall from all types of pollution.
- Mechanical strength.
- Durability.
- Resistant to aggressive media (hot water, grease, steam).
- Relative maintainability (possibility of replacing a single tile).
- Environmentally friendly.
- Possibility of using almost any household chemicals for care.
- Aesthetic appearance.
- Large price range when choosing tiles. nine0015
- And most importantly, you can do it yourself, with your own hands.
To make an apron in the kitchen with your own hands, you need to determine the material consumption.
- Dirt builds up in the seams and is difficult to remove. Therefore, the seams when laying the apron should be as minimal as possible.
The first step towards making an apron with your own hands will be the correct selection of material, which is carried out according to several important criteria:
- The technical characteristics of the tile must correspond to the tasks that the backsplash faces in the first place - this is impact resistance.
- The size of the tile plays an important role, for example 10x10 tiles have a number of advantages over larger formats: undercuts can be avoided and waste is reduced accordingly.
 True, laying such tiles is more difficult and the number of seams in this option is much larger.
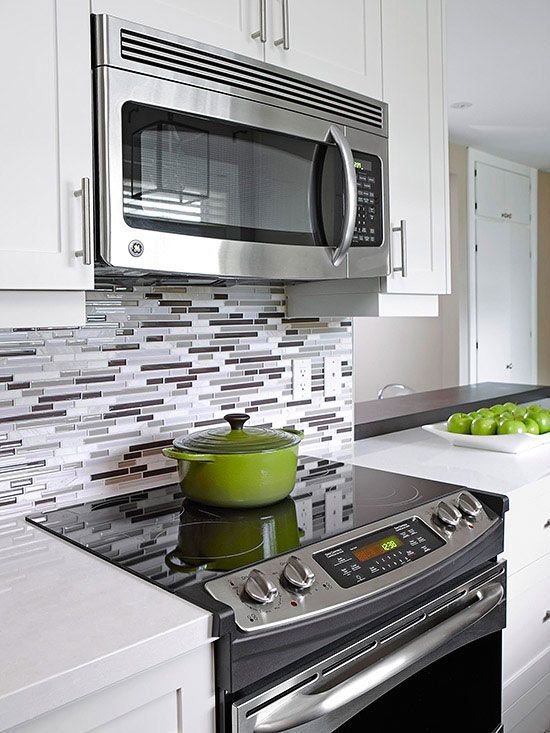
 - When choosing the type of material, you should be guided by the general style of the kitchen. It can be a tile, a “brick”, a mosaic surface. nine0015
- The color of the tiles is selected so that they are combined with other elements of the interior.
- The surface structure can be glossy or matt. Glossy tiles need careful care, as even the slightest traces, up to fingerprints, are visible on its surface. Matte tiles hide pollution better, but, in turn, dirt accumulates behind this “invisibility”.
Which design to choose
Note that there are a large number of design options, and which one you choose is up to you and your financial capabilities. The most common option is to make a kitchen apron on the wall with your own hands from white tiles. A win-win option, since white tiles are combined with almost any interior, in addition, any bright accent can be pasted into the general array of white tiles. nine0003
Various decorative elements inserted into the overall tone look advantageous. There is also a tile with a pattern, from which you can create almost a picture. If you want complete individuality, then you can order your original photo print on a tile apron.
Backsplash design is an important part of the overall interior of the kitchen
There are three ways to visually increase the volume of the room:
- For lengthening, rectangular tiles are placed horizontally. nine0015
- To increase the height, lay vertically.
- Diagonal tiling has the unique property of expanding space.
After it became clear to you from what, in what style and what the height of the kitchen apron will be, we select the necessary set of tools that will allow you to make a kitchen apron with your own hands.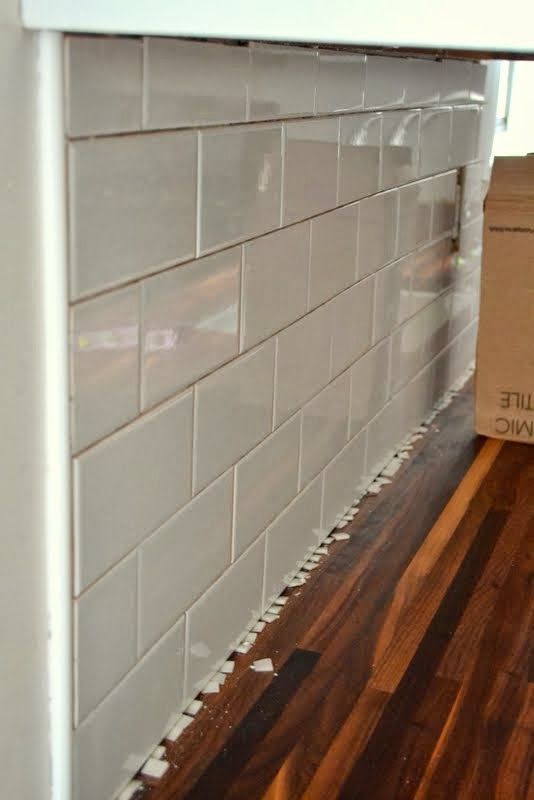
Tools and consumables
You will need the following tools:
- Tile cutter. nine0015
- Construction rule.
- Building level.
- Rubber spatula.
- U-profile guide.
- Trowel or spatula for applying the adhesive mixture.
- Electric drill or rotary hammer with mixing attachment for preparing the adhesive mix.
- Notched trowel.
- Roulette.
- Metal brush.
- Rubber hammer.
- Concrete drill or drill.
Consumables required:
- Tile adhesive.
- Grout.
- Plastic crosses.
- Net grater.
- If the wall is uneven, putty will be required.
- Pencil.
Preparing the wall
The first thing to do is electrical work before laying the backsplash
After you have prepared the above tools and materials, it's time to start preparing the wall yourself. First, the old cladding is dismantled. Then electrical work is carried out to replace the wiring, install additional sockets and switches where they are needed.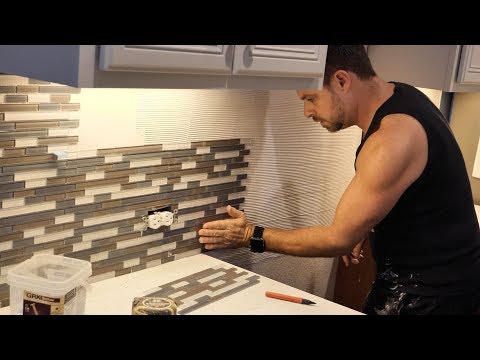 The next stage of the building rule is to check the condition of the wall for drops, if the height of the drop is more than 3 mm, then the space needs to be plastered or puttied. With large irregularities and recesses, the wall can be leveled using moisture-resistant drywall. nine0003
The preparation of the wall is completed, you can start marking the future apron.
Laying a backsplash made of tiles can be done in different ways
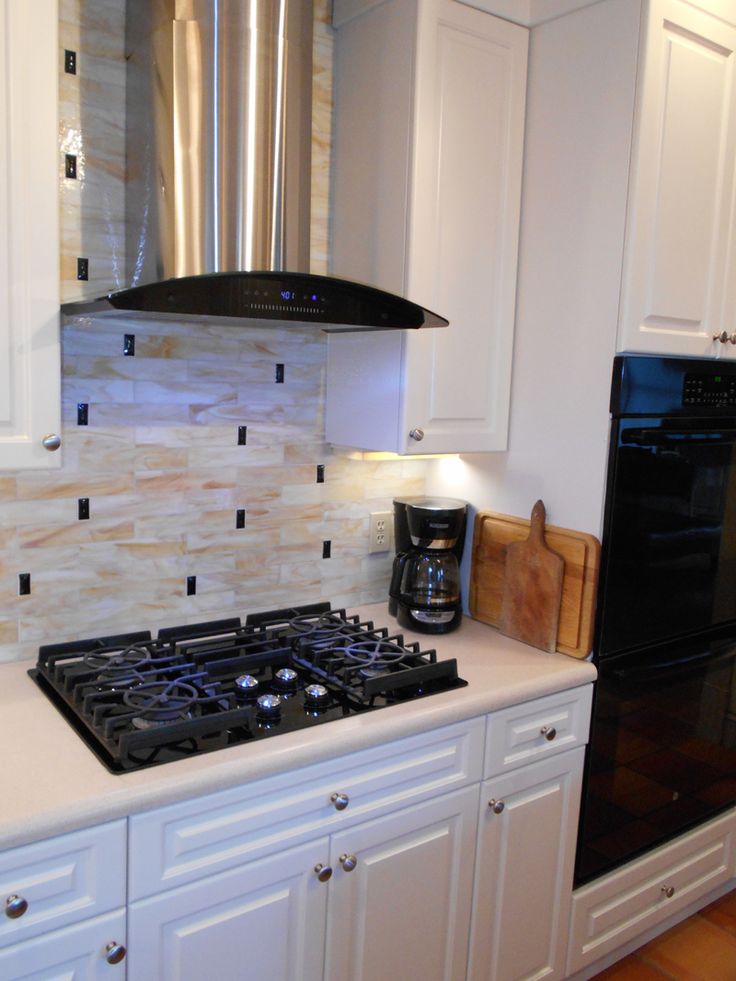
The height of the countertop and the stove determines the distance from the floor to the bottom of the backsplash to be laid. Usually this height is 80-85 cm. It must be taken into account that the tile goes 1-2 cm behind the table. The upper level of the apron is determined by the distance from the wall cabinets to the countertop. The optimal size is 60 cm, since in this case you can do without trimming the tiles. If you have a hood installed, then the tile apron should be placed up to the upper level of the hood, and on the sides we perform the width of the hood plus 5 cm on both sides.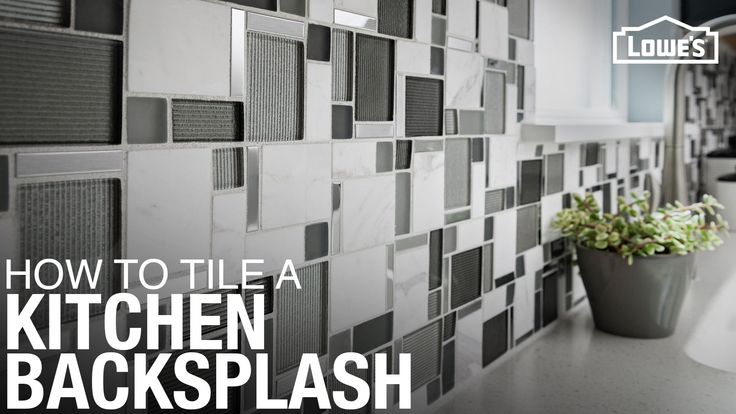 nine0003
Installation instructions
Now let's take a closer look at how to properly make an apron on the wall and, moreover, put it with your own hands. In order for the surface of the apron to be even and neat, we follow the following rules:
- Installation starts from the far lower corner.
- From the "U" shaped profile we arrange a support for the bottom row of tiles
- We prepare the glue. To prevent the glue mixture from drying out, do not do it too much. nine0015
- Using a notched trowel, apply adhesive to the wall with a thickness of 8-12 mm.
- Installation of tiles starts from the corner vertically, stepping back 2 cm from the adjacent wall.
- The joint between tiles should be approx. 1.5 to 4 mm. To maintain the same gap width over the entire surface to be laid out, plastic crosses are used.
- Glue the first row of tiles on the previously installed profile, observing the distance to the tiles located on the adjacent wall.
- For better adhesion of tiles to the wall, tap on its surface with a rubber mallet. nine0015
- Immediately remove the remaining glue with a damp cloth or washcloth, otherwise, after the glue has dried, it will be problematic to do so.
If you do not have a tile cutter, then you can replace it with a ruler and a glass cutter. On the front side of the tile, make a cut and then, along the line of this cut, the tile breaks against the edge of the table.
Grouting
Having completed the installation of the apron, we proceed to the next stage of work, grouting. Poorly executed grout can ruin all previously completed work. Before grouting, you need to make sure that the tile adhesive is completely dry. The seams are cleaned of debris. If unglazed tiles were used for the backsplash, then its upper and side surfaces should be moistened to prevent moisture absorption from the grout.