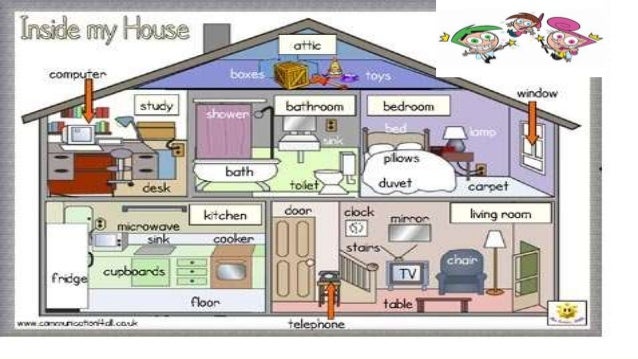
How much does it cost to retile a kitchen floor
How Much Does It Cost to Install or Replace Tile?
Tile Installation Costs at a Glance
- Average total cost: $3,500 (CAD 4,600)
- Average cost per square foot: $6.25-$16 (CAD 8-CAD 21)
- Labor cost: $5-$35 (CAD 6-CAD 45) per square foot; $60-$95 (CAD 80-CAD 125) per hour
Tiles are durable, easy to maintain and offer a wide array of design choices, so it’s no surprise they’re a common choice for floors, walls and other surfaces in homes. Tiling or retiling can also be a simple way to improve the look of a kitchen or bathroom.
This May Also Interest You: Tale of Tile: An Overview of Bathroom Tile Flooring
Thinking of replacing your current tiles or installing new ones? Costs can vary based on the type of tiles you want and where you plan to put them. Here’s a detailed guide on tile costs.
Tile Installation Costs
The cost of tile installation includes the tiles, labor and additional materials. At the most basic level, you can expect to pay between $6.25 and $16 (CAD 8 to CAD 21) per square foot for a standard ceramic tile floor — or about $3,500 (CAD 4,600) in total.
The price varies from there based on:
- Contractor’s labor costs
- Size and type of space to be tiled
- Type of tile used
Labor Cost to Install Tile
According to HomeGuide, the labor cost for installing tiles is about $5 to $35 (CAD 6 to CAD 45) per square foot. The lower end of that price range is for floor tiling, while labor costs for a backsplash or countertop are on the upper end.
While most installers charge per square foot, some charge by the hour. Depending on the project's size and complexity, you can expect to pay about $60 to $95 (CAD 80 to CAD 125) per hour.
Request a written estimate from a reputable tile installation contractor to gauge the cost of completing the project.
Average Tile Installation Costs by Project
Tile installation cost depends on whether you're installing backsplash, countertop, floor or bathroom tiles. If you’re retiling, add about $560 to $1,140 (CAD 730 to CAD 1,500) for the removal and disposal of old tiles. Unglazed tile requires sealant, which can add $100 to $500 (CAD 130 to CAD 650) to the cost, according to Fixr.
These are some of the most commonly tiled areas:
Cost to Tile a Shower
Shower tiles can cost anywhere from $8 to $40 (CAD 10 to CAD 50) per square foot, depending on the tiles selected. Including the cost of other materials and labor, you can expect the project to cost somewhere in the range of $800 to $10,000 (CAD 1,000 to CAD 13,000).
Cost to Tile a Bathroom
Cost for bathroom tiles varies based on square footage, the number of walls and the material you plan on using. Most homeowners pay an average of $7 to $25 (CAD 9 to CAD 32) per square foot.
Tiling a bathroom floor differs from tiling walls because working around sinks, toilets and other fixtures can make it a complicated job. Most homeowners pay an average of $300 to $600 (CAD 390 to CAD 780) to tile the floors of a standard bathroom.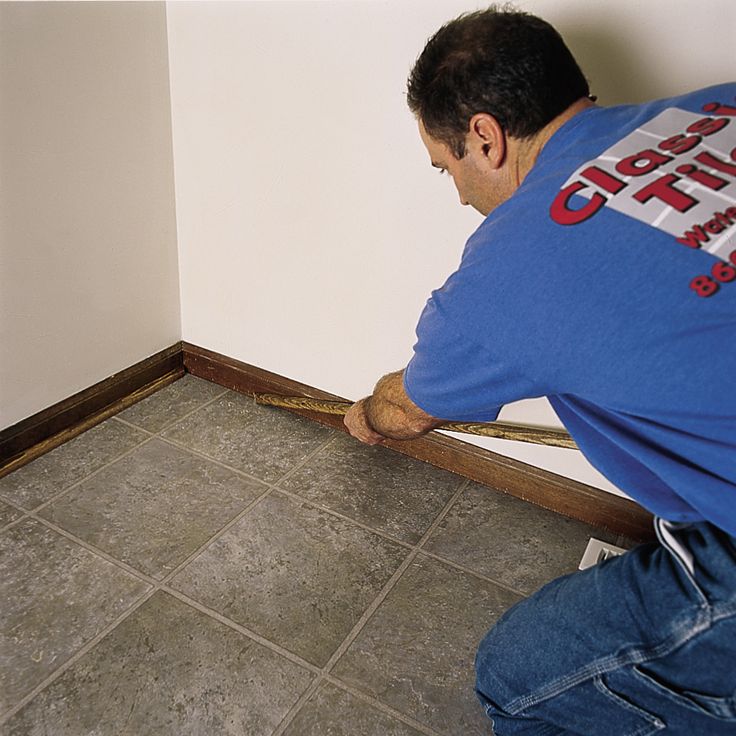
Cost to Tile a Walk-in Shower
Most standard walk-in showers measure 84 square feet and typically cost $800 to $3,000 (CAD 1,000 to CAD 3,900) to tile, depending on your shower size and the type of tile.
Cost to Install a Kitchen Backsplash
Installing a kitchen backsplash typically costs around $23 to $35 (CAD 30 to CAD 45) per square foot. Some prefer glass tiles as a kitchen backsplash because they’re easy to clean and tile patterns come pre-assembled. Glass tile installation will cost around $32 (CAD 41) per square foot.
The installation cost depends on the material you choose to use for the backsplash, with most homeowners paying about $600 to $1,200 (CAD 780 to CAD 1,600).
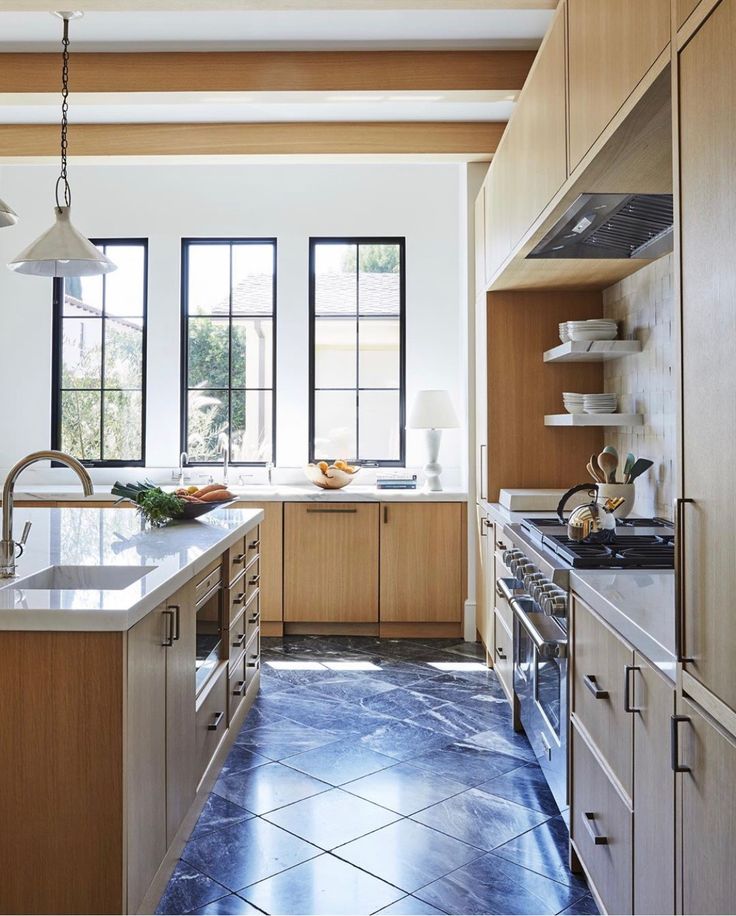
Cost to Tile a Floor
Project price varies based on the type and size of the area you’re tiling. For example, tiling the kitchen floor typically costs $975 to $1,950 (CAD 1,270 to CAD 2,550) for a standard kitchen of 130 square feet. Costs could go up to about $2,800 (CAD 3,650) for a larger space.
Cost to Tile a Kitchen Countertop
Kitchen countertop tiles range in price from about $30 to $90 (CAD 40 to CAD 115) per square foot, labor costs excluded.
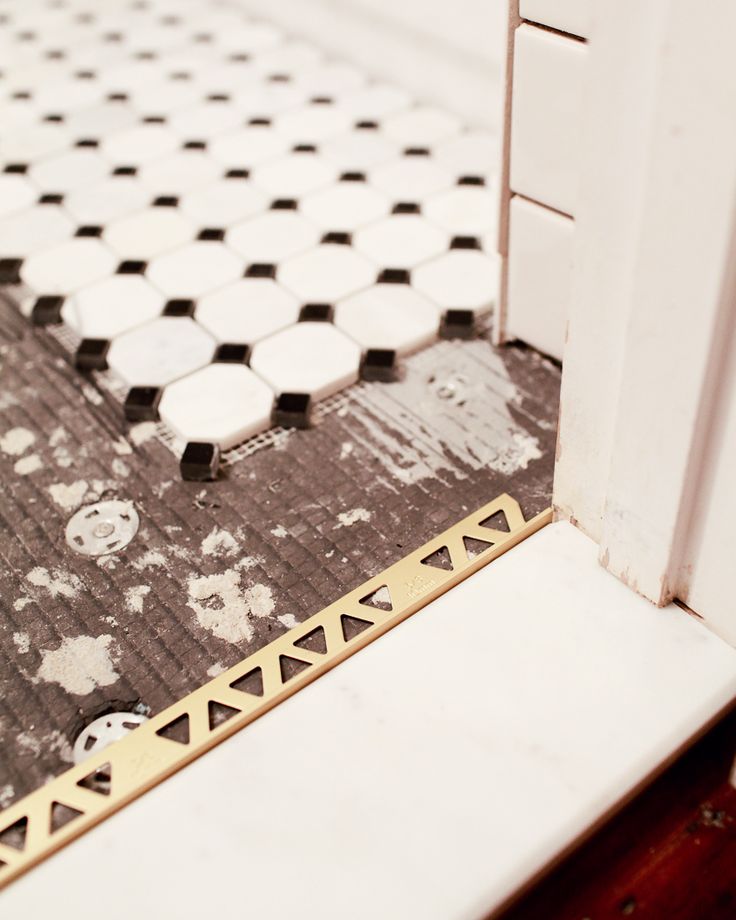
Tile Replacement and Removal Costs
Before replacing tiles, a professional contractor will remove the existing tile first. Removal of existing tiles costs around $3 per square foot (CAD 4). The cement backer board underneath the tile costs roughly $6 (CAD 8) per square foot to replace.
More Related Articles:
- How to Install a Kitchen Backsplash in 7 Simple Steps
- How to Clean Grout
- How Much Does it Cost to Remodel a Kitchen?
- How Much Does Drywall Cost?
- How Much Are Granite Countertops?
Tile Costs by Type
Depending on the material used for tiling, the cost varies. Some of the most commonly used tiling materials include:
Ceramic
Ceramic tiles are a common choice because they are similar in durability to porcelain but half the price. Ceramic tile costs $7 to $14 (CAD 9 to CAD 18) per square foot, including installation labor.
They're most often installed in high-traffic areas, like hallways. Even if exposed to direct sunlight repeatedly, they remain colorfast. Ceramic tiles are stain-resistant, robust, durable and moisture resistant. Compared to porcelain, ceramic tiles don't score as easily.
Some of the key advantages of ceramic tiles:
- You have a variety of colors, shapes and sizes to choose from
- They're scratch- and stain-resistant
- They're easy to install and pocket-friendly
The only disadvantage of ceramic tiles is that grout is prone to discoloration.
Porcelain
Porcelain tile averages around $12 to $19 (CAD 15 to CAD 25) per square foot on average. They come glazed or unglazed. Depending on where it’s installed, unglazed tile may require sealant for added moisture resistance, which can increase the total cost. Porcelain is among the most common tiling material choices because of its ability to resist stains and keep moisture at bay.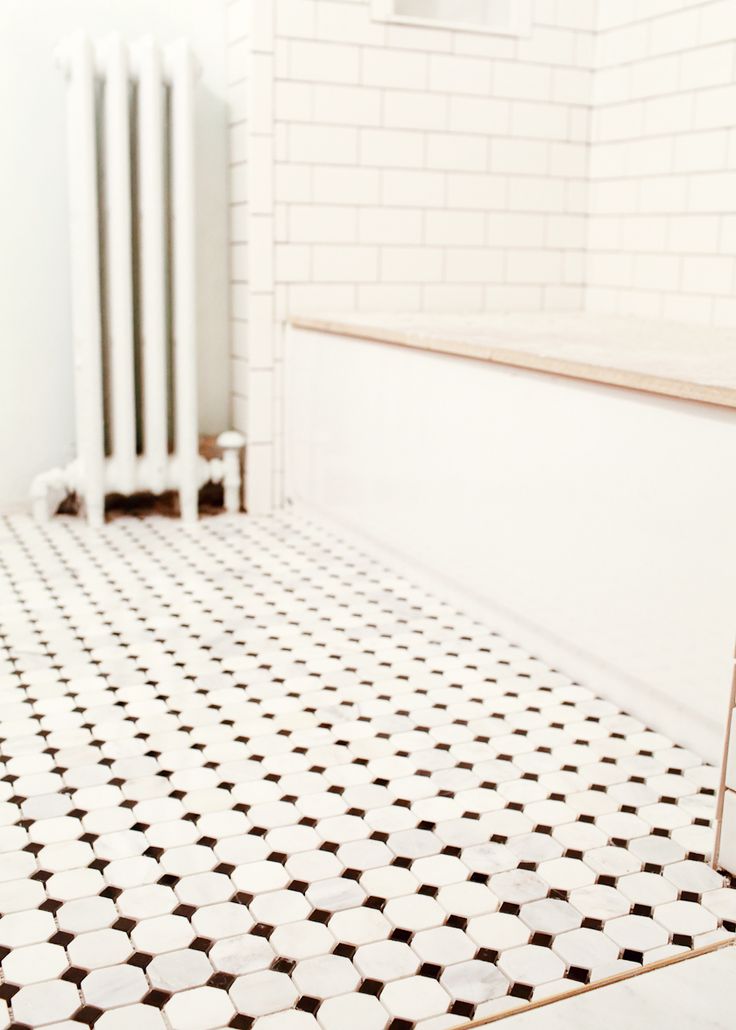
Porcelain is often installed in areas where there's a high moisture presence, like shower stalls, bathroom floors and walls, laundry rooms and kitchen backsplashes. They are also dense enough to withstand heavy traffic.
Some of the main features of porcelain tiles:
- Cost-effective
- Withstand freezing temperatures
- Various finishes like matte, textured, glazed, unglazed, gloss and semi-gloss.
- Easy to clean
However, if porcelain tile chips, it can be difficult to repair.
Glass Tile
Glass tiles typically cost around $25 (CAD 32) per square foot. However, glass tiles are fragile and aren't recommended for flooring as they dent or break easily. And when they do break, they’re not easy to repair. They're better for backsplashes, countertops and bathroom areas.
Some advantages of glass tiles:
- They're easy to clean.
- They come in a variety of colors, patterns and shading options.
Natural Stone
The average price for natural stone tile is about $13 to $20 (CAD 17 to CAD 25) per square foot. The tiles have a distinct look because all the stones are slightly different. Most homeowners prefer the natural look for flooring, countertops, bathrooms and backsplashes.
One downside is that natural stone requires annual sealing. The tiles aren’t as durable as ceramic and are prone to scratches and dents.
All CAD conversions are based on the exchange rate on the date of publication.
How Much Does Tile Installation Cost? Breaking Down the Cost to Install Tiles (2022)
Photo: istockphoto.com
- Typical Range: $886 to $2,855
- National Average: $1,833
Installing tile flooring, backsplashes, and showers is a durable way to update a home’s look. Tile is a sought-after design element for kitchens, bathrooms, laundry rooms, and more. Tile often adds a classic and timeless look while being a long-lasting and low-maintenance option. When considering tile installation cost, it helps to know the additional price factors that go into the project.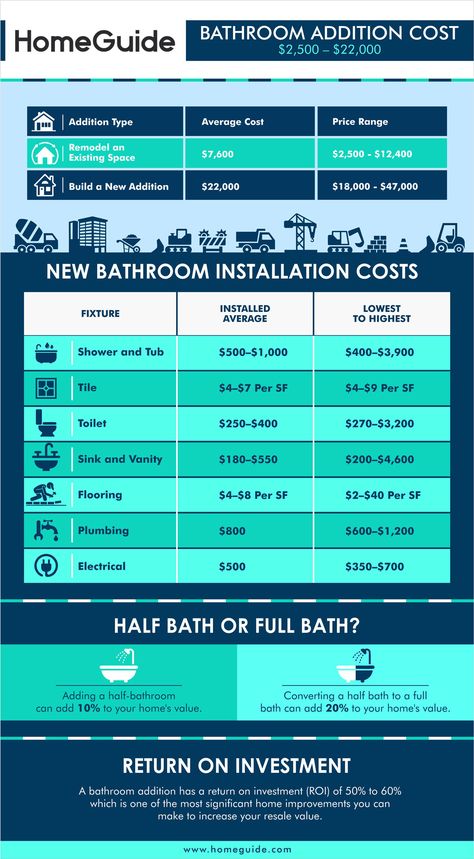 According to HomeAdvisor, the average tile installation cost for porcelain or ceramic tile flooring is between $886 and $2,855, with the national average at $1,833. Expect to pay around $15 to $20 per square foot for installation and materials. The average cost for a backsplash is $1,500 and $3,500 for a countertop. For tile installation projects for kitchen or bathroom remodels, the costs can run from $13.50 to $83 per square foot. Labor costs can range from $4 to $32 per square foot, and some professionals charge by the hour. If that’s the case, expect to pay between $30 to $120 per hour depending on the size and complexity of the tiling project. Square footage and the type of tile being used are the two factors that affect overall tile installation cost. To find the best tile for you and your budget, search online for “tile flooring near me.”
Carpet, hardwood, vinyl, and tile flooring.
Bob Vila has partnered with Empire Today to help you easily get beautiful new floors at a great price.
Free In-Home Estimates
Advertisement
Factors in Calculating Tile Installation CostPhoto: istockphoto.com
Calculating tile installation cost depends on a few factors. Prices can differ from the national average of $1,833 due to the size of the project, labor, prep work, the type and rating of the tile, and installation site.
Size of the ProjectMost professionals will charge based on the square footage of the project area. The larger the area that needs to be tiled, the lower the cost per square foot. To figure out the area that will be tiled, measure the length and multiply by the width. For example: 10-foot by 12-foot room = 120 square feet. It’s always helpful to slightly overestimate to allow for broken tiles or unusually shaped cuts.
LaborLabor can cost from $4 to $32 per square foot. Labor to install a tile floor costs between $4 and $14 per square foot and $25 to $32 per square foot for backsplashes and countertops. The square footage will usually determine labor prices, but some professionals may charge by the hour. If that’s the case, prepare to pay between $30 to $120 per hour, depending on the project.
The more prep work needed before tile can be installed, the more expensive the project will be. Installing tile on a smooth and even surface will take less time and require minimal prep compared to tiling over old and uneven flooring. Flooring that needs to be removed and replaced or walls and countertops that need repair will raise the overall price of the project.
Type of TileThe type of tile will directly affect the installation cost. Consider where you want the tile to go, and choose the tile based on its strength, quality, and where it’s best used. Certain types of tile are not appropriate for flooring but will work for countertops or backsplashes.
Tile RatingTiles have a specific rating system that tells you where they should be installed.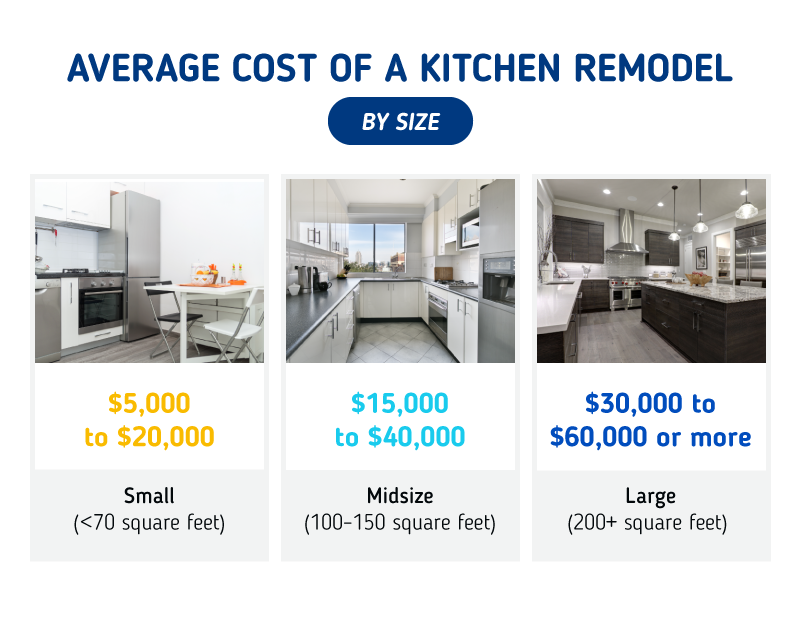 The rating system goes from Class I to Class V, with Class V as the most durable.
Advertisement
- Class I. Class I tiles are not strong enough to use as flooring, and they should only be used as wall tiles.
- Class II. These tiles are best suited for light-traffic areas, such as bathrooms.
- Class III. Class III tiles can be used for countertops, walls, and areas with average foot traffic.
- Class IV. These tiles can be used in any area of the home.
- Class V. Class V tiles are the most durable and are recommended for industrial or commercial use.
Tiles can also be classified by their porosity. Porosity refers to how many air pockets the tile has. Tile porosity is rated by what degree it is glass-like (or vitreous). The more porous a tile is, the more absorbent it is. Tiles that have a high level of absorbance are better suited to areas that don’t have a lot of moisture. There are four levels of tile porosity.
- Non-vitreous tile. Non-vitreous tile costs between $1 and $5 per square foot. Some examples of this absorbent tile are terra cotta and bisqueware. Since it’s the most absorbent, it’s best suited for wall tiling or for use as decorative touches.
- Semi-vitreous tile. Semi-vitreous tile is most commonly used in areas outside of the bathroom. The average cost runs from $2 to $6 per square foot.
- Vitreous tile. Vitreous tile can cost between $4 and $8 per square foot. It’s most often used in bathrooms except for shower areas. Vitreous tile is water resistant on its surface, but not on the back or sides. Repeated exposure to moisture or direct contact with water over an extended period of time could affect the water resistance.
- Impervious tile. Impervious tile is the most glass-like and is the least absorbent. It works best in areas of high moisture with direct water exposure.
 This type of tile runs from $5 to $10 per square foot.
Tile installation costs will be different depending on where the tile is placed. Kitchen backsplash or countertop tile installation typically costs more than flooring tile. If you’re installing tile in a high-moisture area or a location with direct water contact, the tile needs to be nonporous. Typically, the more vitreous the tile, the more expensive it is.
Advertisement
Additional Costs and ConsiderationsWhen budgeting for tile installation, there are usually additional price factors and considerations. These can include other materials, subfloor repair and installation, and geographic location.
Additional MaterialsBacker board will need to be installed if you have a wood subfloor. Since wood will warp if exposed to excessive moisture, it’s not the ideal base for tile installation. Backer board supplies a level and solid cement surface to lay the tile, and it’s commonly used in bathrooms. Backer board can cost between $5 and $8 per square foot and is usually included in the overall cost of labor.
If the existing subfloor needs repair, it can average $40 to $65 per square foot. If a concrete subfloor needs to be resurfaced, expect to pay an extra $3 to $10 per square foot for additional costs. Additional labor hours and materials are needed to level the floor and make sure it’s a smooth surface for the tile installation. In order to make the subflooring ready for the tile, the installer must fill any holes or cracks while also ensuring that the subfloor is clean and dry. Next, a latex primer needs to be applied to prepare the surface for installation. Finally, the installer needs to make sure the subflooring is level and use a self-leveling compound if needed.
Adding a kitchen backsplash?
Top-rated pros can do the tiling for you. Get free, no-commitment estimates from experts near you.
Find a Pro
+ Subfloor InstallationIf the subfloor is too damaged to repair, a contractor may recommend installing a new one. This can be done for approximately $10 to $20 per square foot.
Geographic location can impact tile installation cost. Densely populated urban areas usually have a higher cost of living, which directly affects labor costs. Coastal areas and places that experience higher humidity levels may have elevated prices due to the difficulty of tile installation in those environments.
Photo: istockphoto.com
Tile Installation Cost: Types of TileThe type of tile you choose will affect tile installation cost. Each type has its own advantages and is suited for specific uses. The following are the most common types of tiles.
Let a pro help you pick the right tile
Get free, no-commitment estimates from experts near you.
Find a Pro
+ PorcelainOne of the most common tile materials is porcelain. Porcelain tile can cost from $3 to $10 per square foot for indoor tiles and up to $35 per square foot for outdoor tiles.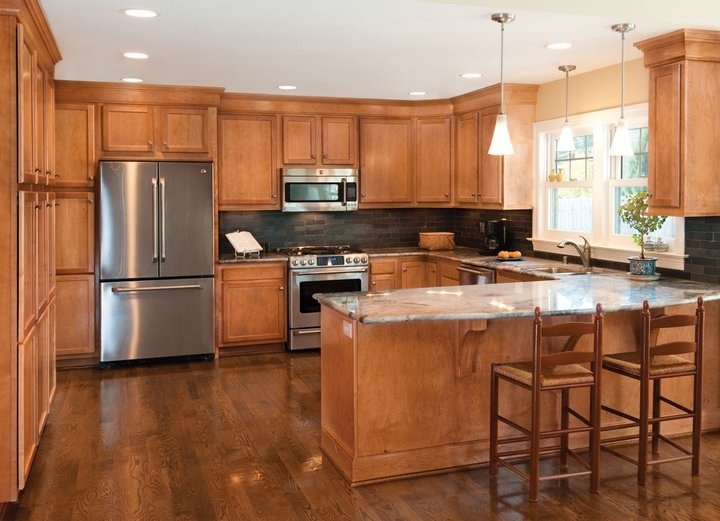 Thin porcelain costs more than thicker tiles because of the process it undergoes to be durable despite the thinness of the tile. It’s helpful to know the Porcelain Enamel Institute (PEI) wear rating if you decide on porcelain tile. Tiles are rated from 1 to 5, depending on durability and where the tile should be used. Tiles that are rated a 1 or 2 are best used for bathroom walls or as a backsplash. Tiles rated 3 to 5 are suitable for flooring and countertops. Porcelain is stain resistant and works well in areas with high levels of moisture.
Ceramic is another common tile material. Ceramic tiles can cost between $0.50 and $7 per square foot for indoor tile. Ceramic isn’t as durable as porcelain, but it’s a more budget-friendly material. Installing ceramic tile over a cement floor is typically more expensive than installing it over a wood floor that’s in good condition. Ceramic tile is scratch-, dent-, and stain-resistant, and it will maintain its color even if it’s exposed to direct sunlight.
Porcelain tile that’s made to look like wood averages $3 to $12 per square foot for indoor tile and up to $35 for outdoor tile. These tiles are typically cut into rectangular planks but are still priced by the square foot. This is an excellent choice for those who enjoy the look and warmth of wood grain while benefiting from tile durability.
VinylVinyl tile is available in a variety of colors as well as in stone patterns and wood grain. This budget-friendly option can cost between $1 to $3 per square foot. This popular tile option is durable and provides a dependable walking surface in your home. Available in various wood grain finishes, vinyl planks range from $0.97 to $5 per square foot.
Advertisement
StoneNatural stone tiles can cost between $5 and $35 per square foot. Stone tiles are durable but not as strong as ceramic tiles. Stone tiles are typically cut to fit the size of your space and provide a unique look. Many homeowners are drawn toward the color variations and natural beauty of stone for countertops, flooring, bathrooms, and backsplashes. This material is prone to scratches and chips and will need annual sealing to prevent staining and water damage. Some natural stone material options are granite, limestone, clay, basalt, pebble, onyx, marble, travertine, sandstone, and slate.
Rectified tiles are cut after the firing process, so each tile has precise edges and measurements. It’s available in many different styles in ceramic or porcelain. The price can run from $0.50 to $15 per square foot for indoor tile and up to $35 per square foot for outdoor tile. Some homeowners opt for rectified tile if they’re looking for minimal grouting between tiles or if they want tiles larger than 15 inches.
SlateDurable slate tiles have a dark, earthy texture with an upscale aesthetic. Slate is available in more colors than just dark gray. It sometimes is found with mixtures of brown, tan, gray, green, and even purple. Slate has a naturally grooved texture, but it’s available in a sanded smooth option as well. It’s extremely durable and can stand up to daily wear and tear. Slate does scratch easily so it’s best suited to areas like a kitchen or bathroom. Slate is challenging to install due to the weight of the material. Expect to pay two to three times the price of the material for installation costs. Slate tiles run from $5 to $15 per square foot for indoor tiles and up to $35 per square foot for outdoor tiles.
Glass tiles average approximately $5 to $15 per square foot. Glass is not a flooring material and isn’t recommended for outdoor use. Still, it’s suitable for use as a backsplash, in a shower, or as a countertop. Glass tiles are available in various earth tones such as brown, green, yellow, blue, gray, and red. They’re commonly available in 12-inch by 12-inch tiles that are made up of either random or uniform shapes that have the appearance of a brick wall.
Advertisement
Tile Installation Cost: Installation LocationWhere you install the tile within your home affects the overall price of tile installation. Here are some of the most popular places to install tile in a home and the average costs.
Kitchen FloorThe average cost to install tile for a kitchen floor is $1,208 to $2,415 for a 161-square-foot kitchen. The price difference is due to the price range for different tile materials. The kitchen configuration and the condition of the subfloor will also affect the cost.
Kitchen Backsplash or CountertopExpect to pay between $25 and $32 per square foot for a kitchen backsplash or countertop. The price per square foot is higher for these jobs due to the complex work to install smaller tiles.
Adding a kitchen backsplash?
Top-rated pros can do the tiling for you. Get free, no-commitment estimates from experts near you.
Find a Pro
+ Bathroom FloorThe cost to tile an average 75-square-foot bathroom floor is $563 to $1,125, depending on the tile material.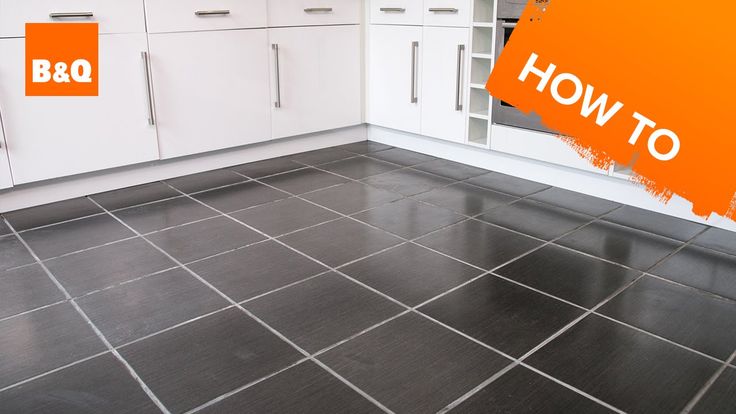
It can run between $7 and $25 per square foot to tile bathroom walls. The average-size bathroom is 5 by 8 feet. The price to tile two walls would be between $780 and $2,600. Cement backer board would raise the price by $6 per square foot.
ShowerIt will cost approximately $2,000 to tile 90 square feet of a shower wall. This price typically includes prep work, backer board installation, and tile and grout installation.
Photo: istockphoto.com
Tile Installation Cost: Benefits of Adding TilesInstalling tile can improve the appearance of your kitchen, bathroom, laundry room, or patio. No matter your style, tile can reflect your tastes with various colors, textures, styles, and shapes. Here are some of the benefits of adding tiles to your home.
DurabilityWhen it’s installed correctly, tile can last a lifetime. Tile is durable and, when properly sealed, it’s also stain- and scratch-resistant. It maintains its color even when in direct sunlight, and porcelain tile is considered more durable than granite.
There’s no need for special cleaning products since tile is easy to maintain and keep clean.
Allergen-FreeThose with allergies are opting for more tile in their homes since tile is impervious to mold, dust mites, germs, bacteria, and other allergens.
AppealTile is an outstanding choice when it comes to upgrading the look of your home. From replacing old, chipped countertops and dull, outdated flooring, tile can brighten up and update your home.
Advertisement
Increase in Home ValueAdding tile is one way to increase your home’s value. Most major home improvements will increase the value, but tile flooring will always add value to your home due to its durability and longevity.
Tile Installation Cost: DIY vs. Hiring a ProfessionalTackling this project on your own will cost between $9. 50 and $51 per square foot, compared to $13.50 to $83 for a professional to complete the installation. Inexperience could lead to incorrect cuts and grout application or breakage. These mistakes could end up costing more to fix than hiring a professional from the start. Unless you have extensive experience, it’s recommended to leave tile installation to the pros. They have the right tools for the job and can finish the installation a lot faster than an inexperienced DIYer.
Don't figure it out on your own
Top-rated pros can do the tiling for you. Get free, no-commitment estimates from experts near you.
Find a Pro
+ How to Save Money on Tile Installation CostTile installation costs can be high, and the additional costs associated with the project can quickly add up. One way to save on tile installation is to buy the cheapest material, but there are other ways to save without compromising quality.
- Use bigger tiles. Larger tiles cost less to install than smaller tiles since there is less labor involved.
- Avoid intricate designs. Complex tile designs cost more than the standard installation due to the time and expertise needed.
- Install tile in select areas. Use tile in smaller areas or scale back the project to just one room in the house.
- Rip out the old flooring yourself. You can save on labor by removing and hauling away the old flooring yourself.
- Get multiple estimates. Contact at least three contractors to get the best price for you and your budget.
Photo: istockphoto.com
Questions to Ask About Tile InstallationAsking a professional the right questions about tile installation cost can minimize miscommunication, save money, and get the desired results. Here are some questions to ask tile installation professionals.
- Do you have references?
- How long have you been in business?
- Are you bonded and insured?
- What is included in the estimate?
- What type of warranty do you offer?
- How long will the project take?
- Can you help me pick out the tile that’s right for this project?
- Is labor charged by the square foot or the hour?
Deciding on the right tile for your home while staying within your budget can be a daunting process. Here are some frequently asked questions about tile installation costs to help guide you in your decisions.
On average, it costs between $15 and $20 per square foot to tile a room. For 100 square feet, it would cost between $1,500 and $2,000.
Q. How long does it take to tile a 10-by-10-foot room?It can take approximately 16 hours for a novice to tile a 10-by10-foot room.
Q. How long will my tiles last?Most types of ceramic, porcelain, and terra cotta tile can last 50 years or more.
Q. Which is better: porcelain tile or ceramic tile?The answer depends on where you’ll be using the tile. Porcelain tile works the best in areas with a lot of moisture, like bathrooms, showers, or sink backsplashes. Porcelain floors are harder and denser, but ceramic is more comfortable to walk on and stays cooler than porcelain. The decision comes down to cost and function.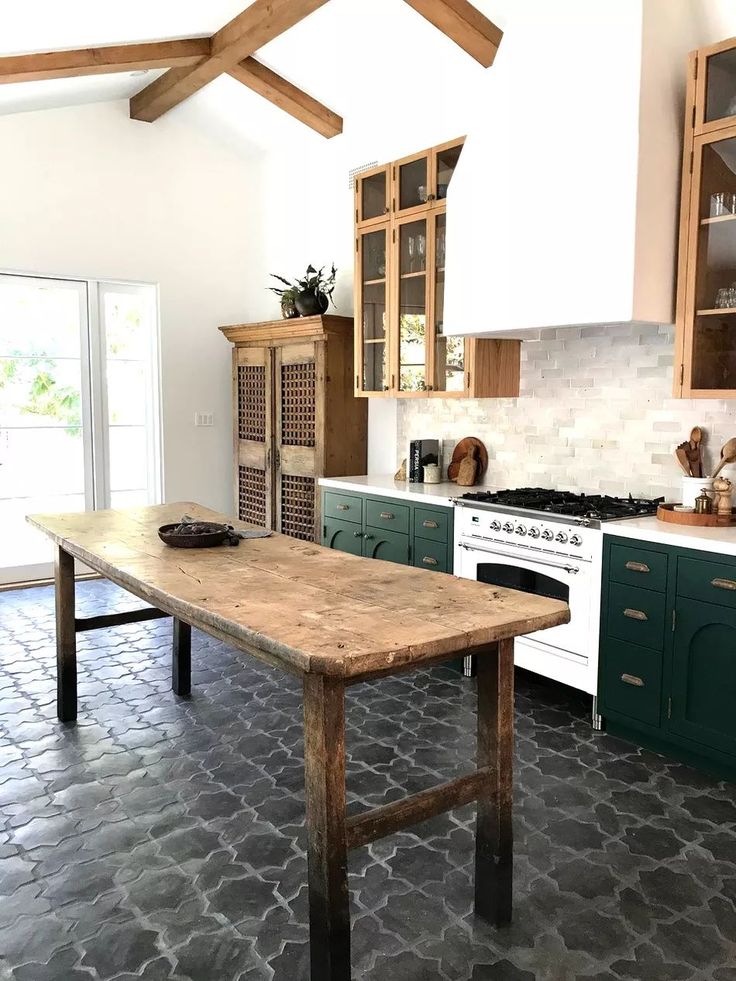
Advertisement
Sources: HomeAdvisor, Thumbtack, Nerdwallet, HomeGuide
Find trusted local pros for any home project
Find Pros Now
+Repair of floors in the kitchen: photo, do-it-yourself
One of the important stages of kitchen repair is the restoration of the floor covering. It should not be afraid of either fat, or moisture, or any mechanical influences.
Renovation of floors in the kitchen is a responsible, difficult task that requires the correct and careful choice of materials, as well as compliance with the work technology. When carrying out repairs, it is necessary to take into account important factors that will affect the characteristics, quality of the floor and the life of the floor. Among them it is worth highlighting:
- Constant changes in temperature and high levels of humidity. During cooking, unfavorable conditions arise for the floor covering: splashes of grease and water, detergents for appliances and dishes, steam from food, sudden changes in temperature - not every material can withstand this;
- Contamination with oils, grease, etc.
 involves the use of aggressive chemicals for cleaning, so the flooring must be stable and durable; nine0008
 - high floor loads. Usually we spend a lot of free time in the kitchen, so the floor covering is regularly subjected to intense mechanical stress and can wear out.
Nowadays, modern kitchens use several types of repairs, and each of them is distinguished by certain stages of work: all minor defects are puttied, skirting boards are changed. Such repairs are most often resorted to, since it does not require much time and dismantling of equipment. The owner just needs to take the furniture out of the kitchen and remove the old flooring that he is going to replace; nine0008 In order for the floor in the kitchen to meet all the requirements, you will have to invest not only effort and money, but also your imagination in its repair. Floor finishes and kitchen renovation options are quite varied. Floor coverings can be classified according to the following criteria: Often the shape of the floor remains even, but when combining the kitchen with the living room, a multi-level floor is often created, which allows for zoning. Mainly used for flooring: As for the color of the surface, it can be monophonic, with a single texture or pattern on each coating unit, as well as with a general pattern, which is assembled from a set of mounting units. Let's take a closer look at what each of these options is and what features the installation process has. nine0003 Kitchen floor shape A multi-level floor is often provided for in a design project. This floor can only be made in a spacious kitchen, where it is necessary to separate the working space from the dining table. Even at the stage of casting the screed, it is given a shape. If you plan to make a classic floor surface, then a simple even screed is poured, after drying, the cladding is mounted. The installation of a multi-level floor also begins with a simple screed, and after it has completely dried, it is necessary to set the limiters that give the necessary shape to the steps, and pour another layer of concrete into the formwork. nine0003 Important! To make it easier to achieve a flat surface during the arrangement of the screed, we recommend using self-leveling compounds. Linoleum is an attractive and practical material that will be an ideal option if you need to carry out an inexpensive kitchen renovation. Compared to dull color options, linoleum has a richer color range, which is represented by an interesting and large variety of textures, patterns and colors. Linoleum itself can last about 10 years and is distinguished by excellent sound and heat insulating qualities, as well as high wear resistance. It is comfortable and easy to wash, which is a huge plus. It is impossible not to note the ease of laying linoleum. First you need to spread it on the surface and wait until it rests for at least 24 hours. Next, it is worth giving it the necessary shape by cutting out the corners, cutting off the excess parts with a construction knife and a metal ruler. nine0003 Folding the edges of the linoleum one by one, a layer of special glue is applied to the base with a spatula, after which the facing material is applied. If it is necessary to join two pieces of material, overlap each other and make an even cut with a knife. This will make a perfect joint, and then it is smeared with wood glue to make the coating impenetrable and integrity. It remains only to adapt the plinth. PVC tiles are nothing but linoleum that is cut into strips or squares. PVC can imitate stone or glossy tiles, laminate or parquet. Usually, PVC tiles are equipped with an adhesive side, which means that when laying it, it is enough to remove the protective layer and simply stick it on the floor. The process itself is elementary. The base has no preparation. If one of the tiles is damaged, it can be easily replaced with a new one. Such a coating has the same minuses and pluses as linoleum. nine0003 The advantages of the tiles include their convenient use in combining different floor coverings. In some kitchens, due to the size, it is easier to glue tiles than linoleum. However, PVC tiles also have disadvantages. The weak point of such floors is the joints of PVC tiles. When water gets there, they can peel off, and the floors lose their original appearance. Laminate is a worthy alternative to the impractical wood floor as it is more scratch resistant. It perfectly imitates wood species (including exotic ones), marble, tiles and granite. The cost of repairing a kitchen when using a laminate does not become critical, since with all the operational and external advantages, the material is relatively inexpensive. When repairing the floor in the kitchen with their own hands, experts recommend using a laminate, which is characterized by increased water-repellent properties, it does not like prolonged contact with water. nine0003 Laminate flooring must be laid on a perfectly hard, even, clean and dry surface. If it is laid on concrete, then for the safety of the vapor barrier, it is necessary to lay a plastic film. Before laying, wait for the material to "acclimatize" by leaving it in the room for 2 days. You need to lay the laminate so that the seams between the plates are parallel to the window light, because they will not be so noticeable. Modern material is equipped with special connecting locks, which does not imply the use of additional fastening either with self-tapping screws or glue. nine0003 When laying, set a distance of 10-15 mm from the walls, as the laminate can expand with changing temperature conditions. The slabs are laid in longitudinal rows: from any of the side walls, carefully snapping each next slab into the lock of the previous one, the edges are hidden under the plinths. Probably one of the most popular coatings that is used when making repairs in the kitchen with your own hands. For the floor, special floor tiles are used, which can imitate various natural materials Installation is carried out directly on the dry screed. As for the thickness of the joint between the tiles, it should not exceed 4 mm and is regulated by special crosses. The seams are processed to match the color of the tiles with a special grout. Cork flooring for the kitchen is nothing new these days. But be that as it may, this material is not yet so widespread. This most likely explains its high cost and the fact that such material does not inspire confidence. Cork flooring is great for the kitchen. The cork is warm, pleasant to the touch, soft and has excellent sound insulation. Plus, this material is environmentally friendly, as is the actual wood flooring itself. Cork is not afraid of moisture, does not rot or swell. Various types of textures are applied to the cork to imitate valuable wood. They make cork floors look like expensive parquet. In work areas where food is being prepared, sharp objects are dropped, hot grease is splashed, and high humidity is present, cork flooring, just like parquet, can be damaged despite the manufacturer's advertisements. Cork floors for the kitchen should have a special varnish or wax coating, which gives the material more reliable protection. But after processing, the cork gets rough and will not be so pleasant to the touch. Other flooring options Before renovating your kitchen floor, we recommend that you consider combining different types of flooring. This technique is often used when covering a multi-level floor, for example, a dining area with a laminate, and a work area with tiles. Combining flooring is a creative process that not everyone can do. For combination, you can decide on the optimal floor covering in one shade or choose a combination of coverings in contrasting colors. Carefully consider the choice of materials for combining a kitchen that is combined with a living room or dining room. nine0003 After all installation work is completed, you can safely invite your friends to inspect the renovated kitchen. Choosing a skirting board Do-it-yourself kitchen floor repair involves protecting the joints between the wall and floor surfaces. The skirting boards themselves can be PVC or wooden. The latter should be installed only for natural wood flooring (solid board, parquet). However, the skirting board needs to be varnished or painted to ensure effective moisture protection. Experts advise using simple PVC skirting boards that blend harmoniously with the color of the floor. nine0003 Summing up, it is worth noting that in order to choose the type of kitchen renovation and material, you need to analyze all the operating factors. How carefully and often do you cook, how much do you like to clean the kitchen, how many people are in the apartment, etc. According to experts, linoleum and tiled floors have priority in standard kitchens. Along with the general interest in everything natural and environmentally friendly, the demand for cork flooring has increased significantly in recent years. In order to correctly choose a cork floor, the pros and cons of which we will consider below, it is worth adhering not only to aesthetic preferences, but also to some features of the cork flooring itself, as well as limitations in their use. This type of flooring is gaining more and more popularity because of its absolute environmental friendliness: for their production they use renewable natural raw materials - the top layer of cork tree bark. They renew their bark after a certain period of time (usually 1-2 decades), dropping the old dry crust to the ground. nine0003 Cork tree bark is processed to the smallest crumb, which is subjected to high-tech processing using high temperatures. Sheets are formed from the obtained friable material by pressing, after which they are glued together with special adhesives using a variety of interlayers. Cork tiles are produced in two main varieties, each of which has a specific purpose, composition and performance properties: All the pros and cons of the cork floor are based on the properties of this unique material: To choose the right cork floor, you need to know and take into account the advantages and disadvantages of such a coating in relation to certain rooms in your house. The undoubted advantages include: But along with the advantages of cork flooring, there are also some disadvantages to consider. Some of them are relative depending on the type of flooring chosen, but others can become a determining factor when choosing one or another floor covering in some rooms. The main disadvantages of cork flooring include: Many skeptics attribute cork floors to their high cost, but compared to parquet and the cost of laying it, cork is not much more expensive, while the aesthetic and environmental properties of such a coating are much higher. To choose the right cork floor for your home, you need to compare adhesive and interlocking slabs and determine their main characteristics. nine0003 For the installation of cork tiles, the surface must be pre-prepared: it must be perfectly even. Tiles are glued using special compounds that improve the moisture resistance and sound insulation of the material. At the end of the laying, the adhesive cork floor must be covered with a special varnish or wax in several layers - this will extend the life of the coating. Over time, such a floor can be updated - re-varnished to improve its aesthetic appearance and wear resistance. nine0003 Adhesive floors are more resistant to temperature extremes and high humidity, which can be achieved due to protective impregnation and the absence of gaps after professional installation. Therefore, this kind of cork floor is suitable for use in the bathroom, kitchen or loggia. Cork tiles make it possible to implement the most daring design solutions, as in the photo, complemented by complex patterns and patterns - this is a definite plus for those who prefer non-standard ideas in the interior. nine0003 The lock plug is sold already covered with a protective varnish layer, which is an undoubted advantage in terms of ease of installation of such a floor. But the impossibility of updating, varnishing like glued cork slabs is a minus, therefore, if a defect appears on the tile, it will have to be completely replaced with a new one, partially disassembling the floor. The advantage of a floating floor is its ease of installation: if you have the necessary knowledge, you can install such a floor yourself, which is not recommended for glued cork boards. Castle floors to improve their moisture resistance should be impregnated with protective wax at the joints of the plates, but even this factor does not make the floating floor reliable in case of excessive moisture. Therefore, it is better to use such a coating for a bedroom, a living room, a nursery, but in no case for a loggia or a bathroom. nine0003 Before starting the installation of an interlocking or adhesive cork floor, it is recommended to unpack the material and leave it indoors for several days. The technology of laying such a floor differs depending on the type of cork flooring: Interlocking slabs are laid identically to laminate: leave a gap of 1-2 cm along the edges of the room, after which they begin to lay the slabs from the first row. The adhesive floor must be laid on a perfectly flat surface, which is recommended to be prepared in advance: cement screed, fiberboard or OSB boards, old flat linoleum. Cork slabs are laid on a special glue. Work begins with marking the floor and laying adhesive panels from the center of the room. It is necessary to work with such plates accurately and accurately, since after landing on the glue it will not be possible to correct and re-glue them. When installing such a floor, it is necessary to strictly observe the markings and avoid uneven seams. Cork glue dries for 36 hours, so the coating cannot be used during this time. nine0003 If you can easily lay the floating floor yourself, it is better to ask specialists for the installation of adhesive panels. Cork flooring can be cleaned with a regular vacuum cleaner, but cleaning equipment for cork floors is prohibited.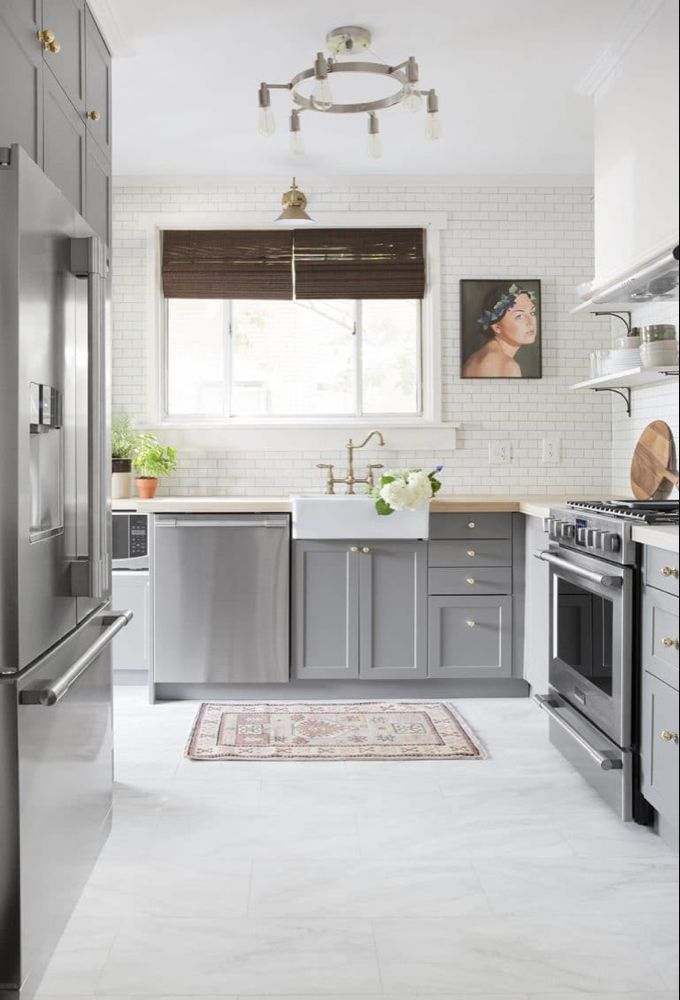 Naturally, this type of floor repair in the kitchen is more ambitious and involves a lot of time and money;
 Do-it-yourself kitchen floor repair: selection of floor coverings
 nine0003
 As a rule, such actions take place as part of a major overhaul.
 Do-it-yourself kitchen floor repair: photos, coating materials and their installation
 nine0003

 In order to exclude this, it is necessary to pass the joints of the tiles with special compounds, after which they will no longer be afraid of moisture. nine0003
 Using a trowel with serrated edges, a layer of tile adhesive is applied to the floor and then the tiles are applied to it. The laying process itself is accompanied by level control - you need to tap on the tile with a hammer with a rubber butt.
 With a cork, you can clean any dirt. Dust accumulation does not occur on such floors, since they are anti-static. But how will the coating react to the fall of a hot and heavy object? A blow will certainly leave a mark, but the unique texture of the cork will hide the marks.
  The best option is an adhesive cork covering, consisting of 100% cork. The alternative cork material, which has an MDF base, is not as practical and durable in the kitchen. nine0003
  For this, a plinth is used, which is able to take on a variety of shapes.
 composition and types, pros and cons, care and installation of the flooring
 By itself, this material does not emit harmful fumes into the environment, and its performance characteristics make it possible to use cork for finishing floors, walls and even ceilings. nine0003
 Cork floor - what is it?
 The last factor depends on the type and purpose of the cork floor - the layers can be with reinforcing, vinyl, varnish and other materials.
 Composition and types of cork floor
 Each slab is made up of cork agglomerate, HDF (high density fibreboard) and cork veneer. In elite types of floating floors, the last component of the coating is often replaced with fine wood, leather, and also a photo print. The size of one tile is similar to laminate - 90 x 18.5, and its thickness can reach up to 1.2 cm. The interlocking floor slabs are already varnished, so they do not require additional processing after laying. nine0008
 Properties of cork
 85;
85; Cork floor: main pros and cons
 Cork does not tend to absorb heat: it gives it back and due to this, such a floor seems warmer than tiles, laminate and other coatings.

Which cork floor is better: sample comparison
 If necessary, they allow the dismantling of the lock cover from the cork and transferring it to another room, re-laying the floor one tile at a time.
 How to lay the cork floor
 Then the next row is assembled with an offset of half the panel and docked with the first. To improve the moisture resistance of the floating floor, the joints between the plates must be treated with a wax sealant. nine0003
 How to take care of your cork floor