How do you wax hardwood floors
Waxing Hardwood Floors 101: Benefits and Pro Tips
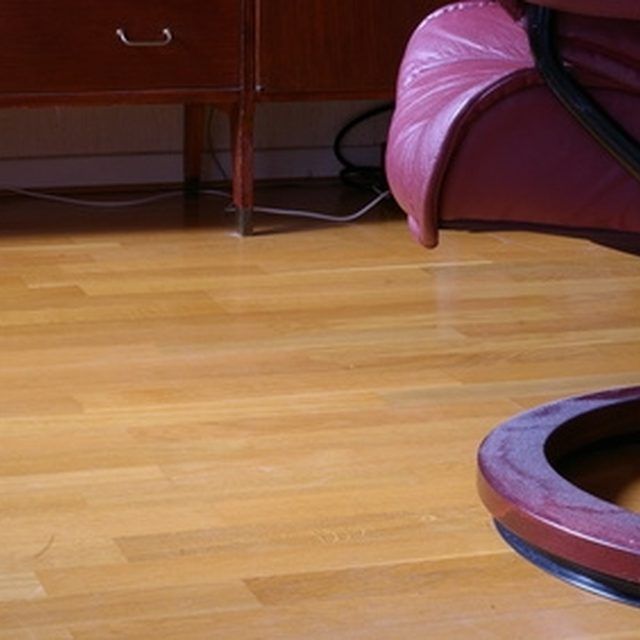
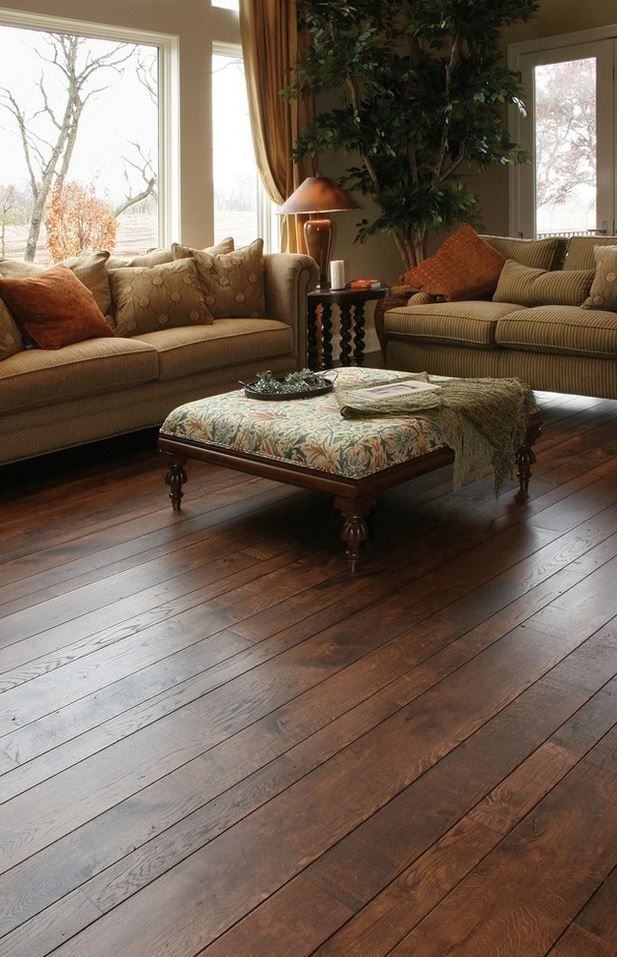
Photo: istockphoto.com
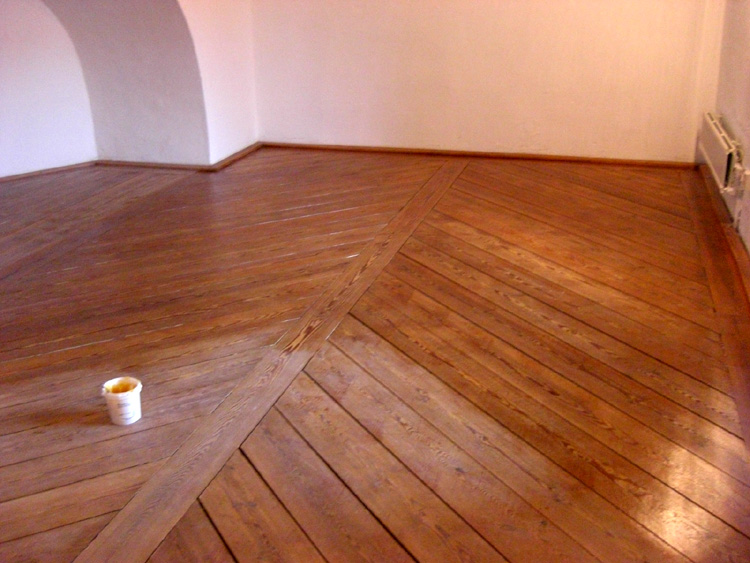
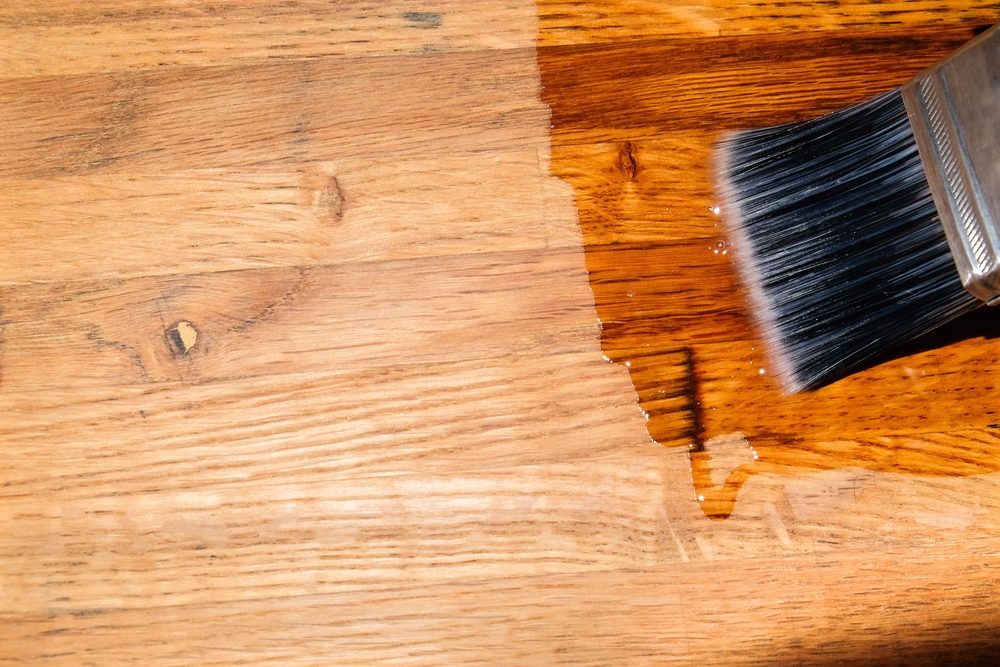
Hardwood floors add classic elegance to your home—but not when they’re dull, dinted, or dingy. Fortunately, waxing hardwood floors is an economical, tried-and-true way to restore their gleam and prolong their life. Read on to learn the technique for applying a high-performing wax finish that will look so grand, you’ll be walking on air!’
Why wax hardwood floors?Popularized in the 1940s, waxing is a floor finishing technique in which clear or colored wax, made of a blend of solvents and synthetic and/or natural waxes like beeswax or carnauba, is applied to a hardwood floor in a thin layer and then buffed to a shine. As the solvents in the wax evaporate, the wax hardens into a protective seal that confers a host of benefits:
- Increases stain resistance: The wax seal limits the absorption of spills to keep floors from staining.
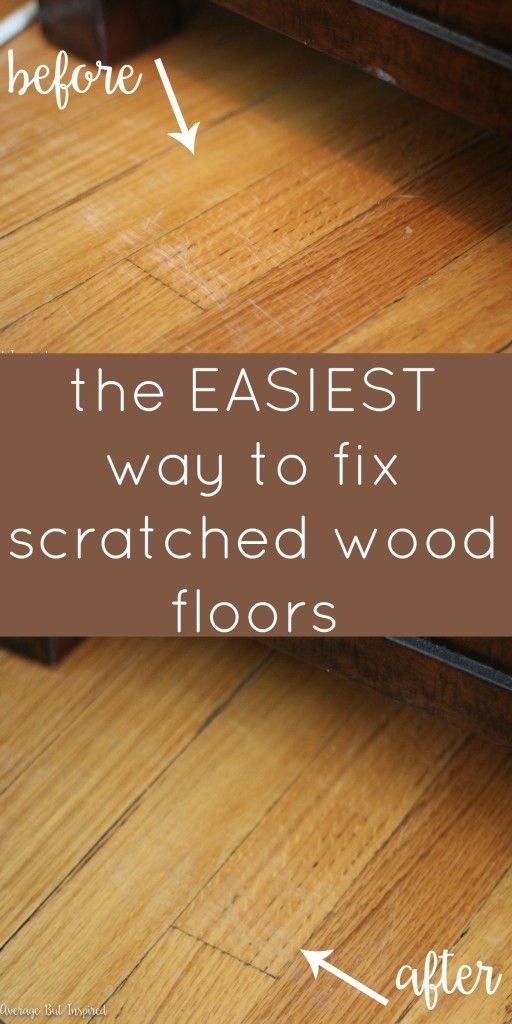
- Minimizes minor imperfections: Wax fades or eliminates the appearance of superficial scratches, dings, and scuffs marks.
- Preserves underlying finishes: Wax acts as the first line of defense against spills, dust, and dirt, preventing them from encroaching on underlying finishes, such as oil, and enabling the underlying finish to last longer.
- Prolongs floor life: The increased hardiness of waxed floors allows them to potentially last years longer than un-waxed floors if regularly maintained.
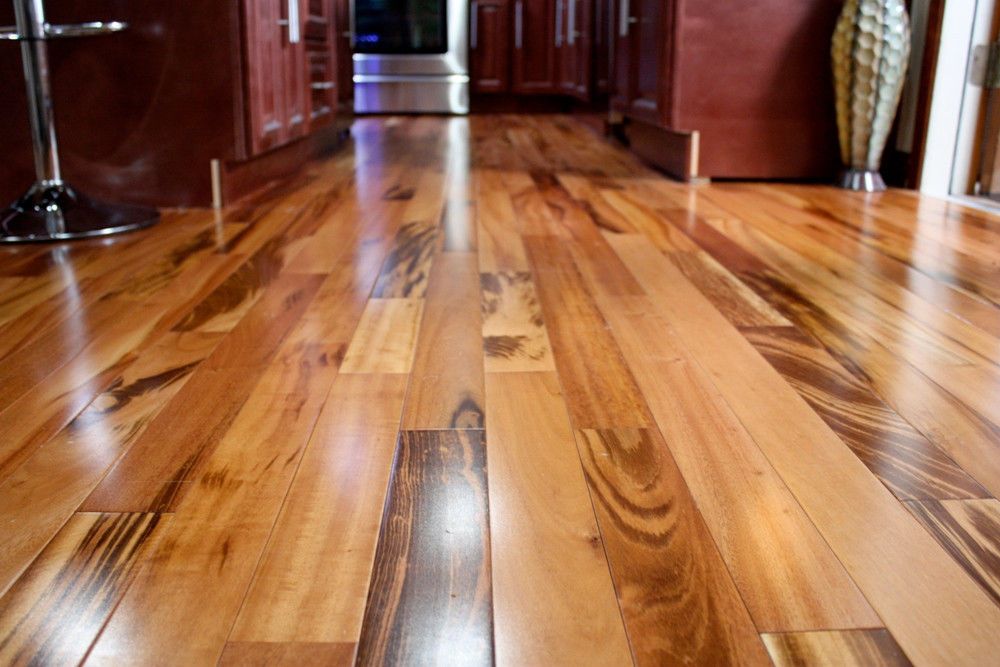
- Boosts beauty: Clear wax lends a shiny look and a glossier feel that vacuuming or mopping alone can’t achieve. Colored waxes, available in hues on the brown spectrum, offer these same benefits plus an attractive tint that gives floors an even richer, deeper patina.
That said, wax offers only limited resistance to deeper dents or gouges, and does little to ward off warping or bulging from widespread moisture exposure due to leaks or minor floods. Wax should be considered as a top coat—a final layer of protection, not the only protective finish, on a hardwood floor.:no_upscale()/cdn.vox-cdn.com/uploads/chorus_asset/file/19495052/06_refinishing.jpg)
Advertisement
Photo: istockphoto.com
Is it good on all floors?The best candidate for waxing is a hardwood floor that was previously treated with a penetrating wood sealer, lacquer, varnish, shellac, or oil, as wax can bolster the protective properties of these finishes. However, you can also wax unfinished floors.
Never wax urethane-finished floors (which could prevent them from being effectively recoated with urethane; instead, use polish) or those labeled “no-wax,” such as no-wax linoleum or vinyl designed to look like wood (they come with a factory coating that doesn’t require waxing).
Waxing is also only suitable for hardwood floors in good structural condition; that is, with no significant chipping, gouging, discoloration, warping, or bulging. If your hardwood is plagued with these problems, replace or repair affected floorboards (e.g., sand away discoloration or fill gouges with wood filler) before waxing hardwood floors.
Refinishing your floors?
Some jobs are better left to the pros. Get free, no-commitment estimates from licensed flooring contractors near you.
Find local pros
+What type of wax should I use?
Make sure to use the appropriate wax for hardwood floors:
- Either a solid paste wax or a liquid wax: Solid paste wax, sold in cans (starting at $9.98 per 16 ounces from brands like Minwax on Amazon), usually has more wax and less solvent. This imparts a thicker consistency that must be applied by hand with a cloth but requires fewer coats. Liquid wax, available in cans or bottles (starting at $13.74 per 32 ounces from brands like Rust-Oleum on Amazon), contains more solvent, so has a thinner consistency and can be applied by mop, but demands multiple coats.
- Labeled for use on floors: Steer clear of waxes labeled exclusively for use on furniture, as they harden into an ultra-slick coat that makes floors slip-prone.
- Solvent-based: Avoid water-based or acrylic waxes on hardwood floors; they can cause finished floors to take on a white tinge, or damage unfinished hardwood floors.
- Buffable: Look for traditional waxes that must be buffed after application; eschew one-step (i.e., “no-buff”) waxes, as dirt readily clings to them.
Photo: istockphoto.com
What waxing techniques achieve the best results?Use the tips below to master the three phases of waxing hardwood floors: surface preparation, application, and buffing.
Surface preparation:- Remove rugs and furniture from the room.
- Strip old wax, if present, by working a soft cloth dampened with mineral spirits or a commercial wax stripper such as Trewax Instant Wax Remover (available on Amazon) over two-foot sections of the floor at a time until no more wax residue comes off on the cloth. Slough off stubborn wax build-up with fine-grade steel wool.
- Dry-mop (with a microfiber cloth pad) or vacuum the floor with a dust brush attachment to eliminate dust and any loose wax build-up.
- If the floor is still dingy after dusting, use a sponge mop to remove grime. Work in three-foot sections at a time, using a store-bought hardwood floor cleaner from brands such as Bona (available on Amazon) or a homemade equivalent consisting of one quarter-cup of dish soap and a gallon of warm water. Damp mop the floor with water to remove leftover cleaner, then dry with a clean towel.
- Always wear gloves and a dust mask for protection from fumes in wax solvents.
- Get into a comfortable kneeling position before applying solid paste wax, as it should be applied by hand (knee pads ought to help). If applying liquid wax, remain standing.
- Grab a putty knife and a soft, lint-free cloth if applying solid wax. For liquid wax, enlist a sponge mop for the quickest application.
- Scoop a tablespoon of solid wax with the putty knife onto a soft, lint-free cloth.
 If using liquid wax, pour or squeeze a tablespoon from the can or bottle directly onto the hardwood floor, then dip the mop head into the wax.
 - Working in one- to two-foot sections, spread a thin layer of solid wax with the cloth, or liquid wax with a sponge mop. Start at one corner of the room and move towards an exit, waxing hardwood floors in the direction of the floorboards. When you’ve used up your first batch of wax, apply more to the cloth or to the floor until you’ve covered the entire room.
- Let the first coat dry, which can take anywhere from 10 minutes to an hour depending on the product.
- Apply additional coats per the manufacturer’s recommendation, allowing each to dry in between. Solid paste wax generally hardens into a thicker layer of protection, so one coat is often sufficient over finished wood, or two coats over unfinished wood, whereas liquid wax usually needs two to three coats at a minimum, as each coat is much thinner.
- Let the final coat of wax dry just until hazy; at this point, it’s ready to buff.
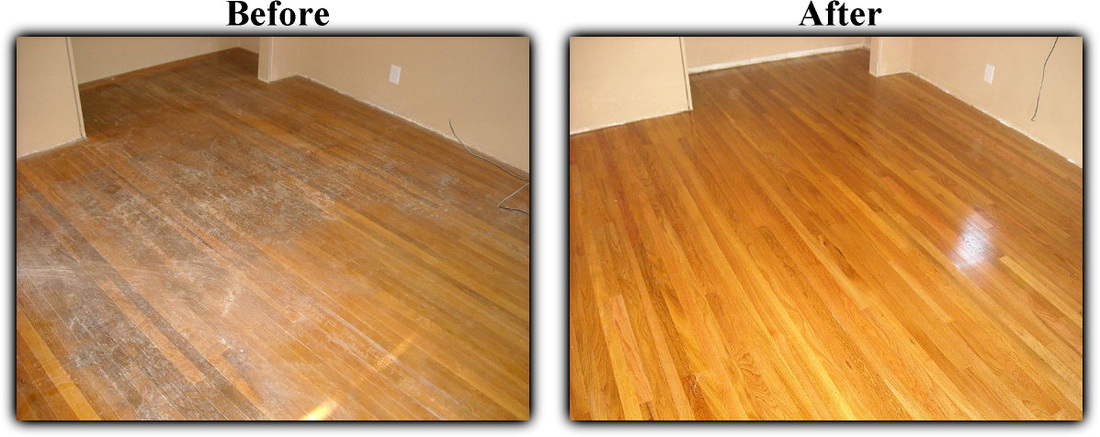
Photo: istockphoto.com
Buffing:- Enlisting a towel for solid wax, or a sponge mop with a terry cloth head for liquid wax, rub the cloth, or glide the mop, over two-foot sections of the floor at a time. Start in the same corner of the room where you began and move in the direction of the wood grain, buffing to the desired luster.
- Employ an electric floor buffer/polisher (rental from Home Depot starts at $30 for a half day) to speed up the process of buffing either solid or liquid wax.
- Leave the freshly waxed floor undisturbed for eight hours before stepping on or replacing furniture.
How can I keep waxed hardwood floors looking great?
Follow these tips to prolong the life and luster of your waxed hardwood:
Advertisement
Photo: istockphoto.com
- Re-wax floors at the interval recommended by the manufacturer. Generally, solid wax coats can last up to two to five years, and liquid wax coats between one to two years.
 If no re-waxing interval is given, wipe a cloth dampened with mineral spirits over a small section of your floor and inspect it. If the cloth is clean with no whitish or colored residue, no wax remains, so it’s time to re-wax.
 - Avoid applying fresh wax before the old wax coat has worn off, as over-waxing hardwood floors can result in unsightly wax build-up.
- In between waxings, fade superficial imperfections by buffing floors using the tips above.
- Weekly dry-mop waxed with a microfiber cloth pad, or vacuum with a dust brush attachment, to keep dust at bay.
- Avoid wet-mopping large areas of the waxed hardwood floor with water; it can cloud the wax coat or damage the wood.
- Wipe up spills as soon as they occur with a water-dampened cloth, then wipe dry.
- Remove stains or discoloration by working hardwood floor cleaner into the offending spot with a cloth. Use a water-dampened cloth to remove the leftover cleaner, then dry with a clean towel.
- Lay rugs or mats at the foot of doorways near waxed hardwood floors to keep dirt from being tracked in.

- Lift, rather than drag, furniture across the waxed hardwood floors to avoid dents.
Refinishing your floors?
Some jobs are better left to the pros. Get free, no-commitment estimates from licensed flooring contractors near you.
Find local pros
+How to Wax, Buff and Polish Hardwood Floors
Floor CleaningHardwood floors add beauty to the home, but like any other type of flooring they do require care and maintenance to retain their looks. The flooring experts at ServiceMaster Clean offer 50 years of cleaning and restoration experience. Check out our tips for hardwood floor care including how to wax, buff and polish hardwood floors.
Urethane and Wax Finishes
Urethane finishes are commonly found on many hardwood floors. If your floor has a urethane finish, it might be water-based, moisture-cured or oil-modified -- the most common found in homes. Paste wax has been used for decades and has seen a resurgence alongside the popularity of hand-scraped hardwood flooring.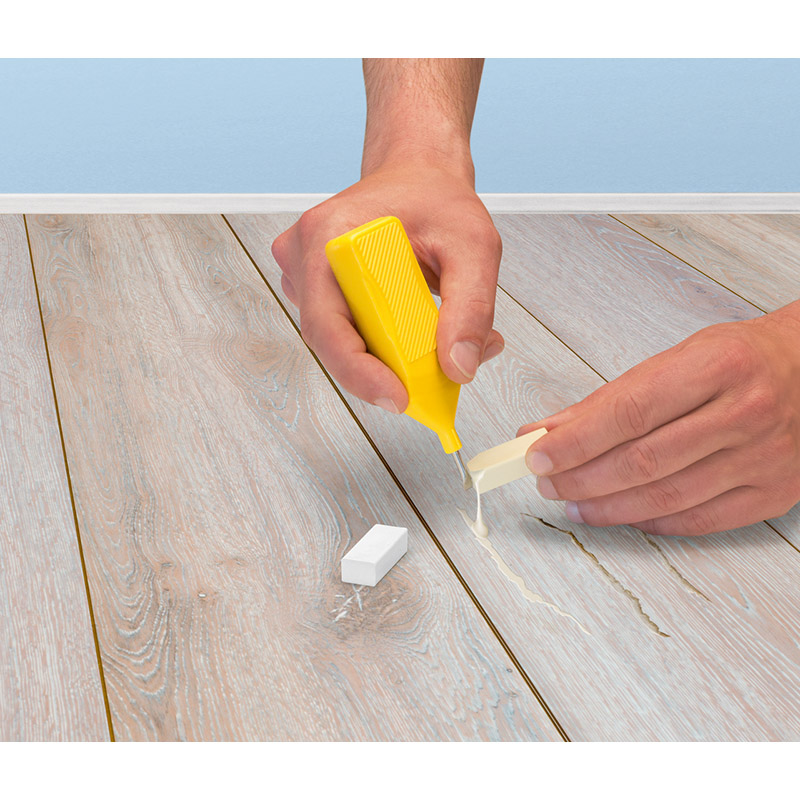 Both urethane finishes and wax offer a layer of protection against moisture, scratches and scuffs. Never apply wax over a urethane finished floor. If your urethane finished floors needs a re-coating, consult a hardwood flooring specialist.
How to Wax Hardwood Floors
Paste wax works great for unvarnished hardwood floors but should not be used on no-wax or urethane finished hardwood. The procedure to wax hardwood floors is a simple but time-consuming process and similar to applying wax to car. Dampen a clean, lint-free cotton cloth and dip it into the floor wax. Apply the wax to the hardwood floor lightly and evenly, following the instructions found on the wax packaging. Liquid wax also may be used. Some floors may require sanding before wax is applied.
Note: Only apply wax to a clean floor that has been prepared according to the manufacturer's instructions. Always work in a well-ventilated room. Take frequent breaks to avoid fatigue. Apply multiple coats if manufacturer's instructions dictate. As the wax dries, it will appear hazy or cloudy. This indicates it's time to move on to the next step: buffing.
How to Buff Hardwood Floors
You can buff hardwood floors by hand, but it may be easier to rent to an electric buffing machine. A buffing machine helps work the wax into the hardwood to help provide a protective layer against moisture, dust and dirt. Follow all instructions accompanying the buffing machine, including the installation of the buffing pad.
To buff hardwood flooring, begin in the corner of the room, farthest from the door and work your way from left to right across that back portion of the room. Always work slowly and carefully, holding the buffing machine with two hands. The buffer will spin clockwise, so go with this motion buffing left to right to work in the wax. Depending on the size of the room, you may need to stop and inspect the buffing pad, switching it for new one if needed. When you've worked through the entire room, you'll likely need to go back and buff by hand the areas (corners and such) where the buffer didn't reach.
How to Polish Hardwood Floors
Polishing a hardwood floor helps restore its sheen after it's been waxed and buffed. Don't apply a urethane finish for a shine over a waxed hardwood floor. To achieve a glossy sheen, it's back to the buffing machine and polishing cloth. To polish the floor attach a polishing cloth to the buffing machine and re-buff to achieve the shining look desired.
Restoring hardwood floors takes time and patience. However, you can turn to the hardwood floor cleaning specialists at ServiceMaster Clean for help. We can clean, wax, buff and polish any hardwood to breathe new life into your hardwood, saving you time and hassle. With our experience and expertise, you know the job will be done safely, effectively and efficiently.
Floor Cleaning
-
Enemies of Flooring: Pets and Hardwood Floors Read More
-
Winter is Over! Your Spring Cleaning Guide to Flooring Maintenance Read More
-
How to Get Dog or Cat Urine Smell Out of Hardwood Floors Read More
-
Getting Dog Smells Out of Carpet Read More
-
How to Wax, Buff and Polish Hardwood Floors Read More
-
How to Get Poop Stains Out of Your Carpet Read More
-
How to Maintain Your Flooring in High-traffic Areas Read More
How to polish parquet: tips and essential products
Damaged parquet? Find out with us how to polish your parquet so that it shines like new again!
Parquet is a very delicate and fragile material that needs constant cleaning and polishing, both with special products and with the help of polishing machines.
Daily cleaning of parquet flooring can consist of vacuuming the surface of the floor, paying particular attention to the corners and crevices, or for weekly cleaning, you can simply wash the parquet floor with warm water and a damp cloth.
To nourish and remove stubborn stains from parquet, you can use special wood cleaners that do not damage the dowels and create a protective film on the surface. To complete the cleaning, you can use wax or a polisher to make the floor shine and look perfect.
Basic characteristics of parquet flooring
Parquet is a type of floor covering made up of wooden bars or slabs, there are different types in terms of thickness, structure, pattern, substance, etc. Parquet is certainly one of the most beautiful floors, but it is very fragile and requires constant care. (If your hardwood flooring is “severely” damaged and simple cleaning/polishing does not solve the problem, we suggest you check out our online hardwood laminating guide, which covers the topic “hardwood floor restoration costs”. You will be able to understand exactly what procedure needs to be followed. and its cost).
The main types of parquet are: laminated parquet, prefinished parquet, solid parquet and, finally, artificial parquet, which does not contain wood, but consists of several layers of melamine resins. Parquet is an excellent heat and sound insulator, in addition, wood is a completely natural and environmentally friendly material.
How to polish parquet without a polisher
It is not always necessary to use a polisher or special products to polish parquet, but there are some natural methods that are just as effective. One of the most commonly used products for polishing parquet naturally is to run a woolen cloth soaked in olive oil over the entire surface, which nourishes and gives the laminate a shine.
If you want to wax your parquet, instead of chemical waxes, you can purchase an environmentally friendly, non-toxic and all-natural beeswax product. It should be noted that for particularly old or worn parquet, it is necessary to use products called polish, which polish and revitalize the wood.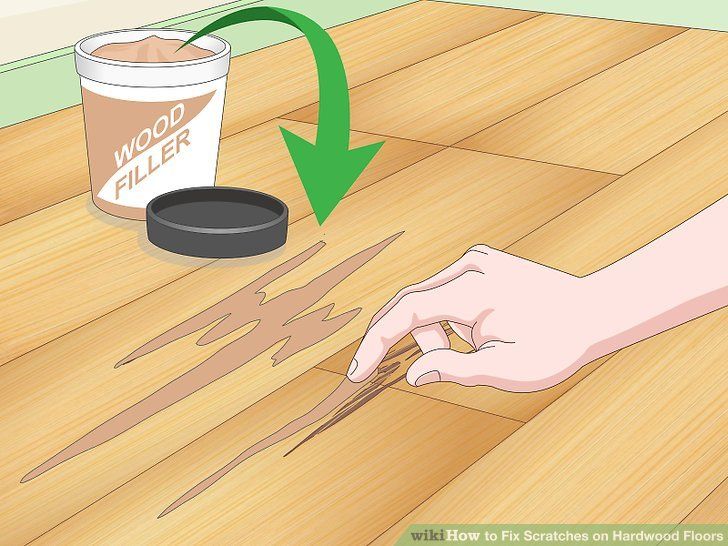
Wood floor polisher, what to choose?
Over the years, parquet flooring can lose its shine and deteriorate, so you can't just use a special cleaner or wax, but you must definitely go through a polisher, a machine that can give shine to any type of laminate. Among the different models of polishing machines, there are those that are considered the best in their class and are used specifically for polishing parquet.
Here are some of the best professional parquet sanders (on offer) most reviewed and most bought online disc, paper filter bag, 7 m cable
Hoover Polisher F38PQ with built-in suction, with bag, 800 W, 4 l, 95 decibels, height: 1 m, reach: 5.5 m, parquet brushes , brown, basic
Lgvshopping Floor polisher Wax machine Control knob 85 w New
XUMINGLSJ Marble floor polishers, polishing brushes, floor mover, professional floor scraper, manual 180° rotating electric floor scraper, two
9YOUTH BURST Floor Polisher, Marble Floor Polisher, Electric Rotary Mopping Mop with Rechargeable Floor Vacuum Cleaner Battery Powered Floor Polishers
Here we put some specifications and descriptions of professional parquet sanders that we can find for sale and which have received positive feedback from our readers.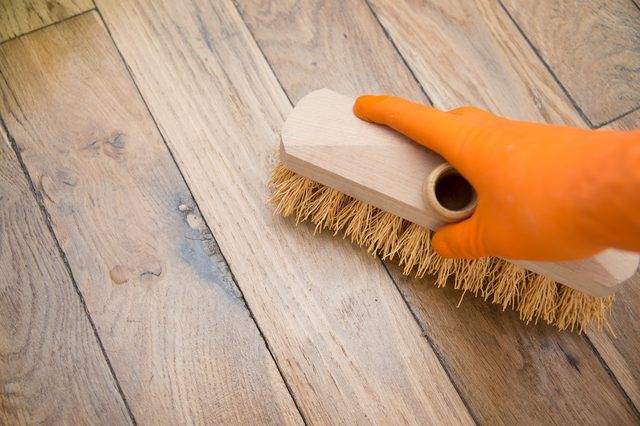 We insert them in an attempt to summarize everything in a clear and understandable way and in the hope that they will be useful for a more informed final choice.
Hoover F 38PQ polisher with two sets of brushes for removing and waxing parquet. The Hoover F 38PQ polisher is also equipped with a vacuum cleaner function with a maximum power of 800W to remove dust from every nook and cranny.
The Karcher FP 303 polisher is ergonomically designed to fit into corners and under furniture. It is very light and handy, easy to use and great for removing polish residue. The Karcher FP 303 has three polishing pads and a fabric pocket to hold dust and other residue.
One of the most popular polisher models is the Imetec SuperPlate Compact with four sets of brushes: parquet wool, hard bristles for waxing, soft bristles for polishing and felt brushes for a shiny effect. This particular model has been specially designed to protect, clean and shine all types of parquet floors.
Also known brand AEG has launched its polisher, AP 8000 Vacuum Polisher, with three brushes and suction function; This polisher is ideal for those who love suction power and a stable and compact design.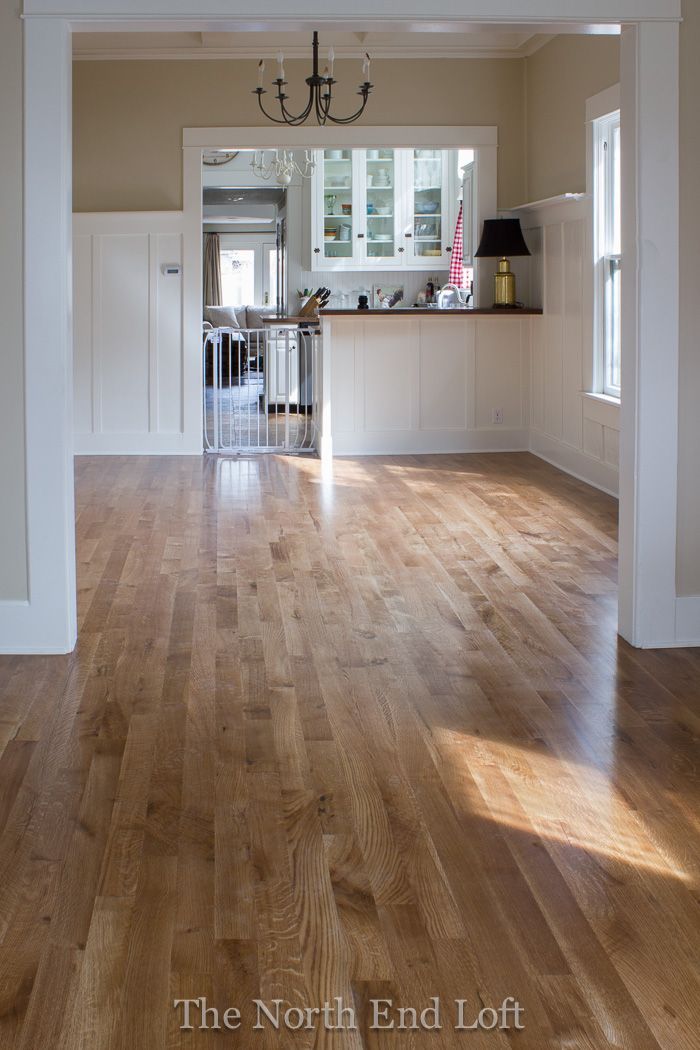
Also from Hoover we find the F3880 model with very good suction power and a set of brushes to remove and distribute the wax in a few moments. For those who want to buy a Hoover polisher at an excellent price-performance ratio, it is recommended to opt for the F3860 model, which guarantees a maximum power of 600 W, front lighting and a set of three brushes.
The best products for polishing parquet floors
As an alternative to using a polisher, you can purchase a variety of special products for parquet. Special cleaners for parquet floors have a delicate formula that nourishes the wood and does not damage it. Here are some of the best parquet varnish (in stock) most viewed and bought online
Nuncas, Livax Splendi Parquet, Wood Floor Protective Wax, 1000ml
12.15 € (12.15 € / l) 9.90 € (9.90 € / l)
HG Protective coating for parquet with glossy finish, 1 l
Emulsio 32 Fabric for cleaning and polishing parquet, 12 pieces (cloth size 28 x 22 cm)
€4. €4.00 (€0.33/each)  99 (€0.42/each)
Novecento X903 parquet polish, neutral, 1 l
FILA PARQUET WAX Wood and parquet wax, 1 liter
Here we put some technical sheets and descriptions of parquet polishing products that we can find on sale and which have received positive feedback from our readers. We insert them in an attempt to summarize everything in a clear and understandable way and in the hope that they will be useful for a more informed final choice.
One of the most suitable products for polishing parquet is the product offered by HG, which is able to make any laminate floor shiny in just one pass. The formula of the HG cleaner nourishes and protects the wood and eliminates any stains and halos.
From the well-known brand Karcher comes a special product for parquet: Karcher wax for interiors is able to care for and protect all waxed or oiled wood floors. Karcher Parquet Wax must be applied with a polishing machine to achieve a bright and uniform surface without halos, scratches or smudges.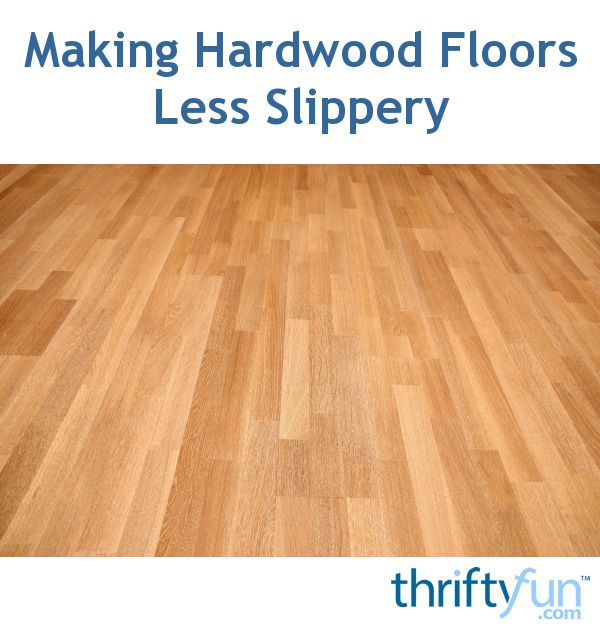
To protect parquet from wear and tear over time and daily installation, you can use the product that creates a protective film on the whole parquet, sold by HG. The liquid must be applied according to the grain of the wood in order to create a very thin and transparent anti-slip protective film that at the same time protects and polishes the surface.
For the care of oiled or waxed parquet floors, it is recommended to use the wax offered by Bona Bona, a product that is simply sprayed onto the laminate and the parquet floor regains its color and shine in a few seconds. This specific Bona product is environmentally friendly and can be used on all types of laminate flooring.
Clean Prince Wax Clean Prince Wax is very suitable for those who want a matt polish that nourishes and protects the surface, creating a protective film even at low concentrations. Clean Prince wax is also able to provide water resistance to all types of matt or glossy parquet.
Wax and oil for wooden floors - coating technology, care and restoration.

Oil and wax have been the main care products for wooden floors for centuries.
Now, waxing and oiling have become popular again, as both the procedure and technology for working with oil and wax have become much simpler. This is primarily facilitated by care products, as well as tools and methods for applying oil. Properly treated wood floors, which are properly cared for, will repay you with their wonderful appearance.
Why is it better to coat floors with oil instead of varnish?
- Oiled wooden floor becomes antistatic.
- To the touch it becomes warm and not as slippery as a varnished floor.
- The oil, due to its penetration into the depth of the wood structure, has higher protective properties of the entire solid wood (from the inside).
- Among other things, on an oiled floor, any damage, chips, scratches, abrasions are either not visible at all, or much less noticeable, etc.
- Another plus of the oil is that it has excellent waterproofing properties, while at the same time leaving the pores of the tree open, which is why the tree retains its naturalness and, simply speaking, "breathes", and this maintains a constant and favorable level in the apartment or room.
 humidity.
Are there any disadvantages and disadvantages of oil flooring?
- Careful preparation is required before oiling the floor.
- Try to adhere to the application technology as accurately as possible, and observe technological breaks between the stages of work.
- Remember that immediately after oiling the floor becomes dirty much faster than a varnished floor.
- A floor treated with a little requires maintenance with the help of products recommended by the manufacturer of the oil composition.
- Remember - metal furniture or metal objects should not be placed on the floor under oil, in order to avoid their reaction, after which dark spots remain on the floor.
Which wood (floor) can be oiled?
- The actual application of oil is an alternative to varnishing wood.
- Getting started, clearly decide for yourself what effect you want to achieve?
- Since the oil muffles the shine, but effectively emphasizes the structure of the tree, as well as its pattern (arrangement of fibers).

- Types of wood that can be oiled:
- Oil coating is used more often for exotic woods. Of the "domestic" species, it is used for application to ash and oak floors.
- But there are wood species that are directly recommended to be processed with oil, not varnish. Among them are lapacho (ipe), jatoba, campas, iroko, and other woods that contain an increased amount of oily substances that prevent the same varnish from sticking to the surface.
Where is the oil used?
The answer to this question is simple - where you need it and, first of all, where varnish cannot be used.
Corridors.
Oil is appropriate here because the floor covered with it is resistant to wiping, which often happens at the entrance to the house and the corridor of the apartment, and the place where it is erased is easy to fix with your own hands.
Terraces.
On terraces, oil impregnations are most often used, for outdoor work with wooden structures.
The downside is that the terrace will have to be oiled twice a year. With this frequency of application, the wood will retain a deep color, be protected from water, and from the so-called "biological corrosion".
Bathrooms.
Since after processing the wood with oil, it fills its pores, the wood becomes harder, which is very important for the bathroom, because neither moisture nor evaporation can penetrate into the deeper layers, but at the same time, vapors can quickly go outside.
But remember, no matter how great the protective properties of the oil, only a small number of woods can be used in the bathroom. Exotic breeds are best suited - Ipe or otherwise Lapacho and Teak.
Treatment of underfloor heating (heat-insulated floors).
In this case, the situation is complicated by the fact that the tree expands when the temperature rises and contracts when it is lowered, so oil for underfloor heating is the best fit, because it can stretch and shrink along with the tree, unlike the same varnish, which creates a strong film and when stretched, the tree may crack.
What is floor oil made from?
Wax oil.
Wax oils are used to create a protective floor coating. It is nothing more than a mixture of liquid wax and the oil itself. Wax in its composition is needed to give the floors a soft, matte sheen and additional protection against moisture and wear.
Floor oil without resin.
Contains at least 90-99% natural oil. Contains a small amount of solvents (and some brands do not contain at all), and, therefore, environmentally friendly.
Of the pluses, the main one is the simplicity and speed of application (no breaks for the solvent to dry).
To cover the same floor area, oil without the addition of resins will require significantly less than those containing solvents and resins.
The main disadvantage is that it requires more thorough and frequent maintenance, like all natural coatings.
High-solid oil.
Very dense. They contain resins that strengthen the oil, so you rarely need to update such floors, because the resin sticks oil particles to the wood fibers.
Types of floor oils - colored and colorless.
Colorless or clear light yellow oils. They are used more often for dark wood species, but any species can be processed, there are no restrictions. They can be used for any type of wood, but they are most often used for dark woods.
Dark - walnut, cherry or oak. They process oak parquet, as well as rare and exotic wood species (except guatamba).
Whitening sex oils.
Grey, white or silver oil is used on light woods such as maple, ash, birch. They also resort to them for processing oak - it turns out very beautifully - “antique”, with a certain whitening effect and a silvery tint.
How to prepare parquet for oiling?
Preparation of floors before treatment with oil compositions is a very important stage, on which half the success depends, because oil very strongly (to a greater extent than varnish, for example) shows all the shortcomings and minuses of wooden floors.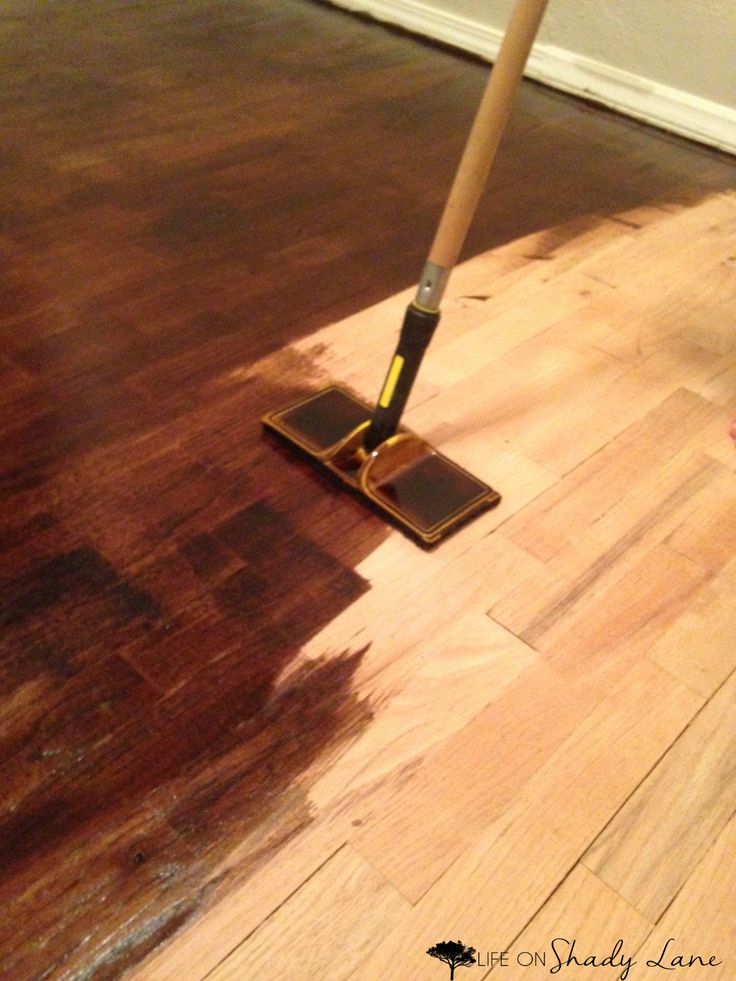 So all the bumps become clearly visible, as well as, for example, poor grinding.
Therefore, oiled floors should be well sanded using sandpaper of different grits (starting with sanding 20, then from 36 to 150), depending on the type of floor.
Sanding the edges of the flooring is just as important. It is made in the same way, that is, using paper with the same grain change.
- If you sand the floor with too fine paper, you can close the pores of the wood, after which the oil will not penetrate into them.
- Be sure to putty the floor before applying oil and sanding.
- Polish the floor also very carefully and evenly - if the floor is poorly polished, stains will be visible on the floor.
At various stages of processing wood floors (this is grinding, polishing, applying oil, removing its excess), work is best done using grinders and thermal pads with a hairdryer.
Wooden surfaces are treated with felt or microfiber nozzles (these are pads).
Pads of different hardness differ in price, so at each stage of work you need to use the pad that is recommended by their manufacturer.
Oil application technology.
After grinding, polishing and subsequent removal of dust, proceed to the application of oil. It is better to start this stage as soon as possible so that the tree's own resins and oils do not clog its pores.
Oil coating is done in several stages, between which so-called technological breaks are necessarily made.
Remove excess oil immediately to prevent it from drying out and forming a crust.
Some flooring products contain a wood finish wax - this must also be removed immediately, otherwise it may cause minor scratches on the wood.
Birch, as well as fir and pine, are recommended to be treated with an alkali solution before applying the oil - then the wood will not darken and this will additionally emphasize the difference in layers.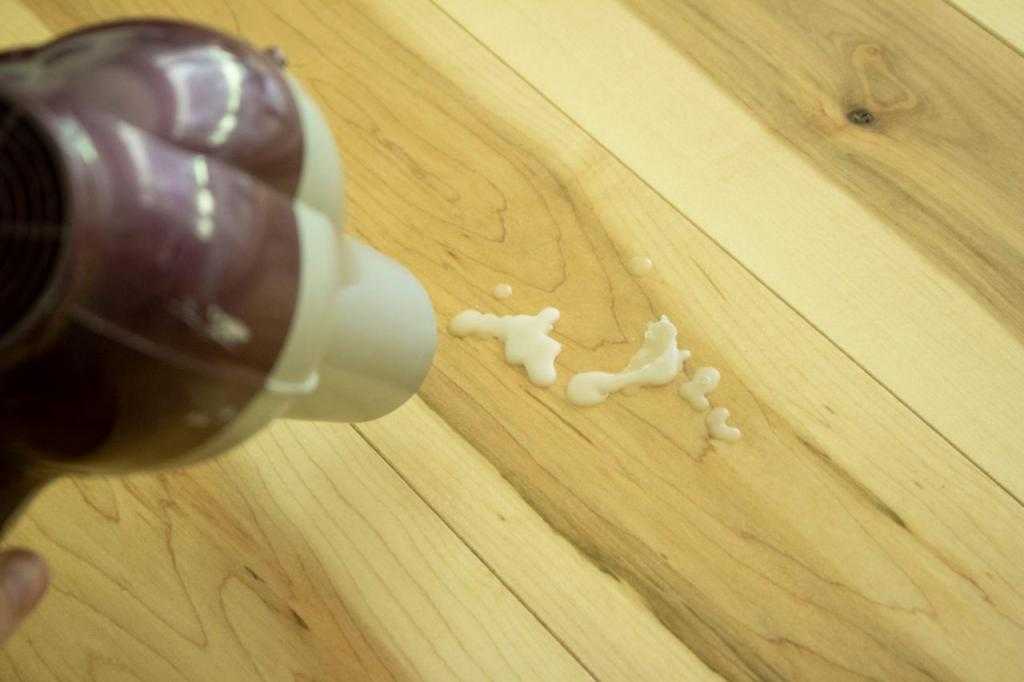
The floor can be oiled in two ways: cold and hot.
Depending on the type of wood and oil, work can be done in 1, 2 or 3 passes.
The stronger the wood absorbs oil, the more passes you need to make (for example, beech floors are processed three times). The cold method of applying oil is easier because this method does not require thermal pads.
But the hot method of applying oil is good because the oil penetrates the thickness of the wood better, and therefore the result is better, because the coating lasts longer.
How to apply oil cold?
First coat
The oil is applied in a thin layer and as evenly as possible, the excess is removed with a soft cloth after a couple of minutes.
After that, they proceed to polishing the surface with a polishing machine with a beige pad, or by placing steel wool on the pad to remove the wood fibers.
After polishing with a polishing machine, all wet places should be wiped dry with any cotton rag.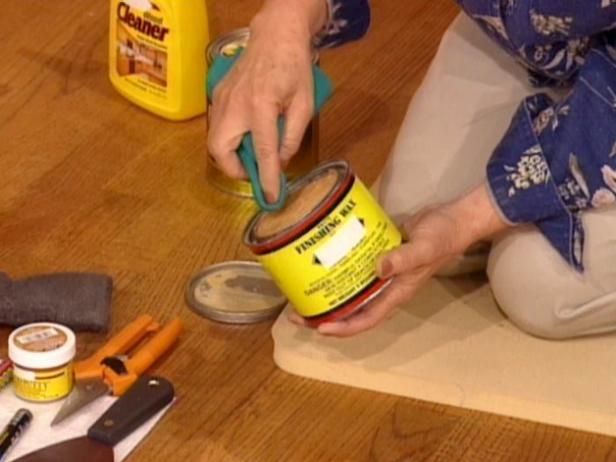 After processing, the oil may stand out for several more hours. Then it should be wiped again, and polished again.
Second coat.
The application of the second layer is started after 5-12 hours (more precisely, it is written on the package with a small one).
Please note that the second layer of oil should go much less, since the floor absorbs it already in a smaller volume.
The last layer of oil (can be either the second or third) is completed by removing its excess with a green or black pad, as well as polishing, for which a red pad is used.
A floor is considered well-finished when it is sufficiently saturated with oil and has a light, pleasant sheen, which is also called "satin".
As a rule, the floor treated with oil can be walked on after a week or two.
Hot oil application.
First coat.
Oil heated to the required temperature (usually 80 degrees) in a water bath is applied (very carefully and evenly) to the tree with a spatula.
As noted above, hot oil saturates the wood better.
An important detail is that the floor must also be heated before processing, because oil can remain on its surface on a cold parquet. By the way, the parquet is also heated with a thermopad.
The oil is also rubbed into the floor using a thermal pad with a beige pad. You need to do this until it is completely absorbed.
Second coat.
The second layer is usually applied in rooms where an increased load (abrasion) on the floors is possible.
The second layer is applied in the same way as the first, 2-2.5 hours after the first.
With the hot method, the surface that has absorbed the oil should be obtained, without matte spots.
Wax application.
Floor wax is needed to eliminate scratches. Wax forms though thin but very strong and resistant to dirt outer layer.
Floor waxing starts 48 hours after the last coat of oil has been applied.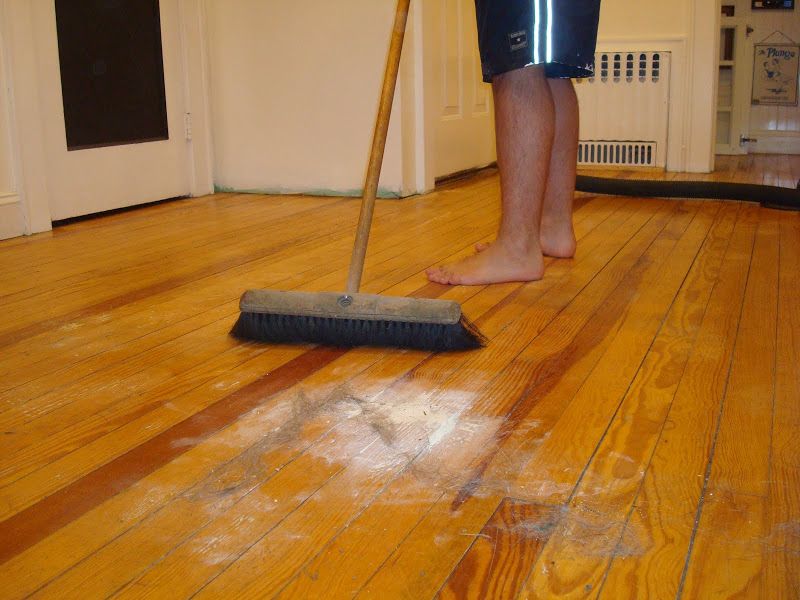
The wax drips off the thermal pad and is then rubbed in and polished with a white pad.
Re-polishing with the same pad (white) is done no earlier than three hours later.
The floor will be walkable after one week at the earliest. It is impossible to start operating it at an earlier date - dirt gets into the soft layers very well. It is also not recommended to lay carpets on the floor covered with hot oil in the first weeks after work.
Maintenance of oiled floors.
Caring for such floors is a little more difficult than lacquered ones. They get dirty faster, especially at the beginning. Dirt will stop sticking to the floor only when all the pores of the wood are saturated with oil. To care for floors, use products of the same series as the oil itself.
Note that such floors require systematic care, periodic restoration, only then they will look expensive and spectacular, and their wear resistance will not decrease.
Dry care.
During the first week (sometimes 10 days), be sure to dry clean, vacuum or sweep. The floor can be wiped with a dry cloth or a thick soft mop.
Wet method.
The floors are either washed or wiped with water and liquid soap (it is based on vegetable oil) or special products that include wax, water, essential and vegetable oils.
Keep in mind that oiled floors often tarnish after washing, so subsequent polishing will be required. You can polish with a simple woolen cloth or with a single-disc grinder.
Periodic care.
To give the floor a shine, after some time the floors are covered with hard wax or rubbed with mastic, which can be replaced with an oil-based care product, and then polished again.
Floor restoration.
It is quite possible to do the restoration of the floor covered with oil with your own hands.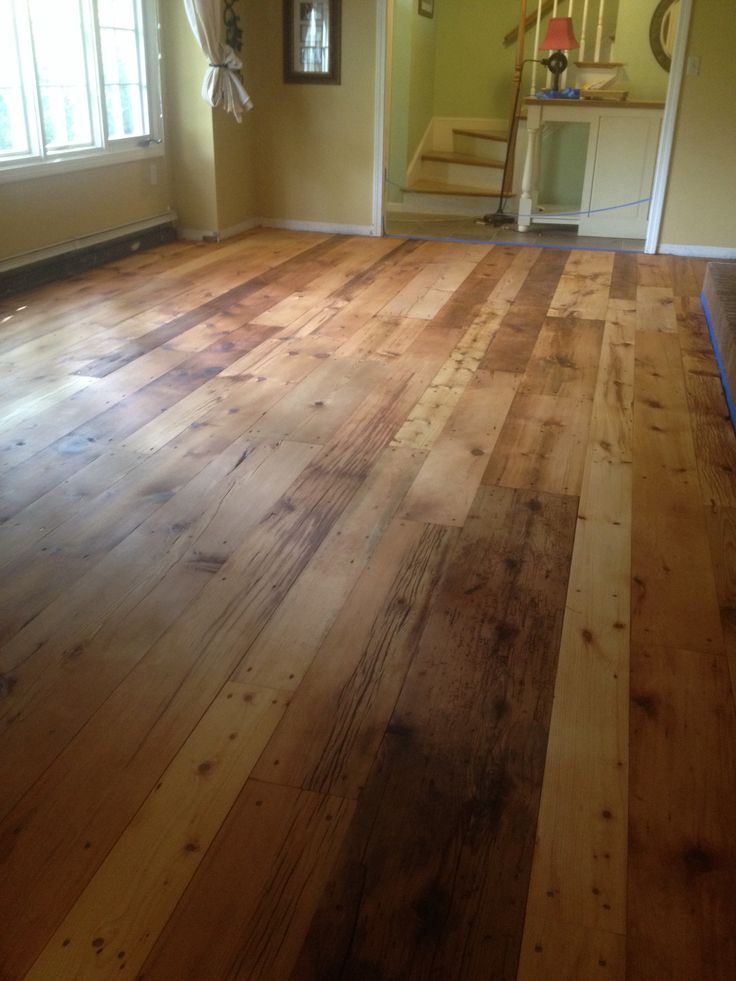 True, in this case you will lose the guarantee of the company that performed the processing.
In a typical home, a new coat of oil and wax is applied every two to three years.
Often, re-sanding after such application is not required - the floors will only need to be washed. But if there is still a need for grinding, then after applying oil, polish the floors with the same single-disk grinder with a pad.
After these procedures, the floor can be walked on after 4-5 hours, although the coating will acquire its final strength only after 5-7 days.
Scratches and stains.
Oiled flooring gives you the opportunity to make small repairs yourself, for example, to get rid of stains and scratches that are less visible on oil than on varnished floors. Scratches are the easiest to remove - sand them with sandpaper and saturate with wax or oil. After applying the solution, the floor will swell slightly (temporarily) and the scratch will heal.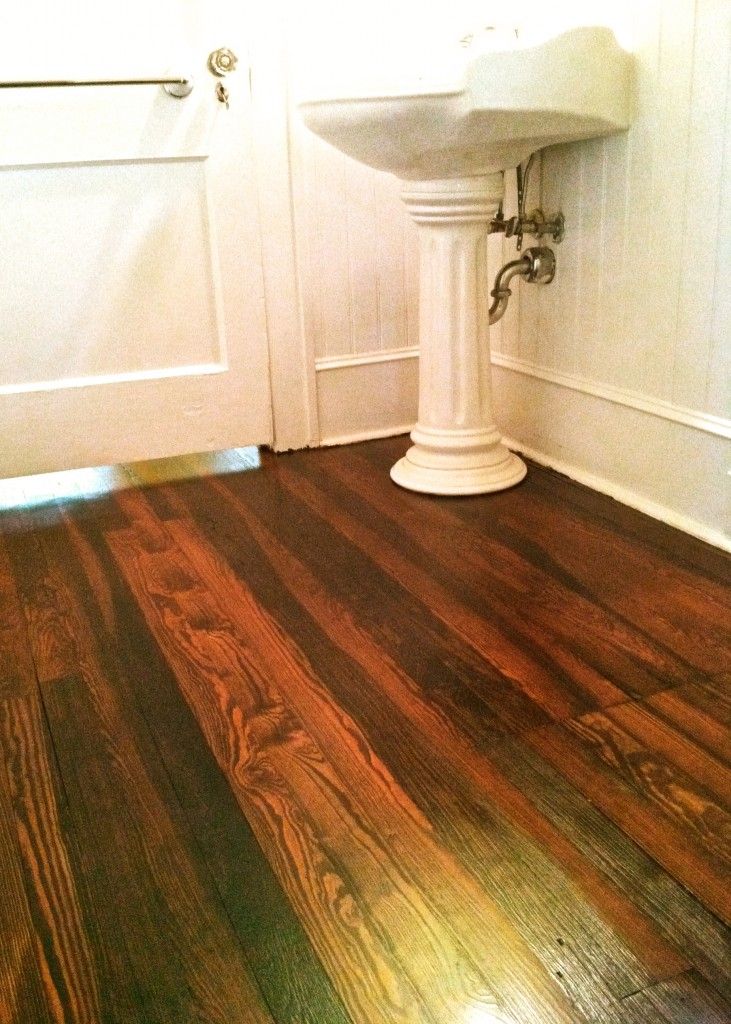
To remove stains on the floors (immediately after treatment, the floor gets more dirty) use plain water (wash off quite easily), if the stains are voluminous, then use products for the care of such floors, preferably from the same manufacturer.
If the stains do not succumb, again, it is recommended to rub them lightly with the same type of oil.
Areas with large stains or deep scratches are recommended to be sanded. Be sure to sand in the direction of the grain (wood pattern). Sand with 100 to 200 grit sandpaper, then lightly oil to restore the original look. The difference between the freshly treated areas and the rest of the surface will be visible for some time, then it will disappear (the difference can be observed even up to 4 months).
How long does the oil on the floors take to dry?
The time for complete drying of the oil directly depends on the type of wood and the oil used.
As a rule, complete drying occurs within a short period of time from 4 to 10 hours, sometimes up to 12.
But after that, the floors should be used carefully for at least a day. Normal operation of floors is possible only after a week, and even better 2.
Any tree (one more, another less) contains some residual resins, so the penetration of oil into varieties with more resins (spruce, pine, fir) is difficult. Based on this, the oil dries for a longer period of time, and may even stand out from the wood for some time (usually up to 48 hours).
If you have oiled the floor using the hot application method, the drying time is reduced by 5-7 days.
Oiled floor color.
Pigments are added to the floor treatment oil in order to obtain the desired shades of the floor covering.
It is clear that the more coloring pigment you add (usually 7-10 percent of the volume of the oil solution), the darker, richer the color will be.
The effect of colorization appears immediately after application - there will be no need to wait.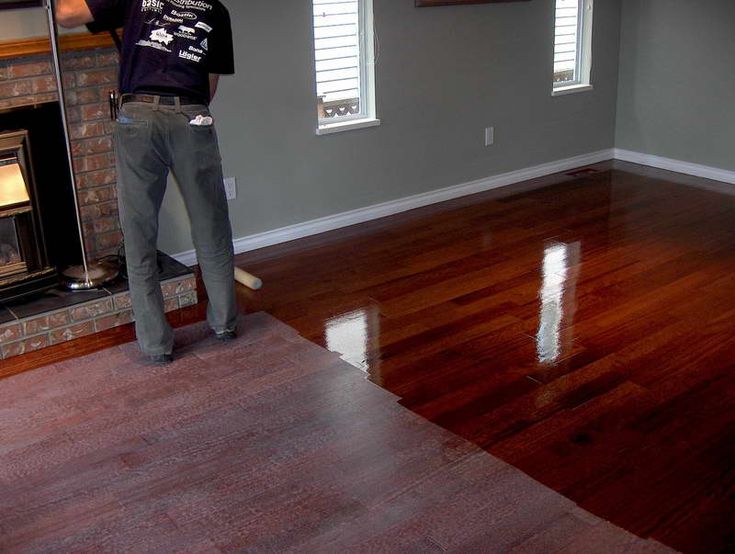
Also a tip: Be careful with the addition of white coloring pigment, when applying, rub it with a pad as thoroughly as possible, because otherwise the floors will look like sloppy painted with white paint.
Note: If the wood is stained, oil treatment is strongly discouraged.
Films, like varnish, oil does not form, so everything that somehow comes into contact with the floor will also be painted.
How much oil should be applied to the floors?
The volume of oil depends on the type of wood, the method of application and, of course, on the composition itself.
As already noted above, oily woods (including coniferous and "exotic") absorb it less.
So for 40 squares of oak parquet, the first treatment should take about 1 liter of oil.
The second layer will take significantly less.
Hot oiling will require more solution.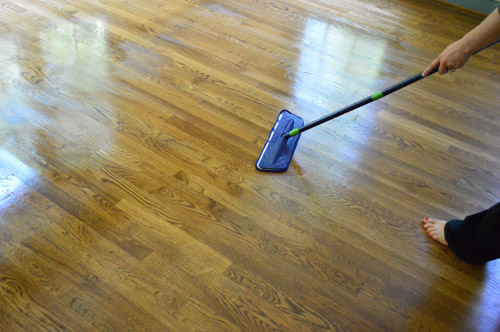
Natural oils are consumed in a smaller volume than their counterparts containing solvents.
What is the difference between oil and sex wax?
Many people think that they are one and the same, but they are not.
Wax forms a thin layer on the surface of the floor and "seals" the pores of the wood.
Maintenance of waxed floors (especially cleaning) is much more difficult.
Wax becomes lighter when exposed to water and needs to be restored, forming stains (but this does not happen with oil - it perfectly protects against water.
Factory oiled parquet board.
There is one, and it is intended for those who do not want to cover the floor with oil with their own hands. In the factory, this is done carefully and efficiently. You will only have to lay such a board, on your own or by professional craftsmen. After installation, it will not be superfluous to refresh the factory layer of oil by applying a small amount of colorless, which is most likely to be recommended by qualified specialists.