Home grown celery
How to grow celery at home: It's easier than you think
Who knew that celery, the last item left on every veggie plate, would become a wellness star? Yes, we’re talking about the same lowly vegetable whose wholesale price has soared as juicers clamor to buy the slender stalks (and the rest of us smear them with peanut butter to make them appealing).
“Medical Medium” Anthony William may extol the benefits of drinking 16 ounces of celery juice a day (based on advice from a spirit voice), but home cooks have long relied on the vegetable to add oomph to soups, stews and other savory dishes.
But for some reason, celery is not a winter garden staple like other greens, and that’s a shame, says Gardening in L.A. blogger and master gardener Yvonne Savio. “If you’re a cook, you need to grow celery, because you get twice as much as what you buy at the store.”
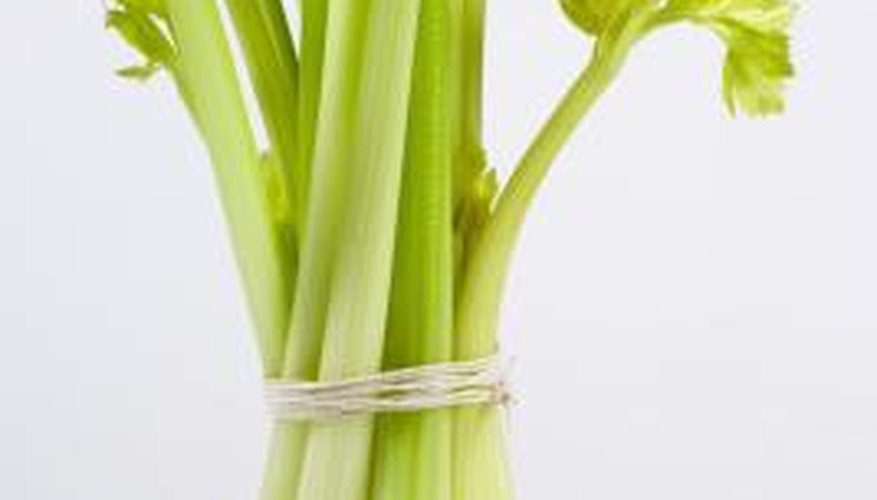
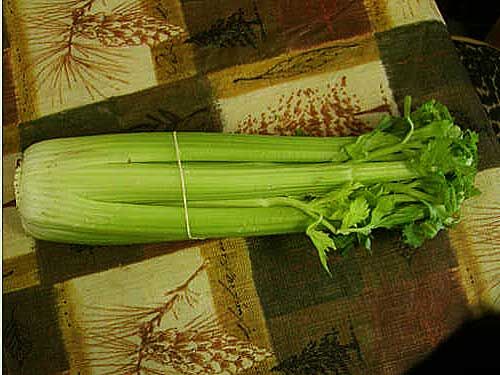
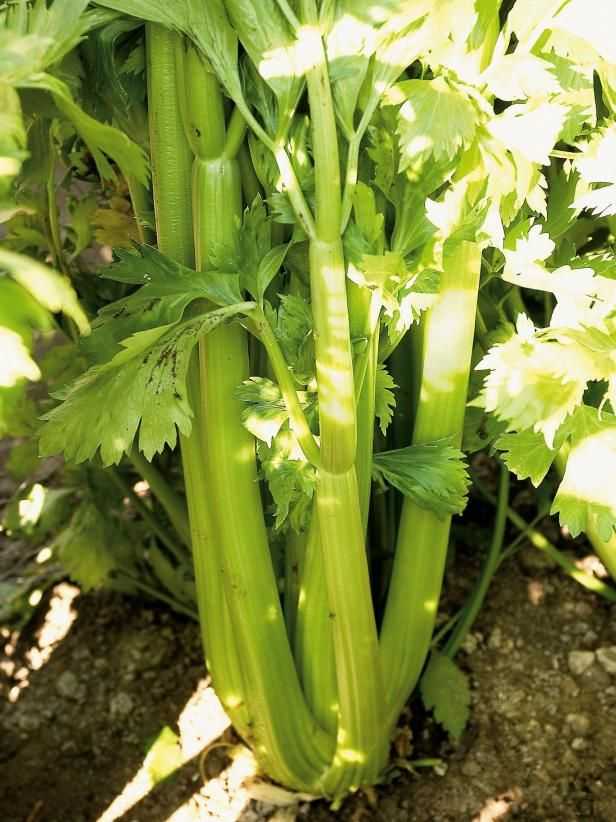
That’s because most grocery store celery is trimmed so that only the pale, sweeter stalks remain. Celery grown in the garden has longer stalks ending in beautiful leafy tops that can be juiced or diced and added to soups and stews.
The plant prefers cooler weather, rich and fertile soil and ample water to grow crisp and juicy, so winter is a perfect planting time in Southern California. Here are Savio’s tips for growing enough leafy stalks to keep your stews — or your juicer — well supplied:
How to start?
Savio recommends starting with celery seedlings; she says a six-pack is more than enough for a family. It takes only one large stalk to create 16 ounces of juice, or a few diced stalks to complement a stew, so unless you’re juicing for the entire family (or raising rabbits), you might want to share your six-pack of seedlings with a friend. If your local nursery doesn’t have celery seedlings in stock, most will order them. Call ahead and ask.
When the weather gets hot, garden celery will bolt — start forming seeds — but the plant still offers one final show of delicate white, celery-smelling flowers.
(Yvonne Savio)
Soil or pot?
You can plant the seedlings in the ground or in a large pot, Savio said.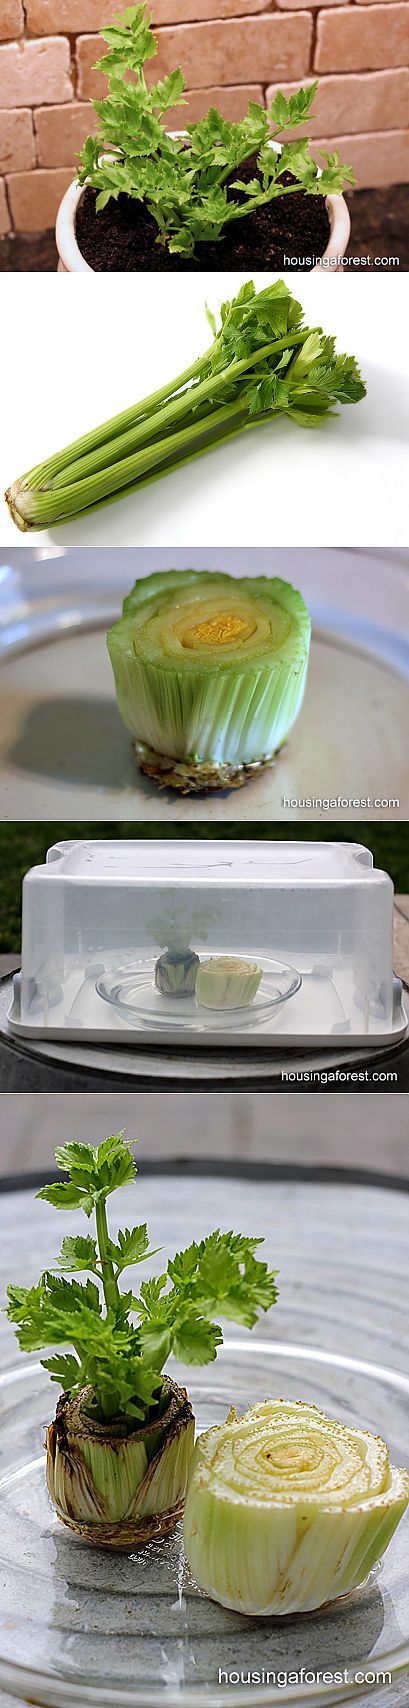 Celery roots range from 18 to 24 inches, according to a vegetable root depth guide prepared by the University of California Cooperative Extension for Los Angeles County, so look for a pot that’s as deep as possible, Savio said. “For any vegetable, find the optimum depth and then add another 4 inches to the pot so the roots have some room to grow. You don’t want them pushing against the sides of the pot.” Finally, choose a sunny location; celery can’t handle high summer temperatures, but during the winter, when days are shorter and the sun less intense, they need at least four to six hours of sun daily.
Soil matters
Like most vegetables, celery needs fertile, well-amended soil to thrive. Savio recommends spreading 1 to 2 inches each of compost and cow or steer manure, topped with an inch or so coffee grounds — her personal secret sauce for mulching and enriching her garden soil. You don’t need to dig the amendments into the soil as much as scratch them in a few inches deep, she said, but do let them “cook” for a week or so; fresh amendments, especially manures, initially raise the soil temperature and can burn tender seedling roots. Prepare your soil first and let it cook while you shop for your celery starts (and other winter vegetables.) If you’re using a pot, Savio recommends mixing two-thirds good potting soil with one-third equal mixture of compost and manure, topped with a cup or two of coffee grounds. (Savio collects her grounds from coffee shops.)
If you prefer the paler, sweeter celery that’s protected from the sun, you can tie up the young stalks to protect the inner branches or cut the top and bottom off a half-gallon milk carton and push it over the young seedling like a sleeve to shade the stalks.
(Yvonne Savio)
Water = crispness
Celery needs water to grow straight, sweet and tall, Savio said, so keep the soil moist. A rainy winter can provide all the moisture necessary, but if your celery starts tasting “like turpentine” or the stalks get soft and “feel a little wobbly,” those are signs more water is needed. If there’s no rain, Savio waters her well-amended Pasadena garden deeply just once a week in the winter, but her soil holds water well. Your garden might need more frequent watering. You can use the finger test (stick your finger 3 inches into the soil and if it feels dry, water) or buy a three-way soil meter that measures soil moisture for about $10. Once the weather starts getting hot, your celery will start producing seeds and turn bitter, much the way that lettuce bolts in the heat.
Celery prefers cooler temperatures, but even after getting its leaves singed on a hot May day, this mature plant is still providing lots of crisp green stalks. The buried bucket is master gardener Yvonne Savio’s technique for deep watering; just fill the bucket once a week and let the water seep deep into the soil through the holes in the bottom.
(Yvonne Savio)
Harvest from the outside
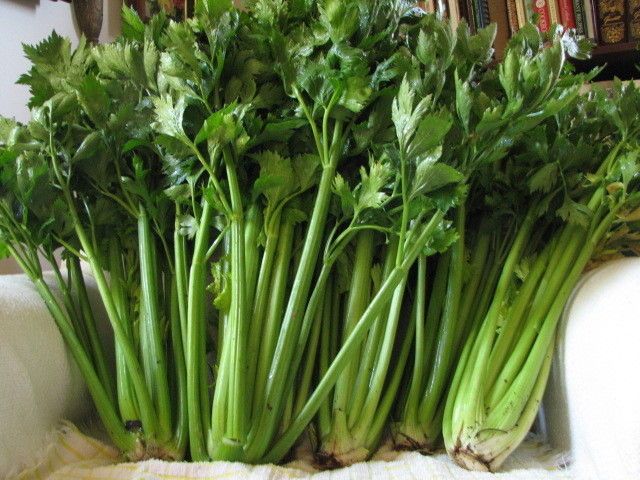
The celery in your garden is going to be taller, bushier and a deeper green than the pale stalks you usually see in the supermarket, because retail plants have been trimmed of their outer branches. The inner branches have a lighter color and milder taste because they’re hidden from the sun, Savio said.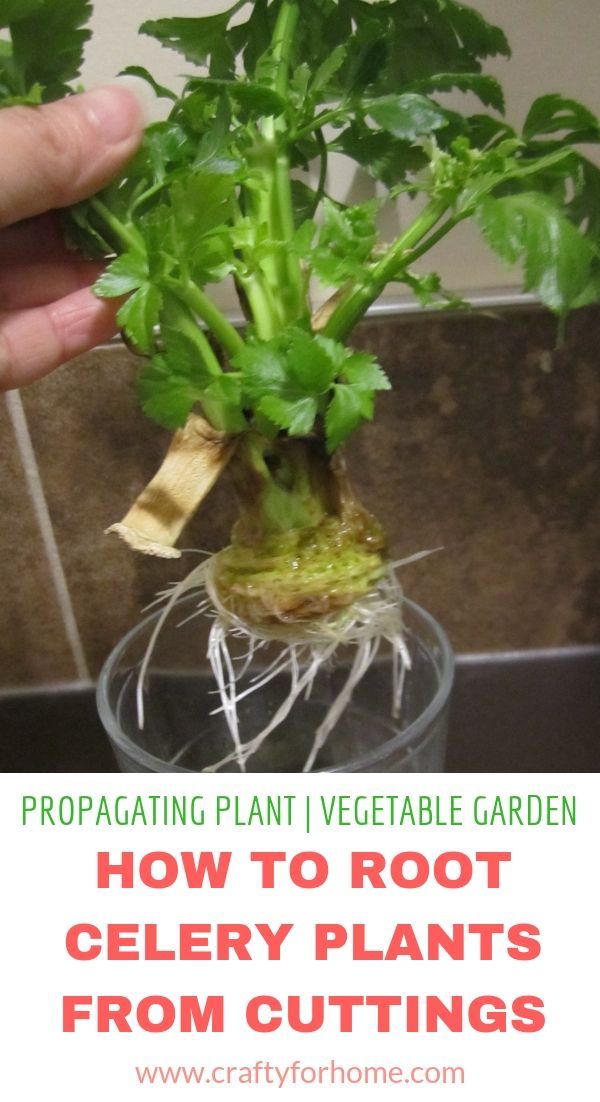 You can blanch your celery by tying the growing plants into little bundles or cutting the top and bottom off a half-gallon milk carton and placing it over the top of your newly planted seedling. That will keep the sun off the stalks as the plants grow. The deeper green stalks have a stronger flavor, Savio said, which is great for cooking but may be more intense as juice. Once your plant has eight to 10 good-size stalks — usually within four to six weeks — you can start harvesting, she said. Snap off stalks at the base, from the outside. Cutting stalks can open a wound in the plant and weaken it, Savio said. The plant will grow new stalks until it goes to seed, so expect to keep harvesting celery well into the spring. And if you let your plant go to seed, expect a final beautiful display of delicate white flowers.
How to Grow Celery From the Base
By
Kerry Michaels
Kerry Michaels
Kerry Michaels is a container gardening expert with over 20 years of experience maintaining container gardens in Maine. She specializes in writing and capturing photography for gardening and landscape design for print and broadcast media, including the Discovery Channel, Small Gardens, and Disney, among others.
Learn more about The Spruce's Editorial Process
Updated on 06/14/22
Reviewed by
Debra LaGattuta
Reviewed by Debra LaGattuta
Debra LaGattuta is a gardening expert with three decades of experience in perennial and flowering plants, container gardening, and raised bed vegetable gardening. She is a Master Gardener and lead gardener in a Plant-A-Row, which is a program that offers thousands of pounds of organically-grown vegetables to local food banks. Debra is a member of The Spruce Gardening and Plant Care Review Board.
Learn more about The Spruce's Review Board
The Spruce / Cori Sears
Project Overview
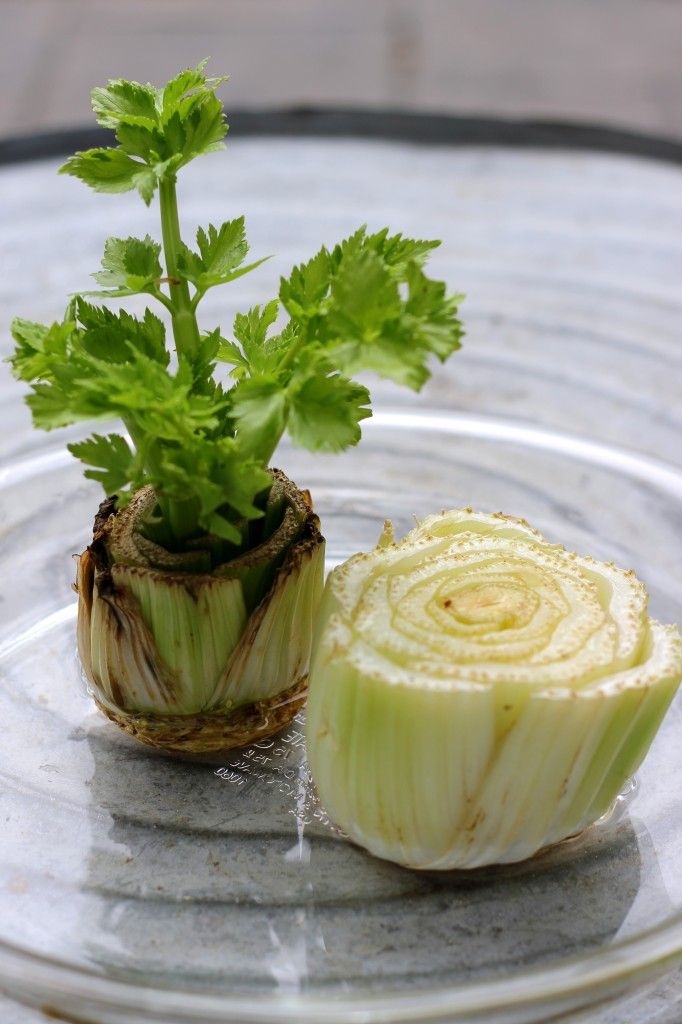
Growing celery from the base of the stalks is a fun, easy garden project that produces fast results.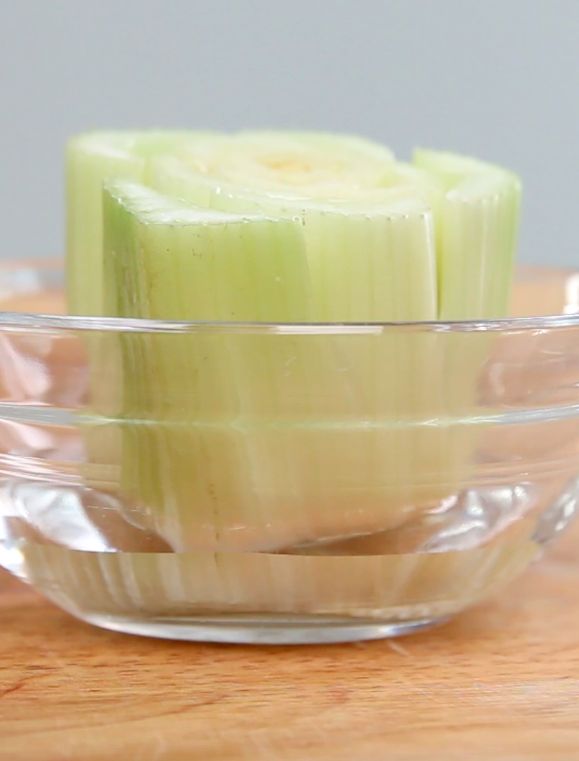 There are two ways to do it: using water in a container or planting the base in potting soil. You might get more leaves than stalks when growing celery from its base, and your celery might not be as big as a store-bought bunch. However, you can use the celery leaves in cooking. Think of them as an herb: They taste like mild celery and work well in soups and stews. Some people even use them as a substitute for cilantro.
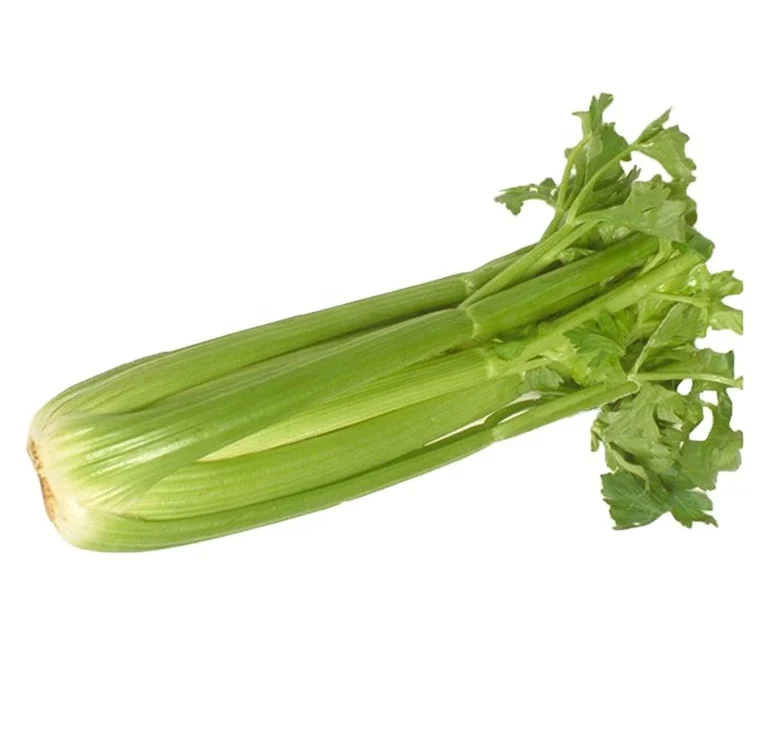
When growing your own celery from its base, consider starting with organic celery, as celery often ranks high for pesticide residue. Look for a bunch of celery that is firm with tightly packed stalks. The leaves should be green and appear fresh.
How to Regrow Foods From Scraps
Equipment / Tools
- Knife
- Trowel (optional)
- Small non-porous container
- Planting container with drainage holes (optional)
Materials
- Bunch of celery
- Fresh water
- Potting soil (optional)
- Slow-release fertilizer (optional)
- A piece of screening, coffee filter, or paper towel (optional)
The Spruce / Cori Sears
-
Cut the Bottom Off Your Celery Bunch
Using a clean, sharp knife, cut off the bottom of your bunch of celery about two inches up from the base.
 Store the celery stalks until you're ready to eat them, and save the base.
 Tip
The best way to store celery stalks is to wrap them in foil or plastic wrap and refrigerate them in the vegetable le bin. Foil-wrapped celery can remain fresher a bit longer than plastic-wrapped celery. To revive stalks that have wilted, cut 1/2 inch off both ends and put the stalks in an ice water bath for 30 minutes.
The Spruce / Cori Sears
-
Place the Celery Base in a Small Container
Take the base of your bunch of celery, and put it in a small container filled with about one inch of water. Place the container in a bright area out of direct sunlight.
The Spruce / Cori Sears
-
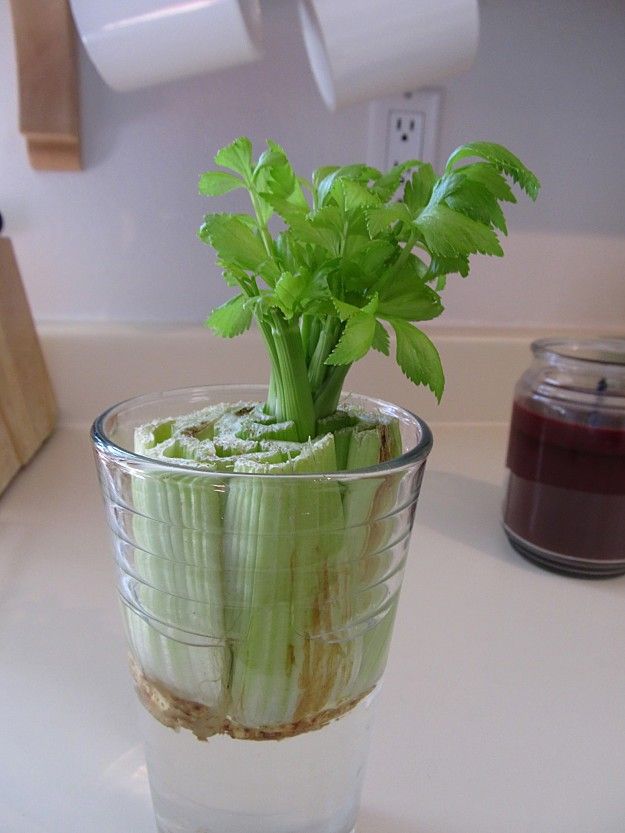
Watch the Celery Grow
Your celery should start to sprout in a day or two. Change the water every few days, and make sure the dish doesn't dry out.
The Spruce / Cori Sears
-
Plant the Celery in a Pot (Optional)
If you want your sprouted celery base to grow larger, plant it in a pot.
 First, to prevent soil leakage, cover the drainage holes in the bottom of your pot with a piece of screening or a coffee filter.
 Then, fill your pot with potting soil until it is about two inches below the rim. Mix in a slow-release fertilizer, following the label directions. Press lightly on the soil to level it, and add water so it becomes damp but not soggy. Next, place the bottom of your sprouted celery base on top of the soil. Add about another inch of soil, so it completely surrounds the celery base. Finally, place the pot in full to partial sunlight, and water often enough to keep the soil damp. Watch your celery grow.
The Spruce / Cori Sears
It's easy to make your own celery salt by using celery leaves and table salt, kosher salt, or sea salt. All you have to do is harvest celery leaves, wash them, dry them as much as possible with a clean dish towel or salad spinner, and dehydrate them. To dehydrate your celery leaves, either use a dehydrator or an oven.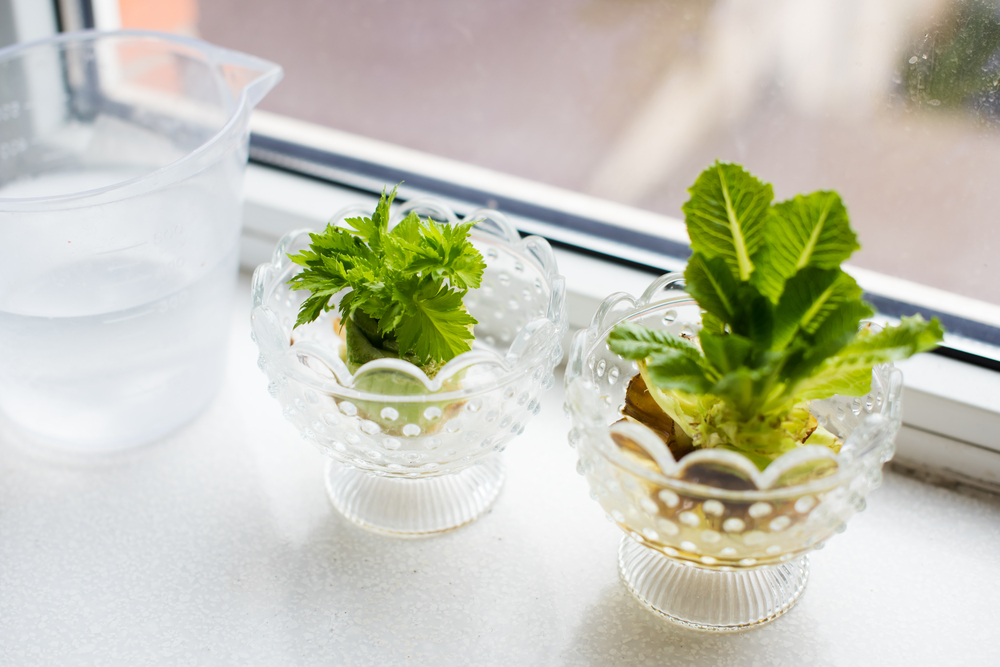
If you are using an oven, preheat it to 350 degrees Fahrenheit. Line a baking sheet with parchment paper, and lay out your celery leaves in a single layer. Heat for five to ten minutes or until the leaves are crispy but not browned. Once they cool, crumble them and mix them with an equal amount of salt. Then store the mixture in an airtight jar.
How to Grow Herbs Indoors on a Sunny Windowsill
Watch Now: Seitan: The Secret Ingredient to a Stellar Vegetarian Stir Fry
cultivation and care in the open field and at home, how to grow on greens, planting with petioles and seeds
Celery is a plant with a bright aroma and original taste. It is considered a natural healer, since the use of this vegetable crop provides the body with a mass of useful elements.
Contents
-
1 Description of the plant
-
1.1 Video: 10 reasons to eat celery every day
-
1.2 Types and varieties of celery
-
1.
 2.1 Photo gallery: Types of celery
 -
1.2.2 Celery varieties
-
1.2.3 Photo gallery: some varieties of celery
-
.4 Table: taking into account the region of growing
-
-
-
2 How to grow celery
-
2.1 Growing from a stump
-
2.1.1 Video: how to grow celery on a windowsill
0035 -
2.2 Growing from seeds
-
2.2.1 planting
-
2.2.2 Video: how to quickly germinate celery
-
2.2.3 Care for the seedlings and their open soil
-
-
2.2.4 Video: picking seedlings
-
2.2.5 Preparing the soil for planting
-
0003
-
3.1 How to grow celery at home
-
3.2 Condema for petiole celery
-
-
4 DISCOUNTIONS
- 9000 4.1 PROTECTIONS 9000
-
4 with celery pests
-
4.3 Photo gallery: celery diseases
-
4.
 4 Table: celery diseases, prevention and control
-
-
5 Harvest and storage
Description of the plant
Celery is a biennial spicy vegetable plant from the umbrella family. Its homeland is the Mediterranean. There are about twenty varieties of celery. Outwardly, they are similar, but differ in the growing season. Since the plant is biennial, in the first year only leaves and roots are formed, and it blooms and produces seeds only in the second year.
Celery - an assistant in the fight against bad mood and excess weight
The ancient Greeks, considering celery a panacea, depicted it on their coins. And wreaths of its leaves adorned the heads of the winners of sports.
Celery was originally used as a medicinal plant. It contains a large amount of vitamins and other useful substances, at present it has firmly become one of the most useful vegetable crops. Celery leaves are used fresh.
 They resemble parsley, but are more fragrant and spicier. As a condiment, celery is used in pickles and marinades. Celery root is good in stewed and baked form, in salads and diet puree soups.
 Celery can be used in a variety of dishes, from marinade to puree soup
Celery root contains a large amount of amino acids, tyrosine, so it can be considered a meat substitute and is useful during fasting.
Video: 10 reasons to eat celery every day
Species and varieties of celery
Breeders have shifted their research focus from the leaves of the plant to other parts of the plant. As a result, we now have three types of celery:
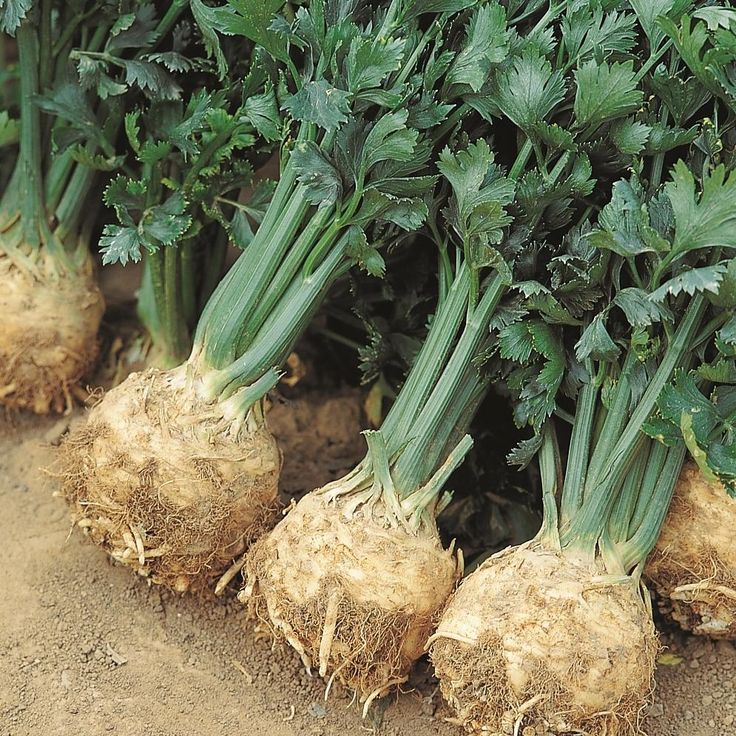
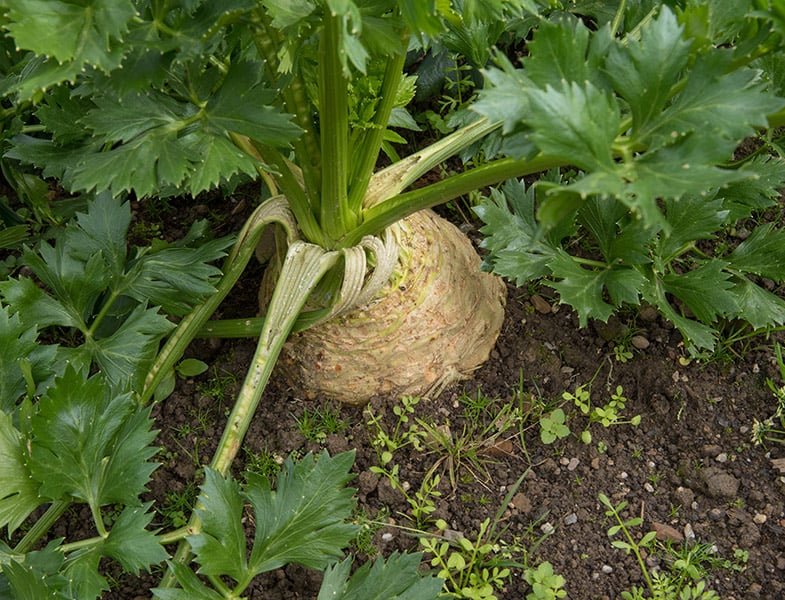
- root celery are well-developed roots up to 500 g in weight;
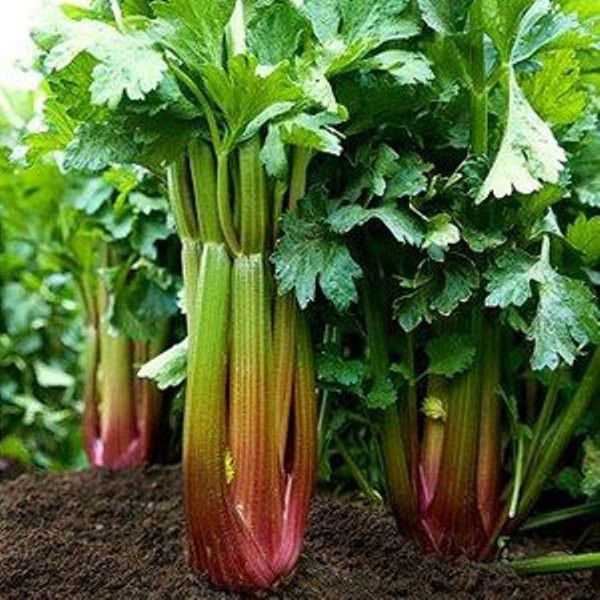
- petiole celery - produces fleshy petioles 3-4 cm wide, without forming a root crop;
- leaf celery - 50 to 200 leaves, collected in rosettes.
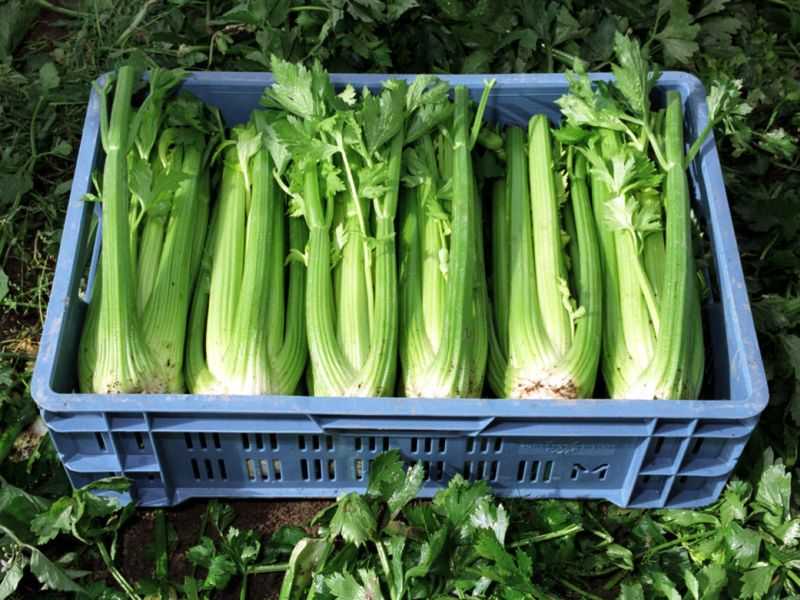
Photo gallery: types of celery
- Three types of celery were bred by breeders
- Leaf celery produces delicate aromatic greens
- Root celery is famous for its useful root crop
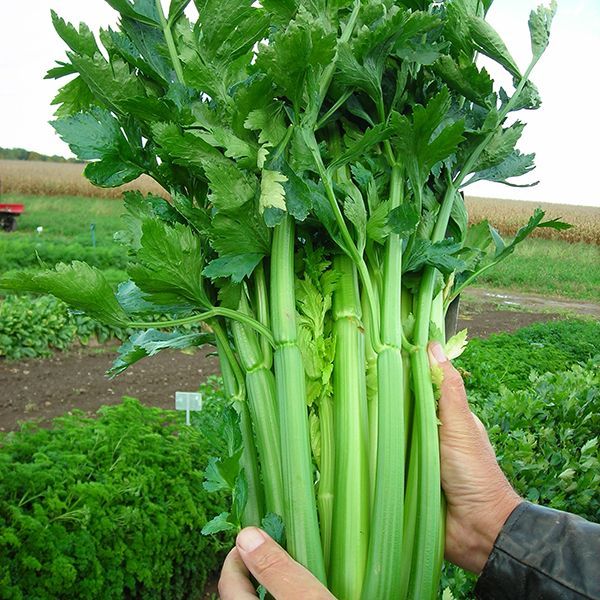
- Petiole celery is popular for its juicy plates and petioles
- 0165
Celery varieties
Varieties of celery
Each type of celery has many properties and maturation periods that differ.
Photo gallery: some varieties of celery
- Varieties of petiole celery
- Leave the lower part of the stalk 3–4 cm high. root formation (3-4 drops per 0.5 liter of water).
- Place the container in a warm, bright place.
- After 3-5 days, roots will appear, and after another week, the growth of young leaves will begin.
- The stalk can now be transplanted into a small flower pot. For this, a universal flower primer with the addition of perlite (3: 1) is suitable. When transplanting, you need to take care of good drainage (3-4 cm).
- If planting is done in winter, additional illumination with a phytolamp is required, which is placed at a distance of 1 m above the plant.
- Before sowing, soak the seeds for half an hour in water heated to +50 °C, and then keep them in warm water for two days. To do this, you need to put a wet weave in a small dish, and pour the seeds on it. Water should be changed every 3 hours. Then the seeds prepared in this way should be dried in a paper towel to a state of flowability.
- Carry out stratification, i.e. keep the seeds wrapped in a damp cloth for a week at room temperature, preventing drying.
 And then put them in the refrigerator for two weeks.
Seeds contain a lot of essential oils and therefore require stratification before sowing. For this, low seedling boxes are suitable. The soil for this purpose may consist of a mixture of peat (6 parts), soddy soil (2 parts), humus (2 parts) and sand (1 part). Two days before sowing, in order to carry out disinfection, it should be spilled with boiling water.
Seeds are sown in wet furrows made with a match at a distance of 3-4 cm from each other, without falling asleep, but only pressing them into the ground. Then the box is covered with glass or film and placed in a dark, warm place. The soil during seed germination should be kept slightly damp at all times.
Video: how to quickly germinate celery seeds
Care of seedlings and planting them in open ground
Two to three weeks after sowing, cotyledon leaves will appear.
 Now you need:
 - remove the film with which the seedlings were covered;
- spray them with room temperature water from a spray bottle;
- carefully loosen the soil;
- place the seedling box on a bright, cool window sill.
In February, in order to prevent seedlings from pulling out, it is required to carry out additional lighting. Seedlings need at least 10 hours of daylight. It will also help to reduce the temperature to +16 °C. Fragile plants can not be watered, you can only spray.
Celery seedlings will have to be illuminated
Seedlings can be picked after the second true leaf appears. When picking, it is advisable to shorten the seedlings by a third. They are deepened to the cotyledon leaves, while the growth point must be kept on the surface.
Video: picking seedlings
Preparing the soil for planting
Before planting seedlings in open ground, care must be taken to prepare the soil.
 Celery prefers to grow after legumes, cabbage, onions, garlic on loose fertile soils. During autumn digging, half a bucket of humus and 20–40 g/m 2 phosphate fertilizers (simple superphosphate) and 10–15 g/m 2 potassium sulfate are applied to the soil. Loosening is carried out in early spring and the second part of mineral fertilizers is applied (10 g of phosphorus and 5 g of potash per square meter).
 In autumn, humus should be added to the soil
Leaf and petiole celery will respond well to the introduction of fresh manure, because a high nitrogen concentration favors the growth of "tops". For the growth of the "roots" of root celery, it is necessary that the manure is well rotted.
Planting in the ground
Plants are planted in the open ground when they reach a height of 20–25 cm and have 4–5 true leaves. In terms of time, this may occur in mid-May. 2-3 weeks before this, they begin to harden the seedlings, for which they take them out into the street, gradually increasing the period of stay.
Seedlings of celery can be planted outdoors in mid-May
Planting pattern: the distance between the holes is 40 cm for root celery and 15–20 cm for other species. Distance between rows - 45–50 cm. Hole depth - 10 cm. For root celery, the growing point should be left at the level of the soil, while for other species, it should be deepened by 2 cm. Cropped plastic bottles will help to protect plants that have not had time to take root from night cold snaps, with which you need to cover each bush by night.
Growing conditions
After planting, celery requires full care: weeding, loosening row spacing, regular watering and fertilizing. Petiole celery should be spudded twice before harvesting.
Celery root should not be hilled. Otherwise, it may form lateral roots, which will lead to deformation of the main root crop. It is useful to carry out the reverse process: to rake the earth in the process of its growth.
Water celery at the root, plentifully.
 Keep the soil moist until harvest, so water weekly. Uneven watering can cause cracking of root crops.
 Two weeks after planting the seedlings in the open ground, you can feed the plants for the first time. The time for the second top dressing is the intensive growth of the leaf part, the third top dressing is carried out during the formation of the root crop. Composition of mix:
- 10–15 g/m 2 urea;
- 10–15 g/m 2 potassium chloride;
- 40–5 g/m 2 superphosphate.
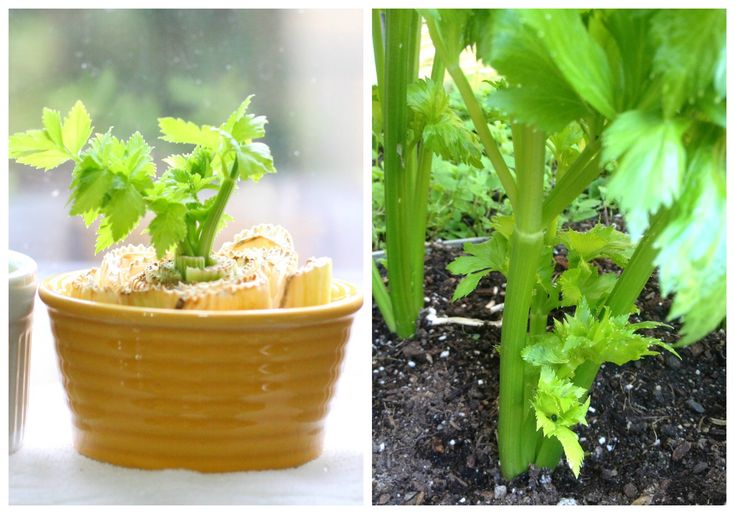
How to grow celery at home
In order to have fresh celery greens at home during the winter period, in autumn the bushes are dug up with a clod of earth and planted in flower pots. As a primer, a mixture purchased at a flower shop (EXO universal soil, Tomato and pepper) is suitable.
In autumn, the celery bush is transplanted into a flower pot and brought into the house.
Watering is carried out as the soil in the pot dries up.
 The plant should be fed once every ten days using nitrophoska (1 tbsp / 10 l).
 Nitrophoska suitable for potted celery
Greens are cut regularly. The optimal size is 12–15 cm.
Caring for petiole celery
Celery will respond well to top dressing with organic fertilizers: slurry diluted in water (ratio 1:10) or bird droppings (1:20). For one plant - no more than 0.5 liters of solution. Such top dressing can be done once every two weeks.
In the process of growth, the petioles require watering and hilling of unbleached varieties to the leaves.
When the petioles are 30 cm long, they should be bundled and tied. In the same period, they are bleached: weak side shoots are removed, and the rest are left in the sun only leaves. Their entire lower part, which is above the surface, is wrapped with paper. This procedure removes excess bitterness in the petioles and makes them more juicy.
Bleaching the petioles removes excess bitterness in them and makes them more juicy
Self-bleaching varieties of petiole celery include: Golden pen, Golden, Tango, Latom.

Celery pests and diseases
Celery can be affected by pests, the most common of which are celery fly, carrot fly, carrot psyllid and bean aphid. Diseases affecting celery are rust, powdery mildew, cercosporosis, cucumber mosaic.
Photo gallery: pests of celery
Manifestation of harmMethods of control Celery fly Larvae leave longitudinal passages in the petioles, eating them from the inside Surrounding plantings with onions or garlic can be repelled.
You can spray celery once every 2-3 weeks with an infusion of garlic shooters.Carrot fly Larvae spoil all parts of the plant A mixture of fine sand, mustard powder and tobacco dust is sprinkled on the bed every two weeks. Carrot leaf pod It feeds on celery juice, as a result the leaves are deformed and die A mixture of fine sand, mustard powder and tobacco dust is sprinkled on the bed every two weeks. 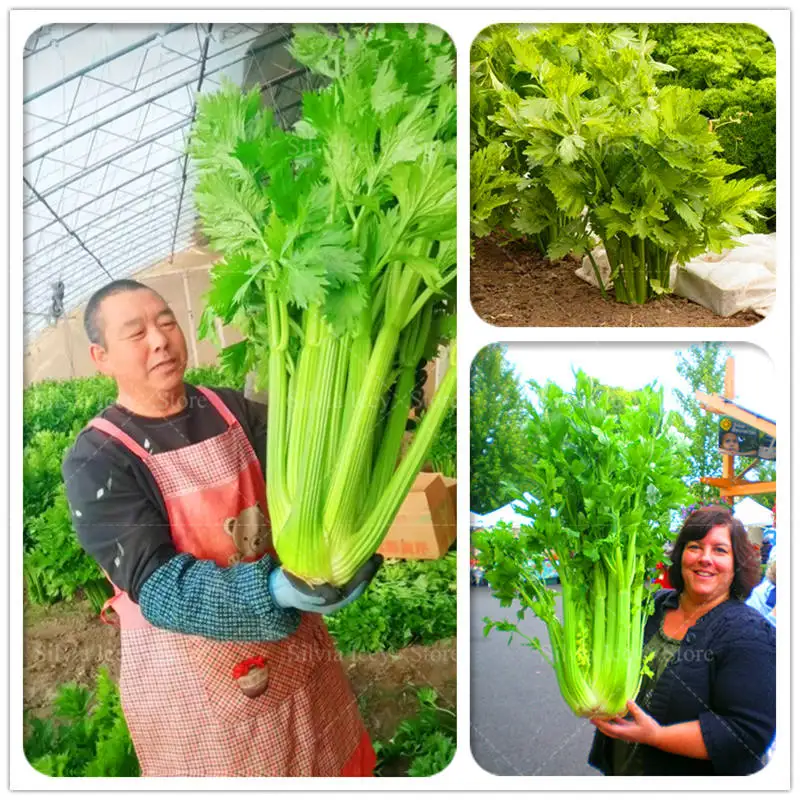
Bean aphid Feeds on plant sap, which leads to twisting and drying of leaves spray plants. To scare away the bean aphid, you can plant thyme and nasturtium next to the celery. Disease Symptoms Methods of control Prevention Rust Application of fungicides: Topaz, HOM, Chorus. At an early stage, it is enough to carry out 2-3 treatments with a weekly interval. Spraying with Fitosporin or Bactofit, thinning out plantings. Powdery mildew
(peronosporosis)White coating on all parts of the plant, similar to scattered flour. Treatment with 2% solution of Bordeaux liquid (2-3 times with an interval of 8-10 days). Weekly spraying of plants with infusion of horsetail or thistle, thinning of plantings. Cucumber mosaic Viral disease, manifested in the appearance of large and small rings on the top. 
Plants must be destroyed. Vector control: mites and aphids. Cercosporosis (early burn) Round spots with a light center and brown edges. Leaves and petioles dry up. Spraying with a solution of Fundazol or Topsin-M. Crop rotation, disinfection of seeds before sowing. Scab Brown spots appear on the roots, the skin peels off. Crop rotation. Harvest and storage
Tuber celery should be harvested before frost. The leaves are broken off, leaving three to four middle leaves. Celery tubers must be dug very carefully, because they have an unusually thin and delicate skin. To make this easier, you can water the soil around the root crops abundantly half an hour before the start.
Celery roots have a very delicate skin
Before storage, the container can be powdered with chalk. Temperature storage conditions: 0-2°C at 90-95% humidity.
 Root crops should be inspected every ten days.
 There is an opinion among literature researchers that the love drink for Tristan and Isolde had the following composition: 100 grams of celery juice, to which 50 grams of apple and pear juice were added.
Get to know celery better and use it to make, if not a love drink, then dishes for good mood and good health. And if it seemed to you that you could cope with the requirements for growing it, you can try planting celery in your area.
- Author: Natalia Stepanova
My name is Natalia. I am a teacher of Russian language and literature by profession.
Rate the article:
(5 votes, average: 5 out of 5)
Share with your friends!
Adblock
detectorfeatures of cultivation and care, proper planting
Back
How to grow celery at home on the windowsill
- Description of celery
- How best to grow celery on a windowsill
- Lighting
- Temperature and humidity for a good harvest
- In what soil to plant celery
- Choosing a container for planting and growing on a windowsill
- Features of planting celery
- Planting celery in a container
- How to grow celery seedlings
- Celery care
- Thinning and soil care
- How to water and how to fertilize celery
- Harvest and storage of celery
- Video: how to grow celery on a windowsill
- Garden
- Celery
- Growing celery
- How to grow celery at home on the windowsill
7 likes
Celery has gained great popularity among lovers of savory salads and side dishes for various dishes.
 In order to grow this vegetable at home in winter, you need to know how to grow it in a pot, how to care for it, what soil is better to plant and in what conditions to keep it. You will learn about these and other details in the article.
 ShowHide
- Description of celery
- How best to grow celery on a windowsill
- Lighting
- Temperature and humidity for a good harvest
- In what soil to plant celery
- Selection of capacity for planting and growing on the windowsill
- Features of celery ,000
- Caring for celery
- Thinning and soil care
- How to water and fertilize celery
- Harvesting and storing celery
- Video: how to grow celery on a windowsill
Description of celery
Celery belongs to the Umbelliferae family. Its greens and root are used in cooking. The homeland of this product is the Mediterranean countries.
 In ancient Greece, Rome, and Egypt, this vegetable was used as a medicinal substance, and only in the Middle Ages did it begin to be eaten. It is a versatile vegetable as all parts of it are used in cooking. Greens and roots are added to various salads, as well as meat dishes. Also, celery is a biennial plant, whose height is 80–100 cm.
 This vegetable is divided into three varieties:
- Root . Produces a large, round root crop about 10 cm in diameter.
- Leafy . It has delicate small leaves with small petioles.
- Petiole . It has big leaves. It has small gray seeds.
Celery is a very fragrant vegetable, but it tastes bittersweet.
The best way to grow celery on a windowsill
Like any root crop, celery can be grown not only in the garden, but also at home on the windowsill. It is best to plant it in spring or late summer.
Learn how to grow celeriac from seed at home.
There are three ways to grow this vegetable:
- Petioles . They can be purchased at the store, while the greens must be cut and used in cooking. The stump should be left and germinated a little, and then planted. It must be free of defects, rot, etc.
- Root crop . Root crops must be purchased at the store or at the bazaar. This method is simple, but it has a minus, because after 2-3 months it is necessary to plant a new plant.
- Seeds . This is a laborious method, but at the same time, growing celery in this way allows you to get a good and tasty vegetable for a long time. Based on this, planting with seeds can be considered the best way to grow celery at home, because by sowing seeds in mid-autumn, you can get the first greens at the beginning of winter.
Lighting
When growing this vegetable in any way, it is necessary to provide it with good lighting.
 To do this, you need to put the container with the plant in a well-lit place, preferably in the western part of the room. In winter, the vegetable must be provided with additional lighting using fluorescent lamps. In order to get a juicy, tasty product on the windowsill, you need good lighting, daylight hours should last 12-15 hours.
 Familiarize yourself with the characteristics of celery juice.
In spring, the plant receives the necessary amount of light, so the need for additional lighting is not needed. Foil can be used to reflect light from a window. Also, to avoid curvature of the sprouts, the plant pot must be rotated daily.
Temperature and humidity for a good harvest
The optimum temperature for growing celery is +18...+20°C. In winter, you should not keep the container with the plant on the windowsill, it is best to move it to a warm, well-lit place. This vegetable loves moisture, but in winter it is worth moistening the soil moderately.
For irrigation, it is best to use settled water, it should be at room temperature.
What kind of soil to plant celery
To get a good harvest, you need to carefully approach the choice of soil and its composition. It is best to purchase a ready-made substrate in specialized stores than to take it from the garden, as it may contain bacteria or pests. The soil for growing this vegetable should be loose, well pass air and water.
You can also prepare the soil yourself. To do this, you need to take soddy soil, peat, humus in a ratio of 1: 1: 1 and mix. You should not forget about good fertilizer, for this you need to dilute 1 tbsp in 10 liters of water. l. nitrophoska or nitroammofoski.
Container selection for planting and growing on windowsill
Choosing a container for planting is an integral part of the entire process of growing celery, since the plant's comfort, development and what the crop will be depends on what container the plant will be in.
 For this vegetable, it is best to choose a wide container with a shallow bottom. Pots for indoor plants, plastic pots or made of clay, or containers are suitable for this.
 Important! Wooden boxes should not be used when growing celery indoors as they are difficult to disinfect and absorb moisture well, which can lead to fungal infections.
Features of planting celery
Celery can be planted using stalks, root crops, and can also be sown by seeds. Each of these methods has several nuances in the landing process that should be observed.
Planting celery in a container
Consider planting celery in a container with the help of petioles and root.
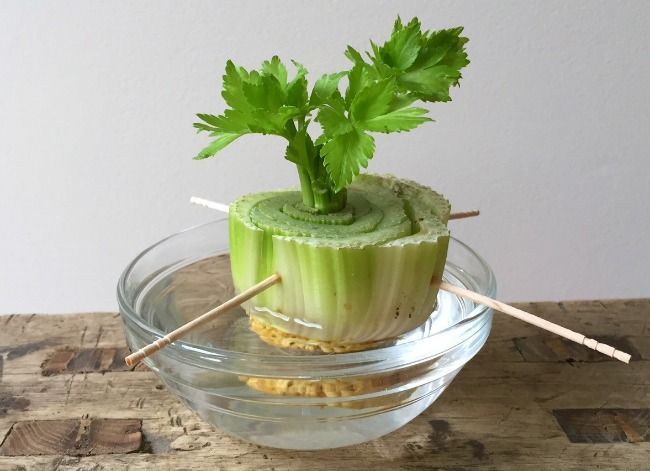
First way:
- Need to buy a vegetable, separate the top from the bottom.
- Place the root part in a shallow container of water, with the root part at the bottom.
- This container must be placed in a warm, well-lit place, but the plant must not be exposed to direct sunlight.

- Change the water to fresh water every day.
- After a week, the tops will dry out and new shoots will begin to break out of them, at the same time the roots will begin to grow.
- Then prepare a pot or box, fill it with expanded clay drainage and fertile soil.
- Next, you need to moisten the soil and plant a petiole with germinated roots. It is worth deepening the entire petiole, only green processes should remain on the surface.
Read also about whether you can eat celery during pregnancy.
Required:
- Purchase a root vegetable or dig it up in your garden.
- Prepare in advance the soil for planting and the container in which you will plant the vegetable.
- It is necessary to plant the root crop in such a way that its main part is above the soil.
- The soil should then be compacted and watered abundantly.
- Next, you need to place the plant in a warm, sunny part of the room.
- In 14 days the first harvest will appear.
How to grow celery seedlings
Celery is a plant with a long growing season, which makes it best grown in seedlings.
In order to grow this crop using this method, you need:
- First you need to select the seeds, they must be free of defects.
- Then the seeds are placed in a container with warm water for 3 days.
- Then you need to put a damp cloth in a warm place, put the seeds on it and wait for germination (this process takes about 7 days).
- 7 days after the seeds germinate, they must be sown in a container with loose, well-permeable air and moisture, fertile soil, while the aisles should be 8 cm wide, pour 1 cm of soil on top.
- After the first shoots appear and there are 2-3 leaves on them, it is necessary to carry out the next dive process, but this is not necessary, since it can simply be thinned out.
Important! The temperature for growing seedlings should be +20°C.
Celery care
As with any plant, celery needs care. It consists in timely watering and fertilizing to improve the growth and comfort of the vegetable, periodically loosening the soil and thinning the seedlings.
Thinning and soil care
Often, when planting celery seedlings, it happens that several seeds fall into one furrow, later on when growing they will interfere with each other, which is why thinning is necessary. You can carry out this process yourself, for this you need to remove the side shoots, large and yellowed leaves. Care also includes weeding and loosening the soil under celery, these processes will enrich the plant with the oxygen necessary for life.
How to water and how to fertilize celery
Watering should be done regularly. On hot days, this vegetable should be watered every day directly under the roots. The soil should be constantly moist, but there should be no stagnant water in the holes.
 It is also necessary to carry out timely and proper feeding. The first time the fertilizer is applied 20 days after planting the seedlings, mineral fertilizers are used for this. For each planting tank, add 20 g of ammonium nitrate and 15 g of superphosphate.
 Apply dry fertilizer before watering. You can also make your own fertilizer. To do this, you need to take finely chopped grass and dilute it in water in a ratio of 1:3. After 3 weeks, top dressing is carried out again in the same way. For large root crops, it is necessary to exclude nitrogen fertilizers, but at the same time increase potash fertilizers.
Collection and storage of celery
Compliance with the rules for plant care will result in a rich, high-quality harvest. As a rule, celery petioles are harvested in early or mid-autumn. Before digging out the petiole, make sure that a large rosette has formed on it.
Cleaning process:
- Use a garden fork and shovel to carefully remove rooted celery.
- Leave it in a humid environment after removal.
- Deepen the roots of the plant in the sand, after moistening it.
- Dig the soil regularly to keep the petioles from rotting from too much moisture.
If you follow these short rules, you can keep the celery sprout until spring. Remember that in order for the vegetable not to deteriorate during further storage, it is necessary to cut off its leaves and leave only medium-sized petioles. Pay attention to the condition of the petioles: they should have a smooth surface without flaws, without voids. You can check the plant for voids in the petiole in this way: tap on it, if the sound is sonorous, then the inside has hollow fragments.
You will be interested to know how to use celery for weight loss.
Also check for rotten vegetables by pressing on the top of the plant. To keep the root crop fresh and tasty after cutting, wrap it in cling film and leave it in the refrigerator to freeze.


How celery is propagated
Celery can be propagated by seeds and cuttings. From seeds, it is most often grown in seedlings, and seedlings appear extremely slowly. It is recommended to sow seeds already in late February - early March. Petiole celery can be propagated by cuttings. It can even be grown from the stalk of a store-bought vegetable.
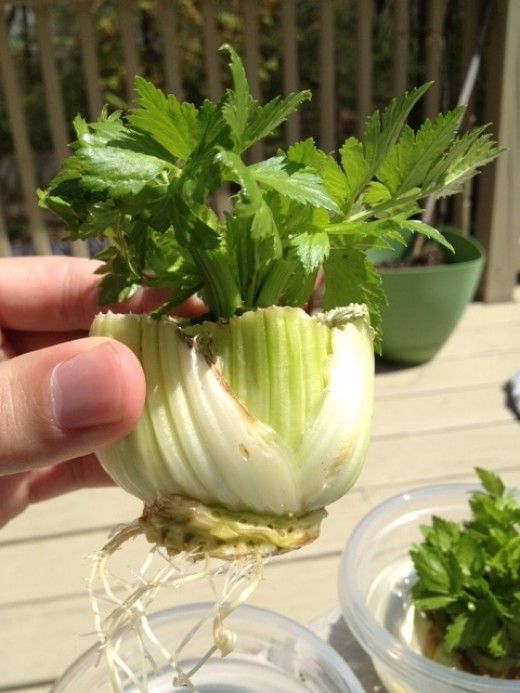
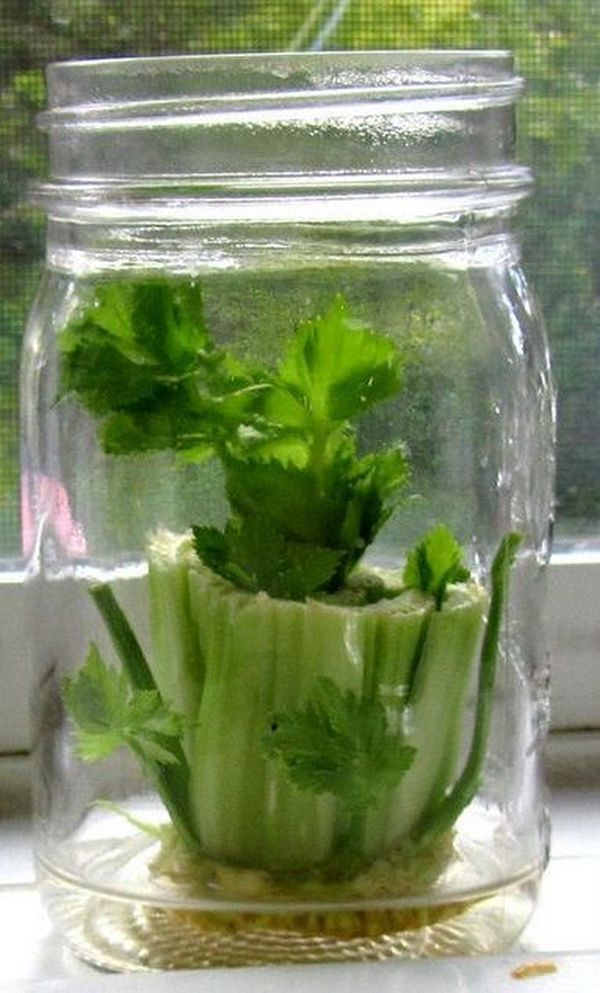
Growing from a stalk
If a fresh stalk, devoid of signs of decay, is purchased from a stalk celery outlet, then a new plant can be successfully grown from it at home.
At home, you can try to get fresh leaves from a healthy stalk
For this you need:
Warm and moderate watering will cut the first new leaves in 2-3 weeks.
Video: how to grow celery on a windowsill
https://youtube.com/watch?v=wJKMjGzNorw
Growing from seeds
To grow celery from seeds yourself, preparations will need to start as early as February.
Planting seedlings
The reason for the long germination of celery seeds is their high content of essential oils. Seeds should be sown already at the end of February (i.e. 70-75 days before planting in open ground). To speed up germination, you can:
-
-