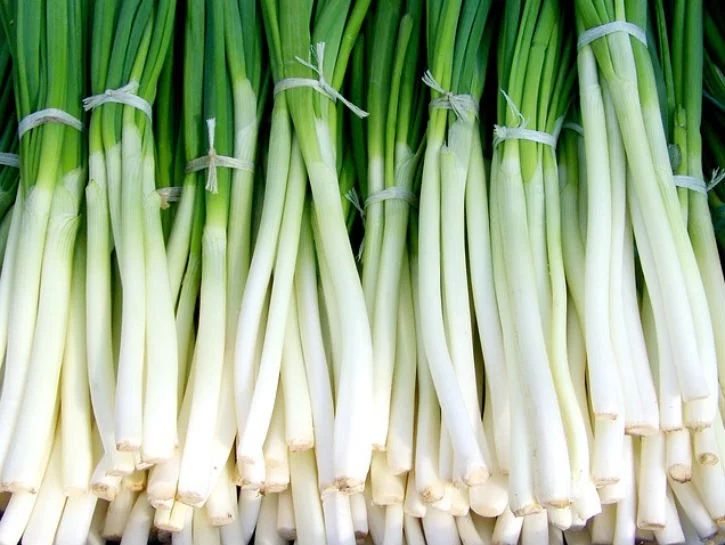
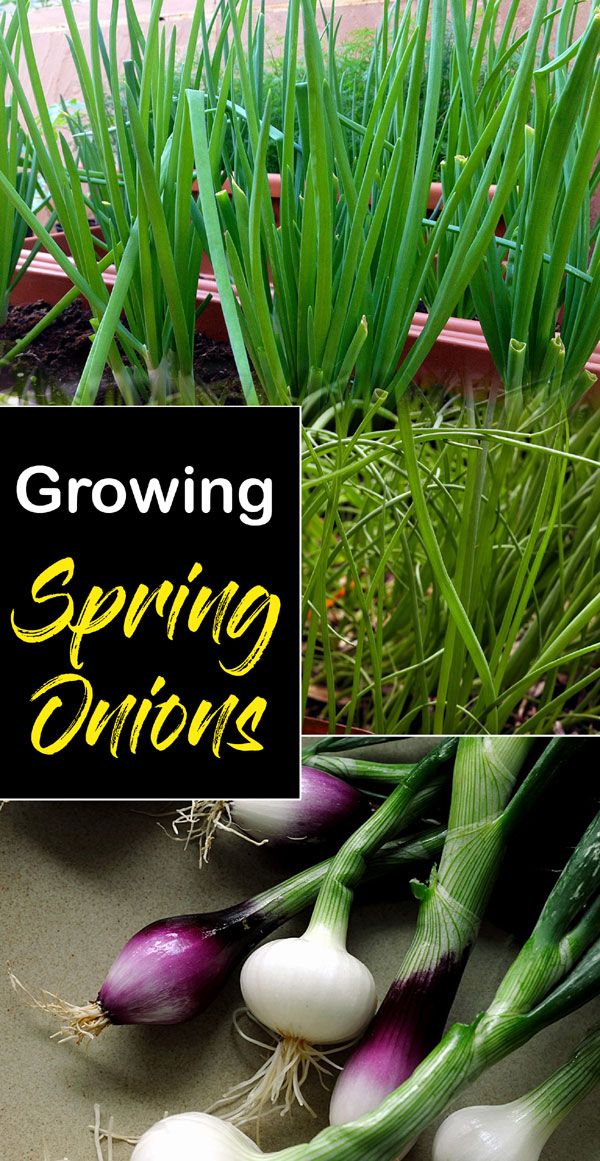
Growing spring onions
How To Grow Spring Onions
Easy-to-grow vegetables that are ready to harvest in just eight weeks make spring onions a firm favourite. Perfect for use as a "filler crop" between rows of slower growing vegetables, this tasty salad and stir-fry staple can be eaten raw or cooked. Here’s how to grow spring onions from seed.
Which spring onion variety to choose
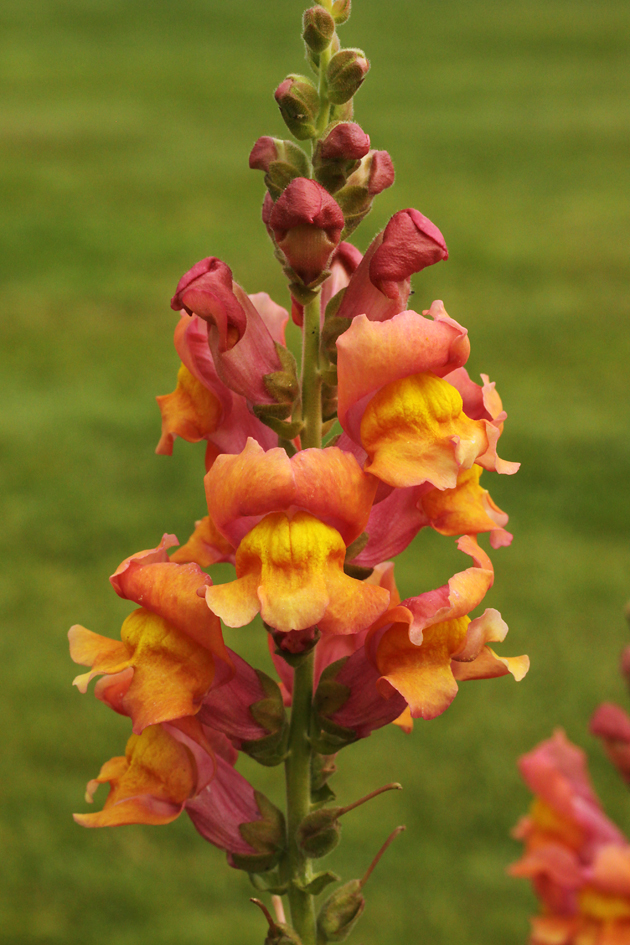
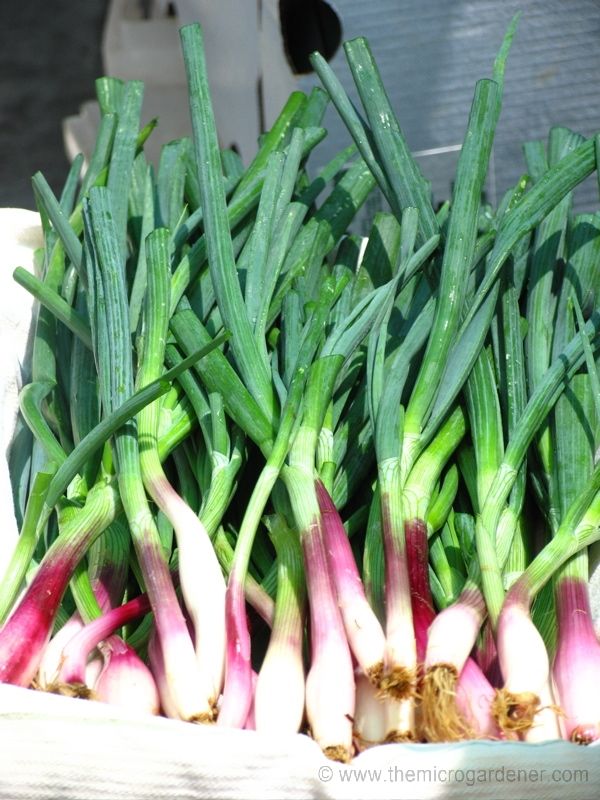
Striking red varieties brighten up salads
Image: Spring Onion 'Apache' from Thompson & Morgan
Spring onions add interest to many dishes. The white bulbs have a delicate oniony flavour while the long hollow leaves can be thinly sliced to add texture and colour.
The benefit to growing your own spring onions from seed is that you can try varieties not readily available in the supermarket. Choose from solid all-rounders or those best suited to pickling or growing over the winter. Here are some of our favourites:
- Spring Onion 'White Lisbon' - Short cropping time and great for overwintering, this is a great choice for new gardeners.
- Spring Onion 'Pompeii' - A rounder shape, this silver skinned and succulent variety is ideal for pickling and serving on cocktail sticks.
- Spring Onion 'Apache' - A red variety that offers good flavour and a crisp texture, this spring onion adds interest and colour to salads.
- Spring Onion 'Feast F1 Hybrid' - An outstanding all-rounder ideal for successive sowings to be havested all summer long.
When to sow spring onions
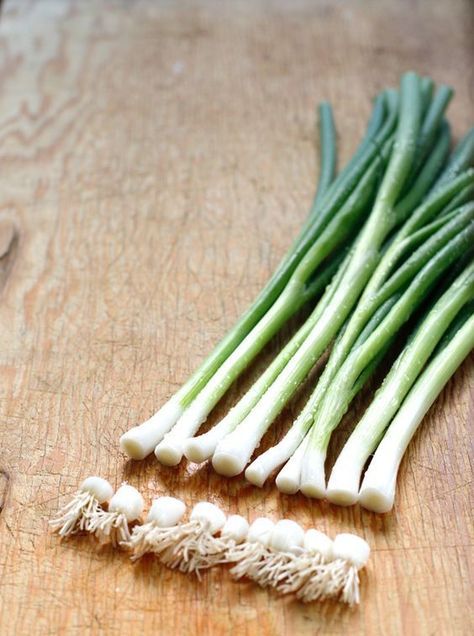
Sow at regular intervals for a succession of spring onions throughout the summer
Image: Spring Onion 'Feast' from Thompson & Morgan
Sow spring onion seeds from March to August at 3 weekly intervals. Harvesting can usually start 8 weeks after sowing.
For an early spring crop, sow seeds in September and over winter.
How to sow and grow spring onions
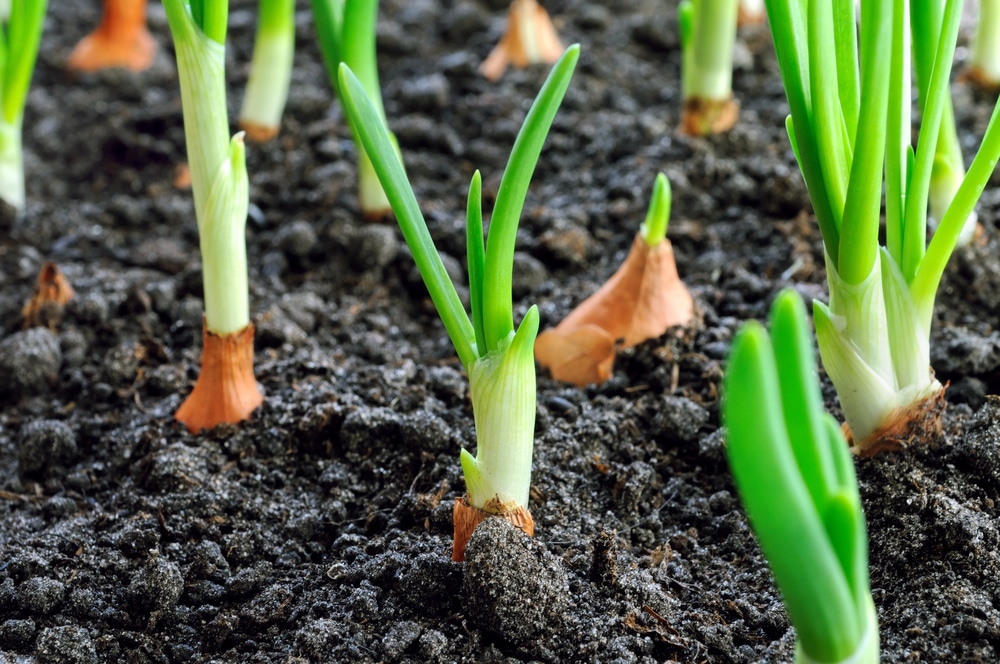
Sow your seeds thinly in shallow drills
Image: Piotr Debowski/Shutterstock
Spring onions will grow in any good fertile soil provided it’s well drained.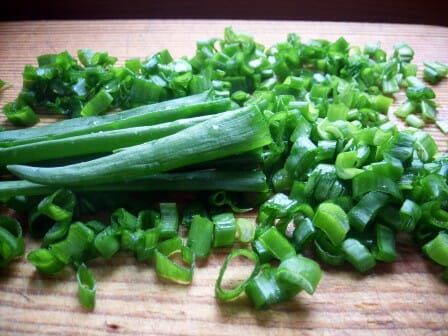 Prepare the ground in advance by getting your soil down to a fine tilth and adding a granular general purpose fertiliser about a week before you expect to sow.
Make drills 1.5cm (0.5") deep and 15cm (6") apart and sow thinly. You won’t need to thin your spring onions because you’ll be pulling them and adding them to your salads in just a few weeks.
Spring onions rot in waterlogged soil, so do plant them in well-drained ground, and be careful not to over-water. It’s also crucial to keep weeds away because like all onions, spring onions hate competition. It’s also advisable to protect the young seedlings from birds, by covering them with horticultural fleece.
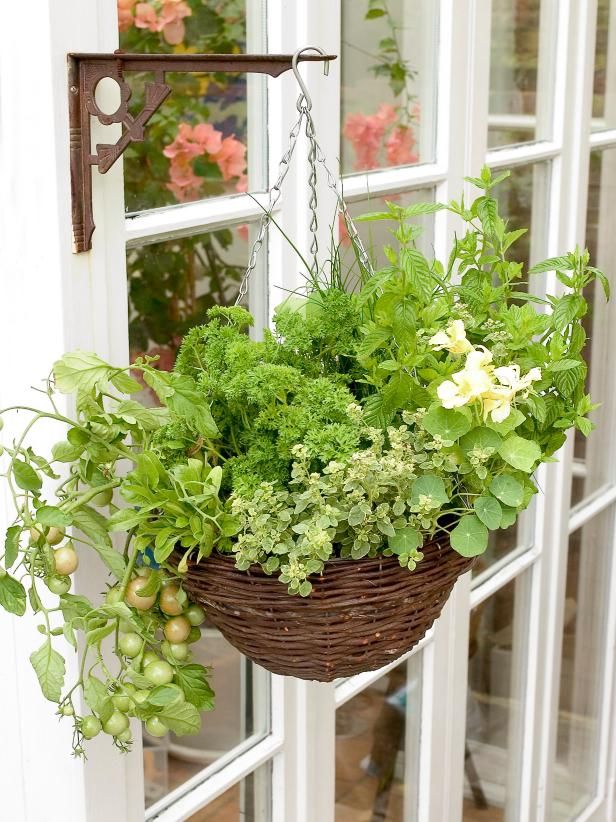
You can also sow spring onions into containers or pots on the windowsill. Just add compost to within about 3 cm (1") from the top of the container before lightly scattering seed over the surface and covering with 1.5cm (0.5") of compost. Water sparingly to keep the soil moist and you’ll soon have a tasty crop to enjoy.
Tips for growing spring onions
Some varieties grow into large onions if you wait too long to harvest
Image: Shutterstock
Small bulbs are ideal for salads and stir-fries, but some varieties develop into larger, normal-sized onions if you leave them long enough. Do beware of "bolting" in hot weather – snip out any flowering heads as soon as they appear or, though still edible, your onions will be smaller.
Spring onions also overwinter well. By sowing them in late August, through to October you’ll get a nice early crop of crisp salad veg by the end of spring.
Now you know how to grow spring onions, why not give them a go? Versatile, delicious, and highly nutritious, these crisp, crunchy scallions really are a must for your garden. Find other popular alliums to grow, growers guides, and our full range of products at our onions, garlic and shallots hub page.
Written by: Sue Sanderson
Plants and gardens have always been a big part of my life.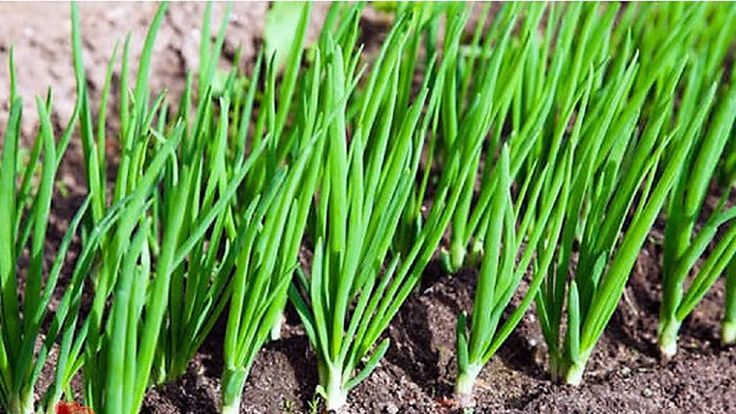 I can remember helping my Dad to prick out seedlings, even before I could see over the top of the potting bench. As an adult, I trained at Writtle College where I received my degree, BSc. (Hons) Horticulture. After working in a specialist plantsman's nursery, and later, as a consulting arboriculturalist, I joined Thompson & Morgan in 2008. Initially looking after the grounds and coordinating the plant trials, I now support the web team offering horticultural advice online.
How to Plant and Grow Spring Onions
Allium cepaAlong with robins, daffodils, and cool breezes, why not add homegrown onions to your list of things to look forward to this spring?
Spring onions, Allium cepa, are easy to grow and care for in your garden, whether you sow seeds the fall before for overwintering, or plant in spring from seeds, slips, or sets as soon as the ground can be worked.
We link to vendors to help you find relevant products. If you buy from one of our links, we may earn a commission.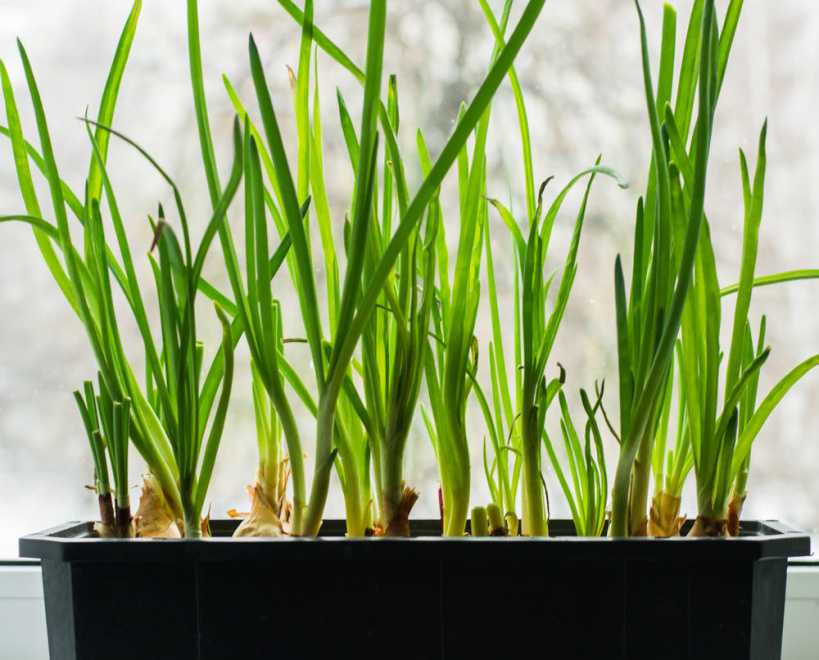
The harvest is versatile and tasty.
Eaten raw, spring onions have just the right amount of fresh, savory, allium flavor for salads, nachos, or garnishes.
Both the hollow green tops and the white, red, or yellow portions of the young bulbs also add extra zip and nutrition to cooked recipes that include frittata, stews, and onion jam.
Before you plant your own crop, it’s important to distinguish between this delectable harvest of immature bulbing onions and scallions or bunching onions.
We’ll go over that distinction together, and then move along to the best techniques for growing spring onions at home.
If you’ve never had the pleasure, it may surprise you to learn how quickly and easily this homegrown veggie goes from planting seeds or sets to an early-season cool-weather harvest.
Here’s what we’ll cover:
What You’ll Learn
- What Are Spring Onions?
- Propagation
- How to Grow
- Growing Tips
- Where to Buy
- Managing Pests and Disease
- Harvesting
- Storage and Preserving
- Recipes and Cooking Ideas
- Quick Reference Growing Guide
What Are Spring Onions?
There’s a lot of delicious confusion about the name “spring onion. ”
”
Many people use the phrase to describe scallions, but these are actually perennial alliums that spread by bunching and never form full-sized bulbs.
The vegetables that are commonly referred to as “spring onions” in the way that we’re covering here, on the other hand, do produce large bulbs. They are harvested to eat quickly after picking, without curing, and without the expectation that they’ll last in storage for more than a week or so.
Though they are technically storage types, the same as the bulbs we’re all familiar with from the grocery store or our long-term gardening efforts, the difference here is in the way they’re grown and when you pull them.
While it can take as long as 120 days from sowing to harvest mature bulbing onions that are ready for curing, you pull spring onions while they’re immature, and before they’ve formed skins to protect them in storage.
They’re generally more pungent than scallions, and not as sweet as the A.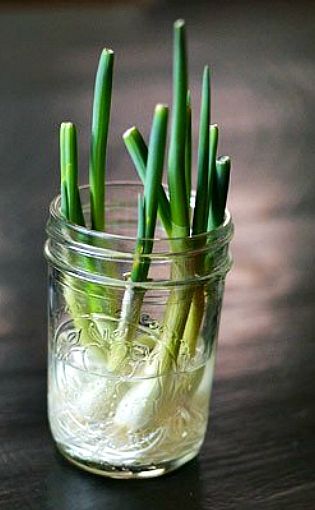 cepa bulbing varieties grown to maturity.
You can also eat the spring onion’s outer layer, unlike the papery brown outer skins that you’ll see on storage onions.
The main advantage of growing bulbing onions to harvest in spring is the speed with which you can achieve this. And it sure is nice to have a homegrown vegetable that’s ready to eat fresh and cook with when the weather’s still cool, early in the season.
If that sounds good to you, let’s get growing!
Propagation
There are several options for starting spring onions, each with its own advantages.
From Seed
To plant seeds outdoors, prepare the soil by cultivating it to at least eight inches deep.
Sow spring-planted seeds as soon as you can work the ground. Just check the forecast first, and don’t plant if nighttime temperatures are expected to drop below 20°F.
Space the seeds about four inches apart, pressing them lightly into the soil and covering them with a quarter-inch of sifted compost or light soil.
Firm the soil with the heels of your hands, and water the seeds in well.
You can also start seeds indoors to transplant out.
To learn more about sowing vegetable seeds outdoors, refer to this guide.
From Sets
Onion sets are tiny, dormant bulbs. They have already been sown from seed, harvested as young bulbs, and then dried. These stay dormant until you plant them, usually around six to eight weeks before the last frost date in your area.
Sets are the fastest option to grow spring onions, yielding a harvest a few weeks after planting.
Of course, sets are a bit more expensive than slips and cost far more than seeds. There aren’t nearly as many options available to you as when you purchase seeds, either.
But the speedy harvest can justify the extra expenditure, especially when you compare the price of growing them from sets to buying a similar product from the grocery store or a farmers market.
And can you put a price on being able to walk into the garden just weeks after planting to pull a fresh, savory vegetable minutes before chopping it to toss into a salad or light soup?
Space sets four to six inches apart.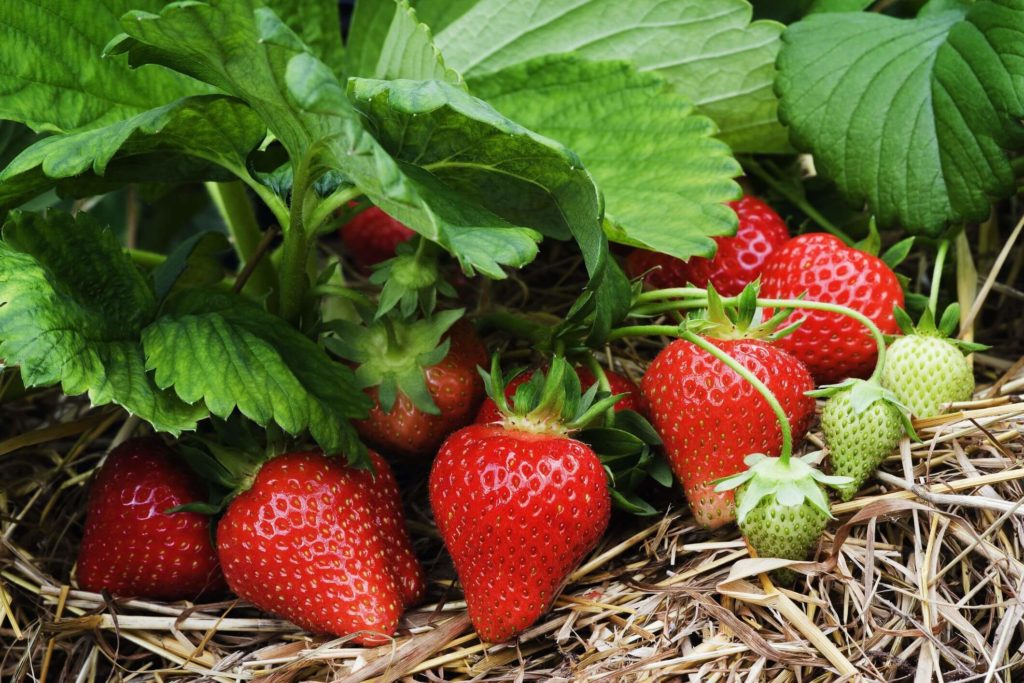 Plant them two inches deep in a long furrow or individual holes. The pointed side, which may already be showing a bit of green, faces up.
Cover them with fine soil and tamp it with the heel of your hand, being careful not to damage the bulbs. Water them in, but don’t let the soil get too soggy.
Keep the soil moist but don’t let the bulbs sit in water puddles or they’ll rot. They may take just a few days to sprout, or up to a week.
For more tips on onion propagation, reference our comprehensive growing guide.
Transplanting Slips
You may want to get a head start by transplanting live “slips,” which are thin, wispy seedlings measuring a couple inches long. You can find them online or at local nurseries, usually sold in packets of 50 to 100.
They aren’t as viable as dormant bulb sets. In my experience, nearly 100 percent of sets grow after transplanting, but more like 75 percent of slips survive transplant.
But slips do give you a harvest weeks earlier than planting from seed, and they tend to cost less than sets.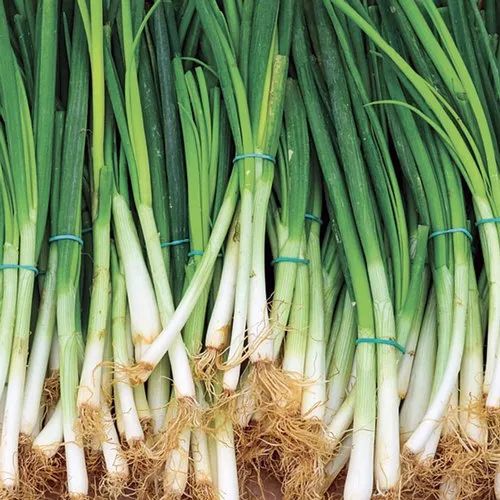
Transplant slips that you purchased or those you grew yourself from seeds started indoors in rows or groups in well-worked soil, spacing them four inches apart.
Planting time will depend on your growing area and the length of the season. Some gardeners also choose to plant theirs out in cold frames.
Place each one about three-quarters of an inch deep in furrows that you’ve dug, with the root end pointing down in the soil. Gently backfill with fine soil, firming it at the soil line, and then water deeply.
How to Grow
Even though they won’t be allowed to grow to maturity, A. cepa plants need the same friable, well-draining soil as larger bulbing onions.
Also work in plenty of composted manure or other organic matter, and plant them only in slightly acidic to neutral soil with the ideal pH, somewhere between 6.0 and 7.0.
Choose a sunny location, one that receives at least six hours of sun per day. Remove any rocks or lumps from the soil and rake it smooth ahead of planting.
If you’re planting in the fall or late summer for an early spring harvest, put the seeds or sets in the ground a month or two ahead of your first average frost date.
Consult our guide to growing winter onions for more information.
Once the seeds have germinated or the sets or transplants have sprouted, there’s not a lot of maintenance involved.
You will want to mulch the plants once they reach a couple of inches tall, setting down a two-inch layer of herbicide-free straw, grass clippings, or dry leaves. This will help keep moisture in and weeds out.
You’ll also want to provide supplemental water to keep the soil moist – but not waterlogged – throughout the growing season. Aim to provide an inch of water per week any time the plants don’t receive sufficient rain.
Growing Tips
- Plant in well-draining soil amended with plenty of organic matter.
- Give plants an inch of supplemental water per week when rain isn’t sufficient.
- When the tops are a few inches tall, mulch with a few inches of herbicide-free grass clippings, pine straw, or shredded leaves.
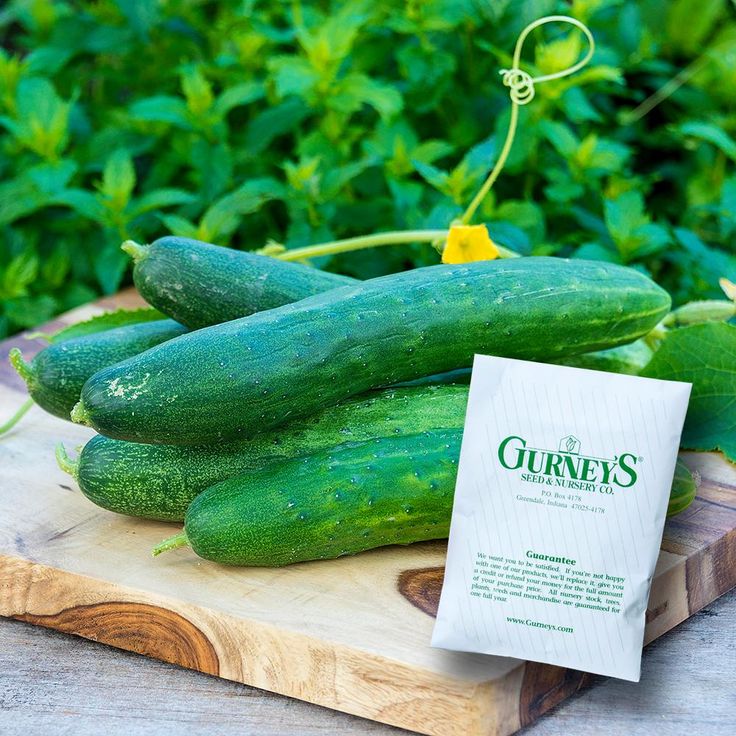
Where to Buy
There is a wide variety of onions that you can grow for your early harvest. Burpee has a number of different cultivars available, and you can choose from seeds or sets.
Onion Collection
If you can’t decide on a particular cultivar, why not check out this collection of onion sets, featuring red, white, and yellow types? Packets of 300 sets are available from Burpee.
Managing Pests and Disease
Onions are far more appealing to human diners than insect pests, and they aren’t particularly vulnerable to disease either. Here’s what to watch for:
Pests
One nice thing about growing these alliums is that herbivores like deer and rabbits tend to leave them alone.
There are just a few insects that might attack your crop, but the threat is minimized since they’re harvested ahead of the warm weather when many pests typically proliferate.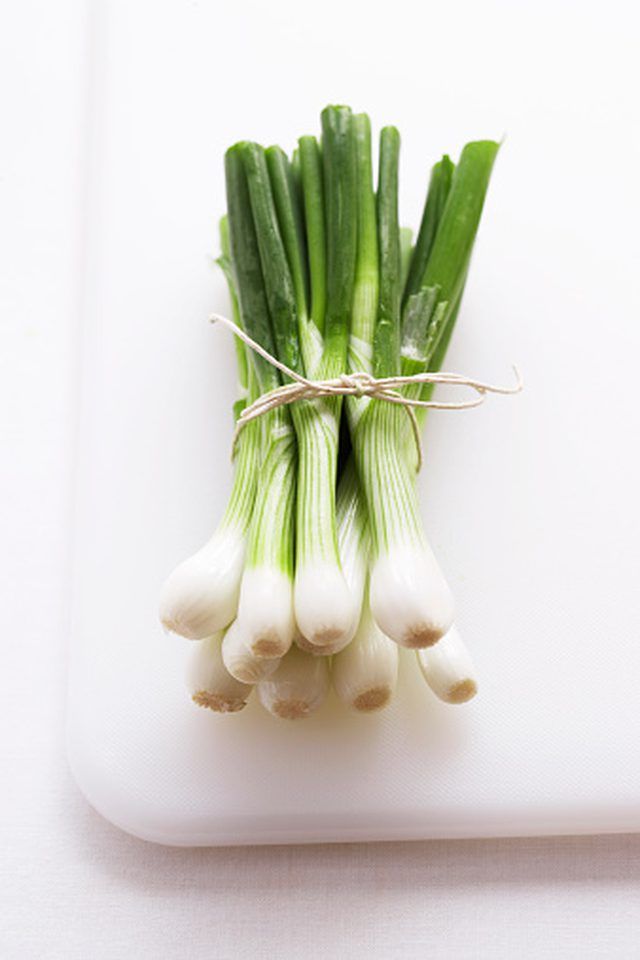
Here are four to watch for:
Allium Leafminers
Allium leafminers, Phytomyza gymnostoma, wreak havoc on many edible members of the allium genus, including garlic, chives, and, yes – spring onions.
They’re tiny flies, just an eighth of an inch long. The pupae can overwinter in the stems, bulbs, or soil, so these leaf miners pose a threat on those planted in late summer or fall for a spring harvest.
The larvae tunnel through leaves until they reach the stems, and the adults suck sap from the leaves, creating those telltale white trails.
Use row covers to prevent these leaf miners from gaining a stronghold.
And turn to our guide to learn more ways to detect, treat, and prevent allium leaf miner infestations.
Onion Maggots
Can you say, “yuck”? Onion maggots (Delia antiqua) grow to about a centimeter long. Their pupae overwinter in the soil and then emerge in the spring as gray-brown flies.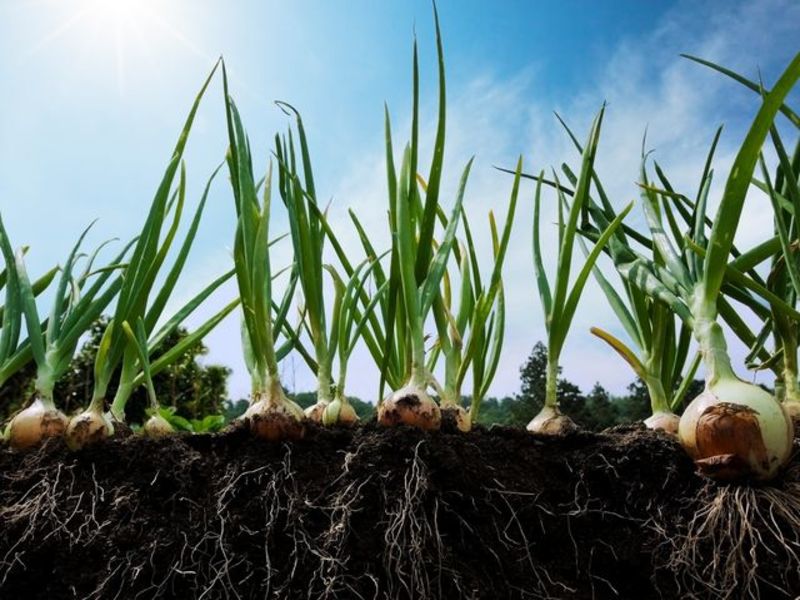
The adults in turn lay eggs on allium leaves, and the larvae that hatch chomp down on all parts of A. cepa: roots, bulbs, and tops.
The maggots also create wounds that allow soft rot pathogens entry into the plant.
Root maggots present the biggest threat when spring weather is cold and wet – which is typical early in the season. If you’ve noticed wilting on newly emerged plants, D. antiqua could be the culprit.
An integrated pest management strategy can help to prevent these root maggots from getting established in seedlings and bulbs. Learn more about detecting and controlling root maggots in our guide.
Slugs
These gastropods are active at night, and they may chew up scapes in the early spring.
This can slow down the plants’ growth, render the tops inedible, and eventually kill whole plants.
It’s fairly straightforward to eliminate or at least deter slugs before they do substantial damage, though, with methods including hand-picking the culprits or employing diatomaceous earth.
Learn more techniques for coping with slugs in the home garden in our guide.
Thrips
Thrips are tiny winged insects that are part of the Thysanoptera family.
They thrive in warm weather, damaging and killing plants by sucking sap from the foliage.
They’re not much danger to spring onions growing in cool weather, unless you started seeds early, the summer before. Thrips have this nasty habit of overwintering and then the nymphs come out in full force in early spring.
You can recognize their presence if you spot white or silvery spots on the green tops.
If you can catch them early, you can usually deter them with neem oil or insecticidal soap. Just remember that a few will become thousands once the weather gets warmer.
Learn more about detecting and preventing thrips in our guide.
Diseases
These plants are relatively disease-free, but several species of Botrytis fungi may attack them.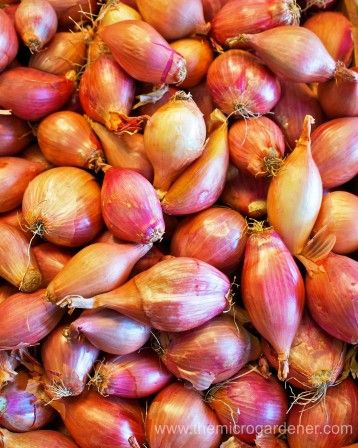
The resulting disease can cause neck rot or sunken spots on the immature bulbs.
It can also make the leaves wilt, which slows the growth of the plant and keeps the young bulbs from developing.
Prevention is key to stave off botrytis. It thrives in soggy conditions, so well-draining soil is a must.
If you detect symptoms of this fungal disease, it sounds ruthless, but you’ll need to pull all of the affected plants and destroy them. Otherwise, the fungus can spread quite quickly.
Also consider applying a fungicide to the remaining unaffected A. cepa plants.
Harvesting
You’ll have lots of swell harvest options for this homegrown veggie, depending on when you planted and what type of onions you enjoy most.
To start, once the tops are at least four inches tall, you can clip a few of the greens to use as a flavoring in your cooking, or to eat raw.
If you planted from seed, the immature bulbs will be ready to pull 40 to 50 days from sowing, depending on the variety. Be sure to consult your seed packet for more information.
Those who start spring onions from slips or sets can expect a viable crop in three or four weeks, and no later than 40 days after planting.
For full spring onion flavor, wait until the plant is about six to eight inches tall and the main stalk is half an inch wide.
If you’re pulling those grown from seeds or sets planted the previous year, they should attain the proper size shortly after the ground thaws in spring.
To harvest, get a firm grip on the leaves where they meet the bulb at its “neck.” Twist a half turn, and tug upward until the white part emerges from the soil.
If they’re growing in compacted soil, you may need a trowel or spade to loosen the roots before pulling.
A few more notes on the harvest process:
If your plants start forming buds and flowers – or bolting, in other words – pull them immediately to retain the best flavor.
If you’re planning to leave a few bulbs in the ground to reach full maturity as storage onions, be sure to replace the dirt you disturbed while harvesting the immature bulbs growing nearby. Gaps in the soil can collect moisture that will harm the remaining bulbs.
And if you don’t like a pronounced oniony flavor, be sure to pull your crop before it reaches full maturity. Older roots will be extra pungent.
Storage and Preserving
There are plenty of varieties of homegrown onions you can grow and cure to store for months, but those picked early are best suited to fresh enjoyment.
Try to only pull as many as you can use quickly.
You can keep extras in an open zip-top bag in the fridge wrapped in a damp paper towel, but only for a week or so. Don’t use any of the greens that turn yellow, wilt, or have soft spots.
If you end up with more than you can eat straight from the garden, fear not. There are plenty of ways to preserve spring onions too.
The first is simplest: Chop them, freeze them on a baking sheet, and then place the frozen pieces into an airtight container in the freezer, where they’ll keep for about six months.
You can add the frozen pieces to stews and stir fries, or thaw them overnight in the fridge. But keep in mind that these are best for cooking, and they won’t maintain their crisp texture for use in salads or garnishes after thawing.
You can also dehydrate the chopped tops or diced bulbs, using a dehydrator or oven set to 125°F – no blanching required. A crisp, dry texture indicates they’re ready.
Thin rings of the bulbs are also delicious in pickle recipes.
Our sister site, Foodal features a recipe for zucchini bread and butter pickles, and while it calls for a small, sweet, mature onions, spring-harvested onion bulbs will work here, too.
Recipes and Cooking Ideas
Along with being easy to grow and one of the first vegetables you can harvest in cool weather, these immature A. cepa bulbs have a range of uses for fresh eating and in cooking.
You can use a few slices here, or a spoonful of chopped greens there, to enliven a wide variety of dishes from salads to scrambled eggs.
One of my favorite rites of spring involves mincing a young bulb to add to a light vinaigrette, and tossing it with fresh-picked mesclun, and then garnishing the salad with some of the greens.
Photo by Nina-Kristen Isensee.If you end up with an abundant harvest, you’ll have enough of the bulbs on hand to cook more substantial dishes, like this German onion tart from our sister site, Foodal.
Just keep in mind that it’s best to cut off the green tops and use them for another purpose as you would with scallions or garlic scapes, since they don’t caramelize the way the bulbs do.
You could also swap the white or yellow portion of the immature bulbs for full-size storage onions in chowders and soups like Foodal’s farmers market-inspired curried corn and cabbage soup, or this recipe for chicken split pea soup.
Photo by Fanny Slater.Make the same substitute in stir fries. Or give spring onions a try as a seasonal ingredient in Foodal’s recipe for easy chicken fajitas, and don’t forget to save the tops for a garnish.
Speaking of the greens, you can use them interchangeably with scallions, or even chives.
They do tend to be a bit more pungent than those other alliums, but they’ll pep up many different dishes from baked potatoes with sour cream or steamed green beans to simple weeknight meals like 15-minute sesame noodles. Get the recipe for these from Foodal.
As the season warms up, grill the fresh harvest for a piquant side dish.
Start by cutting off the roots and the tips, trimming them so you’ll have sections about four or five inches long.
Brush them lightly with olive oil and grill for five minutes per side on a medium-hot grill.
They should start to soften and the white part should begin to caramelize, but don’t let them cook so long that they get mushy.
Season them to taste and spritz with balsamic vinegar or fresh lemon juice before serving warm or at room temperature.
You can chop leftovers to use in sandwiches, meatloaf mix, or as a pizza topping.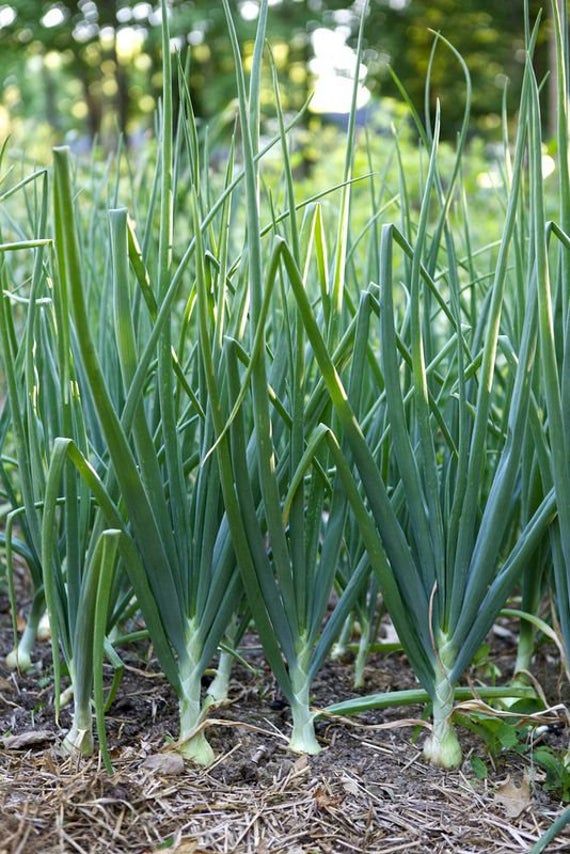
Quick Reference Growing Guide
| Plant Type: | Annual bulb-forming vegetable | Tolerance: | Frost, part shade |
| Native to: | Asia | Maintenance: | Low |
| Season: | Spring | Soil Type: | Fertile soil rich in organic matter |
| Exposure: | Full sun | Soil pH: | 6.0-7.0 |
| Time to Maturity: | 21-40 days (sets), 60-80 days (seeds) | Soil Drainage: | Well-draining |
| Spacing: | 4-6 inches (sets), 2 inches (seeds) | Attracts: | Bees, other pollinators |
| Planting Depth: | 1/4-1/2 inch (seeds), tips above the soil line (sets) | Companion Planting: | Broccoli, kale, and other cabbage family members; lettuce; strawberries; tomatoes |
| Height: | 10-14 inches | Avoid Planting With: | Other alliums including garlic, leeks, and shallots; asparagus; beans; peas |
| Spread: | 2-4 inches | Family: | Amaryllidaceae |
| Water Needs: | Moderate | Genus: | Allium |
| Common Pests and Diseases: | Allium leaf miners, onion maggots, slugs, snails, thrips; bacterial soft rot, botrytis blight and rot | Species: | cepa |
Spring Onions Have Sprung!
When you’re eagerly anticipating the first cool-weather vegetables, the spring onion harvest can give you a quick boost.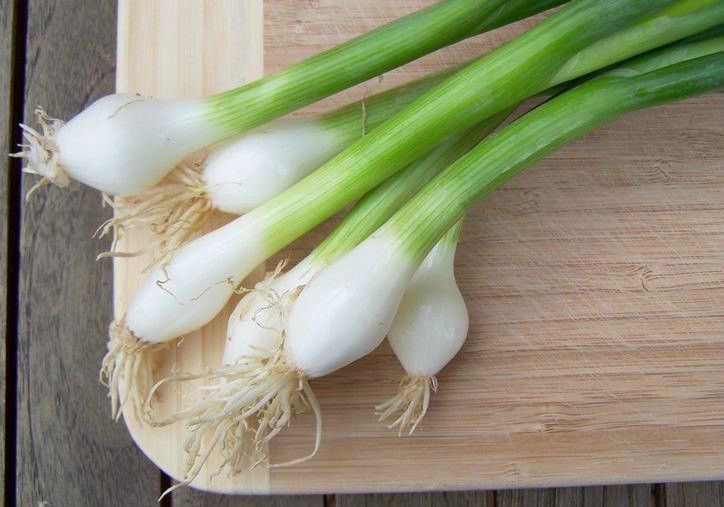
I hope you enjoy the experience! If you have questions or success stories to share, the comments section below awaits your input.
And if you’re interested, there is lots more info about onion growing in these guides for you to read next:
- How to Grow and Harvest Bunching Onions
- 15 of the Best Onion Varieties to Grow at Home
Growing green onions: the secrets of a good harvest
Sun, 07/09/2014 - 09:54 | Comments: 4 | Author: OLCHUKS
Growing green onions is a profitable profitable business that can generate good income throughout the year. In addition, fresh herbs are a great addition to the family table, which you should not refuse. Today, many farms are engaged in the cultivation of green onions on a feather, and it can be organized in almost any area.
Content
- Onion growing technology in the open field
- Principles of growing onions in greenhouses
- Procedure for planting onions in a greenhouse
- Growing green onions at home
- Growing green onions from seeds
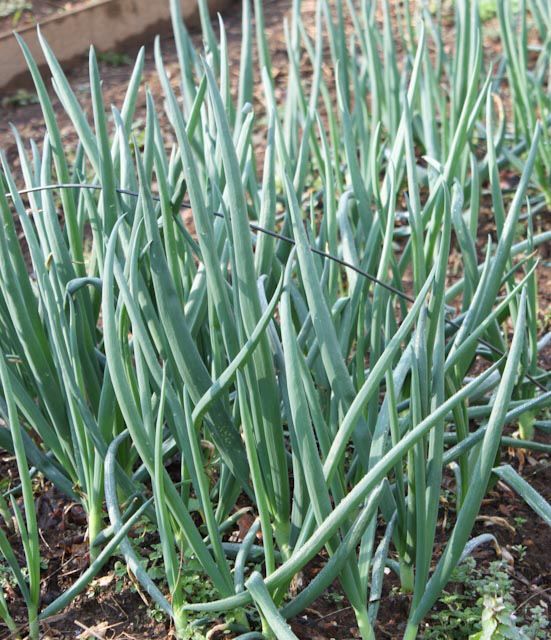
Technology of growing onions in open ground
Not a single vegetable garden and not a single summer cottage can do without green onions, since their cultivation does not require serious labor costs.
As a rule, pre-winter planting is used for this, in which the soil is prepared already in autumn. It must first be loosened and fertilized: 1 bucket of manure, 30 grams of superphosphate fertilizers and 15 grams of potash fertilizers are taken per 1 square of the area. The area must be leveled with a rake.
Bulbs are planted in the first half of October, even before the start of frost:
- They need time to give roots, so planting should not be delayed.
- It is important to take into account that the distance between the bulbs is at least 15 cm, otherwise they will be crowded.
- Top the bulbs with a layer of humus 2-4 cm thick.
- When the soil begins to freeze, plantings are covered from above with a layer of manure with straw or peat.
- Warming will help them survive severe colds, as onions are not very frost-resistant plants.
- When the snow begins to melt, that is, approximately at the beginning of April, the bed is cleared of the covering layer, after which a greenhouse is placed on top of it.
In the future, plantings and growing shoots are watered as the soil dries, and periodically 1-2 times during the planting season they are fed with a small amount of nitrogenous fertilizer. The soil must be periodically loosened to ensure sufficient oxygen supply to the roots of the plants. As a result, already in the first days of May it will be possible to harvest the first crop of green feathers.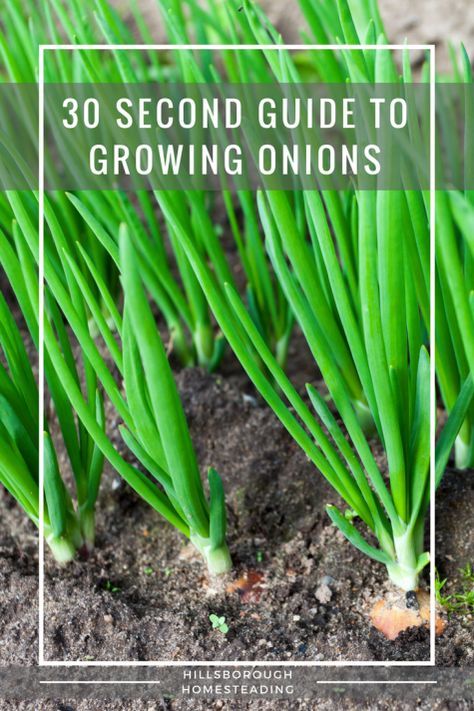
Onions can also be grown outdoors from the beginning of spring, but then shoots will appear later, and the first crop can be harvested only in early June.
When the crop is harvested, the bulbs are shaken off the ground and the roots are trimmed. From a square meter of plantings, you can get up to 15 kg of onions; this crop is almost always characterized by high yields.
Principles of growing onions in greenhouses
Greenhouses can also grow onions in winter.
Green feather has always been in demand, and hothouse onions can be a good selling item.
As a rule, special varieties are selected for this breeding:
- Trinity.
- Bessonovsky.
- Spassky bow, etc.
For planting, you need to choose sufficiently large bulbs, the diameter of which is not less than 3 cm - otherwise the seedlings will be ugly and weak.
Seed should be stored in a dry place, bulbs should not be damaged:
- Onions grow well in polycarbonate greenhouses, they help to store heat well and let in enough sunlight.
- It is best to use the soil after planting eggplant, beets or tomatoes, as it will already be supplied with the necessary nutrients.
- To save space in the greenhouse, potting soil boxes can be placed on racks.
- Multi-tier cultivation will produce a much higher yield, but the distance between two tiers should be at least half a meter.
- It is necessary to ensure that there are no cracks and drafts in the greenhouse.
- Gas heating of greenhouses is usually used, but sometimes potbelly stoves are also installed, which also provide enough heat.
- The temperature should not fall below 10-15 degrees, in this case the onion will give the fastest harvest, and it will be ready for sale just a month after planting.

It is important that the lighting in the greenhouse is from above. If there is no way to provide natural sunlight, you need to take care of the lamps. If the light falls from the side, the feather will tilt, and the seedlings will be very mixed up.
Procedure for planting onions in a greenhouse
Soil before planting:
- Loosen well.
- Manure and compost fertilizer are added to it.
- A small amount of phosphate and potash fertilizers are also applied to the soil.
Before planting, it is recommended to wet the bulbs: if water gets under the outer shells, seedlings will appear much faster.
- The top of the bulb is also cut off.
- After emergence of seedlings, it is necessary to monitor the uniform moisture of the soil and periodically apply a small amount of nitrogen fertilizers.

- Start harvesting the onion feather when it reaches a length of approximately 15 cm.
- Bulbs always germinate unevenly, so harvesting has to be done selectively.
The bulb is dug up and the stem is pulled out of it. It is cleaned and wrapped in film for sale. It is important to remember that if nitrogen fertilizers were applied to the soil, onions are stored less.
Experienced gardeners note that the best time to sell greenhouse green onions is the end of July, August and September.
At this time, ordinary gardeners have already managed to sell their crops, and most of them are busy with canning vegetables. For fresh herbs, the price rises, and you can make a good profit from it. The sale of greenhouse onions is recognized as a profitable business, since the crop can be obtained almost all year round. To streamline the process, it is necessary to divide the greenhouse into zones, and after harvesting, the process is repeated.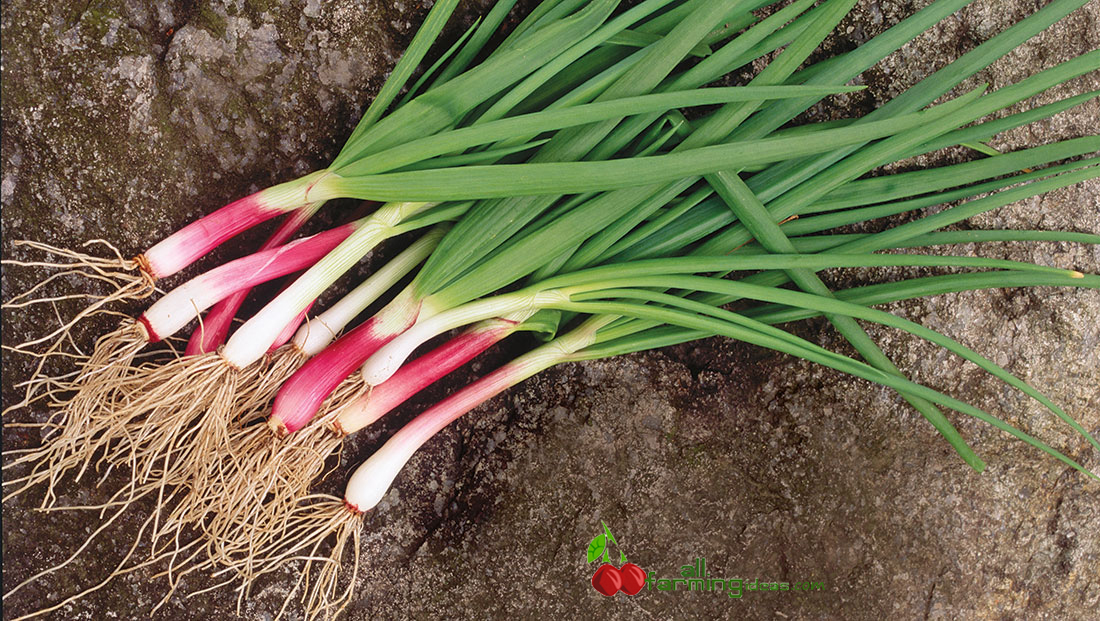
Green onions are actively grown in hydroponics in Europe.
In this case, the seed is planted in boxes with little soil and a lot of water. Nutrients are supplied to the roots in large quantities, so you can achieve a good harvest. The advantage of the method is that you can place containers at any level and use the space of the greenhouse as efficiently as possible.
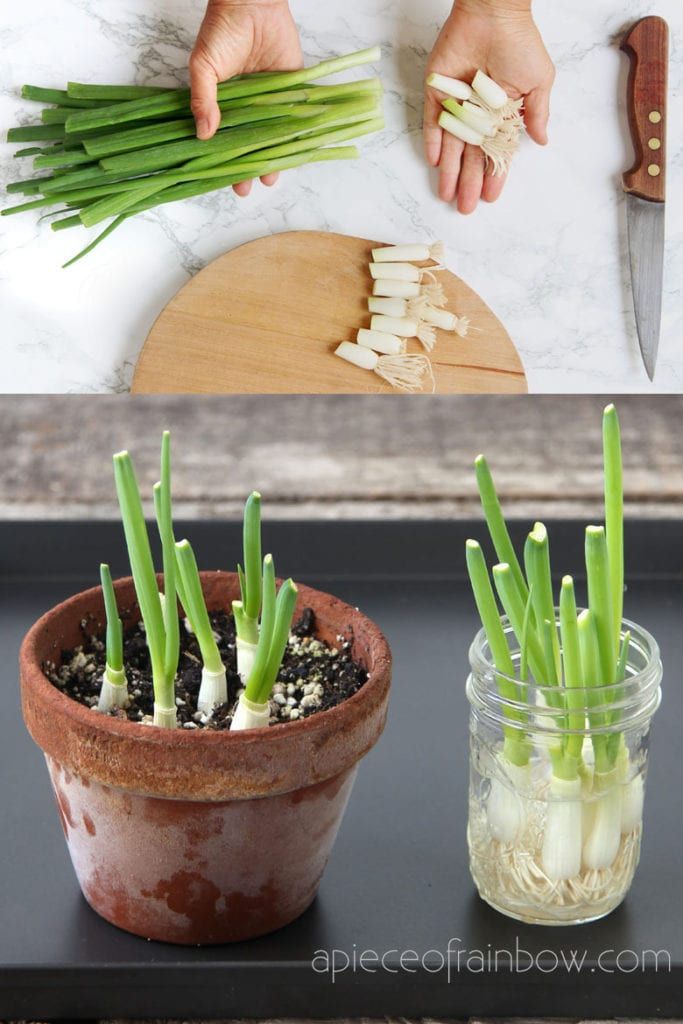
Growing green onions at home
Green onions are a truly unique crop, as you can grow an excellent crop on your own windowsill.
Strigunkovsky, Bessonovsky, Danilovsky varieties are most often chosen for forcing at home, as they are multi-germ and give a large number of seedlings. To make the feather the same size, the bulbs are sorted into small and large before planting.
How to plant green onions at home:
- Low boxes are used for planting.
- The soil mixture should be approx. 7-10 cm thick.
- It is better to choose enriched soil, which will have the required amount of nutrients. You can buy it in a specialized store.
- The yellow husks are removed from the bulbs, and the tops must also be cut off. This will allow the sprouts to appear faster on the surface.
- The bulbs are planted bottom to the ground and do not need to be fully sunk into the ground.
- Spacing between bulbs should be approx. 2 cm.
- When sprouts appear and the leaves are about 3 cm high, it is recommended to take the boxes to the balcony for fresh air.
- The ideal air temperature for growing onions is 18-22 degrees, the water temperature is up to 25 degrees. Subject to the temperature regime, you can achieve strong green leaves.
- Fertilizer is usually applied to the soil 1 time when the height of greenery reaches about 4 cm. Complex mineral top dressing is usually used: superphosphate, potassium chloride and ammonium nitrate.
- When the feather is about 25 cm high, it can be cut off.
- Usually, the feathers are cut off at the edges first, as they will grow from the center of the bulb.
Grown greens can usually be harvested within a month.
If you want to always have fresh herbs in your house, you can plant green onions in 2 boxes, the interval between plantings is 20-25 days. In this case, when the crop is harvested on the first bed, green shoots will just begin to appear on the second. The first container can be freed from the waste soil and the bulbs can be planted again.
Growing green onions from seeds
There is another way to grow onions for feathers - planting from seeds.
This is a little more labor intensive than growing with bulbs, but this method also produces good yields. Onion seeds are cheap, and such plantings are usually carried out from the end of summer to get a harvest by spring.
- Before planting, the seeds are soaked for 2-3 days so that they have time to "hatch".
- The soil before planting is carefully loosened, a complex of organic fertilizers is introduced into it, after which the bed needs to be leveled.
- Seeds are sown in rows, row spacing is about 30 cm.
- After emergence, the bed is thinned out.
- In October, when the first frosts begin, the bed is covered with a layer of peat or straw to protect it from freezing.
- With the beginning of spring, after the snow melts, the overwintered shoots are opened, and then they are looked after like ordinary garden plants: drying or waterlogging of the soil should not be omitted, the bed is periodically loosened to ensure air flow.
- The feather is cut when it reaches a height of 25 cm or more.
Planting onions from seed guarantees fresh greens in early spring, when other gardeners are just beginning to sprout.
Green onions in general are an undemanding plant that grows well even in fairly poor soils. However, if you take care of the plantings, they will delight you with an excellent harvest, which will not only be an excellent vitamin addition to the table, but also bring good profits. This is an amazing plant that can be grown in a greenhouse, and in a garden bed, and at home on a windowsill. Under the right conditions, green onions grow quickly, and the seedlings will turn out beautiful and tasty.
More information can be found in the video.
Category:Garden | green onion
How to grow onions at home in normal household conditions
When snow falls outside the window and fluffy snowdrifts lie, it's so nice to see fresh greens on the table! In addition, in winter, natural vitamins are especially needed by our body. And the first assistant in the fight against colds or flu is green onions. Phytoncides secreted by onions disinfect the room, destroying bacteria, viruses and fungi.
Content
- SMENTIONAL SHOUNTION
- Instructions on how to grow green onions of house
- Prepare the soil in a container
- Further care of the green onions
- Green onions in water
Smart decisions
Its purposeful properties help to settle with avatitis and spring fatigue, increase immunity and improve digestion. Green onion feathers will not only serve as a bright decoration for dishes, but also have a beneficial effect on the body.
Although you can buy green onions in the supermarket both in winter and summer, they can't be compared to those grown on your own windowsill. Firstly, by planting green onions at home, you can pick up the required number of feathers for cooking at any time, and secondly, you will be sure that the greens were grown without the use of any harmful substances and chemicals.
By planting green onions at home, you can pick up the necessary number of feathers for cooking at any time.
Growing onions at home can seem like an option for any child - stick an onion in the ground in a flower pot and watch how green feathers will appear. However, if you decide to take the matter seriously and eventually harvest a rich harvest of not only greens, but also the bulbs themselves, you will need to take into account a number of basic rules and nuances.
Instructions on how to grow green onions at home
You can get greenery from bulbs in winter by forcing on a feather, that is, by sprouting the root crops themselves. For this, onions are usually used, which you have grown in your garden or bought in a store. multi-bearing varieties (Timiryazevsky, Spassky, Strigunovsky, Arzamassky, Pograsky, Soyuz) are optimally suited. The bulbs should be approximately the same diameter - about 2 cm, not damaged or diseased.
Place the calibrated bulbs in a container with hot water (+40 degrees) and put on the central heating battery for a day. After soaking, you can remove the layer of brown husk to verify the quality of the selected root crops and remove the damaged layer, if any. Before planting, the top of the bulbs is cut off by one and a half centimeters.
You can get greenery from bulbs in winter by forcing on a feather
Prepare the soil in a container
was to grow green onions in a conveyor way - then you do not have to wait for the next batch of onion feathers to sprout.
Soil or substrate can be used as soil: fine expanded clay, fine gravel, sand. The substrate should be pre-washed with a hot concentrated solution of potassium permanganate and running water. Fill the boxes with soil 3-4 cm, if you have chosen a substrate, fill it with water so that it covers the surface by 1 cm. Dip the prepared bulbs into the soil every two centimeters, keeping them upright. It is not necessary to deepen the onion too much, only the roots should be in the water, otherwise the bulbs will rot.
Further care of greens
Planted bulbs should be watered every other day with warm water
The container is placed for a week in a warm place where the temperature does not fall below +25 degrees. When feathers 1-2 cm high appear on the bulbs, the box should be moved to the windowsill. Ideal windows that face the southwest, south and southeast. If there is not enough sunlight, you can additionally highlight the containers with fluorescent lamps. Only in the presence of sufficient lighting, green onion feathers will accumulate useful substances and acquire a rich taste.
Planted bulbs should be watered every other day with warm water. Make sure that the water is constantly at a level just below the surface of the substrate, and the soil does not dry out.
The first green feathers must not be cut off, otherwise further green growth will be halted.