Growing plants from cutting
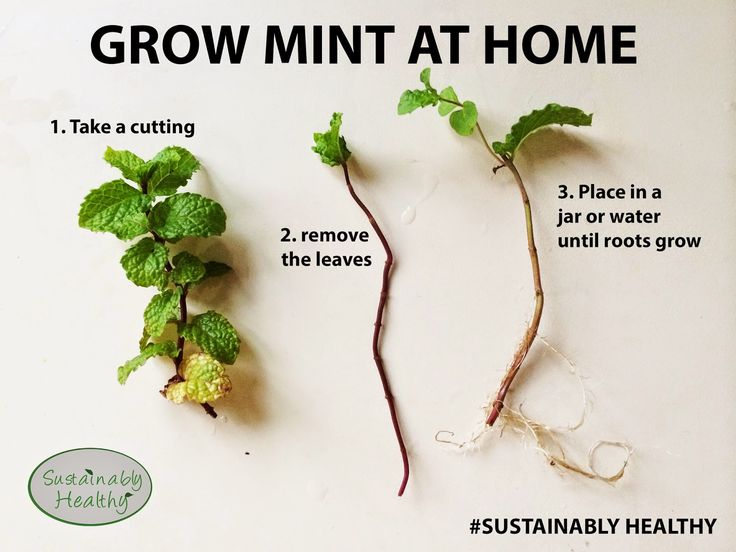
how to root plant cuttings in water for propagation
Hello! Thanks for being here! Today I’m going to show you how to root plant cuttings in water. This is a great way of multiplying the plants you have and sharing the plant love with friends. I will say, it’s kind of hard to give away a plant that you’ve been nursing from its beginning. But, it’s so rewarding and so cool to get results! I just gave two Chain of Hearts cuttings away today to super awesome homes. I can’t wait to check in on their progress.
When I was in my early 20s I worked at a golf course that had a 30 foot Monstera deliciosa. You read that right…30 FEET! That’s where my love of plants began. It’s actually my favorite plant of all time (if you didn’t already know). Anyway, some of the leaves were 2 feet wide and absolutely beautiful! One day I saw this tiny leaf pop out of soil and when no one was looking, I brushed the dirt away from the shiny green stem and plucked it right out of there! I kept looking watch over my shoulders like I was about to pull a bank job or something. I mean, I guess technically it was stealing. But I didn’t see it that way. I was spreading the love! But let’s make something perfectly clear, IT IS STEALING WHEN YOU DO IT AT A STORE so don’t do that! I ended up telling my supervisor (it was weighing on my conscience) and he laughed, told me I was silly, and that it was totally fine! All this to say, I took it home, put it in water, it rooted, and it made me so happy! I was so in love with this amazing method of reproduction. Let’s talk about How to Root Plant Cuttings in Water.
Most common house plants can be propagated by water method. Right now my new subject is a tiny little stem from my big Fiddle Leaf Fig. So far no roots but there is a tiny green leaf!! If you’re not sure, just try it!
Let’s get started
- Identify the location where you will snip your cutting from the main plant. Not all cutting that will root in water have root nodes, but most of them do so find the root node on your plant.
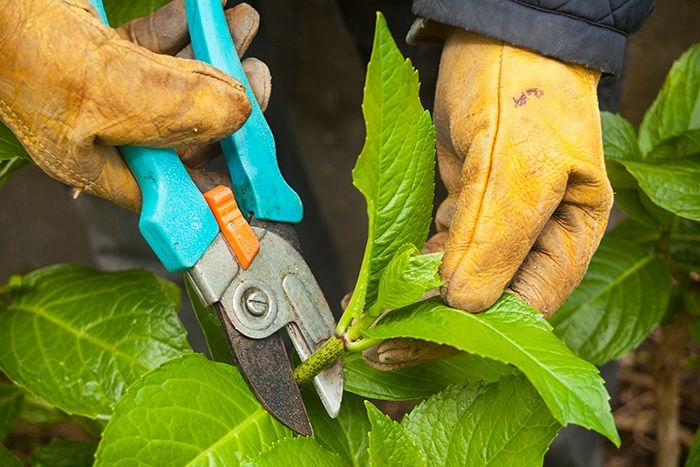
- Carefully cut just below the node with a clean sharp knife or scissors. About 1/4″ below the node.
- Place the cutting in a clean glass. Poor enough room temperature water to cover the nodes of the cutting.
- Change out the water every 3-5 days with fresh room temperature water.
- Wait and watch as your roots grow! This can take weeks to months depending on the plant.
- Once your roots reach approximately 3″-5″ then it’s time to put the cutting in soil!
Need a visual? Watch my propagation tips on AM Northwest.
Place your rooting plants in an area with bright indirect light. You’ll also need patience…serious patience! If you are trying a new cutting and two weeks go by with no roots, it’s not always bad news. I know someone who stuck a fiddle leaf fig leaf in water and 3 months later she started to see roots.
When you change out the water, be sure to give the roots a little rinse and a little rub with your fingers.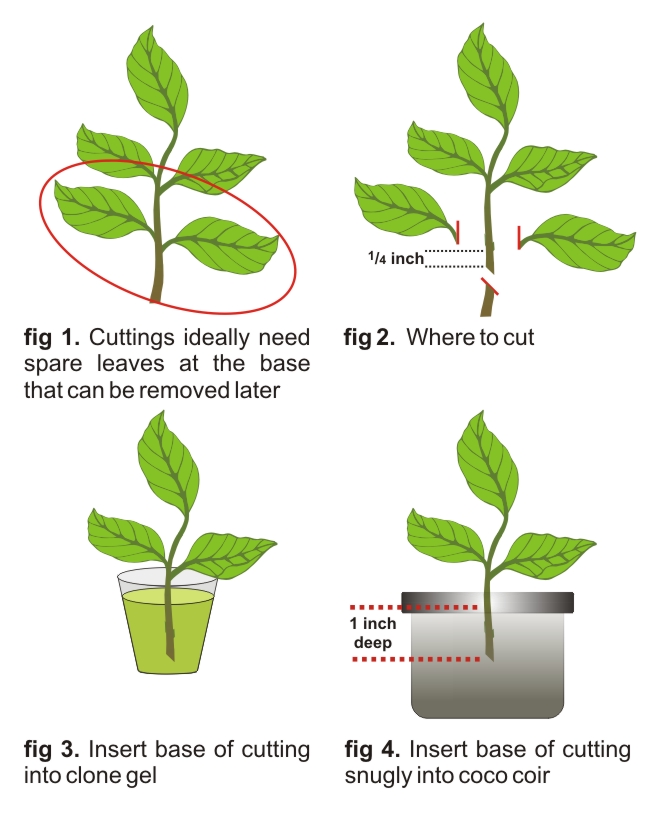 The roots can get a mucky film (that’s the technical term) and you want to wipe that away before placing them in the new water.
That’s all you have to do! It’s so simple. Now you can make your own plants and trade with your friends. It’s one of my most favorite things to do. Once you are ready to pot your rooted plant, check out my How to Repot a Houseplant post. I know you won’t be actually repotting but there are some good tips about potting in general. Thank you so much for visiting! See you next time!
Check out my Instagram for daily plant love and inspiration!
This post has affiliate links for your convenience
How to Grow Plants From Cuttings
Grow New Plants at Home With This Easy Propagation Method
By
Marie Iannotti
Marie Iannotti
Marie Iannotti is a life-long gardener and a veteran Master Gardener with nearly three decades of experience.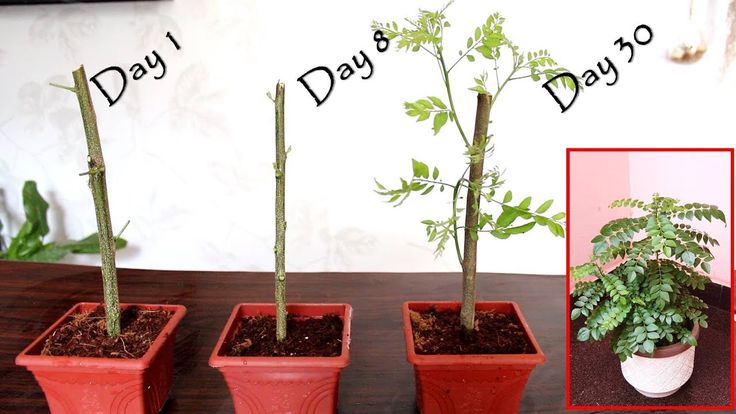 She's also an author of three gardening books, a plant photographer, public speaker, and a former Cornell Cooperative Extension Horticulture Educator. Marie's garden writing has been featured in newspapers and magazines nationwide and she has been interviewed for Martha Stewart Radio, National Public Radio, and numerous articles.
Learn more about The Spruce's Editorial Process
Updated on 10/25/22
Reviewed by
Kathleen Miller
Reviewed by Kathleen Miller
Kathleen Miller is a highly-regarded Master Gardener and Horticulturist who shares her knowledge of sustainable living, organic gardening, farming, and landscape design. She founded Gaia's Farm and Gardens, a working sustainable permaculture farm, and writes for Gaia Grows, a local newspaper column. She has over 30 years of experience in gardening and sustainable farming.
Learn more about The Spruce's Review Board
The Spruce / Jiaqi Zhou
Project Overview
Garden plants can be propagated in many ways, but one of the easiest methods is taking stem cuttings. How to grow plants from cuttings is simple: Trim off a healthy portion of stem, place it in water or a growing medium until it develops roots, and then plant it in a pot or the ground.
Growing plants from cuttings is a common way to create new houseplants, but it can also work for many garden plants. In cold-weather zones, some gardeners take clippings of tender annuals and root them indoors to prepare a supply of new plants for garden planting in the spring.
Here's what to know about how you grow a plant from a stem cutting.
Watch Now: How to Propagate Dipladenia
When to Take Stem Cuttings
Stem cuttings can be taken and rooted at almost any time during the parent plant's active growth period. You also can take cuttings from many woody plants (plants with hard stems) during their dormancy. In cold climates, you can take cuttings in the fall before frost arrives, root them indoors, and then transfer them to pots. By springtime, you will have vigorous potted plants that can go back into the garden.
Types of Plants to Grow From Cuttings
Soft-stemmed herbaceous plants are the easiest to grow from cuttings, but many woody plants can also be propagated with this method. The following list includes examples of plants that grow from cuttings.
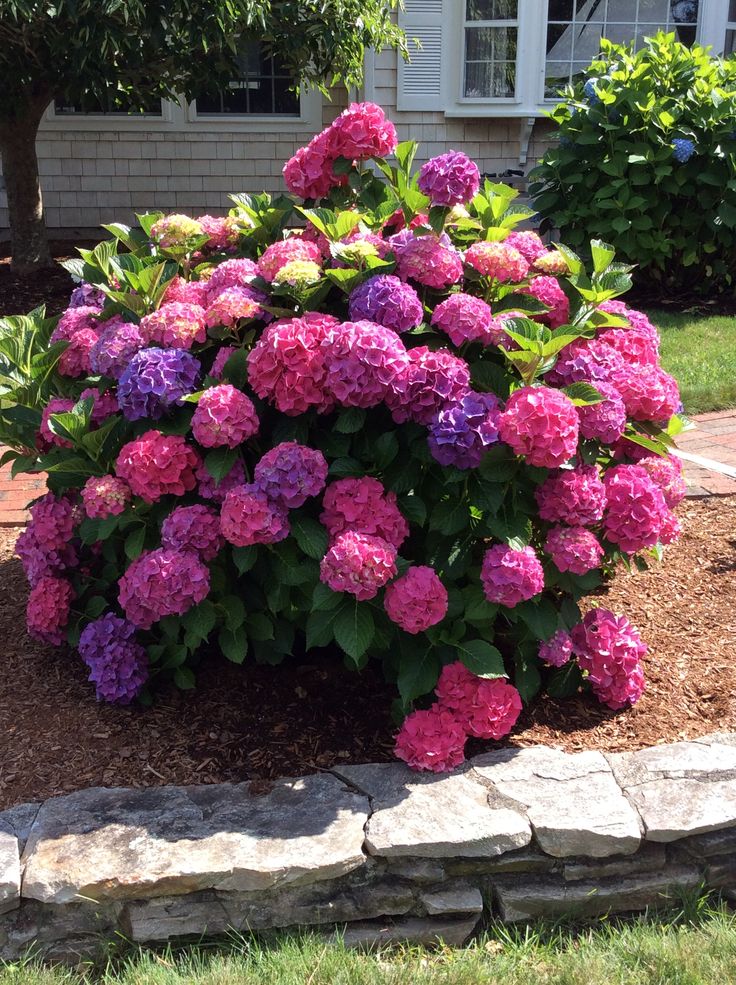
- Semi-hardwood cuttings are woody around their base but have softer stems up top. Examples of plants that can be propagated via semi-hardwood cuttings include holly, hydrangeas, and azaleas.
- Hardwood cuttings have woody stems throughout. Examples of plants that can be propagated via hardwood cuttings include crepe myrtle, forsythia, and rose species.
- Softwood cuttings have flexible soft stems. Examples of plants that can be propagated via softwood cuttings include clematis, asters, and chrysanthemums.
- Greenwood cuttings are very similar to softwood cuttings, except that their base is slightly harder and they take a bit longer to grow.
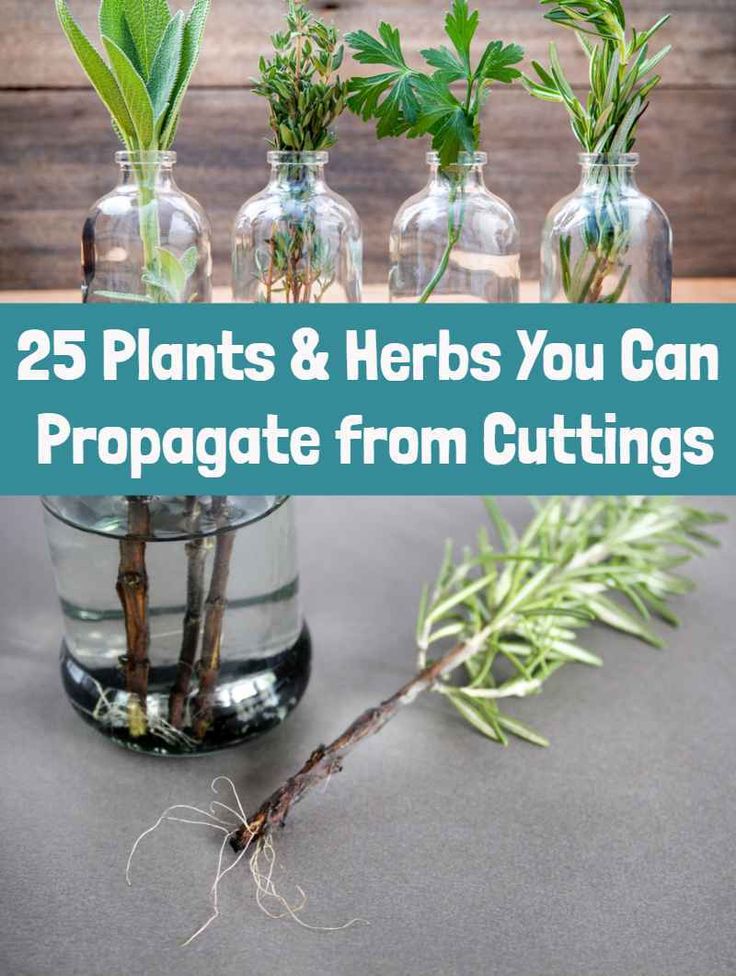 Examples of plants that can be propagated via greenwood cuttings include boxwoods, dahlias, and gardenias.
Before You Begin
The key to successful rooting of stem clippings is to find the moisture and temperature level appropriate for each type of plant. Do some research on the species you are trying to propagate to learn the conditions it likes best. You can make your plant cuttings grow faster not only by providing the conditions they like but also by applying rooting hormone to the cut end, which helps to encourage root production. It's also best to take several clippings to maximize your chances of success.
How long plant cuttings take to root varies widely depending on the type of plant. Many herbaceous annuals will quickly grow to maturity. But cuttings from perennials and woody plants, such as shrubs, can be harder to root and take longer to reach maturity.
Tip
It is possible to grow a plant from a cutting in water. Simply place the cut end down in a container partially filled with plain water, and refresh the water every few days until a substantial root system has formed.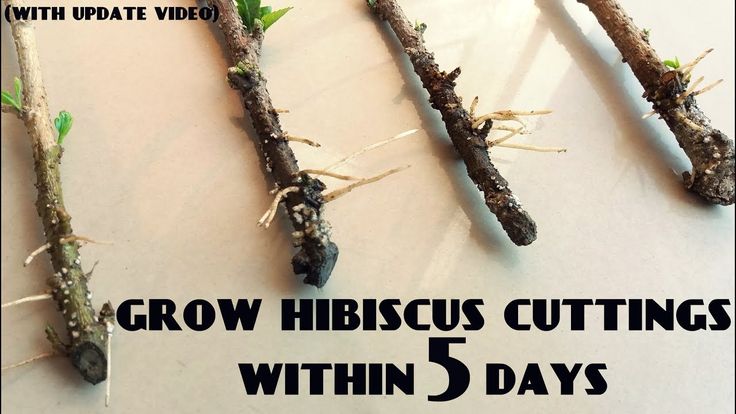 However, transferring a water-rooted seedling to soil is not always successful, so it's generally better to plant cuttings straight into soil.
Equipment / Tools
- Razor blade or scissors
- Small container for rooting hormone (optional)
- Pencil or stick
Materials
- 6-inch containers for planting
- Soilless potting mix
- Existing plant (parent plant)
- Alcohol
- Rooting hormone (optional)
- Plastic bag
The Spruce / Loren Probish
How to Grow Plants From Cuttings
-
Prepare a Container
Fill a clean 6-inch-deep container with soilless potting mix to hold cuttings for rooting. A soilless mix drains well and provides suitably moist conditions that encourage the cutting to root. Don't use ordinary garden soil, as it might contain pathogens that can kill the cutting before it ever takes root.
The Spruce / Loren Probish
-
Choose a Parent Plant
Select a healthy parent plant from which to take cuttings.
 Avoid plants with diseases or lots of drooping or dying foliage. The best specimens for cuttings will have plenty of new growth and be large enough that taking cuttings will not harm them.
 Tip
Good green growth is more important in a parent plant than plentiful flower buds. Too many flowers can actually hinder the ability of a cutting to grow roots.
The Spruce / Loren Probish
-
Find the Best Stems for Cutting
Choose green, soft (non-woody) stems for cuttings. Newer growth is easier to root than woody, older stems. Look for a stem with a node—a bump along the stem where a leaf or flower bud attaches. This point is where new roots will emerge.
The Spruce / Loren Probish
-
Take the Plant Cutting
Use a pair of scissors or a razor blade that has been sterilized in alcohol to make a clean cut just below a node. The cutting doesn’t need to be long, but it should contain at least two leaves and one node.
 A cutting that is 4 to 6 inches long is usually sufficient. Longer cuttings sometimes dry out when placed in their growing medium.
 The Spruce / Loren Probish
-
Prepare the Cutting
Place the cutting on a flat, hard surface, and make a clean, partial slice through the middle of the node with a sterilized razor blade. Scarring the node will increase the chances of roots emerging from this spot.
Then, remove all but one or two leaves on the cutting. The cutting needs some leaf growth to continue photosynthesis, but too many leaves will consume energy that would otherwise go to root creation. If the leaves are very large in proportion to the stem, cut off the top halves of the leaves.
The Spruce / Loren Probish
-
Apply Rooting Hormone (Optional)
Wet the node end of the cutting, and then dip it in a small container of rooting hormone. Tap off any excess hormone; too much actually hinders chances for success.
 This step is optional. Some plants root easily on their own, but rooting hormone can help others by stimulating the cutting into sending out new roots.
The Spruce / Candace Madonna
-
Bore a Planting Hole
Use a pencil or similar pointed object to poke a planting hole into the potting mix, rather than planting the cutting straight into the soil. Make the hole slightly larger than the stem diameter. Doing so will prevent rooting hormone from being wiped away when you embed the stem in the pot, and it's also gentler on the stem.
The Spruce / Loren Probish
-
Plant the Cutting in the Soil
Carefully plant the cutting in the hole you made in the potting mix, and gently tamp the soil around it. You can fit several cuttings into one container, but space them so the leaves do not touch one another.
The Spruce / Loren Probish
-
Cover the Pot With Plastic
Place the container with the cutting into a plastic bag.
 The bag will keep the humidity high and hold in heat. But don’t seal the bag completely because some airflow is necessary to prevent fungal rot.
 Keep the container in a warm spot in the house, ideally in an area that has indirect bright light. Don’t put the cutting in full sunlight until new leaves begin appearing along the stem.
The Spruce / Loren Probish
-
Monitor the Cutting
Until roots form, keep the soil slightly moist but not so wet that condensation forms on the inside of the plastic bag. Check regularly for signs of rot, and remove any suspect cuttings as soon as you spot trouble.
After two to three weeks, begin checking for roots by tugging gently on the cutting. When you begin to feel resistance, it means roots have developed. At this point, you can transplant the cutting into its own pot or the ground.
The Spruce / Loren Probish
30 Plants That Grow From Cuttings in Soil
Watch Now: 19 Timelapses Perfect for Plant Lovers
Article Sources
The Spruce uses only high-quality sources, including peer-reviewed studies, to support the facts within our articles. Read our editorial process to learn more about how we fact-check and keep our content accurate, reliable, and trustworthy.
Plant Propagation. University of Maine Extension.
CUTTINGS IN A JAR | Science and life
Growing plants from cuttings is the most popular method of vegetative propagation.
Bud and leaf cuttings can be cut from any shoot - green, semi-lignified or lignified.
‹
›
View full size
It would seem that what else can be written in addition to the numerous manuals on rooting cuttings? But when you start cutting yourself, you discover a lot of little things that decisively affect the result.
The easiest way to root is in a jar of water. Under certain conditions, it can be used even for plants that are considered difficult to root. But for all the simplicity of this method, there are many little things on which success depends.
For example, not all plants tolerate water changes.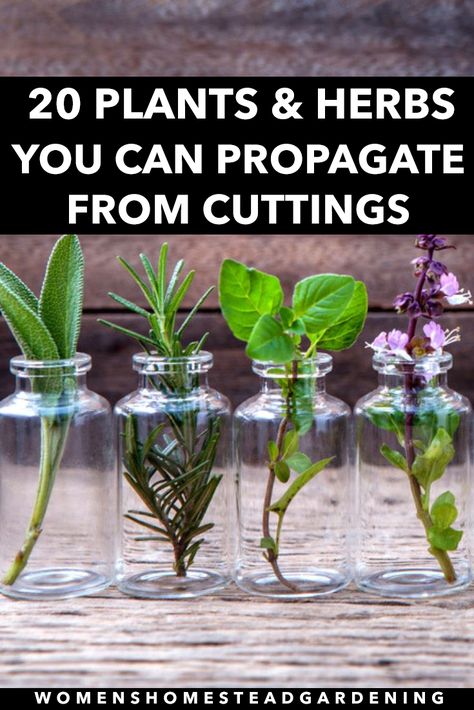 In order to avoid possible failure, it is better not to change the water, but only to add it when it evaporates. Apparently, it accumulates some metabolic products necessary for the plant. I have repeatedly had to observe the death of blue passionflower cuttings that have already given roots after changing the water, even if the water was well-settled and did not contain any harmful impurities.
Equally important is the number of cuttings in the bank. Honeysuckle does not want to take root if there are more than three cuttings per 200 ml of water, but one at a time in a jar of even smaller volume, the same cuttings perfectly give roots.
Growing plants from cuttings is the most popular method of vegetative propagation. Left - nodal stalk. Its lower cut is located directly under the node or kidney. This is how green unripened stems are usually cut, since the tissues located in this place are more resistant to fungal diseases. A cut in the middle of the internode (on the right) is made, as a rule, when cutting cuttings from more mature lignified shoots.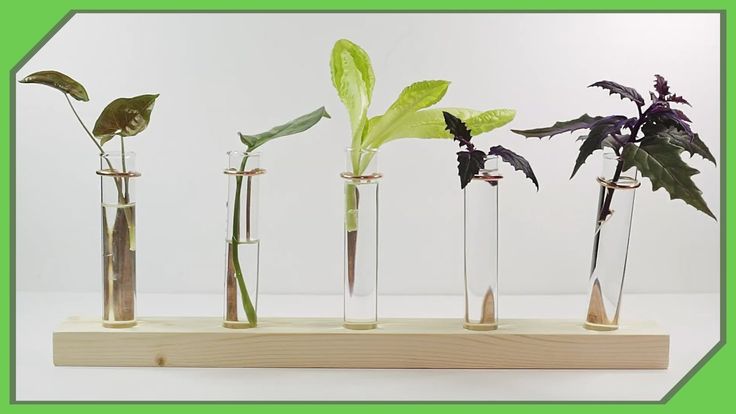
Interestingly, the ability of a plant to produce rooted cuttings depends on the nutrition of the mother plant. If it received nitrogen in excess, the roots on the cuttings form very poorly. It is also difficult to form roots in plants that are "starved". For the most active root formation, the mother plant must be fully provided with potassium, phosphorus and slightly less nitrogen.
It is also important from which shoots the cuttings are taken. Fattening, powerfully growing shoots give poor quality cuttings. So do not chase power and size, cuttings take root much better from lateral, not very strong growing branches. But it is curious that in some conifers, the place where the cutting is taken affects the shape of the future plant. From the cuttings from the lateral horizontal branches of the spiky yew, disheveled or even almost creeping plants are obtained, and from vertically growing cuttings - vertical ones. Similar phenomena have been observed in the cuttings of spruce trees.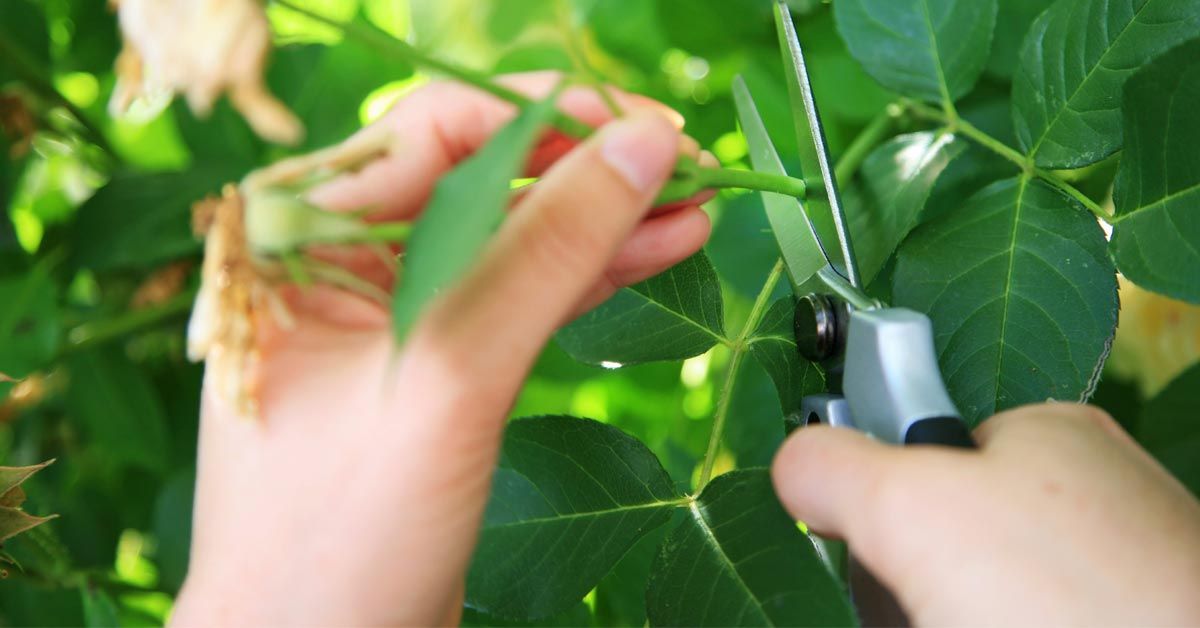
For easily rooted plants, the age of the mother plant does not play a role, but for those plants that are difficult to root, this is very important. The older the "parent", the worse, in most cases, its cuttings take root. At a young age, cuttings are even taken from plants that are not accepted to be cut, for example, apple trees and pears, in which, when treated with heteroauxin (a root formation stimulator), apical cuttings taken from annual seedlings easily root. But the ease of root formation in cuttings harvested from annual branches decreases with increasing tree age, even when treated with stimulants. Moreover, some plants with age completely lose the ability to vegetative reproduction. This happened in our garden with petiolate hydrangea, which gave excellent layering 20 years ago, and now even buried branches of the bush do not take root.
Cuttings, consisting of a bud with a leaf, can be cut from any shoots - green, semi-lignified and lignified. The upper cut is made as close as possible to the kidney, if possible, without leaving a hemp. The lower one is 2.5-4 cm from the upper one. Each cutting should consist of one leaf (the other leaf is removed), a bud located in its axil, and a very short segment of the stem.
It is also not indifferent from which part of the shoot the cutting is taken. Often, very long shoots are taken for cuttings, from which a large number of cuttings are immediately cut with secateurs. The lower the segment of the stem from which the cutting is taken is located, the better it takes root in most plants. Once I had to take cuttings from the same passionflower branch. Despite the fact that the entire branch was equally lignified, only the last cutting, taken from its very base, took root. The same can be observed in such a frequently cutting plant as a rose.
Light has a great influence on the rooting of cuttings. A cutting that has no leaves grows better roots in the dark. To root a cutting that has at least a piece of a leaf left, light is needed. But even in the light in an opaque dish, the roots form much better than in a light jar. It is believed that a cutting harvested from a branch during the period when there are no leaves already contains some heteroauxin, which, apparently, decomposes in the light. If there are leaves, it is they who produce the rooting stimulator heteroauxin. It would be possible to leave all the leaves on the cuttings, but, being in the water, and even more so when rooting in the substrate, when the water supply is limited, the extra leaves dry out the cuttings and they may die.
The level of water in the bank is also important. If there is too much water, there is not enough oxygen near the bottom, and this can cause rotting of the lower part of the cuttings: after all, roots form only at the border of water and air. The experiments of the British showed that the roots appear much faster and along the entire length of the cuttings in the bank, if the water was aerated.
And one more interesting observation. Many plants reproduce best when they are dormant. Blackcurrant cuttings planted in the ground in autumn take root much better than spring ones, which almost completely die.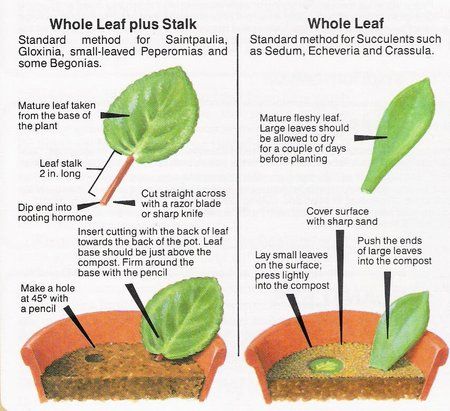 Sea buckthorn propagates well by winter cuttings. Cut off at the end of January - February, sea buckthorn sprigs give roots in one or two weeks in a jar of plain water or water to which honey is added. A tablespoon of honey is diluted in a glass of water and the cuttings are placed in the solution for 6-12 hours. The main mistake of gardeners during the winter cuttings of sea buckthorn is its too late transplantation into the soil. Roots on cuttings grow very quickly, they become too long and break off when transferred to the garden.
Excellent roots in ordinary vases with water were given by long branches of yew berry and western thuja cut in February and March for a bouquet (about 60 cm long and about a centimeter in diameter). In May - June, all of them with well-developed roots were planted in the ground.
And one more curious cutting method, which has recently been common among amateur gardeners.
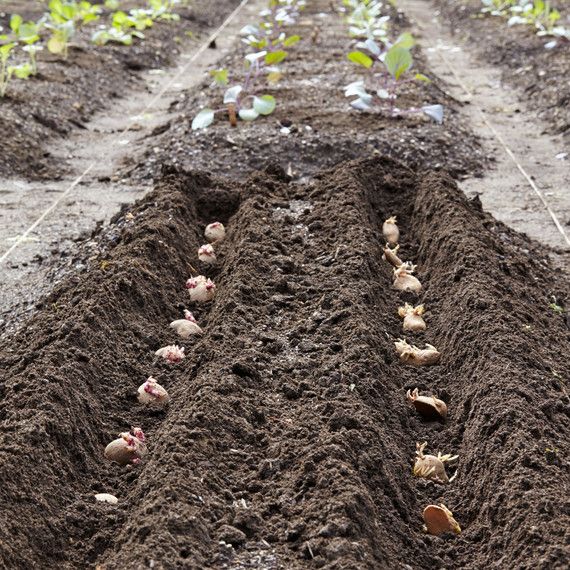
Take a large potato tuber and carefully remove all the eyes from it. The cuttings are stuck directly into the tuber, buried in the ground and covered with a glass jar to create a greenhouse effect. With regular watering, cuttings quickly give roots, and young plants planted in the garden develop well. So it is possible to root even poorly cutting plants. The method is quite justified, since instead of water, the cuttings immediately receive a large amount of ready-made nutrients, in particular carbohydrates, including starch.
This method arose by chance, and one can even guess how. It has long been known that it is best to keep grafting cuttings at home in the refrigerator. The cuttings are stuck into ordinary potato tubers, wrapped in paper and placed in a plastic bag with holes. Probably, one of the gardeners left the cuttings in the tuber for too long, and they gave roots.
Some flowers can be stored in the same way. In particular, I managed to keep green tulip buds bought in early February fresh until March 4-5. Put into the water, after three or four days they acquired a normal color and blossomed beautifully.
Last year, almost in autumn, cuttings of roses quickly took root in potatoes.
how to grow more plants by cuttings
Why is this method so popular? And because the offspring during cuttings will be an exact copy of the parent, will quickly take root in a new place and will please with endurance in harsh conditions. And most importantly, you will receive a new planting material for free.
Types of cuttings
Cuttings are different. Which option to choose depends on the type of plant.
Green cuttings
In most cases, woody cuttings are used for propagation, but some plants prefer to propagate by young green shoots.
Suitable for: barberry, weigela, hydrangea, deren, viburnum, vesicle, lilac, chaenomeles, mock orange.
How to root. Actively growing young lateral shoots are cut with a sharp knife into segments with 2 to 3 internodes. The lower cut should be oblique at a distance of 0. 5 - 1 cm from the kidney. The top cut is straight. It is even more reliable not to cut the cuttings, but to tear them off with the "heel" - the part of the stem from which they depart. Cut off the lower leaves.
Then the cuttings are treated with a root formation stimulator - Kornevin or Heterauxin (1): either the lower part of the shoot is powdered with powder, or the drug is diluted in water and the cuttings are placed there for 6 hours. Then they are planted in a garden or pot to a depth of 2 cm. 3–5 cm of coarse sand must be poured over the ground: it protects the cuttings from decay.
Stem cuttings
This option is suitable for herbaceous perennials, which use cuttings for propagation. They are cut until mid-summer.
Suitable for: aquilegia, astilba, cornflower, gelenium, delphinium, sedum, phlox paniculata.
Photo: shutterstock.com How to root. The stems are cut into pieces with two internodes. They are dusted with any root formation stimulant and planted in the ground - preferably in a greenhouse.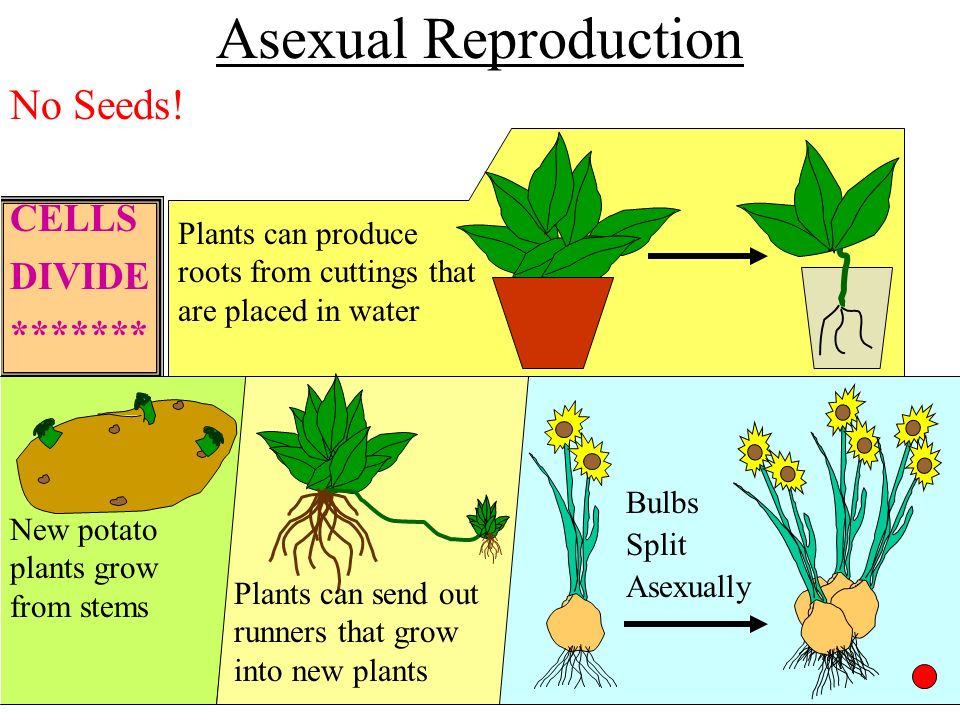 Such cuttings will take root quickly - if, for example, at the end of June you plant cuttings of panicled phlox, then in August you will get young plants with roots - they can already be transplanted into a flower garden.
Semi-lignified cuttings
These are shoots that have begun to bark on the bottom, but the top is still green.
Suitable for: hydrangeas, rhododendrons.
How to root. At the end of June, the tops of semi-lignified shoots of the current year are cut off and cut into cuttings with two internodes. Cut off the lower leaves. Longitudinal incisions 1–2 cm long are made on the bark. The cuttings are powdered with a root formation stimulator and planted in pots in a mixture of peat and sand in equal amounts. After 2 - 3 months roots are formed, and young plants can be transplanted into open ground.
General rules for cuttings
Each type of cuttings has its own characteristics, but there are also general rules that must also be taken into account.
Cut in the morning or on cloudy days. At this time, there is more juice in the cuttings - these take root better.
Cover with bottle. No matter where the cuttings are planted - in pots or directly in the garden - they need to arrange a mini-greenhouse. The easiest way is to cover them with a plastic 5-liter bottle without a bottom, or put them in a large jar with a lid (2). Such a shelter will help maintain high humidity around the cutting.
In a few weeks young shoots will emerge from the buds. At the end of summer, they begin to gradually open the bottle so that the seedlings get used to the fresh air, and then the shelter is completely removed.
Spray. One shelter with a bottle is not enough, because it is very hot in summer. Cuttings should be sprayed regularly with warm water. Ideally, daily. It is possible once a week (many people come to the country house for the weekend), but in this case, the soil around the cuttings should be constantly moist. So water them properly.
Protect from the sun. During rooting cuttings should be in partial shade.
Insulate in winter. Rooted cuttings are left to winter where they were planted. And so that they do not freeze, in late October - early November, the soil around them is covered with a thick layer of fallen leaves or covered with several layers of non-woven fabric.
In the spring or autumn of the following year, young plants are transplanted to a permanent place.
Popular questions and answers
Typical questions of gardeners about plant cuttings we asked agronomist-breeder Svetlana Mikhailova.
Which fruit crops can be propagated by cuttings?
Many varieties of cherries, almost all varieties of cherry plums and some plums propagate well with green cuttings. But cherries and apricots do not give roots on cuttings.
Can apple trees be propagated by cuttings?
In the vast majority of apple varieties, cuttings do not take root.


