Growing peas in a garden
Learn How to Plant and Grow Peas at Home
Pisum SativumOpinions may differ, of course, but many gardeners will tell you that freshly picked peas (Pisum sativum) deliver a nearly unmatched pleasure.
Fresh-off-the-vine peas deliver a crisp crunch, an unmistakably bright and complex flavor, and because they are often the first spring crop to be harvested, the first promise of summer’s bounty yet to come.
We link to vendors to help you find relevant products. If you buy from one of our links, we may earn a commission.
In this growing guide, we’ll learn about the types of peas available to home gardeners, when and where to plant them, and most importantly, when to harvest and eat them.
How to Grow Peas
- Fat or Skinny?
- Non-Edible Shell
- Edible Shell
- Sunny but Cool
- Spring Sprinkles Should Do the Trick
- Here Come the Bugs
- You Can Eat the Whole Plant
- A Salad Bar of Your Own Making
- Plump or Lean, It’s All Good
Let’s get started!
Fat or Skinny?
Broadly, there are two categories of this vegetable: edible pod, and non-edible pod.
And within these two categories, there are dwarf – or bush – types, which get to a height of 16 to 30 inches at maturity, and the tall – or telephone – types, which can grow three feet or taller.
The dwarf cultivars tend to produce their crop all at once, much like a determinate tomato, whereas the tall varieties bear fruit over a longer period. Some gardeners prefer the easier harvestability of the taller varieties.
You can often get away without trellising bush varieties, whereas with the tall ones, you’ll almost certainly need to provide support.
Non-Edible Shell
Garden peas, also known as English peas, are non-edible pod types, and must be shelled before the green orbs within are eaten, either raw or cooked.
Heirloom Green Arrow Pea Seeds
‘Green Arrow’ is a popular heirloom open pollinated dwarf garden type, and is available from Eden Brothers in sizes ranging from 1 ounce to 10 lbs.
If you’d like to try a tall variety, consider ‘Alderman,’ such as these from Stonysoil Seed Company, available via Amazon.
Heirloom ‘Alderman’ Seeds
This heirloom variety will grow up to 7 feet tall, and you’ll get approximately 50 seeds per packet.
Want More Options?
Take a look at our guide, “17 of the Best Shelling Pea Varieties to Grow in Your Garden.”
Edible Shell
Snow peas (P. sativum var. saccharatum), sometimes called Chinese pea pods, are of the edible-pod type. They’re nearly as flat as a flash drive, with tiny peas inside the pod. They’re often used in stir fries.
If you’re looking to grow a snow variety, consider ‘Oregon Sugar Pod II’ from Burpee.
‘Oregon Sugar Pod II’ Seeds
You can order packets of 300 or 900 seees that will develop into 28-inch-tall plants. Seed packets that have been grown and harvested using purely organic methods are also available.
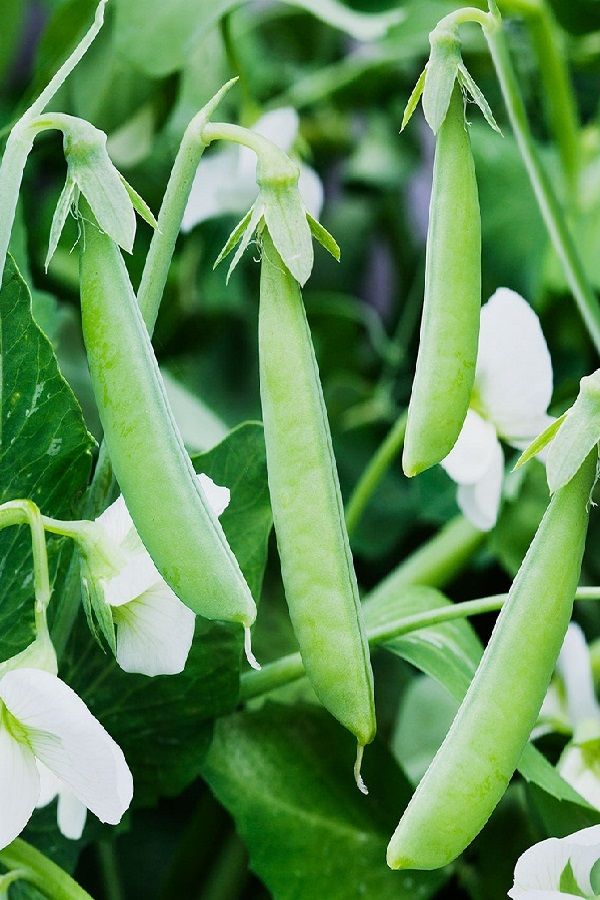
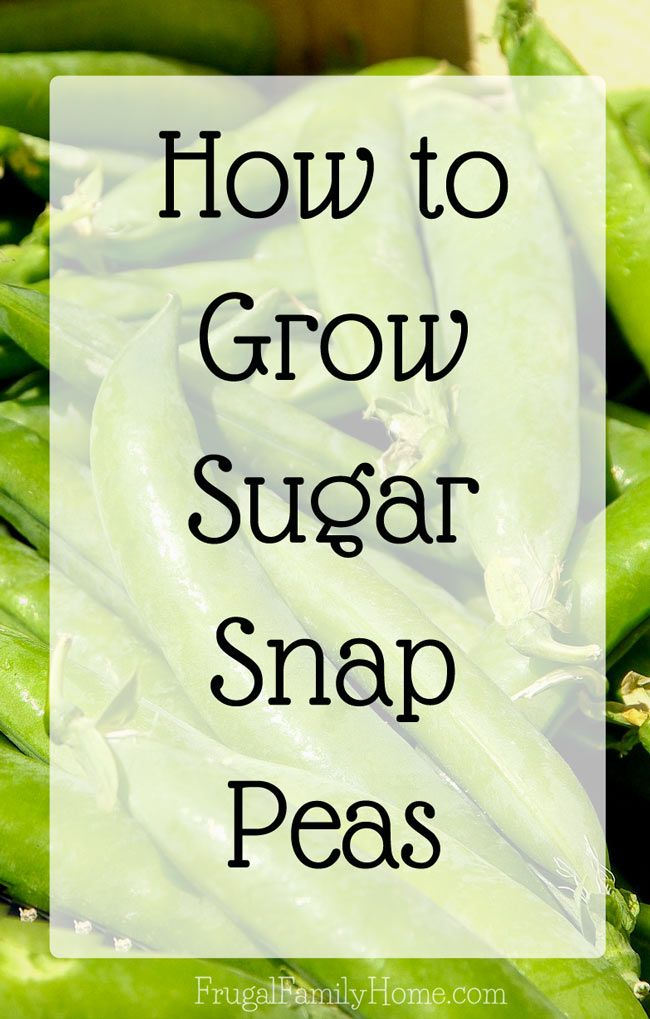
Sugar snaps are a blend of garden and snow. They’re plump like garden peas, but have a tender, edible pod like the snow variety.
If you’d like to grow sugar snaps, consider Burpee’s ‘Super Sugar Snap.’
‘Super Sugar Snap’ Pea Seeds
This variety gets about 60 inches tall, and is available from Burpee.com in packages of 300 or 900.
Sunny but Cool
P. sativum is a frost-hardy, cool-weather crop. Plant seeds in full sun as soon as the soil can be worked, when the soil temperature is at least 45°F.
If you live in an areas with warm summers, you’ll want to get your seeds in the ground as early as you can, because once temps hit 85°F, it’s adios P. sativum.
These legumes prefer well-drained soil with lots of organic matter. They’re happiest in soil with a pH between 6 and 7.5.
Plant the seeds 1 to 1 ½ inches deep and one inch apart. Space rows 12 to 18 inches apart.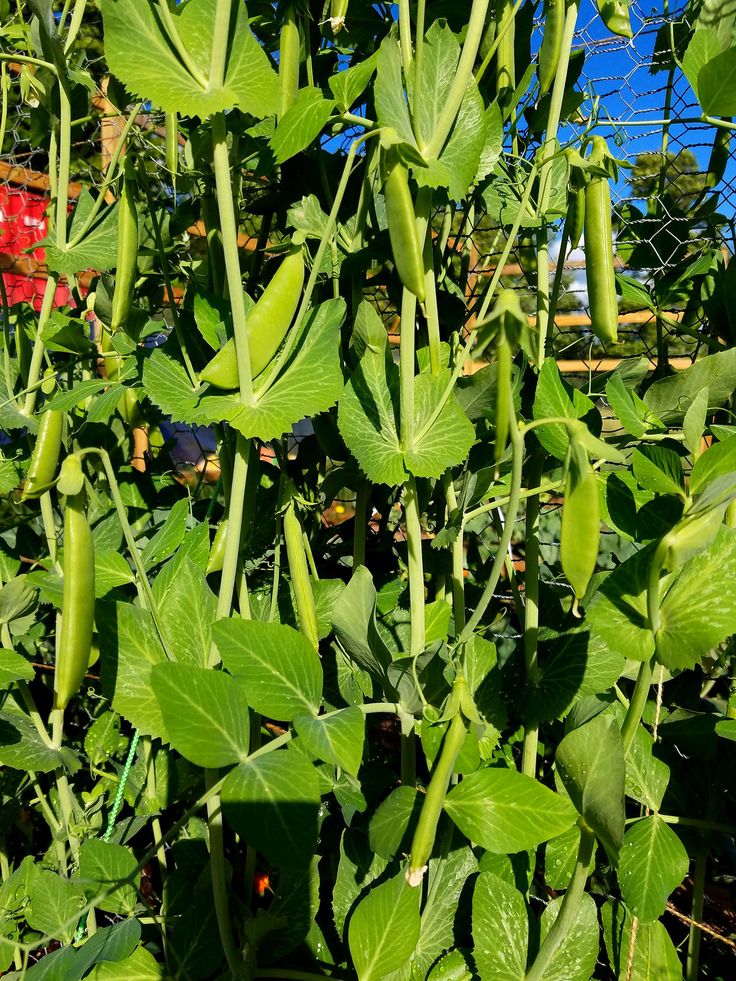 Thin seedlings to two or three inches between each after they’ve emerged, keeping the strongest specimens.
Add mulch to your planting area, to help retain moisture at the drip line.
Spring Sprinkles Should Do the Trick
These plants need a good amount of water, especially when pods are forming. If you get an inch of spring rains weekly, you’re in good shape. Anything less than that and you’ll have to supplement.
If soil tests warrant it, you can feed with phosphorus. But these plants gather their own nitrogen, so they don’t need supplements of that nutrient.
You’ll want to keep the garden area free of weeds by pulling the interlopers by hand.
Here Come the Bugs
P. sativum can be afflicted by aphids, which can be treated with neem oil such as this one from Bonide, available at Arbico Organics.
Bonide Neem Oil
This 32-ounce spray bottle is ready to use, and can also be used to treat powdery mildew, another problem from which this plant can suffer.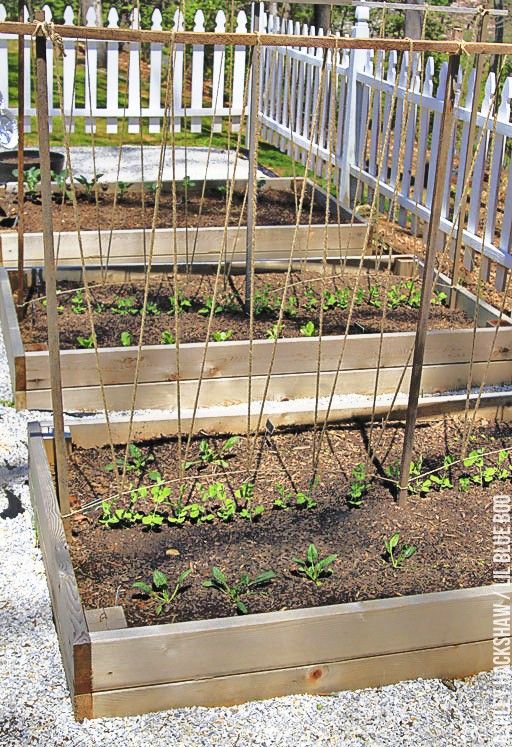
Monterey Bt Biological Insecticide
Cutworms are another potential pest of this plant. Sprinkle diatomaceous earth around your plants to discourage these moth larvae, or use a Bt product, such as this one from Monterey, available through Arbico Organics.
You Can Eat the Whole Plant
Harvest English types before the peas have completely filled the pod. These veggies should be shelled and eaten as soon as possible – they will last only two to three days in the refrigerator.
You can also allow the English types to fully mature and dry on the vine, and then harvest the dried peas for use in soups, or to plant next year.
Snow peas should be picked as soon as they reach edible size. Consult the seed packet for optimal size at maturity, depending on your cultivar.
Pick sugar snaps while tender, as soon as the pods swell.
Snow and snap peas will remain tasty for as long as a week in the refrigerator. Just wait to wash them until you’re ready to eat.
Keep in mind: some varieties will need to have the strings removed before cooking.
The vines of these plants are also edible, and because they are the most tender and delicious when the plant is very young, some gardeners plant extra seeds just to harvest the tendrils and shoots, before the pods even form. They’re delicious added to fresh early-season salads.
A Salad Bar of Your Own Making
These green bits of goodness are wonderful sources of protein, fiber, and iron, and we’ve collected some recipes that are as tasty as they are healthful:
Let’s start with a fresh pesto pasta salad from our sister site, Foodal. English peas combine with other garden delights – basil and spinach – to create a refreshing summer salad.
Another salad from Foodal, made with black rice and a red wine vinaigrette, combines a hearty grain with greens, radishes, carrots, and our tasty emerald orbs.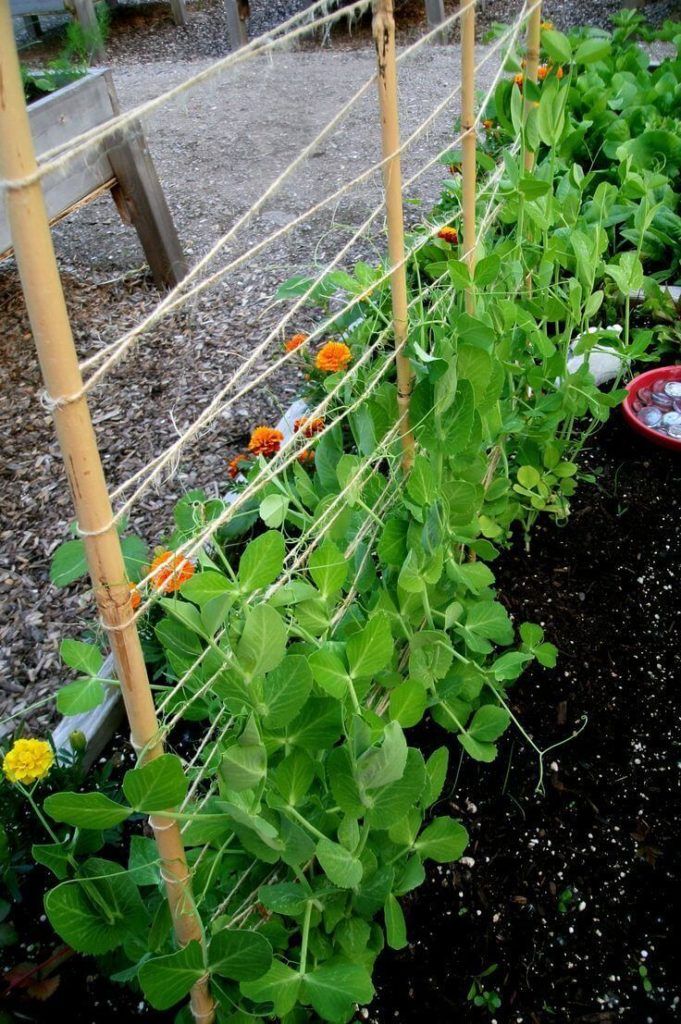
Mushroom mattar masala is a delicious vegetarian side dish, especially when it’s made with fresh vegetables from the garden. The Magic Saucepan shares the recipe for this one.
Or for a delectable casserole entree, try this lasagna bianca from Sugar Love Spices, with white sauce, asparagus, peas, and mushrooms.
For a change of pace, how about a creamy pesto zucchini pasta with peas? This quick dinner from The Fitchen makes use of coconut milk and white wine vinegar, with spiralized summer squash “noodles.”
Plump or Lean, It’s All Good
Nothing sings the promise of summer veggies to come like the springy flavor of peas, whether they’re chubby BBs thumbed from the shell, or flat as a stick of Wrigley’s and waiting to be sliced into a salad.
Among the few veggies that can take a frost with no ill effect, peas are easy to grow, provided you give them rich soil and plenty of water.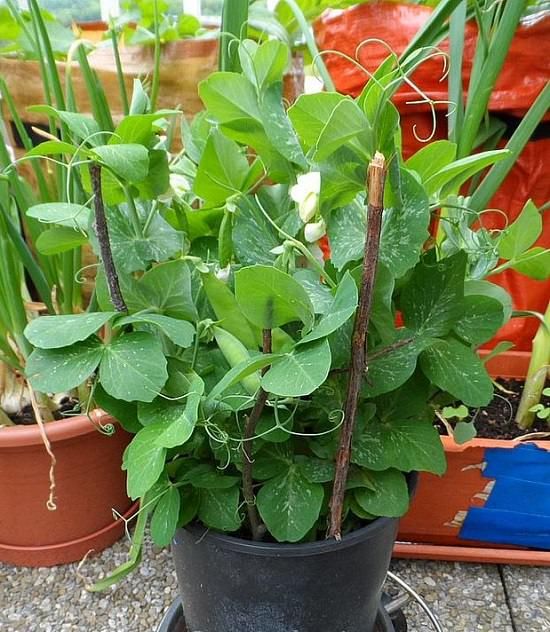
Do you grow this legume? Which variety grows best in your neck of the woods? Share your experience in the comments section below. And if you’d like to learn about another spring vegetable, check out our rhubarb growing guide.
Product photos via David’s Garden Seeds, Stonysoil Seed Company, Burpee, Bonide, and Monterey. Uncredited photos: Shutterstock.
How to Grow Peas - Bob Vila
depositphotos.com
Chances are the phrase “eat your peas” sounds familiar. But if the only thing that comes to mind are the mushy, canned variety, prepare to be converted. Fresh peas right off the vine taste nothing like their mass-produced cousins. They’re full of flavor, crisp, and in some cases they’re as sweet as candy.
The good news is that peas also are incredibly easy to grow and do well in cool weather, so they are often planted during shoulder seasons when other veggies are already fading or unable to start. This guide to growing peas will have you embracing peas on your plate again.
Common Name: Pea, Garden Pea, Snap Pea, Sugar Pea, Snow Pea
Scientific Name: Pisum sativum
Hardiness Zone: 2 to 11
Soil: Rich, quick-draining soil, pH 6 to 7.5
Light: Full sun
Water: Regular, even
Food: Little to none
Propagation: Sow directly in soil
Safety: Edible, nontoxic
Peas are lovely vining plants that are easy to grow in nearly any climate. Their vines range in size from 2 feet long to several feet high. Unlike other vegetables, the plants can tolerate quite a bit of cold and fog, so peas are an excellent cool-season crop and an attractive addition to a fall vegetable garden.
There are two different categories of peas: shelling peas and edible-pod peas. Shelling peas are usually called garden peas, and they require growers to open the pod (shell) to harvest the peas, and then discard the shell. Edible-pod peas include snap peas and snow (or sugar) peas. Snow peas are flatter than snap peas. The entire pea, including the shell, is edible.
If you’re wondering “is a pea a vegetable?” the answer is yes and no. Peas are legumes, though the fresh and frozen peas are considered starchy vegetables. No matter what you call it, nearly all of the pea plant is edible including the shoots, leaves, flowers, and pods.
Advertisement
Photo: istockphoto.com
Recommended Pea Varieties- Sugar Snap: sweet-tasting edible pods; eat right off the vine
- Little SnapPea Crunch: a small, crisp variety of snap pea great for containers
- Snowbird: A very early, cold-tolerant, dwarf snow pea
- Mammoth Melting Sugar: A large edible, sweet snow pea
- Lillian’s Caseload: Excellent taste, high-yield shelling pea
- Sugar Magnolia: Shelling pea with purple pods and bright green peas
- Lincoln: High-yield shelling pea, heat tolerant
- Little Marvel Garden Pea: Hardy, compact, high-yielding shelling pea
RELATED: 10 Ways to Weather-Proof Your Garden
Planting PeasPeas do best sown directly in the ground. Starting peas indoors is usually not worth the effort since peas like cool weather and are usually the first crop to go in and their roots don’t take kindly to transplanting. The most important thing when planting peas is giving them some kind of support, such as a trellis, on which to grow. A trellis might be as simple as a garden string fashioned between two stakes. Even bush varieties need some trellis support.
When to plant peas will depend on your climate. Peas don’t like temperatures above 85 degrees, so they are considered a cool-season crop. In areas with cold winters, peas can be the first crop sown in early spring, as soon as the soil is workable. For fall crops, plant up to 12 weeks before the first expected frost date.
In climates with milder winters, plant anytime from fall to early spring; however, if you live in a climate where springs turn hot (above 85 degrees) quickly, avoid planting too late. Most peas take 60 to 70 days to mature.
Photo: istockphoto.com
Where can peas grow?Choose a place in your garden with full sun and good airflow. Garden peas are climbing vegetables that require support as they grow but be mindful of planting along a fence that doesn’t allow for air circulation. Not enough circulation leads to powdery mildew.
Advertisement
Garden peas can tolerate various soils as long as there is adequate drainage. Enrich the soil with compost to create a nutrient-dense planting mix. You can maximize garden space by planting a tall, vining pea plant that will climb up a pole, and planting microgreens in its shade, not unlike companion planting with cucumbers and salad greens.
How do you plant peas?Planting peas is rewarding as most pea seedlings germinate within 1 to 2 weeks.
- Plant seeds at the base of a trellis. How high will depend on the type of pea you’ve chosen.
- Dig a narrow, shallow trench, about 1½ inches deep.
- Plant the seeds 6 to 7 inches apart in the trench unless the seed packet suggests otherwise.

- Press the seeds into the trench and cover them with 1 inch of soil.
- Gently tap the soil to firm it over the seeds.
- Water carefully to avoid flooding and dislodging the seeds.
- Keep the soil evenly moist.
- Once the pea seedlings are several inches high, you can mulch around the base of the plant to keep moisture in.
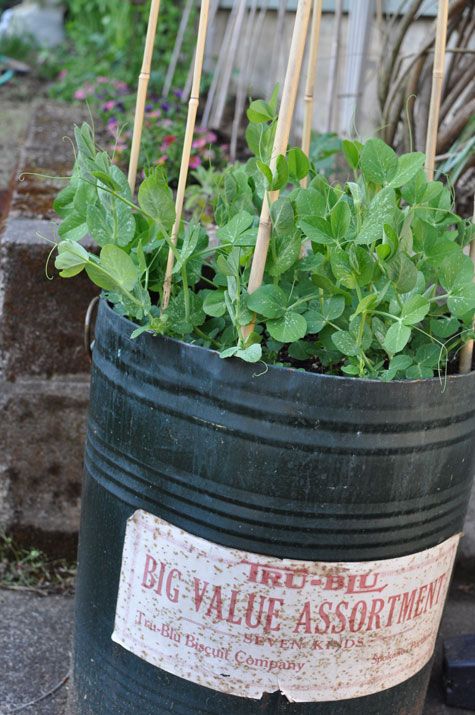
In general, peas do not put down deep roots. The plants, especially the dwarf or bush variety, do not grow very tall. For these reasons, it is possible to successfully grow them in a container. The biggest challenge is to ensure that the soil is both rich in nutrients and drains well. Some kind of trellis or support will need to be added to allow the peas to grow up and not simply vine over the sides. It’s advisable to set the trellis in place before the peas start to grow.
RELATED: 10 Tips for Turning Your Yawn of a Yard Into an Incredible, Edible Landscape
depositphotos.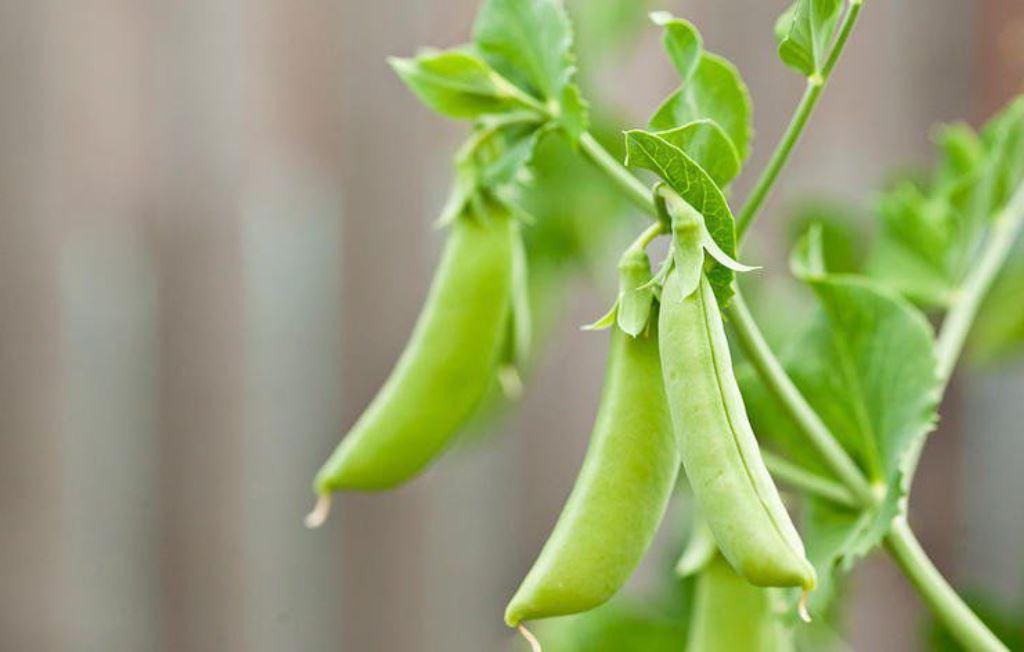 com
com
Avoid overhead watering—water peas at the base of the plant, keeping the soil evenly moist. Watering in the early morning will help prevent wilting during the day and allows plants to dry out before cooler evenings, helping to prevent powdery mildew. Be careful not to flood out delicate pea seedlings.
Advertisement
Fertilizing PeasIf peas are planted in a compost-rich planting mix, no fertilizing is required during the growing season. If the soil is lacking in nutrients, fertilize pea plants 6 weeks after germination with a water-soluble fertilizer (10-10-10) and apply directly to the soil after watering in the morning.
Some growers choose to inoculate peas with Rhizobium, a bacterium that helps fix nitrogen from the air to store in the roots, resulting in a healthier, more vigorous plant. Look for a pea inoculant at any garden center or nursery. Prior to sowing the seeds, sprinkle a small amount of the inoculant directly into the seed packet and shake it.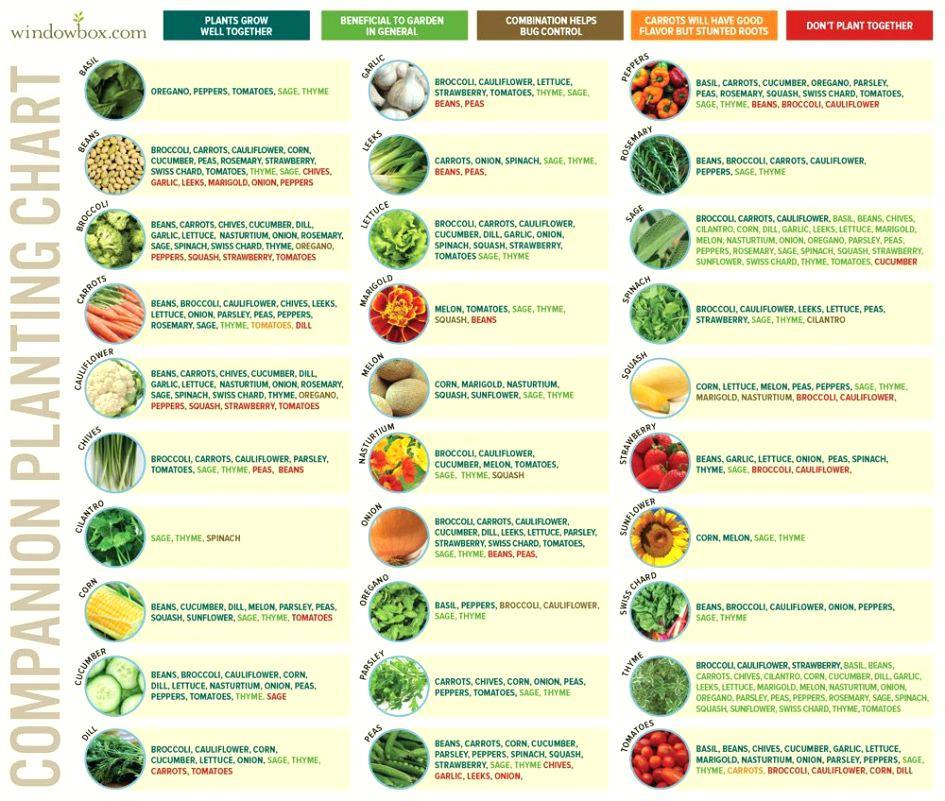 Many seed varieties will already be inoculated and will say so on the package. Peas will grow and produce without inoculation.
Nearly all parts of the pea plant, Pisum sativum, are edible and pose no risk to animals or humans. However, it should be noted that sweet pea plants, Lathyrus odoratus, which are grown for their flowers, are toxic to humans, dogs, cats, and horses. The seeds of the sweet pea are poisonous. To make matters even more confusing, there is an edible sweet pea variety called Lathyrus sativus, which can be consumed but should be avoided in large quantities.
Photo: istockphoto.com
Potential Pests and DiseasesPea seedlings are susceptible to slugs and snails. Because peas can be grown during cooler months, this is often a bigger problem in early spring or fall weather. Aphids can cause damage to plants, though not often the pods, and spread disease.
Powdery mildew is a common problem in the vegetable garden and pea plants are no exception.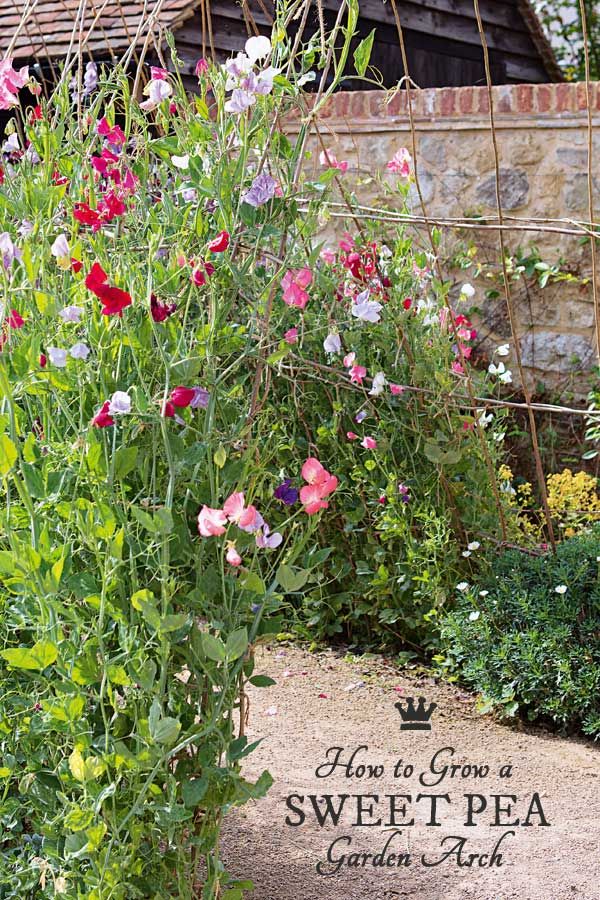 If caught early, the affected leaves can be removed to prevent spread. If it’s already started to spread, either wait until the peas mature, harvest the peas and then remove the plants, or pull out the diseased plants right away to prevent spreading. There are fungicides for powdery mildew, but it is difficult to spray the plants without coating the edible pods, and it is not generally advisable.
Advertisement
RELATED: 9 Products to Help You Corral Your Garden Veggies
Harvesting PeasKnowing how to grow peas is a great start, but understanding how to harvest and store them also is helpful. Harvesting peas of any variety requires similar steps; however, the type of pea you’ve planted will dictate the pea’s readiness for harvest as well as how you store the pea.
When is the best time to harvest peas?Peas typically mature between 60 and 70 days after planting, though the exact time to maturity depends on the variety—this will be listed on the back of your seed packet.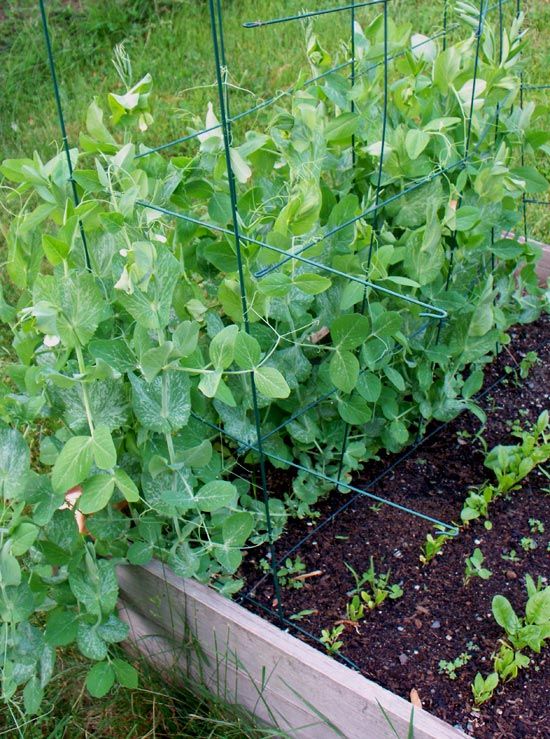 Most pea plants will begin to produce pods within 8 to 10 weeks. The pods first appear at the bottom of the plant. Harvest these right away to encourage more growth and pod production. Look for pods that are plump but not hard. If peas over-ripen, they become starchy and the shells become tough.
depositphotos.com
How do you harvest peas?Harvesting garden peas of any variety requires similar steps; however, the type of pea you’ve planted will dictate the pea’s readiness for harvest.
Snow peas are best when still flat, with just the beginning of peas forming inside. Sugar snap peas are at their sweetest when the pod looks plump and glossy, typically when the pods are 2 to 3 inches long, but the length varies depending on the exact variety. Garden peas are best when the peas are large but not fully developed. Look for pods that are full but not split or ready to burst. They will be somewhat cylindrical and still bright green.
- Look for peas that are at peak readiness.
 Peas produce a lot of pods, and it won’t take long to learn the ideal stage for harvest once you’ve picked a few.
 - Harvest peas any time of the day, but morning is best, when they are plumpest.
- All types of pea plant are delicate, so be careful when harvesting them. Try twisting the pod gently with one hand while holding the vine with the other, or use scissors or garden shears to remove the pods to avoid breaking the vine.
- Peas are best when eaten right away.
- Shell garden peas by splitting them open and gently scraping the peas inside into a bowl.
- Some snow peas and snap peas have fibrous strings at the edge of the pod that should be removed before eating. If you plan to store your peas, wait to remove this.
If you are storing garden peas, shell the peas and then immerse them in cold water to chill. Some gardeners will shell their peas directly into a bowl of chilled water. Once they are cool, remove them from the water, allow them to dry, and store them in the refrigerator in a bag or container.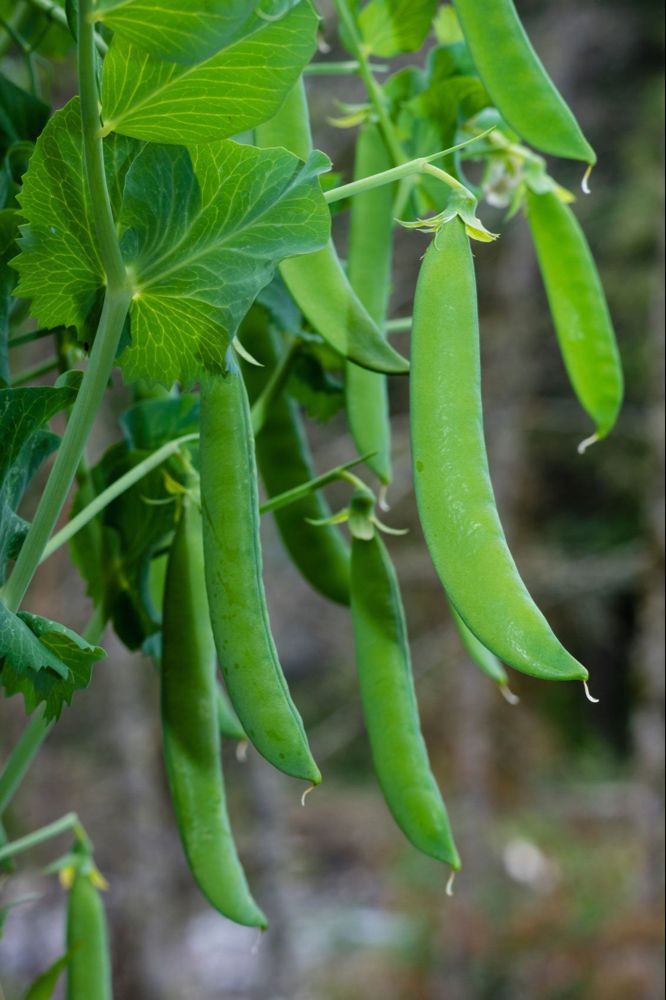 They should hold their quality for up to a week in the refrigerator.
Advertisement
You can also freeze peas following the same method, allowing them to dry completely before freezing. Don’t freeze whole garden peas; always shell them first.
Snow peas and snap peas should be cooled right after picking. Dunk them in cold water, allow them to dry, and store them in the refrigerator for up to a week. Both have fibrous strings at the edge of the pod that should be removed before eating, but leave them intact until you are ready to eat them. You can freeze snow and snap peas similarly to garden peas after cooling the pods and allowing them to dry.
If storing dried peas, particularly toward the end of harvest season, allow the pea pods to dry completely on the vine. They will start to brown and will sound like a rattle. Once the pods appear dry, pull the entire plant up and hang it to dry. Once the rest of the plant has dried out, remove the pods, shell the peas inside, and store for planting next year.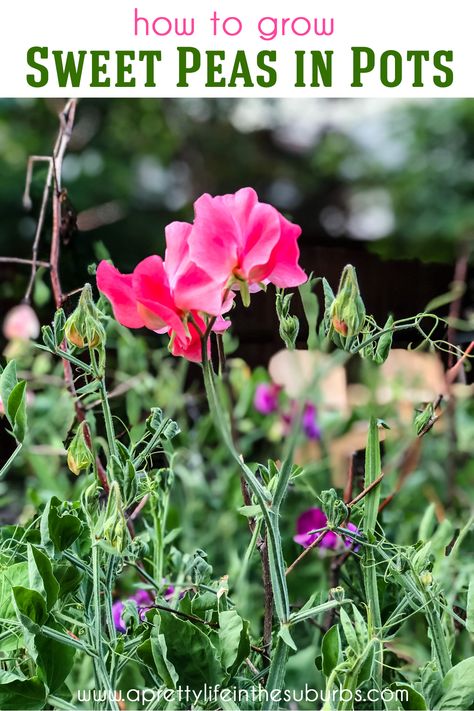
Photo: istockphoto.com
Advertisement
how to plant, grow and harvest — AgroXXI
Green peas are an absolute hit of the garden season. And here are some simple tips that will be useful to you for a good harvest!
Green peas are very easy to grow and care for.
As a rule, most summer residents are interested in pea varieties for fresh consumption. In this capacity, varieties of sugar peas are excellently recommended. Of these, the most early ripening is "Ambrosia", the plant yields a crop of technical ripeness 54-56 days after the entrances. Light green pods usually contain 8-9grains without parchment layer.
Zhegalova 112, a popular mid-season variety of sugar peas, was created at the Gribov vegetable breeding station. The term of maturation from seedlings is from 50 to 60 days. The longest fruiting period is distinguished by the early ripe leafless "Sugar Slider", and the high palatability of "Moscow Delicatessen".
What affects the yield of peas
1. Planting time is a very important point when it comes to peas. Peas germinate and develop best in cool, damp weather. nine0004
If you wait too long, the heat will cause serious damage to your pea patch. On the other hand, if you sow in cold, wet soil, your peas will never sprout. Therefore, carefully read the information on the seed bag and sow at the indicated time.
Usually planting time is indicated four to six weeks from the last frost, which in the Moscow region, for example, may fall at the end of April. But it is at this time that the weather is insidious and can change at any moment. However, peas are not afraid of short-term frosts and will even survive the fallen snow, provided that the cold snap does not drag on. nine0004
2. Peas like soil with the following characteristics: loam, pH 5.5 to 7.0, well drained and rich in humus.
Every gardener knows how to improve the amount of organic matter in the soil: add compost. But if you are in doubt about the drainage capacity of the soil in your garden, it is better to make raised beds for peas.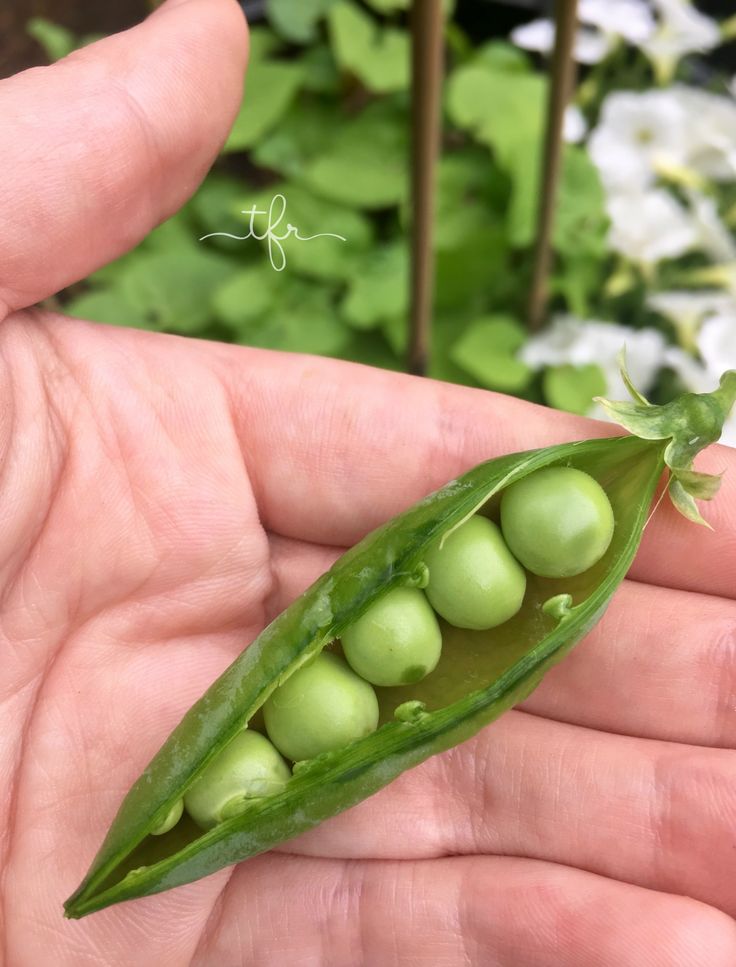
3. Plant each pea 4 cm deep and 3 cm apart. Don't plant too close to the surface as the birds will find and peck at the peas looking for food. nine0004
4. You do not need to water your peas very often when they are growing. The weather will probably take care of watering due to the time of year. After flowering, pea plants need more water. By the appearance of the plants, you will determine whether you need to add moisture or not.
5. Peas do not require much fertilizer. You can apply the application of complex fertilizers Folirus on the leaf, then do not add a large amount of nitrogen to the soil - this will lead to plant diseases.
6. It is not worth hoeing a bed of peas even if you notice weeds. The root system of pea plants is located in the top layer of soil. If you damage it with a hoe, you will lose your crop. Mulch your garden bed ahead of time to avoid weed problems. At the same time, keep moisture in the soil.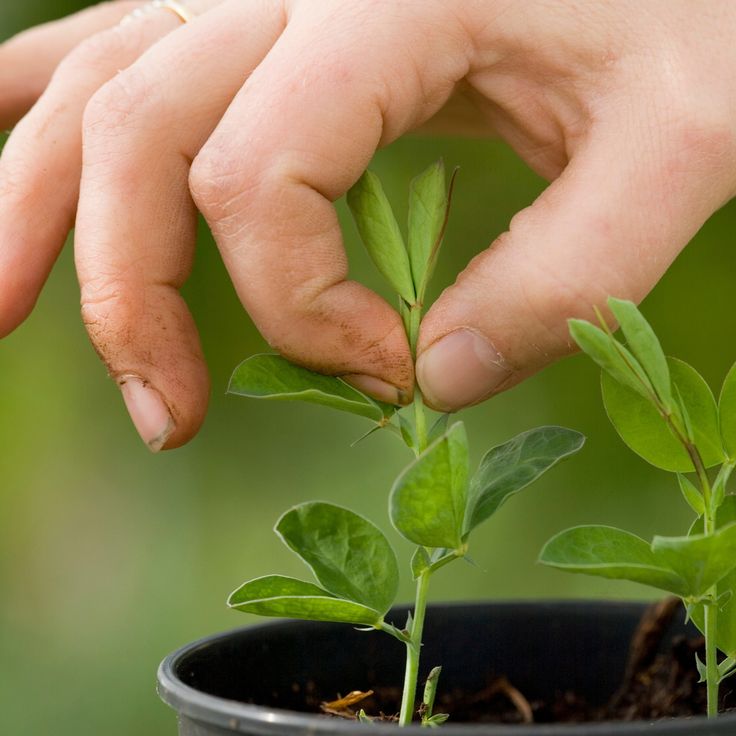
7. Almost all pea plants need support. You can build a support from any materials at hand: wooden or plastic pegs, a grid attached to posts, or a lattice will do. nine0004
General problems of peas
Every plant has its own problems, and so do peas. Here's what you need to know about pests and diseases:
1. Aphids. Aphids are a threat to many plants because these tiny but harmful insects seem to be in almost every garden, damaging plants and opening doors for diseases.
Aphids can be identified by discolored or deformed leaves with sticky residue. If you look closely, you will find the insects themselves. You can spray your plants with a strong jet of cold water to make them fall off the leaves, and then once the peas are dry after the water treatment, dust them with flour. Another option is to use insecticidal soap. nine0004
2. The bean weevil, whose adults look like beneficial entomophage ladybugs, lays its eggs in the spring on the underside of the leaves of young plants. Golden-yellow eggs must be destroyed immediately! Bean weevil larvae are more harmful and voracious than adults. They are pale yellow in color, the back is covered with white hairs with black tips. If an attack appears, then you can get rid of insects with the help of insecticidal treatments or ... rent guinea fowl from a poultry farmer. Birds will deal with bugs very quickly - for guinea fowls this is a favorite delicacy. nine0004
3. Mice. That's who likes to taste peas besides birds. Summer residents drive mice away from pea beds by sprinkling ground black pepper on the soil or using Freitenmaus, VE - a humane repellent to repel mouse-like rodents.
4. Fusarium wilt is a soil-borne fungal disease. It affects the roots of the plant, and then rises, interfering with the water supply of the crop. You can try to treat this disease with fungicides. All diseased plants must be destroyed to stop the spread of the disease. nine0004
Also check the soil.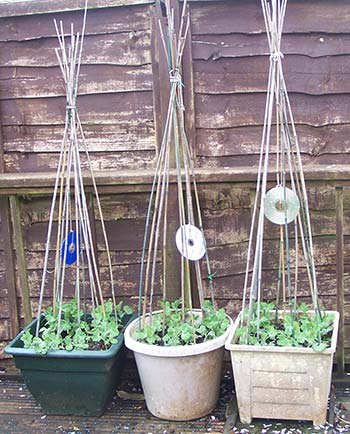 Too much nitrogen in the soil makes plants more susceptible to disease. You should immediately stop applying nitrogen fertilizers to the soil in case of Fusarium wilt and switch to liquid foliar feeding.
Companions for peas
Most vegetables have plants that grow best next to them and have antagonists.
The best companion plants for peas:
- beans
- carrots
- corn
- cucumbers
- eggplant
- lettuce
- melons
- parsnip
- potatoes
- radish
- spinach
- turnip
Plants that peas should stay away from: onions and garlic.
How to collect and store peas
Harvesting peas is elementary. The main thing is to collect peas as often as possible. The more you choose, the bigger the new pods will grow.
When harvesting, hold the plant with one hand and pinch off the pod with the other.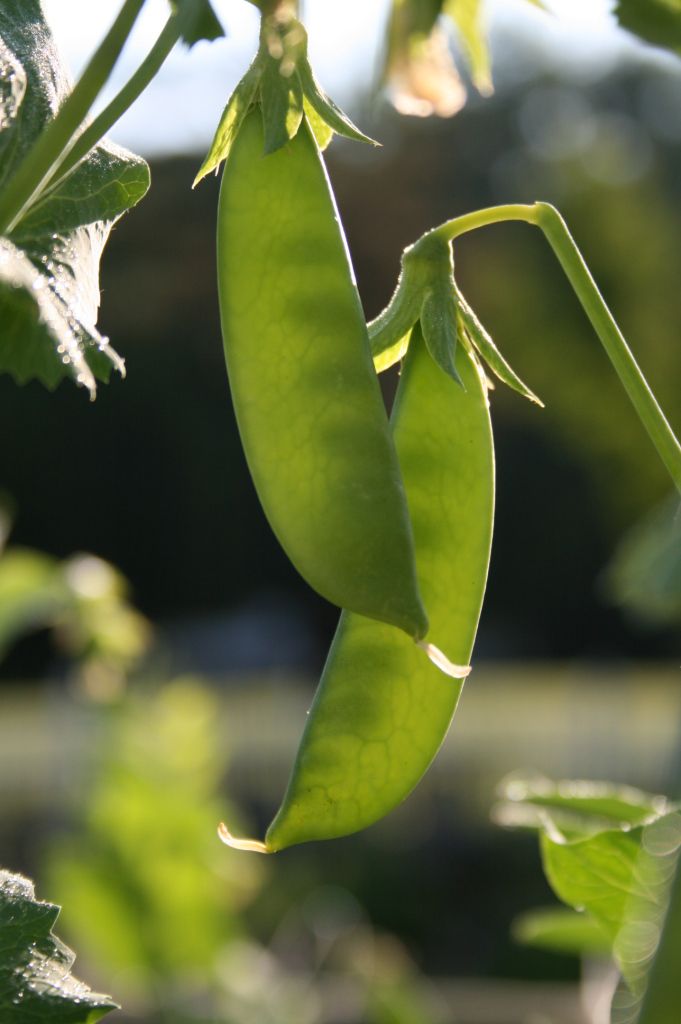 Do not rip the pods off with brute force. So you risk pulling the plant out of the ground.
Fresh peas keep their qualities in the refrigerator for a week, in the freezer, of course, much longer, but freeze with preliminary blanching. Otherwise, after two or three months, the peas will acquire a nasty, bitter taste. With aging and overripening, sugar turns into starch, peas begin to taste bitter. nine0004
Freeze peas as soon as possible after picking, as peas quickly lose moisture and become limp to retain their fresh aroma and sweetness, you will need to act quickly. And don't forget - blanching is a must if you plan to keep freezing for a long time!
Is the topic interesting? Subscribe to personal news in ZEN | Pulse.Mail.ru | VK.News | Google.News .
planting, care, harvesting and storage of crops, useful tips
Content:
- Characteristics of culture
- Planting peas in open ground
- Choosing a place
- Climate conditions
- Cowing
- Requirement Requirement
- The best neighbors of the peas
- Pre -Mess
- Sowing seeds
- Plant care
- Watering
- Tying
- Pinching tops
- Protection of seedlings from birds
- Loosening of the soil
- Features of top dressing
- The fight against pests and diseases
- Collection and storage of yield
- Useful tips
- herbaceous plant from the family, one of the most ancient cultures, one of the most ancient cultures. which was cultivated in its homeland - in Southwest Asia. The culture is in demand not only as a vegetable and fodder crop, but also as green manure - an ideal predecessor for the cultivation of other agricultural plants. How to grow peas in a personal plot so that the plant will be pleased with the harvest? Consider the basic agricultural practices. nine0004
Characteristics of the culture
Leaf blades of complex structure with a long shoot and consisting of an unpaired number of small leaves attached to the stem with petioles with tendrils. The flowers are white, rarely purple. From sowing to flowering, peas take 30-45 days.
The fruit is a bean that differs in size, shape and color depending on the variety. Each pod contains 5-10 smooth green seeds.
Planting peas in open ground
Cultivation of peas requires fertilization in the spring immediately before sowing: for 1 m 2 area, add 15 g of urea and ½ tsp of boric acid, and fertilize the soil with compost.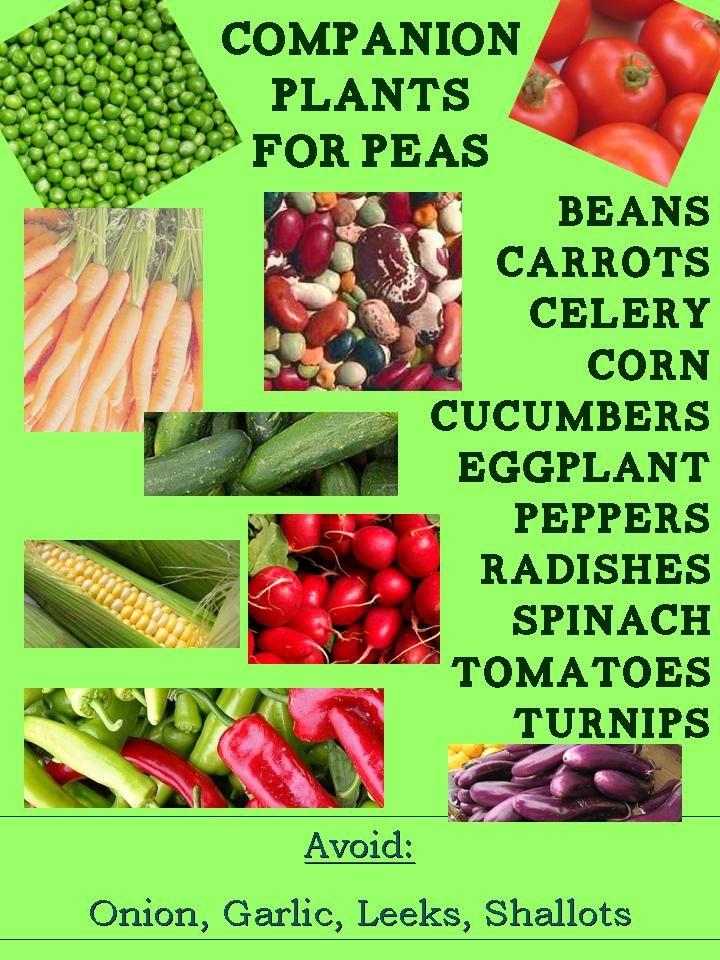
Planting peas in the open ground in spring should be carried out taking into account all the factors that favor the growth of the crop, since the harvest depends on this.
Choice of location
The crop grows well in an open light area, protected from gusty winds. Before planting, you need to take care of installing supports that will hold shoots 2–2.5 m long.
Climatic conditions
The plant is not afraid of cold, so it can be grown in almost any climate. However, the timing of sowing peas depends on the climatic conditions of the region. If even cold soil is suitable for planting peeling varieties, then warm, well-heated soil is needed for sugar varieties.
Attention! Pea seedlings are able to withstand short-term cooling, but temperatures below zero can kill plants.
Sowing time
Depending on the climatic zone, sowing time is at the end of April - the first ten days of May. Early maturing varieties can be sown from late April to early July with an interval of 10 days.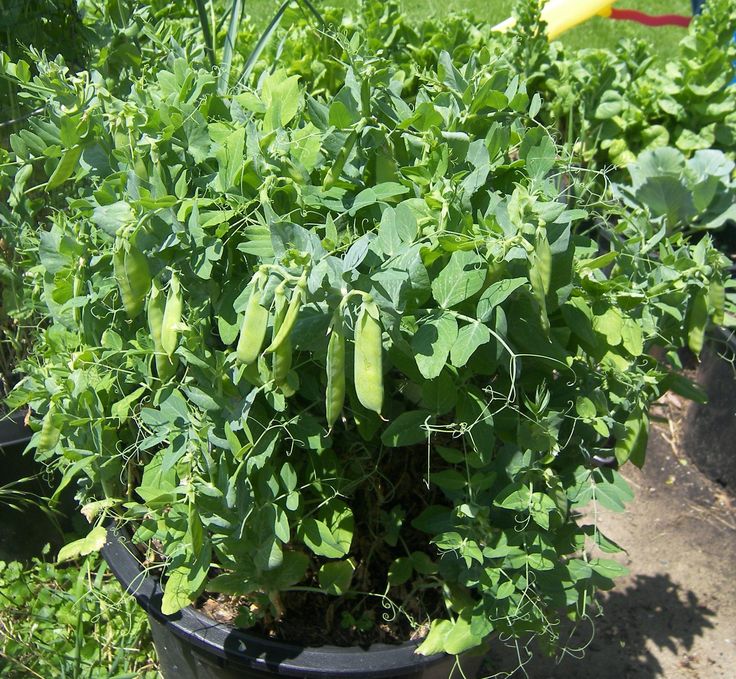 nine0004
Soil and lighting requirements
Growing peas in open ground involves planting in a well-lit area with a groundwater table of at least 1 m, so that the root system does not rot.
Sow in light, fertile soil with a pH of 6-7. Experienced summer residents advise growing peas in the near-stem circle of young seedlings. The crown of trees is not so dense as to cover the crop, and peas enrich the soil with nitrogen.
Best Pea Neighbors
You can plant peas next to some crops. The root system of the plant is so developed that it goes deep into the earth and extracts nutrients, which it gladly shares with neighbors.
Suitable crops for growing next to peas:
- corn;
- herbs;
- cucumbers;
- radish;
- carrots;
- solanaceous;
- beans.
Peas cannot be combined with alfalfa, garlic, onion and clover. nine0004
Soil preparation
Heat-loving crop grows on lightly fertilized soils.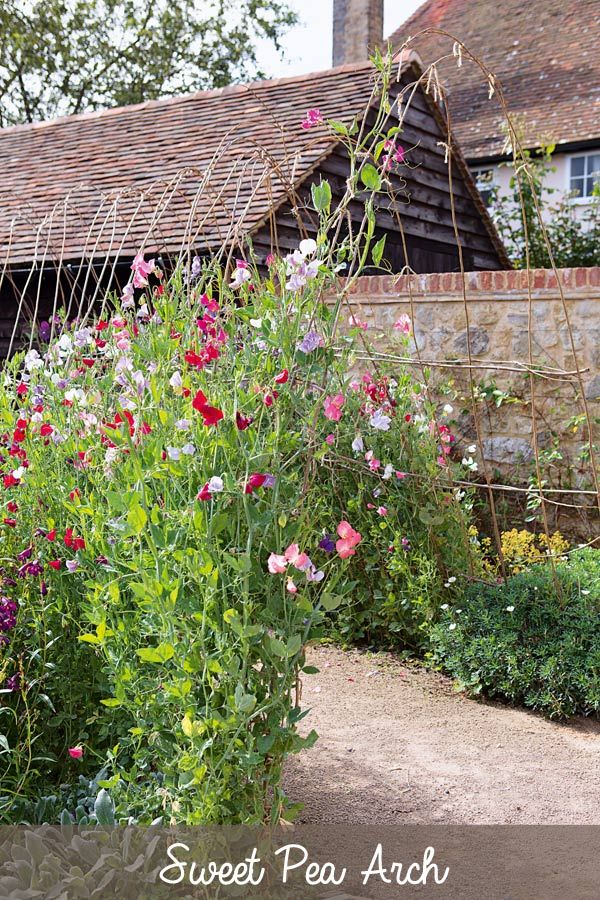 Before sowing, the soil should be fed with mineral and organic fertilizers, acidic soil should be limed, double superphosphate should be added in the amount of 20 g and potassium - 30 g.
Attention! The depth of seed placement depends on the structure of the soil. If the soil is clayey, the seed is only slightly buried in the soil, and on light soils, sowing is carried out to a depth of 1.5–2 cm.
Pre-sowing seed treatment
Once you have decided when to plant your peas outdoors, start preparing the seed. All seeds are carefully inspected and damaged are discarded. Good material is heated and disinfected. To disinfect the seeds and protect them from the effects of nodule weevil larvae, you need to put them in a warm solution of boric acid. Some gardeners, before planting peas in open ground, also treat seeds with a growth stimulator.
Sowing seeds
The most popular way to sow peas is with double-line tape. At what distance to plant peas according to this scheme? It is desirable that there be about half a meter between the tapes, and 40 cm recede from line to line for sugar varieties, and 20 cm for peeling varieties.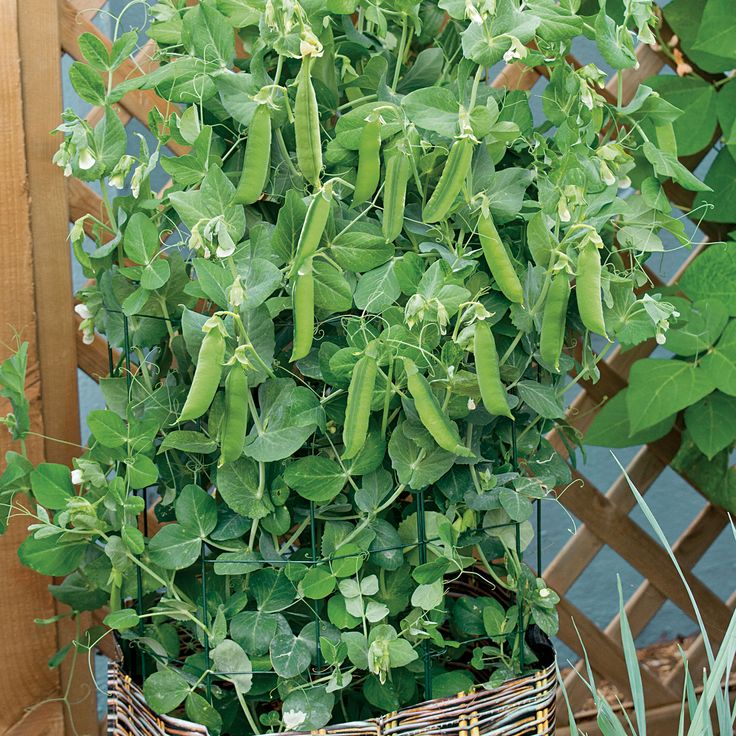 Thickening benefits the culture, as this increases its stability and protects the root system.
Features of plant care
The process of growing peas in the country includes caring for the crop throughout the entire growing season. The main activities are proper watering, tying to a support, pinching the tops, protection from birds, loosening the substrate and fertilizing. nine0004
Watering
Water well during flowering. The procedure is carried out 2 times a week. If the weather is hot - every day. After heavy rains, loosening is carried out in the aisle.
Tie
After the shoots have grown to 20 cm, tie them to a support. To do this, stakes are driven in from one and the other side of the row and the twine is pulled in such a way that the stems are tightly sandwiched between them.
Top pinching
Pinching stimulates the growth of new shoots, so the procedure is carried out as early as possible. After the side shoots grow back, you can pinch the top again.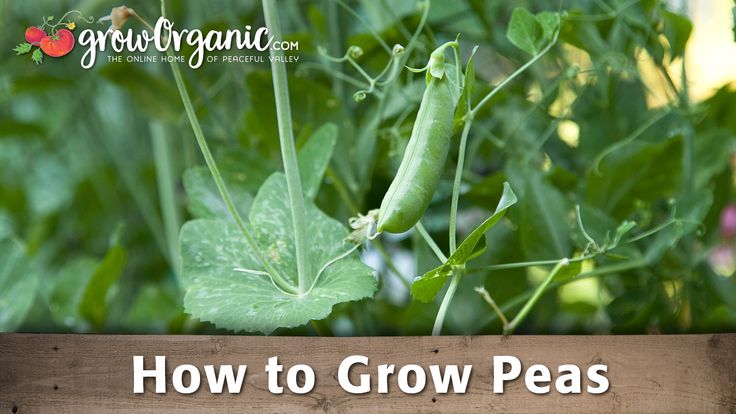 The procedure is best done in the morning. nine0004
Sprouting bird protection
When beautiful green pea shoots emerge above the soil surface, they become extremely attractive food for birds. Immediately after sowing, it is recommended to cover the bed with a thin layer of hay, otherwise the birds will eat all the seedlings.
Loosening the soil
Frequent loosening of the soil helps to provide the roots with oxygen. The plant responds with good growth and fruiting. It is especially important to loosen the soil after heavy rains, as drops strongly compact the soil. nine0004
Peculiarities of top dressing
In the spring, after preliminary watering of the soil, fertilizers are applied - per 1 m 2 plantings are bred in a bucket of water 1 tbsp. l. nitroammophoski. You can also feed peas with mullein infusion and add dry organic matter to the soil.
Fertilizers containing phosphorus and potassium are used three times per season:
- before flowering;
- while tying the pods;
- in autumn, when digging up the soil.
The soil is fertilized with nitrogen only in spring to ensure good growth of the crop. nine0004
Pest and disease control
Peas can be damaged by leaf moth, codling moth, garden and cabbage cutworms. The culture suffers from mosaic spotting and suffers from ash. To avoid infection of plantings, it is necessary to observe crop rotation and disinfect the material before sowing.
Harvest and storage
It takes 2 months from sowing to harvesting sugar peas. Harvesting is carried out every other day. The fruits at the bottom of the plant are the first to ripen. nine0004
Peas can be stored dried or frozen. Housewives also preserve the fruits and use them to make salads.
Helpful Hints
Do not allow the earthen clod to dry out, as this is fraught with drying of the shoots and discoloration of the fruit with a loss of taste.
If pests appear, do not treat with chemicals, as this will affect the quality of the crop and harm human health.