Growing cut flower
How to Plant & Grow a Cut Flower Garden, plus 5 flowers to get started
While growing vegetables is my passion, I also grow a cut flower garden because I enjoy having a non-stop supply of beautiful flowers to harvest for homegrown bouquets. And while many plants are grown for their flowers – perennials, biennials, bulbs, and even edibles – annual flowers like zinnias and sunflowers are among the most popular type of cut flowers grown by gardeners. They’re productive, easy to grow, beautiful, and can be planted in gardens or containers.
Zinnia Queeny Lime Orange is a recent introduction with large, dahlia-like flowers in a unique combination of apricot and lime green.Planning a cut flower garden
If you’re new to gardening, start with the right spot. Flowers need plenty of sun and rich, well-drained soil. Prep the site before planting by loosening the soil and digging in some compost and a slow-release flower fertilizer. Raised beds are a popular choice for gardeners who want a tidy garden that is easy to care for. No space for a cut flower garden? No worries! If you’re a casual cut flower gardener like me, you can tuck annual flowers wherever you have space – between vegetables, amongst your perennials and shrubs, or even in pots and planters.
First timers may want to stick to a few easy-to-grow annual flowers like zinnias and sunflowers. Read the descriptions in seed catalogs or on the plant tags at the nursery carefully. You’ll want to organize your cut flower garden so that the tallest plants are at the back of the bed, medium-sized ones in the middle, and short stature plants at the front. Also take note if certain cut flowers, like sweet peas or climbing nasturtiums grow on vining plants. These will need netting or a trellis to climb. Tall annuals, like certain zinnia and sunflower varieties, may need stakes or other types of support to prevent them from toppling over as they grow.
The ProCut Series Sunflowers are extremely popular among cut flower growers for their beautiful color range and long-lasting, single stem flowers that are pollenless.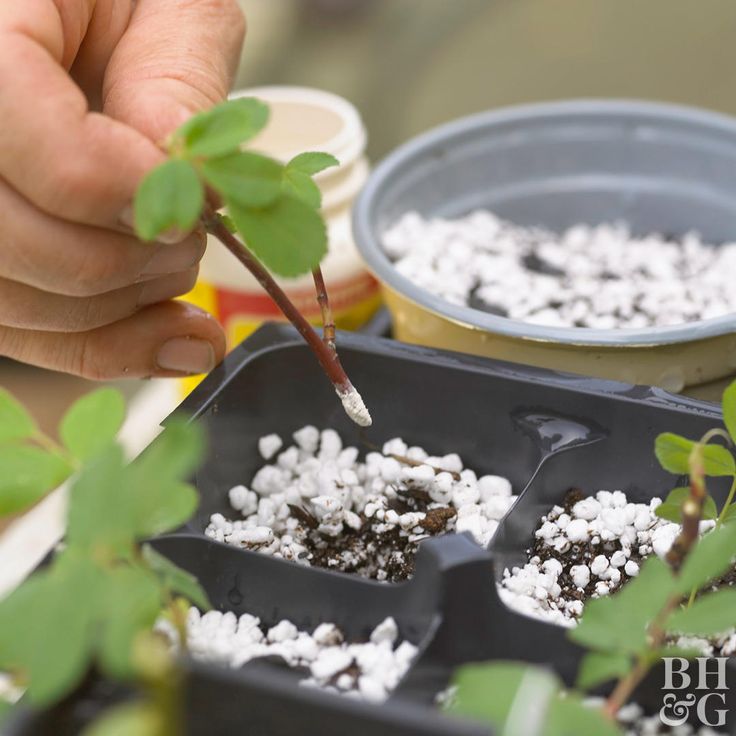 This is ProCut White Nite. (Photo Courtesy of Johnny’s Selected Seeds)
Planting a cut flower garden
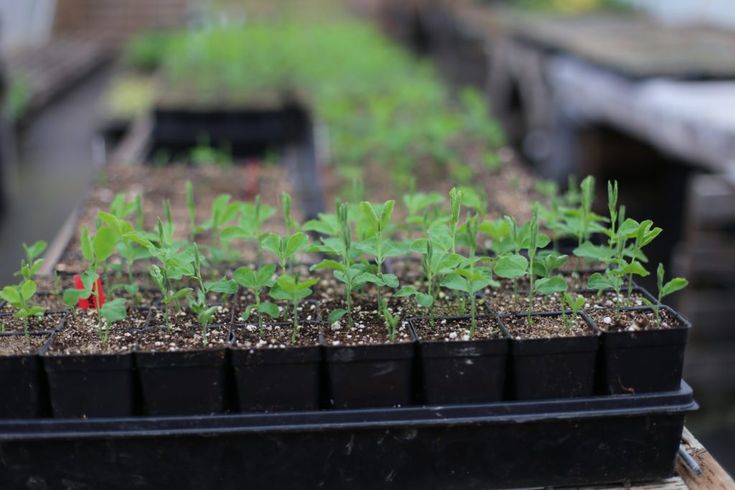
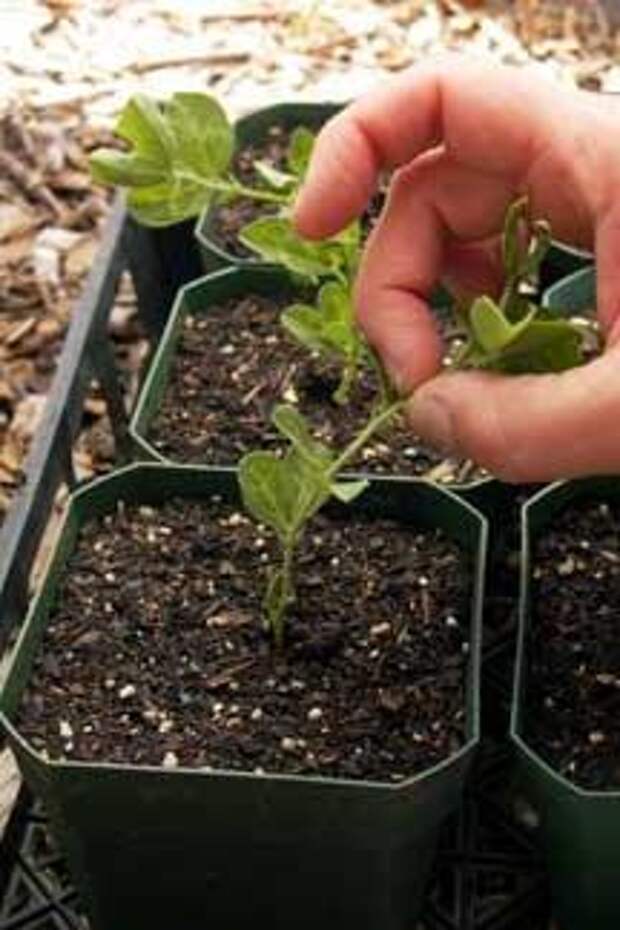
While many annual flowers are fast-growing and can be direct sown in the garden in spring, planting seedlings gives you a head-start on the season. Generally, I start my annual cut flowers inside under my grow-lights around 6 to 8 weeks before our last expected frost. Read the seed packet or catalog for variety-specific growing information.
You can also buy annual flowers like cosmos and phlox at your local nursery, but it can be hard to source the varieties that have been bred for cut flower production. And if you want high-quality cut flowers, these are the varieties to grow. They offer outstanding characteristics like long vase life, longer stems, and bigger flowers. Again, it pays to read seed catalogs carefully.
The key to a non-stop supply of beautiful blooms is succession planting. Cut flower farmers don’t plant zinnias, for instance, just once. Why? After a few weeks of intense blooming, the flower production of many annuals declines or the bloom size shrinks.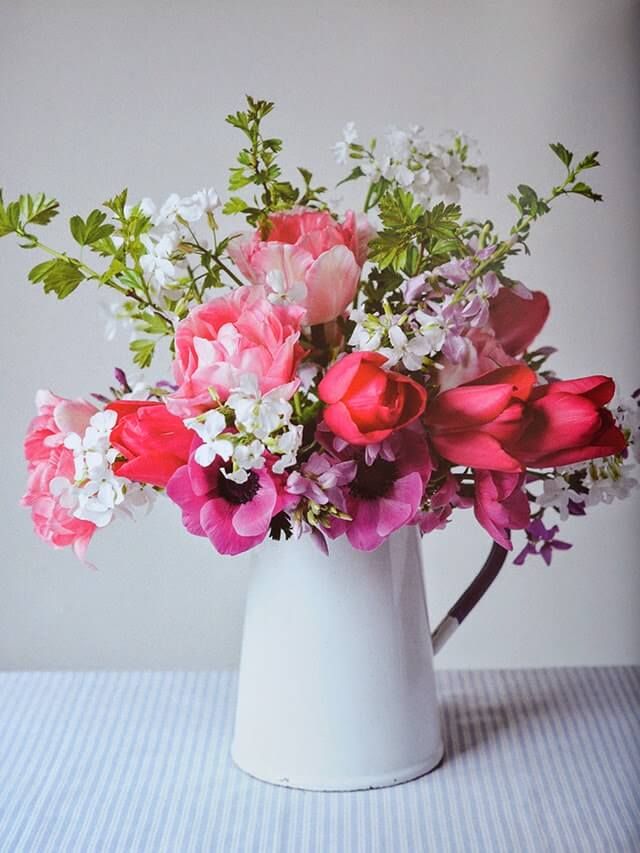 Planting fresh seedings every two to three weeks ensures a steady supply of large, florist-quality flowers. My season is short, but I still make three plantings of zinnias so that I have gorgeous, huge blooms for my bouquets.
Growing cut flowers
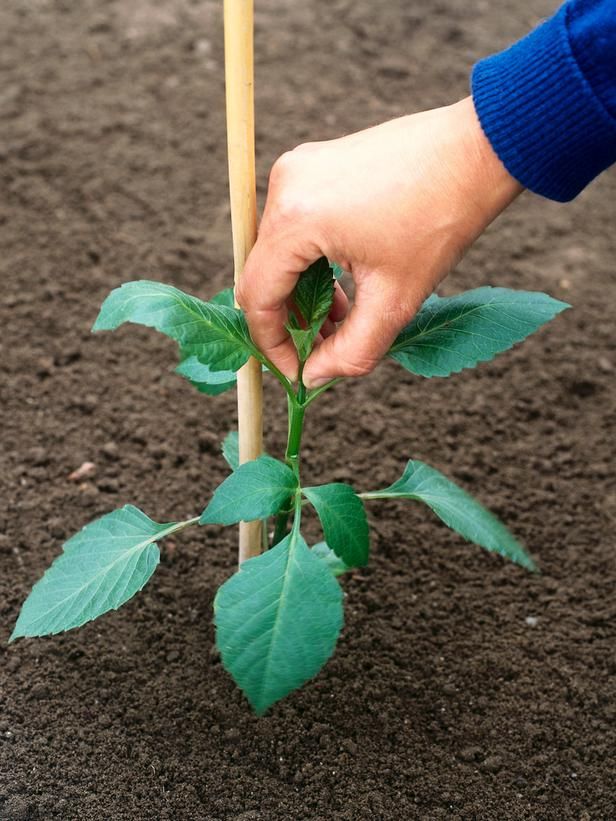
There are a few tasks to keep on top of as the growing season progresses. Many plants, like zinnias and Celosia benefit from pinching. Pinching is done to young plants to encourage them to branch and produce longer stems for bouquets. Plants are usually pinched when they are 10 to 12 inches tall. Use your fingers or a clean pair of pruners to remove the growing tip, pinching back to a healthy set of leaves.
Pay attention to watering as water-stressed plants produce fewer and smaller flowers. Hold soil moisture with a mulch like straw, shredded leaves, or black landscape fabric applied to the soil surface. Mulch also reduces weed growth and, if a black landscape fabric is used, it will warm the soil promoting growth, especially in late spring and early summer.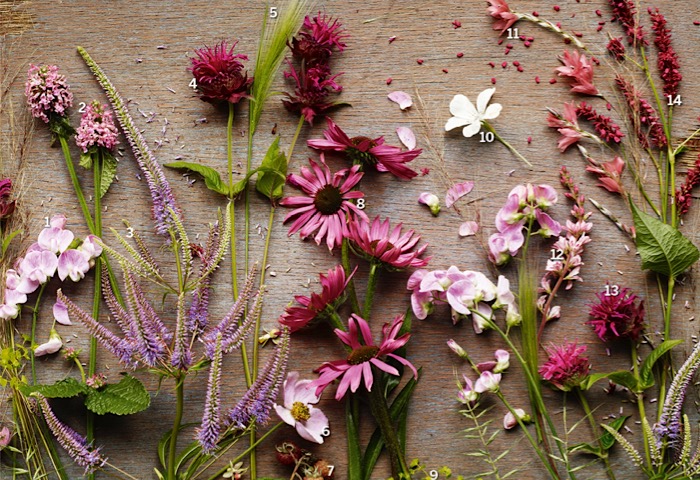
To keep flower production high, feed the plants every two to three weeks with a liquid organic flower fertilizer. Never leave dead flowers on the plants. If they are producing more flowers than you need, harvest them all as they open and share them with friends, family, neighbors, or a local nursing home. Spent blossoms that are left on the plant reduce production so be sure to pick all newly opened blooms several times a week.
Harvesting flowers at the right time of day and with the right techniques can mean the difference between an arrangement that lasts for hours or one that lasts for weeks! (Photo Courtesy of Johnny’s Selected Seeds)Picking flowers from a cut flower garden
Did you know that proper flower harvesting can extend the vase life of cut flowers? Here are a few cutting tips:
- Harvest in the morning or evening, avoiding the heat of the day.
- Harvest flowers from plants that are well irrigated and not water stressed.
- Have a clean bucket (or two if you’re harvesting a lot of flowers) ready and filled with cool water.
- Make sure your pruning shears or snips are sharp and clean.
- Cut flower stems at a slant to increase surface area and water update.
- Remove any foliage that would be under water.
- As soon as the bucket is full or you are done harvesting, bring it into a cool, shaded space to arrange your flowers.
5 Awesome annuals for your cut flower garden:
1. SunflowersSunflowers are a must in a cut flower garden. Not only are they easy to grow, their cheerful flowers come in a wide array of colors, sizes, and forms. There are two main types of sunflowers: single stem and branching. Single stem sunflowers do exactly what you think – they produce a single stem that is topped with one flower. When growing single stem varieties, like the Pro Cut series, you can plant the seeds close together (6 to 7 inches apart) to get more from your growing space, but expect smaller flowers. Those planted on a one-foot grid spacing will produce larger blooms. Single stem sunflowers last up to two weeks in water.
Branching sunflower varieties, on the other hand, yield plants that produce flowers over an extended season. The stems are generally not as strong as those of single stemmed sunflowers and they do take several weeks longer to flower. Personally, I like to plant some of each type so that I have a long harvest season and plenty of variety.
One last note about sunflowers – certain hybrids are pollenless and don’t drop pollen that can stain clothing and tablecloths. You may wish to grow these in your cut flower garden.
I love sunflowers! And to enjoy the longest season of the cheerful blooms, I plant fresh seeds every 2-3 weeks from late spring through mid-summer.2. CelosiaI am a BIG fan of the velvety, long-lasting flowers of Celosia which come in a tempting palette of colors. Some species have feathery plumes, while others have rounded, folded combs and are also known as cockscomb. All make excellent cut flowers for homegrown bouquets.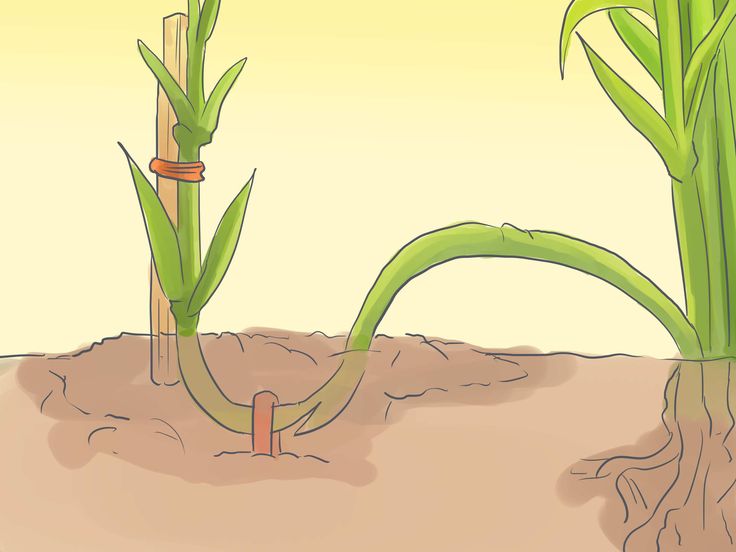
Celosia takes a bit too long to go from seed to harvest to direct seed in my zone 5 garden and therefore I grow them from seedlings. You can grow the seedlings yourself or buy them from a local nursery. If you’re after a certain variety however, I’d recommend starting your own seeds indoors about eight weeks before the spring frost date. Chief Mix is a choice blend of cockscomb-types in bold shades of dark red, fuchsia, carmine, and gold.
Celosia is a heat-lover and wants a site with plenty of sun as well as compost enriched soil. The two to four foot tall, top-heavy plants benefit from sturdy support, so after planting it’s a good idea to erect horizontal netting over the bed to encourage tall, straight stems.
Chief Mix Celosia produces large, velvety cockscomb flowers held on 36 to 40 inch tall plants. (Photo Courtesy of Johnny’s Selected Seeds)3. ZinniasIf I could only grow one type of cut flower, it would be zinnias. I grow several species and at least a dozen varieties every summer in my veggie garden. Zinnias bloom all summer long, require little fussing, and have an incredible range of flower sizes and colors. Plus, they’re super fast from seed to bloom. That said, I still prefer to start them indoors so that I don’t have to wait as long for the show to begin.
To plant a bed of zinnias for cutting, space the seedlings around 10 inches apart and erect horizontal netting a foot above the ground. As the plants grow, they will grow up through the netting and not flop over in high winds or heavy rain.
Once zinnias have been flowering for a few weeks, the bloom size begins to diminish. Succession planting fresh seedlings every few weeks extends the crop of large, high-quality blooms. Cut flower farmers often pinch their zinnia plants to encourage longer stems. Zinnias should be pinched when they’re around a foot tall. Using clean pruners, remove the top few inches and cut back to a fresh set of leaves.
Grow a rainbow in your garden with zinnias! This cottage garden favorite is one of the easiest cut flowers to grow and can be direct seeded or transplanted after the risk of frost has passed.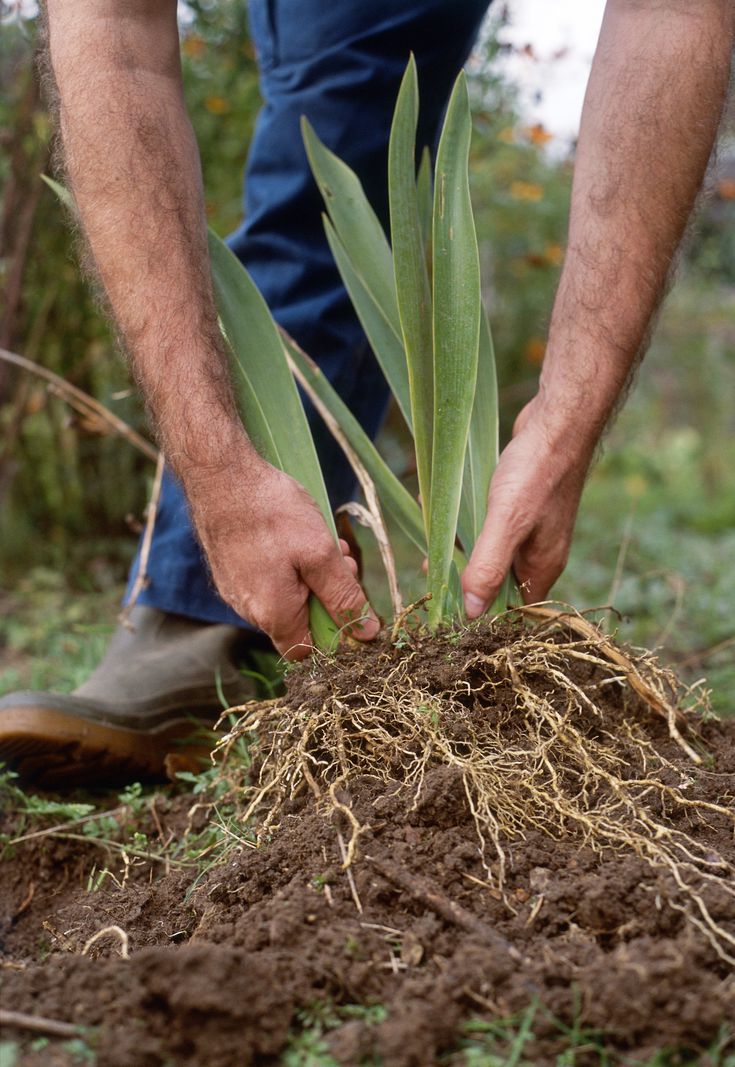 Benary’s Giant Mixed produces huge flowers up to six inches across in a variety of bright colors. (Photo Courtesy of Johnny’s Selected Seeds)
4. Rudbeckia
While there are hardy perennial Rudbeckias, there are also some, like Rudbeckia hirta, that are grown as annuals. When started indoors and planted out after the last spring frost, this hardworking cut flower begins to bloom by mid-July and continues all summer long.
Like zinnias, these are super easy to grow, but unlike zinnias, they don’t need to be pinched to produce plenty of flowers. Cherokee Sunset mix yields large four to five inch diameter flowers in rustic red, orange, bronze, yellow, and gold. Many of the flowers are doubled, but there are also single and semi-doubled flowers too – a wonderful mix of flower colors and shapes.
With annual-grown Rudbeckias like Cherokee Sunset, you’ll enjoy huge four to five inch diameter flowers in rustic shades of red, orange, gold, and chocolate. (Photo Courtesy of Johnny’s Selected Seeds)5.
 Phlox
PhloxPhlox drummondii is an under-appreciated annual that produces charming clusters of dainty flowers. Some are dwarf plants, growing just a foot tall, while others grow up to two feet and make excellent cut flowers. My must-grow varieties include Art Shades Mix or Cherry Caramel which add old fashioned charm to bouquets.
Unlike most of the annual flowers I’ve featured, phlox does not transplant well and is often direct seeded in mid-spring, or as soon as the soil can be prepared. If you do wish to start the seeds indoors, use care when transplanting the seedlings to the garden and avoid disturbing the roots.
The ridiculously beautiful flowers of Cherry Caramel phlox have made it an in-demand variety for cut flower growers. (Photo Courtesy of Johnny’s Selected Seeds)For further reading on how to grow a cut flower garden , check out the wildly popular book, Floret’s Farm Cut Flower Garden.
To learn more about growing beautiful flowers, check out the following articles:
- Container plants for full sun
- How to grow SunPatiens
- 10 plants with showy blooms
- How to grow bells of Ireland from seed
Are you going to grow a cut flower garden this year?
7 Tips for Growing a Cut Flower Garden and How to Make Beautiful Arrangements
I love growing and arranging my own bouquets from my cut flower garden. There is nothing like the satisfaction and creativity of growing something so beautiful from a tiny seed. Learn my favorite varieties to cut and my tips for making beautiful arrangements.
Are Flower Gardens Worth It?
I remember a conversation a few years ago when a friend, who grew a wide variety of cut flowers in a very small space, told me why she didn’t grow tomatoes and herbs. I was curious because, at the time, growing anything but vegetables seemed like effort wasted.
I mean, you can’t actually eat flowers, my practical side reasoned.
She lived in a city condo with a very small yard, and enjoyed flowers so much, that growing vegetables seemed like a waste of space to her.
You can buy vegetables at the store, was her logic.
It only took a few years for me to do a 180 and realize the value in “wasting” a few rows of garden space on some carefully selected cut flower varieties.
There is an old Chinese proverb that says, “If you have two loaves of bread, sell one and buy a lily.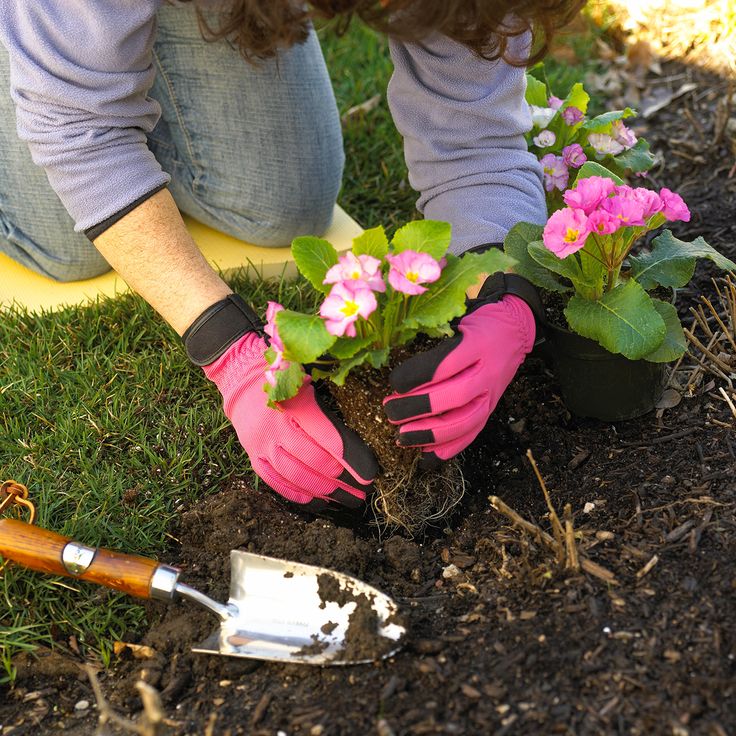 ”
”
The value of flowers was not lost on the speaker of this proverb.
Flowers are Inherently Beautiful
Flowers are inherently beautiful. The joy gained from walking past fresh flowers is valuable in and of itself. An end, not a means to an end.
They don’t feed your belly, but they do feed your soul.
They offer a special beauty that is only available for a few months out of the year.
Planting seeds, harvesting flowers, and arranging them into beautiful bouquets are all part of the enjoyment for a gardener, knowing that they were planted for no other reason than to admire their beauty.
We certainly waste time and efforts on much more frivolous pleasures.
7 Tips to Grow a Beautiful Cut Flower Garden
1. The more you cut, the more they produce.
Now this isn’t universally true for all flowers, so check the variety you are planning on planting.
For example, I grow peonies in early spring. They are beautiful, and have the loveliest smell of any flower I have ever beheld, but they are short lived. Basically, they break almost every rule for a good cut flower candidate. Once you cut them, you better get out the camera, because they last all of one to two days in a jar full of water. My plant produces about five or six large flowers, and that is all. Cutting them back doesn’t encourage them to make more.
I’m guessing all these facts add up to the reason peonies are so dang expensive to buy in the store.
I find the same to be true for daffodils and gladiolus.
In my summer cut garden, I favor cosmos and zinnias, because they produce from late June through mid to late October, or whenever the first frost happens to be.
The more you cut, the more they produce.
Just two rows of zinnias and cosmos will keep your home in bouquets for all of summer, and most of fall.
Other great varieties are dahlias, sunflowers, roses, hydrangeas and lavender.
This year I planted several white tea roses by the barn. I was instructed by the nursery to cut them back to the bottom where there are five leaves. This will yield a beautiful long stemmed rose for my arrangements and keep the plant thriving.
2. “Dead head” your flowers.
My flower friend that I talked about earlier taught me this lesson.
When you are out harvesting flowers, make sure to cut off all the dead or dying blooms that you didn’t get to yet. The plant is wasting extra nutrients and water on a bloom that is already near the end of its life cycle, so relieve the plant of this burden by snipping off all the dead heads.
This will encourage the plant to focus its energy on creating and opening new blooms, instead of maintaining the old.
3. Plant flowers that are especially hardy to drought and weeds.
For me, this comes down to four exceptional varieties: cosmos, zinnias, dahlias, and sunflowers. (This may vary, depending on the zone you are in.)
I have tried growing plenty of other types of flowers, but none have ever done as well as these four.
In fact, they are so easy to grow that I always get ‘volunteer’ plants all over my garden from flowers that dropped seeds the fall before.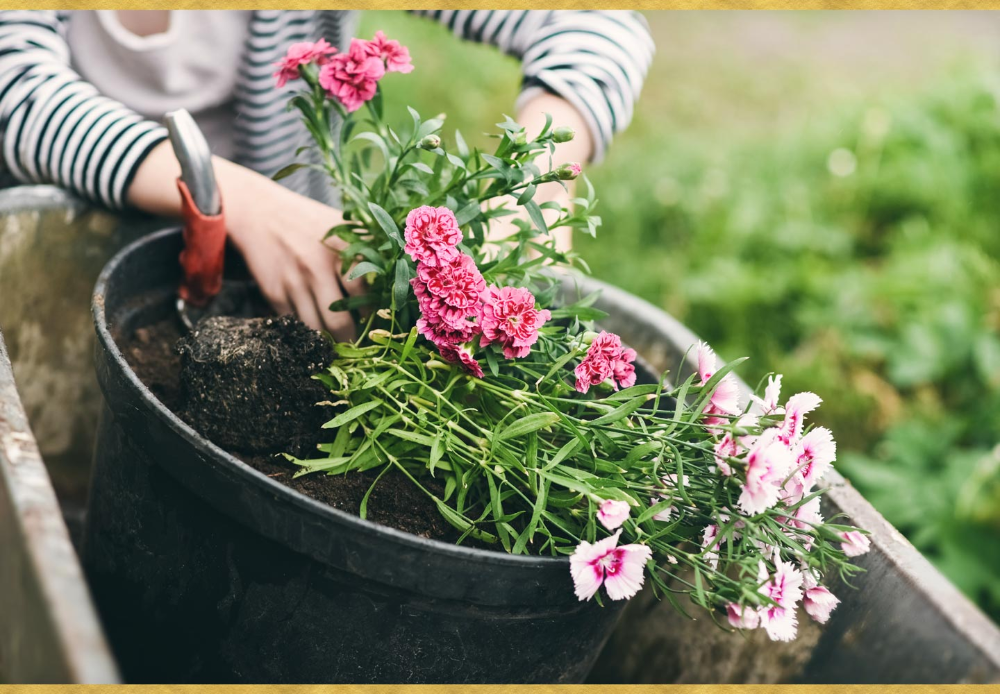
I have zinnias growing in my driveway.
They aren’t known to re-seed themselves, per se, but I have it happen in random spots around my garden and home every single year.
If you are a lazy gardener, like myself, you will really only need to weed when the seedlings are small and first coming up. I usually neglect my weeding duties from June on, and my flower crop is none the worse for it.
I enjoy cut flowers all summer long. More than I can even use.
Check your zone to find out which flowers grow best in your region. Some are more suited to heat and humidity while some favor cooler environments and shade.
I live in Missouri, so summers are hot, humid, and usually pretty dry.
It is necessary to keep the soil moist while the seeds are germinating, but after that they can get by with very little water.
Bear in mind, I did not water the volunteer zinnias growing in my driveway, yet the seeds managed to sprout anyway, so they could probably handle that as well. But as a general rule of thumb, seeds need to have moisture to germinate.
4. Use natural weed repellent
I love this handy guide for using essential oils to ward off garden pests.
Zinnias are especially prone to beetles that eat little holes in the blooms and make the leaves look like lace. I have actually encountered this issue in my garden this year.
Essential oils like cedarwood, lemongrass, eucalyptus, thyme and peppermint mixed with a little water in a spray bottle can help keep pests away.
According to the doTERRA blog, “Vinegar makes an effective herbicide and weed killer.”
For weed control, you can put mulch or grass clippings between the rows, and around established plants.
If you are brand new to gardening, make sure to do a google image search to find out what the seedlings look like for the seeds you are planting. This way you will be able to differentiate the weeds from the tiny seedlings.
5. Long stem varieties that last up to a week after being cut are ideal.

Geraniums, the darling of hanging baskets everywhere, are beautiful, but their tiny stems make them terrible candidates for cut flowers.
You want something that can stand tall in a vase or mason jar.
Light blooms with strong stems do well for extended periods of time, after they are cut.
Like I mentioned before, peonies are my favorite flowers of all time, but you better take them in while you can.
The gorgeous top heavy blooms start to wither and fade away just a few days after being cut.
6. Choose plants that produce for several months.
For minimal effort and maximum blooms, select flower varieties that keep on producing like a tomato plant does, allllllll summer looooong.
This year I planted hydrangeas all over our homestead to enjoy the beautiful blooms year after year. You gotta love perennials!
My beloved cosmos continue on so long, that by late summer/early fall, they stand over seven feet tall. They start producing flowers when they are less than two feet tall. They just keep going and going and going…
The only thing that can get them down, from my experience, is a frost.
And that, my friends, in the life of a cut flower gardener, is a sad sad day. That’s when you bring in the pumpkins!
7. Choose blooms with colors and shapes that coordinate, and match your home decor style.
Be proactive in planting your cut flower garden by thinking ahead several weeks to the end result.
I made the mistake the first couple of years of just throwing seeds out there, without thinking about the bouquets and arrangements I would create with them for the next several months.
Maybe I wasn’t really confident anything would actually come up at all.
But when they did, I had oranges, reds, yellows and speckles, and all kinds of crazy mismatched blooms on my hands.
I planted every color zinnia on the market, and ended up with arrangements that looked tacky, and too vibrant for my home decor style.
Now, I choose flowers with softer shades, like white, pink and green.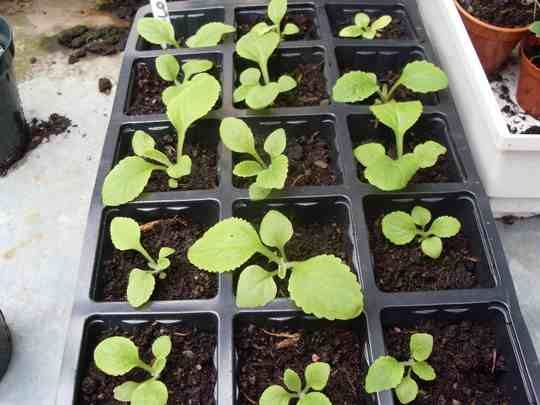
Tips for Making Beautiful Arrangements
1. Include some buds.
In my older mindset, you know the one where I thought growing flowers was a pointless endeavor, I thought cutting buds before they were completely open was wasteful.
But, remember the philosophy I later developed… Beauty is not wasteful.
And, by golly, I think unopened blooms look spectacular in a flower arrangement.
I always include several, and I really think cutting them back like that ultimately encourages the plant to produce more.
2. Add herbs.
I like a little added greenery in my flower arrangements.
Mint and basil are both perfect additions to your cut flower garden for this application.
3. Use unconventional vessels, instead of a vase.
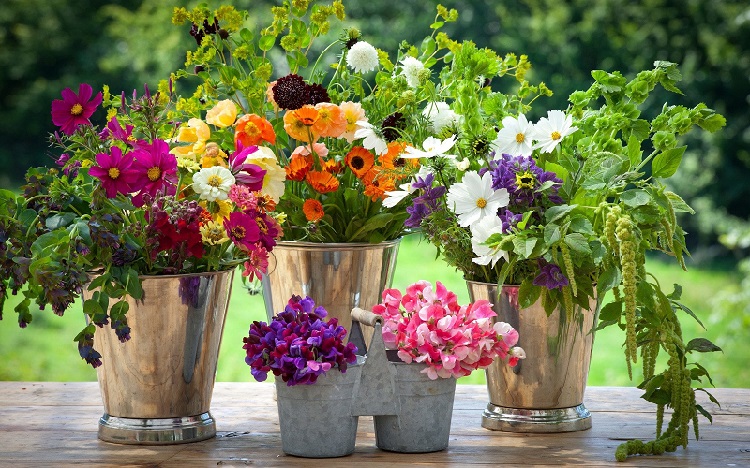
Think ironstone pitchers, mason jars, galvanized buckets, and enamelware.
Whatever you are drawn to, and is gracing your shelves already, put flowers in that.
Me, I have ironstone everywhere, so that is typically the route I take.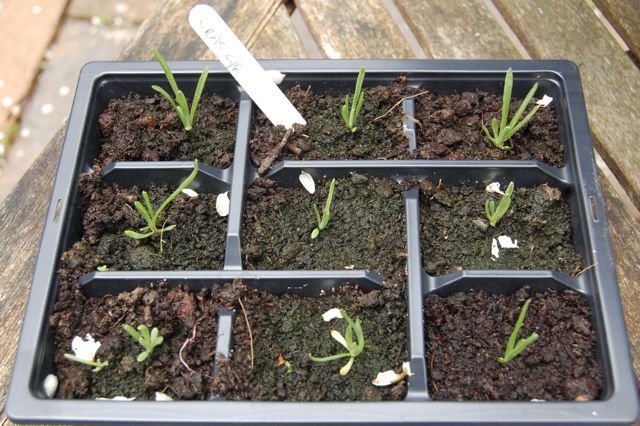
I normally order all my seeds from Baker Creek Heirloom Seeds online.
Pink and White Cosmos
Polar Bear Zinnias
Sunflowers
Basil
Sunflowers are very hardy cut flowers, and are super easy to grow.
I hope you all are encouraged to start growing your own cut flower gardens!
It truly is so simple and worth the effort to have fresh blooms in your home, without spending a dime, all summer long.
How to grow a chrysanthemum from a bouquet (cut flower): cuttings, rooting
Contents
- Preparation of cuttings
- Best cut varieties
- Freshness
- Stem selection
- Timing
- Sprouting
- Optimum substrate
- Tank selection
- Heading technology
- Care during rooting
- Top dressing
- Watering
- Transplanting outdoors
Chrysanthemums are in demand in bouquets due to their wide color variety, brightness and opulence.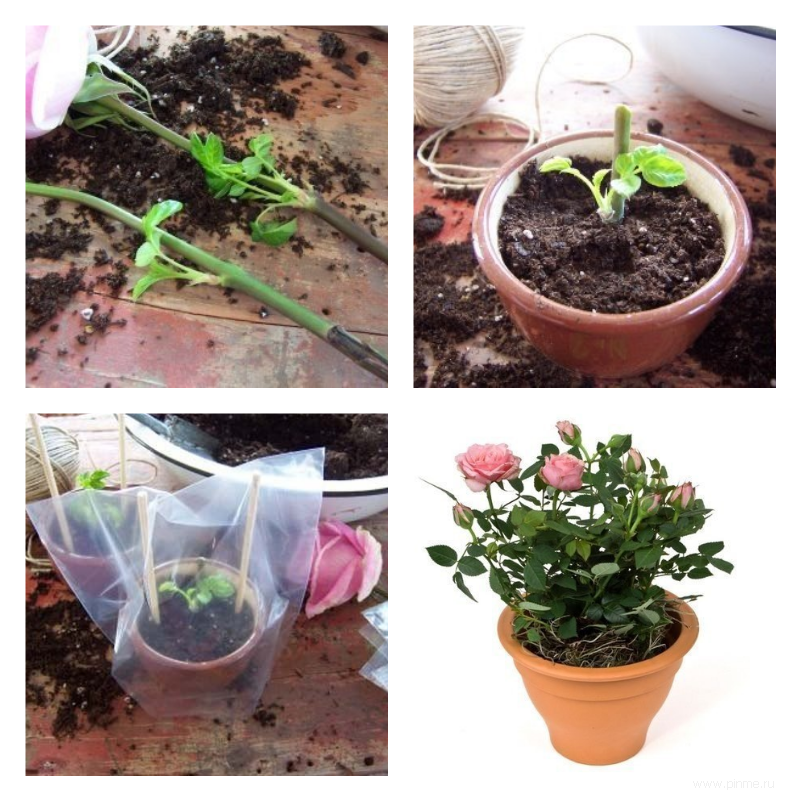 Another advantage of the plant is the possibility of growing at home or in the garden. Therefore, if you were presented with a gorgeous bouquet of chrysanthemums, and he conquered you, you can try to get this beauty on an ongoing basis. To do this, you should get acquainted with the intricacies of technology, which allows you to grow chrysanthemums from a bouquet.
Preparation of cuttings
Initially, you need to decide on the problem of the possibility of growing a chrysanthemum from a bouquet using a cutting. The answer to this question is unequivocal. You can get a homemade chrysanthemum from a bouquet. But for this you need to correctly choose the stalk and observe a number of other conditions.
A cutting is a special part of a plant used for vegetative propagation. For cuttings, shoots (stem with leaves and buds), stems, leaves or roots can be used.
Due to placement in a special nutrient substrate, the cutting develops a root system, and subsequently a full-fledged plant is formed.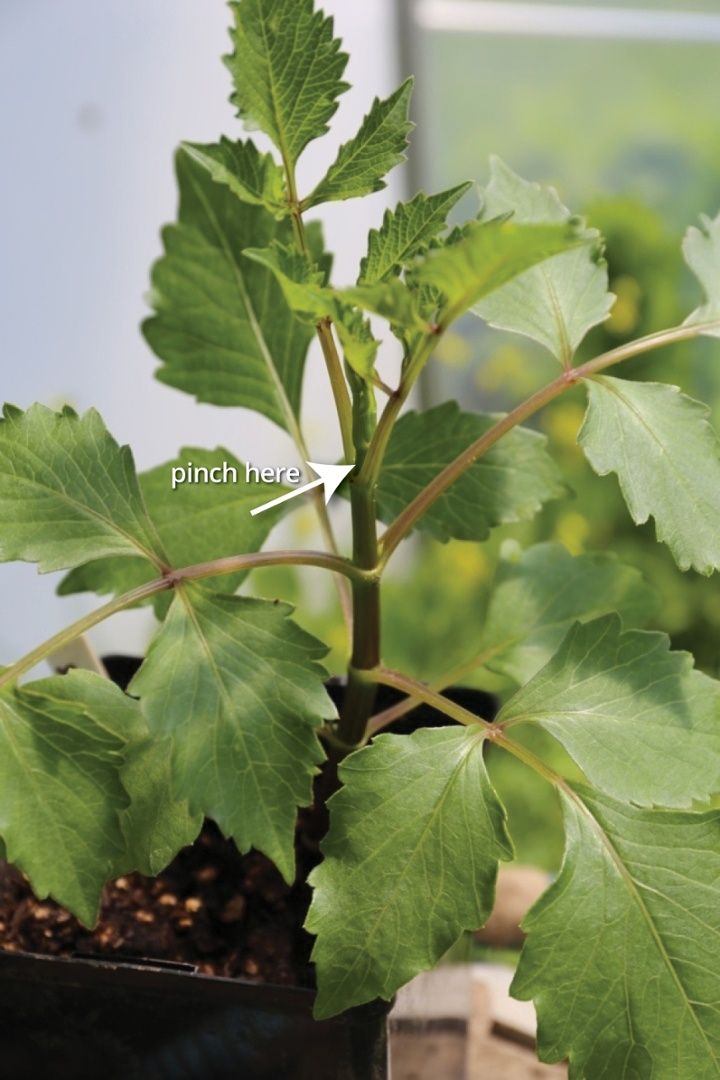 Cuttings are one of the most common and effective ways to propagate flowering plants. Chrysanthemum is no exception.
Best cut varieties
Only domestic varieties are suitable for growing the plant in question from cuttings. Flowers from abroad are treated with special chemicals that prevent wilting. A side effect of such means is to prevent the germination of roots on the handle. This circumstance makes it impossible to carry out the rooting procedure.
The varieties of small-flowered Korean chrysanthemum take root best of all from cuttings. They are perfectly adapted for growing in the temperate latitudes of Eurasia. It is more difficult to propagate large-flowered Indian varieties from a bouquet.
Freshness
It is not necessary to use the flowers from the bouquet to pick up the cutting immediately, you can admire the beauty for a while. Unlike roses, which need to be rooted immediately, nothing bad will happen to chrysanthemums from a short downtime. They will retain the ability to take root in the ground.
As already mentioned above, the advantage of chrysanthemum is simple reproduction. Almost any shoots and stems are able to give roots. But there are some requirements for the selection of cuttings. Their implementation will significantly increase the likelihood of successful cultivation.
Watch this video on YouTube
Stem selection
Not suitable for rooting:
- too young shoots that have not gained strength - they will not have enough resources for germination;
- old flowers with lignified shoots - in the process of growth, their roots and basal sprouts will rot.
Requirements for a flower when choosing from a bouquet:
- Average age.
- Semi-woody stem of medium thickness. A thick, coarsened stem with a large number of internodes on the shoots will not work.
- Lateral shoots with leaves of bright, saturated green color should depart from the stem.
 The number of leaves on the shoot - 4-6 pcs.
 - The most productive are the lateral shoots, which are located on the main stem below the shoots with flowers.
- On the stem, leaves and shoots there should be no signs of wilting - spots of yellow or other color.
Shoots are carefully cut off from the selected flower. The cut should be carried out so that at the end of the shoot there is a “heel” (part of the main stem). Selected cuttings leave 3-6 top leaves. The rest of the leaves are removed.
The remaining leaves are shortened by one third of the original length. Such a measure will slow down the growth of leaves and stimulate the formation of roots. The top of the shoot is pinched to ensure branching during future germination.
Timing
The most favorable period for the rooting procedure is the middle or end of winter. Planting a cutting from a cut flower in winter will allow you to admire the accustomed analogue on the windowsill or in the garden by spring.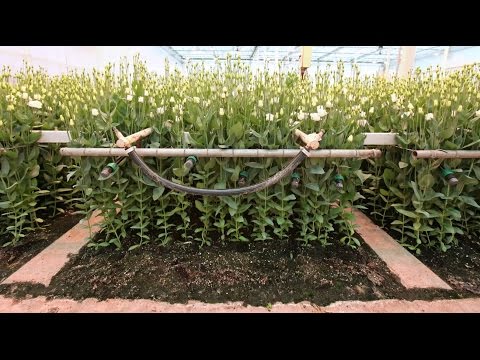
It is possible to prepare cuttings from a bouquet of chrysanthemums at any other time of the year. In this case, you just have to wait, because planting and rooting are recommended only in the spring.
Watch this video on YouTube
Sprouting
After selection, the main task of preparing for planting is the appearance of small roots on the stem of the shoot. To do this, the shoot from the cut flower must be kept in water.
Procedure for preparing cuttings for planting:
- Take a small glass or other convenient container.
- Pour clean, filtered or boiled water.
- Dissolve an activated charcoal tablet in water. It will provide protection against the development of pathogens and bacteria in the liquid.
- The shoot is placed for three hours in a special agent that stimulates root formation based on indolylbutyric or beta-indoleacetic acid.
- After soaking in the stimulator, place the cutting in a glass of water.
- The sprout is kept until small roots appear on the stem. They should develop on the fifth day.
Optimum substrate
An important condition for successful rooting is the competent selection of soil that is optimal for the plant. Chrysanthemums love soils with neutral or low acidity (pH).
In a soil with a high acidity index, the plant in question will not survive. To lower the pH in the soil, it is enough to add wood ash.
The plant will need a lot of nutrients to grow. This factor must be taken into account when preparing the land.
Substrate composition for planting chrysanthemums:
- humus;
- compost;
- peat;
- nitrogen-phosphorus-potassium fertilizer;
- light and loose flower soil.
Perlite (small pebbles of volcanic origin) or vermiculite (a layered mineral) is added to the soil to improve its moisture and air permeability properties. These substances will increase the looseness of the earth.
Tank selection
A feature of chrysanthemum is that the plant has a superficial root system. The roots do not grow in depth, but in breadth. This aspect must be taken into account when choosing dishes for disembarkation.
The container should be shallow but spacious enough. The minimum diameter is 30 cm. Among the materials of dishes, ceramics can be used, but plastic is recommended. Today there is no problem with a variety of special plastic containers for seedlings and flowers. Finding the optimal capacity is not difficult.
Heading technology
As soon as the roots in the water have sprouted up to 50-100 mm, the optimal moment for planting in the ground comes. It is impossible to overexpose the shoot in liquid, because such a situation will lead to rotting of the roots and death of the shoot.
Watch this video on YouTube
Step-by-step instructions for planting cuttings in the soil:
- A layer of drainage is placed on the bottom of the prepared container.
- A soil substrate of shallow depth is placed over the drainage layer.
- The stalk is carefully placed on the soil.
- The stem is deepened by 40-50 mm. It cannot be buried deep.
- When applying, the soil is periodically compacted, but not much.
- After planting is completed, the soil is abundantly moistened with water.
- Sprout in a container is covered with a plastic bag to create favorable conditions with a comfortable temperature and humidity. The optimum temperature during the rooting period is 18-20 ° C. At lower temperatures, the development of the sprout will slow down significantly. An increase in temperature will lead to a moisture deficit with a subsequent threat of plant death. Abundant absorption of liquid will require frequent watering, and this will lead to root rot. Instead of a plastic bag, you can use a piece of a transparent plastic bottle or any other similar material at hand.
- Place the cutting in a warm and bright place.
 You can not put a container with chrysanthemum on the sunny side. The northern direction is also not recommended. The east or west side of the house will be optimal. The plant should be under the film for two weeks.
Care during rooting
Planting is only the first stage of growing a chrysanthemum from a cut flower in a bouquet. In order for the plant to please the owners with beautiful and lush flowers in the future, it is necessary to create favorable conditions for constant growth and development.
Top dressing
For the growth and development of the cutting, a large amount of useful substances is required. At first, the plant takes everything it needs from the prepared planting substrate. But later the soil must be saturated. The first feeding of chrysanthemums is recommended after the formation of new young leaves.
The purpose of the first dressing is to increase the root mass. In the first feeding, nitrogen-containing fertilizers are used. But with their addition, you should be more careful, because if a lot of humus or peat was added to the substrate during planting, an excess of nitrogen will lead to negative consequences. In this case, it is better to refuse top dressing.
Watch this video on YouTube
The second feeding is carried out in another fifteen days. This time you can use any mineral flower fertilizers. To feed a young plant, it is recommended to use solutions with a low concentration of fertilizer so as not to burn the root system.
Watering
Watering frequency depends on soil conditions. It is necessary to periodically (once a day) visually check the condition of the soil. If the top layer is dry, it's time to water. Frequent moisture will not contribute to the development of the plant, so you should not be zealous in this matter.
Transplanting outdoors
Full rooting of chrysanthemum occurs 30 days after planting.
After this period, the young plant begins to grow normally, without requiring excessive care and attention.
Chrysanthemum is suitable for growing not only in pots at home, but also in open ground. The brightness of the colors and the duration of flowering, combined with the ease of propagation, makes the plant very popular with flower growers and gardeners.
You need to plant a flower in a site with favorable conditions. The soil should be loose and light with a low or neutral acidity index. The territory is dry and bright. You can not choose places in the lowlands where moisture collects.
Before planting, the chrysanthemum plot is dug up. The soil is fertilized:
- 5 kg of humus or peat;
- 0.5 kg wood ash;
- 0.07 kg nitrophoska.
Planting chrysanthemums in open ground is done at your discretion: in spring or autumn. The optimal period for the beginning of the active growing season is the period from mid-April to mid-May.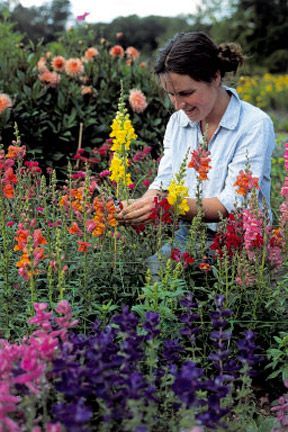 The key condition for landing is warm soil and air. A weak plant can die if it gets into adverse temperature conditions.
Rooted in early spring and mature shoots can be planted outdoors in early autumn. After landing, it is important to prepare the young chrysanthemum for wintering - to cover. As a covering material, spruce branches, dry foliage or straw are used.
Watch this video on YouTube
The deadline for the procedure is mid-September. If planting in open ground is made later, the plant will not have time to adapt and grow stronger. As a result, the chrysanthemum will freeze, regardless of how carefully the covering material is laid.
Before planting in the ground, the young plant is hardened off. The procedure is carried out 15 days before the planned day of disembarkation.
When planting in the autumn, the sprout is taken out into the fresh air, daily increasing the time by thirty minutes until the time spent outside reaches ten hours a day.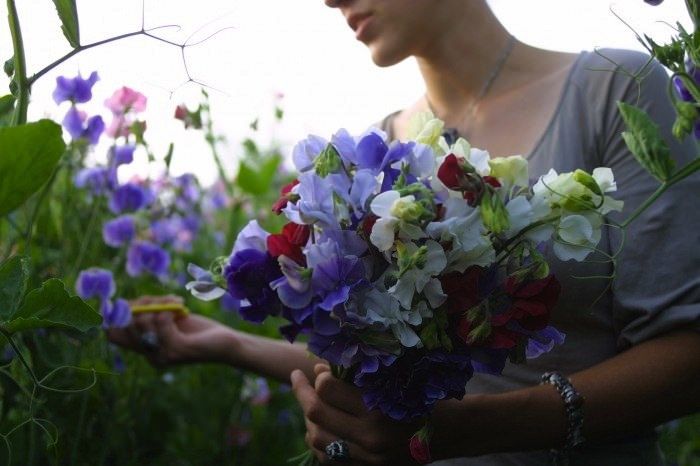 When planting in the spring, it is worth limiting the removal of the plant to a glazed loggia or veranda with active ventilation.
Procedure for planting chrysanthemums in open ground:
- Make small holes in the soil. Diameter - 15-20 cm, depth up to 15 cm.
- Drainage made of broken bricks, granite chips or small pebbles is laid at the bottom of the recess. Drainage layer - 3-5 cm.
- The distance between bushes must be at least 25 cm.
- Transplantation from the container is carried out by the method of transshipment with a clod of soil to prevent damage to the root system.
- The plant is placed in the recess. The soil is lightly rammed.
- Produce abundant watering.
- To preserve moisture, the area around the plant is mulched with hay or dry leaves.
- A stick is stuck into the ground next to the bush. The plant is carefully tied to a peg to give stability and protect from strong winds.
The first two weeks after planting, the young chrysanthemum is shaded to protect the leaves from direct sunlight.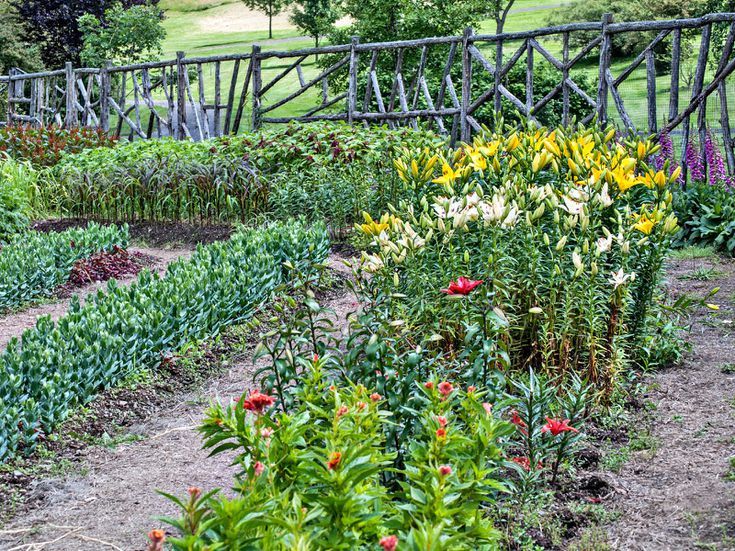 Within a month, the plant adapts. It is actively monitored, providing the optimal moisture regime of the soil with regular watering.
Water should be clean and warm. Don't bother with watering. The soil around the flower is periodically mulched. After the adaptation period, it is recommended to carry out the first feeding.
how to root in order to give roots, what to do
Contents:
- Growing a rose from a cut flower
- Advantages of growing roses from a bouquet
- Rules for choosing starting material
- When is it better to grow a flower from a cutting
- Is it possible to grow roses from the presented roses in winter
- Step -by -step instructions for rooting a rose from a cut flower
- REFRIDING Material in water
- Planting rooted rose in the soil 9000,
- Plants 9000,
- Use potatoes
- Use of use .
- Feeding considerations
- What can be sprayed for better growth
- Planting outdoors
Gifted roses will delight with their beauty for a short time.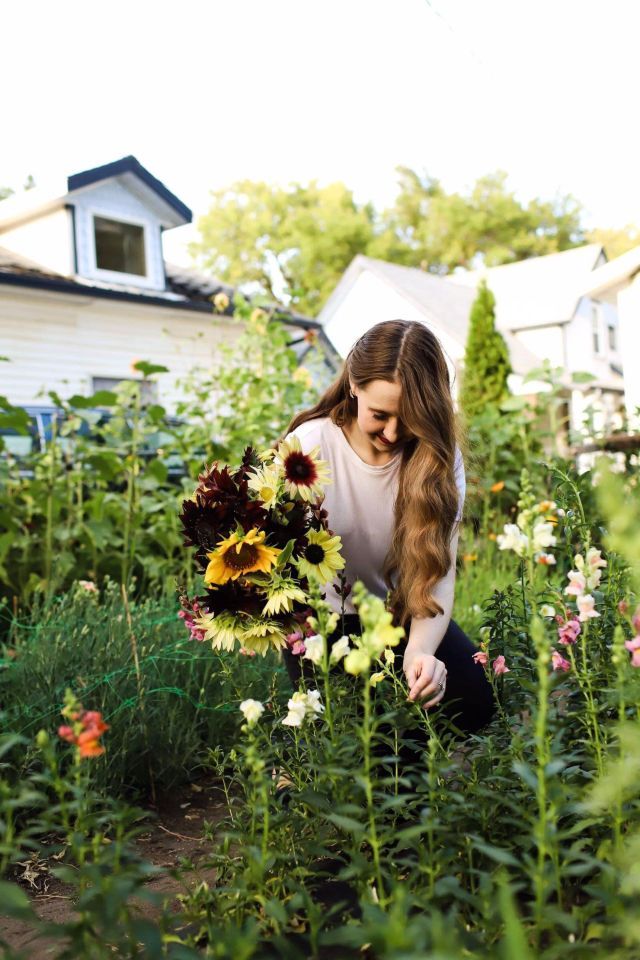 However, if you want to keep an unusual variety, you need to know how to grow a rose from a cut flower. By following simple recommendations, you can get a rose bush at home.
Growing a rose from a cut flower
Growing a rose from a cut flower
Growing roses from a bouquet gives you the opportunity to create your own unique rose garden without financial costs. In order for the culture to take root, you need to know how to grow a rose from a cut flower. After the cuttings take root, the bush can be grown indoors or transplanted into open ground.
Benefits of growing roses from a bouquet
A sprig of roses from a presented bouquet often pleases with its external characteristics for 5-6 days, after which it wilts. Therefore, it is important to know how to root any rose for further cultivation. The advantages of this method are considered to be:
- a correctly performed procedure allows you to get the required number of seedlings;
- several varieties can be propagated simultaneously;
- there is no need to spend financial resources on the purchase of planting material;
- you can grow any variety you like;
- retains all characteristics of the plant.
Important! Rare varieties of roses can often be used in bouquets, the seedlings of which are difficult to obtain. Therefore, growing a crop from a bouquet allows you to save the unusual external characteristics of the plant.
Benefits of Propagation with Cut Flowers
Rules for Selecting Raw Material
How to Grow a Rose from a Cutting at Home - Sprouting and Planting
To understand how to root a cut rose in order to obtain a healthy bush, it is necessary first of all to choose the right material. Not all bouquet flowers can be used to form cuttings. When harvesting material, the following requirements must be taken into account:
- fresh plants or those that have begun to shed their petals can be used;
- the stem must be elastic, without traces of rot and diseases;
- thin stems are not used, nor are too thick ones;
- Each cutting must have at least 3 buds.
Important! To grow a rose bush, varieties grown under normal conditions are used.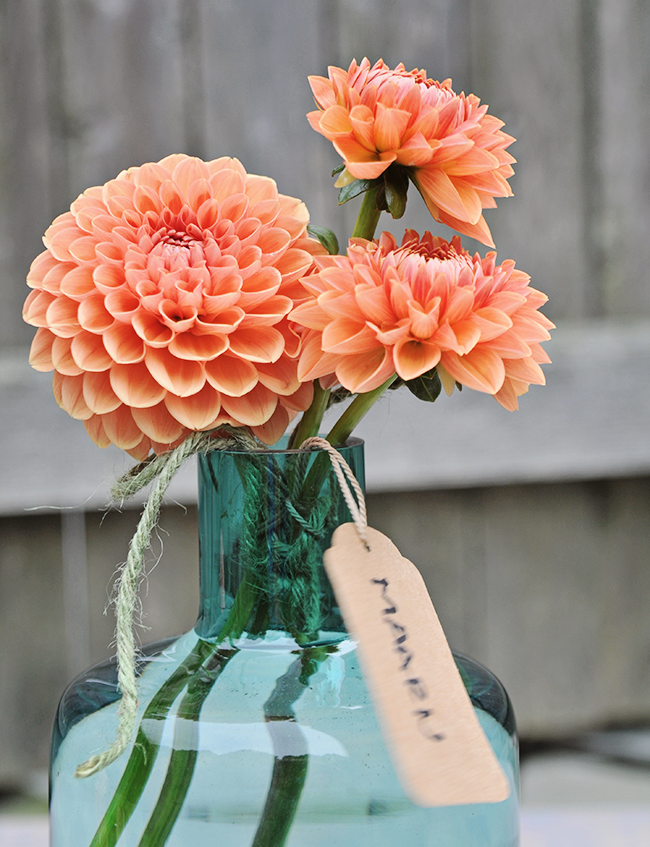 Flowers that are imported from other countries, as a rule, are treated with chemicals for long-term storage, so they rarely form roots.
Selection of planting material
When is the best time to grow a flower from a cutting
How to grow your own rose from a purchased rose - planting and growing from a cutting
To get a flowering bush, it is not enough to know how to grow a rose from a flower, you need to choose the right period. Summer is the best. At this time of the year, roses form roots quickly and germinate well in most cases. Flowers also take root well in autumn and spring, but in winter, many cuttings do not take root.
Is it possible to grow roses from cuttings of given roses in winter?
In winter, plant buds are most often in a passive state. Therefore, to obtain a seedling in winter, the following conditions must be observed:
- cut fresh, freshly presented roses;
- harvest several cuttings;
- cuttings must be woody;
- All material used must be thoroughly disinfected before starting cuttings.
It is also important to know how to prune a rose so that it takes root. An incorrect cut often causes the stem to rot.
Step-by-step instructions for rooting cut flower roses
Lawinia rose - popular flower description
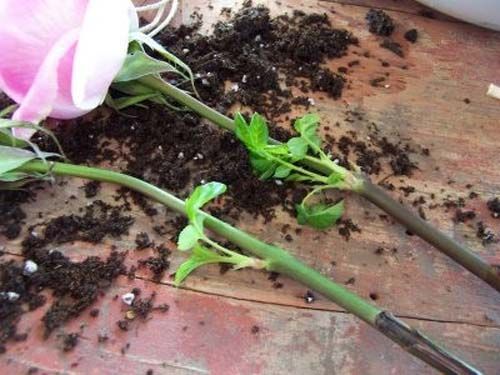
Growing rose seedlings from a bouquet should be carried out only after the appearance of the root system. To get a seedling, you must follow the step-by-step recommendations.
Rooting planting material in water
Rooting roses in water is the most common propagation method. To carry out the procedure, you must perform the following steps:
- select a suitable flower;
- Using a scalpel or sharp knife, cut off the top and bottom of the stem. For the cutting, use the middle of the shoot with leaves;
- cut the upper part of the handle with an even cut, the lower one at an angle. There must be at least 3 buds on the handle;
- the lower leaves must be removed, all remaining ones are cut in half;
- add "Kornevin" to a glass of warm water and place the cutting.
 Leave for a few days
"Kornevin" stimulates the growth of roots, but many are wondering if it is possible and how to make a rose give roots in water without using this agent. In such a case, you can use folk methods. For this, a spoonful of fresh honey is added to a glass of water. It also stimulates root formation and can speed up flower establishment.
Rooting cuttings in water
Important! In order for the cutting to take root faster, it is necessary to cover the glass with a bag on top, forming a small greenhouse.
Planting a rooted rose in the ground
After the planting material has been impregnated with a growth stimulator, it is necessary to plant it. For cuttings, it is necessary to choose light and nutritious soil. You can purchase a special soil designed for roses. However, if this is not the case, you can use another. The most suitable is the one intended for violets.
Planting a flower is carried out according to the following algorithm:
- The pot is treated with a solution of manganese.

- Drainage is laid in a thin layer on the bottom of the pot.
- The soil is heated to room temperature and placed in a cutting container.
- The stem is wetted in Kornevin powder and placed in the soil to a depth of at least 3-4 cm.
- Cover the top of the pots with cling film.
The container with planting material should be placed on the window, but care must be taken that direct sunlight does not fall on the greenhouse for a long time.
Other planting methods
Shoot can take root not only in the ground. Many growers choose alternative methods that also give positive results.
Use of potatoes
Medium sized potatoes are used for propagation. In the root crop, all eyes must be carefully removed. Make a hole with a knife. Dip the prepared shoot in Kornevin and place it in the prepared recess. Potatoes are planted in a pot with soil. From above it must be covered with a bag.
Important! Potatoes should be used fresh.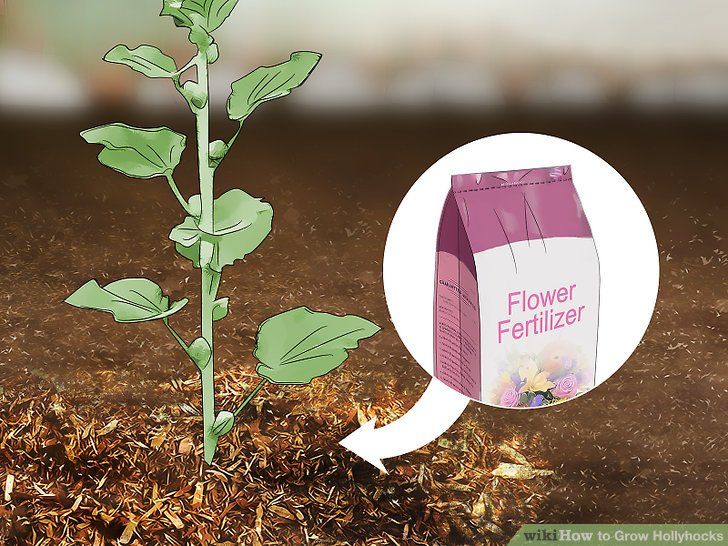 Tubers that have been stored for more than 2 months are not suitable.
Rooting rose cuttings in potatoes
Using sphagnum
Rooting rose cuttings in sphagnum gives good results. Moss is placed in a small black plastic bag. The prepared stem is dipped in a growth stimulator and inserted into the moss. Hands need to press the moss so that it completely envelops the stem. Tie the bag with string. Place a bag of moss in a pot and pour water over it. Top the pot also cover with a bag.
Features of top dressing
In order for planting material to quickly begin to form young leaves, it is necessary to use fertilizers. A complex mineral fertilizer is used as top dressing. It dissolves in water and is brought under the stem. It is necessary to carry out top dressing no more than once every 15 days.
What can be sprayed for better growth
To accelerate growth, it is necessary to spray with "Auxin" or "Cytokinin". These drugs stimulate the emergence of new shoots and accelerate the growth of the bush.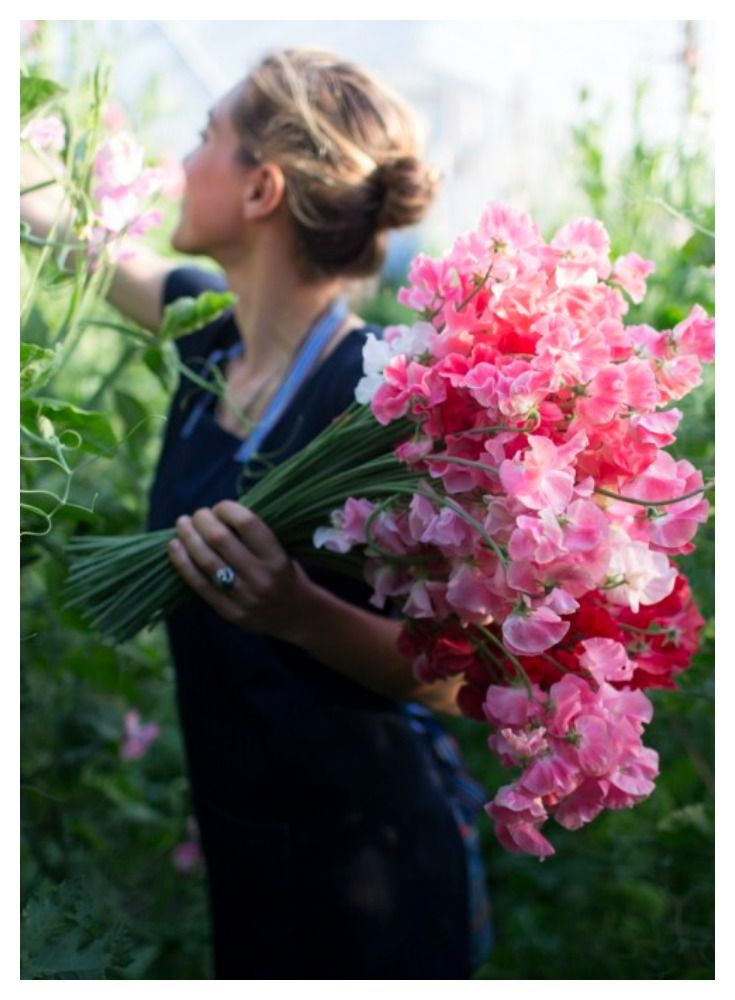
Learn more
- Best lighting for dark living room

- Can i plant tomatoes in june
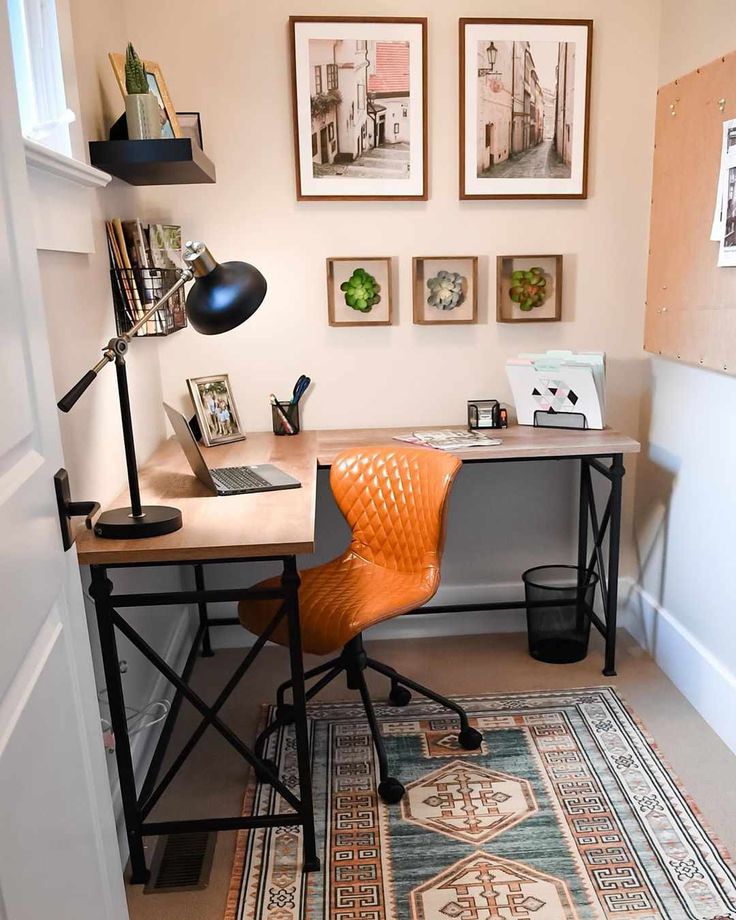
- Guest bedroom office ideas
- Luxury carpet for living room

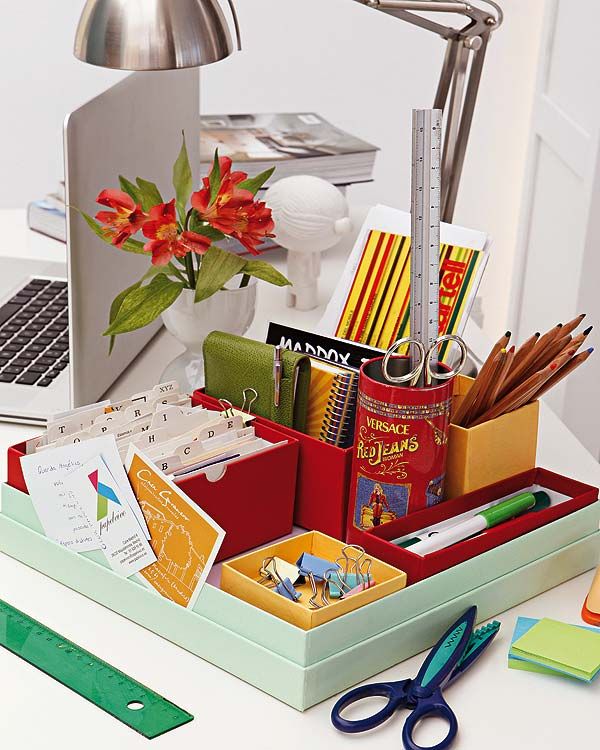
- Organizing home office papers
- Round pot plant

- How do i get rid of pigeons on my roof

- Best blender rating

- Average cost of doors

- Dining room accent wallpaper

- Apartment layout plans