Gas stove burner cleaning
How to Clean the Burners on a Gas Stove
By
Sarah Aguirre
Sarah Aguirre
Sarah Aguirre is a housekeeping expert with over 20 years of experience cleaning residentially and commercially. Over that time, she has been writing about tips and tricks for housekeeping and organizing a home for national publications.
Learn more about The Spruce's Editorial Process
Updated on 09/07/22
Reviewed by
Melissa Homer
Reviewed by Melissa Homer
Melissa Homer is a member of The Spruce's Cleaning Review board. She is a trained cleaning professional, consultant, and educator with a two-decade career spanning commercial and professional residential cleaning. Melissa specializes in premium surface care, cleaning safety, cleaning procedure efficiency, cleaning training documentation, and cleaning damage repair.
Learn more about The Spruce's Review Board
The Spruce / Hilary Allison
Project Overview
Gas stoves are speedier than electric cooktops, except when they lose effectiveness when a burner gets clogged. A clogged gas burner will give off a weak flame or, in some cases, no flame if the burner is badly soiled. Learn how to clean gas burners and get back to cooking in a snap.
How to Clean a Stovetop
How Gas Burners Work
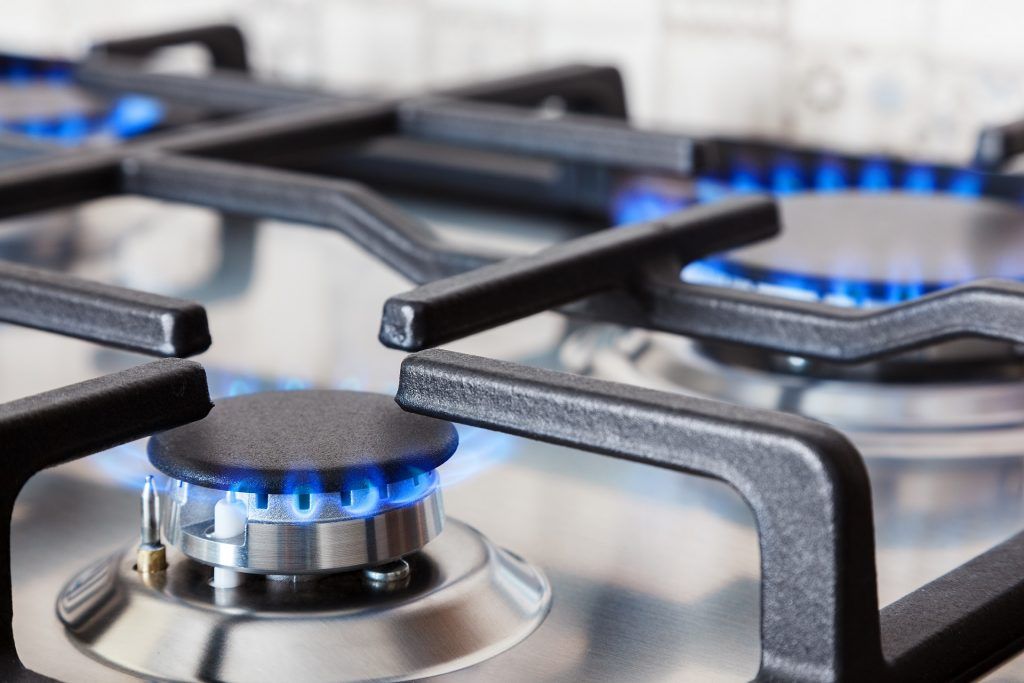
The burners on your gas stovetop consist of a burner assembly attached to a small gas intake valve on the front or top of the stove, which is in turn connected to the main gas line. Turning the burner control knob opens the intake valve, allowing gas to flow through the venturi tube, a wide pipe that narrows in the center. The gas enters the venturi through one of the wide ends, increasing in pressure as it passes into the narrow section of the tube. As the gas passes back into the second wide section of the tube, the pressure lessens, drawing in air through a small hole in the bottom of the tube. The air mixes with the gas and flows into the burner.
The burner head itself is just a hollow metal disk with holes or slots in the outside edge. Many burners are designed with a metal or ceramic cap that sits atop the burner head and diffuses or directs the flames emerging from the burner head. A standing pilot light (on older stoves) or an electric spark pilot is located on one side of the burner, and it sends a small flame or spark to ignite the air-gas mixture as it flows through the holes in the burner. Adjusting the control knob on the stove governs the volume of the air-gas mixture, thereby controlling the intensity of the flame.
How Often to Clean Your Stove's Gas Burners
A gas stove system is remarkably simple and trouble-free. In fact, difficulties arise only when the flow of gas becomes hindered, which is often caused by food residue that spills over the sides of pots and pans and clogs the ports around the burner heads. If left unattended, this food residue can become quite hard and difficult to remove. The best rule of thumb is to clean gas burners whenever the flame becomes irregular or exhibits a yellow color. Barring that, cleaning the burners once a month is probably sufficient. There is some variation in how manufacturers recommend cleaning the burner heads on a gas stove, but the following materials and steps will work for most stoves.
Tip
If you are working with a stainless steel stovetop, use caution when removing stovetop grates and burner parts. Lift the grates—never drag them off—as they can scratch stainless steel irreparably. This is a big issue with some of the fancier gas stoves with large heavy grates that are awkward to remove to get to the burners.
Watch Now: How to Clean the Burners on a Gas Stove
Need more help? Talk to an oven technician near you
Our partners can help you compare quotes from top-rated professionals near you
Get a Quote
Advertiser Disclosure
The offers that appear in this table are from partnerships from which The Spruce receives compensation.
Equipment / Tools
- Drying cloth
Materials
- Dish soap
- Non-abrasive scrub pad
- Old toothbrush
- Baking soda
- Paper clip
-
Read Manufacturer's Instructions
Knowing what kind of care is best for your appliance will go a long way in protecting your investment.
The Spruce / Ulyana Verbytska The product manual that comes with your cooktop will help you know which areas are safe to remove for cleaning, making your job a much easier one. The manual may even suggest recommended cleaning products (or products and ingredients to avoid). This can be a good starting point in learning how to clean and unclog your burners. If you no longer have the printed manual, you can probably download it from the manufacturer's website.
 -
Remove Burner Caps
If you have an older cooktop with a standing pilot light, you'll need to shut off the gas valve before you begin. Many gas burners have a removable ceramic disc that sits atop the burner to diffuse the flames. If this is the case with your stove, simply lift this disc off the burner, making sure the burners are completely cool before doing so.
The Spruce / Ulyana Verbytska -
Remove Burner Heads
Beneath the caps, the burner head sits atop the venturi tube.
The Spruce / Ulyana Verbytska Remove the burner heads by lifting straight up. Take care not to bend or damage the ignition electrode if your stove uses this design.
 -
Soak the Parts
Soak the burner heads and caps in a mixture of liquid dish soap and warm water for about 20 to 30 minutes. This will help loosen debris that is hardened on.
The Spruce / Ulyana Verbytska -
Scrub Burner Heads and Caps
Using a non-abrasive scrub pad and an old toothbrush, scrub away food stains from all surfaces of the burner heads and caps. If debris remains in the port openings, use a straightened paper clip to dig it out, but take care not to damage the metal. Don't try to dig around too deeply in the portholes, and never use a toothpick, as there's a risk that the wooden pick will break off and further clog the ports.
For extremely stubborn stains, make a paste of half baking soda and half water. Apply it to the surfaces of the burner heads and caps, and scrub with a non-abrasive pad and toothbrush.
The Spruce / Ulyana Verbytska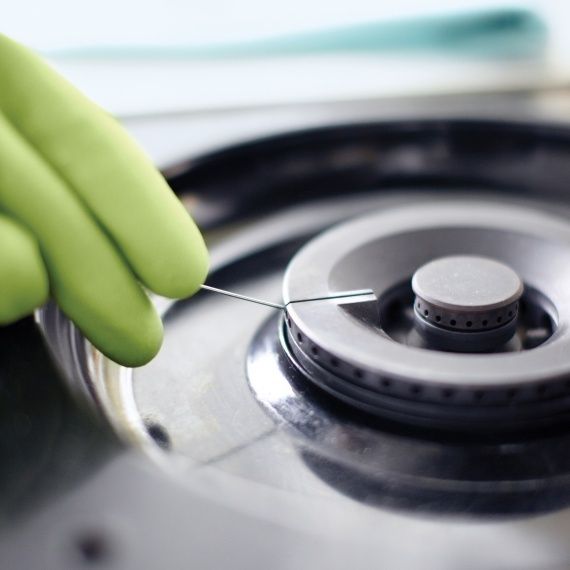 This may take repeated applications, but it will usually remove even the most stubborn stains.
 Warning
Never use bleach or steel wool to clean stove burner parts.
-
Rinse the Parts
Rinse all parts thoroughly under running water, shaking them to remove excess water, then drying with a cloth. Allow all the parts to then air-dry completely before reassembling the burners. As the parts are drying, you can turn your attention to cleaning other parts of your stove, such as the grills and drip pans. The same soak-and-scrub method is a sure-fire way to clean these parts, as well.
The Spruce / Ulyana Verbytska -
Reassemble the Burners
Once completely dry, you can reassemble the drip pans, burner heads, caps, and grills. On electronic ignition stoves, take care not to bend or damage the ignition electrodes as you reinstall the burner heads.
The Spruce / Ulyana Verbytska -
Relight the Pilot Lights
On stoves with standing pilot lights, follow the manufacturer's instructions for relighting the pilot flames.
The Spruce / Ulyana Verbytska Test the burners to make sure they operate correctly—any unusual flame color or shape may indicate that the burner heads are not completely dry, or that the caps are not seated correctly over the burner heads.
Tips to Clean the Burners on a Gas Stove
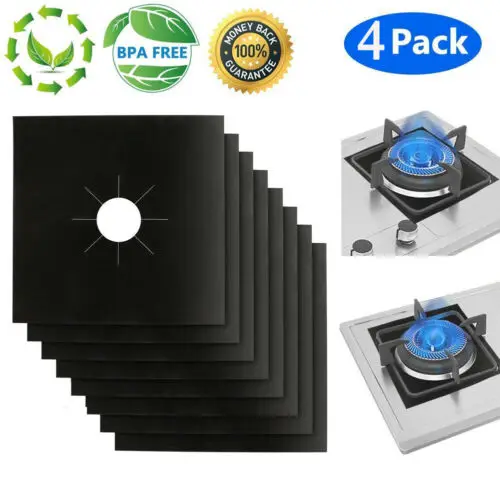
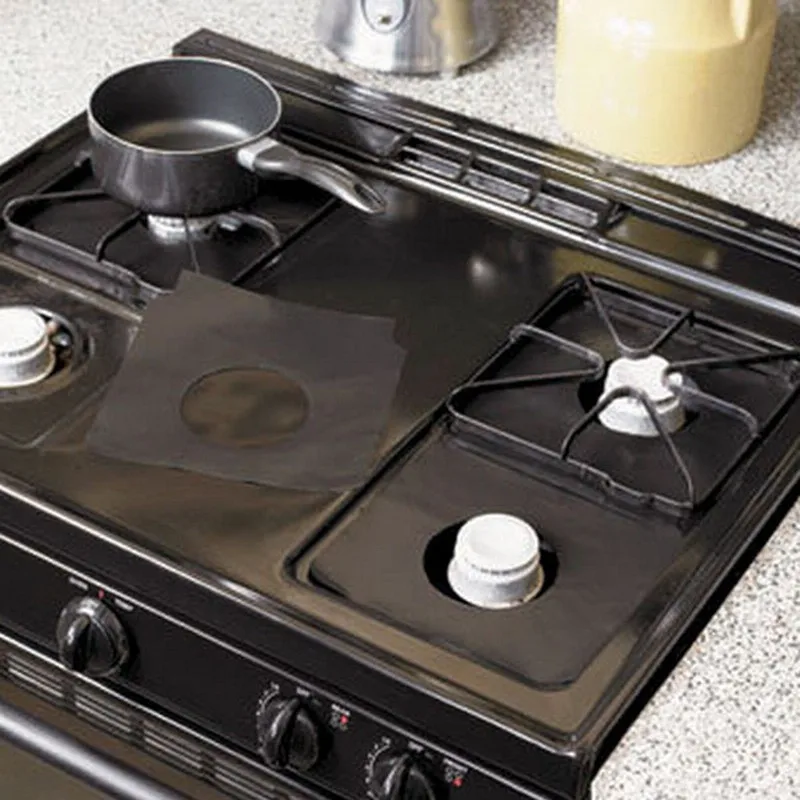
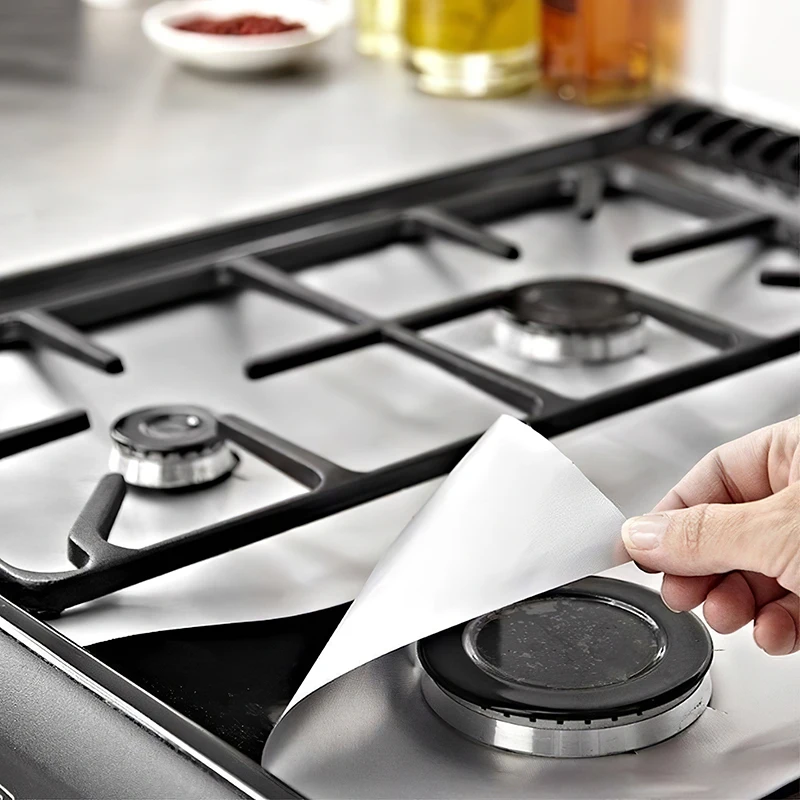
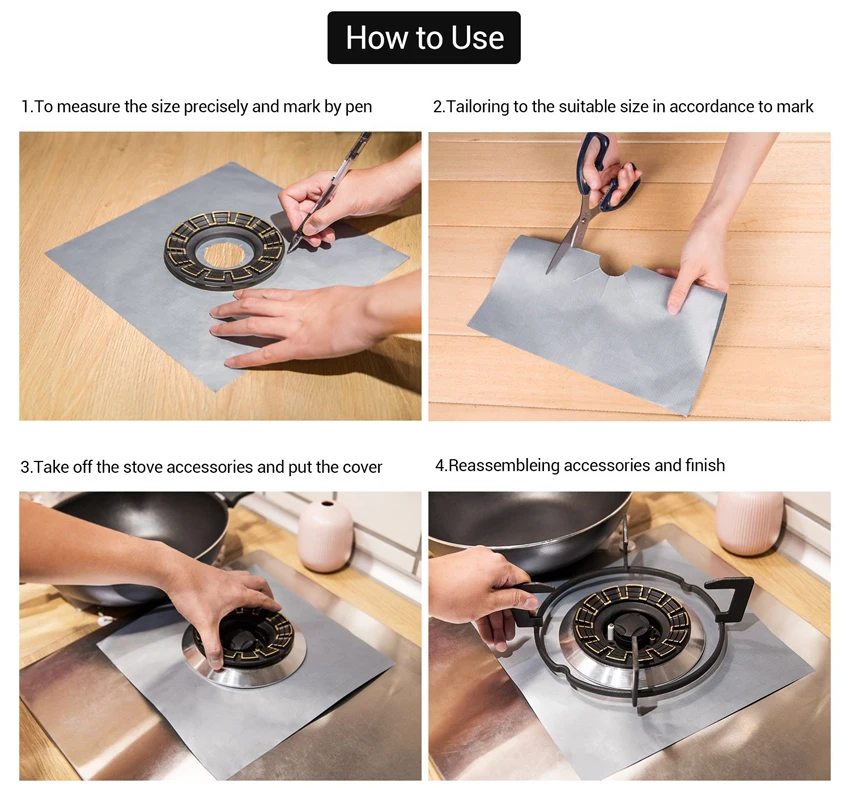
- Use a removable gas range protector cooktop liner that fits over the burners to catch spills and keep boil-overs from causing a mess on your burners.
- Keep all cooktop components, including grates and burners, dry in order to prevent rust.
- Never use a knife or other sharp object to clean up hardened spills on your gas cooktop.
- Keep the grates clean to keep the burners unclogged. Some gas range models may have grates that can be cleaned in a self-cleaning oven, but check your user's manual to find out.
The 10 Best Stoves, Ranges, and Cooktops of 2022
How to Easily Clean Gas Stove Grates & Burners
Gas stovetops bring together powerful burners and durable grates to deliver a dynamic cooking experience.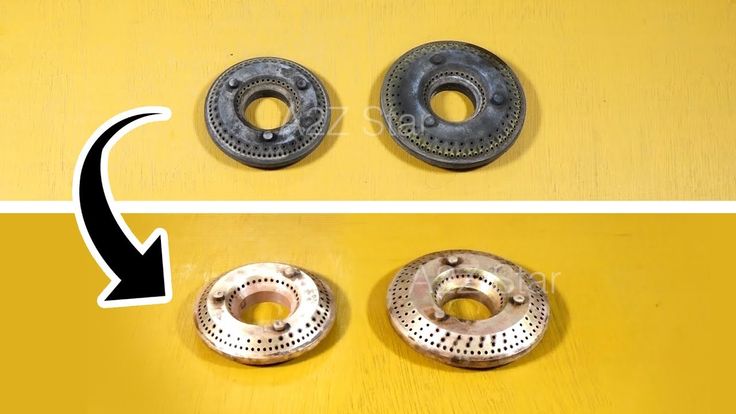 Gas stove surfaces, burners and grates can get dirty while cooking and require cleaning. This guide will teach you simple, everyday steps for cleaning your stove burners and grates as well as heavy-duty cleaning techniques for built-up or stuck-on grease and spills.
You should always check your appliance’s owner’s manual before beginning any cleaning process. Your specific model may come with its own cleaning considerations and methods. Read on for more information on how to clean a gas stovetop, including how to clean clogged gas burners and cast-iron stove grates.
HOW TO CLEAN GAS STOVE BURNERS
Most gas burners feature an easily removable burner cap which protects the burner base underneath from food spills. However, food or grease can accumulate under and around the caps over time. Regularly cleaning them, as well as the burner base, will help you maintain even flames and proper ignition. See below for tips on how to clean dirty or clogged gas burners in a few simple steps.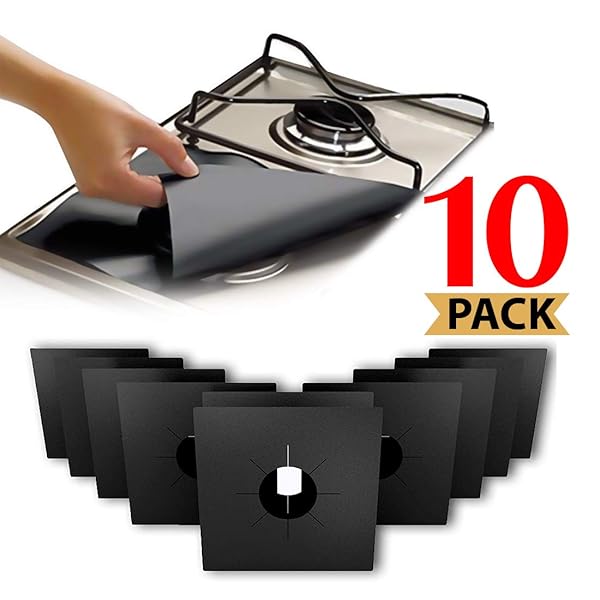
WHAT YOU’LL NEED
- Non-abrasive scrubbing pad or cloth
- Mildly abrasive cleaner or soap
- Straight metal pin or needle
- Baking soda (optional)
STEP 1: PREP THE STOVETOP FOR CLEANING
Before cleaning, make sure all controls are turned to the off position and the cooktop is cool. Remove the stovetop grates and set them aside. Remove the burner caps.
STEP 2: CLEAN THE BURNER CAPS
Wipe down all sides of the burner caps with a non-abrasive scrubbing pad or cloth and mildly abrasive cleaner or soap. If the caps are extra dirty, soak them in hot, soapy water for a minimum of 20 minutes.
If food and grease is still stuck on the burner caps, try creating a paste of three parts baking soda and one part water. Coat the caps with the paste and let them sit for 20 minutes. Rinse them and wipe them down with a soft cloth.
STEP 3: CLEAN THE BURNER BASE
Wipe down the burner base with a non-abrasive scrubbing pad or cloth and mildly abrasive cleaner or soap.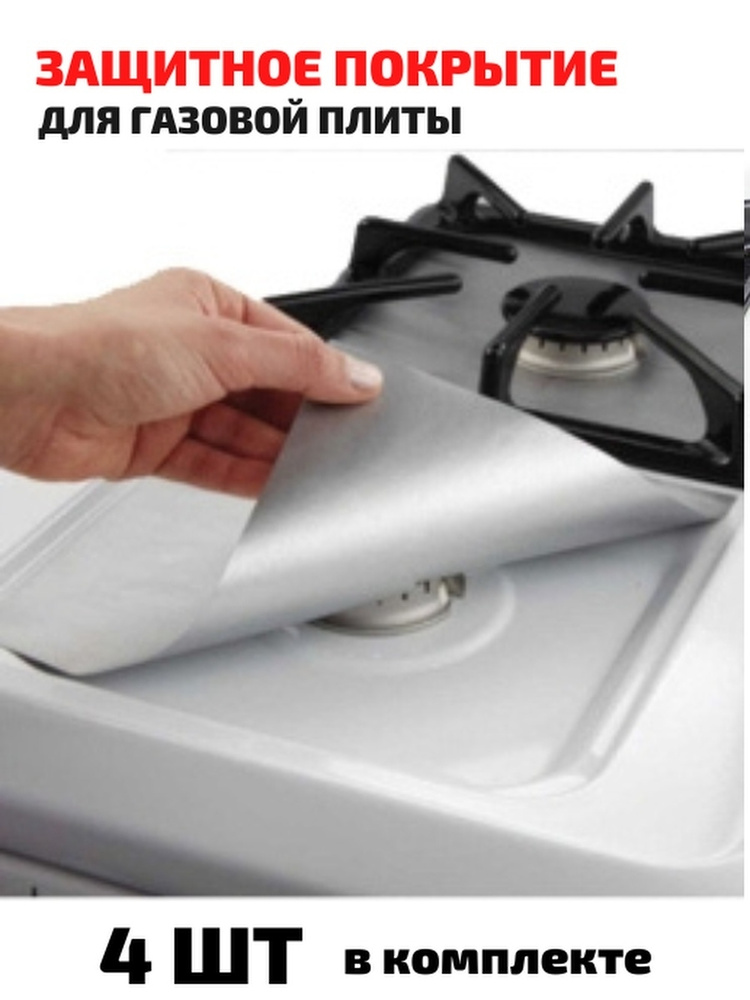 If the ports (the notches that help spread the flame) look dirty or clogged, remove any food or grease with some type of straight metal pin or needle. Do not use a wooden toothpick. Wipe down the burner with clean water and a soft cloth.
STEP 4: PUT THE BURNER CAPS BACK ON
Manually dry the caps with a towel before putting them back on. Some burners have a marker on the underside of the cap that indicates which burner they belong to.
Some burner bases also have pins that help you align the cap correctly. The burner cap should fit flush with the burner and move very little when you try to turn it in either direction. Check if the caps were reinstalled correctly by turning on the burner and verifying that the flame looks normal.
HOW TO CLEAN STOVE GRATES
Gas stove grates are designed to handle whatever you throw on them, and a certain amount of spillage can be expected. Read these steps on the best way to clean stove grates, including cast iron grates, to get them clean with minimal time and effort.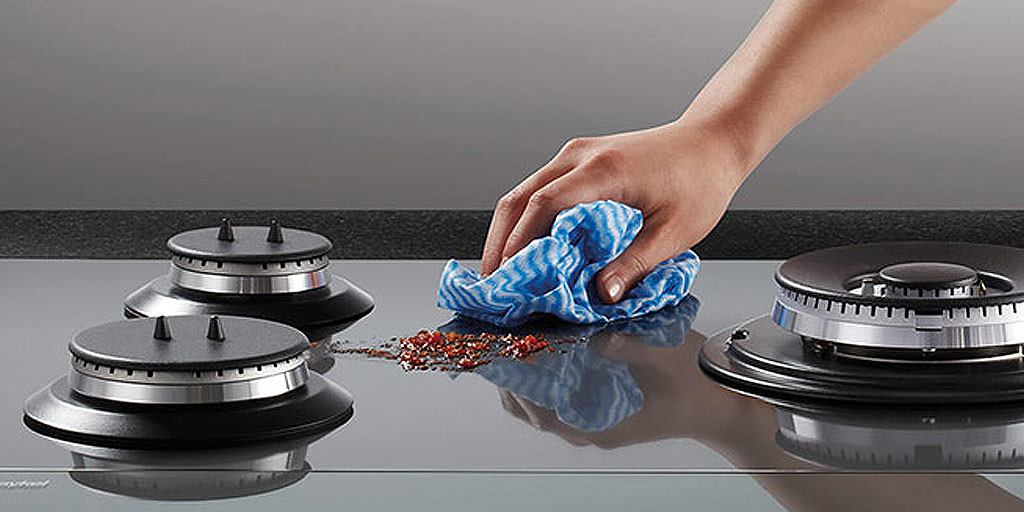
WHAT YOU’LL NEED
- Non-abrasive scrubbing pad or cloth
- Mildly abrasive cleaner or soap
- Dishwasher (optional)
STEP 1: REMOVE THE GRATES AND SCRUB THEM
Make sure the grates are cool before removing them. Scrub them gently with a non-abrasive scrubbing pad or cloth and mildly abrasive cleaner or soap. Don’t worry about using water and cleaners on cast iron grates; they are mainly for heat conduction and durability, so they don’t need to be treated like a cast-iron pan for cooking.
STEP 2: PUT GRATES IN THE DISHWASHER, IF NECESSARY
Many gas stove grates are dishwasher-safe, but check your oven’s owner’s manual before placing them in the dishwasher. If you’re washing them in the dishwasher, make sure to place the grates in the lower rack and select the most aggressive cycle. Scrubbing the grates by hand ahead of time can improve the cleaning process.
STEP 3: PUT THE GRATES BACK ON
Wait until the grates are completely dry before putting them back on the stove. Look for any tabs or marks that indicate how they should be configured on the stovetop. When the grates are back in place, jiggle them slightly to make sure they are secure.
Gas burner heat is measured in BTUs (British Thermal Units). Not all gas burners on a single stovetop are capable of putting out the same amount of heat. Check your owner’s manual for the BTU ranges of each burner so you can avoid overcooking and spills.
HOW TO GET GREASE OFF THE STOVETOP SURFACE
To tackle grease on a gas stovetop, first remove the grates. Work warm water and liquid dish soap (the kind used for handwashing dishes) into a lather with a soft cloth. Coat the stovetop surface with soapy water and let it sit for around five minutes. Scrub the surface until all the grease is gone.
If liquid dish soap doesn’t do the trick, try creating a paste of three parts baking soda and one part water. Coat the stovetop surface with the paste and let it sit for at least 20 minutes. The paste should then come up easily with a soft cloth or sponge.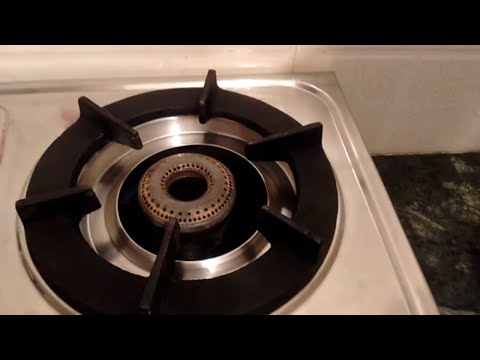 For more information on cleaning your stove surfaces, read this guide on how to clean an oven in four steps.
HOW TO KEEP YOUR GAS STOVETOP CLEAN
Cleaning your stove surface, burners and grates after each use will help it withstand years of messy meals. Even if there hasn’t been a major spill, some grease or food residue most likely made its way onto your stovetop and could bake on the next time you fire it up.
If you’re shopping for a new cooking appliance, consider a stovetop with a protective finish built in. For example, Maytag® DuraGuard Protective Finish and DuraClean Cast Iron Grates clean up easily and let pots and pans slide smoothly around the cooktop for fewer spills when transitioning from burner to burner.
Shop Maytag
® gas cooktopsMaytag brand offers hardworking gas cooktops with features on select models like the Power™ burner, to give meats and vegetables a powerful sear or the simmer burner which provides precise, adjustable heat to give your cooktop both a full-power simmer burner and warming setting all in one. Explore these Maytag® cooktop options to find the best model for your home.
MGC7430DS
MGC9536DS
MGC7536DS
READY TO TAKE ON YOUR NEXT CLEANING PROJECT?
-
How to Clean a Dishwasher Filter Learn how to clean and change your dishwasher filter in a few easy steps.
 Discover how often you should clean your dishwasher filter to prevent buildup and clogs.
 -
How to Use a Self-Cleaning Oven: 4 Quick Steps A self-cleaning oven can help you keep up with kitchen maintenance. Learn how to use a self-clean oven and how self-cleaning ovens work with our informative guide.
-
How to Clean Stainless Steel Appliances without Streaks What’s the best way to clean stainless steel appliances? Learn how to clean and polish stainless steel for a shiny and streak-free finish every time.
Browse All Info Hub Articles
WAS THIS ARTICLE HELPFUL? PASS IT ON
what to clean, the main stages of cleaning a gas burner, useful tips
According to researchers, the average woman spends about 18 years of her life in the kitchen. The most important cooking tool is the gas stove. To prevent equipment from malfunctioning, each housewife needs to know the appropriate care rules.
It is important not to change the pressure, saturation or intensity of the flame. To do this, there are many recommendations regarding the proper care of the stove. Do you want to know all the possible problems of the kitchen stove and how to deal with them? Then this article is for you! nine0003
Proper care of household appliances will ensure their long service life.
Problems and causes of gas stove failure
The most common problem that affects the change in flame pressure is fouling of the burners. During cooking, small particles of food and liquids accumulate in the holes of the dividers.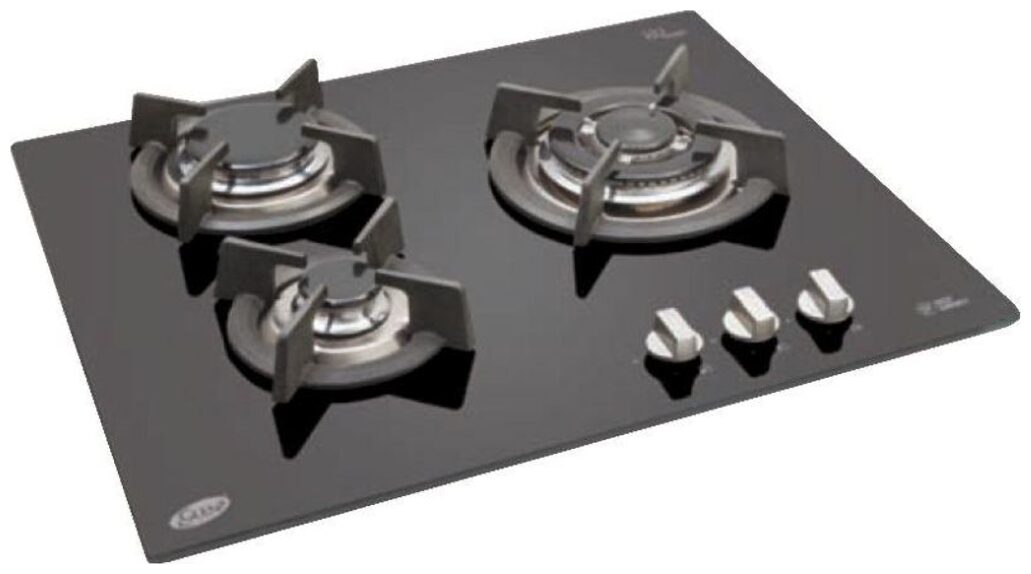 The situation is much worse - clogging of the nozzles, which ultimately leads to inactivity of the burners.
Also, one of the factors of arising difficulties may be the wrong choice of detergents for the stove. For example, powdered products are not completely removed from the burners and get inside to the jets. nine0003
Before checking the gas stove, it must be disconnected from the gas supply.
Therefore, it is worth knowing how to properly care for a gas stove. Do not forget that the gas supply pressure also affects the performance of the stove. But a qualified specialist will help to check for this problem. Remember, doing amateur activities without any knowledge can harm your life.
During maintenance of gas stoves, water heaters and floor standing boilers, the gas supply is interrupted. Residents of apartment buildings are informed about this in advance. nine0003
Cleaning time: correct removal of dirt from burner elements
There are many methods for cleaning the cooker.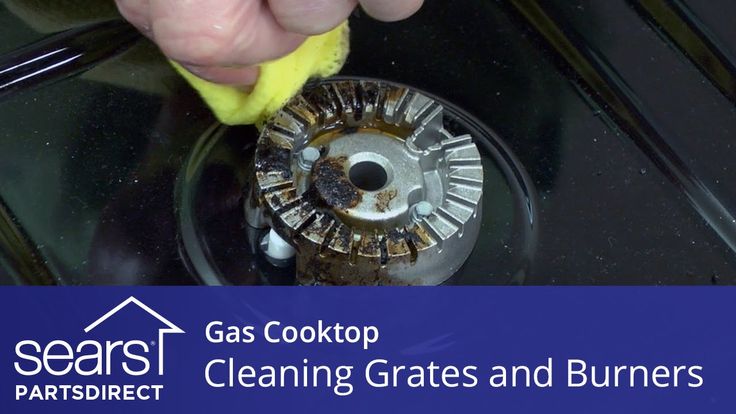 Each hostess individually selects the method that is closest to her. Therefore, there is no single recipe for the effective elimination of food debris, soot and fat.
You don't have to use expensive chemicals to keep your stove sparkling clean.
Before you begin to remove soiling from the burners in any way, it is necessary to shut off the gas supply to the stove so that no leakage occurs in any case. If you are a user of an electric stove, then you should limit the power supply. Next, in order to protect against burns, make sure that the cooking stove is cool. Then remove the surface grille. nine0003
Many people dislike ready-made chemical solutions because of their aggressive effect and high risk of allergic reactions. Instead, it is better to use folk methods that are safe and often remove dirt and grease much more effectively.
It is important to understand the structure of the burner. Its components are a gas burner cover, a divider and nozzles with jets. Contaminants must be thoroughly removed from all elements. The next step is to remove the burner cover and detach the flame spreader. The small openings of the divider should be cleaned with a thin and sharp object, such as a needle or a piece of wire. You can also use a toothbrush. Now we can move on to the main part. nine0003
The gas stove has special burners and electric ignition, which also accumulate a lot of grease and dirt.
First method:
- Fill a small container with hot water.
- In a ratio of 10:1, mix water with dish detergent.
- Depending on the intensity of contamination, soak all burner parts in the resulting solution for 15 to 90 minutes.
- After waiting for the right time, you must put on gloves for further work. These gloves can be purchased at any hardware store or supermarket. nine0038
- With the help of a sponge for dishes, and specifically its hard part, all components should be cleaned.
- Rinse everything under running water to remove soap residue.

- Wipe dry or lay to dry.
Scouring pads should not be used as they can seriously damage the surface, in addition to a sponge it is best to use a toothbrush or cotton buds for the hardest to reach areas such as handles. nine0003
To preserve the original appearance, do not use metal brushes, which can perfectly clean all the dirt, but at the same time spoil the appearance of the burner parts.
If it happens that the burners have not been cleaned for a long time, then there is a more effective and stronger method for this.
After soaking, softened dirt will be much easier to remove.
Second method:
- Follow the steps above for disassembling the parts. nine0038
- Add a small amount of 9% vinegar to a container of water. The mixing ratio is two parts water to one part vinegar. The resulting solution should be brought to a boil.
- Soak the components in the hot solution for about half an hour.
- Be sure to wear rubber gloves to protect your hands from the harmful effects of the cleaning solution.
- Rub with a regular sponge to remove dirt.
- After all manipulations, rinse all elements under running water to remove the remnants of the toxic substance. nine0038
The solution should be left on the plate for 30-60 minutes, after which it is washed off with a damp sponge.
Important! Vinegar is a liquid with a pungent odor, so a well-ventilated area must be provided before proceeding.
Don't forget about another easy, but quite effective way to clean the burners.
If a regular sponge doesn't work, use a toothbrush.
The third way is to use the well-known universal assistant in everyday matters - baking soda. The algorithm of actions is almost the same as in the previous versions. nine0003
- Dissolve one part baking soda in two parts water.
- Next, put the contaminated items into the liquid.
- Wait about half an hour. During this time, the "assistant" will have time to well separate the dirt from the parts.
- Then remove residue by hand with a sponge cloth.
- Finally rinse with water.
Each area to be cleaned must be treated with a damp sponge coated with soda, usually even old dirt is removed the first time, but if we are talking about hard-to-reach places, you will have to use cotton swabs dipped in a solution of ammonia. nine0003
"Ambulance" for ingrained soot and grease
On the shelves of modern household chemical stores you can see a lot of different products for professional care of the stove. But, as many years of practice shows, there is no point in spending money on jars with emulsions, gels, powders. There are proven folk methods that require a minimum of time and financial resources.
First you need to remove the remains of food and light dirt, which are rubbed off with a dry sponge with a hard surface or a rough cloth. nine0003
Even in the fight against such a serious problem as carbon deposits and fat that have accumulated for a long period, there is every chance to cope without special chemicals.
Please note! Before starting work, follow all safety requirements: disconnect the stove from the gas or electricity supply. Also, in addition to the grate, remove the burners and its components.
It is always necessary to clean the burners of the gas stove from carbon deposits in a timely manner, they are quite easy to remove, they can be disassembled and washed all the parts separately. nine0003
The following reagents really effectively remove carbon and grease:
- soda;
- citric acid;
- mustard powder;
- refined gasoline;
- ammonia;
- silicate adhesive.
Since the burners are made of aluminum, they must be cleaned with chlorine- and acid-free products and must not be soaked.
Baking soda
The indispensable soda comes to the rescue again.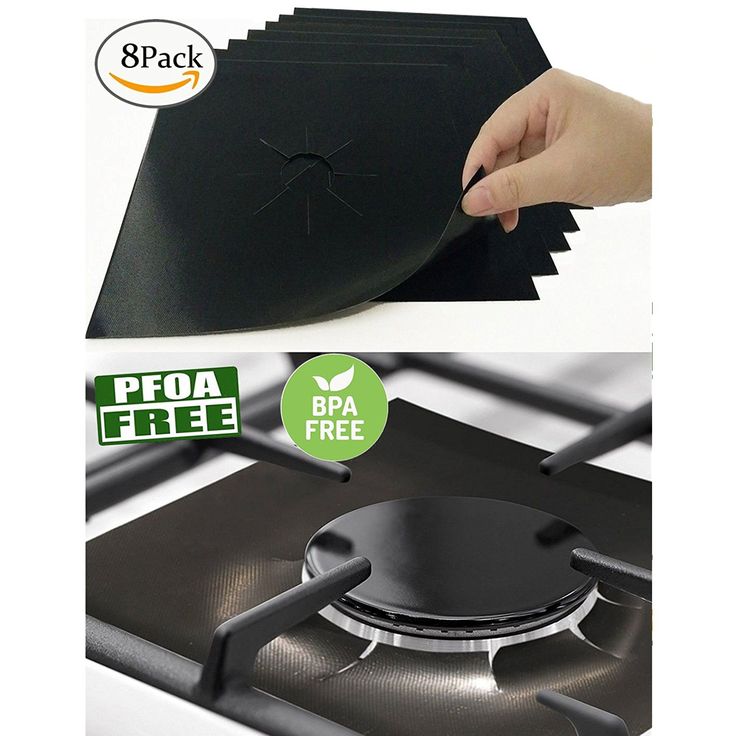 Only in this case it will be necessary to create a known chemical reaction from school times. nine0003
- First, treat the “affected” surface with vinegar and allow time for the liquid to act on its own. Five minutes will be enough for this procedure.
- Sprinkle soda evenly over vinegar. These two substances will instantly react. If you hear a quiet hiss, then the action of acid and alkali is going well. Only there is no need to rush to wipe off traces of burning.
- Wait 20-25 minutes for the substances to react with each other. nine0038
- After the specified time, gently wipe the area with a dry cloth or kitchen sponge.
Some housewives even rub gruel a little, but this must be done with extreme caution.
Citric acid
Lemon juice will easily dissolve greasy traces.
- Take a slice of lemon and squeeze it into the desired areas.
- Let the product work for about 15-20 minutes.
- After that, rub the already “former” dirt a little and completely remove it with a damp cloth.
 nine0038
When using lemon as a bonus, you get a pleasant smell.
Mustard powder
While the first method is universal, the second is suitable mainly for traces of fat. Mustard powder easily and effectively fights old oil stains.
- You only need to apply the product to the dirty area.
- Then set the timer for 20 minutes.
- At the end, apply force to wipe off the dirt and rinse with cool water. nine0038
Mustard powder perfectly dissolves fat, so it has been used by housewives for a long time.
Refined gasoline
The agent is not inferior in effectiveness to the previous substances.
To a large extent, with strong traces of fat, this substance can serve as a lifesaver.
The product deserves the name "stain remover" because it will help in cleaning without harming the surface in a matter of minutes. But there is only one drawback - it is a pungent smell. Therefore, it is worth using this method with open windows.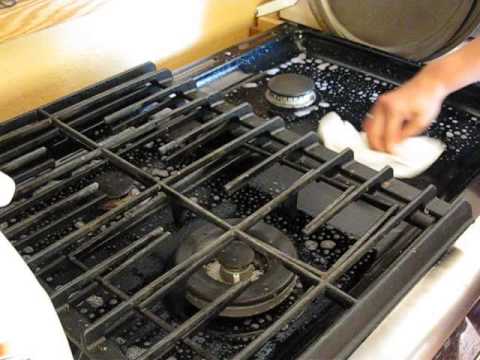 nine0003
- Needs to be applied to burnt or grease affected area.
- Wait about 10 minutes.
- Done. Wipe with a dry cloth to remove gasoline residue.
It is necessary to moisten the sponge with the product and, centimeter by centimeter, very carefully treat all parts of the grate.
Ammonia
Ammonia is simple to use but effective. Especially with very old pollution. The advantage is the smell, which literally disappears in seconds. The algorithm of actions is the following. nine0003
- Apply ammonia with a soft brush.
- Gently massage onto the affected area.
- Leave the substance to work for about 15-20 minutes.
- Finally wipe the area with a damp dishwashing sponge.
The duration of the procedure is determined in each case individually - it is necessary to look at the state of contamination and how easily they are separated from the grate.
Silicate adhesive
This tool is super effective when exposed to long-dried and forgotten dirty marks.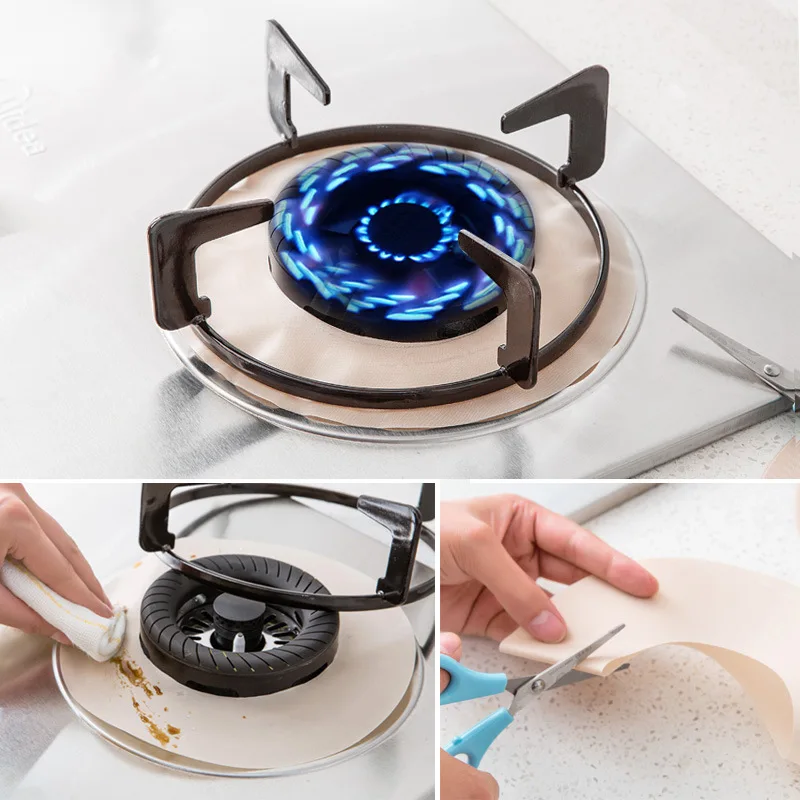 The necessary tool is very simple to prepare.
- Add a tablespoon of silicate adhesive to 300 ml of water.
- Dissolve a small amount of grated laundry soap in the resulting liquid.
- Pour in three tablespoons of baking soda.
- Mix all ingredients well and apply to burnt or greasy stain. nine0038
- Hold for several hours.
- Then rinse with a damp cloth or sponge.
Tip: laundry soap can be replaced with a teaspoon of any laundry detergent.
The plate will shine and literally creak. Don't forget to wear gloves!
Removing dirt from nozzles
It is important for every attentive housewife to know what a nozzle is. This is a small element of the gas burner, which is responsible for the gas supply itself. Therefore, if in the process of using the stove there are problems associated with the intensity of the flame or even with the disappearance of gas, you should pay attention to the nozzle.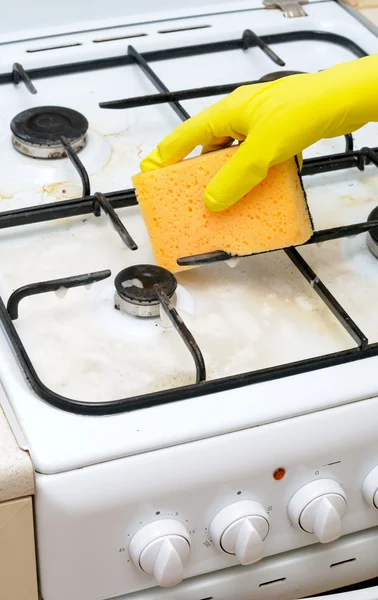 It appears to be contaminated. nine0003
Dirty gas hob nozzles can cause burners to burn poorly.
Please note that you should call a professional before attempting element cleaning methods yourself. A gas fitter will look at the condition of the device and prove a problem that needs cleaning.
If the problem persists after cleaning, call a gas master to check the gas supply. Do not troubleshoot the hob yourself!
If, nevertheless, it is a clogged nozzle, the following scheme should be followed.
- First you need to remove the burner from the gas stove. There is a need, then wash according to the above instructions.
- The next step is to find a small hole.
- For cleaning, you can use a needle, a paper clip, after straightening it, or a piece of wire.
- We insert the tool into the nozzle and carry out several rotational movements.
- To make sure that the component is cleaned, repeat the movements a couple more times.
 nine0038
 - As a result, install everything in its place and open the gas line.
Do not use powdered products to clean the burners of a gas stove, they can clog the holes in the flame spreader.l
Important:
- Do not check the gas flow directly through the nozzle. Before supplying gas, it is necessary to bring the burner to its original form.
- Never allow water to enter the nozzle.
Use toothbrushes to clean the narrow tubes that direct gas to the splitter cover. nine0003
Helpful hints
- To ensure that the gas stove does not cause difficulties when cleaning it, it is necessary to carry out caring manipulations regularly.
- Various powders are strictly prohibited for washing gas appliances. Since small particles can get into the holes of the nozzles, which will lead to disorder of the plate.
- If the actions carried out on the gas stove do not lead to a result, you should call a gas fitter for a scheduled diagnostics of the kitchen stove.
 nine0038
 - Call a gas appliance specialist at least once a year. Only a service technician of such installations will be able to inspect the condition of the device.
- Do not be indifferent to safety regulations. Shutting off the gas in time and ventilating the room where the gas stove is located can save your life
.
In the process of regular care of the surface of the stove, do not forget about the timely cleaning of the burners. Contaminated parts of the stabilizer can lead to malfunctions of the device. nine0003
Thus, following all the above rules and recommendations for the care of a gas or electric stove, you will be able to maintain excellent performance and flawless appearance of the kitchen appliance for a long period.
Video: how to clean the gas stove and its elements
Video about how to clean the gas stove:
Video about how to clean the gas stove grate:
Video about how to clean the handles of the gas stove:
Video on how to properly clean a gas stove burner:
How to clean gas burners at home: the best ways
It's hard to imagine a modern kitchen without a gas stove. In the process of cooking, no matter how carefully you use the equipment, it gets dirty. How to clean gas burners and nozzles at home and what methods are best to use?
Contents:
- Why you need to clean the burners
- Cleaning steps
- Ways to clean gas burners
- Cleaning the nozzles on a gas stove
- Tips
Why you need to clean the burners
Although the burners on the stove are the least prone to pollution or burning gas from time to time. And if the stove is still old and unkempt, the flame may disappear altogether. The reason for this may be a weak fuel supply or dirty burner dividers, dirty nozzles. nine0003
When cooking food, it is not uncommon to flood the stove with bubbling water, fat, boiled milk, etc.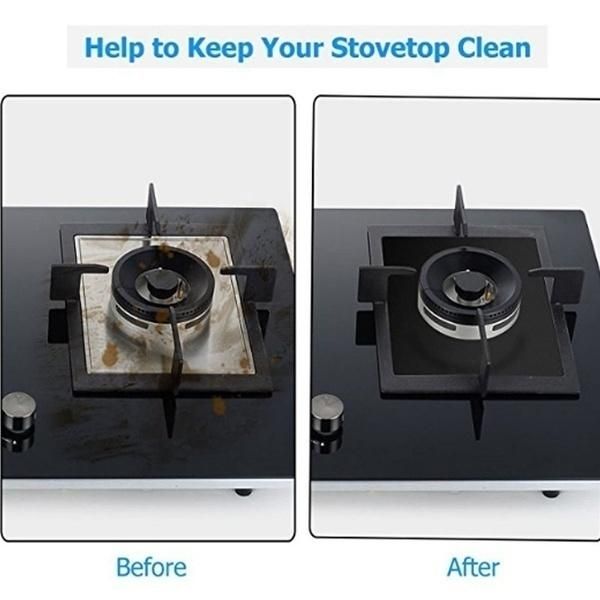 Not only the surface of household appliances suffers, but also the burners. Why do you need to periodically clean the dividers?
- To avoid fat, food residues that would not burn with the gas and would not emit an unpleasant odor.
- So that impurities do not trap gas at the outlet of the dividers.
- So that clogging does not lead to a complete failure of kitchen equipment. nine0038
Cleaning steps
The stove must be cool before cleaning if it is hot. Then follow the following cleaning steps:
- Close the general gas valve and open the window for ventilation. This is necessary for safety reasons. Situations are different, so it's better to play it safe.
- Remove the grate and other parts from the stove to leave open dividers.
- Proceed with the removal of dirt from the burners and stove with any of the means of your choice.
 nine0038
 - Reinstall all detachable parts after complete cleaning. Check gas combustion.
Methods for cleaning gas burners
In order not to spend money on the purchase of special cleaning products for stubborn dirt, you can use folk methods:
- Using table vinegar. Remove the burners from the stove. Disassemble them into two parts: a divider and a cover. Then, take a capacious saucepan, pour a liter of boiling water into it, pour in half a glass of table vinegar. Place the burners in the resulting liquid for half an hour. After that, take out the parts, rinse them in clean water, wipe dry with a soft cloth. The dirt should be completely gone. Put the burners in place, check them for serviceability. nine0038
- Use of baking soda. It is sure to be found in any home. Baking soda is especially good at removing stubborn greasy stains. First, remove the burners and wash them in a soapy, detergent-based solution to remove soot and carbon deposits. Take 4 tablespoons of baking soda, put it in a bowl, add water to make a thick paste.
 Using a sponge, apply the resulting mixture to the burners. Leave it like this for half an hour. Then, use a toothbrush to clean all the gaps on the divider so that no dirt particles remain. Rinse them in clean water and dry with a towel or paper towel. nine0038
 - Detergent for cleaning burners. Soaking the parts in a soapy solution is another effective and inexpensive way to clean the burners from dirt. Fill a bowl with two liters of hot water, dissolve 4 tablespoons of any dish detergent. Place the removable parts of the burners in the resulting liquid for one hour. After the specified time, rinse the parts in clean water and wipe dry with a towel. Assemble the gas stove.
Cleaning the nozzles on the gas stove
Poor combustion can be caused not only by clogging of the dividers on the burners, but also by contamination of the nozzles. Consider the step-by-step process of cleaning the nozzles on the stove. nine0003
- As with cleaning the burners, turn off the gas valve, open the window for ventilation.
- Remove the grate and all parts of the burner from the appliance.
- Empty bowls will remain on the stove. There will be small holes in the middle of these bowls. This is the injectors.
- To clean them, you will need a thin copper wire, a needle or a paper clip. Let's say you chose copper wire. Take it and insert it directly into the nozzle of the nozzle, deeper. Scroll the wire several times, move it up and down. nine0038
- After cleaning the jets, clean the bowls and hob with soapy water. Collect everything the way it was. Check combustion.
We recommend reading an article on how to clean a frying pan from carbon deposits at home.
Tips
- Once a year, call the master who will check the stove for serviceability of kitchen equipment, gas leaks.
- To avoid stubborn greasy stains on the hob, wipe it after each use, even if it seems to be clean. nine0038
- Do not use powdered cleaners to remove dirt. They can get into the burner dividers and stay there.

Learn more