Fold up oven
Ninja Foodi 8-in-1 Flip Mini Oven review: a compact cooker
When you purchase through links on our site, we may earn an affiliate commission. Here’s how it works.
(Image credit: Ninja)
Homes & Gardens Verdict
We found the Ninja Foodi 8-in-1 Flip Mini Oven a little tricky to clean, but it is a great choice for smaller kitchens and those who want extra cooking space without having to give up an entire counter.
Reasons to buy
- +
Easy controls
- +
Quick pre-heat times
- +
Perfectly even toasting
- +
Comes with a range of trays
- +
Flips away when not in use
- +
Light illuminates the inside of the oven when cooking
- +
Good at air frying
Reasons to avoid
- -
Trays won't fit into specific slots
- -
Too short for some baking tasks
- -
Tricky to clean on the inside
Why you can trust Homes & Gardens Our expert reviewers spend hours testing and comparing products and services so you can choose the best for you. Find out more about how we test.
We tried out the Ninja Foodi 8-in-1 Flip Mini Oven to see if it's a good choice for your kitchen. Designed to slot right into smaller kitchens without taking up too much space, this oven has a unique flip feature that allows it to be folded away when not in use, massively reducing its footprint on your kitchen counters. It's a popular choice for those in apartments, or simply those who need more space to cook in their kitchen, but is the Ninja Foodi 8-in-1 Flip Mini Oven any good? We put it to the test, making cauliflower buffalo wings, air frying salmon, and roasting vegetables to see if it's a must-have toaster oven.
Ninja is known for making some of the best toaster ovens, and given that it also makes great air fryers, it's no surprise that the Ninja Foodi 8-in-1 Flip Mini Oven combines the best of both. It has an air fryer mode, as well as broiling, toasting, and even dehydrating function. The bottom can be opened for easy cleaning, but I found that some areas were tricky to reach when I did try and clean the oven after prolonged use.
If you lack cooking space in your home or you want a compact toaster oven to take some of the pressure away from your regular oven, the Ninja Foodi 8-in-1 Flip Mini Oven is a great choice. I love how easy it is to flip away and press it against the kitchen wall, which will buy you a lot of space on your kitchen counter if you're dealing with a chef's kitchen or a smaller space.
Today's best Ninja Foodi 8-in-1 Digital Air Fry Oven deals
Reduced Price
£219.99
£179
View
Reduced Price
£199
£179
View
£179. 99
99
View
Show More Deals
Ninja Foodi 8-in-1 Flip Mini Oven: Specifications
(Image credit: Ninja)
- Capacity: 13" pizza, 9 slices of toast or 4-lbs in air fry basket
- Cooking programs: 8
- In the box: Cooker unit, crumb tray, air fry basket, sheet pan, wire rack
- Modes: Air fry, air broil, air roast, bake, dehydrate, toast, bagel, keep warm
- Power: 1,800 Watts
- Dimensions: 19.72 x 7.56 x 14.96 inches
Ninja SP101: unboxing
(Image credit: Future)
The Ninja Foodi 8-in-1 Flip Mini Oven comes in a large, hefty box with a range of inserts to easily slot inside the oven. When the oven is not in use, you can turn it back onto a rear flip-away base, and then push it back against your kitchen wall. This clears plenty of space in front of the oven, which is great for preparing food before putting it inside the oven to cook.
When flipped up, your oven can open from underneath. This gives easy access to clean the inside of the oven, and when you remove the crumb tray you'll find it easy to remove any splashes or food residue.
(Image credit: Ninja)
The cooking modes in the Ninja Foodi 8-in-1 Flip Mini Oven include air frying, air roasting, air broiling, as well as baking, toasting (as well as a mode for bagels) and even dehydrating.
The timer and temperature can be adjusted using the dial, and then it's a case of pressing down on that dial to start or pause your cooking mode.
The control panel on the Ninja Foodi 8-in-1 Flip Mini Oven. I received the UK model, which has the same modes but calls them slightly different names.
(Image credit: Future)
Toasting in the Ninja Foodi 8-in-1 Flip Mini Oven
A toaster oven is designed to replace the best toaster as well as microwaves and air fryers, but if it can't toast, that won't save you on the space a toaster will take up in your kitchen.
The Ninja Foodi 8-in-1 Flip Mini Oven comes with a toast and bagel mode. You can choose the level of browning and the amount of slices inside your oven when cooking on the toasting mode. The bagel mode will heat from only one direction as opposed to above and below, which will leave the edges of the bagel soft and perfect for making a warm sandwich.
(Image credit: Ninja)
I was impressed by both the bagel toasting and the regular toasting in the Ninja Foodi 8-in-1 Flip Mini Oven. Everything came out even, with some slight marks from the wire rack on one side of the toast. I didn't find that the top toasted more than the bottom when using the regular toasting mode, so it's perfect for sandwiches, paninis, and warming pastries.
Cooking fish in the Ninja Foodi 8-in-1 Flip Mini Oven
I've become accustomed to using the best air fryers when cooking fish at home, so I tried the Ninja Foodi 8-in-1 Flip Mini Oven out on the air roast mode when cooking salmon.
Salmon is quite a fatty fish, so I've found that a lot of fat can drip away when cooking it in an air fryer. This happened with the Ninja Foodi 8-in-1 Flip Mini Oven too, and I was concerned that the juices dripping away would cause an issue if they fell directly onto the heating element.
The Ninja Foodi 8-in-1 Flip Mini Oven crumb tray sits underneath the heating elements, but they are guarded by a metal grated cover. You can put a drip tray underneath to prevent the fat from the salmon falling onto the elements.
You can illuminate the inside of the Ninja Foodi 8-in-1 Flip Mini Oven using a button the control panel, which made it easy to monitor it while it was cooking.
My salmon cooked in the same time as an air fryer, about 12 minutes in total, which is a lot less than if I'd cooked it in an oven. The fish was crispy and perfectly cooked, and there was no difference in cooking between the fish that was at the back of the oven, and the one at the front.
Making chicken wings
I used the air fryer tray to make chicken wings with the Ninja Foodi 8-in-1 Flip Mini Oven. After marinating my chicken in buffalo sauce for a few hours, I laid it out in the air fryer tray and put it in the oven. The air fryer tray can only go in the top oven latch, but you can put the wire rack beneath it to cook other elements of a meal simultaneously.
(Image credit: Ninja)
Like salmon, chicken wings are quite fatty, so there was a lot of fat and also buffalo marinade dripping down from the tray insert to the dripping tray. This became baked-on, and a little tricky to clean.
With a pre-heat time of only a minute, the SP101 has the wings cooked in record time. After 15 minutes in the oven they were perfectly cooked and ready to serve. I had to use oven gloves to hold the tray while I put the wings onto a plate, and then left the oven to cool fully before putting it back against my kitchen wall.
(Image credit: Ninja)
Baking in the Ninja Foodi 8-in-1 Flip Mini Oven
Anyone who's read my reviews of the best stand mixers will know that I'm an avid baker, so I was keen to try the Ninja Foodi 8-in-1 Flip Mini Oven out to bake.
The Ninja Foodi 8-in-1 Flip Mini Oven doesn't come with a muffin tray, but you can buy a 12-cup muffin pan on the Ninja site if you love to cook cupcakes.
I used the baking sheet, which is 13x13 inches, to place my cupcake cases in the oven. I was concerned that they would touch the top of the oven when they rose, but I had no issues. I would definitely refrain from cooking bread or a full-sized cake in the Ninja Foodi 8-in-1 Flip Mini Oven, but that's down to the smaller internal capacity as opposed to any issues in its ability to cook.
Cleaning
(Image credit: Ninja)
The insert trays, including the drip tray, can go in the dishwasher with the Ninja Foodi 8-in-1 Flip Mini Oven. That's great, because a lot of stubborn oil and residue can become baked onto the inside of the air fryer.
When you remove the crumb tray you can pull the base open and clean the inside of the oven. Ninja advises to just use soap and water to do this, but I found that the heating elements became quite dirty and difficult to clean if I didn't clean them after every use.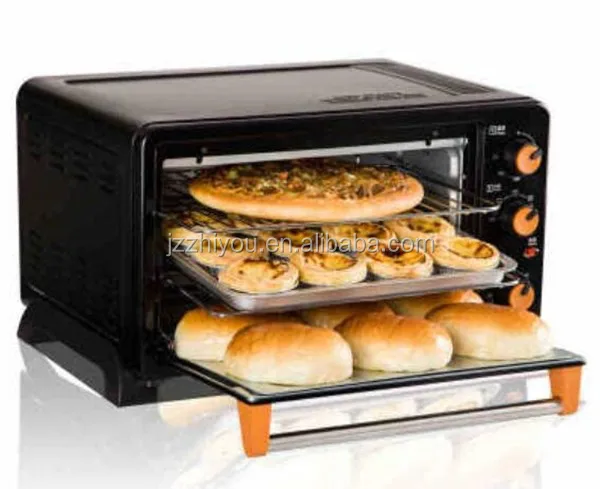 This didn't create any issues in cooking, but it did lose some of the aesthetic value of the oven.
Should you buy the Ninja Foodi 8-in-1 Flip Mini Oven?
(Image credit: Ninja)
If you plan on using this as your primary oven, you may struggle with the shortness of the cooking space. Not all trays slot into every cooking space in the oven, and it is definitely too short to bake bread or cakes. You will also struggle to fit a whole chicken into this oven, so I would suggest opting for a larger toaster oven if you plan on using this as your primary cooking unit. If you have an oven to cook larger items and want a smaller toaster oven to cook side dishes or make speedy midweek meals, the Ninja Foodi 8-in-1 Flip Mini Oven would be great for you.
Another big reason to buy the Ninja Foodi 8-in-1 Flip Mini Oven is the pre-heat, which is so quick that it can save you a lot of time when cooking. The cooking and toasting is even, the quality of the air frying is great, and the controls are very easy to get to grips with.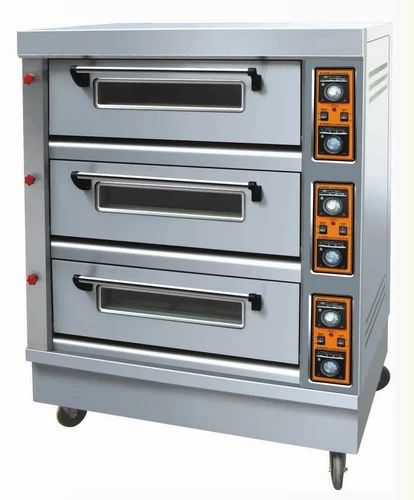
As I've said, I found cleaning in the Ninja Foodi 8-in-1 Flip Mini Oven quite tricky. The inserts can go in the dishwasher, which is great, but the heating elements themselves are hard to clean because they cannot be removed.
Today's best Ninja Foodi 8-in-1 Digital Air Fry Oven deals
Reduced Price
£219.99
£179
View
Reduced Price
£199
£179
View
£179.99
View
Show More Deals
About this review, and the reviewer
Millie Fender is our Editor for all things small appliances at Homes & Gardens. She spends a lot of time testing everything from toasters to air fryers and recommending the very best ones to readers.
All our reviews are tested from home, and the Ninja Foodi 8-in-1 Flip Mini Oven review is no exception. Millie tested it from August to November to fully make the most of all its capabilities before bringing you this review.
Millie Fender is Head of Reviews on the Homes and Gardens Ecommerce team. She specializes in cooking appliances, such as the best kettles, and also reviews outdoor grills and pizza ovens. Millie loves to bake, so she will take any excuse to review stand mixers and other baking essentials. When she's not putting products through their paces in our dedicated testing kitchen, Millie's reviews are conducted at home, meaning she uses these products in her own day-to-day life.
The Ninja Foodi Air Fryer Oven review
With continually updated technology and new brands hitting shelves all the time, air fryers continue to be one of the hottest kitchen gadgets on the market. No wonder there’s been a rash of new products that seek to combine air fry technology with the traditional appliances people already have in their kitchens.
The Ninja Foodi Digital Air Fry Oven is one such product. Building off the success of the existing Ninja Foodi, it combines an air fryer and toaster oven into one convenient package. But is it worth the investment? We tested the Ninja Foodi air fry oven to see if it could actually combine two pieces of equipment in one without sacrificing on the performance of either.
How does the Ninja Foodi Digital Air Fry Oven look and feel?
Credit: Reviewed / Jackson Ruckar
The Ninja Foodi oven is narrow and can be flipped up on its side for storage.
As soon as you take it out of the box, you get a sense that this countertop appliance is a high-quality product. Constructed of brushed stainless steel, it’s beautifully finished with rounded corners and has a digital control pad. It’s also wider and shorter than a typical toaster oven.
When cooled and not in use, the Foodi Air Fry Oven can be flipped up on one side to stand up at the back of the counter, an odd but convenient storage solution. Rather than a towel bar handle in the front, it has a small one off to the side that you use to open the door. While it’s unusual and takes a bit of time to get used to, this handle functions perfectly fine and helps make the oven more space efficient.
The Foodi Digital Air Fry Oven comes with an air fry basket, a cooking rack, a nonstick sheet pan, and a crumb tray that also seem sturdy and well made. They’re larger than the ones you typically find in a toaster oven, as the oven is so wide.
What can the Ninja Foodi Digital Air Fry Oven do?
Credit: Reviewed / Jackson Ruckar
This toaster can air fry, dehydrate, toast, bake, air broil, and keep food warm.
As the name implies, this Ninja countertop oven air fries. And just like a typical toaster oven, it also toasts and bakes. It also air roasts, air broils, dehydrates, and keeps food warm. Because it’s so short, however, it can’t hold a whole chicken like many toaster ovens in its price category.
The manufacturer encourages using the large sheet pan to make sheet pan dinners and includes a formula and some recipes for them.
If you’re looking for other multi-functional appliances that can slow cook, pressure cook, grill, and more, Ninja also offers the classic Ninja Foodi Pressure Cooker and the Ninja Foodi Grill, both of which we've tested.
What we like
- It’s beautifully designed.
- The digital controls are easy to read and intuitive to navigate.
- It’s quiet.
- It’s an excellent toaster, and does a good job of baking a sheet pan dinner.
- To check on food, there’s an oven light.
- For storage, it easily can stand on its side.
- It cooks fast.
What we don’t like
- It’s expensive.
- It can’t roast a whole chicken.
- There could be more cooking guidelines for specific foods in the cookbook.
How does it perform?
Credit: Reviewed / Sharon Franke
The air fry setting left fries unevenly cooked.
Air frying
To be blunt, it’s not the best air fryer on the market, but it’s also far from the worst. The Digital Air Fry Oven air fries unevenly, and food prepared from scratch seemed baked, not fried. On the website the manufacturer claims it can air fry 4 pounds of food at once. While we could pile up that amount of fries in the air fry basket, the loaded basket couldn’t fit in the oven at the rack position recommended for air frying.
Toasting
Credit: Reviewed / Sharon Franke
The Ninja toasts very evenly, but there's no setting that allows for extremely light toast.
The Foodi Digital Air Fry Oven can accommodate nine slices of packaged bread without squishing them. And it can toast them fairly evenly, too. When used to toast two slices, it gives impressive results, browning exceptionally evenly. It does, however, toast to a golden-brown shade on both the light and medium settings, so it could be a disappointment if you like your toast only lightly browned. It has a special bagel toasting setting and it browns bagel halves very uniformly.
Air roasting
Credit: Reviewed / Sharon Franke
Our sheet pan dinners came out beautifully cooked.
Ninja recommends using their oven to air roast sheet pan dinners with a protein (like steak, chicken, or seafood), vegetables, and spices. After following the oven booklet’s recipe for Spicy Chicken, Sweet Potatoes & Broccoli, I was impressed with the result. All of the ingredients (about 3 pounds in total) came out lightly browned and tender in just 22 minutes and made a tasty sheet pan dinner for four. This technique does seem like a very good use for this appliance.
Baking
Credit: Reviewed / Sharon Franke
Biscuits browned evenly in this toaster.
You’re not going to be able to fit an entire loaf or Bundt pan in this Ninja, but you can use it to bake a cake or muffins in a shallow pan, or small items like cookies right on the sheet pan. Biscuits baked up just as well as from a full-size oven.
Air broiling
Chicken breasts came out juicy and browned on both sides in just 20 minutes. However, even when cooked well-done, steaks looked gray on the outside and in no way resembled broiled or grilled meat. So, while this oven is fast, it can’t consistently deliver the kind of searing you expect from broiling.
Dehydrating
Credit: Reviewed / Sharon Franke
The dehydrate setting works fine, but you can't fit enough to make it worthwhile.
Although its wide air fry basket holds more food than the ones in a typical air fryer (or the racks in a toaster oven), the Ninja is still only able to dry a small amount of food. After running the dehydrator for 10 hours, I was rewarded with a small bowl of banana chips. At least the machine kept quiet as it worked.
Keep Warm
The Ninja kept a small macaroni and cheese casserole at a safe serving temperature for a full two hours. As you would expect, however, the food was dried out by then. If you’re not going to serve food within a half hour or so, you are probably better off just cooling and reheating it.
Is the Ninja Foodi Digital Air Fry Oven easy to use and clean?
Credit: Reviewed / Jackson Ruckar
The Ninja has an easy-to-use digital interface, although it does smudge.
The digital control panel on the Ninja oven is well laid out and easy to read. Its interface centers around a knob that you turn to select the time and temperature (or number of slices and doneness) for each function, and it’s fairly intuitive to program.
We love the fact that the oven preheats automatically and the preheat time is just one minute, so it doesn’t add appreciably to the cooking time. During cooking, the product is quieter than most air fryers, and you can turn on an interior light to check on your food’s progress.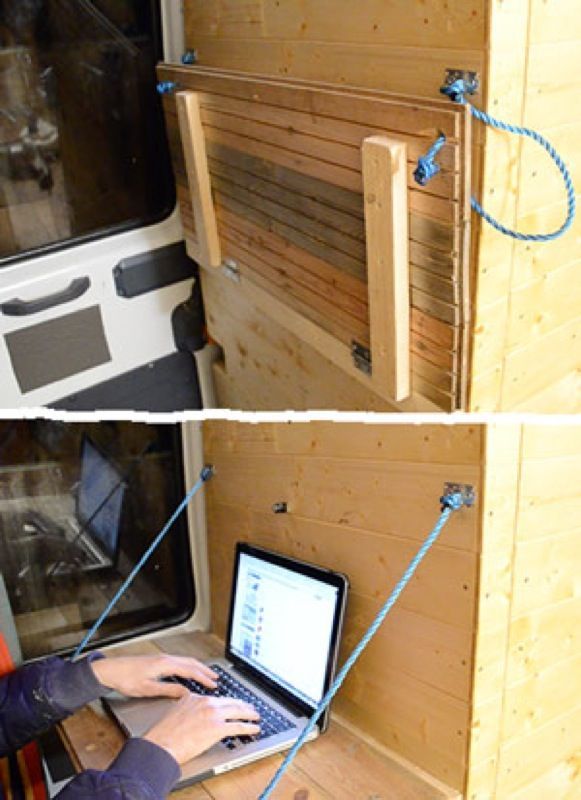
The sheet pan and the air fry basket can be cleaned in the dishwasher. In the standing position, the back opens, giving you access to the inside for cleaning.
The Ninja Foodi Air Fry Oven comes with a very thorough and easy-to-understand owner’s guide, as well as a booklet that contains recipes and cooking charts for air frying and dehydrating and a leaflet with instructions on how to build a sheet pan meal. It would be helpful if there were also charts to use as guidelines for baking, air roasting, and air-broiling.
Warranty
Ninja offers a one-year limited warranty on the Foodi Digital Air Fry Oven and a 60-day money back guarantee.
What owners say
On Amazon, the Ninja Foodi Digital Air Fry Oven has earned itself 4.7 stars from nearly 15,000 customers who praise its convenience, ease of cleaning, and fast cook times. They say it looks great on the counter, and stows pretty efficiently when not in use. Some detractors complain that the interior is not tall enough for their cooking needs.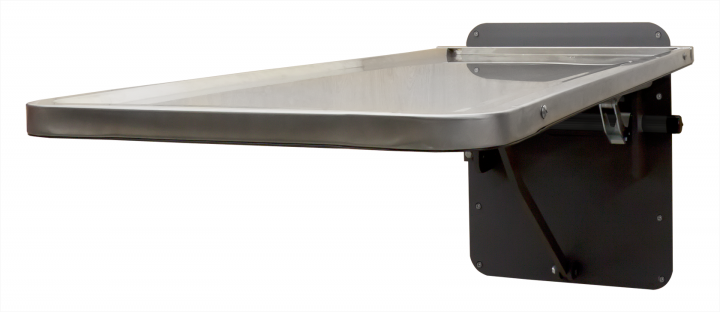
Is the Ninja Foodi Digital Air Fry Oven worth it?
Credit: Reviewed / Jackson Ruckar
Although it's not an amazing air fryer, this is a great toaster oven.
Yes. If you're looking for an air fryer and a toaster oven, this product is definitely worth your consideration. It’s an excellent toaster and a fair air fryer. The only real drawbacks are that it has a large footprint on your countertop and can’t roast a whole chicken. If you have the counter space and are in the habit of buying rotisserie chickens at the supermarket, we say go for it.
We do recognize that it’s not an inexpensive appliance, but it costs equal to or less than the Breville and Cuisinart ovens that are its main competitors. If you decide to spring for it, definitely try out the sheet pan meals.
Get the Ninja Foodi Digital Air Fry Oven on Amazon for $200
Related content
The product experts at Reviewed have all your shopping needs covered. Follow Reviewed on Facebook, Twitter, Instagram, TikTok, or Flipboard for the latest deals, product reviews, and more.
Prices were accurate at the time this article was published but may change over time.
How to fold the oven with your own hands: drawings, diagrams, views
The stove is the best way to heat a building up to 100 square meters. It gives a living heat that cannot be compared with modern chiller systems and air guns. Over the centuries of operation of fireplace stoves, the masters have identified all the design flaws and were able to eliminate them. Self-laying the stove is available to everyone, but you need to know a lot of nuances and tricks in order for the stove or fireplace to be truly functional, and not just take up space in the house. This article is completely devoted to the topic of how to build a stove with your own hands. In addition to detailed instructions, you will find recommendations and advice from experienced stove-makers to improve the efficiency of the design.
Content
- 1 Types of stoves
- 2 Where to place the structure
- 3 of which consists Choosing a brick
- 5.2 Creating a mortar
Types of stoves
Folding a stove is a simple matter, but before you start, you need to decide on the type of structure. It is selected depending on the required options, the availability of free space in the house, as well as other parameters. After that, a scheme of the stove is created with the required dimensions and notes - it is according to this scheme that the subsequent laying of the stove will take place.
- Heating. Its name fully describes the purpose. This is an ordinary stove, which is the easiest to fold. It is characterized by the simplest construction compared to the following subtypes. Often equipped with a bed.
Heating stove for summer cottage
- Heating and cooking. In this category of stoves for the home, a secondary option is added - cooking in pots or pans.
 Such a design will not replace a full-fledged stove, but it will quite cope with the task of saving gas.
 Heating and cooking stove
- Combined. This is a multifunctional unit, which is located in the kitchen of the house, and is equipped with an oven or a fully working stove for cooking. Projects of furnaces of this type are quite complex and are recommended for construction only by craftsmen.
- Fireplace stoves. Folding such a stove with your own hands is also not difficult, but there are certain requirements for its appearance. The facade should be beautiful and neat, its task, in addition to heating, is to decorate the house. Fireplaces take up much less space and are easy to light, so their popularity is growing.
Brick stove
These are not all types of stoves, but the most common ones are listed. Next, we will talk about how to fold the heating discharge furnace.
Where to place the structure
Many stove drawings only consider wall options due to the fact that it is easier to build a chimney inside an already finished wall. However, there are many options where furnace designs are constructed right in the middle of the house. This method is only suitable when you need to fold the stove in a large room - in a small area it will not only interfere, but also spoil the view, it is also possible that people passing by will be constantly burned.
Wall-mounted stoves are good in their own way - with such planning, there is a significant saving in space, installation is simplified, costs for finishing the stove are reduced, but even a small draft will help keep the temperature at foot level low. This problem can be solved by installing underfloor heating or a water circuit.
The scheme of the stove should include not only the design itself, but also departments for storing firewood, coal and other fuels. During cleaning and frequent ignition, soot and soot may enter the environment, as a result of which it is not recommended to place the equipment in the immediate vicinity of bedrooms and living rooms. The standard place where you can fold the oven with your own hands is the kitchen. In this part of the house, carpets are rarely hung or expensive furniture is placed, the floors are usually covered with linoleum, and the walls with washable materials.
Note: The stove is finished with tiles or bricks, not with wallpaper or plastic panels.
Plates must be ceramic or stone, otherwise fire is possible, because even the outer part of the furnace structure has a high temperature during operation.
What does the stove consist of
Today, even stove projects are developed by designers, so the appearance can be completely different, but the internal components are difficult to replace with something. Pay attention to this section, having studied it in detail, you will already half know how to fold the oven with your own hands.
Firebox
It is also a heat exchanger. It is the main part of any heating structure. Furnace fuel is loaded into it, ignition and combustion are carried out there. The dimensions of the furnace are directly proportional to the area of the house to be heated. The minimum side dimension of a square heat exchanger is 40 cm, the maximum rarely exceeds 1 meter. Laying the heart of the stove with your own hands is only possible with refractory bricks - constant strong heating will cause ordinary building materials to crack. The wall thickness should be equal to half the brick.
Brick oven furnaceAsh pan
This is a part of the structure, which is located at the very bottom under the heat exchanger on the stove diagram. It is necessary to collect waste combustion materials, it is often combined with an air supply compartment. This is not to say that this is a mistake, but this is how stove debris can spread throughout the house. Many stove designs provide for a special tube for supplying oxygen, so the diagrams show one door leading to the ash pan.
Chimney
Before folding the oven with your own hands, think about how the soot is planned to be removed, because the installation of the chimney requires partial dismantling of the roof and its subsequent sealing. Some craftsmen use corrugated pipes instead of a brick chimney, similar in appearance to pipes from old hoods. Such materials are not suitable for cleaning and constant heating, they are more suitable for periodic use, so it is better to build a chimney for a house from standard bricks.
The flue gas outlet must be as straight and without joints as possible. This will make it easier to clean. If you can’t do everything yourself, then you should connect specialist assistants to the case. The furnace master will not take a lot of money, but will help prevent carbon monoxide leakage, make sure that the pipes and the structure itself do not smoke.
Chimney made of bricksNuances of construction
To fold a durable stove, you need to have enough knowledge about its structure, it will simplify the process of using the tricks of experienced stove-makers.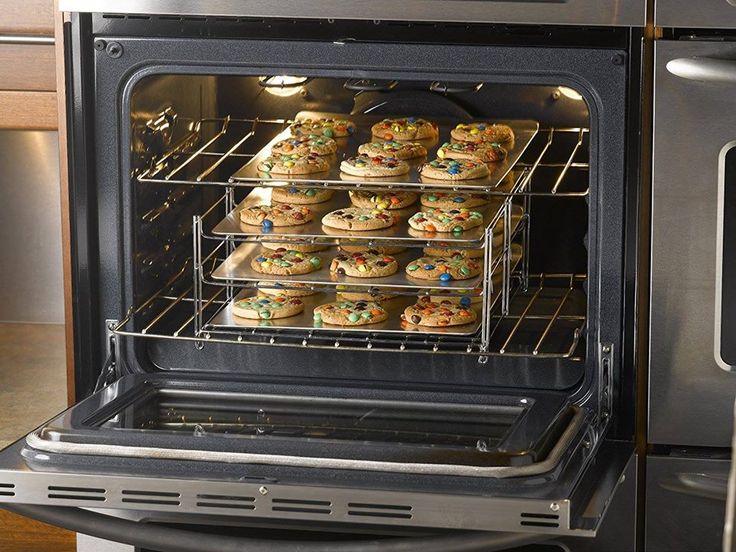
- In order not to spend a lot of time on finishing, it is enough to beautifully lay out a brick oven. To prevent pieces of mortar from spoiling the appearance, use construction tape, which is subsequently peeled off along with dirt. You can give the stove an original facade using blocks of different colors, rounded with a grinder.
- Use commercial solutions. They contain high-quality filler and binder, and are also produced using modern aggregates and additives, which improves their technological properties.
- The difference in thermal stability between fireclay and silicate blocks is 550 degrees, so that the cladding does not collapse, the firebox must be rounded with a sheet of basalt.
- Many drawings and diagrams of furnaces indicate the need for the use of metal corners. With their help, it is much easier to build a stove with your own hands or fold a heat exchanger. In addition, the corners help to correctly orient all rows of masonry according to the markings.
- To create joints of the same thickness, iron rods can be used - they are laid out on the bottom row and filled with mortar, after which they are pressed with the top layer.
- It is convenient to fold the arch of the stove or fireplace using plasterboard templates or other dense materials. To form bricks, use different nozzles.
- Lay the chimney according to the level and plumb. Even a slight roll of 5-6 degrees can destroy all your efforts.
- Buy in advance all the necessary building material. There is nothing worse than going to the supermarket for a few drills or bricks in the midst of the process.
- Take your time and do not start the work on the assembly of the furnace in a bad mood - irritation and haste are not the best advisers in the construction business.
- Refer to the diagrams often and do not deviate from the designed design.
- Use quality tools and building materials - this will increase the safety of work and improve the quality of the fireplace or stove.

Selection of furnace material
Choosing a brick
M250 brickNote: Among the whole variety of building materials, in order to build a furnace with your own hands, you need to choose brick grades M250-500.
Such raw materials are more expensive than usual, but, as experts say, they cope much better with numerous heating-cooling cycles. In addition, to finish the furnace, additional molding of bricks with a grinder or grinder may be required. Products of grades M100-200 crumble during processing, as they contain too much clay. They can lay out any decorative elements after the stove is made.
Making a mortar
In order to fold the oven with your own hands, you will need a heat-resistant mortar with a large margin of safety. You can make your own oven masonry mix or buy it at a building department store. You will need normal clay, clean sand and settled water. Before folding the oven, calculate the approximate amount of mortar - 3 buckets of the mixture are used per hundred bricks.
The preparation is simple: soak 1 volume of clay in three times the amount of water. Leave the water solution for 3-4 hours. After the time has elapsed, add the sifted sand to the consistency of thick sour cream. It is necessary to knead in a clean container using a shovel or drill-mixer. Do not use cement mortar to build a furnace with your own hands - it will begin to crack after a few weeks of operation from a constant temperature difference.
Masonry steps
We have dealt with the theoretical part, it's time for practical work. Since laying out the stove is quite difficult, you will have to be patient and be prepared for minor alterations. Building a furnace with your own hands begins with clearing a place on the foundation. If the house was built recently and there is no complete finishing yet, then it will be much easier - you will not have to dismantle the cladding or tiles. Make accurate measurements in accordance with your drawings and diagrams and start laying the stove.
- Blocks are laid according to the marking on fresh mortar. The first section of the ash pan and the hood recess are created. Don't forget to plan the placement of the doors before laying out the stove. In stoves and fireplaces, shutters and hatches must have heat-resistant handles, a metal base and fastening loops. It is quite difficult to mount the doors on mortar or by welding, therefore, wire fastening is used, so that there are no recesses between the masonry and the plugs, you need to make grooves in the bricks in advance and adjust them to size.
- Lay out the order until you reach the level of the fuel grate.
 Install and secure it. The internal part of the heat exchanger is made of fireclay bricks, which increases its service life.
 - The firebox closes from the top about 12-15 rows. If you want to not only lay out the stove, but also make it multifunctional, install a steel sheet with cooking burners in the upper part. Remember to create vents and a hatch for adding firewood.
- Next, you should do the installation of the upper cap passage, through which smoke will rise. Subsequently, a metal or asbestos pipe is installed at the top of this passage, but finishing the chimney with bricks is much more reasonable, since it will not burn out over time.
- All joints are tightly sealed with mortar - the mixture must always be fresh, so you do not need to start a whole trough at once. It will dry before being applied to the masonry.
- Furnace finishing is the last step and is optional if the structure is located in a technical or industrial area. Silicate brick or expanded clay slabs are suitable for finishing the furnace.
If you built a fireplace, then the portal for it should be made of plaster or marble. In the latter case, it is worth considering the large weight of the stone, which can shrink the foundation.
This data is enough for the DIYer to fold the stove or fireplace himself. Responsibly approach the process and remember safety precautions.
Folding the oven with your own hands step-by-step instructions for beginners
Despite the modern abundance of heating and kitchen equipment, many owners cannot imagine a private house without a stove - and this is absolutely correct. Even if it is planned to create an autonomous heating system, then the stove will also be useful. For example, in order to save money in the spring or autumn, when full-fledged heating is no longer needed, but you don’t want to breed excessive dampness in the house either. Having heated the stove once a day or every two days, it is possible to maintain an optimal balance of humidity and heat in the premises.
Folding the oven with your own hands step by step instructions
Folding the oven with your own hands with a step by step instruction which has intricate configurations - for a beginner it will be quite difficult. Therefore, if there is no experience in the furnace business, then it is better to choose an affordable ordering option that will be easy to figure out.
When choosing a model, it is necessary to take into account not only the simplicity of the circuit, but also the heat transfer and functionality of the furnace, since there are furnaces that do not provide all the functions. Heat transfer is selected depending on the area that the heating structure should heat.
There are a lot of models of stoves, as experienced stove-makers, working on one of them, make their own adjustments to its design, and thanks to this, new and new options for the heater appear. And to stop at one of the types of furnaces, you need to know what they are in terms of functionality. Article 9 ContentsBrick ovens Proskurina
- 6.1 The list of required materials
- 6.2 Scheme-order of the construction of the furnace designed by Yu. Proskurin
There are three main types of brick stoves for the home - heating and cooking, cooking and simply heating without additional built-in elements.
- The heating and cooking oven can have not only a hob, but also an oven and a tank for warming water, as well as a drying niche. In addition, such a structure is able to heat one or two rooms of a certain area.
Example of a heating and cooking stove
Such stoves are often built into the wall, turning the hob and firebox towards the kitchen, and the back wall into the living room. Thus, the oven performs a triple function - it works as a partition, food is cooked on it, and it provides dry heat to the bedroom or living room.
- Heating stoves work only for heating, and most often have a compact size.
Such a stove is installed precisely in order to maintain the balance of moisture and heat in the house in autumn or spring, when it is too early to turn on autonomous heating or have not yet turned on the central one.
Compact heating stove with chimney window
It is good to install such a stove, for example, in a country house, if there is an appliance on which you can cook food. If the power supply in the holiday village is often turned off, then it is better to choose a building with a hob for installation.
- The cooking version of the stove can also be used for heating, if you need to heat a small area. The device is perfect for a country house or for a small building for permanent residence.
Having such a stove and a supply of firewood, you can not worry that the house will be cold and damp, and the family will be left without dinner or hot tea during a power or gas cutoff.
It should be noted that any type of oven can be compact or massive. The choice of the size of the furnace structure depends on the area of \u200b\u200bthe house or room, as well as the place that is allocated for construction.
Choosing a place to install the stove
When choosing a place for the construction of the stove, it is necessary to foresee the nuances that are important not only for creating comfortable operating conditions, but also for reasons of fire safety. It is especially important to consider the location of the stove in an already built house, since the chimney pipe should not stumble upon the attic floor beams or roof rafters during its construction.
The stove is installed against an internal load-bearing wall, in the middle of a room, or built into a wall located inside the house.
- It is not recommended to build the stove near an outside wall, as it will quickly cool down and the efficiency of its use will be significantly reduced.
- In the middle of a large room, the stove is installed if it is necessary to divide the room into two zones.
Moreover, with a beautiful decorative finish, it will become a decoration of the house and can become one of the elements for the interior that will emphasize a certain style.
- When building a stove into a partition between rooms, it must be ensured that it is isolated from combustible wall materials using heat-resistant asbestos sheets or special drywall.
- The space allotted for the stove must be larger than its base by 120 ÷ 150 mm in each direction, since the perimeter of the foundation is always slightly larger than the size of the stove.
- In order to make it easier to determine the dimensions, you need to choose a model that comes with an ordering scheme.
Once the model has been selected and the installation site determined, it is time to purchase materials and prepare all necessary tools. The quantity and range of materials for each of the models is selected individually, but the tools used in laying are always the same.
You may be interested in information on how to install a chimney in a wooden house
Tools for the job
For the process of building a furnace, you will need the following tools and tools: A) A pickaxe is used for hewing and splitting bricks.
B) The furnace hammer has the same functions as the pick, but, in addition, it is convenient for them to remove the dried mortar that has come out of the masonry.
C) The rule is used to level the concrete on the foundation surface. Often it is made independently from a perfectly flat planed board.
D) A wooden spatula is used for grinding and mixing clay mortar.
E) A spirit level is a necessary tool, as it will help keep the rows even, both horizontally and vertically.
E) Bast brush is used to remove sand and hardened mortar from the inside of the oven.
G) Pliers are used to cut and bend steel wire when installing and fixing cast iron building elements.
H) Lead scriber is used for marking when decorating the stove with tiles.
i) Stukalce - a piece of pipe used for fitting tiles.
K) Scriber-rod for markings.
L) The rasp is used for grinding lumps and removing sagging on finished masonry.
M) The building angle is required to bring out the internal and external corners by 90 degrees.
H) A plumb bob is used to check the verticality of walls.
O) A rubber mallet is used for tapping bricks laid in a row.
P) A chisel is needed to parse old masonry and split bricks.
R) Trowels or trowels are used to remove excess mortar and apply it to the rows of bricks during laying.
C) Jointing will be needed if the stove is not lined with a finishing material, and the seams between the rows are neatly drawn.
In addition, you will need two containers for mortar and water, as well as a sieve for sand, if the mortar is to be made independently.
The laying of the upper rows will be easier if there are "goats"
For the convenience of work, you need to have scaffolding, which is otherwise called "goats". It is convenient to stand on them, carrying out masonry at a height, especially since the size of the working platform provides a place for installing a container with a solution.
Furnace foundation
- The foundation for the furnace is usually laid together with the common foundation for the entire structure, but they should not be interconnected, since one of them may damage the other if deformation or shrinkage occurs.
- If the stove will be built in a house already built on a strip or column foundation with a wooden floor, then the coating will have to be opened and the base under the stove built from the ground.
- If a compact stove model is chosen, and a slab foundation is arranged under the house, then the heating structure can be erected directly on it, making a waterproofing gasket.
Approximate scheme of the furnace foundation
If the foundation still has to be built from scratch, you need to remember that it must have the same shape as the furnace base, but protrude beyond its limits by 120÷150 mm in each of sides.
- The contour of the foundation is marked on the wooden floor, a part of the plank covering is sawn out according to the markings.
- Next, a pit of the required size is dug in the underground soil, with a depth of 450÷500 mm.
- The soil at the bottom of the pit is well compacted, and a sand bed is placed on it, which is moistened with water and also compacted to a thickness of 80÷100 mm.
Foundation pit for furnace foundation with sand and gravel "cushion"
- After that, along the perimeter of the pit, roofing material can be laid, which will perform the function of waterproofing and formwork, if it is temporarily reinforced with boards or bricks. After the concrete mortar has hardened, the formwork is removed from the foundation.
Instead of roofing material, formwork made of boards covered from the inside with a polyethylene sheet can be used.
Immediately it should be noted that it is better if the concrete base for the stove rises above the floor by 70 ÷ 100 mm. In this way, bricks can be saved and the joining of the floor surface and the side walls of the foundation can be simplified.
- A layer of crushed stone of the same thickness is poured on top of the sand and is also well compacted.
- The next step is to install a reinforcing mesh made of metal wire or a finished mesh at the bottom of the pit.
The elements of the lattice are interconnected by means of a twist of wire.
Foundation reinforcement - option
- The first layer of mortar is poured into the prepared excavation. It can consist of crushed stone, sand and cement - 1:2:1 or gravel and cement 3:1. This layer should take up approximately ⅓ of the space to be filled.
- After pouring the first layer, immediately knead and pour the second, consisting of sand and cement in proportions of 3:1.
The second layer is poured to such a height that 50 mm is left to the top, which will be required for the upper leveling layer of the foundation.
If necessary, for the upper layer of concrete, the formwork can be expanded, and then a reinforcing mesh with cells of 70÷80 mm can be laid on top of the poured mortar.
Reinforcement of the top layer of the foundation
- The last top layer of mortar is then poured and leveled using the rule.
The foundation is left to mature the concrete for 27÷30 days. It is advisable to moisten it daily with water and then cover it with plastic wrap - this will help make the concrete more monolithic and durable.
The poured foundation is left until the concrete has fully matured.
On the finished foundation, after the formwork has been removed, two or three layers of roofing material are laid, which will protect the brickwork of the furnace from capillary moisture coming from the ground or from the underground.
After that, you can proceed to the main work - laying the stove.
A few recommendations for masonry work
- Before starting to lay bricks on the mortar, the whole building rises dry from the brick, but each of the rows must be laid out strictly in accordance with the ordering scheme.
Dry laying is recommended by experienced stove builders to all craftsmen who take up the construction of a stove for the first time. This event is necessary in order to understand the location of all internal channels and not make gross mistakes when fitting bricks in each of the rows.
For dry laying, you need to stock up on wooden slats, which will determine the thickness of the seam between the bricks. Usually their thickness is 5-7 mm. The same rail will need to be used for the main masonry, already carried out with a solution. Such a "calibration" of the thickness of the seam is especially necessary if the laying is done "for jointing", and must be flawless.
This process is carried out slowly, thoughtfully, as it is very important to understand how the smoke will be removed from the furnace, and how it will enter the chimney.
- After lifting the structure dry before laying the pipe, it is carefully dismantled. If at the same time the bricks were adjusted to size, then each row can be folded into a separate pile by marking the number of the row and the place in it on the bricks with a marker.
- Performing the main masonry, each of the rows is also first laid out dry, and then, after carefully fitting all the details, it is mounted on the mortar.
- When the main masonry is done, two measuring sticks are laid on the edges of the previous course to maintain the exact joint thickness. Then the solution is applied with a layer of 10 ÷ 12 mm. A brick is laid on top of the mortar, pressed, and, if necessary, tapped with a rubber mallet until the brick rests against the measuring rail. The excess protruding solution is selected with a trowel.
Masonry and jointing techniques
- Laths are pulled out of the masonry after the installation of the third ÷ fourth row above them, and then used again. Therefore, you need to prepare several pairs of these auxiliary elements.
- After pulling out the slats, the seams are carefully filled with mortar and immediately “embroidered”.
- When laying on the mortar, each of the rows is checked using the building level for compliance with the horizontal and vertical planes.
Compliance with these nuances will help simplify the process of building any furnace, avoid "fatal" errors that may lead to the need to redo the entire work.
Heating and cooking oven with a drying chamber designed by Yu. Proskurin
As mentioned above, there are a large number of different models of ovens. This publication will consider one of the compact and functional options that can be installed in a small house, as it does not take up much space, but is able to heat a room of 16 ÷ 17 m².
Yu. Proskurin's stove design is a two-turn heating and cooking variant equipped with a single-burner stove and a drying chamber designed for drying vegetables and fruits, medicinal herbs, mushrooms, etc.
Yu. Proskurin's heating and cooking oven with a drying chamber
If desired, an oven box of a suitable size can be installed in the niche of the drying chamber.
The stove has dimensions (excluding the height of the chimney) 750×630×2070 mm. Its heat transfer is 1700 kcal/h. The design provides for two operating modes - summer and winter, which is very important both for fuel economy and for the ability to heat the stove and cook food without heating the entire structure in the summer.
List of required materials
In order to erect such a heating structure, the following materials will be needed:
In addition, the work will require clay, sand, cement, crushed stone, gravel, marl and an oven box, if decided, install an oven instead of a drying niche.
Scheme of erection of the furnace designed by Yu. Proskurin
| Illustration | Operation summary |
|---|---|
| The first row is laid out in a continuous plane, observing the location of the bricks. It is very important to lay this row perfectly evenly in all respects, since the quality of the masonry of the entire structure will depend on it. | |
| In the second row, the blower (ash) chamber and the base of two vertical channels are formed. The doors of the blower and cleaning chambers are installed on the same row. | |
| The metal doors are provided with special lugs, through which pieces of steel wire are threaded and twisted - they will then be embedded in the seams between the bricks. Temporarily, until they are fully fixed, the doors are supported with bricks on one or both sides. | |
| On the third row, the formation of the blower chamber and the lower part of the chamber of vertical channels continues. At the same time there is a fastening on both sides of the installed doors. | |
| On the fourth row, the doors of the blower and cleaning chambers are completely covered with bricks. The common chamber of the vertical channels is divided in two, so instead of one large hole, two are formed, having a length of ⅔ of a brick, and a width of half a brick. | |
| The fifth row is completely laid out with fireclay bricks. A hole is formed above the ash chamber with a seat for the grate. To do this, a part of the brick is cut out, from the side with which it should be turned to the hole above the blower chamber. | |
| The grate is mounted on the same row. It is planted on a clay solution or laid freely, without a solution. There must be a distance of 4-5 mm between it and the brick. | |
| On the sixth row, the formation of the combustion chamber and vertical channels continues. | |
| In addition, a furnace door is installed on the same row, the frame of which must be wrapped or overlaid with asbestos before installation, which, when the metal is heated, will allow it to expand without stress and damage. | |
| The seventh and eighth rows are laid out according to the order, the formation of the furnace and vertical channels continues on them. | |
| On the ninth row, the furnace door is covered with bricks. Moreover, in order to remove the load from the ceiling from the door, the side and third bricks from the edge are ground off on one side and a brick is installed between them, hewn from both sides. | |
| On the tenth row, the fuel chamber and the first vertical channel are combined - this is done so that the hot smoke from the furnace is directed precisely into this created hole. For a smooth flow of smoke, the protruding corner of the solid brick enclosing the second vertical channel is cut off. | |
| On the eleventh row, the masonry follows the scheme, except that cutouts are made on the edges of the bricks framing the combustion chamber, which will form a recess for mounting a single-burner hob. | |
| Then, on the same row, asbestos strips are laid on the cuts made on the bricks, and the slab panel is mounted on them. A steel corner is installed on the side of the formation of the cooking niche. | |
| Row 12 is laid out of red brick, and in the future, all the masonry comes from it. Two vertical channels are again formed and a niche is being formed around the hob. | |
| Row 13 is laid according to the scheme, but in the front part of the first vertical channel a place is formed for installing the summer-winter valve. After that, a valve is mounted on the clay-sand mortar. | |
| From rows 14 to 17, masonry is carried out according to the same principle - a cooking niche and channels are formed. | |
| On the 18th row, steel corners cover the cooking niche. One of them is mounted on the edge of the niche, the second - at a distance of a brick from the first, and the third is pressed against the second with the back side. This is done so that it is convenient to carry out the laying of the next row. | |
| for 19row, the cooking niche is completely covered, with the exception of the formation of an opening for the steam exhaust channel and a place for installing a valve. To do this, cutouts are made on the bricks, into which the valve is mounted. | |
| 20th row is laid out according to the scheme. It continues to form two vertical channels and a steam outlet. Moreover, if you look closely, you can see that one of the bricks forming the first vertical channel is cramped. | |
| On the 21st row, the first vertical channel and the steam exhaust are combined with the help of the hollow space left. In this row, almost all bricks are placed only along the walls of the perimeter of the structure. Only the second vertical channel is fenced off. | |
| In the same row, the resulting cavity is covered with metal strips, which are laid according to the scheme shown in the figure. | |
| Next, a sheet of roofing iron is laid on the steel strips, with the help of which a chimney opening is organized, located on the opposite side from the steam exhaust opening. | |
| On the 22nd row, laying is done on top of the roofing sheet. Leave a hole for the chimney and two holes for the vertical ducts. In the place where the drying niche will be formed, a piece of a corner is laid, which will protect the brick on the edge of the chamber from damage and make the edge of the niche more accurate. | |
| 23 row - a drying chamber is formed, and its rear wall is made of bricks installed on its side. It isolates the chamber from the chimney opening. | |
| On the 24th row, the walls of the drying chamber, the chimney and two vertical channels are formed. | |
| 25 row - work continues according to the scheme. The second brick of the back wall of the chamber is installed in the same way as the first. | |
| On the 26th row, preparations are underway to combine the two vertical channels, so the inner bricks in both holes are grinded at a slight angle. | |
| 27 row - the first and second channels are combined with masonry. They have a common cleaning door. The rest of the work goes according to the scheme. | |
| On the 28th row, the drying chamber is covered with three pieces of corners according to the same principle as the cooking niche was covered. Vertical channels are combined into one wide one, and the cleaning door is fixed with side bricks. | |
| On the 29th row, the drying chamber and vertical channels are completely covered. A chimney channel opening is left, which is lined with bricks with cut out mounting grooves for the chimney damper. After laying the row, a frame with a valve is installed on the clay-sand mortar. | |
| On the 30th row, the entire surface of the oven is covered completely. Only the chimney hole is left, which should be half a brick in size. | |
| 31-32 row - the formation of the chimney begins. |
This drawing shows the oven in section. The diagram clearly shows all the internal channels through which heated air will circulate.
The sections clearly show the configuration of the internal channels of the stove
If a novice stove-maker carefully studies the diagram of this simple model, he will be able to easily build it in his house. The main thing is to follow all the useful recommendations and carefully, slowly, perform masonry work.