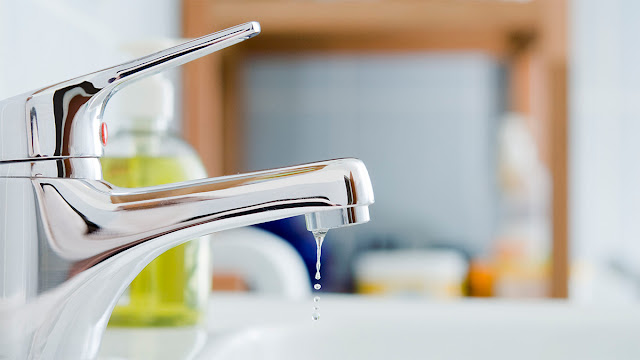
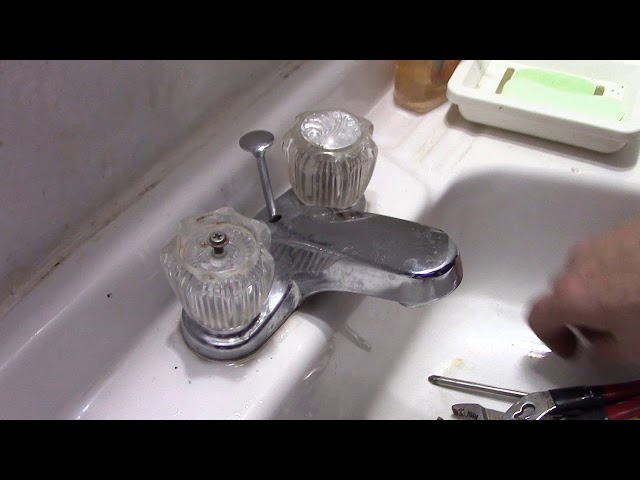
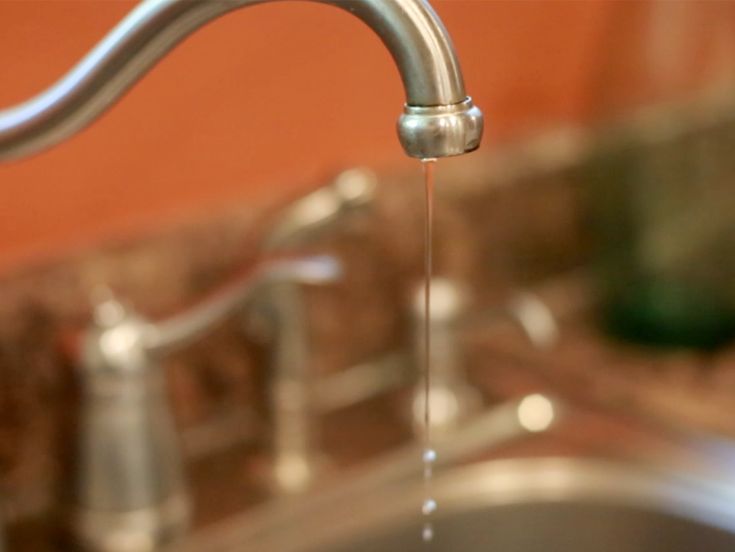
Dripping bathroom faucet
5 Reasons Your Faucet Is Dripping Water & How To Fix It
Did you know that a leaking faucet can waste up to a hundred dollars worth of water? And that’s just a minor leak. A larger faucet leak can waste more than 30 gallons of water a day, putting a significant dent in your wallet. To help you save money, we have compiled a list of 5 causes of leaky faucets and how to fix them.
Our expert technicians are here for youSchedule Online Today
Table of Contents
5 Causes of Leaky Faucets
There are many more causes of leaky faucets than you might think. Here are the main five causes:
A Damaged Cartridge
If you have a faucet with two handles, one for hot water and the other for cold, then you have a cartridge-style faucet. The cartridge is a valve on each handle that controls the flow of the water into the faucet spout. If your faucet is dripping water, this is a sign of damage to the cartridge.
Broken Washers
A common cause of a leaking faucet is broken washers. Washers rest against the valve seat, and overtime, friction can cause the washers to wear out. This then leads to leaking. If a washer is the wrong size or not installed properly, it can also lead to leaking.
Water Pressure
If you notice that the faucet in your bathroom only drips water during certain times or when your faucet’s handles move a certain way, then it could be your home’s water pressure that is causing the leaks.
Malfunctioning O-Ring
An O-ring is located in the sink’s faucet. It is a small disc that is attached to the stem screw to hold the handle of the faucet in place. Similar to washers, O-rings can get worn out or loose. If one of your faucet’s handles is leaking, this is probably the cause.
Deteriorated Valve Seat
If your faucet is leaking from the spout, then it could be the valve seat. The valve seat connects the faucet to the spout. Sediment can build up and corrode the seat, causing a leak.
Tips & Insights: The Advantages of Investing in a New Condensing Furnace
How To Fix A Leaky Faucet
Save yourself some money by fixing a leaky faucet yourself.![]() Be your own repairman—or repairwoman—and follow these steps:
Be your own repairman—or repairwoman—and follow these steps:
Deactivate the Water
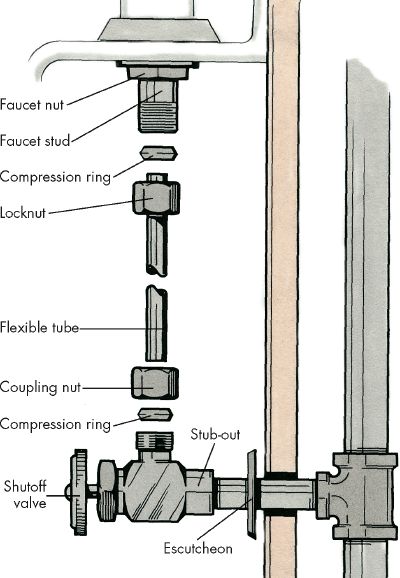
One of the most important steps in fixing a leaking faucet is to turn off the water. If you do not shut off the water to the sink, you could end up flooding your bathroom. To shut off the water, look for the fixture shutoff valves below the sink and turn the handles clockwise. If your faucet doesn’t have any shutoff valves, turn off the main water supply for the house. Check to make sure that the water is off by turning the faucet on. If no water comes out, then you did your job.
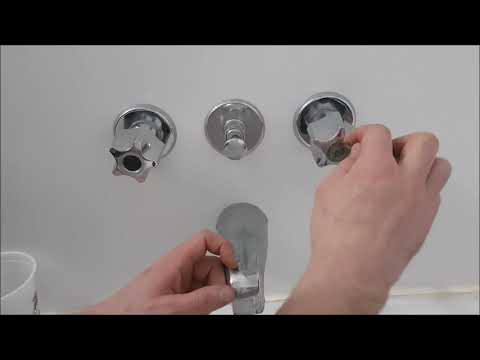
Disassemble the Faucet Handles
The way to remove the handles of a dripping faucet depends on the type of fixture. For standard fixtures, you can use a flathead screwdriver to remove the caps on top of the handle, revealing handle screws. Unscrew these and pull the handles off.
Detach the Valve Stem
Once the faucet handle is removed, you will see the inner valve stem or cartridge. This also needs to be removed. Compression faucets have a brass valve stem that can be unscrewed. Cartridge faucets can be pulled straight out. If you are having trouble, you can refer to your faucet manual or look up instructions online.
Inspect the Parts of the Sink
Once you have taken all the parts out, carefully inspect them to confirm what needs to be replaced to fix the leaking faucet. You should see rubber washers, O-rings, and seals.
Replace the Damaged Parts
If any parts are old or worn out/damaged, replace them. Go to your local hardware store and find the parts you need. The best and easiest way to get the right parts for your dripping faucet is to bring the old ones into a hardware store and ask for exact duplicates.
Tips & Insights: What Are the Pros & Cons of Buying a Heat Pump?
Sanitize the Valves
Look at the valve body after you have removed the stem or cartridge. Usually, there tends to be mineral buildup. To clean it, pour white vinegar over the valve seat and let it soak for a couple of minutes.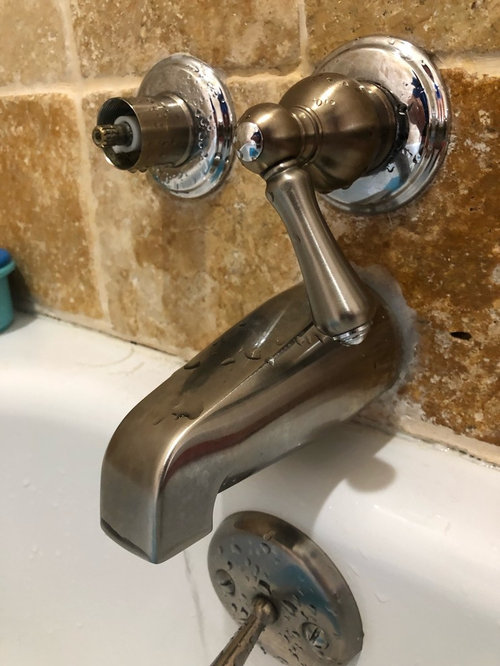 Then scrub it away, and scrub the other parts of your sink to restore it’s shininess and smoothness.
Put The Faucet Together
Once you have the new replacement parts and have cleaned everything, reassemble the faucet. Turn the water supply on and check for any leaks.
4 Type of Faucets
Knowing the 4 common types of faucet will help you know how to disassemble and fix it if need be.
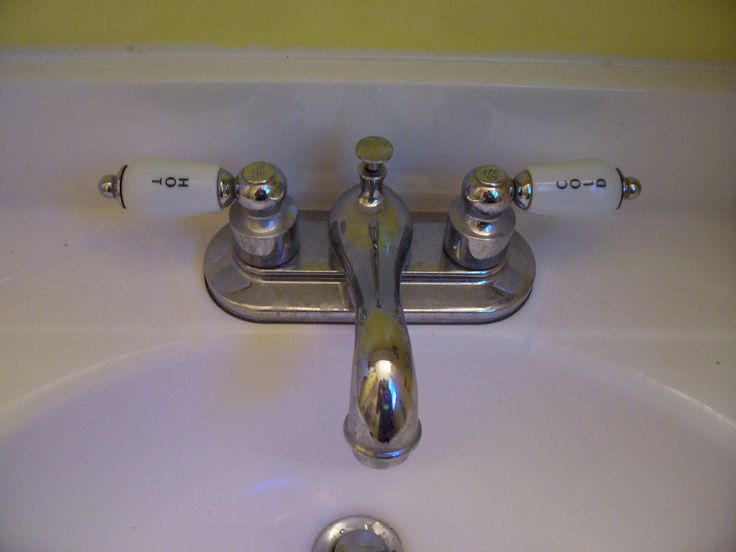
Cartridge Faucets
Cartridge faucets are commonly found in bathrooms and are characterized by the two handles on either side of the spout. The handle moves up and down to turn the water on or off. The inner workings of the sink contain a cartridge that moves up and down to control the flow of water.
Disc Faucets
Disc faucets are newer faucets, and typically a bit more expensive than other standard options. They are extremely durable and reliable. Disc faucets have only a single lever to operate them. The lever sits atop a cylindrical body.
Tips & Insights: 5 Advantages of Installing Radiant Floor Heating Systems
Ball Faucets
These faucets use a ball joint to control the hot and cold waterlines. They are characterized by a single handle on a rounded cap mounted on top of the spout. To work them, you push up and down to adjust the pressure, then left or right to adjust the temperature. They’re common in kitchens and other high-use areas.
Compression Washer Faucets
Although they are the oldest type of faucet, compression washer faucets are still commonly used today. They use rubber washers to tightly seal against the flow of water. They have two handles that do not move up or down, only side to side. The most identifiable trait of compression washer faucets is that you can feel the handle of the faucet getting tighter as you shut it off.
Faucet & Plumbing Installation Services
If you cannot fix a leak in your faucet, give our team a call at (484) 206-8594. We offer emergency plumbing services and will address the situation quickly. Once we discover the source of the problem, we will let you know the parts and components that need to be replaced to fix the dripping faucet.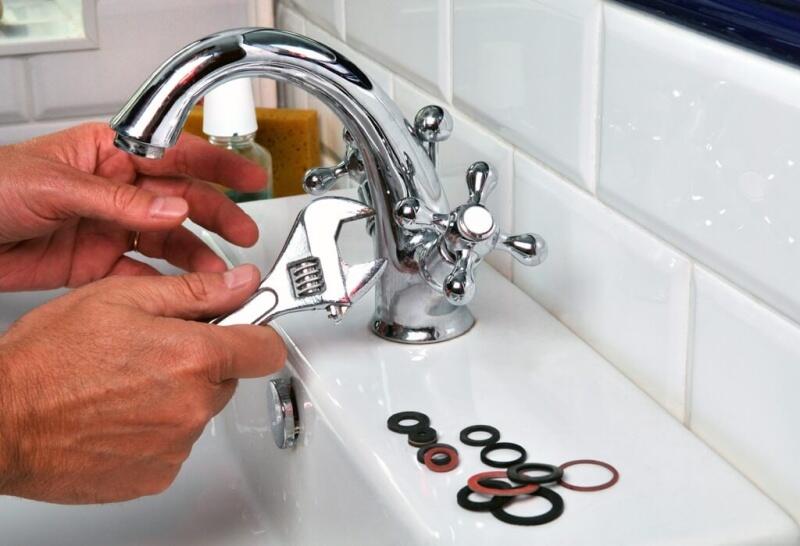 Do you need help with a different plumbing problem? In addition, to fixture repair solutions, we offer other types of services such as water heater repair and sump pump installation. You can trust the team of licensed plumbers at WM Henderson.
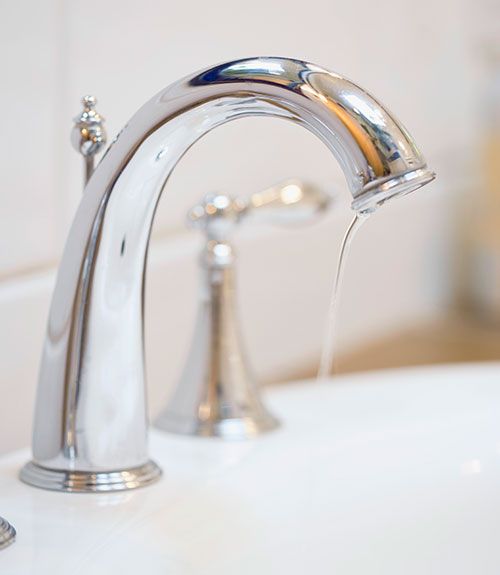
How to fix a leaky bathroom faucet
Drip. Drip. Drip. You probably know that all too familiar sound and how it grows in rhythm and volume with each little drop. The leaky faucet is a common nuisance that no homeowner is immune to. Fortunately, you can fix it with relative ease with the right tools and supplies.
From shaving to brushing your teeth, your bathroom sink gets a lot of use nearly every day. This use inevitably leads to the components inside the faucet head wearing down or corroding from mineral deposits, which can cause a dripping faucet. Faucet leaks are not only wasteful but can also run up your water bill if left untreated. According to the United States Environmental Protection Agency (EPA), household leaks account for nearly 10,000 gallons of water waste each year. Fixing water leaks when they happen can prevent this and save households about 10% on monthly water bills.
If you want to know how to get the drip out of your life and reduce water waste, read on. In this article, you’ll learn how the faucet works, common causes of faucet leaks and how to repair faucets DIY style.
Possible causes of a bathroom leaky faucet
At some point, we all have to deal with a leaky faucet. Older homes and even newer ones will run into this troublesome issue. Whether it’s your bathroom sink or the bathtub faucet, most causes of leaks are generally the same and attributed to accumulated mineral deposits, corrosion or defective parts of the faucet.
Fortunately, faucet replacement parts are found at just about any home improvement or hardware store and are generally easy to install, even for DIY enthusiasts. Even if you don’t consider yourself much of a handyperson around the house, you’ll be surprised at how straightforward fixing a leaky sink can be.
The following are components that commonly wear down or corrode, causing your faucet to drip or leak. Once you know which component needs replacing, you can purchase the necessary parts at your local hardware store and get to work on your faucet repair. Even better, replacing all parts at the same time will help you avoid having to make another repair shortly down the road.
A worn-out internal washer
An internal washer stops water flow in the faucet. It opens and closes as you turn the water faucet handle on or off. Over time, friction can cause a rubber washer to wear down, and the sink faucet will begin to leak.
A bad O-ring
The O-ring — found in cartridge faucets — is a small rubber disc and can become loose or wear out over time and break. Repeated use and friction cause the O-ring to wear out. When this happens, water drips from the base of the sink or handle rather than the spout.
A corroded valve seat
Corrosion can occur from mineral deposits or friction on parts.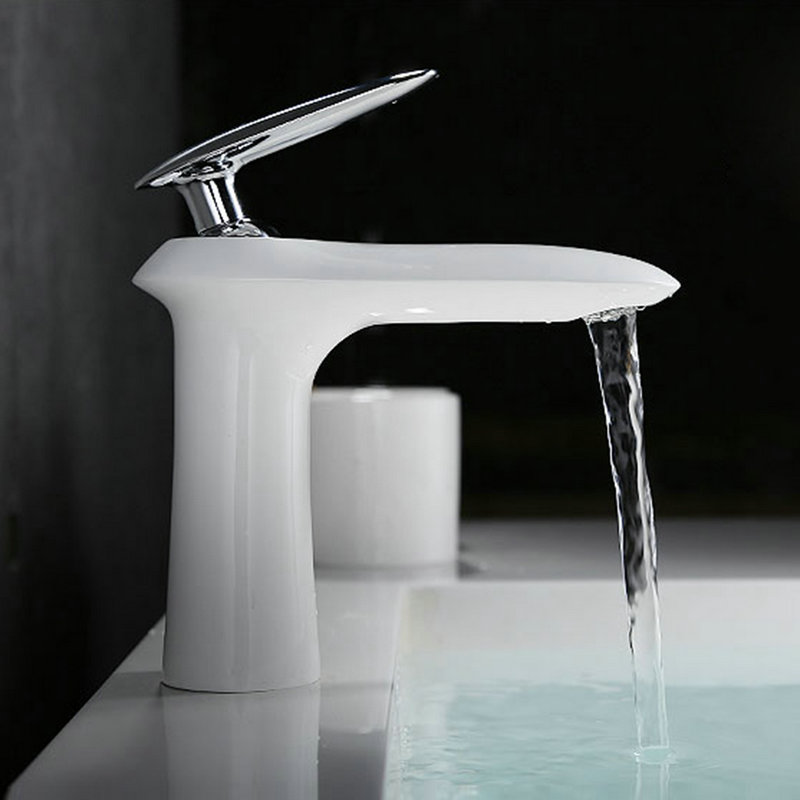 The mineral buildup causes corrosion on the valve seat. White vinegar is a common remedy to remove mineral deposits to prevent further corrosion. Incorrect installation of washers can compromise the structure of the valve seat, as well, affecting the seal and causing the faucet to leak.
How to fix a leaky bathroom faucet
If you notice your bathroom sink drips or leaks out of the faucet head when turned off, there is likely an issue with the seal inside the faucet head, allowing the water to run through or drip.
Before calling a professional plumber, consider whether you’re able to repair the leak in your bathroom sink yourself. By learning how to take apart the faucet and install the new replacement parts, you might be able to stop faucet drips and leaks. To get started on this DIY project, gather the tools and supplies listed below:
- Allen wrench
- Flathead screwdriver
- Crescent wrench
- Pliers
- Towel
- Sink stopper
- Faucet cartridge
- Vinegar for sediment removal
The following steps will help you determine which side of the faucet has a leak and how to remove, repair and replace the faucet head.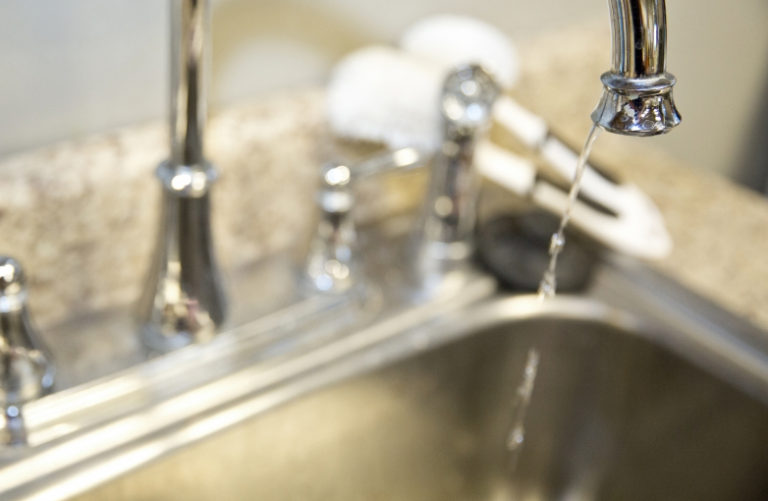
Turn off the water supply to the faucet
First, you need to shut off the water supply. You can do this by turning the shut-off valves located under the sink. To determine which side of the faucet leaks, begin with turning off the cold water valve only. If the water continues to drip, turn off the hot water valve. Once you know which side of the handle faucets has the issue, turn off both valves.
Sometimes, the valves under the sink won’t turn. If that’s the case, shut off the main water valve to the property. This is at the exterior water meter. Open the water meter lid and turn the knob located inside clockwise to turn off the water valve. Some main water valves require a specialized key. You can obtain this by contacting your local municipal water service.
Remove the faucet
There are several types of faucets requiring different removal methods; however, their anatomy is generally the same.
Before you begin, turn both handles to the “on” position to empty the faucet of any remaining water. Be sure to close the sink drain to avoid losing any parts or tools. Place a towel inside the sink to avoid surface damage.
Using an Allen wrench, remove the screw located on the faucet handle (this specific screw is also sometimes referred to as the set screw). If there is a decorative cap covering, you can detach it by gently prying it off with a Phillips flathead screwdriver. Now, you can remove the handle to get to the faucet cartridge located inside the faucet.
Remove the faucet cartridge
You may need to remove a “beauty ring” using a crescent wrench to unscrew the hex on top of the faucet cartridge. The cartridge should then come out of the faucet easily. To remove the cartridge, simply grasp firmly and pull in an upward motion.
Once you remove the old cartridge, thoroughly dry the area and components with a clean towel. Now, you’re ready to replace it with the new cartridge.
Replace the faucet cartridge
To install the new cartridge, insert and press the faucet cartridge into place. Using a crescent wrench or pliers, reattach the “beauty ring” and avoid over-tightening and stripping the packing nut.
Reinstall the faucet
Now that you have replaced the old, worn-out components, you’re ready to reinstall the faucet handles on the sink.
Place the handle over the newly installed faucet cartridge and set the screw with an Allen wrench. Once in place and secured, open the water valve. Be sure to remove any tools or other materials from the sink before testing the faucet for leaks.
To avoid damage to the newly installed components, slowly turn the hot and cold water handles to the “on” position. Allow water to run for one to two minutes to remove any debris collected on the new parts. This ensures the aerator is not clogged. During this time, watch for any signs of leaks. If the aerator is sluggish, soak in vinegar to remove accumulated debris.
Call an expert
If, after doing these steps and your faucet is still leaking, you may require help from a professional plumbing company. With more complex issues, DIY can get complicated. Without specialized tools and expertise, you may end up doing more harm than, good causing an immediate need for a plumber.
If you’ve had the faucet for a long time, it might be time to replace it. Like any other home appliance, faucets have a limited life span, and you’ll eventually need to replace them. If there are leaks in several locations around the faucet or the replacement parts have been discontinued, it might be time to think about replacing the faucet with a newer model.
To be proactive about future leaks, you can also consider investing in a home warranty through Cinch Home Services. Through a service call, we can match you with a local service provider who can help eliminate the leak.
Protect your plumbing systems with a home warranty from Cinch
Cinch is committed to taking a no-nonsense approach to home warranty protection. We offer home protection plans that are easy to read and understand and also include coverage on certain bathroom systems, such as plumbing and water heaters, in addition to kitchen and laundry appliances.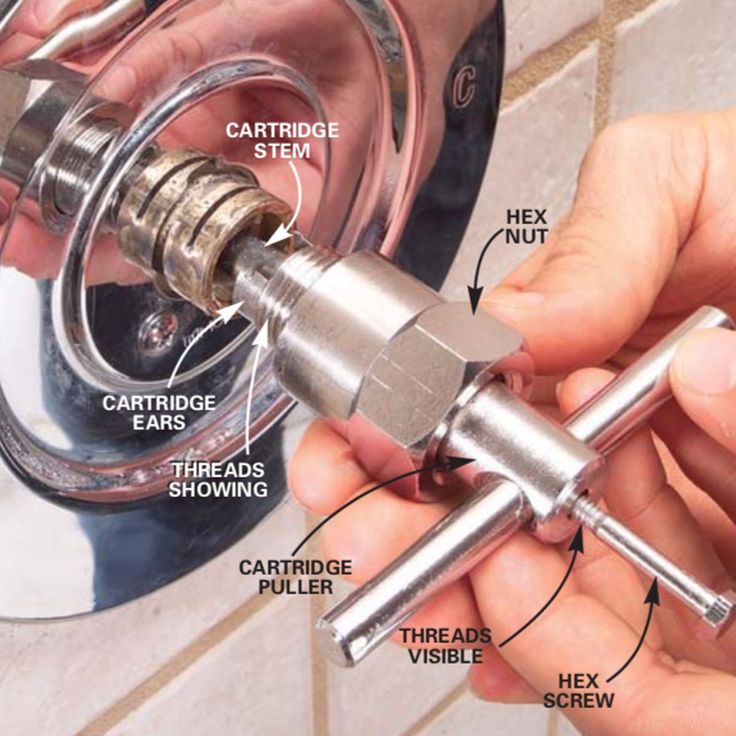
Backed by a 180-day workmanship guarantee, Cinch home warranty plans are an affordable way to repair home appliances and systems when they break down over time due to everyday use. Discover the right home protection plan for you, and contact us today for a free quote.
The faucet in the bathroom is dripping: how to fix and eliminate the leak
Why is the faucet in the bathroom dripping and how to fix it? The main cause of leakage is the thinning of the gasket and moving parts. Sooner or later, this happens with any mixer. The service life of the product depends on the manufacturer, materials and water hardness.
How to fix leaks
Root causes
Product types and repairs
- Single lever
- Double valves nine0011 Ball
Other causes of breakdowns and their elimination
- Broken shower switch
- Leakage at the junction of the gooseneck and the body
- The junction of the watering can and the shower hose is leaking
- Water pipe joint leak
- Gasket thinning.
- Oil seal wear.
- Breakage of the crane box.
- Cartridge failure.
Instagram @designplan.online
To make a quality repair, you need to know not only the type of malfunction, but also the type of mixer itself. They differ in types of construction: two-valve and single-lever. Single-lever, in turn, are cartridge and ball.
Single-lever
From the name it is clear that the handle of such products is one. Water temperature and pressure are adjusted by turning the lever. The most common subspecies is a mixer with a disc cartridge cartridge equipped with rotary plates that block the pressure. They are usually made from ceramic. This species most often has the following accidents. nine0003
Single lever bath mixer with shower Grohe Euroeco
Types of breakdowns
- Leakage under the stem.
- Problems with thermoregulation.
- Lever is tight.
- The pressure is not shut off completely.
Instagram @smesiteli_tataev
Instagram @smesiteli_tataev
Instagram @pro_otdelku
Since the cartridges in such products are not disassembled and it is impossible to replace a separate part, the entire cartridge is changed. So, if the faucet in the bathroom is leaking, how to fix it?
Repair Instructions
- The lever has a protective plug to prevent water from entering the latch. It must be dismantled.
- The colored plug can also be removed.
- You will need a small flathead screwdriver. Leave the screw holding the handle to the stem and remove it. nine0012
- The fixing nut is covered by a dome-shaped pad. It needs to be unlocked.
- You will need a wrench. Remove the nut securing the cartridge.
- Replace cartridge.
- Replace all parts in reverse order.
Instagram @smesiteli_tataev
Instagram @smesiteli_tataev
Ball
In this product, the water pressure is blocked by a small stainless steel ball - hence the name. When you turn the knob, the ball moves and closes the flow of hot or cold water. The neutral position is provided by springs made of anti-corrosion metals. Such a product is durable, but, nevertheless, if a malfunction occurs, there is an algorithm of actions.
Single lever bath mixer with shower VIDIMA Orion
Repair Instructions
- Loosen the screw and remove the lever.
- Unscrew the trim.
- Under it you will see a nut. It also needs to be unlocked.
- Remove the plastic seal from the body that holds the ball.
- If the seal is worn, replace the part with a new one.

- Pull out the check ball. It needs to be cleaned and checked for integrity. If the condition is satisfactory and there are no or little signs of wear, rub the part with a soft cloth with a drop of polishing agent. Do not use abrasives. After that, put the ball in place and assemble the product. If you notice serious damage to the ball, then it must be replaced. nine0012
Instagram @anholt_alex
Instagram @anholt_alex
Instagram @anholt_alex
Two-valve
What to do if a two-valve faucet is leaking in the bathroom - how to fix it? In products with two handles, the water is blocked by a faucet box. They are valve and semi-turn.
Half-turn bushing repair
The half-turn bushing is similar in design to the single-lever cartridge. It is she who is most often the main cause of water leakage in the bathroom. Inside the box there are plates that, when shifted, block the pressure of water. If they are damaged or worn out over time, there is nothing to hold back the pressure, and the water begins to seep over time, increasing the flow.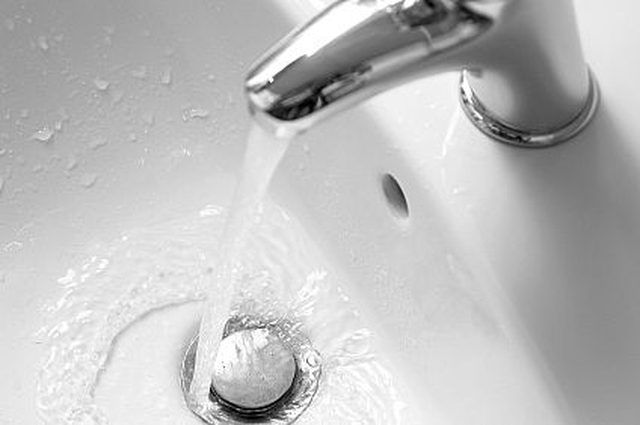 Half-turn axle boxes usually change completely. Here's how. nine0003
- First remove the cap. This can be done with a screwdriver, pry it, or unscrew it - if you have a threaded option.
- You will see a screw that fixes the bushing. It needs to be turned out. Please note that this part is often covered with rust or fungus - work carefully to avoid breaking or smoothing the threads on the head.
- Take a suitable key. Use it to unscrew the crane box. nine0011 Fit and secure the new part and replace the plug.
Single lever bath mixer with shower Grohe Concetto
Replacing the valve box
The valve box, sometimes referred to as the wing-type box, works by means of a worm gear mechanism. It regulates the water pressure by moving the stem with an elastic band. The main breakdown in such a mechanism is the thinning of this very gum. If it is unsuitable, water begins to leak when the valve is closed. Unlike all other mechanisms, the wing mechanism can be repaired without completely replacing the entire part. It is done like this. nine0003
- Remove the faucet handle.
- Take a suitable wrench and unscrew the bushing.
- Install a new seal and consumable from the underside.
- If the leak is between the valve stem and the clamp nut, the stuffing box is worn out and needs to be replaced. The box is removed in the same way.
- Unscrew the stem in the valve mechanism and replace the thin rubber that is in the groove of the stem.
- If there is no part, use electrical tape, it must be wound around the rod. nine0012
Instagram @modulceramica
@crocus_shop_rnd
Instagram @rosbri
Instagram @smesiteli_tataev
It happens that the breakdown does not depend on the mechanism. How to fix such problems?
Shower switch broken
The most common failure of a faucet in the bathroom is a leak from both the spout and the shower at the same time.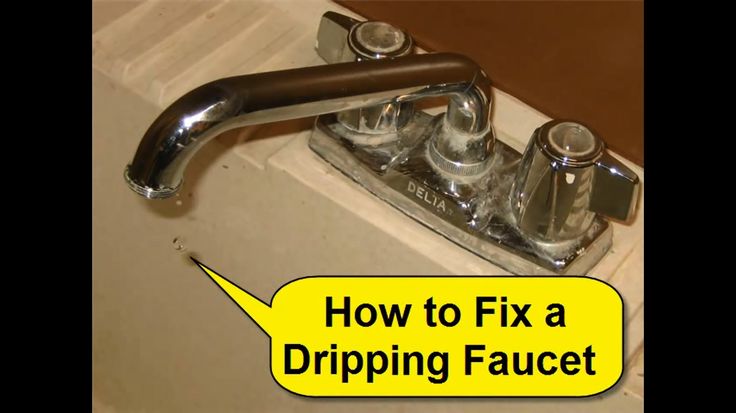 This means the switch that directs the water is broken. To fix the breakdown, you first need to figure out what type of switch you have. There are several. nine0003
Single lever bath mixer with shower VIDIMA Fine
Pendulum
It is also called the flag type. Usually found on valve variants. Most often, when repairing the current pendulum model, you need to update the spool or cartridge. The work is done by analogy with the repair of a crane box.
- First of all, you need to get rid of the plug.
- Screw, which is also removable under it. nine0012
- The lever is unscrewed.
- The key removes the switch.
- Change spool.
- All parts are returned to their place in reverse order.
Push-button (exhaust)
More often comes with cartridge models, but is also found in valve models. Repairing a pushbutton switch most often comes down to replacing the gasket.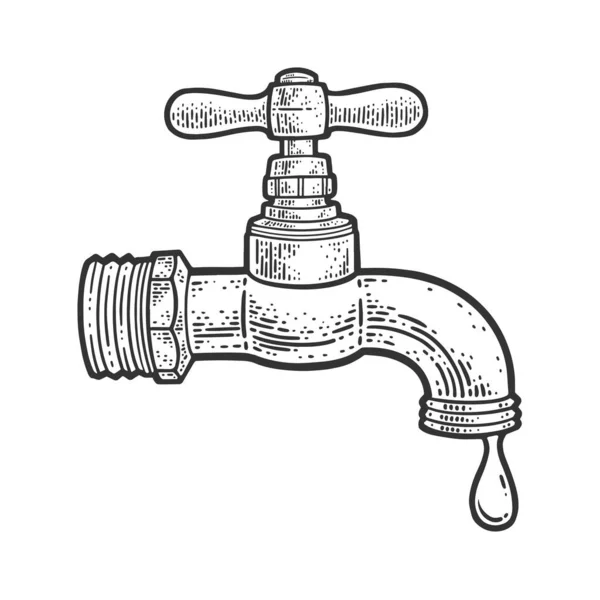 It can wear off, harden or deform over time. After that, she will not be able to hold water. If the water does not switch or flows from everywhere at once, the gasket most likely needs to be updated. It's done like this. nine0003
Grohe Grohtherm
thermostatic double-lever bath mixer with shower- Take an adjustable wrench. Use this tool to unscrew and remove the button. Try to act carefully, without damaging the elements of the mechanism.
- Next you will see the stem. It will have several seals in the form of washers. Remove them and replace with new ones.
- Replace the button. nine0012
Instagram @berg.interior
Instagram @santehmega 1
Instagram @santehmega
Leak at the junction of the gooseneck and the body
The junction of the faucet spout and the body often leaks. Here, too, the most likely problem is a damaged gasket. It is put on the body of the spout, thus sealing the joint.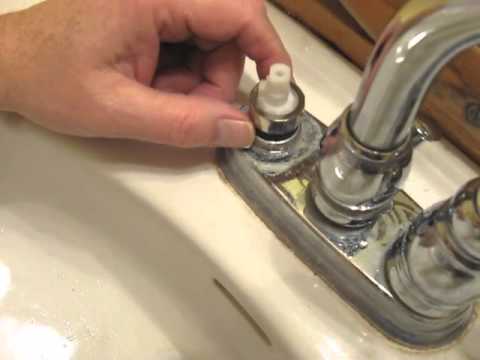 If it has thinned and a leak has appeared, the gum must be updated as follows.
Repair Instructions
- Take an adjustable wrench and unscrew the nut that secures the spout to the faucet body. nine0012
- Loosen the mounting nut.
- Remove the damaged part and install a new one. It is convenient to use tweezers for this.
- Reinstall parts in reverse order.
Instgram @magazin_sputnik
Instgram @luxform
The joint of the watering can and the shower hose is leaking
And again, the issue is most likely in the gasket. Seals are installed at the joints, which deteriorate over time. The shower is dismantled along with the hose, and the part is replaced following the algorithm. nine0003
Repair Instructions
- Loosen the hex nut that holds the valve and hose together.
- Take the key.
 Remove the flare nut at the point where the hose and shower head are attached.
 - The gasket will be located on the pressure hose.
- Replace it with a new one.
Instagram @elitesw_ukraine 2
Instagram @burlington_ru
Instagram @elitesw_ukraine
Water pipe joint leaked
If your case is leaking water connections, first determine the location of the problem and the way the faucet is connected. There are three types of breakdowns.
Malfunction of the inlet pipes at the junction. If the faucet mounted in the wall leaked at the connection points to the branch pipes, most likely the gasket was deformed or worn off. She needs to be replaced. Just unscrew the faucet from the wall by removing the nuts and change the seals.
Single lever bath mixer with shower Roca Victoria-N
Leaking flexible hoses connecting mixer and pipe. Bathroom faucets are connected to the plumbing using flexible tubes that can leak over time.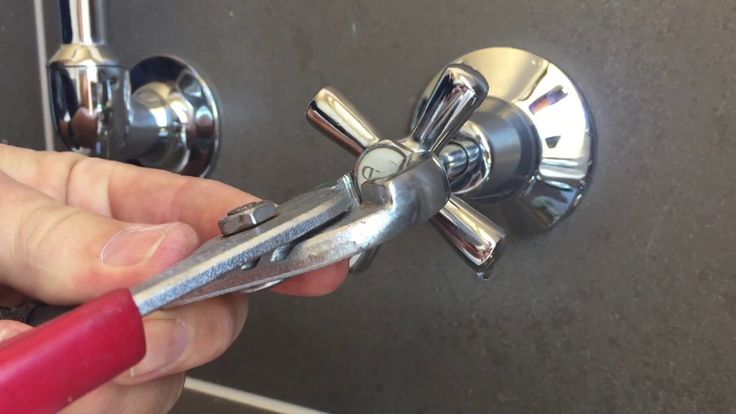 If this happens, check the seal on the thin end of the tube. Most likely it's about him. If it is worn out or warped, update the consumable, and the leak will be eliminated. It's done like this.
Repair Instructions
- Remove the product from the sink or tub. Use a wrench for this. Troubleshooting from the bottom of the mixer while it is connected is very difficult. nine0012
- Unscrew all hoses connected to the product.
- Replace the rubber rings on each one.
- Replace all elements.
- If the seals on the shower hose are damaged, the spout must also be removed.
Instagram @kobzevstudio
Instagram @indesland
Instagram @designplan.online
Instagram @berg.interior
Prepared by
Elena Perlova
DIYFaucet dripping in the bathroom how to fix it, expert advice
It would seem that what's wrong with a dripping faucet? But if this small problem is not addressed in a timely manner, it can cause serious consequences. Firstly, this problem can cause serious damage to the plumbing, and then the gasket may simply fail. And to fix this problem, you will need to invest a lot of effort and money. Therefore, it is worth knowing in advance what to do if the faucet drips in the bathroom, how to fix and solve the problem that has arisen. nine0003
Content
- possible causes of breakdown
- How to fix the tap, depending on its type
- Possible breakdowns and their elimination
- Replacement of the gasket
- Settings 9001
- Two-valve
- Video
Possible causes of failure
The first thing to do is figure out why the faucet is leaking. Often the main problems of failure of a plumbing fixture are damage to oil seals, gaskets, as well as increased service life. If the mixer began to drip after purchase, then this is probably a factory defect. But in order to perform high-quality repairs, it is worth understanding the features of breakdowns. nine0003
Leakage may occur due to the following reasons:
- gasket wear;
- oil seal wear;
- contamination of the ball cartridge;
- poor-quality installation;
- mixer wear.
A common defect in a bathroom faucet is gasket wear. A gasket is a rubber element that acts as a seal between the connection in the faucet in the closed position. If this element begins to wear out, then the mixer begins to drip slowly and as it wears out, the dripping turns into a leak. Usually the gasket is changed every 7-8 years. nine0003
Another common cause of faucet leaks is seal wear. The thing is that the sealing stuffing box element can wear out over time. It is quite simple to determine this sign - in the closed state, no defects and breakdowns of the mixer are visible, but as soon as the tap is opened, water immediately flows out from under all the valves.
The design of the faucet has some peculiarities - elements are installed inside that quickly become dirty when exposed to mechanical components contained in tap water.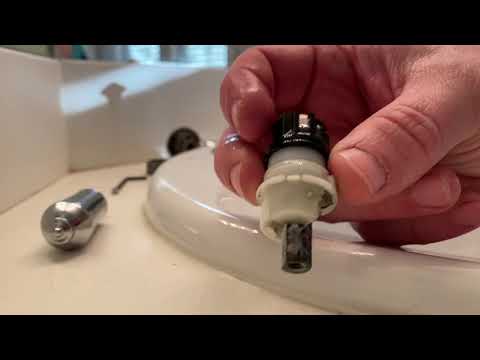 To eliminate the leakage of the tap, it is required to completely disassemble and carry out a high-quality cleaning of all parts. nine0003
Mistakes made during the installation process soon cause the faucet to fail and leak. Overtightening the nut will damage the gasket and will accelerate further wear. If there is a loose connection or defects in the hoses, the mixer begins to drip after a certain period, and then a leak appears.
The reason why the faucet is leaking is the wear of the faucet. Usually, the manufacturer sets a certain wear period, therefore, after a certain period, wear of the threaded elements, the gander filter, and the elements of the locking mechanism occurs. Then the elimination of all problems is possible only with a complete replacement of the mixer. nine0003
How to fix the faucet depending on its type
What to do if the faucet drips in the bath how to fix it? It is worth considering all the features of the repair of the mixer device.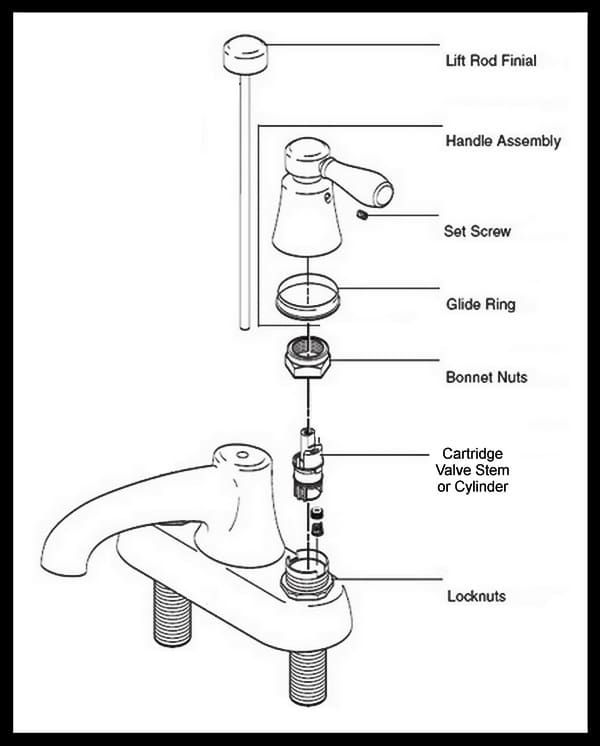 Moreover, it is not so difficult to repair the faucet in the bathroom with your own hands. Even those who do not have experience in plumbing matters will cope with this matter. The main thing is to have the desire and inventory, materials. Regardless of whether the faucet is installed - a single-lever mixer or a double-lever mixer, first you need to prepare for the repair. nine0003 Double-leverSingle-lever
Features of preparation for the repair process:
- The first thing to do before repairing the current faucet is to turn off the water supply. Usually the shutoff valve is located in the toilet;
- while turning the valve, do not turn it too much, otherwise you can break the locking mechanism, then you will have to not only make a leaking single-lever tap, but also repair the valve;
- you need to turn the valve slowly, if it has not been used for a long time, then it needs to be developed, but it should be done slowly. nine0012
It is essential to stock up on repairing a single-lever mixer:
- spare taps;
- set of keys, which must have a gas key;
- different types of screwdrivers - Phillips, flat;
- be sure to purchase new gasket elements with different diameters;
- special tape, which is designed to seal threaded elements;
- electric drill; nine0012
- seals made of silicone material.
So what to do if the faucet is leaking? It is worth figuring out what is the reason and only then you can fix the faucet in the bathroom.
Troubleshooting
There are several reasons why a two-valve faucet may leak. One of the most common causes of leakage is the wear of the rubber gasket.
Gasket replacement
If the faucet is dripping, the rubber gasket may be worn out. The main sign that the faucet requires replacement of the rubber gasket will be the appearance of a leak from the mixer gander. nine0003
The rubber seal must be replaced as soon as possible, otherwise the flowing water will gradually destroy the inner surface of the housing. If the mixer is not disassembled in time and the old part is not replaced, then scours will appear on the important constituent components. In these cases, only a complete replacement of the mixer is required.
Gasket replacement features:
- The first step is to remove the handwheel from the spindle.
 Next, the core is unscrewed with an open-end wrench; nine0012
 - the old gasket element is usually located at the opposite end of the core and is attached there in the area of the special protrusion. The old gasket element is removed;
- a new sealing element must be cut out of a piece of dense rubber base, while it is necessary to navigate according to the shapes of the old worn gasket element;
- the cut piece must be installed in the original place of the old sealing element;
- the whole node is assembled together. nine0012
Scheme of the mixer device Unscrew the faucet head with an adjustable wrench Unscrew the metal gasket on the faucet The gasket is removed and replacedIf your single lever faucet's leaking problem is a worn gasket, you can fix your faucet in minutes. But it is important not to tighten, otherwise it can lead to complete wear of the entire mixer.
Replacing the gland
If the faucet in the bathroom is leaking, then the whole thing may be the wear of the gland. Usually a leak is observed when the tap is opened. In these cases, the water will leak in the area between the stuffing box clamp nut and the valve stem. nine0003
If the faucet drips due to the wear of the stuffing box, then how to fix the faucet leak yourself? You can use the repair scheme:
- the gland nut is unscrewed with a screwdriver;
- the gland can be made by yourself from the sealing tape;
- the old oil seal, which has become unusable, must be removed;
- , a sealing tape must be wound on the valve, which will later replace the old stuffing box and prevent leakage from the tap; nine0011, it is necessary to tighten the nut in place.
If everything is done correctly, there will be no water leakage after turning on the tap again.
Seal replacement stepsReplacing the bushing
The reason for the failure of the faucet with bushing is the wear of the rubber gasket. Usually in the mixer it is available at the junction between the faucet axle box and the mixer.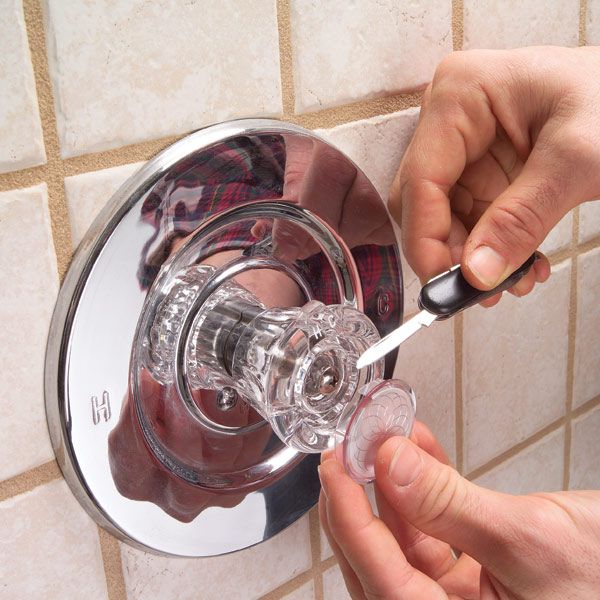 More often, the faucet leaks due to the fact that the gasket wears out, loses its elasticity properties, or completely collapses. You can fix a leaking faucet in the bathroom quite quickly, the main thing is that you need to clearly follow the instructions. nine0003
How to disassemble and repair a bathroom faucet:
- Use a knife or screwdriver to remove the decorative plastic plug used to indicate cold or hot faucets;
- you need to unscrew the screw, which is located under the plug. The screw is loosened with a screwdriver. If the screw does not unscrew, then it needs to be warmed up, for this it should be doused with hot water. After that, the screw can be easily unscrewed with pliers;
- after that you need to remove the flywheel; nine0012
- unscrew the nut that secures the crane box. We remove the nut from the body;
- we clean the surface of the stem and sealing elements well;
- be sure to inspect all the details, they should not have hidden defects, damage;
- then the old liner is removed and a new one is installed in its place;
- the whole structure is assembled.

Gooseneck repair
Sometimes the failure of a single-lever faucet can be due to the wear of the rubber gasket of the faucet gooseneck. Then it will be necessary to repair the gander. Over time, the rubber gasket that is installed on the gander wears out and you can observe a strong drip of water from the tap, and then it can simply flow continuously. nine0003
So if you have a leaky faucet in your bathroom, it could be due to a bad gooseneck gasket. In order to replace the rubber gasket on the gander, you need to unscrew the fixing element of the gander - the nut. To unscrew it is worth using an adjustable wrench. After that, the old gasket is removed, and a new one is installed in its place.
Faucet gooseneck assemblyUnscrewing the gooseneckWorn gasketReplacing the gasketTimely cleaning of the aerator - a guarantee of the durability of the gooseneckInstalling the spout in placeBall valve repair
If suddenly a ball valve is leaking in the bathroom, then it is necessary to use the standard troubleshooting scheme. You can fix problems yourself.
Repair of the ball valve is carried out as follows:
- it is necessary to slightly unscrew the screw that secures the valve handle with a hexagonal screwdriver and remove it;
- after that we will see the stem that is attached to the ball. As well as a threaded ring with four notches; nine0012
- then carefully press the notch and turn it counterclockwise;
- then you need to remove the chrome dome with pliers, there should be a ring;
- it is necessary to carefully examine the plastic ring. If it has acquired a creamy color and fuzzy shapes, then perhaps the whole point is in this element and it needs to be replaced with a new one. If there are deposits of rust on the plastic ring, they should be removed with a detergent;
- after that, you need to remove the ball from the socket. This element also needs to be carefully examined, if it has scratches, various defects, then it is better to change it; nine0012
- be sure to inspect the faucet inside.
 Usually there are seals with springs in the recess, often these elements wear out, the faucet starts to drip. It is necessary to remove them and install new seals with springs;
 - then install the ball in place, while its hole should be located on the right;
- we collect all other elements.
- mixer leak;
- the occurrence of simultaneous water inflow into the area of the shower screen and drain;
- low water pressure;
- the appearance of a leak in the area of the push-button switch;
- Violations in the pushbutton area.
A single lever mixer can fail for various reasons. Typically, a leak can occur because a small speck has entered the cartridge of the device. nine0348 In these cases, the mixer is completely disassembled and the cartridge is replaced. In order to repair the faucet, you will need the following inventory:
- hex wrench;
- pliers;
- wrench;
- slotted screwdriver;
- sharp knife;
- new cartridge.
When all the tools and materials are prepared, you can start repairing the mixer. The whole process is carried out according to the following scheme:
- First of all, the plug made of plastic material is pryed off with a knife and removed. This element is an indicator for the direction in which the lever must be turned to open cold or hot water. In addition, this element provides overlapping of the hole for placing the locking screw;
- the screw is unscrewed and the handle is removed from the control lever. Usually a single-lever faucet has a hex-type screw, so you will need to use a hex wrench to unscrew it; nine0012
- nuts of decorative and union type are turned away. These elements hold the cartridge in the saddle;
- then take out the old cartridge. You need to put a new product on the area of \u200b\u200bthe old cartridge. The installation is installed so that all the holes of this element completely coincide with the holes on the saddle;
- the mixer must then be completely assembled.

Another such unpleasant problem of a single-lever faucet as the simultaneous flow of water into the area of \u200b\u200bthe shower screen and drain often occurs due to wear of the rubber elements in the place of the spool switch. This breakdown is eliminated only with the help of a complete replacement of gaskets and rings. However, rubber rings are quite difficult to find on the free market, usually an additional set of these elements comes with the mixer. But if they are not there, then they can be cut out of the rubber material yourself. But homemade rings will last much less. nine0003
The aerator should be cleaned periodically.A weak stream from a faucet may be due to a clogged aerator. In these cases, the aerator mesh is removed, it is blown and washed from all sides. After that, the mesh can be installed back.
Mixer leaks in the area of the pushbutton switch may be due to a worn gland. To fix this problem, you just need to remove the old oil seal and install a new one.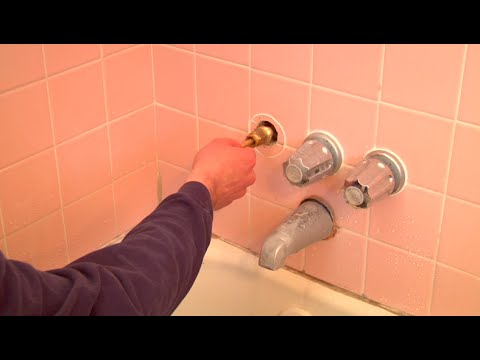 The seal can be purchased at any hardware store. nine0003
If the pushbutton switch itself stops working, the failure of the spring may be the cause of this failure. This breakdown is eliminated quite simply - the old spring is removed and a new spring is installed in its place.
Two-valve
Two-valve mixers usually suffer the same damage as single-lever mixers. Usually, troubleshooting does not require the intervention of a specialist, because everything can be quickly fixed on your own. The most common breakdowns are usually the following problems:
- seal wear;
- flywheel rubber seal wear;
- leak from under the valve;
- leak from under the union nut of the spout.
The old stuffing box is changed according to the following scheme:
- first you need to seal the stuffing box, if this does not help, then its complete replacement will be required;
- to replace this sealing element, unscrew the union nut and remove the stuffing box sleeve; nine0012
- then the old oil seal is removed;
- , it is necessary to perform a high-quality seal, for this, the tap stem is wound;
- oil seal is installed;
- , then replace the sleeve and tighten the union nut.

How to replace the old rubber gasket:
- first you need to turn off the water and remove the casing, fastened to the bolt and held on the thread;
- the neck is removed with a wrench; nine0012
- at the bottom of the neck there is an old rubber gasket, which is replaced by a new element;
- then assemble the mixer in reverse order.
Leakage from under the valve may be due to a protruding pin from the stem. This problem can occur because the pin was not initially installed tightly or because the sealing tape wound around it has worn out and worn out. In this case, the water is blocked, the flywheel is removed from the valve head and the fallen stem is removed. Next, the sealing tape is wound and the pin is installed in place. nine0003
Water leakage from the union nut of the spout can occur due to wear of the rubber seal. In this case, you need to remove the spout union nut, remove the old gasket and replace with a new one.