Diy makeup room
+10 Simple DIY Makeup Room Ideas & Items
Makeup room décor can be used for more than just makeup routines. In addition to applying makeup, you can manicure or pedicure, chat with friends, or simply relax. If you’ve seen some gorgeous makeup room décor on Instagram, and are looking for ideas for your own décor, you’re going to find what you’re looking for here.
First, we’ll go over some of the essentials in a makeup room décor. Next, we’ll talk about some of the best makeup room ideas that we’ve found online.
Makeup Room Decor Items & Essentials
Let’s see what the essentials furniture and elements in professional makeup room ideas are:
Mirror (with the Right Size)
No makeup room design (cute or professional) is complete without a right-sized mirror. A countertop mirror will help you when you want to apply makeup. In a lot of makeup room design ideas, you can see a full-length tall mirror and an integrated mirror with lighting. The first one helps you to see the full body, and the second is perfect for makeup application.
For the mirror in your makeup room wall décor or with vanity, you have different options. You can go for a square, round or unusual shape DIY vanity mirror, purchase mirror elements and tiles, etc.
Get more information about the painting process by reading diy makeup vanity.
Light and Lighting
You’re going to need the perfect lighting for your glam sessions; especially if you create beautiful videos. Illuminated mirrors or installing lights that run around your vanity mirror are the best choice, which can also turn into a fun DIY part of your makeup room design.
For your makeup room décor’s lighting, there are many tutorials on YouTube and different blogs on how to make a ring light. If you don’t have enough time, you can always purchase already installed lights on online shops like Amazon.
Storage Space
None of the makeup room design ideas (even makeup room ideas for small rooms) forget about adequate storage that keeps your items including makeup brushes, lipsticks, and hair tools organized. Clear cube organizers are one of the perfect ways for keeping your beauty products in place. You can also easily find any items easily (no labels needed) since they are clear.
If you prefer minimal makeup room design ideas, you can look for designs that benefit from drawer organizations. For makeup room ideas on a budget, you can purchase plastic organizers. They offer the function as expensive ones and help you organize your beauty items by type, brand, color, etc.
Shelves are also practical for storing your items. Put one or two in your room and enjoy storing anything on them; from lipsticks and perfume to purses and picture frames. Jewelry stands, perfume trays, different jars, and unique containers are other storage types that you can use in your DIY makeup room décor.
Makeup Room Furniture
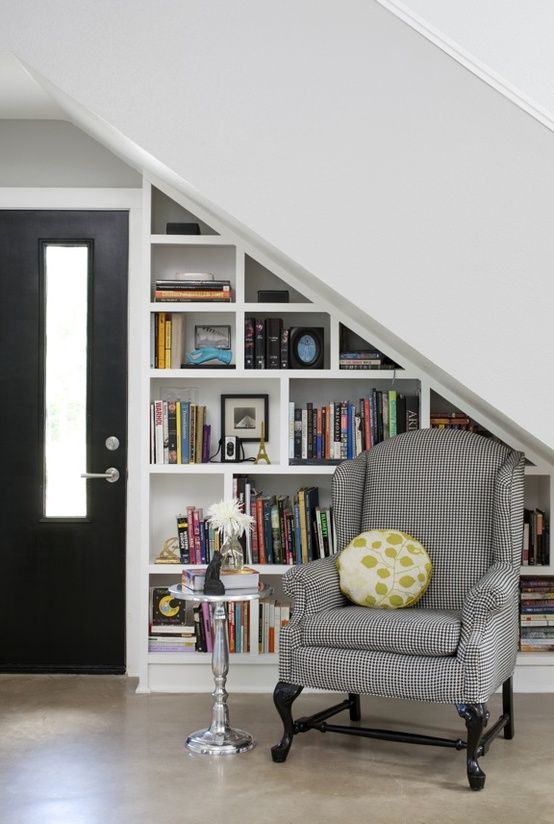
A cute and comfortable chair completes your makeup room décor. If you choose a woven, wooden, leather, metallic, or plastic chair, don’t forget to add a throw blanket and one or two throw pillows.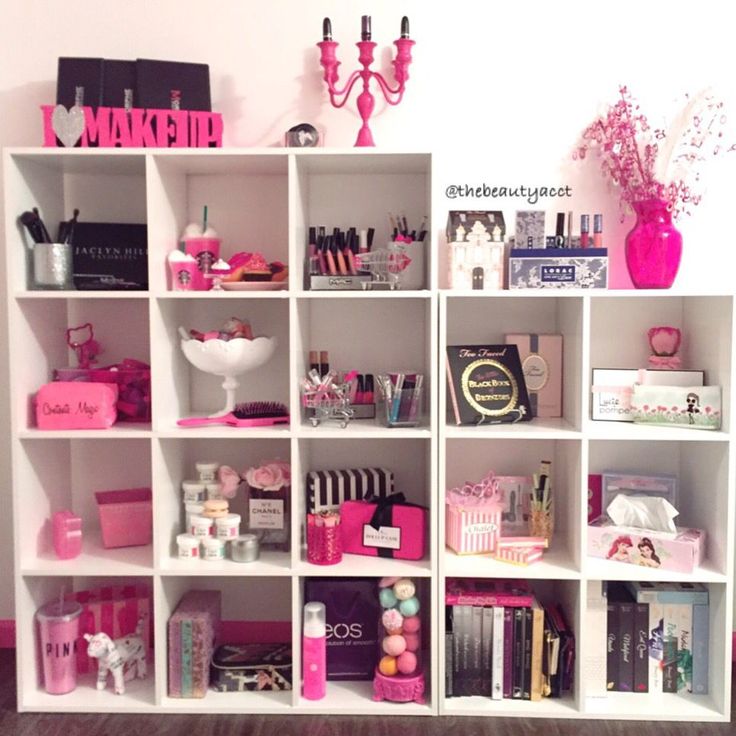 This way, you can keep the chair warm and add to the look at the same time.
You can learn more about pillows by reading diy pillow.
DIY Makeup Room Design Ideas
Now, let’s review some of the makeup room ideas for extra inspiration:
Colorful Makeup Room Décor
The most eye-catching factor in your makeup room design can be its color. It doesn’t have to be fancy or complicated. Simple designs with good use of even one color offer an amazing space. Right now, black and white or completely white designs are very popular. However, there are many beautiful colors that you can choose for your idea like calming colors of pink or grey. However, some avoid the color pink, as it provides a brighter effect to the entire room.
Makeup Room Ideas for Small Rooms
Makeup room designs can be as large as your living space, providing that you have the necessary space and budget. However, if you don’t have large space and an unlimited budget, your DIY makeup room décor can still be glamorous.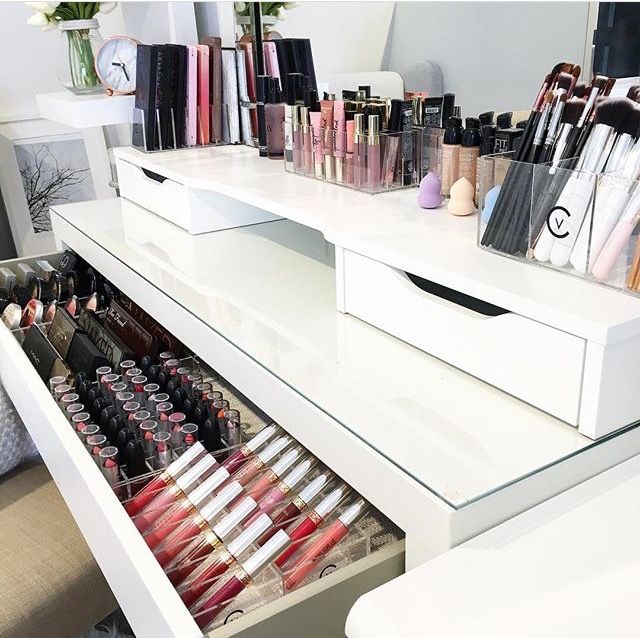
You can create a small and adorable makeup room with some changes. For example, you can use compact dressing tables, hang your mirror, use wall shelves, etc. You can even forget about the table completely and leave everything to a large mirror and handy shelves on its sides. Small makeup room ideas don’t take up a lot of space, as well as make your room look bigger.
Makeup Room Ideas on a Budget
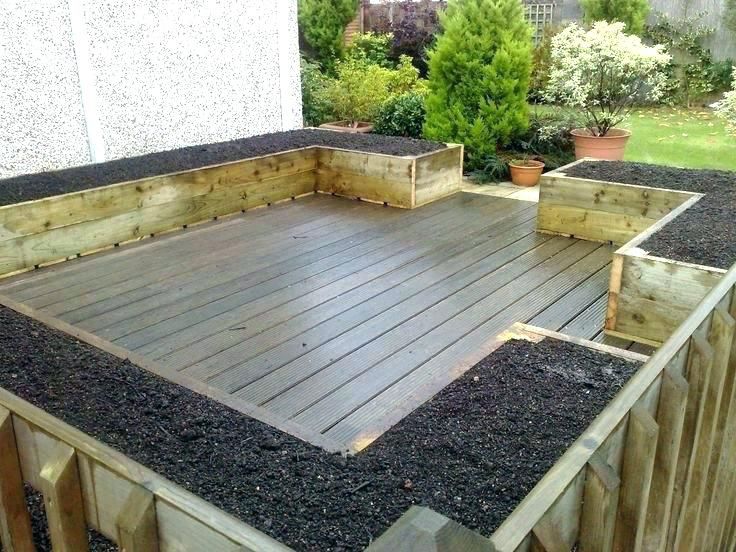
Looking for makeup room décor ideas? Why not repurpose antique furniture? Antique makeup room furniture brings a special and intrinsic value to your décor. If you haven’t inherited such pieces, don’t worry. You can always hunt them in different stores for a good deal. Sand the furniture down, repaint them with a lovely color, screw on some stylish knobs, and your unique makeup room is ready for your beauty sessions.
If you have two small dressers or nightstands, we have another makeup room idea on a budget for you. Find some planks of wood, and you’ll have a pretty beauty station in no time.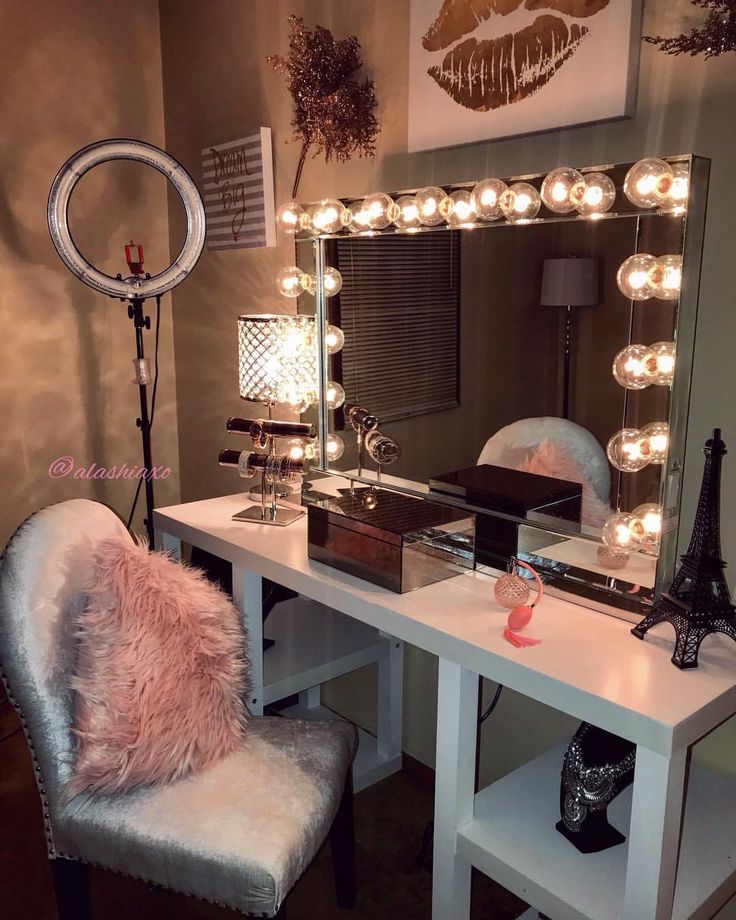 Using the planks, bridge the dressers or end tables and you’re done! Just don’t forget to leave some room for your makeup room furniture like a chair.
Closet Makeup Room Ideas
If you have a closet that you can free up, and you’re also a fan of simplicity, make sure to create a closet makeup room. Without any fancy or glamour elements, you can have an elegant and practical closet make-up room.
DIY Makeup Room with Lamps
Makeup room ideas without challenging lighting are also a possibility. One or two simple lamps can give your space a charming look while offering the light you need to apply makeup. For a more unique style, you can try mismatching the lamps or thrift them.
To make things more exciting, add a couple of square frames (available at local craft stores) and frame small motivating quotes or fashion logos to feel like a true fashion icon.
As you can see, designing your makeup room can be easy, super fun, and sometimes challenging.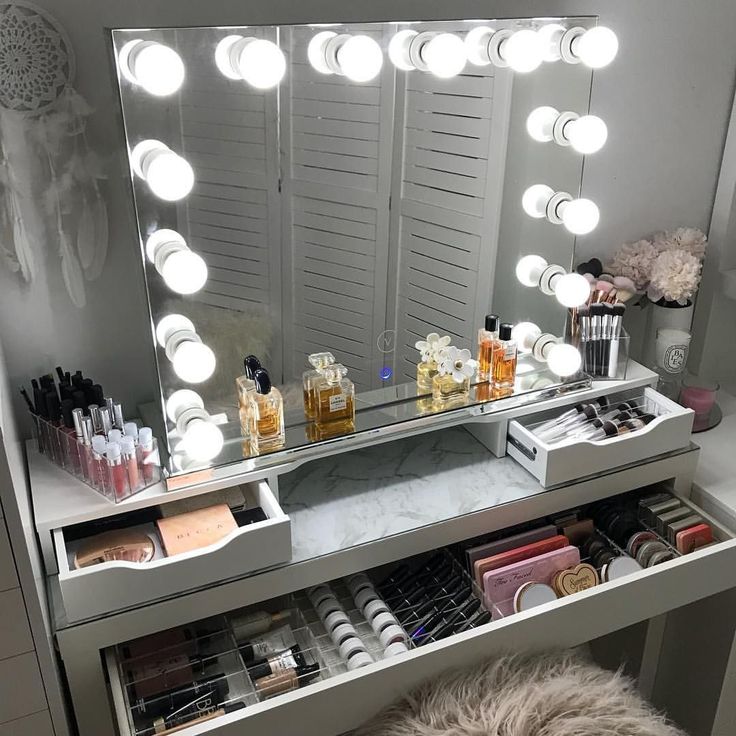 Hopefully, you’ve found the inspiration that you were looking for here. Buy a few new items, repurpose old pieces, use your imagination, and design the décor that you have in mind!
Makeup Room Ideas with IKEA Furniture
Are you hoping to design your makeup room in the most convenient way without sacrificing its main features? Then it’s time to visit the closest IKEA. There, you can find all the furniture and storage you need for several makeup room ideas.
Remember that you don’t go for conventional furniture. For example, instead of a table, you can purchase a dresser or use small bookshelves as storage. Look around some more and you may even find some options for your makeup room wall decor.
Simple & Modern Makeup Room Decor
Minimalism and modernism are not going anywhere any time soon. And why would they do that? They offer both a seamless look and functionality, even when it comes to DIY makeup room ideas. By choosing the right items, you can feature clean lines and sleek design to denote this style as well.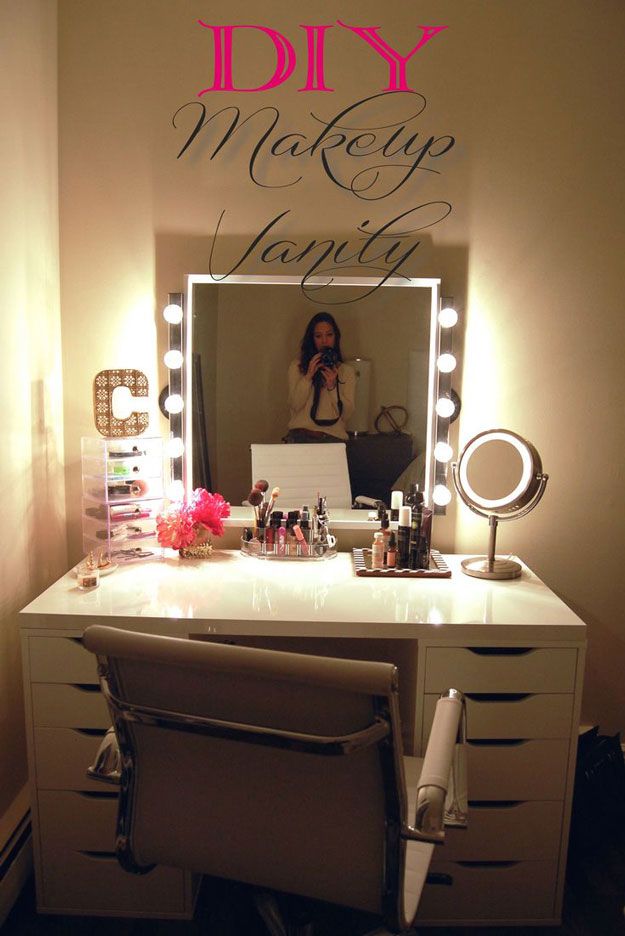
A vanity mirror featuring framed LED or a circular/hexagonal mirror with a wooden accent, storing the makeup tools neatly in clear glasses or simple boxes, incorporating the classic black and white or going monochrome (pink is the first option that comes to mind), using a wall-mounted table are only e few ways to create a modern and simple makeup room.
Going for gold or rose gold furniture and items made from iron or stainless steel is another way to approach simple makeup room ideas. In addition to their modern vibe, they make the space look more spacious. If you found the furniture that you’re looking for but the color isn’t just right, simply paint it with a gold or silver color for a touch of elegance.
Professional Makeup Room Ideas
As a pro, you probably have a lot of cosmetics. And a key to having a glamorous yet tidy and comfy makeup room is zero clutter. All of those lipsticks, eyeliners, foundations, brushes, etc.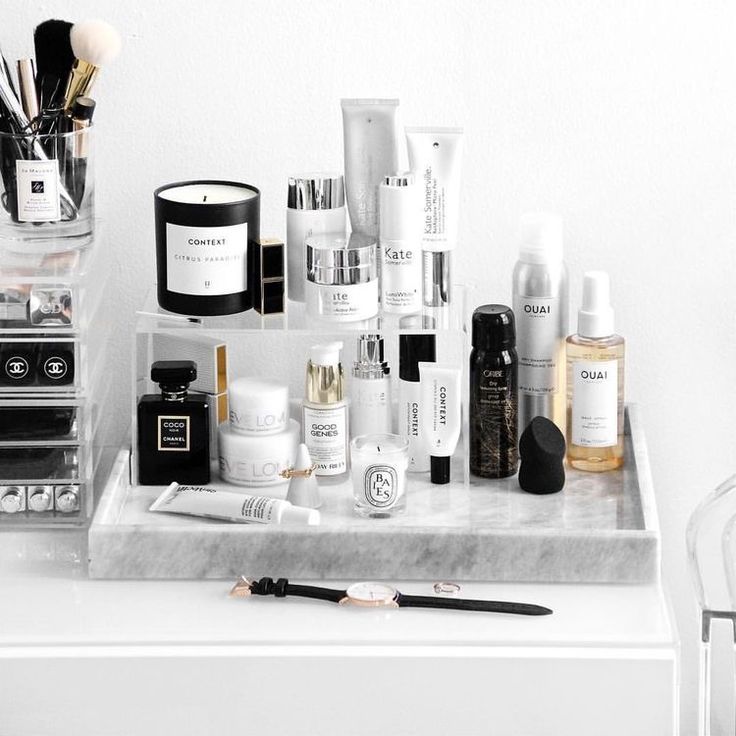 scattered on your tabletop deprive you of having the ideal spot for that “me time” portion of your day.
Finding the right storage helps you prevent such mess. A makeup glass storage for example with drawers and a few open shelves helps your store your cosmetics. This way not only you showcase them in a nice way that elevates the overall decor (thanks to its glass look), but all the items are also visible too, so you don’t have to look for them or forget about some of your beauty products.
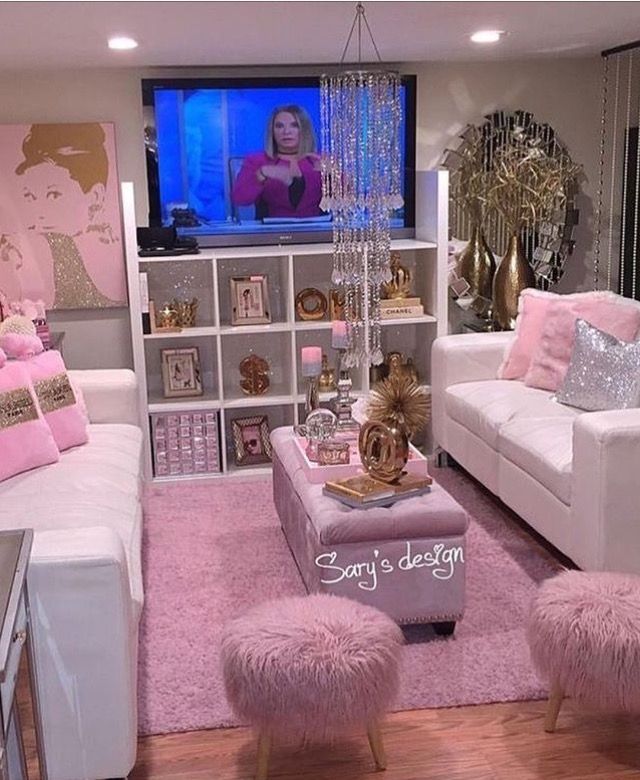
Glam Makeup Room Ideas
A glam room is more than just a makeup room. So, in addition to essential makeup room decor items including storage space, vanity table, a mirror, and lights, consider a place to socialize too. Creating a mini sitting area allows your friends can wait while you’re doing your makeup or trying new makeup and talk about things.
A small coffee table, carpet, and magazines will complete any glam makeup room ideas. But that doesn’t mean that you should forget about your favorite things.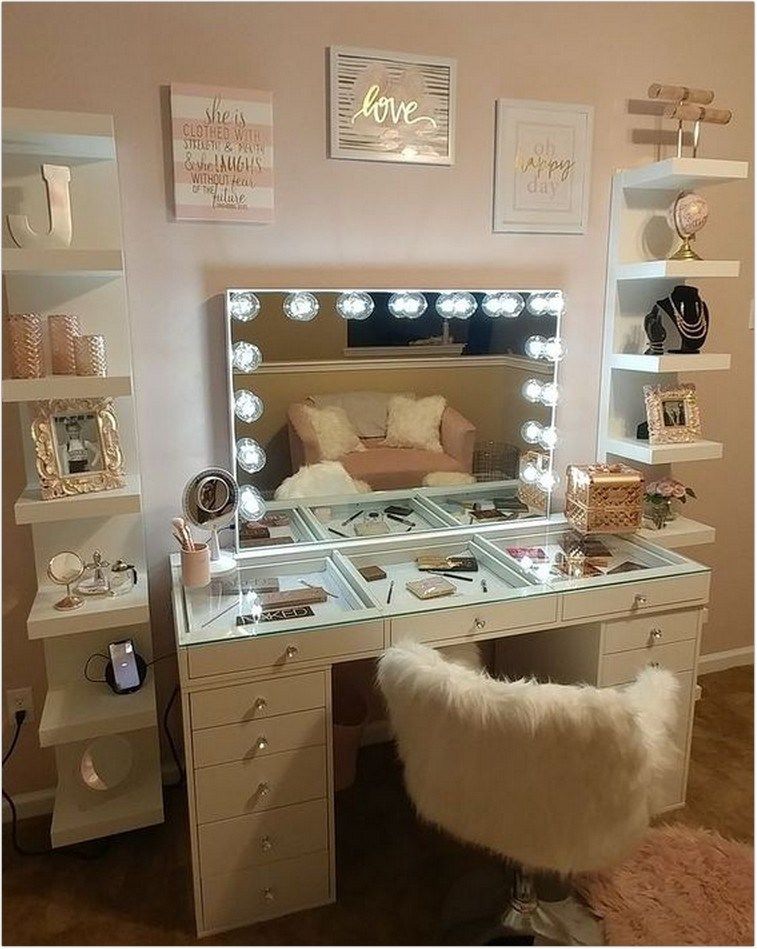 Candles, flowers, a curtain, paintings, throw pillows, decorative books, and small figurines all are potential additions to your space.
Makeup Room Wall Decor
As the finishing touches, it’s a good idea to add some makeup room wall decor to your space too. Bold wallpapers, canvas paintings, frames art or pictures, quotes, brand logos, decals, etc., all can make a great wall decor. You can also go with plain colors or discard this step completely if you prefer minimalist designs.
DIY Makeup Room Ideas on a Budget (Cheap Decoration)
DIY makeup room ideas will certainly open up insight into the makeup room setup. There is no need to use a high cost to make it. It just takes creativity and imagination, certainly with a little equipment and materials.
The makeup table can be made using materials in the house. The room can be arranged to your liking. Certainly, adjust to the planned budget.
To make it easier to create a makeup room, here are some images that can be sampled.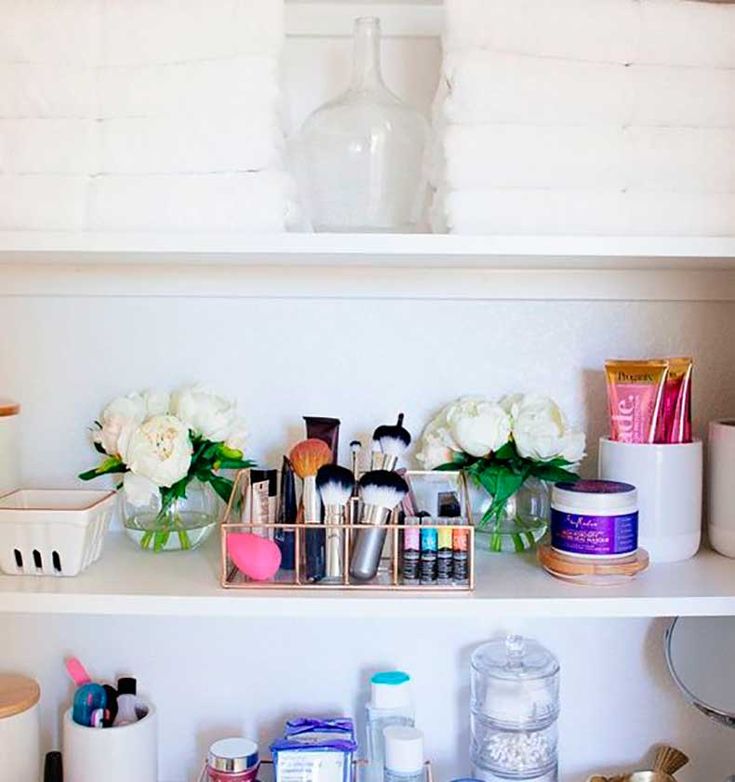
Table of Contents
- 1. Minimalist Makeup Room
- 2. DIY Brush Storage
- 3. Bright Makeup Room Design
- 4. Cheap Furniture for Makeup Room
- 5. Corner Makeup Vanity Table
- 6. DIY Black Makeup Desk
- 7. DIY Makeup Organization
- 8. Lighting Ideas for Makeup Desk
- 9. DIY Makeup Room Ideas with Lighting
- 10. Decorating Ideas for a Makeup Room
- 11. Makeup Room Inspiration
- 12. Cheap Makeup Room Ideas
- 13. Makeup Room Decor Ideas
- 14. Dressing Table Makeup Ideas
- 15. IKEA Makeup Vanity Table
- 16. Makeup and Office Room Ideas
- 17. Hair and Makeup Room Ideas
- 18. DIY Makeup Room Lighting Inspiration
- 19. Makeup Room Storage Ideas
- 20. Makeup Studio Room
- 21. Classic Makeup Vanity
- 22. Home Makeup Room Ideas
- 23. Makeup Beauty Room
- 24. Pink Makeup Room
- 25. Permanent Makeup Room Ideas
- 26. Glam Makeup Room
- 27.
 Makeup Room Essentials
 - 28. Lighting for Makeup Room
- 29. DIY Makeup Room Ideas with Minimalist Style
- 30. Salon Makeup Room
- 31. Womens’s Makeup Room
- 32. DIY Makeup Room Ideas on a Budget
1. Minimalist Makeup Room
belviradesign.comThe makeup room doesn’t have to be with a lot of wall decorations. The table can be made as absorbent as possible with a little stuff on it.
Mirrors also don’t have to be in front of the table. You can try putting a big mirror high enough next to the table. That way, the space at the table can be used for makeup.
2. DIY Brush Storage
beautynewbie.comBeauty brushes can be made by yourself using used materials in the house. Like a jam jar or a place made of other glass.
Jars can be decorated using colorful ribbons to your liking. Inside the jar can be filled with rice or Styrofoam so that the brush can stick and neater.
3. Bright Makeup Room Design
pinterest.comUsing a bright room theme will make the atmosphere more comfortable.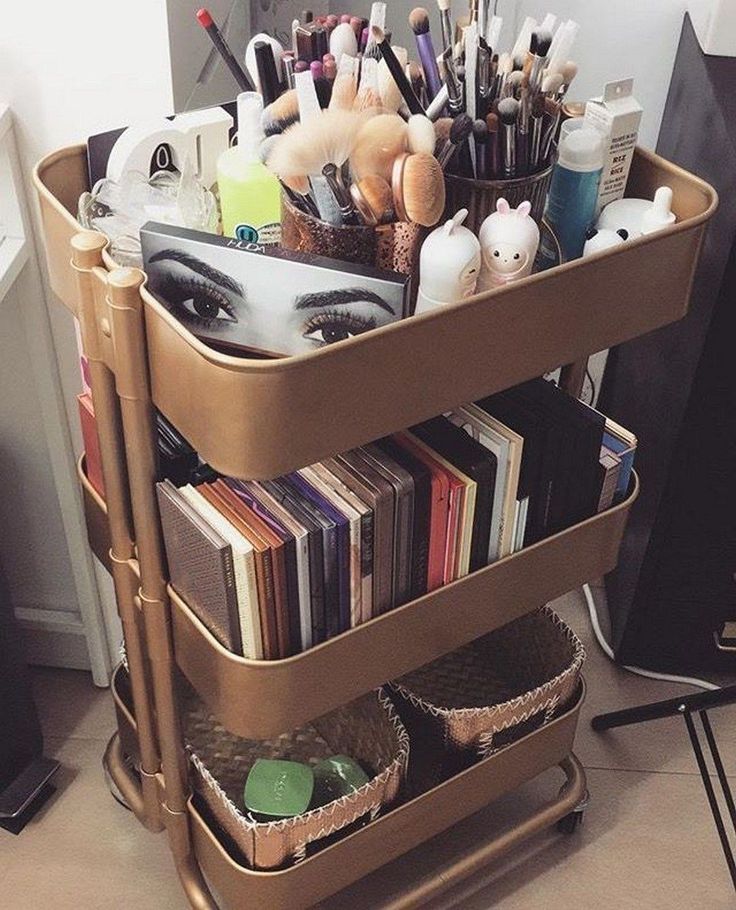 Use the dominant white color to give a bright impression.
In addition to white, it can also use gray or black for blending. The combination of black and white is certainly a perfect fit.
4. Cheap Furniture for Makeup Room
futuristarchitecture.comUsing furniture doesn’t actually make the room look cheap. You can wear aesthetics to make it feel classier.
Such as fur carpets, floating shelves, high flower vases, minimalist table lamps, rattan baskets, and other items. Alternatively, you can also use a mix of white and pink.
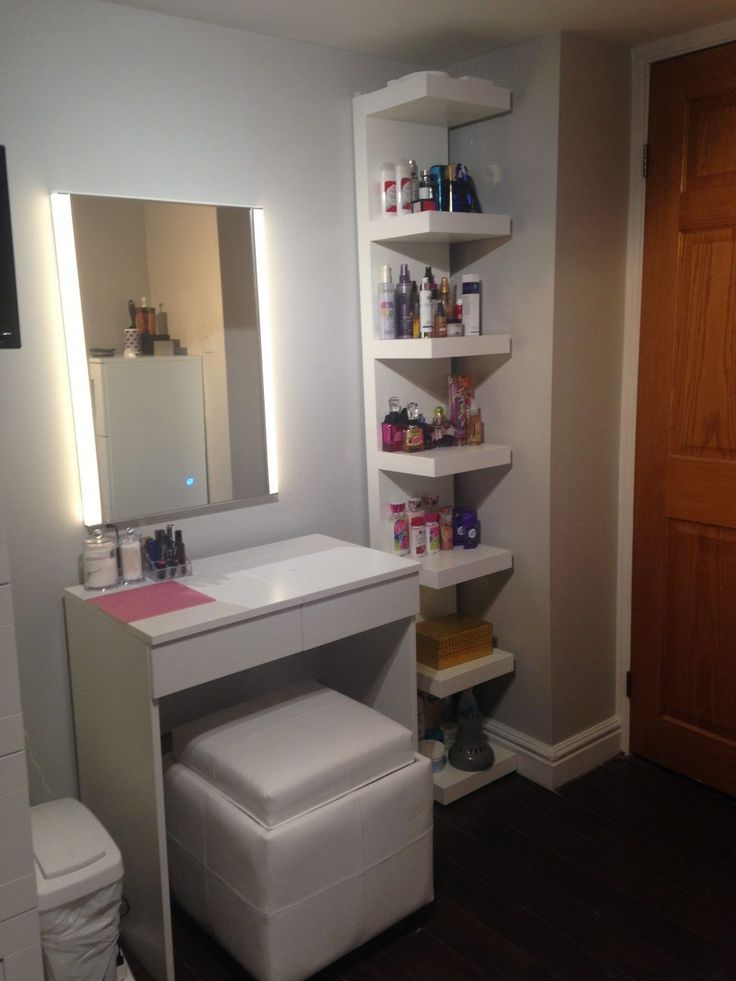
5. Corner Makeup Vanity Table
iohomedecor.comUsually, the corner of the room is an empty and untapped place. The place can be used as a makeup room. Use the corner table to make the makeup look neater.
After that, add some supporting equipment. Like bright lights, large glass, as well as other salon equipment.
6. DIY Black Makeup Desk
pinterest.comUsing all black color turns out to be also good for tables and makeup equipment.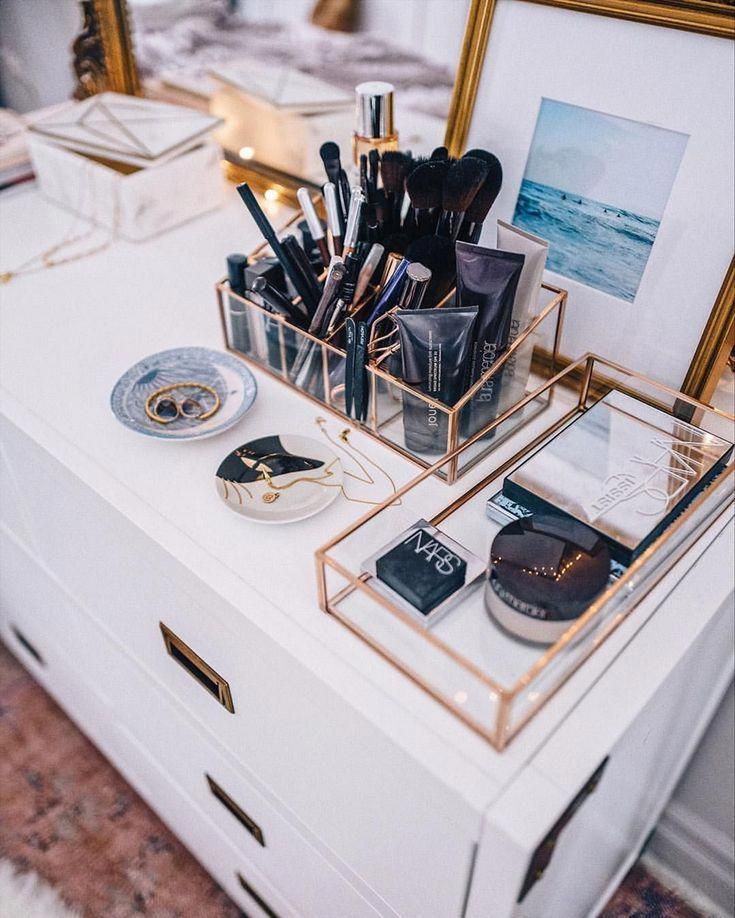 The use of this matching color will give a minimalist and elegant impression.
What can I wear in black? Tables, chairs, safes, lipsticks, mirrors and more.
Preferably, black is not used for walls. Because, if the wall is black, then the room will look dark.
7. DIY Makeup Organization
pinterest.comIn the makeup room, in addition to the room, also have to arrange a table. The arrangement of this table is important, to make the dressing table look neater and cleaner.
Use squares and shelves arranged with a minimalist design. You can select a box with the color according to the theme used. For example, like the image above, white is selected because the surroundings use white as well.
8. Lighting Ideas for Makeup Desk
belviradesign.comUse bright lighting to make makeup clearer. The lamp used to choose white color so that there is no mistake when makeup.
Give a rack next to the dressing table to store items. So, the dressing table is clean and looks neater.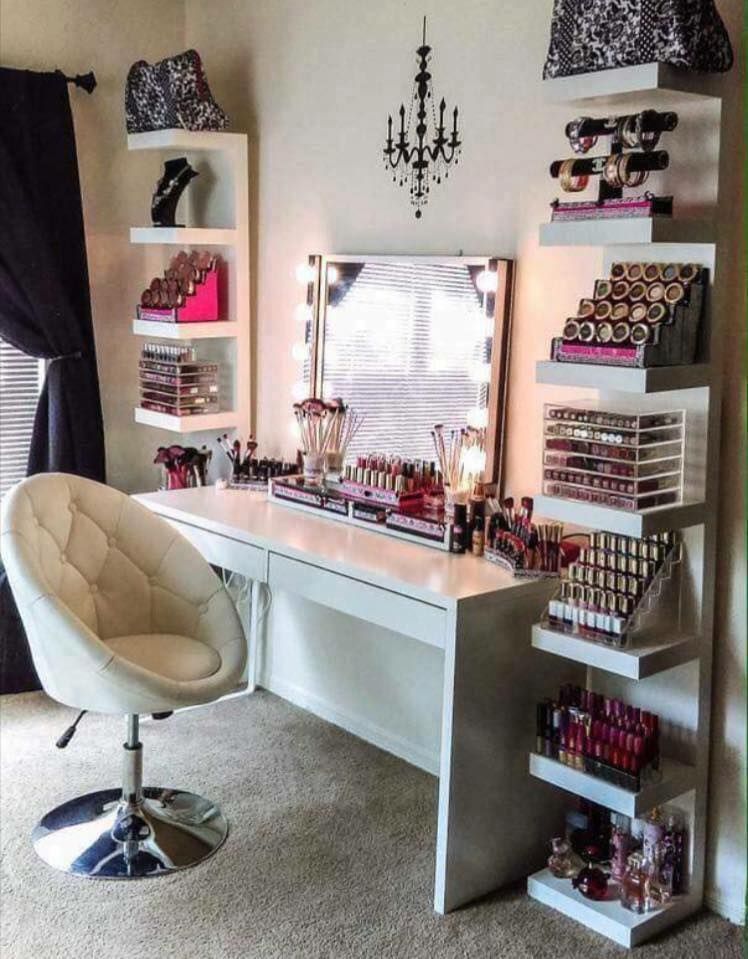
9. DIY Makeup Room Ideas with Lighting
mygadged.comUsing a small makeup room can be used as a solution. Especially, when there is no other room adequate.
Just use the rough room and absorb the set and to a minimum. The cost of making a small room is also not much. So, costs can be saved to a minimum.
10. Decorating Ideas for a Makeup Room
akerufeed.comDecorating the dressing room certainly costs not least. But, if it turns out that the room is small, it might save you a little cost.
Use minimalist furniture and décor. Use a table with lots of drawers or shelves. So, a lot of stuff can go into a drawer.
Also pay attention to the use of colors from furniture and walls. Using white will make the room brighter and more spacious.
11. Makeup Room Inspiration
onechitecture.comFloating table will probably fit a minimalist design. In addition, the use of mirrors and floating shelves will also look aligned with the table.
To add an aesthetic feel, use a fur carpet at the bottom. Maybe, you can use a nice better seat to look fancy.
12. Cheap Makeup Room Ideas
boltblogs.comTo get a cheap price, then using cheap goods is the right choice. Use the existing table again, a small table is okay.
Make sure, if you buy a table with a chair, so it can be more efficient. Put the make-up equipment in a drawer. Also use a small storage area on the table to style other makeup tools.
13. Makeup Room Decor Ideas
mothbath.blogspot.comActually, the image above is a simple and easy to emulate design. Use a table that is quite long but not wide. Give the dressing equipment off the table.
Use the drawer as a make-up storage area. Choose a glass large enough to make the room look more spacious.
14. Dressing Table Makeup Ideas
riskieren.coWith a simple design, the makeup room can look aesthetic. Especially using a blend of white and light brown colors.
The addition of plants also makes the room fresher. Glass can be used in the shape of a circle so that it does not look ordinary.
15. IKEA Makeup Vanity Table
zerukorestaurant.comIKEA products are certainly familiar with home use. IKEA furniture can be a pretty good choice for styling a dressing room.
16. Makeup and Office Room Ideas
house8055.comA makeup table combined with a work desk? Why not?
Just use an L-shaped table, or place two tables next to each other. Then, one table for dressing, the other used as a work desk.
17. Hair and Makeup Room Ideas
fremtiden.coMakeup is not complete if without smoothing the hair. Therefore, also use the dressing room to style the hair. Just add hairdryer and some other equipment.
18. DIY Makeup Room Lighting Inspiration
hgtv.comUsing lots of lights will certainly make the room brighter. Also make sure to use a large mirror so that when makeup, the face is clearly visible.
Lights can be installed around the mirror for easy makeup.
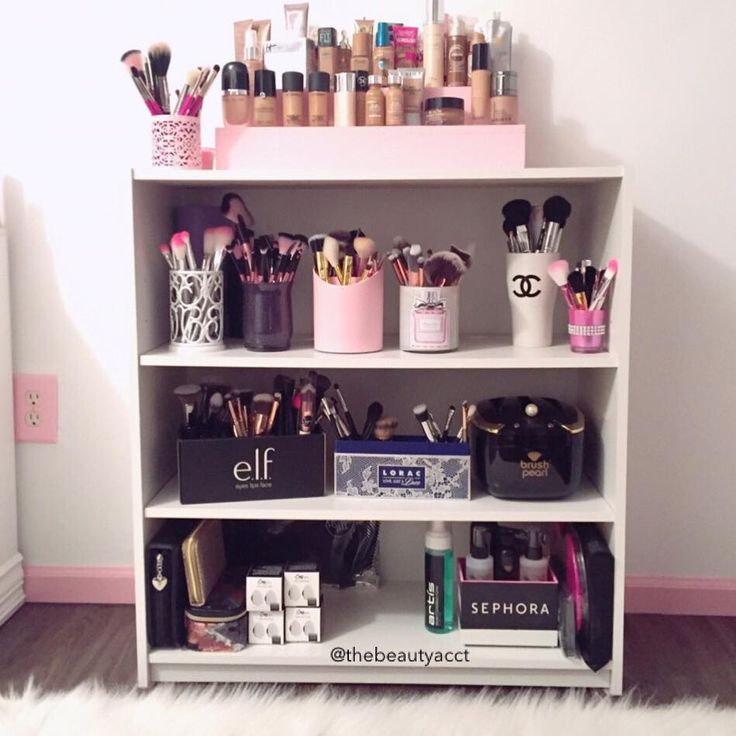
19. Makeup Room Storage Ideas
pinterest.co.ukGot a lot of makeup equipment?
Try using a cupboard or shelf that can store all the items.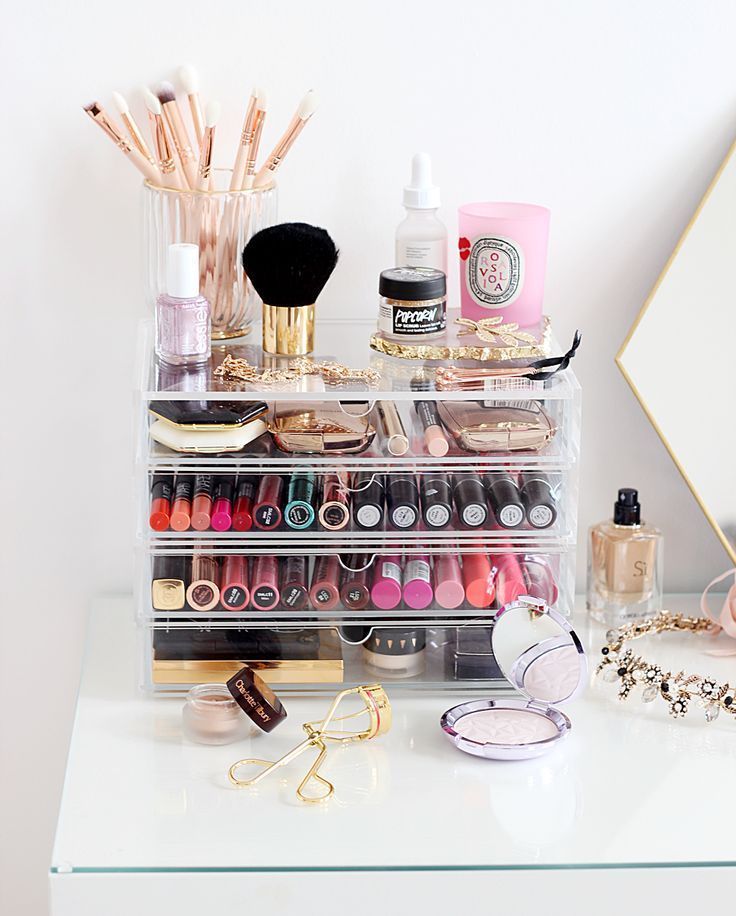 Using a lot of shelves does not matter, because it will be very useful if it turns out that makeup equipment is also a lot.
20. Makeup Studio Room
zyhomy.comAs a makeup artist, you can also record and upload to social media. Share your experience of makeup and tutorials.
21. Classic Makeup Vanity
unscripted360.comEven if you use the DIY theme, you can still make your makeup room look elegant. Just use classic-style tables and mirrors. Combine it with a room theme that also looks luxurious.
With this blend, there will be an elegant and luxurious makeup room. But remember, just use a rough budget, don’t overdo it.
22. Home Makeup Room Ideas
blessedecor.comAt home, making a dressing room is not difficult. Make use of what’s in the house and use it as a place to put makeup.
If there is no special room, you can use the room or clothes room. Putting makeup equipment near the bathroom can also be a solution.
23. Makeup Beauty Room
homemania. ru
ruUsing regular furniture can also look beautiful and attractive. Especially with a suitable color mix, the dressing room feels more comfortable.
24. Pink Makeup Room
decorology.coPink color can make a makeup room look more girly. Combine it with white so that it doesn’t look monotonous.
If there is no room, you can place the dressing table in the corner of the room. Just use a small table to sing.
25. Permanent Makeup Room Ideas
gagohome.comMaking the dressing room permanent is the right choice. Because, every day we need makeup.
If it’s permanent, just use a big enough table. The lights for the dressing table can also be used a lot so that it is brighter.
26. Glam Makeup Room
archzine.netWhat’s the inspiration from the image above? Does it look interesting to be realized in your house?
27. Makeup Room Essentials
matchness.comIn a makeup room, the most important things that should be there are tables, mirrors, chairs, and makeup equipment.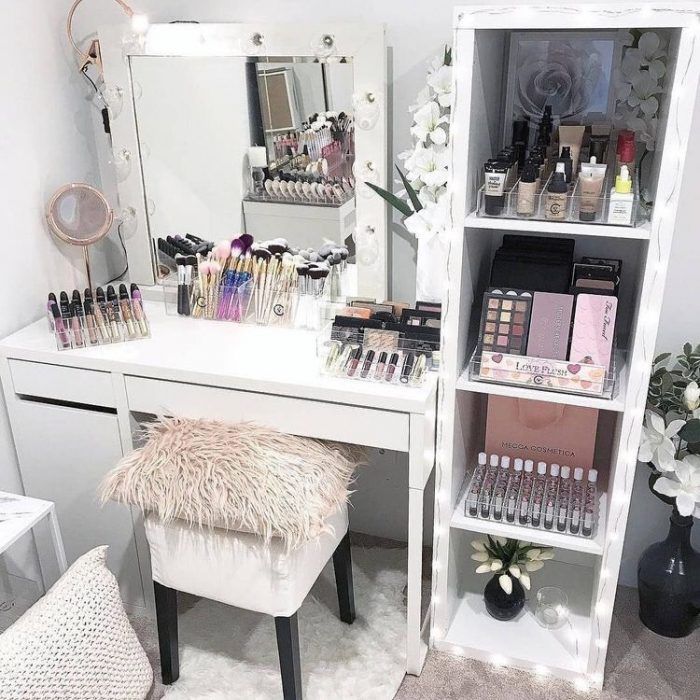
28. Lighting for Makeup Room
weheartit.comUsing cute and unique lights will certainly make the makeup room not look boring. Moreover, the lights used are not like those used by many others.
29. DIY Makeup Room Ideas with Minimalist Style
matlabekhoob.comUsing a simple table certainly doesn’t matter. The most important part is not the table, but the presence of a mirror in front of us.
30. Salon Makeup Room
pinterest.comCreating a salon-like makeup room can also be a good idea.
31. Womens’s Makeup Room
ikeahackers.netLooks minimalist and neat, right?
32. DIY Makeup Room Ideas on a Budget
pinterest.comAs mentioned earlier. The makeup room doesn’t have to be expensive. Using furniture in the house can also be. Small table, with a tiny mirror, and a pretty white chair.
Makeup equipment can be stored elsewhere. So, a small table will not be full of makeup equipment.
DIY make-up mirror - 20 secrets. Step-by-step instructions for making a makeup mirror.
Every woman's cherished dream is to have a make-up mirror or, as it is also called, a make-up mirror for make-up, a cosmetic mirror, etc. at home. At the same time, it is not at all necessary to buy it for big money.
Inexpensive tools and materials, as well as efficient advice, any man can make such a practical and useful gift to his beloved, in just a couple of days. nine0003
Keep in mind that a good quality dressing mirror is not collect technically competently in one day. Even experienced craftsmen rarely succeed turn this focus.
Too much of everything here is tied to moments with painting and wood processing. But a properly assembled product will delight your second half for many years.
After all, situations often arise when literally through half a year, everyone who looks into such hastily assembled mirrors begins to look small and fat. Why this happens, we will tell a little later. nine0003
This mirror is also an excellent replacement for the ring light.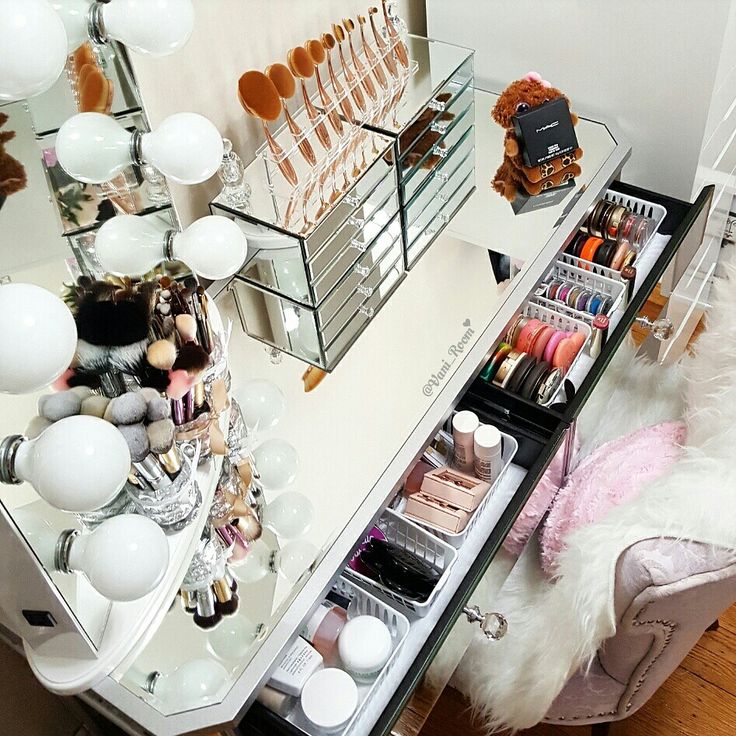
Gorgeous selfies are obtained near it.
Let's look at all the tricks and life hacks of a dressing room mirror and note the mistakes that will lie in wait for you when making it at home.
Materials
First, let's decide what materials and tools you need.
- drill + drills
- bulbs with sockets
- switch + plug
- electric wire ShVVP 2*0.75mm2
- sanding paper
- varnishes, paints, stains, adhesives
- mirror itself
- mirror fixing
Choosing a dressing room mirror board - dimensions, material
A lot of people use an ordinary pine board, which freely sold in Leroy Merlin. She is the most popular material. nine0003
Secret No. 1
Pay special attention to knots when buying it.
There must be a minimum number and they must located in such places that they do not interfere with drilling holes for cartridges with light bulbs.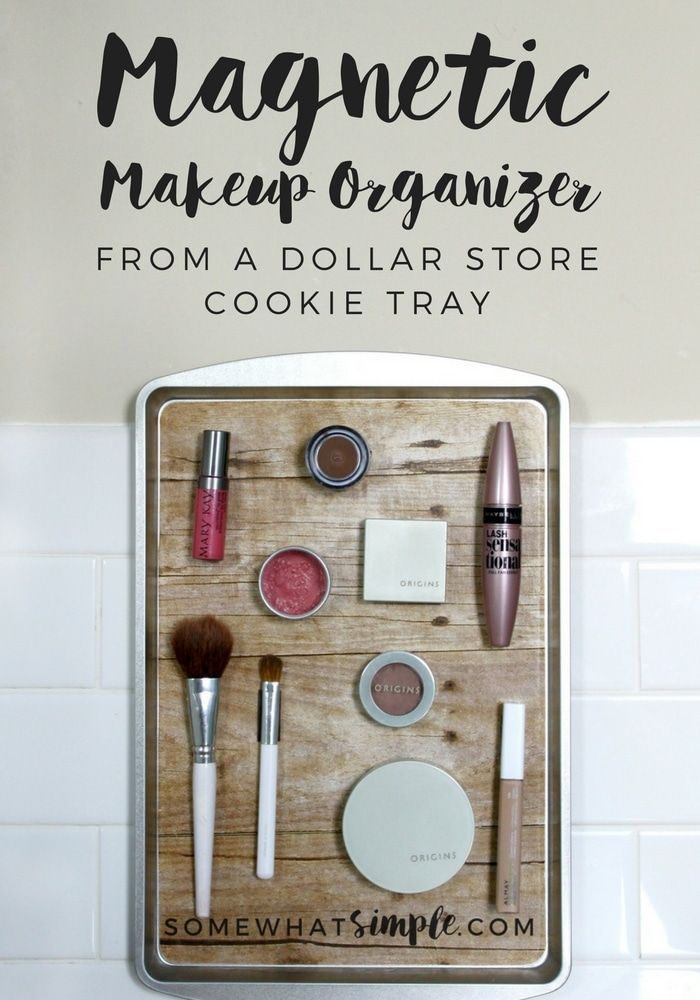
Secret №2
However, for a better product, professionals recommend taking a furniture board.
That's what the use of pine board leads to.
Over time, you will definitely develop cracks. First of all, this will happen on the back of the frame. nine0003
This happens because the board initially goes raw. When moisture begins to leave it, the tree bursts. And it's natural process.
It is a very big problem to find dry wood in the Russian climate.
But the main evil of damp pine lies in something else - as it dries, the wood will lead and deform.
The mirror will start to curve accordingly. Hence and small and fat people appear in the reflection.
If you have no choice, at least wait a while until the pine board is dry. Do not collect the mirror immediately after purchase wood. nine0003
See how she behaves before get to work.
Making a mirror frame
frames. You will need four pieces - two short and two long.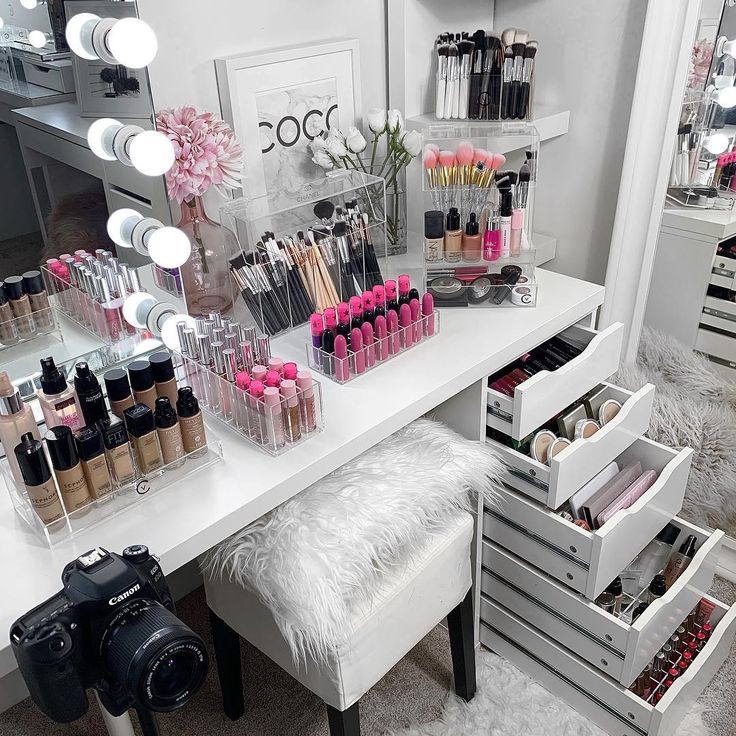
Remember, dimensions are always individual and depend on the mirror available.
Secret №3
The main thing is that the inner perimeter should be 1.0-1.5 cm larger than the mirror itself.
A standard frame suitable for a small dressing room has approximately the following dimensions:
- board width 9-10mm
- thickness - 18-20mm
- long piece - 75-80cm
- short - approx. 30cm
This is for an interior mirror 55*65cm.
Next, the boards need to be connected to each other somehow. Add up them into a rectangle of the desired shape and glue them together with furniture glue.
No need to additionally go through the joints with staples from the construction stapler, as some advise. This spoils the appearance and destroys the wood. nine0003
Secret №4
Wipe the glue thoroughly, do not leave the slightest drip.
Otherwise, they will not allow the paint layer to adhere properly.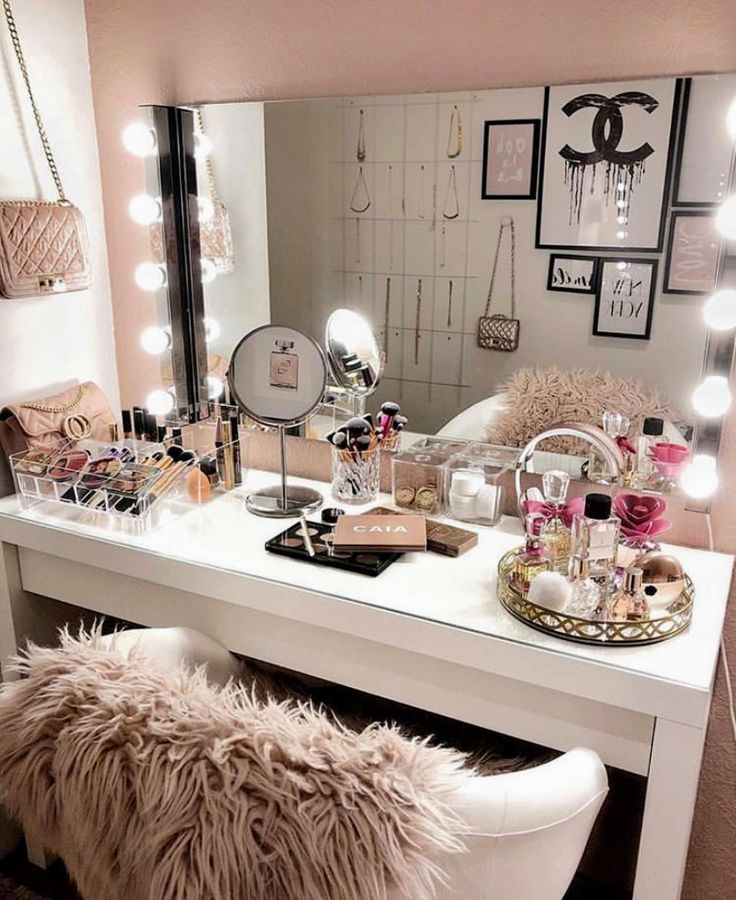 And you will have problems with painting.
Secret No. 5
If you still have large wide gaps after joining, buy an inexpensive moisture-resistant wood putty.
Grease all rough seams and joints with it.
For greater structural reliability, the pieces of wood are additionally interconnected with furniture corners. nine0003
Plus, some drill on a slanting self-tapping screw. To get it was not visible, first make a recess at the end with a drill.
Choose corners responsibly. Use those that do not bend at the first lateral load.
Pay attention to their thickness.
Secret #6
Be careful when fastening the corners - step back the appropriate distance under the mirror, cartridge and side rails.
Only then screw in the screws. nine0003
Allow the workpiece and adhesive to dry. For greater stability and in order to hide the cartridges as much as possible in the future, attach additional sidewalls to the frame.
Use leftover boards.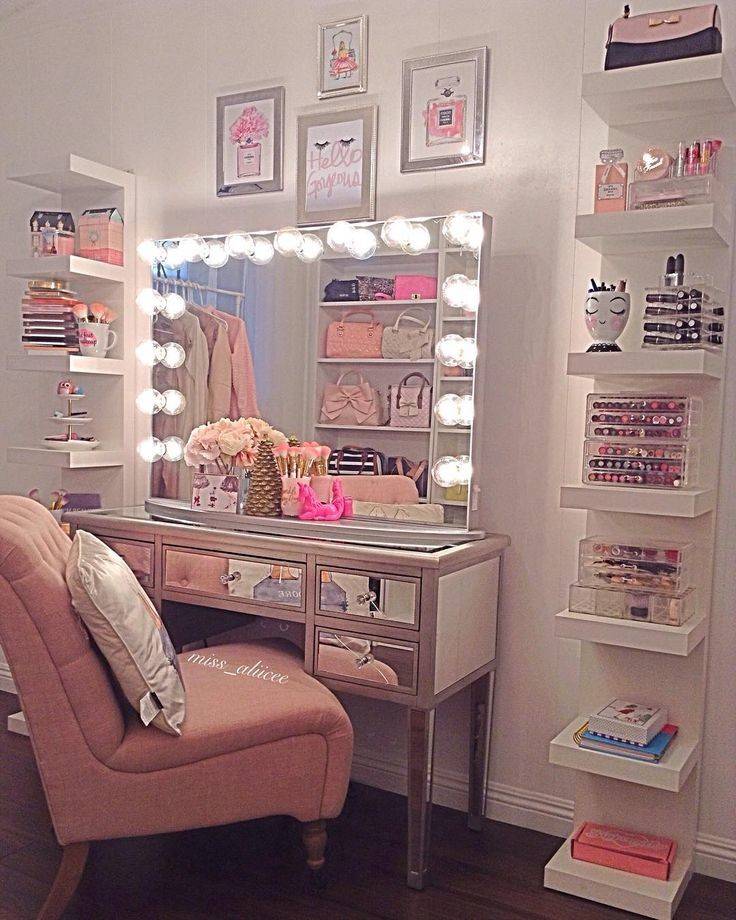 Glue first and then put them on self-tapping screws to the main frame.
Secret No. 7
To get the most monolithic-looking design, follow the following workflow.
- glue two sides of wood
- tighten them with clamps
- install several self-tapping screws
Then everything is polished at the same time and one single cast edge.
From the side it looks like solid wood.
Drilling holes for sockets
Now you need to mark the places for installing light bulbs. Usually there are 8 or more of them.
Measure the length of the board, excluding the bottom bar, as in most cases it plays the role of a fixing element and there are no bulbs in it will be. nine0003
Then divide the entire distance into equal parts. two light bulbs must be in the upper corners.
After measuring the width, find the middle and put a mark.
From these marks, as from the starting points, display everything the rest of the holes.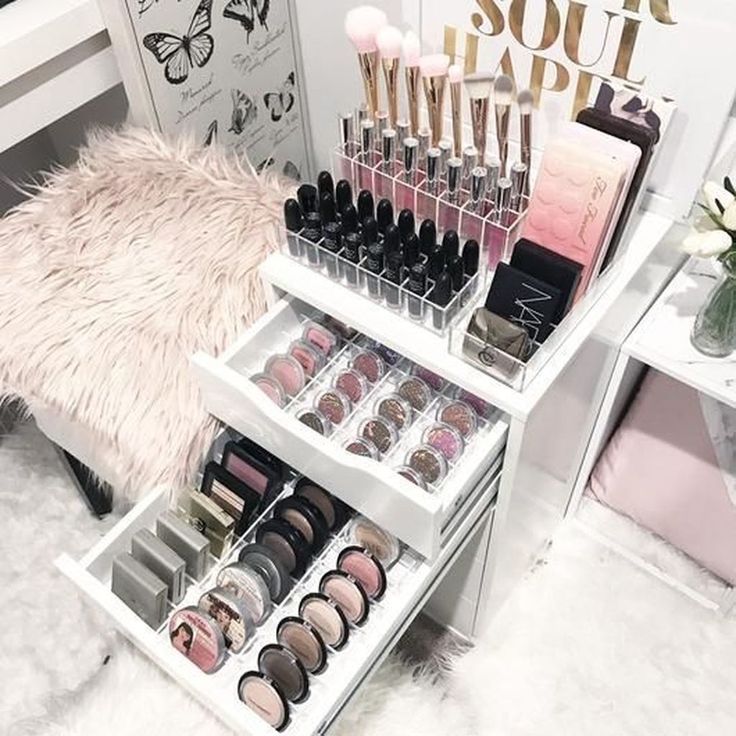 Next, with a pen drill with a diameter of 38-40mm, you need to drill the marked plots.
Select this drill diameter if you have an E27 chuck. For E14 cartridges, a D-26mm drill is suitable.
Professional carpenters use not pen, and a forstner drill. nine0003
Secret No. 8
When using a drill, do not go through the tree at a time.
Otherwise, the reverse side of the board will collapse and tear wood structure.
To prevent this from happening when the pen tip is only starts to show on the other side, turn the frame over and start drilling from there. In this case, the hole will be more accurate.
Thoroughly sand the resulting holes and all boards with sandpaper. You can also round the ends with sandpaper. nine0003
The look will be more aesthetic.
Next, remove all dirt, dust and wipe to perfect cleanliness of the resulting frame, preparing it for painting.
How to properly paint a mirror frame
and nuances.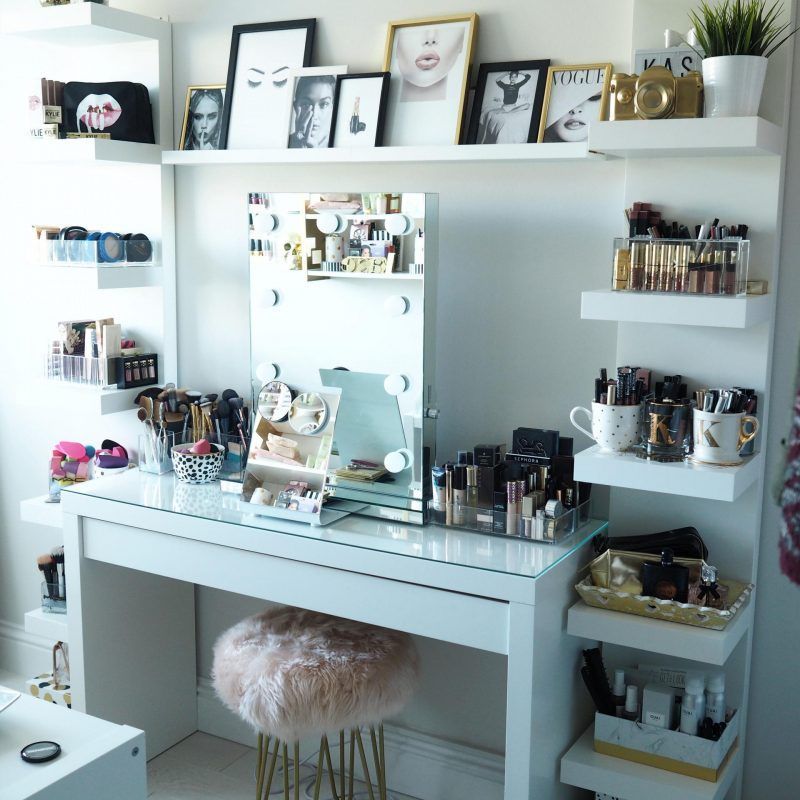 Sometimes even more than with an electrician.
First, always be sure to read that the manufacturer writes on their packages and jars with varnishes, paints, stains etc. nine0003
And strictly adhere to these recommendations. If it says that after applying the first layer you need to wait two or more hours, just do it, take your time.
Secret №9
Secondly, not all varnishes are applied with a brush.
Some only with rags or sponge. They are literally forced to rub over the surface.
Painting is again best done with a roller rather than a brush.
Secret No. 10
Wooden frame must be protected with varnish or paint on both sides. nine0003
Never leave the back wall unfinished.
The cheapest and fastest option is to spray paint the frame with paint.
One small can is enough for two coats. However, such the result will most likely not please you or your soulmate.
The second way to finish the frame - apply stain first, and then varnish everything.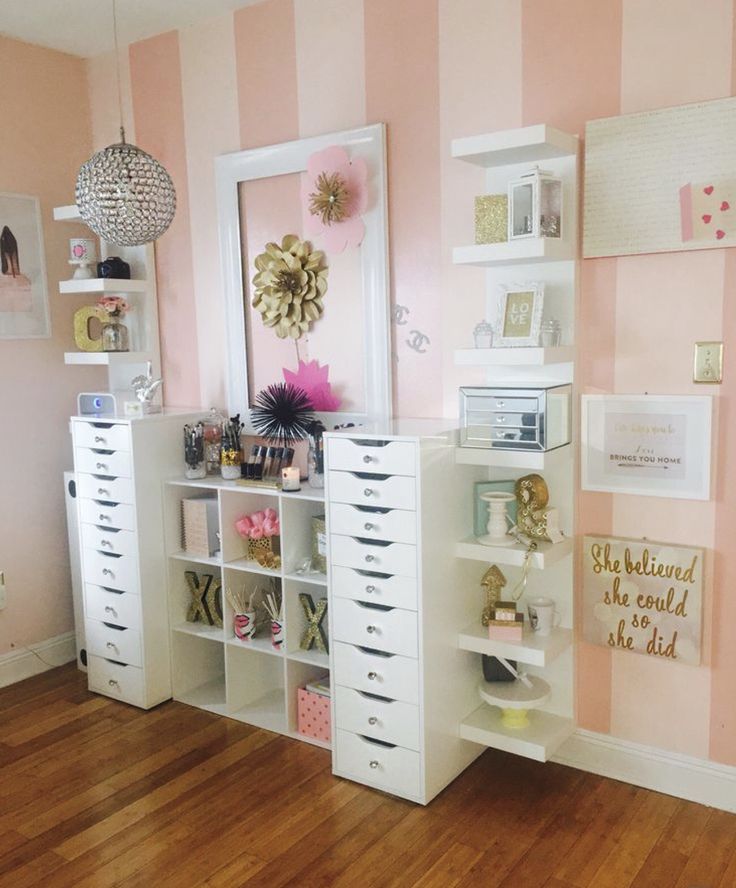
To prevent sagging, for applying varnish and stain, as mentioned above, use not a brush, but a sponge made of foam rubber. nine0003
Secret №11
After applying the first layer of varnish, be sure to remove the raised pile with sandpaper.
Secret No. 12
In this case, you can not use coarse-grained sandpaper, the optimal grit size is 220. get rid of.
After that, go through the second circle with varnish. Everything will be smooth and will last for many years.
The third way - first apply acrylic on the wood color. For example, Palizh. nine0003
Next one hour later, go through the frame with Teknos oil on wood.
Secret №13
The oil is applied in two layers with an intermediate drying time of 8 hours!
Then, in order to develop the texture, the surface is rubbed with a cotton cloth. The end result is a wonderful piece. Look at the result yourself.
Secret #14
However, keep in mind that black is not always suitable for professional make-up artist work.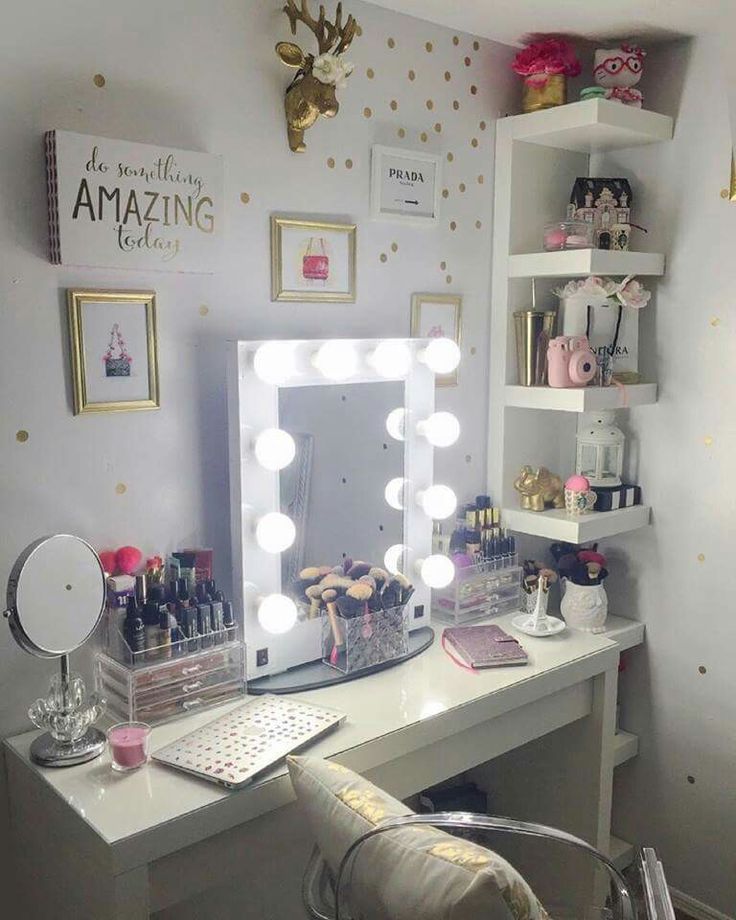
In this kind of work it is very important to see the real skin texture (pores, defects). This requires a lot of soft light. nine0003
The black frame will interrupt it. Although for home interiors, this option is very popular.
Connecting sockets with light bulbs
Let's move on to one of the important and incomprehensible for many stages - connection of electricity. In fact, there is nothing super complicated here.
Cartridges do not buy simple, but with a fixing ring.
Secret No. 15
If your task is to make a mirror where the cartridge will purposefully act as an element of decor in the loft style, then the black E27 cartridge is your choice. nine0003
But when there is a desire to see only light bulbs and no extra elements, then small models of white color E14 will do.
Each cartridge must be disassembled. Unscrew the fastener puck and bottom. Run the end of the wire through it.
Use a two-core wire of the ShVVP 2 * 0.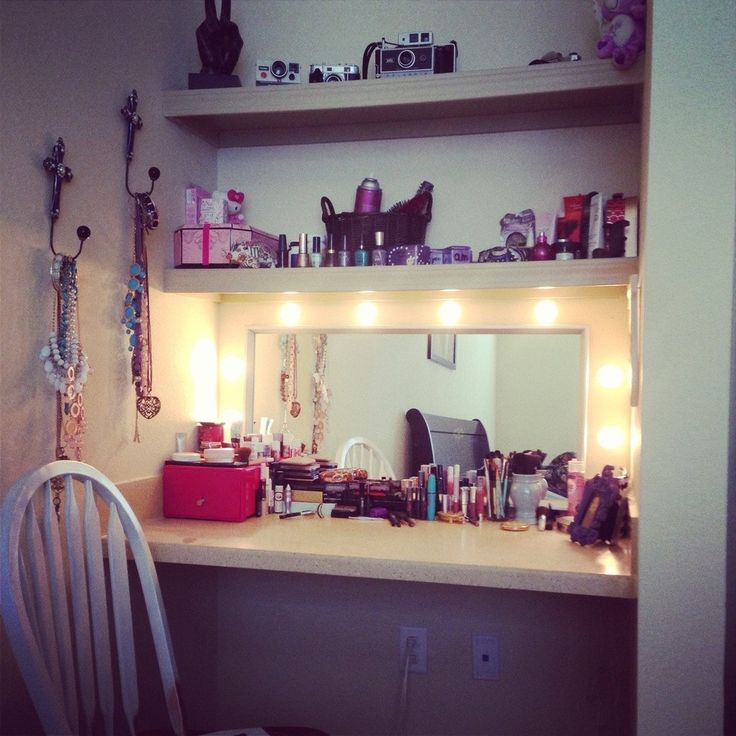 75mm2 brand. For such a small load of this section is quite enough.
Strip the outer sheath of the cable by 3 cm and themselves lived at 0.5-1cm.
There are two screw contacts inside the chuck. They need insert the stripped cores and tighten the bolts. nine0003
Then reassemble everything in the reverse order. The first cartridge is ready. In order not to make mistakes, read the detailed instructions.
Insert it into place in the frame and measure distance to the next light bulb. Cut the insulation lengthwise.
Again, peel off 2-3 cm of the outer shell.
Secret №16
Attention! The cores inside the cable do not need to be cut.
They must remain intact. You will only have to remove the insulation from them. This can be done even with a lighter. nine0003
Next, compress the stripped wire in half, twist cores and insert them into the next cartridge.
Do the same procedure with all remaining light bulbs. Remember to measure the correct length of wire each time.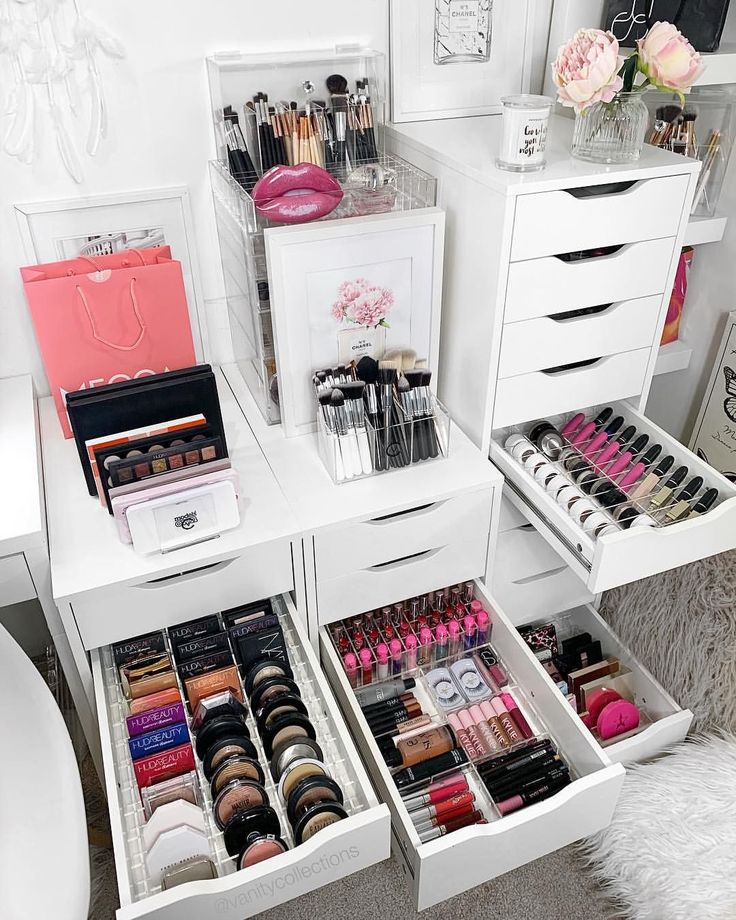
You should end up with a homemade garland with lamps connected in parallel.
The connection here is precisely parallel, not consistent!
If you make a series connection, you will get a completely unexpected effect. nine0003
In modern cartridges, the connection is made without any cogs. They have 4 plug-in contacts on the “ass”.
In this case, the wires still have to be cut. Two wires of the power cord are plugged into one contact, and two outgoing wires into the other.
Secret No. 17
To keep the wires from hanging on the back wall, for greater safety, they can be hidden in a plastic cable channel.
Cut it to fit the frame, make holes for cartridges and fasten on the back as in the photo below. nine0003
To completely close the cartridges, the lid must be quite high.
If there is a router, a chamfer is simply removed in the board, where and all wires are laid.
To prevent the wire from falling out, it can be nailed with special cable clamps.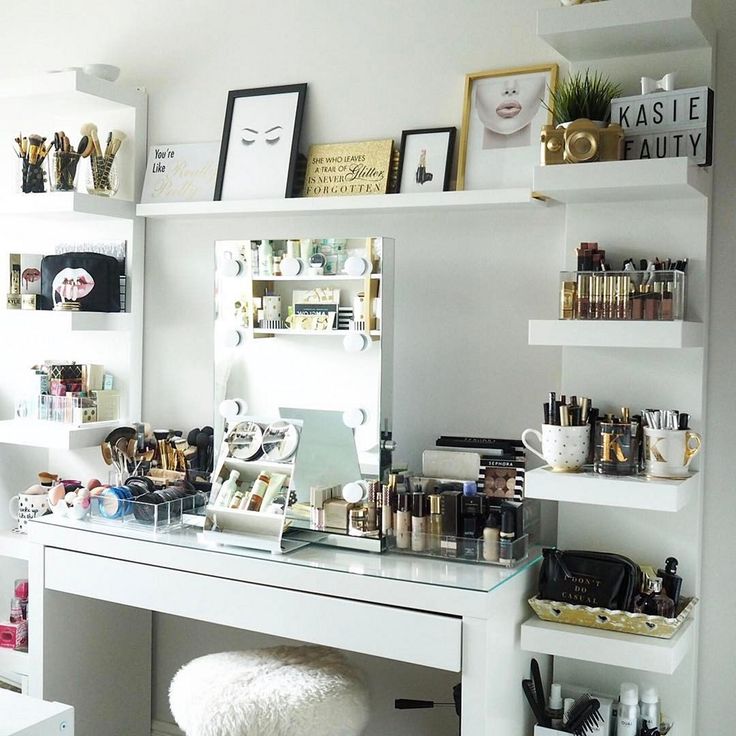
There is a plug at the very end of the cord. between her and The first light should be a switch.
Only one core is passed through it - phase. Second You don't even need to cut the wire.
This makes the standard room switch look bulky. nine0003
Therefore, it is better to install a small “nutcracker” into the frame instead.
Often it is simply put on the side of the double-sided tape mirrors.
Just be sure to bring the wire to it through frame, and do not let it over. Otherwise, the mirror will not be pressed close to the wall.
Secret #18
But the best option is to use a miniature infrared switch.
These are often used to illuminate the working area in the kitchen.
It is a small box (her fixed inside the frame with double-sided tape) and a button in the form of a barrel.
This keg exits from the side through a drilled hole mirrors.
Box with 4 terminals. Connect two wires from the first light bulb, on the other two - the wire from the plug.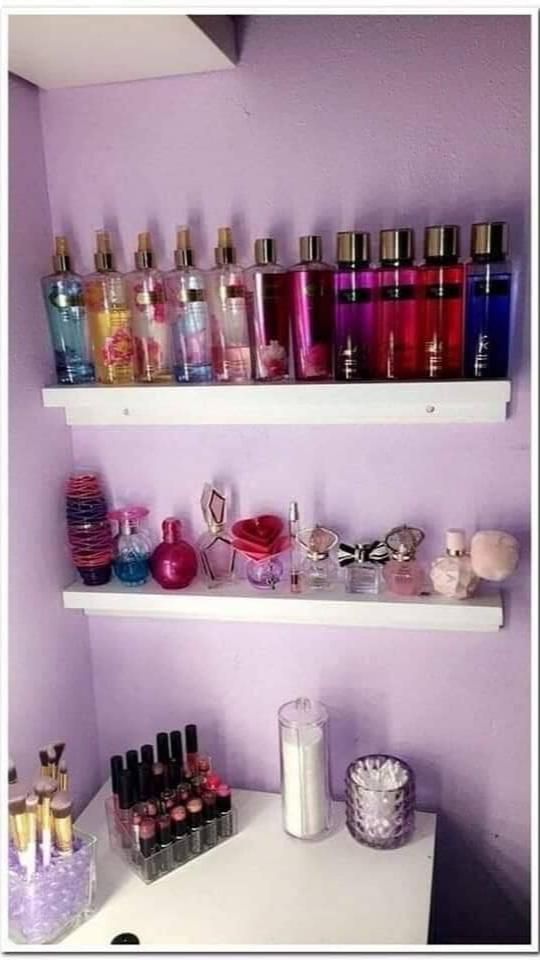
To turn on the mirror, it will be enough to bring your hand to this sensor, without even pressing it.
Well, the simplest option is a cord with a built-in switch on the wire. nine0003
These are usually sold for table lamps.
Can be matched even with a dimmer to adjust the brightness.
Which bulbs to choose for the makeup mirror
For the make-up mirror, buy only LED light bulbs.
Mandatory with frosted bulb. It gives a soft diffused light, unlike transparent ones.
The glow temperature must be 4000K.
This is a white neutral light. If you meet in the store 4100K or 4200K, buy them. These nuances do not greatly affect the final picture and how the light will fall on the face. nine0003
Your eye can't tell the difference.
Do I need to install the lower row of lamps? Almost always backlit becomes the letter P.
The bottom row only increases the cost of labor, plus interferes with the work of the make-up artist and takes up extra space on the make-up table.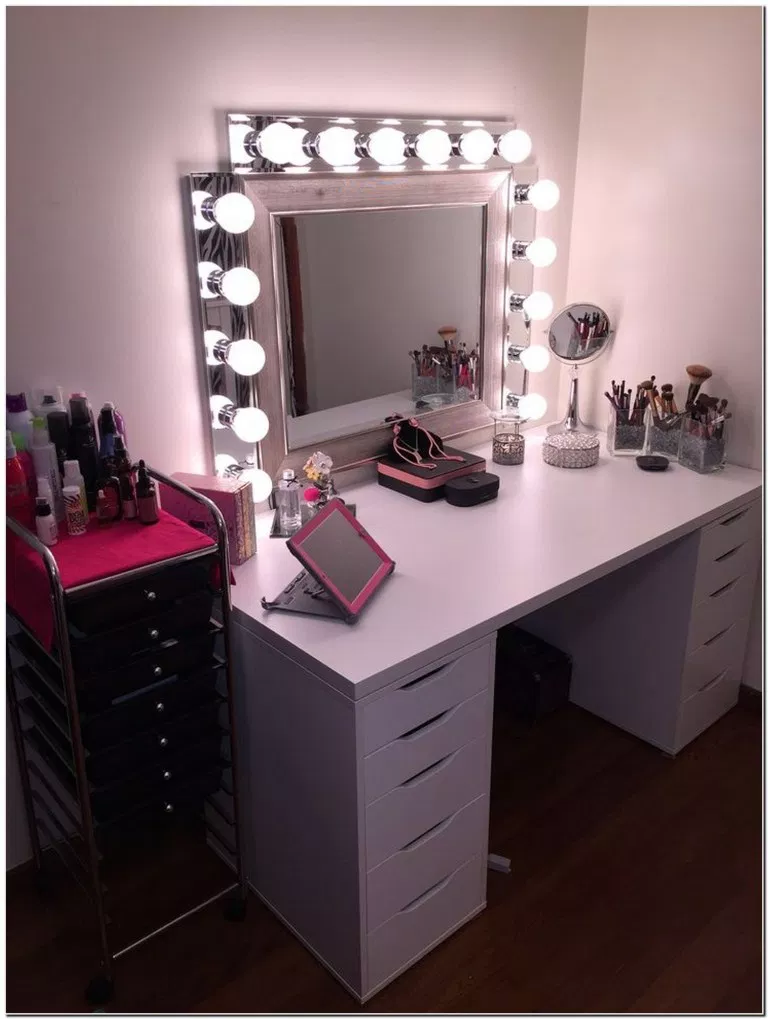 Light from three directions is enough to create even, good lighting on the face.
However, with the huge size of the mirrors, without the bottom row already not enough.
How wattage should all bulbs be? It all depends on their quantity. nine0003
6W lamps are used for full-length mirrors or make-up stations.
For a small make-up artist's home mirror, 3-4W is enough. No more than 5W. Otherwise, there will be uncomfortable sensations and constant eye fatigue.
Also, so that your eyes do not hurt, select light bulbs without pulsations.
On quality products, this is written immediately on the packaging.
How to attach the mirror
The mirror itself is attached to the table in various ways. Often self-tapping screws with plastic washers. nine0003
They are soft enough that they will not press the mirror with force that could cause it to crack.
Professionals paste the mirror.
Secret No. 19
In this case, only transparent glue and specially designed for mirrors is used.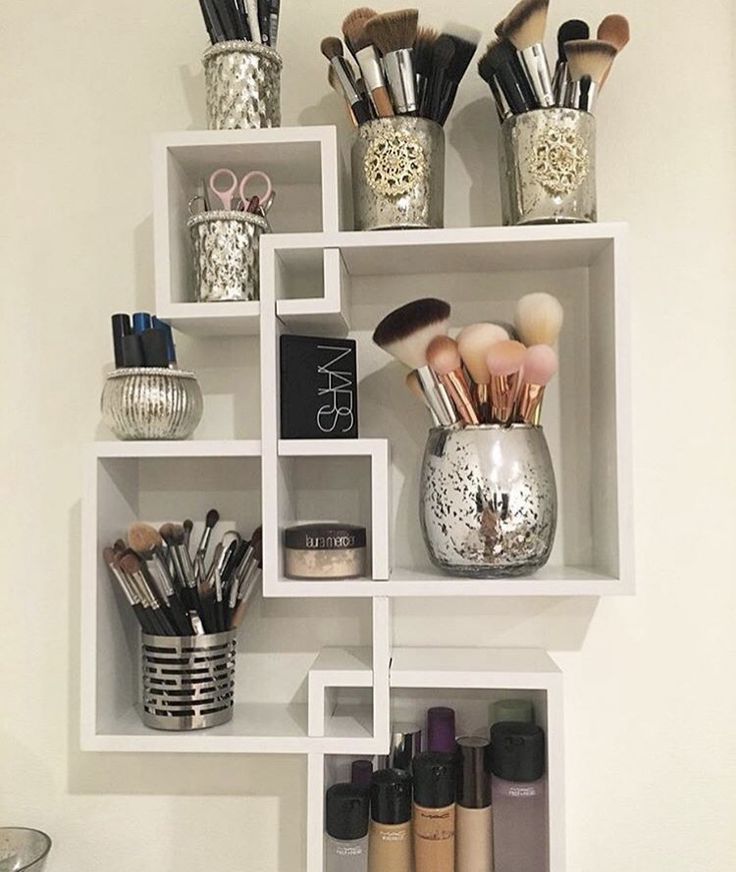
Other brands, of course, will also be kept, but ask mirror specialists and they will tell you how other adhesive compositions eat up amalgam in just six months. Amalgam is what is used to cover the back of a mirror. nine0003
But even when gluing, additional fixation.
Secret #20
Just don't use hard metal corners for this.
As mentioned above, when the boards are wet, the frame begins to lead over time. And with a hard mount, your mirror may crack.
Mounting a mirror on a table
The easiest way to do this is to use a couple of furniture corners from a hardware store. From the reverse side, screw them into the frame of the mirror, and then from the bottom of the table itself. nine0003
For greater reliability, take not two, but three, four corner.
You can not fasten it tightly at all, but make it stand. Cut out a wide sheet of plywood or board, paint it the same color as screw with a mirror and self-tapping screws to the bottom of the frame.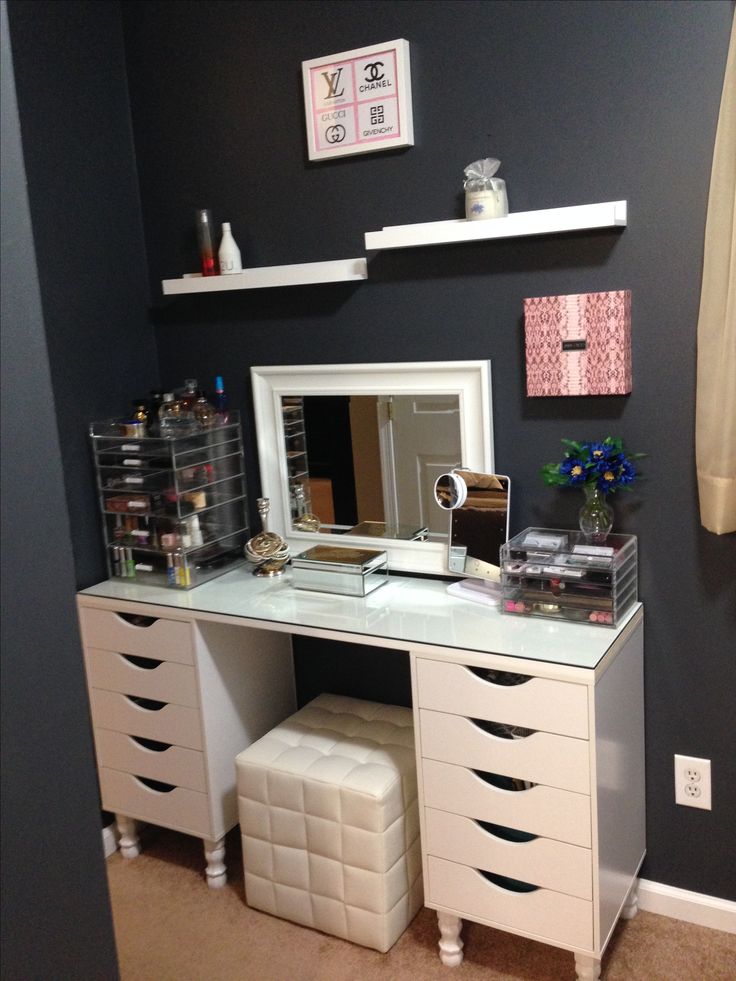
The end result is a stable and mobile structure that does not tied to one place.
Well, or just hang it on the wall with special fasteners.
Your mirror is ready. Turn on the lights and bring beauty. nine0003
If all this step-by-step instruction seemed too complicated for you, you can pay attention to ready-made makeup artist mini-mirrors from our Chinese comrades.
Read more
Read more
They have some interesting features that the usual bulky models don't have. Thousands of satisfied customers after purchasing this product cannot be wrong.
Make-up mirror do-it-yourself: installation instructions
Until recently, this stylish piece of furniture flaunted only in beauty salons and make-up rooms. Over the past decade, it has grown out of the beauty industry and migrated to dressing rooms, bathrooms and bedrooms. Since this product does not belong to the budget category, you can make a make-up mirror with your own hands. nine0003 Make-up mirror with your own hands
Contents of the article
- Features of make-up mirrors
- Step-by-step instructions for making
- Step 1. Choosing tools for cutting
- Step 2. Preparing tools and materials
- Step 9025 Step 9025 Frame Making holes for light bulbs
- Step 5. Painting the product
- Step 6. Arranging lighting
- Step 7. Fixing the mirror
- Video - DIY make-up mirror for a make-up artist
- Video - DIY mirror with light bulbs
Features of dressing room mirrors
Mostly dressing room mirrors are made from the following materials:
- solid wood;
- MDF or chipboard;
- aluminum profile;
- plastic.

Make-up mirrors are one of the easiest ways to transform a room.
A mirror is a good way to decorate a spaceInitially, they were in demand exclusively in the actor's life. Makeup was often applied in small closets without strong light sources. Light bulbs installed around the perimeter of the glass sheet have become an excellent solution in conditions of poor lighting. nine0003
Table 1. Important parameters
| Parameter | Description |
|---|---|
| Size | Preferably in full height, but in small rooms the construction looks cumbersome. In such rooms, mirrors up to 1 m in height are preferable. |
| Styling concept | As an accent item, it should blend in softly with the interior. It does not look appropriate in the vicinity of massive furniture, since in such a combination it overloads the space. nine0532 |
| Accessories | Presence of a table with niches, drawers and other storage systems, as well as a mobile base is welcome. The latter option is especially relevant for makeup artists. The latter option is especially relevant for makeup artists. |
This item is actively used by make-up artists and stylists. Bright light removes shadows from the face and makes it possible to correctly apply makeup.
Cosmetics should only be used in the right lightStep-by-step instructions for making
To create a dressing room mirror, you will need a reflective surface, wooden beams and minimal skills in working with wood. Following the proposed algorithm, it can be made in a few hours.
Step 1. Selecting tools for sawing
The right mechanism ensures a high quality product. With a hand saw or a chain saw, for example, you will not get a straight cut line. For sharp factory sharpening, experience is needed. If you apply too much force, you can damage the timber. A hand-held circular saw has a small depth of cut. The plane is broken if sawing from different sides of the part. nine0003 Optimal tools for sawing timber
Step 2.
 Prepare tools and materials
 You will need the following parts and accessories:
- mirror;
- straight wooden blocks corresponding to the dimensions of the reflective surface;
- wire;
- double-sided adhesive tape;
- paint, stain or varnish;
- furniture corners/brackets;
- lamps;
- cartridges and fuses;
- wire plug. nine0027
Listed includes cartridges. They are selected depending on the type of lamps used and their number.
Lamp holderThe holder is a device that helps to connect the lamp to the electrical network. It is made from heat-resistant plastic or ceramics. The latter option is used less frequently. There is also a silicone version used in the manufacture of designer structures.
Separately, the quality of the lamps should be specified. If the mirror will be an assistant in applying makeup, their power should not be strong. Because the face is a short distance from the reflective surface, intense light can cause blinding.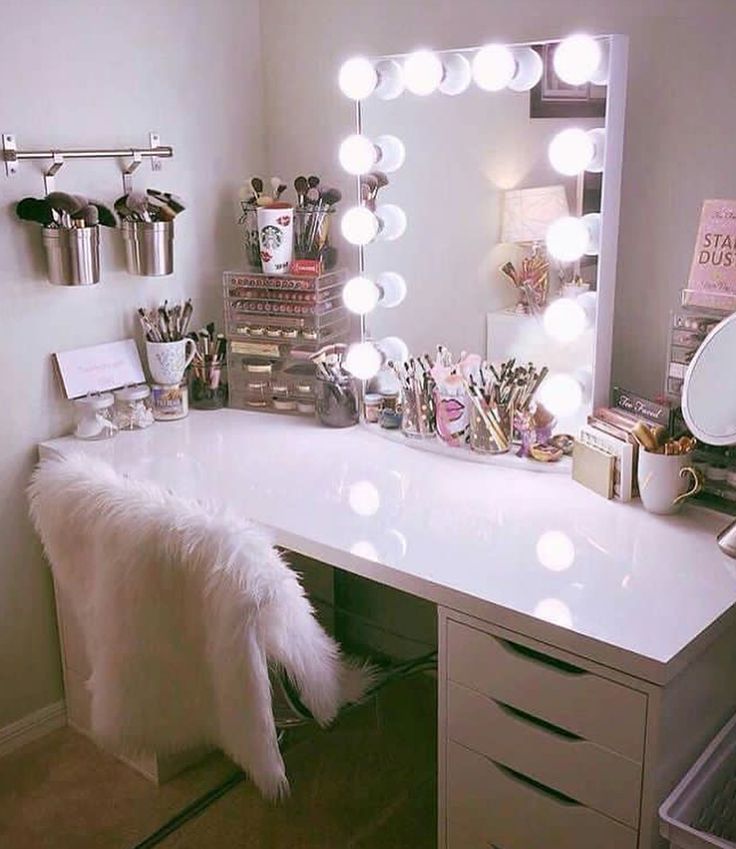 nine0003
When choosing bulbs, you need to start from the size of the mirror. The smaller it is, the less power should be. The optimal solution is 3.5 watts. It is advisable to purchase the LED option. Performance tuning is not required.
Advantages of LED lamps:
- Long service life of about 2 years.
- Since the bulb is made of plastic, the bulb rarely breaks when dropped on the floor.
- This variety barely heats up. You can be sure that in the process of applying makeup will not flow. nine0027
White light bulbs look good on the make-up mirror.
LED lampRequired tools:
- electric drill;
- tool for cutting bars;
- sandpaper or grinder;
- measuring tapes;
- cutting pliers;
- miter box or square;
- screwdriver.
Step 3. Making the frame
It is necessary to cut out a frame from wooden blocks that matches the size of the mirror.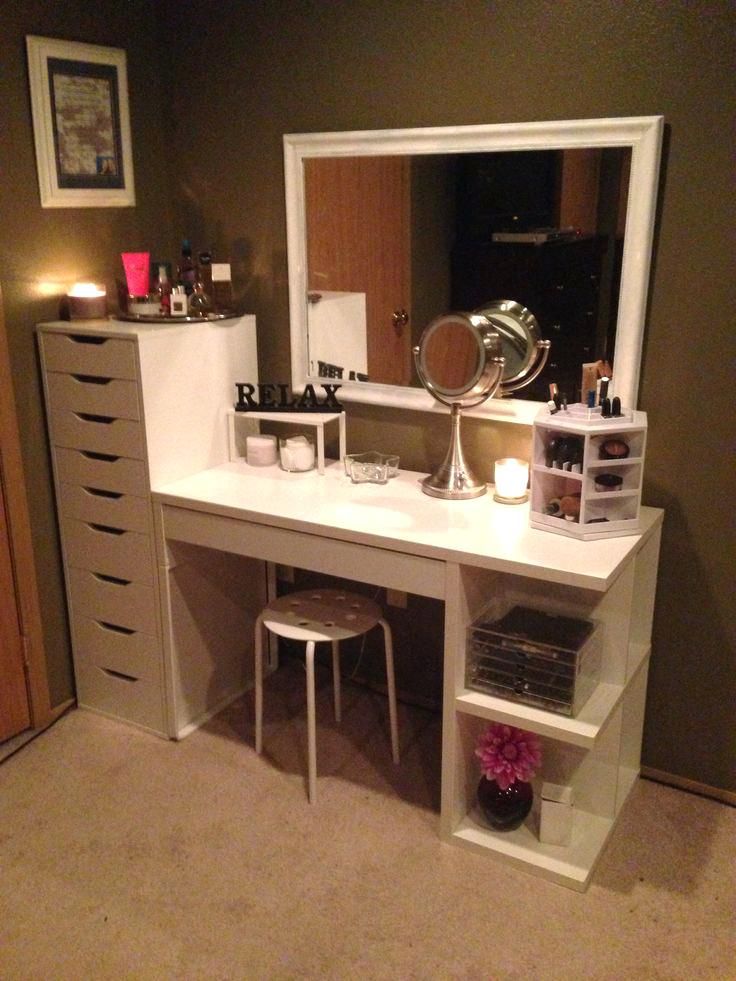 Details are sawn so that the ends have an angle of 90°.
Small roughness is removed with sandpaper. First use a coarse abrasive. The final work is carried out with a fine-grained sandpaper.
Finished BeamsA grinder produces a less labor-intensive and better result.
Varieties of grindersIn addition, you need to make recesses for inserting a reflective surface. We fasten the frame with furniture corners or staples.
Fragment of a frame with a mounting hole for a mirrorFix the frame with bracketsStep 4. Making holes for the bulbs
Making holes for the bulbs. The recesses must be at the same distance from each other. Approximate step - 20 cm.
Marking for holes for lamps. For these purposes, the 40th drill is suitable. Base preparedStep 5. Painting product
At this stage, the frame is given the desired shade. You can paint the product with paint or treat it with stain and varnish. The color should match the overall color scheme of the interior.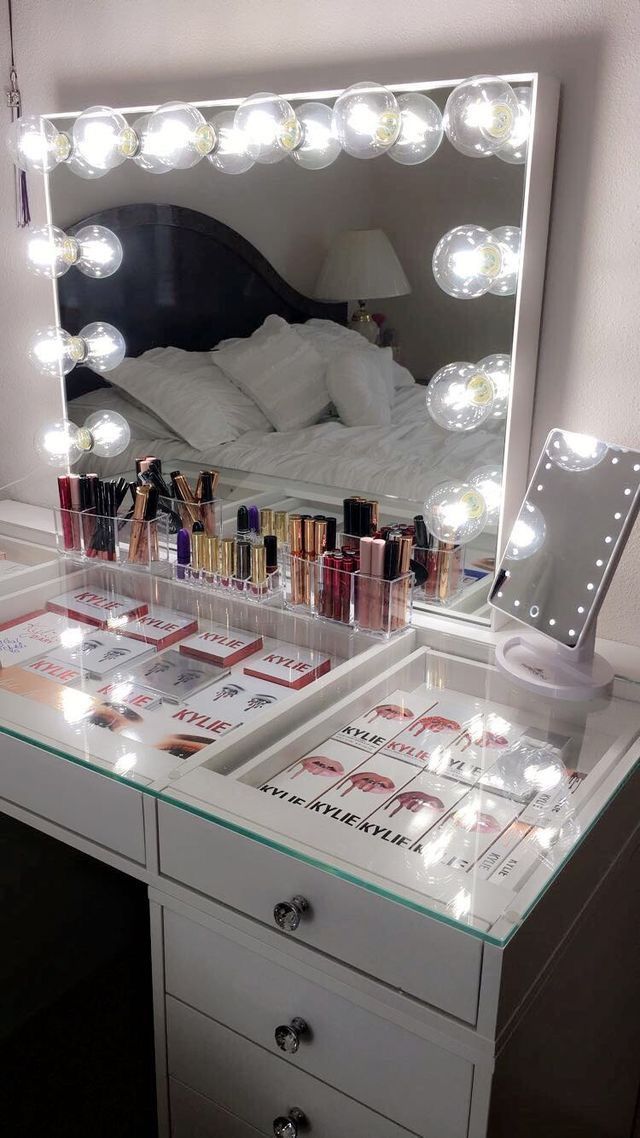 nine0003 Covering the frame with paint
Step 6. Organizing the lighting
Procedure:
- Lay the frame face down on a hard surface.
- Place the sockets with wires in the recesses made and lead out the wiring.
- Twist the wiring onto the chuck screw and fix each mechanism to the frame.
- Check the fixation of the installed mechanism and insert the bulbs.
Before checking the operation of lighting devices, make sure that the wires do not touch each other. If any of the bulbs do not turn on, you may need to swap the wires.
Finished frame without bulbs Screw in the bulbs and checkStep 7. Fixing the mirror
In addition to making indentations to insert the reflective surface, you can additionally use industrial tape. This will enhance the strength of the structure.