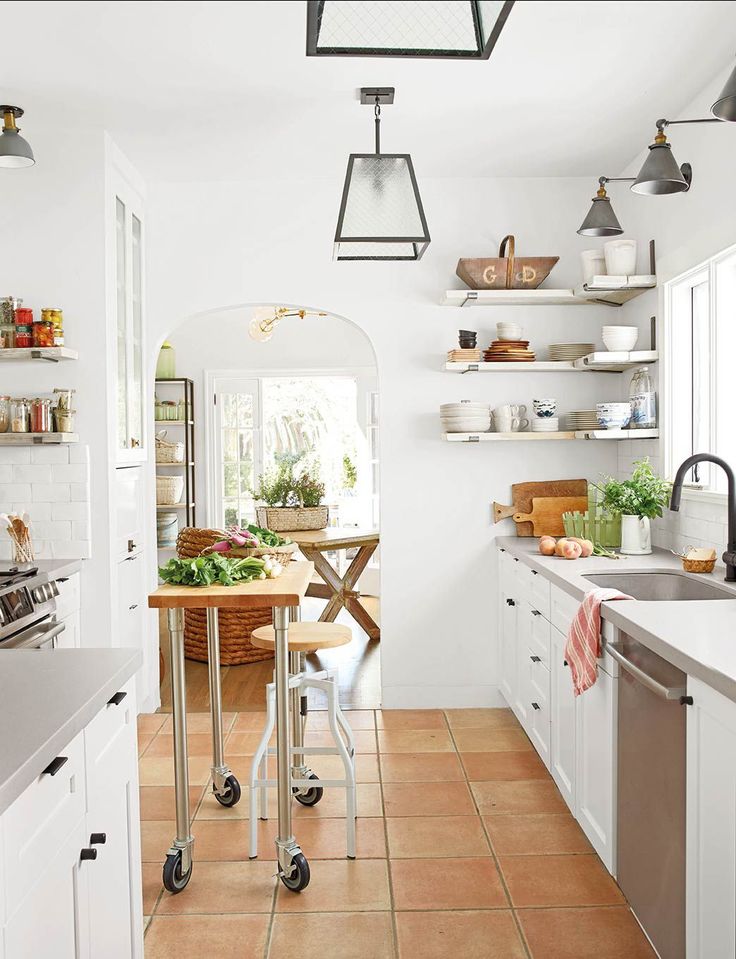
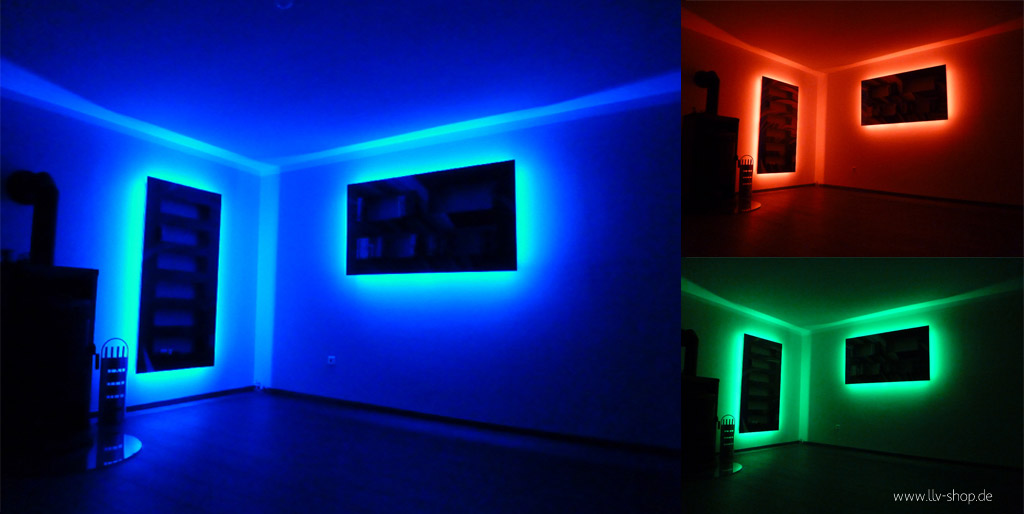
Diy bed nook
DIY Bed - With Built In Shelves, Drawers, & Reading Nook
See how we built this DIY bed for our girl's bedroom. This DIY platform bed with drawers, shelves, and a reading nook saves so much space in her room and creates a beautiful focal point.
I'd say the main part of our girl's bedroom makeover is the DIY bed we built for her.
PinHer room is rectangular in shape and she doesn't have a lot of wall space so in order to give her all the clothes and toy storage she needs and still be able to have space for her art/ homework table and large cork board wall we had to figure out a way to get rid of her dresser.
Putting drawers under her bed was definitely the answer, but I couldn't find the exact right bed with storage so I decided to design and build it myself.
Now, I'm not a woodworker by trade, but I've been able to create beautiful built-ins in our home and used those same steps and store bought drawer units from IKEA to create this built in bed with the skills I have.
I swear, if I can do this project - by myself I might add, you can too and today I'm going to share the step-by-step process with you so you can build your own DIY bed and add a ton of function and character to a bedroom in your home.
Supplies For This DIY Bed:
- Nordli modular drawers (IKEA)
- These drawers come in different widths and number of drawer configurations. Be sure when you purchase you don't purchase the top, cause you don't need it and it will save you money.
- I took the width of the wall the built in bed would be on and played around with the drawer configuration to get as many drawers as possible. It's okay if it's not an exact fit, I'll show you how to fill in the sides with panels to complete the built-in look.
- I used three 31.5 inch drawer units, and one 15.75 drawer unit.
- 2 x 2 furring strip for bottom frame
- White melamine panel boards for the platform bed
- ¾ maple plywood (4 x 8 sheets) for shelving units
- 1 x 2 birch board for trim on shelves and along top and bottom of platform bed frame
- trim for platform bed side panels and along back wall
- 2 x 4 wood for platform bed wall brace
- ¾ inch birch board for platform bed side panels
- IKEA connector bolts- drawer units may come with these (they're specific to IKEA furniture) but to be safe pick up a few near the return counter at IKEA.
- 18-gauge 2 inch nails (use with nail gun)
- 1 ¼” Kreg screws
- Wood glue (my fave is Titebond)
- Wood putty
- Paintable caulk (my fave is Dap)
- Tube of plastic wood
- 2" and 4 " wood screws
Tools:
- Measuring tape
- Level
- Drill
- Drill bit holder /drive guide
- 18-gauge nailer (with portable compressor)
- Kreg Pocket Hole Jig with clamp
- Miter saw (10” is fine for most of the project, but you’ll need a 12” or larger for the crown molding.)
- Kreg Crown Pro Jig
- Nail punch
- sand paper – fine grit
- Caulk gun
- Paint brush - this is my favorite one
- Foam roller
How To Build A Platform Bed Using Nordli Drawers As A Base
Using Ikea drawers as a base for you bed will get you the under bed storage you need and be less work.
Measure for your built in bed
Like I said, your measurements will depend on your space, the size of the mattress, how deep you want your headboard shelves and how big you want the reading nook.
To start:
Definitely start by taking measurements of your overall space (wall to wall) and the length and width of your mattress since these are the two measurements that can't change.
You'll want to add about 2 inches to the length and width of the mattress measurement to allow for bedding to be tucked in.
Headboard shelves:
For the headboard shelves, I'd do a minimum of 8 ½ inches deep (what we did) but if you can do 10 inches deep, I think you'll get more use out of the shelves.
Reading nook shelves:
Any space left over at the foot of the bed will be your reading nook. You'll want the bench area to be big enough to curl up and read even with pillows behind you, so you won't want to make the shelves too deep.
To give you an idea, our platform bed frame is 41 inches deep (from wall to edge of bed) and the shelves at the foot of the bed are 12 inches deep which left 28 inches (depth) for the bench cushion.
PinPART 1: Building the platform bed
Step 1: Assemble the Nordli drawers according to the instructions
- Place them side by side and note the length of your drawer units and their depth.
Step 2: Build a base/ riser
Lifting the drawer unit off the ground a few inches will make opening the drawers easy (especially if your room has carpet) and create more of a built in look.
The front piece of the base will run the length of the entire unit (wall to wall) while the rest of the base will support the edges of your drawer units.
- CUT A - Cut one piece of 2 x 2 furring strip the length of the entire unit (wall to wall)
- CUT B - Cut one piece of 2 x 2 furring strip the length of the drawer units
- CUT C - cut 2 pieces of 2 x 2 furring strip the depth of the drawer unit minus 4 inches
- Place A and B on the ground and position C between the two long pieces with even amounts of overhang on either end of A.
- Pre-drill holes and attach pieces with a wood screw.
Step 3: Dry fit your base
You may need to cut your existing baseboard to create a notch for your built in bed.
Step 4: Make side panels for your platform bed unit
To fill in the extra space on either side of the drawer units we need to create side panels.
Tip: It’s best to give your cut pieces a coat of paint before assembling. It makes the painting process much easier.
- To figure out the width of your side panels take the length of your unit (wall to wall) minus the length of the drawers (side by side) and divide by 2.
- CUT D - Cut the ¾ inch birch boards the same height as the drawer units by the width you just calculated above.
- Using your Kreg Jig, drill 2 pocket holes on one long side of each side panel and attach the side panels flush with the front of the drawer unit on both ends. (When looking at the panel from the front, you'll see the drawer unit and the side panel, the panel won't cover the drawer unit.)
Step 5: Attach the base/riser
Position your drawer units together AND upside down so the bottom of the drawer unit is facing up.
Line up the front edge of each drawer unit and hold them in place using clamps.
Lay the furring strip base on the drawer unit so the front of the base matches up with the edge of the metal drawer slides and the side panels you just installed. - The rest of the base should run along the edge of the drawer unit too.
- Pre-drill holes and attach the base to the drawer unit using wood screws. It's important that you pre-drill holes and take care to go through the furring strip (base) and into the thin walls of the drawer unit.
Step 6: Secure the drawer units to each other
- Carefully flip your drawer unit with base over so it's right side up and roughly put it in place.
- Double check that the front of each drawer unit is flush and use connector bolts to secure the drawer units to each other to add stability and reduce gaps between the drawer units.
Tip: Your IKEA drawer units should have come with connector bolts. If your drawer units didn’t come with connector bolts, you can find them (usually for free) at IKEA near the return counter. You can also use wood screws that go through the first drawer unit wall and into, but not all the way through, the second drawer unit wall.
Step 7: Add bottom trim
- CUT E - Cut 2 pieces of 1 x 2 birch board the length of your platform bed unit and attach to the base you created using a nailer. (The second piece will be attached in step 11.)
WARNING: You’ll see in the images below that I don’t have the trim piece I just had you attach installed. This was a mistake I made along the way so the way your project looks at this point will differ slightly from the photos below. Definitely attach that trim piece in step 7 first.
Step 8: Place your drawer units
- Place your drawer unit so the front of the drawer unit meets the baseboard notch. Your unit will have the bottom trim piece attached at this point so instead of pulling your unit forward to the base piece, you'll pull it forward to the trim piece.
- Double check the measurement from the back wall to the front of the drawer unit to make sure it matches your plan and accommodates the width of your mattress plus 2 inches for bedding. In our case we cut the baseboard at this measurement, so it was just a matter of pulling the drawer unit and base forward to the front of the notch in the baseboard.
🎉 Well done! Here's what it should look like at this point (but yours will have the bottom trim piece.)
PinStep 9: Back wall brace
- CUT F - Cut your 2 x 4 the length of your back wall minus a couple inches (to make it easy to get in place.)
- measure the height of the drawer unit and mark a level line along the back wall at the same height.
- Using a stud finder, mark your studs just above the line along the entire length of the wall.
- Line up the top edge of the 2 x 4 with the line you marked and attach to the wall with 4" wood screws making sure to hit each stud.
Step 10: Attaching the platform
- CUT G - Cut your melamine board the depth of your platform bed and the length of the entire unit.
- If your wall isn't perfectly square you may want to cut your melamine board the depth of your platform bed minus ½ to give you some wiggle room.
- I had my boards cut at Home Depot and needed them to fit into my SUV, so as you can see, I had multiple smaller pieces cut to all equal the dimensions I needed.
- Place your melamine board on top of your drawer units and the 2 x 4 wall brace so that the front edge of the melamine board lines up perfectly with the front of the drawer unit.
- Using wood screws, attach the melamine board along the back wall brace and into the drawer unit walls.
Step 11: Attach the top trim piece
- Run a small line of wood glue along the raw edge of your melamine board.
- Grab your other piece of trim (CUT E) and line up the bottom edge with the raw bottom edge of the melamine board and attach the trim piece with a nailer.
- **Note that the trim piece will stick up above the platform. This creates a small lip to keep the mattress from sliding around.
Step 12: Adding side panel trim
- You now have a slight gap between the side panel and baseboard and the side panel and the wall.
- CUT H - measure the distance from the top of the bottom trim to the bottom of the top trim and cut a piece of window/ door casing to fit. - The reason I chose window casing is because it's thicker at one edge. You'll want to choose a casing that has its thick edge almost fill the gap between the baseboard and the side panel.
- Attach with a nailer.
- Repeat on the other side.
PART 2: Building the shelves for the built in bed
We talked earlier about determining the depth of both your headboard shelves and the reading nook shelves. Keep in mind that you'll be adding trim to the front of the shelves that's ¾ inch thick so when cutting the wood for your shelves, take your depth and subtract ¾ inch.
The width of your headboard shelf unit will be equal to the depth of your platform bed.
The number of shelves and spacing is up to you. Definitely think about what you plan to put on the shelves to determine your spacing.
At the bottom of each shelf unit I put an 18 inch flat panel to act as a headboard on the headboard shelves and a place to lean up against on the reading nook shelves. If you plan to lean a pillow up against the headboard shelves when the bed is made you may want to make this panel a bit taller.
These shelves are very similar to the ones I built for the built ins in our sitting room. The only difference is the flat panel I added here. For more more details and more photo angles of this project including more detailed steps for the crown molding visit this post and scroll to the part where the shelves are being built.
For each shelving unit you'll need to cut:
- 2 side panels PIECE A: Cut the height of your shelf unit minus ¾ inch X depth of shelf unit minus ¾ inch.
- *Tip: leave 2 inches between top of shelf unit and ceiling to accommodate for crown molding.
- Front flat panel PIECE B: Cut desired height of flat panel minus ¾ inch X width of shelf unit minus 1 ½ inches.
- Interior shelves PIECE C (number of shelves is up to you): Cut width of shelf unit minus 1 ½ inches X depth of shelf unit minus ¾ inch.
- Top Piece PIECE D: cut depth of shelf unit minus ¾ inch X total width of shelf unit.
Step 1: Drill pocket holes for shelves
- Using the Kreg Pocket Hole Jig I drilled two pocket holes on the inside top edge of each side panel (A).
- I drilled two pocket holes on the inside side edges of the flat panel (B).
- I drilled two pocket holes on the underside of both ends of each interior shelf piece (C) (not including the top shelf, piece D.)
- There are no pocket holes on the top piece (D).
Step 2: Attach the flat panel (B)
- Lay one side panel (A) flat on the floor, pocket holes up.
- At the opposite end from the pocket holes/ bottom of side panel place your flat panel so the front side (without the pocket holes) is flush with the raw edge of the side panel and bottom edge is lined up with the bottom of the side panel.
- Attach using Kreg screws and the pocket holes you created.
Step 3: Attach the bottom interior shelf (C)
- Place your first interior shelf directly above the top edge of the flat panel so its raw edge is flush with the raw edge of the side panel and is square with the side panel.
- Attach it to the side panel using Kreg screws and the pocket holes you made at each short end of the shelf.
Step 4: Attach the top piece (D)
- Place the top shelf (D) next to the top of the side panel (A) so the raw edge of your top piece is on the floor and flush with the side of the side panel) and attached it with a Kreg screw using the pocket holes on the side panel (A).
Step 5: Attach the remaining interior shelves(C)
- Measure and mark the spacing for each shelf starting at the bottom shelf.
Be sure you're marking where the top of each shelf will line up and mark both edges of the side panel to ensure your shelves are installed straight.
- Hold each interior shelf in place, pocket holes facing the bottom of the shelf unit, making sure both sides match up with the marks you made (double check that your shelf is square) and attach using Kreg screws and the pocket holes you made.
- Repeat this for each shelf.
* Be careful because at this point the shelves are flimsy.
Step 6: Attach the second side panel (A)
- Lay your second side panel (A) flat on the ground, pocket holes facing up, and carefully flip your partially built shelf unit over so the top shelf edge (D) touches the floor and the raw edge of the side panel runs along the edge of the flat panel.
- Attach the side panel to the flat panel first, using the pocket holes on the inside of the flat panel, and double checking that everything is square.
- Measure and mark the same measurements for each shelf and attach using the pocket holes you already created on the underside of each interior shelf working your way up to the top piece, which attaches using the pocket holes you made on the side panel.
Repeat steps 1-6 for your other shelf unit.
Step 7: Place your shelf units and secure to the wall
- Place both shelf units on the platform bed.
- Secure to the wall by screwing through the side panel closest to the wall and into the wall.
- *Double check to make sure the unit is plumb and level. You may need to use wood shims if your wall isn't square.
- Don't worry about small gaps; we'll be caulking for a perfectly finished look.
Step 8: Add vertical trim pieces
- Cut 1 x 2 birch wood the length of each vertical side minus the top shelf.
- Place a bead of wood glue down the raw vertical edge of the shelf unit.
- Line up the outside edge of the shelf unit with the edge of the trim and attach using a nailer.
- Repeat on wall side placing the edge of the trim as close to the wall as possible while keeping it plumb.
- Repeat on other shelf unit.
Step 9: Add horizontal trim
These trim pieces are what make your shelves look substantial and really finished.
- You'll want to measure and cut each horizontal trim piece for each shelf individually because each one will be slightly different cause of how your vertical trim piece was placed next to the wall.
- Cut each piece from 1 x 2 birch wood, place a bead of wood glue along the raw edge of the interior shelf and line up the top edge of the trim with the top of the shelf. Attach using a nailer.
Step 10: Add crown molding
- Measure and cut your crown molding. I followed the instructions on my Kreg Crown Pro to get the right measurements and angles.
- I used a 3" crown molding which makes using a 10" miter saw a bit tricky. The first time I did a project like this I rented a 12" miter saw, but this time I was able to make the cut with my Kreg Crown Pro by lifting the guard on my saw. -- Not ideal, but it saved me some money.
- Attach the crown molding
The Finishing Touches On This DIY Bed
Once you have everything in place and secured you'll have a lot of small gaps and holes. The key to a beautiful built-in look (and your new best friend) is caulk, wood putty, and Spackle.
I put these steps in a specific order to save you time.
Filling in pocket holes
- Fill each pocket hole with plastic wood and smooth as best you can. Once it's completely dry, sand it smooth with fine grit sand paper.
Warning: Be sure not to do any sanding when you have wet plastic wood, caulk, Spackle or paint on your shelves.
Nail holes
- Depending on the strength of your nailer you may have nails that stick out just beyond the surface of your wood. Use a nail punch to hammer these nails just below the surface of the wood.
- Fill each nail hole with Spackle by wiping a tiny amount in each hole with a dry finger.
- Once the Spackle is dry, sand smooth with fine grit sand paper.
Once these steps are complete and you've sanded everything smooth, give your entire project a wipe down with a damp cloth or paper towels to get rid of any dust before moving onto the next step.
Caulking for a finished look
This step is a bit time consuming but VERY worth it. So put on some music and dive in! - Did I mention it's one of the most satisfying parts of the project and when you stand back after this step you're going to be really impressed with your work!
- Make sure your entire project is clean and free of dust.
- Run a small bead of caulk along every single gap and seam one at a time.
- Dip your finger in a small bowl of water and run it along your bead of calk for a smooth finish. ** You'll want plenty of paper towels on hand for your fingers.
- You'll do every single seam on the entire project.
Final coat of paint
You'll notice that I gave everything a coat of paint before building and installing. Doing this saves a ton of time and reduces brush and drip marks because you can quickly paint each piece while it's flat (in a place like the garage) with a foam roller.
But once you've patched and caulked everything, you'll need to put a final coat of paint on your entire project.
The key to a finished look is to use a small foam roller and not ever have too much paint on your paint brush for the corners.
A couple tips:
- It’s best to use a semi gloss paint so your shelves are easy to dust.
- To get an exact match to the IKEA drawers, take a drawer front to the hardware store and have them color match it.
Turning This DIY Bed Into A Focal Point
To finish off the look of this DIY bed we added removable wallpaper behind it in a bold floral print. (This print is from Coloray Decor. The artist has an Etsy shop, but this print isn't always in her shop. If you can't find it there, go directly to her website.)
PinThis DIY bed turned out way better than I imagined. I love that it freed up so much floor space in her bedroom and the decor will last for several years as she gets older.
PinPinPinReady to create a home that feels like you without the overwhelm?
Inside my course, Style Your Way Home, I'll teach you my step-by-step approach to discovering your unique design style and how to incorporate all the styles you love into your own home design plan. Plus, you'll learn my simple 4 step process to to apply your decor plan to any room in your home so you can make quick and confident decisions and create a home that feels like YOU.
Nook beds ideas 10 space-clever beds for alcoves and nooks
Nook beds are having something of a moment, appearing on the social feeds of internationally renowned designers – and Homes & Gardens (of course). We think we know why they're suddenly so en vogue: we all found the comfort, shelter, warmth and reassurance of home during the pandemic addictive, and they're the perfect bed idea, and retreat, we've all been looking for.
Perfect for making large bedrooms feel cozier, for making brilliant use of space in small bedrooms and for making bedtime an occasion in kids' bedrooms, we think every home should have one – or more.
These, below, are our favorites – but we think this feature may just continue to grow as we add more finds to it.
Nook bed ideas
Whatever you call them – and you'll find them called nook beds and alcove beds when you're searching on Instagram and Pinterest – there's plenty of inspiration for creating your own perfect retreat. .. but these are the best we've found. So far.
1. Create a false wall to create a faux niche
(Image credit: Future / Simon Brown)
Let's start by saying that a nook bed needn't be in a nook. It may be that it's just a bed squeezed into a small bedroom that's retro-designed with a nook. Because while a bed placed against a wall, whether or not it is under a window with lovely views, can be quite cozy, the room will always look compromised unless you make a small bedroom layout look purposeful.
And you can do this by building a false wall in front of the bed and decorating it in a contrasting color or scheme to the rest of the room, as interior designer Beata Heuman has in this space.
'This could make a small room feel even more compact,' says Homes & Gardens' Editor in Chief Lucy Searle. 'However, the sculptural nature of the false wall, the color blocking and, of course, the window make the nook feel incredibly inviting and space-clever. '
2. Think practicalities as well as decor
(Image credit: David Oliver/Veere Grenney)
If you're looking for guest bedroom ideas, you might want to consider the practicalities for your nook bed: storage, lighting and privacy. Everything you want in your own bedroom or a hotel bedroom.
This alcove bed has it spot on: curtains to draw for privacy, shelving for storing personal items or for bedtime reads, and lighting for reading or simply the convenience of not having to get out of bed when it's time for lights out.
In terms of decoration, this nook bed is a beautiful example of ceiling wallpaper ideas, with the print used throughout the space creating a cozy, inviting effect.
3. Turn a child's small room into a secret hideaway
(Image credit: Future / James Merrell)
Children's rooms are often the smallest spaces, turning quickly from nursery to toddler's room to – before you know it – teen spaces. A nook bed can accommodate your child safely from toddler to high school graduate, and we defy any child not to love the privacy and comfort a curtained niche can offer.
4. The grand nook bed you'll stay in all weekend
Styling, Alice Hart
(Image credit: Jon Day/Future)
Fit for royalty (we're thinking Marie Antoinette), this nook bed is taken from one of our own photo shoots, inspired by the Bloomsbury Set and the Arts & Crafts movement. And we think it's the kind of nook bed you'd never want to leave – hemmed in by the layers of fabrics, and calmed by the muted color palette.
'From dusky pink to chalky blues, the Bloomsbury Set loved color and embraced it in every room – furniture was painted then painted again, creating tonal depths that harmonized and contrasted with other furnishings and a medley of textiles,' says Homes & Gardens' Interiors Editor.
It's a wonderful example of how to mix patterns, we think, too.
5. The pared back but peaceful nook bed
A post shared by Benjamin Guedj (@oursroux)
A photo posted by on
A total contrast to our cozy nook bed above, this elegant design by Paris-based designer Benjamin Guedj is reminiscent of French coastal properties – and in fact is in a home in Biarritz on the west coast of France.
It's the perfect, restful-looking retreat that is probably more suited decoratively to warm weather, but we can picture pulling that curtain across and sleeping soundly...
6. The nook bed that's also a reading nook
A post shared by Veere Grenney (@veere_grenney)
A photo posted by on
The detailing in this little nook bed by Veere Grenney is exquisite – from the rope that draws the eye to the lantern in the ceiling, the subtle reading light on the wall, the coordination of the textiles and the shutters at the window.
Perfect for a child's room, this one is actually in a guest room – we want an invite! 'The VGA solution for a cosy single bed in a guest room,' say London-based Veere Grenney Associates . 'Cashmere walls and curtains and a little tented bed surrounded by books and even a little telly. Does it get much better?!' No, it really doesn't.
7. The alcove bed in a nook
A post shared by Rita Konig (@ritakonig)
A photo posted by on
We've noticed that interior designer Rita Konig is partial to a nook bed, and describes this one as 'The coziest, most calm corner – from @stevengambrel 's Sag Harbor home'. And we agree – the pale blue color palette – one that Gambrel favors –is restful and inspiring.
However, it's the position of the nook bed that really caught our eye – it has its feet in the room's alcove, butting right up to the fireplace – it really is the perfect solution for a small bedroom. The room is an all-one-shade affair, which is a clever space-enhancing trick, too.
Picture: @ericpiasecki
8. The nook bed that makes great use of eaves
A post shared by Jefferson Street Designs (@jeffersonstdesigns)
A photo posted by on
In attic bedrooms, eaves space is often wasted – or given over to awkward storage space. Here, in a bedroom refresh by @jeffersonstdesigns , it's been used to the max.
It's a simple look to recreate – we'd argue that it's simpler than building in storage – and the detailing with the wallpaper creates a real focal point in a bedroom that might otherwise have been. .. just ordinary. We like the little nook bed nook, too, where the lucky owner can store books and a lamp.
9. A child's nook bed that's fit for an adult
A post shared by Katie Ridder Inc. (@katieridderinc)
A photo posted by on
We love the smart suiting approach to the textiles used for this nook bed by @peterpennoyerarchitects and interior designer @katieridder , designed for their daughter's bedroom at the family in Millbrook, NY.
The vertical stripes actually perform a neat visual trick – other than looking incredibly smart – making this compact space feel taller than it is. The red keyline used around the nook and in detailing within is the perfect finishing touch – adding warmth, and framing the bed perfectly.
10. Proof that nook beds are better than bunks
A post shared by Appletree Designs (@appletree_designs)
A photo posted by on
If you have children sharing a room, loft bed ideas are a sensible, space-saving option – but they rarely look smart. Enclosing them within a frame like the one above by New Zealand-based Apple Tree Designs is the perfect solution, giving both beds much more status.
'Let your child's dreams come true!' they comment. 'A climbing ladder, a cozy sleeping space, each bed with its own bed light and nook and under bed storage. May the adventures begin!' Indeed.
What is an alcove bed?
An alcove bed, like a nook bed or niche bed, is a bed set into a recessed space created by a room's architecture. You can create an alcove bed by having a frame built around the bed, with a wide opening along one side of the bed. This frame can be painted, wallpapered or upholstered inside and out, and the opening can be curtained to create an alcove bed. The bed itself can be freestanding or can be part of the carpentry.
master class + tricks and tips - BurdaStyle.ru
If the base of your bed is upholstered in fabric, and this fabric is no longer as fresh as you would like, here is a master class on how to make a new upholstery.
Master class author
Natalya_Pyhova
This method is suitable if the upholstery of the bed base is worn out, dirty, or you just want to change it. For example, in our case, for a small bedroom, we wanted the furniture in it to be light. Therefore, it was decided to change the dark fabric upholstery to a new, light pink color.
All work was completed in 1 day. Here, the upholstery took a little longer than it could, since the original dark upholstery could show through the new light pink fabric, and the base was first re-upholstered with an additional layer of white fabric. If your upholstery fabric is thick enough, you can skip the "lining" step.
How to sew a sofa cover: 3 tutorials
You will need:
- webbing fabric;
- if necessary - fabric for an additional "lining" layer;
- tools to disassemble and then assemble the bed base;
- tailor's pins;
- fabric scissors;
- sewing machine and thread;
- furniture stapler and staples;
- if necessary - small nails and hammer.
Bed skirt: master class
Step 1
Disassemble the bed, remove the legs and other parts that will interfere with the upholstery. In order not to get confused later during assembly, you can mark the right / left parts and write down on a piece of paper at what distance from the edges of the parts the attachment points are located (holes for screws, and so on).
Step 2
Headboard first, underlayment. Take a piece of fabric sufficient to wrap the part with a large margin (at least 20-30 cm, you can cut off the excess later). Wrap the headboard with the fabric inside out. At the corners, fasten the folds with pins. Then remove the fabric, topstitch the corners and cut off the excess.
Turn the headboard trim piece right side out, put it on the headboard. Wrap the edges of the fabric, pull it quite tightly and secure with a stapler. You can start from the middle of each side, gradually moving to the edges. Ideally, two people work together: one pulls and holds the fabric, the second fixes the fabric with a stapler.
Step 3
Now for the outer layer of fabric. Here, the excess fabric is simply neatly folded into folds, and the folds are fixed with a stapler. You can do the same as in the step above, sewing up the corners and cutting off the excess.
Step 4
When you're done, put the headboard fixings back in place.
If you use two layers of fabric, as in our case, after the first layer is ready, you can find, by referring to the records, places for fastenings, and mark them by screwing in and out screws. It will be easier to find these holes later.
Step 5
Wrap the side and end piece in the same way. The corners on these parts of the bed can simply be cut off (see the top photo). In places that are hard to reach / inconvenient to work with a stapler, you can use small nails and a hammer.
Step 6
It remains to return the parts to their place and assemble the bed.
Photo and source: abeautifulmess.com
Instructions on how to make a wooden bed with your own hands
Currently, furniture stores offer a huge selection of products of various styles, designs and preferences. The cost of such furniture is very expensive, especially if you are looking for a good double bed made of quality wood.
You don't have to spend a lot of money on expensive furniture. An economical solution in this situation would be a wooden bed that you make yourself.
Preparation for work
In order to assemble a wooden bed with your own hands, you first need to prepare and draw up a drawing, prepare fasteners for the bed and other necessary materials and tools that will be needed to assemble the bed with your own hands. Before you know what size bed is right for you, you need to check the length and width of the mattress. The amount of materials needed for a bed depends on its size.
Mattress size chart
If you are not satisfied with the finished products that are on the shelves in stores, then you can make a mattress with your own hands. For manufacturing, you will need two pieces of foam with a thickness of 125mm. Pieces of materials should differ in density, the upper layer is denser (45 kg / m³), and the lower layer (35 kg / m³). The width and length of the mattress is determined by you. The most common option is two hundred by one hundred and fifty centimeters. On top of the foam filler, a cover of the appropriate size is put on. As a result, you get a great mattress that you made with your own hands.
Materials needed to make a wooden bed with your own hands:
- In order to make the headboards of the back wall and the front wall, you will need three boards measuring 200x30x2 cm.
- For the side of the bed, two boards measuring 250x30x2 cm.
- Five bars with a section of 4x4 cm and a length of 200 cm - for supporting, supporting and legs of the bed.
- Thick plywood or batten 150x4x2 cm for attaching the headboard and for the slatted cover.
- You will also need stain, self-tapping screws, wood glue and varnish.
To make the assembly of the bed with your own hands easy and well done, you will need a product drawing.
The following tools are required for assembly:
- Drill
- Jigsaw
- Hacksaw
- Cutter
- Screwdriver
- Sandpaper
- Planer
- Metal ruler
- Elbow
- Roulette
- Pencil
Having prepared all the parts and tools for work, you can start marking and sawing. The main thing is to follow a few basic rules:
- Prepare a drawing with the exact dimensions of all the necessary parts.
- You need to create a list of parts and specify the required amount of material.
- Use a pencil or cutter to mark the marking lines for cutting parts.
- To save time when making identical parts, you can make one and use it as a template for another.
- Use sandpaper to protect the surface of all saw cuts.
Step-by-step instructions for assembling the frame
Determine the size of the mattress you will use with the future bed by measuring it in centimetres. The position of the mattress in the frame frame should be free, but without large gaps.
Frame plan
Cut 2 end boards and 2 long boards to size and assemble them into a rectangle. Secure it all with eyelets and wooden splints. Connections should be in a W-shape. Nests must be cut with a jigsaw or gouged with a chisel. The grooves should be 50mm deep and -20-30mm wide. To fix it, it is necessary to lubricate the lugs with carpentry glue and connect the parts. Using clamps, you need to fix the parts at an angle of 90 degrees, and wait until the glue is completely dry.
This form of frame is a quality product. This type of construction is an example of a traditional carpentry connection. If it doesn’t work out to make an ear-shaped middle connection, then you can also use a spike fastener to fasten the frame. To do this, you need to take the boards and cut holes in their sides, with a diameter like that of a wooden spike, grease them with glue and assemble them.
The easiest way to assemble a wooden bed base is to fasten it with self-tapping screws with additional reinforcement using a metal corner.
Fixing the legs
The bed you make will stand on reliable and strong legs. To do this, you need to cut off the bars of the same size, from which the legs will be made. You can mount the legs of the bed at the corners of the bed, as well as from the outside, or insert them into a previously made frame of the product.
If you have chosen to fasten the legs to the frame, then the best way to fasten them is with spike fastening. It is reliable enough for such designs, and the legs of your bed will not stagger for a long time.
If the manufactured bed is wider than 200-220 cm, an additional support must be installed. It is attached to the middle of the frame. It is necessary to make and fix an additional longitudinal board and attach a leg to it.
Lamellar frame assembly
Lamellar frame - is a lattice or mesh, the main function of which is to support the mattress. One of the main advantages of this kind of product is that it will not be pressed inward, but will keep its shape and prevent the bed from deforming.
It is necessary to ram the fixing type locking rail on the inside of the bed frame, on the sides and end plates. Make a marking 100mm high from the top edge of the workpiece. The rail can be fixed with a dotted or solid strip around the entire perimeter. You can also use a metal corner.
To create a frame from a lamella, you need a beam with a section of 30x30mm. The lamella frame is attached to the inner dimension of the bed frame. We fill the slats on the frame, 150x4x2 cm in size. It is attached across the entire length in increments of no more than 5-7 cm.
If you stick to the previously made drawing, then there will be no problems in assembling the bed with your own hands. The finished double bed will serve you for many years. In conclusion, you need to process the frame of the product with sandpaper and varnish on top.
Finishing the bed
For a beautiful appearance of a hand-made wooden bed, you need to choose a cover that matches your interior. At the end, it is necessary to carefully sand the frame, soak it with olive oil and cover it with pentaphthalic or oil paint of the color you need.
With the help of a stain, with a brush, the surface of the bed must be given the desired tone, this work must be done before varnishing the wood.