Dark cabinet stain
Staining Your Wood Cabinets Darker
Updated January 2022
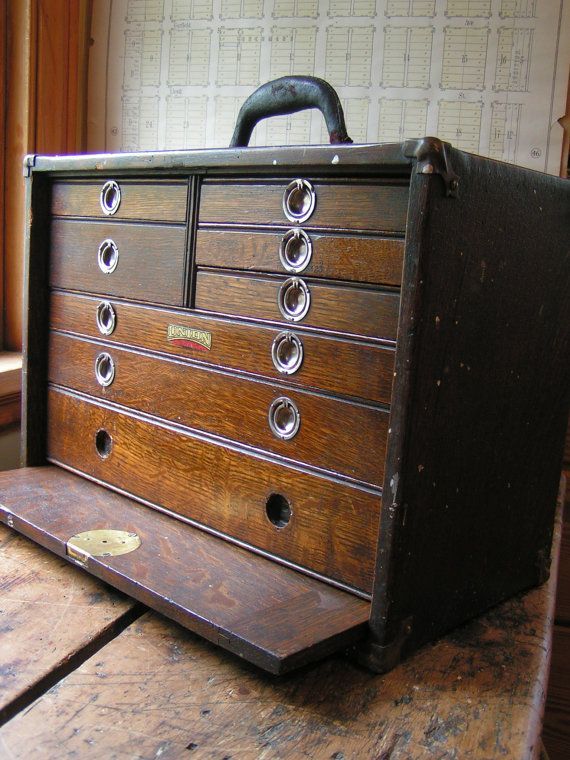
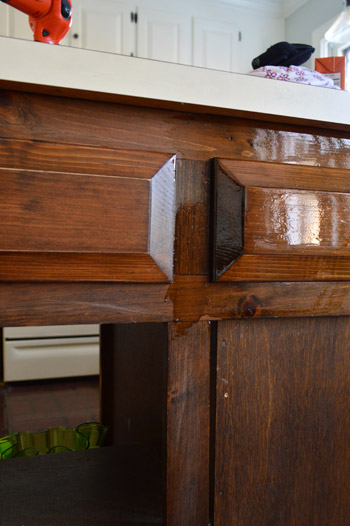
We weren’t happy with the color of our existing kitchen cabinets – too orange and dated looking! – so we wanted to give them a quick makeover for a darker, more contemporary look. We decided to stain them to maintain the wood grain appearance, but we worried that would require us to sand off all of the old finish. Yuck! Luckily, we knew of a product that would let us skip that messy and tiring step while still giving us the end results we wanted.
You can see our results above, and read below for how we got there!
What Stain Product Did You Use?
We used Minwax Polyshades for this project, which is similar to a gel stain. Unlike traditional wood stains, which have to soak into the wood to work, a PolyShades coat or gel stain product sits on top of the existing stain, much like a paint application would. Like paint, you need to take a bit more care when applying PolyShades to avoid drips or brushstrokes – but we’ll cover that in more detail below (even on video)!
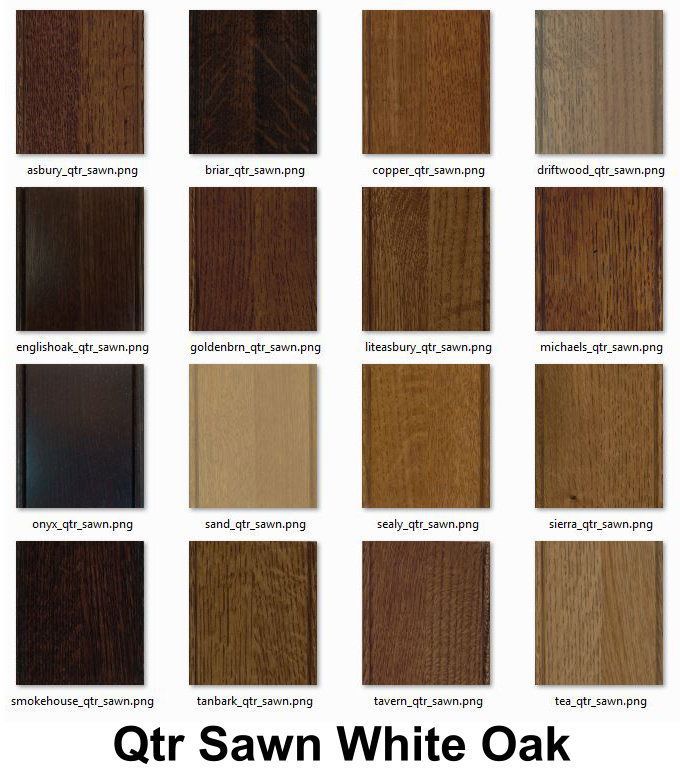
These products come in lots of colors, but we chose one called Tudor in a satin finish. We had previously used a darker PolyShades color on our bathroom vanity (Espresso) but wanted something slightly lighter in the kitchen. Keep in mind that your final color will be impacted by the color you are staining over, so you may want to test a few colors in an inconspicuous spot (like the back of a door) before starting. And you should always go darker – so from light to medium, or medium to dark.
These products are also oil-based, which means you can skip the usual last step of sealing the stained surface with a coat of polyurethane sealer (like you have to do with water-based stains).
Can You Stain Your Cabinets Darker Without Sanding?
While yes, you can avoid completely sanding and stripping an old stain finish off of your kitchen cabinets, you will need to do some light sanding as part of this project. So be wary of any tutorials that suggest otherwise. But don’t fret – this is the type of sanding you can easily do by hand with a simple sanding block or sheet of sandpaper.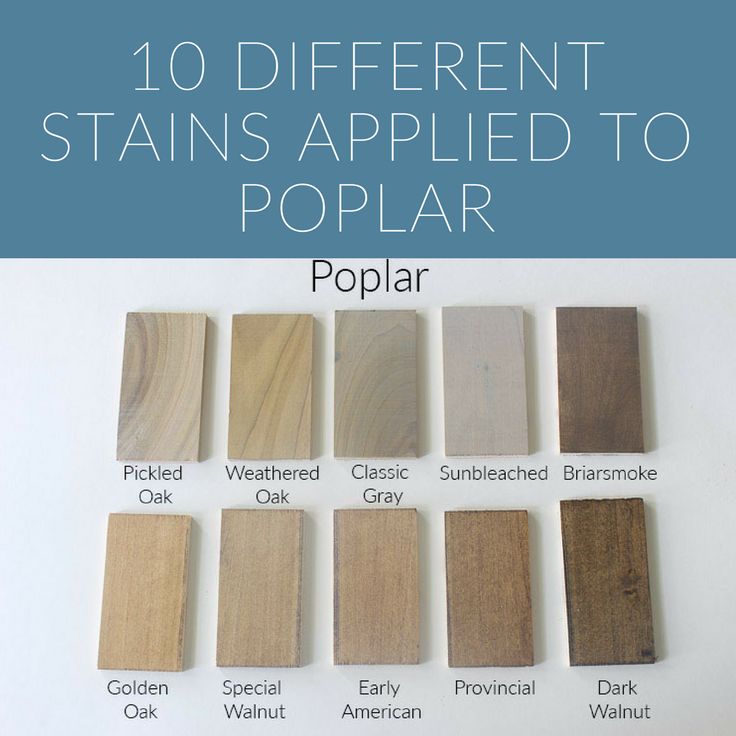 Lightly roughing up the surface will help your new stain adhere for longer-lasting results.
What Materials Do You Need?
The best part of this project is probably what you DON’T need. You don’t need any polyurethane sealers or varnish. You also don’t need any chemical strippers, power sanders, or other heavy-duty products to get your already stained cabinets down to their raw wood. Still, you will want to have these supplies on hand:
- Minwax PolyShades or similar gel stain product (we only needed 1 quart for two coats)
- 2 or 3 stain-grade paint brushes (small enough to fit in mouth of stain can)
- 220-grit sandpaper or sanding block
- Extra fine steel wool (#000 grade)
- Screwdriver or drill
- Dropcloth or old cardboard
- Nitrile gloves (optional)
- Wood filler & putty knife (optional)
- Painter stands (optional)
- Degreaser or liquid deglosser (optional)
You will also need a space – like a garage or maybe a basement – to lay out your cabinet doors while staining and drying.
How Long Does It Take To Stain Your Cabinets Darker?
The process is very straightforward as DIY projects go (if you can paint a room, you can do this) but it does take a bit of time, mainly due to the drying process. Ours took about five days total, but yours may vary depending on the size of your kitchen or the amount of cabinetry you’re staining (we were only doing our lowers).
- Prep day
- First staining day
- Second staining day
- Drying & curing
- Reassembly
Step 1: Remove Cabinet Doors & Hardware
Before beginning, you’ll want use your screwdriver to remove your door, drawers, and any hardware (knobs, pulls, hinges, etc) so you’ll have unobstructed surfaces to apply stain too. You also want to spread out your doors and drawers apart from the cabinet frames so that those two surfaces don’t accidentally come in contact during the process (which could make things stick together).
We propped all of our doors up on old paint sample cans, but you could also use a set of painter tripods if you’re fancier than us.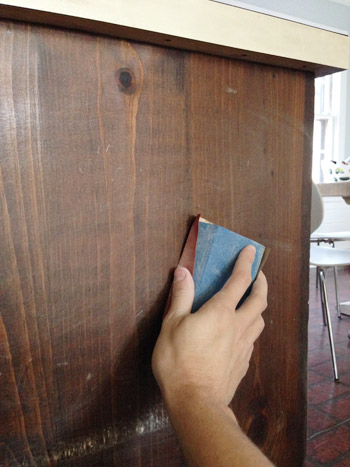
Step 2: Patch Any Hardware Holes
If you are changing any hardware (like using a different pull size or hinge style) you’ll want to fill any useless hardware holes now. We chose to eliminate all of the knobs on the backside of our kitchen peninsula for a cleaner look. The drawers were just dummies anyways (they pulled out on the other side) and doors were just secondary/less used access points to the front cabinets.
So Sherry wood puttied the holes, let them dry, sanded, and repeated. We always like two coats of wood putty on big holes like this to account for any shrinking or dips. In retrospect, we should’ve used a darker wood filler that was closer to the original cabinet color.
This lighter wood filler is what we had on hand and we made it work by dabbing a little more stain on the puttied parts with each coat of PolyShades.
Step 3: Give Your Cabinets A Light Sand
To prepare for staining, you’ll want to sand everything – drawer, doors, and frames – lightly with a high grit sanding block.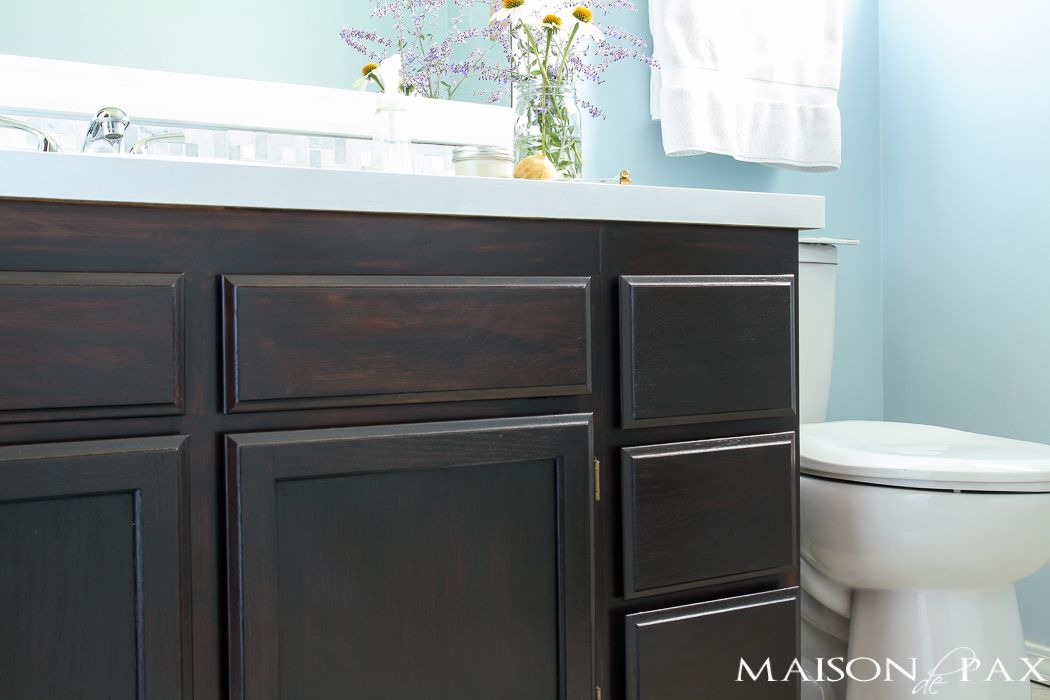 Again, you’re not trying to remove the old stain. You just want to rough up the surface slightly so that the new stain can adhere.
After sanding, be sure to wipe everything down with a damp rag or paper towel to remove any sanding dust or dirt. Also, if you have any spots that are coated with grease or grime, you may need to use a spray degreaser to make sure the surface is fully clean. We wiped everything down with a liquid deglosser just to be safe before beginning.
Step 4: Apply Your First Coat of Stain
PolyShades is best applied with a paintbrush and you’ll want to systematically do your frames, drawer fronts, and both sides of any cabinet doors. We actually chose to not stain the backs of our cabinet doors (shhh!) but if you do, be sure to not flip them over until your stain is fully dry.
Also, don’t be alarmed if your first coat doesn’t look much darker going on. It will dry darker and you can always do additional coats until it’s dark enough for you. We ultimately did two coats.
Note: These are dummy drawer fronts that are screwed in place, which is why we didn’t remove them.
Tip: Applying PolyShades For A Smooth Finish
We had learned from our first project using PolyShades that applying it is pretty straightforward, but it can be a little challenging to keep it from looking drippy or streaky. We came up with a simple method of dragging the brush along everything after it’s applied to smooth it out. I filmed this quick video of myself putting one coat on a door so you could see it in action:
Note: You can also view this video on YouTube
In case you can’t watch the video, here’s the gist:
- The stain goes on pretty thick, which is exciting if you’re going for a darker color. Resist the urge to leave it thick because that excess stain will create drips.
- Don’t worry too much about brush marks at first. Focus first on covering the area that you’re working on.
- Once you’ve got the whole area covered, go back over the whole surface with long, even strokes. This will thin everything out and make your brush lines more even.
Although do as I show in the video (not in the pics below – oops) and brush in the direction of the wood grain. This will help any lingering brush lines blend with the wood grain better.
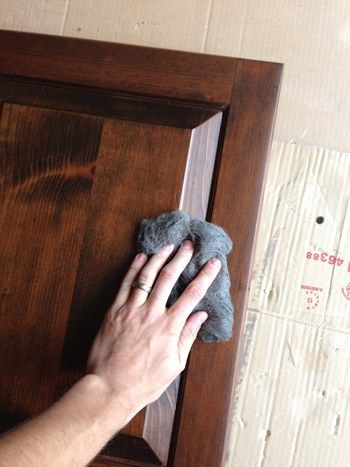
Step 5: Let Dry, Buff, & Recoat
After our first coat fully dried (we gave it 24 hours) it was substantially darker than it looked when wet – phew! If you’re happy with the color, you can be done here. We wanted our slightly darker so we chose to apply a second coat of PolyShades.
Before beginning the second coat, we followed the manufacturer’s instructions and buffed the first coat with some very fine steel wood (000 grade). This doesn’t visibly damage the finish, it just roughs it up enough for the second coat to hold nice and firmly.
You can see below how these coats “build” and gradually get darker.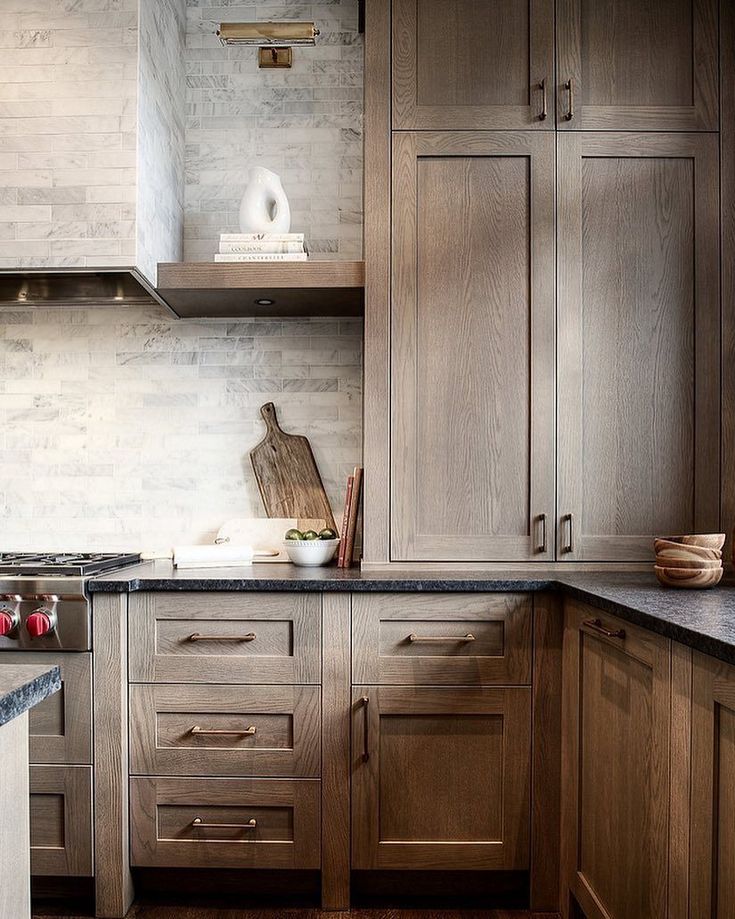 Also, you can tell how the “wet look” wasn’t a good predictor of how it’d dry.
Step 6: Let Second Coat Dry
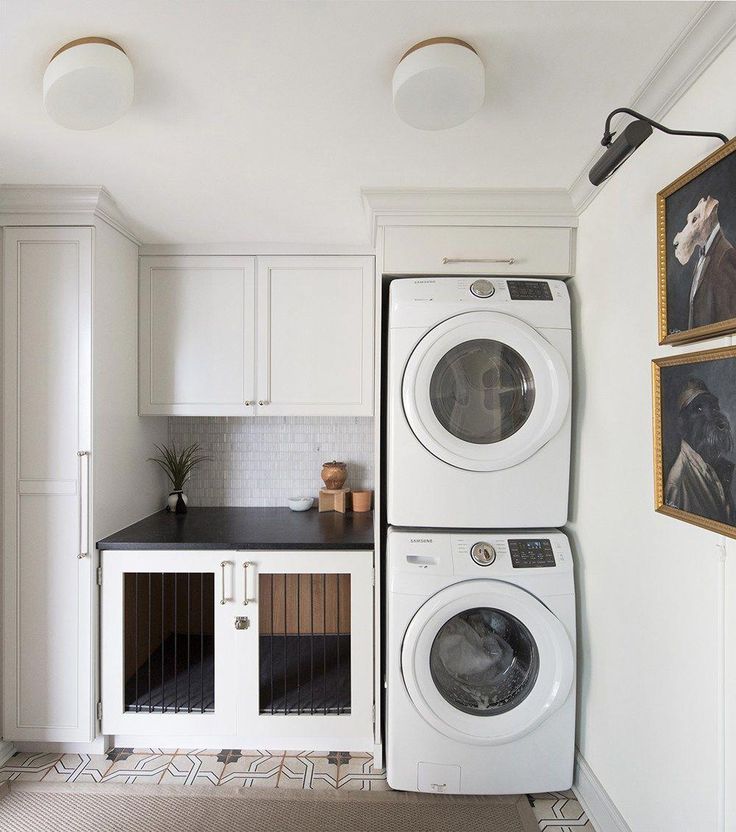
The next day, as our second coat was almost fully dry, we could finally see the results of our efforts (thanks to not staining the backs of the cabinet doors!). You can see in the side-by-side below that we definitely achieved the darker and more contemporary, less orange and dated look we were hoping for. And we loved that you could still the wood grain coming through!
Again, this is the part with a traditional stain you would need to seal your wood cabinets with varnish or polyurethane. But since PolyShades is an oil-based stain and poly in one, you can skip it!
Step 7: Reassemble Your Kitchen
With everything done, you can reattach your drawers, doors, and hardware. If you’re installing new hardware, we’ve got a fully tutorial on how to easily (and quickly!) make new holes for cabinet knobs and pulls. For us, we just used the existing holes and added darker knobs that almost disappeared against the dark stain.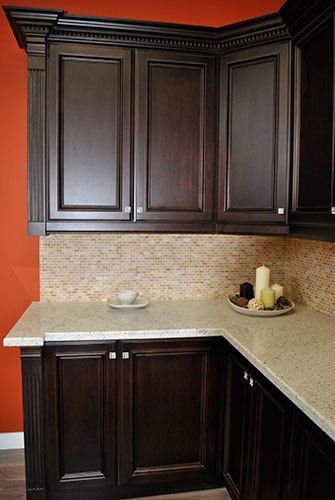 So here’s our final look!
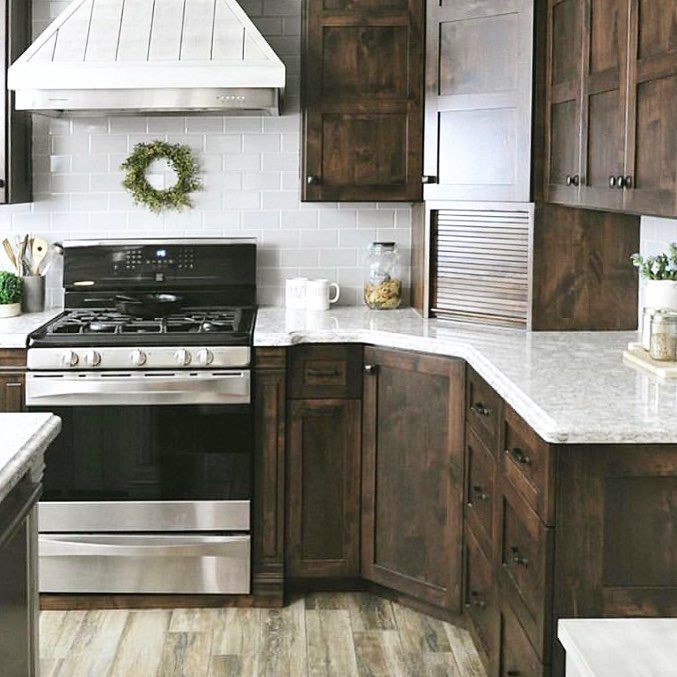
As a reminder, this is where we were last week with those redder and more knotty lowers. Although, this is after we had painted the upper cabinets white.
And it’s a far cry from where we started when we bought the house!
UPDATE: Since originally completing this project in 2014 we soon updated the laminate countertops by applying a faux concrete finish to them using Ardex.
And two years later, we fully remodeled this kitchen with a completely new layout. But the old cabinets held up great for two years while we waited to begin the remodel. You can read all about that in these posts:
- Choosing A New Layout
- Gutting & Rebuilding
- The Big Reveal <– You can find all of the sources for the room right here!
- A Video Tour Of How We Organized Our Cabinets & Drawers
*This post contains affiliate links*
PS: Wanna know where we got something in our house or what paint colors we used? Just click on this button:
How to Stain Wood Cabinets
What can we help you find?
Search
Search
If your budget doesn’t have room for new cabinets, don’t worry. You can give your wood cabinets a quick makeover with a fresh coat of stain. Using a different color stain—even as simple as going one shade darker or lighter—can give your kitchen, bathroom or other rooms in your home the new, updated look you want.
Step 1: Choose a Stain
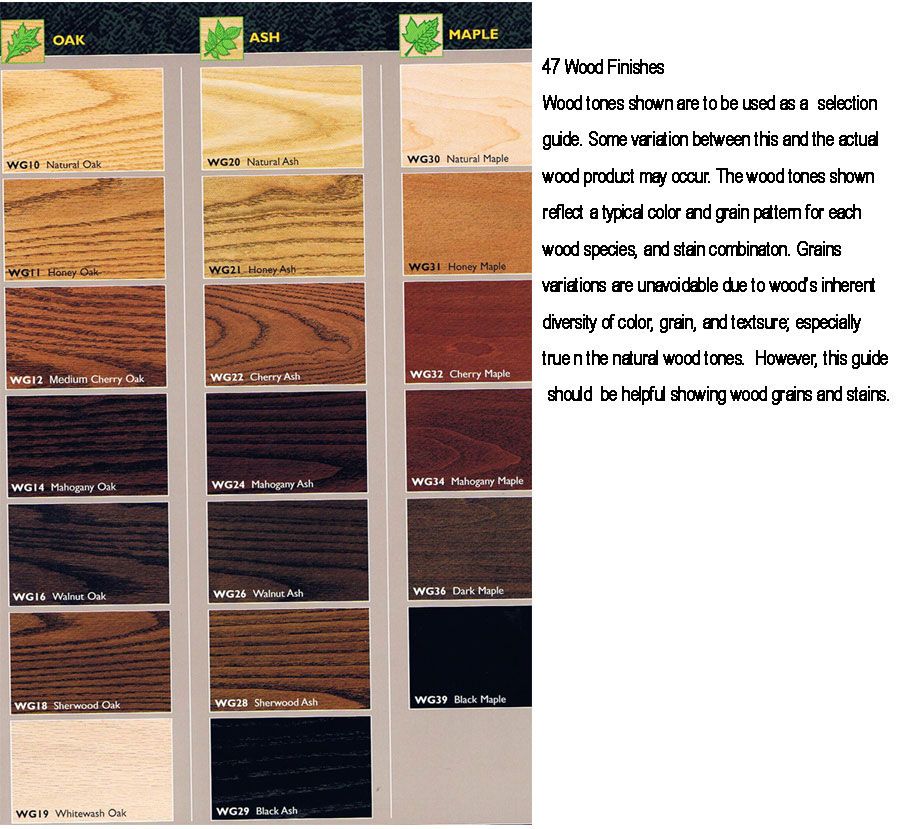
Decide on a stain finish. Before starting, you need to have an idea of what you want your finished cabinets to look like. The color or shade of stain you use affects how a room feels, especially the kitchen. To open up a room and make it feel larger, opt for a light stain. To add warmth to a larger kitchen or room and make it seem cozier, choose a darker stain. Also, keep in mind the type of wood from which your cabinets are made. You want the stain color you are going for to complement the wood. Some stains work better with a particular wood more so than others. You must take into consideration the natural color of the wood and the size of the wood’s pores. For example, woods such as rosewood, cherry and mahogany are types that are rarely stained because of their natural appearance.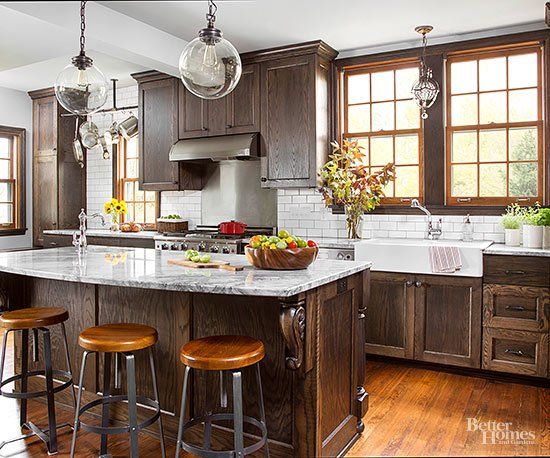 They are usually just protected with a clear coat. Woods such as maple are less porous than others and so are harder to stain. For help deciding, get advice from an associate at your local True Value hardware store.
There are several types of stains to choose from. There are oil-based and water-based stains, gel stains and stain/sealer in-one formulas. Oil-based stains penetrate into the wood without raising the grain but carry a strong odor. Instead, you may choose a water-based stain. They’re eco-friendlier and offer easy soap-and-water cleanup. They do often require a light sanding to minimize raising the grain.
Never use deck stain on cabinetry.
Step 2: Remove Hardware, Doors and Drawers, and Clean Surfaces
Remove cabinet doors and drawers, and their hinges, handles, knobs, closures and other hardware using a screwdriver. If you're going to stain your cabinets with the doors on, you don't have to remove the hinges. Just mask them with painter's tape. Keep in mind, though, that staining the pieces may be easier with them removed.
Be sure to protect floors, countertops and any other surfaces in your kitchen or work area with drop cloths or plenty of newspaper. Also, remember to keep track of the hardware and which door or drawer corresponds with it
Clean the wood with trisodium phosphate (TSP), a heavy-duty cleaning powder. Dilute the TSP with water according to the manufacturer’s specifications. Use a sponge and the TSP solution to wash doors and cabinet exteriors, letting them dry completely.
Use TSP as directed by the manufacturer. TSP can corrode metal and damage finished wood. Be sure to wear protective eyewear and rubber gloves.
Step 3: Remove Old Finish
Remove the existing finish by sanding. Use a medium/low-grit sandpaper to remove the old finish and to smooth out any imperfections in the wood. Work carefully around any decorative details and curved areas. Always sand with the grain of the wood. Any swirl marks caused by sanding will stand out when you stain.
Using chemical strippers is another and often easier method. Using a medium-sized paintbrush, apply the solution evenly over the surface. Let it soak for 20 to 30 minutes then remove the old finish using a plastic scraper or a smooth, round-edged putty knife. The surface may be soft, so be careful not to damage it with the scraper. Allow the piece to dry completely. Most chemical strippers need to be mixed with water, so check the manufacturer’s directions before applying.
Always follow manufacturer’s instructions and wear rubber gloves and protective goggles when using strong chemicals.
Never strip furniture near an open flame, as stripping chemicals can ignite.
Ventilate the room with fans or open windows — or remove cabinet doors and work in a well-ventilated work area like the garage or outside, if weather permits.
Once you’ve removed the old finish from the surface, use a clean rag to remove the finish from any areas you might have missed and to ensure the wood is completely bare. Let it dry.
If you use a stain stripper to remove the old finish, it’s a good idea to lightly sand the surface afterwards with fine-grit sandpaper. This will ensure a tighter bond between the wood and the new coats of stain.
Step 4: Apply Sanding Sealer
Applying sanding sealer or pre-stain wood conditioner is similar to priming the wood. The sealer helps the wood absorb the stain evenly. It can also be applied after staining to reduce the number of finish coats necessary. Shake the sealer container thoroughly and apply two thin coats using a small paintbrush. Don't let the sealer puddle or fill in decorative grooves. Wipe off any excess stain with a clean cloth. Let the sealer dry completely before lightly sanding with medium-grit sandpaper in the direction of the grain. Wipe the wood again with a clean cloth.
Step 5: Start Staining
Apply stain with a cloth or medium-sized paintbrush and allow it to penetrate into the wood. Coat once for a light stain or apply additional coats for a darker shade. Wipe off excess stain with a clean cloth and allow the piece to dry completely. Lightly sand between coats using fine-grit sandpaper.
If you are using water-based stains, you can minimize raising the grain by moistening the wood with a damp cloth and sanding. Allow the wood to dry completely and sand lightly with fine-grit sandpaper. Repeat as necessary.
When staining cabinets, you usually don't have to worry about the inside of the drawers or cabinets since these parts are rarely visible. But you may want to stain the inside of cabinet doors.
Step 6: Finish It
When you're done staining and the surfaces have dried, make sure you’re happy with the color of the wood. Use a small- or medium-sized paintbrush to apply a light polyurethane sealer or clear varnish to the wood to give it an extra layer of protection and a shine that will last for years. Follow the manufacturer’s instructions for application tips and drying times.
Reinstall the cabinet doors and drawers and their hardware after the stain and finish has dried completely.
Congratulations! With a little work and a few coats of stain, you've got “new” cabinets and you didn't break the bank.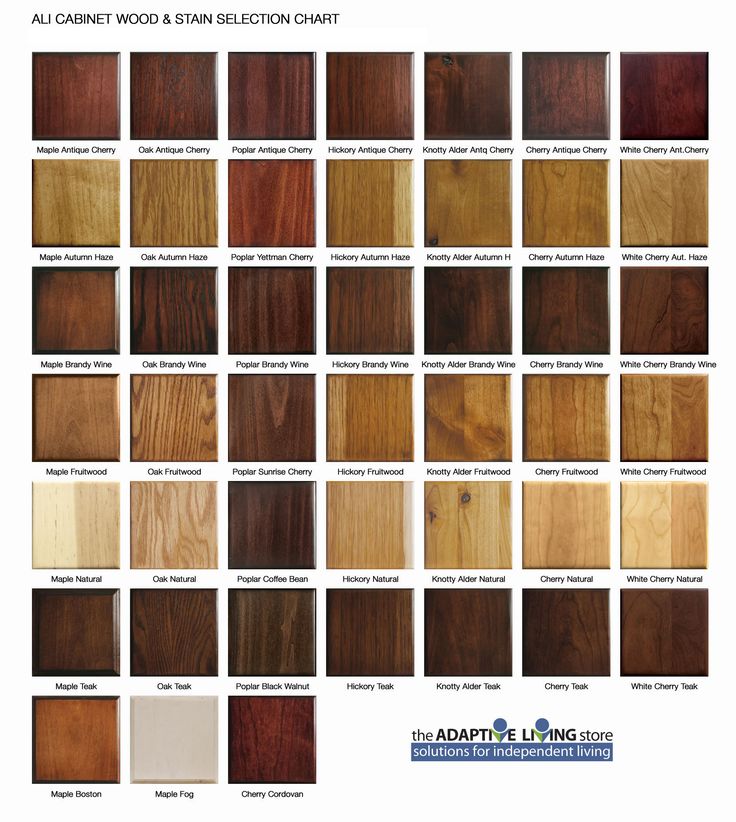
Project Shopping List
Here’s what you’ll need to complete this project successfully.
How to remove furniture stains (oily, white, black, water)
How to remove furniture stains (oil, white, black, water) Find:Author: Alina Kononova
Reading time ~ 3 minutes
Read Later Send article by e-mail We do not collect your data, let alone pass it on to third parties Send
How to remove stains from furniture depends on the type of stained surface and the nature of the stain itself. The sooner you start cleaning the stain, the less effort you will have to make. To ensure that the coating remains intact after cleaning, before using any method, it is worth trying the product on an inconspicuous area. After making sure that it did no harm, you can begin the process. Folk recipes will help to cope with pollution quickly and efficiently. nine0041
 A cotton pad is moistened with drying oil, applied to pollution. Rub off with gentle movements. Remove residue with a damp microfiber cloth
 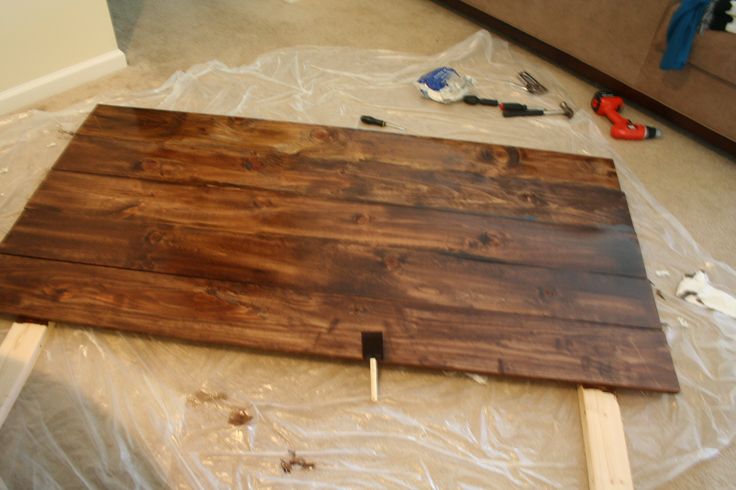 Leave for 2 hours. Clean off the remnants of the mixture, wipe with a damp cloth, and then microfiber. Coated with wax, polished. Flour can be used instead of salt
  Leave for a while, then carefully collect the remnants of the product with a damp cloth and wipe dry
  Wait until it softens, then remove with a damp cloth. Finished surface polished
Fabric upholstery
Vacuum up any problem areas on upholstered furniture.
Various products can be used to fight stains. The simplest and most versatile is dishwashing gel solution. Dissolve a small amount of liquid in warm water, mix vigorously. The resulting foam is applied to the contaminated area, left until it completely settles. Then, with a soft sponge, rub the stain from the edges to the center (this way there will be no streaks left), and then wipe it several times with a damp cloth. Leave to dry. nine0003
Drink stains
Dark stains from coffee, tea, juices, beer or hot chocolate can be removed from the upholstery with a bar of laundry soap. Moisten a bar of soap with water, rub the dirt with it. Leave for 30 minutes, then gently rub with a damp piece of gauze, collecting any remaining foam and dirt.
Beer, tea or cocoa stains can be removed from upholstery fabric by treating the upholstery with soapy water.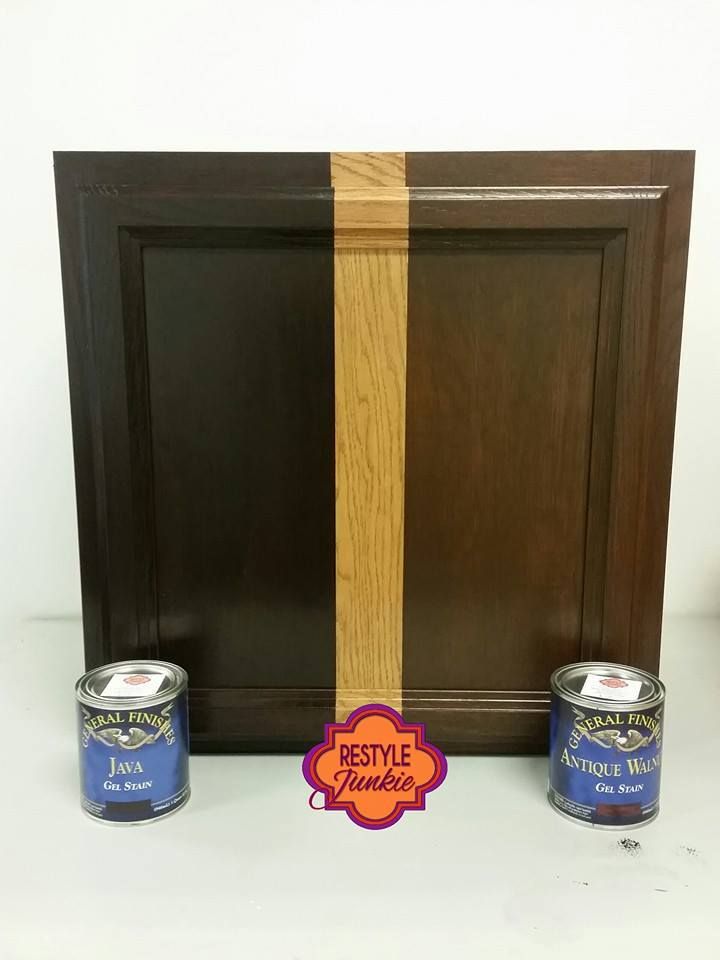 To do this, a small amount of chips obtained from a piece of soap grated on a fine grater is stirred in warm water. Moisten a sponge with liquid, apply to pollution. In another container, combine a liter of cold water and a tablespoon 9% vinegar. A cotton pad soaked in acetic water is wiped over the problem area. Blot the damp upholstery with a paper towel.
Fruit and vegetable juices are removed with a solution of vinegar and ammonia. Both liquids, taken in equal proportions, combine, moisten a cotton pad. Rub the stained area. Moisten the disc again, treat the stain. Do this until the traces of juice disappear. Then wipe the upholstery with a clean dry cloth.
Grease stains
To deal with grease stains on upholstered furniture, you can use various tools at hand:
- Rubbing alcohol and soda with salt. Sprinkle the stained area with a mixture of salt and soda, leave for 20 minutes. They clean the powder with a brush, put a napkin soaked in alcohol on the dirt for half an hour.
 After removing the napkin, rub the dirt with a brush. The remains of the product are removed with a damp sponge.
 - Vinegar. A cotton pad is moistened with vinegar, put on the stain. Leave for a while. After 20-30 minutes, rub the upholstery with a brush. Then wipe with a damp clean cloth.
- Kerosene or gasoline. Use the same way as vinegar. nine0018
- Turpentine. A container with turpentine is heated in a water bath. Warm liquid is abundantly applied to the stain, left for a couple of hours. After that, remove with a paper towel, and sprinkle the upholstery in the area of contamination with a large amount of baking soda. After 10 minutes, clean off the powder with a brush, wipe the fabric with a cloth moistened with soapy water. Remove the foam with a damp clean sponge, wipe dry with a napkin.
- Lemon juice. Fresh juice from one large fruit is combined with 2 tablespoons of vinegar. Wet a cotton pad with this solution, leave it on the dirt for a quarter of an hour.
 After treatment with a sponge moistened with soapy water. The remaining foam is removed with a clean, damp cloth. Wipe with a dry cloth. nine0018
 - Wheat bread. The crumb is moistened with water, a ball is formed from it. Roll the ball over the greasy spot, directing it from the edges to the center.
Water stains
White spots on furniture from cleaning covers or spilled water. To tidy up a sofa or chair, you can use:
- Ammonia solution. A small amount of alcohol is added to the water, poured into a spray bottle, shaken. Spray liquid on the problem area. Rub with a dry, clean cloth. Do not wash off. nine0018
- Plain water. The sponge is moistened, the divorce area is carefully treated, trying to wipe the white marks.
- Vinegar. A tablespoon of vinegar is dissolved in a glass of water, a sponge is moistened with liquid, and the stain is treated. Then wipe with a sponge moistened with soapy water. Excess is removed by applying a dry cloth to the upholstery.
To avoid streaks, it is recommended to dry the damp furniture fabric immediately after cleaning. You can use a hair dryer or paper towel for this. nine0003
Chipboard or MDF
A simple damp cloth is enough to remove fresh stains from furniture made from chipboard or MDF. But if the pollution is old, more effective means will be required.
| Spot type | Medium | Cleaning method |
| Fat | Baby soap | Rub the stained area with a soft sponge dampened with soapy water. The remaining liquid is blotted with a paper towel |
| Juice, chocolate, wine | Dishwashing liquid | A small amount of gel is applied to a sponge, placed on the dirt, left for a few minutes. Then gently rub the stain, wash off the remaining foam with a damp cloth and wipe dry with a cloth |
| Coffee | Ammonia or ethyl alcohol | Moisten a cotton pad with liquid, treat a dark spot.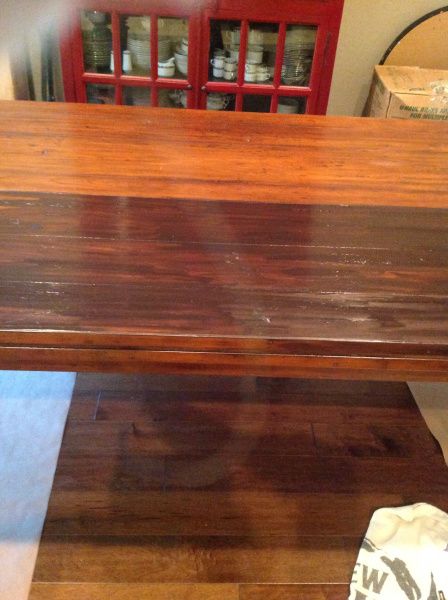 Wipe dry with a paper towel or soft cloth Wipe dry with a paper towel or soft cloth |
| Acid traces | Citric acid, vinegar | Apply a weak solution of one of the liquids to the stain, leave for a few minutes, remove with a damp cloth. Wipe with microfiber cloth |
| Gum or wax | Ice | Apply an ice cube to the dirt, wait for it to harden. Scraped with a plastic scraper |
| Nail polish drop, lipstick mark, marker pen streak | nine0043 Acetone or other solventApply a small amount of solvent to a cotton pad, work gently on the stain. Wipe first with a damp cloth, then with a paper towel |
If none of the products you have tried has worked, it is worth masking the contamination. To do this, use special pencils for laminate, which can be purchased at hardware or furniture stores. The composition, as close as possible to the color of the MDF or chipboard surface, is applied to the darkened area, polished. nine0003
Leather
Removing stains from leather furniture is not too complicated. The main thing is to use only soft sponges and products without abrasive particles, so as not to damage the material.
Fresh stains can be easily removed with a damp cloth. If the stain has dried, you can use one of the following methods:
- Ammonia and glycerin. This mixture will remove dark ink stains on fair skin. Do not use it on a colored or black surface - a noticeable whitish trace will remain. nine0045 Ammonia in its pure form or with the addition of a small amount of glycerin is applied to the blackened area, left for several minutes. Then remove the residue with a damp sponge.
- Milk. Suitable for white leather upholstery. Wipe the problem area with a cotton pad soaked in milk. This method can be used not only to remove the stain, but also to refresh the color of the material.
- Ammonia or weak vinegar solution (for fair skin). A soft cloth is moistened with one of the liquids, and the greasy stain is wiped off.
 After that, the cleaned area is treated with vegetable oil (castor, sunflower, linseed), and polished with microfiber or suede. This is necessary to protect the material from cracking. nine0018
 - Talc or starch. Used to remove traces of fat from the skin of any color. Plentifully sprinkle the stain with powder, leave for several hours. When the talc absorbs dirt, it is cleaned with a soft cloth. Wipe the leather upholstery first with soapy water and then with a clean, damp cloth.
- Soap solution. Effective against darkened blood stains. With a damp soapy sponge, gently treat the stain, and then wipe it with a dry cloth.
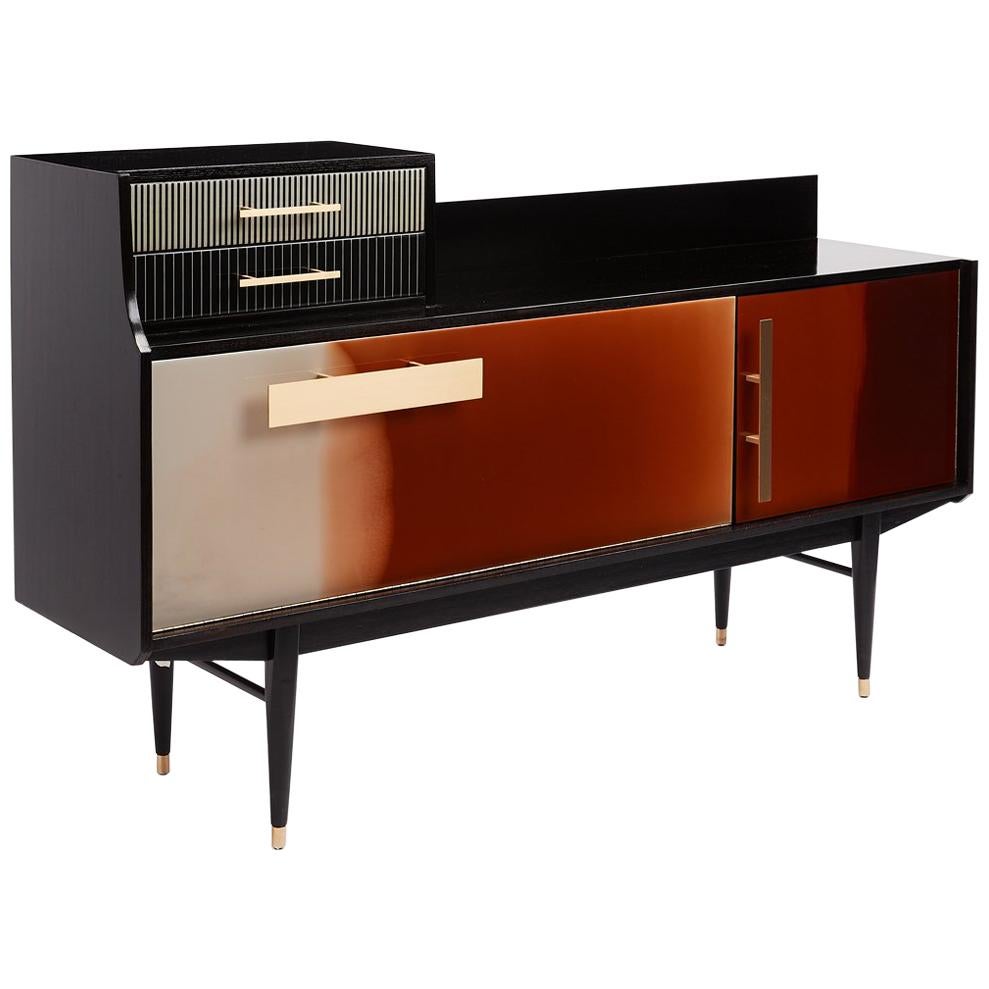
Lacquered and polished surfaces
Do not use abrasive compounds or hard-bristled brushes on varnished furniture as they will damage the surface.
| Spot type | Medium | Cleaning method |
| Fat | Raw potatoes | Cut the tuber in half, apply one part of the cut to the problem area, rub in a circular motion.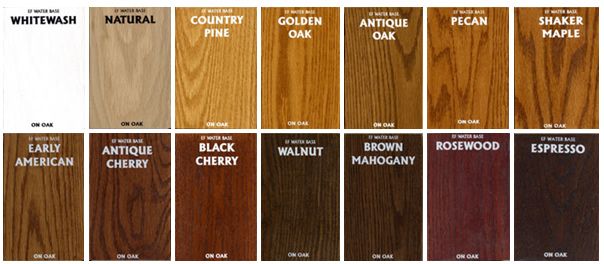 Leave for a few minutes. Polished with a microfiber cloth Leave for a few minutes. Polished with a microfiber cloth |
| Fat | Mineral oil | Apply a small amount of oil to a rag, wipe the stain. Remove residues with a sponge moistened with soapy water, then wipe dry |
| Hot dish marks | Vegetable oil and table salt | Such stains are found on the table in the kitchen. You can remove it by pouring a little salt on the trail and pouring vegetable oil on top. Leave for 20 minutes, then gently remove with a soft cloth. Wipe dry with paper towel |
| Old hot object stain | Salt and vegetable oil | If the mark is old, leave the mixture of salt and oil for a few hours. After that, the remains of the oil-salt mass are removed with a sponge and the surface is polished with a piece of woolen cloth |
| White traces of lime or chalk | Vinegar and vegetable oil | Liquids are mixed in equal proportions, applied to a rag, rubbed off dirt. Do not rinse, polish with a microfiber cloth Do not rinse, polish with a microfiber cloth |
| Water stains | Vegetable oil | Apply oil on a cotton pad, treat problem areas. If it does not help, you can add an equal amount of ethyl alcohol | to the oil
| Fat | Talc | Sprinkle the powder over the stained area of the furniture in a thin layer. Leave for 10 minutes. Gently rub the stain with a soft cloth. Remove the remaining talcum powder with a damp sponge, wipe dry with a paper towel | nine0055
| Fat | Milk | Moisten a cotton pad with heated milk, rub greasy marks with it. Do not rinse, polish with a piece of velvet or woolen cloth |
| Fat | Beer and wax | Place a container with 200 ml of beer on fire, bring to a boil. Throw a small piece of wax, boil for several minutes. Wait for the solution to become slightly warm, apply to the soiled area, polish with a woolen cloth |
Share:
How to easily remove stains of various origins from furniture
11. 02.2019 14:20 In section
TiNAO is ahead of all other districts of Moscow in terms of sales of residential real estate
11.02.2019 14:17 Section
Fisherman competitions start all over the country
11.02.2019 14:15 In section
Uralets reported about the mining of the house in order to get sick leave for his wife
Stains on new furniture are always unpleasant, but they can be easily removed using the simplest, both folk and professional means. We will tell you how to remove stains from water, wax, brilliant green, hot objects, felt-tip pens from furniture. nine0003
Of course, there are high-quality furniture made from modern laminated chipboard, which is resistant to stains. For example, the well-known bookcases Pit Mebel are made from such materials.
But if you are the owner of standard furniture, then first of all we turn to general recommendations for cleaning surfaces.
• Wood and veneer furniture can be cleaned with dishwashing detergent applied lightly to a damp piece of soft cloth. nine0003
• Mirror and glass surfaces should only be treated with window cleaner without abrasive particles to avoid scratching them.
• Pencil and greenery can be removed with a non-abrasive school eraser, and marks from a marker, ballpoint pen or felt-tip pen can be erased with any alcohol solution or WD40.
• You can easily find special crayons and pencils for furniture and laminate flooring in construction supermarkets. They can mask a stain that does not want to leave. Match the shade exactly to the tone and follow the manufacturer's recommendations. nine0003
• As a last resort, deep cleaning can be applied. This process is long and requires accuracy. You need to remove the top layer of varnish and paint, and then apply it all again. For the first time, this can be difficult, so it is better to entrust the work to professionals.
• Before using chemical cleaners, wear a respirator and gloves, open windows and doors, and follow the instructions on the package.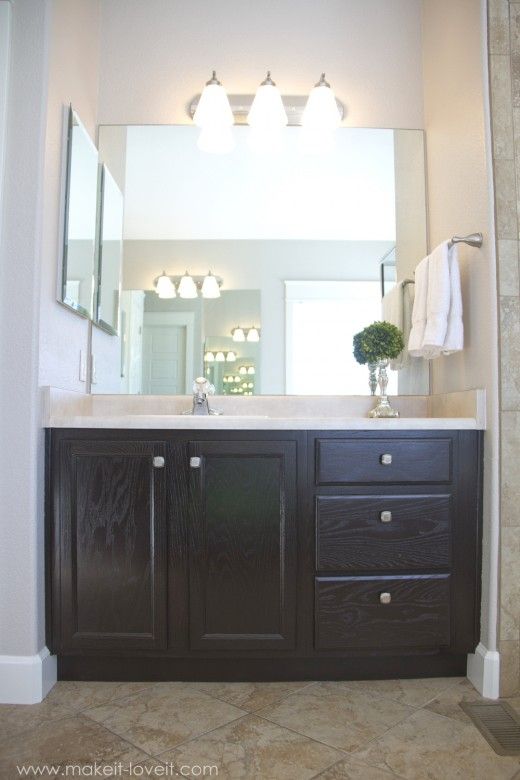
How to remove water stains from wood and polished furniture
White circles on a wooden tabletop look very unaesthetic, and excess moisture is absolutely useless for such a surface. There are several ways to get rid of this trouble.
• The most common mayonnaise will help to remove water stains. The sauce must be applied to the problem area and left until the morning. After that, the place is polished with felt. This method should be tested on a small inconspicuous area so as not to plant a greasy stain.
• A hair dryer will also help remove water stains. Set the temperature to medium and dry the surface methodically for 15-20 minutes. Once the stain is gone, wipe the area with a soft cloth lightly dampened with oil. So the tree does not dry out. nine0003
• You can try to remove the stain with toothpaste, the most common, white. Squeeze a small amount onto the surface and rub with your finger for a few minutes. Remove residue with a slightly damp cloth and polish.
• Cigarette ash or plain flour will help draw moisture out of wood. Pour them on the stain and after a while treat with a mixture of alcohol and olive oil in equal proportions.
• Make a slurry of common salt and olive oil, apply to the problem area and leave for several hours. After that, the composition is removed, and the surface is polished with wool or felt. For polished furniture, you can use walnut. nine0003
How to remove grease stains from furniture
It happens that one careless move can leave a very untidy grease stain on a tabletop or any other surface. This is especially true for kitchen furniture, which is most often exposed to such a risk. There are several tried and tested products that can be used to remove grease from furniture, especially if it is fresh.
• Try a non-aggressive degreasing solution first. It can be a warm vinegar solution, a mixture of ammonia and water with the addition of lemon juice (about 1:10:2). The stain is rubbed with a slightly dampened cloth until the problem disappears, dried naturally, and then polished with a special tool or a colorless shoe polish. nine0003
• You can try adsorbents such as talc or raw potatoes. The first is poured directly onto the stain, and gruel is made from potatoes. Leave the composition for a short time, and after removal, polish the surface.
• Grease marks can be wiped off with drying oil, warm beer or milk. A cotton swab is lightly moistened with the selected liquid and the stains are treated until they disappear completely.
• Natural wood furniture is cleaned with a weak solution of medical iodine, which must first be tested on an inconspicuous area to prevent a new stain. nine0003
How to remove white spots from hot objects
Getting rid of white marks on the surface of a table or chest of drawers is quite simple, with the help of tools that are always at hand. The main thing to remember is that it is better to try each new tool in an inconspicuous place, for example, on the back of a countertop or door.
• If you do not trust folk remedies - you can use polish.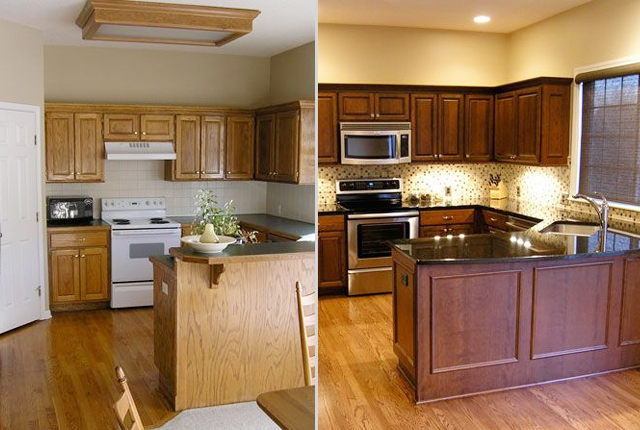 It will take a little longer, because. the work is carried out in several approaches, and each new layer must be dried naturally. nine0003
• Candle wax is also indispensable for removing white spots. Lightly rub the problem area with it and iron it with a non-hot iron through a paper towel or toilet paper folded several times. A thin cotton cloth can be laid on top so as not to inadvertently damage the surface.
• Wrap a tablespoon of salt in a piece of soft cloth and dip the resulting swab in a mixture of cologne and linseed oil in equal proportions. In a circular motion, rub the composition into the stain, leave it overnight, and then polish it with felt or wool. nine0003
• Salt can be used in other ways. Mix it into a slurry with vegetable oil and apply to the problem area. For a fresh stain, half a minute will be enough, for an old one - a few hours. After removing the composition, the surface is polished as usual.
How to remove wax stains from furniture
Work on removing wax from the surface is carried out in two stages. First of all, you need to scrape off what has stuck on top of the table. If the wax has hardened, you need to carefully remove it with a plastic card or a wallpaper spatula. Try not to use metal objects so as not to leave scratches. If the wax has not hardened, wrap a piece of ice or any semi-finished product from the freezer in a plastic bag. Apply it for a few seconds and then scrape off. nine0003
The remaining greasy mark is covered with several layers of paper towels, then with a cloth, and ironed with a medium temperature iron, after turning off the “steam” function. Change towels more often as they get dirty. So the stain will go away faster and leave no traces.
How to remove traces of tape and stickers from furniture
Such a nuisance can happen after transporting furniture if the tape was sticky enough. Sticky marks can be removed with nail polish remover, alcohol or acetone. The glue can be slightly heated with a hair dryer, so it will come off faster.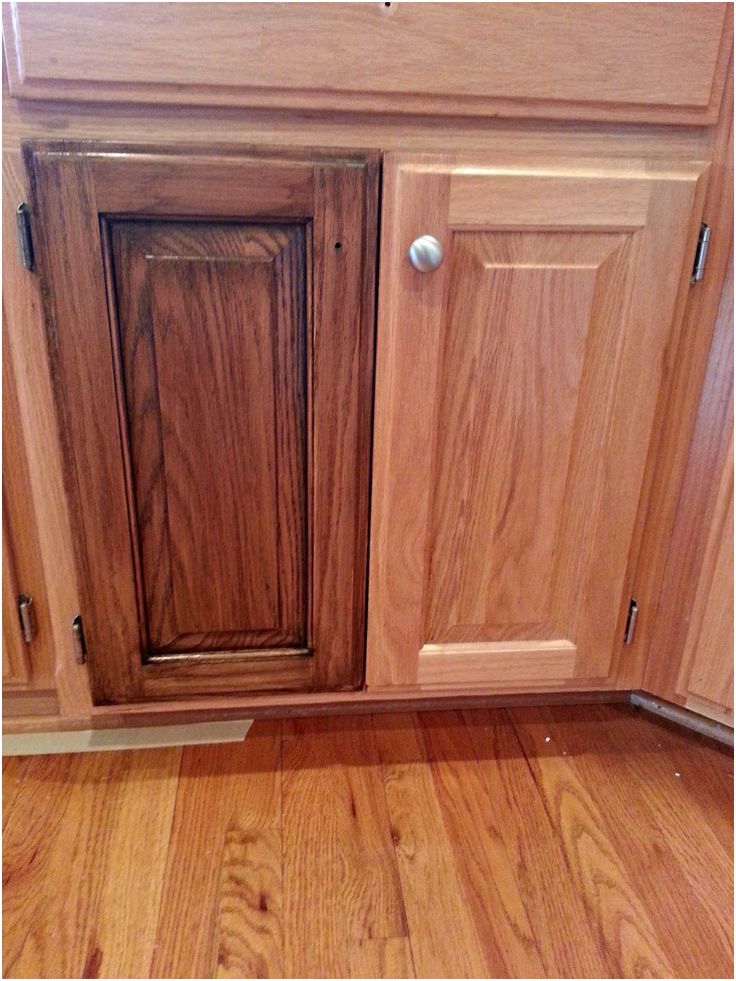 In no case do not scrape the surface with metal objects, this will only worsen the situation, and then restoration will be indispensable. nine0003
Paper tape, sticker or sticker can be removed simply by heating. Set the hair dryer to the highest temperature and hold for half a minute. The sticker will come off without a trace. If the sticking effect persists, wipe this place with a slice of lemon or a cloth moistened with its juice.
If the adhesive is already old and not too tacky, try erasing it with a school eraser. Do not overdo it so as not to damage the surface. If you are afraid to rub too hard, arm yourself with a pack of wet hand cleansing wipes. The process will take a little longer, but then you will be sure that you will not damage the appearance of the product. nine0003
It is easier to remove traces of tape from wooden furniture if you soften them with any vegetable oil. Apply it to the fabric and leave for half an hour. After that, the soft adhesive mass can be removed with the edge of a plastic card or simply rolled up with your fingers.