Cover a tile countertop
Countertop Covers for Kitchen or Bath Counters
By
Lee Wallender
Lee Wallender
Lee has over two decades of hands-on experience remodeling, fixing, and improving homes, and has been providing home improvement advice for over 13 years.
Learn more about The Spruce's Editorial Process
Updated on 11/30/22
Reviewed by
Johnathan Brewer
Reviewed by Johnathan Brewer
Johnathan Brewer is a home improvement expert with over two decades of professional experience as a licensed general contractor specializing in kitchen and bath. He has been featured on HGTV’s “Super Scapes,” “Curb Appeal the Block,” “Elbow Room,” DIY Network's “House Crashers,” "This Old House," and OWN Network's Emmy award winning show, “Home Made Simple.” Jonathan is also a member of The Spruce Home Improvement Review Board.
Learn more about The Spruce's Review Board
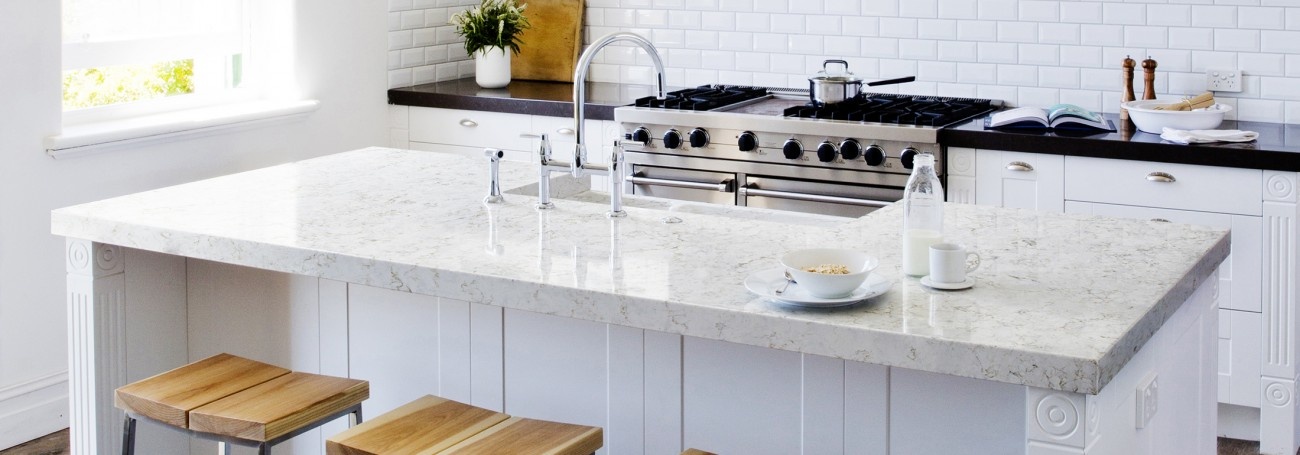
The Spruce / Kevin Norris
Old, unattractive kitchen or bathroom counters don't have to remain so. If the homeowner doesn't have the budget to entirely replace the countertops right away, one option is to use countertop covers. Some of these methods are do-it-yourself, and all of them are much cheaper and far more green than landfilling your old countertops and entirely replacing them.
Get Inspired by These Kitchen and Bath Countertop Covers
Best Options for Countertop Covers
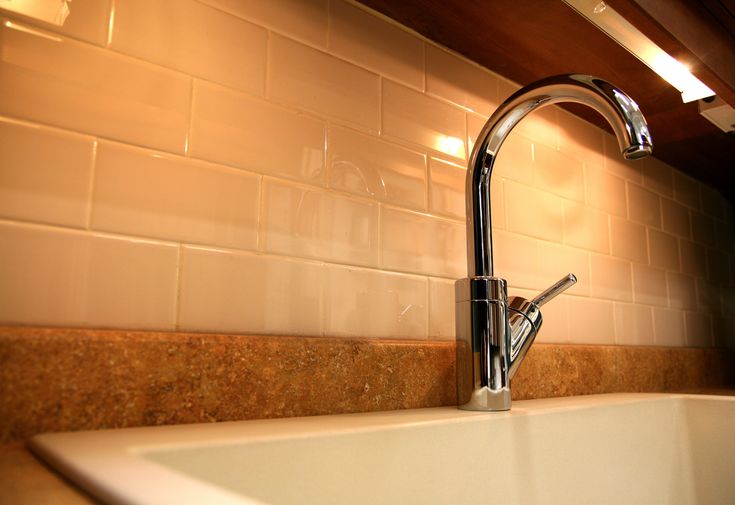
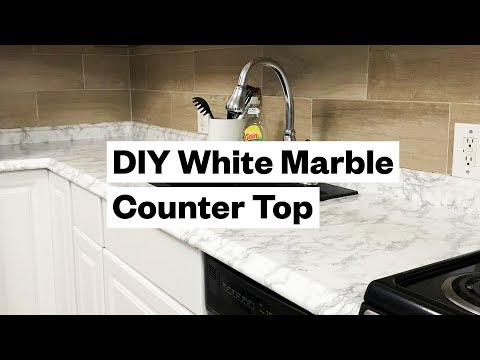
Countertop covers are always temporary to one degree or another; none are permanent solutions. The most temporary countertop covers are spray paint and PVC countertop films. At some point, these covers will scratch, gouge, or otherwise fail. Other covers are longer-lasting temporary solutions: ceramic tile, laminate, or wood overlays.
Always, though, the end game of countertop covers is to extend the countertop until you have the budget or desire to replace the counter with a new countertop.
That said, the best options for countertop covers are ceramic tile and countertop resurfacing kits.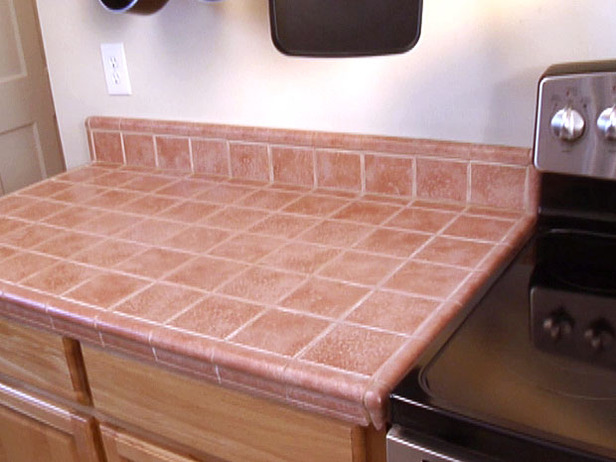 They offer the longest-lasting results for the price. Unlike other options, such as laminate or skim concrete, both options are straightforward and require no special skills.
-
01 of 08
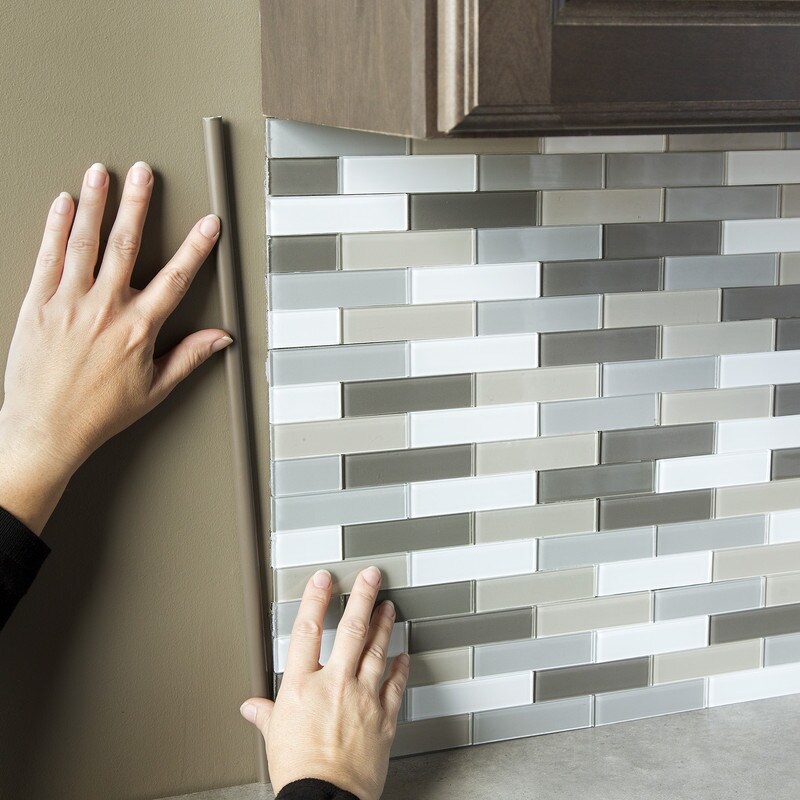
Tile Over the Old Countertop
Beth D. Yeaw/Getty Images
Tile is great for covering all kinds of surfaces—walls, floors, and showers—and there's no reason why you can't use it to cover up your old countertop.
Glazed ceramic and porcelain tile are the most stain- and heat-resistant, plus they come in a vast range of sizes, shapes, and colors. Natural stone tile also works for this application, but the stone must be sealed periodically to protect against stains.
Tile can be installed directly on top of the old counters, provided they are flat and are stable enough to prevent the new tile from cracking.
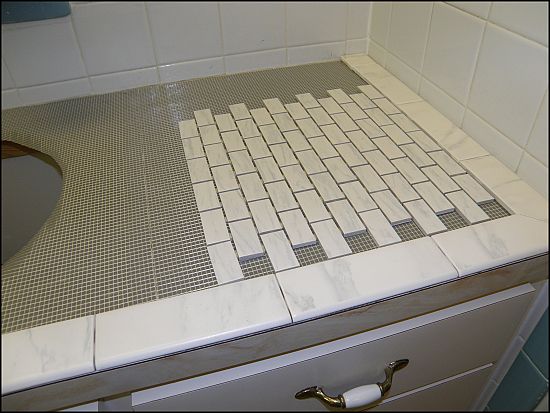 If your counters can accommodate a little extra thickness, it's best to start with a layer of 1/4-inch cement board glued to the countertop, and lay the tile over that.
 Tile is extremely durable and generally easy to clean, but the grout joints are prone to staining and collecting grime. To minimize stains and deep-set dirt, be sure to seal the grout as soon as possible after installing the tile, and re-apply the sealer every few years, as recommended by the manufacturer.
Tip
If you decide to use tile for your countertop just keep in mind that the grout lines can trap dirt and bacteria. A solid surface is a great choice for countertops.
-
02 of 08
Use a Countertop Refinishing Kit
jodiejohnson / Getty Images
Countertop resurfacing kits are like paint on steroids. These kits include epoxy-like paint and decorative stone chips to create the look of natural stone. Most kits are designed for making over old laminate counter surfaces.
Refinishing kits come with everything you need (except for a few tools and basic supplies) to completely cover a standard-size countertop, including the front edge and, if desired, a 4-inch backsplash.
The overall process is straightforward and non-technical, but it involves some hard work, messy sanding, and careful attention to detail. Follow the manufacturer's instructions to the letter for the best results that will last for years.
One downside of countertop resurfacing kits is their price: often, ranging from $200 to $300.
-
03 of 08
Lay Laminate Over the Countertop
edel-fotografie / Getty Images
If you have old laminate (Formica, Wilsonart, etc.) countertops that have square edges, you can cover them with a layer of new laminate, which is sold in sheets up to 5 feet wide and 12 feet long. If your countertops have a raised and rounded edge, often called a waterfall edge, you can't cover them with new laminate because it's impossible to get the new material to conform to the edge contours.
A laminate re-covering process is similar to fabricating new custom laminate countertops. You cut the sheets a little bit oversize and glue them down with contact cement. Then you trim the edges flush to the old counter with a router or laminate trimmer. The result is essentially a brand new countertop. Best of all, the new layer adds less than 1/8 inch of thickness.
-
04 of 08
Skim Coat the Counter With Concrete
Sarah Riedl
Many homeowners love the look of concrete slab countertops but aren't up for the highly labor-intensive installation of a cast-in-place slab. But you can get the same look and feel of solid concrete by coating your old countertop with thin coats of cement-based floor leveler or flooring underlayment.
After roughing up the old counter surface with sandpaper to ensure proper adhesion, you apply multiple thin coats of cement leveler, using a trowel or a drywall knife. The final coat of cement needs a food-grade sealer (and wax, if desired) for a shiny finish that cleans easily and resists stains.
A faux-concrete cover isn't exceptionally durable and may be prone to scratches and stains. But it's an easy, inexpensive option for those who love the concrete look. Approach this cover-up method with care and thought as it can prove to be more work than expected.
-
05 of 08
Cover With a Countertop Film
Instant Granite
Countertop film is a thicker, tougher version of contact paper or shelf paper. It's more like a cross between vinyl flooring and shelf paper, and it has a self-adhesive backing for sticking directly to the old counter surface.
The installation of countertop film is, not surprisingly, a bit fussy. But it's no more complicated than applying contact paper. To install, lay out the film, trim it to rough size, align it to the countertop's edges. Finally, stick it down incrementally, using a squeegee tool to work out the air bubbles as you go.
Countertop film is hardly a long-term solution, but it can be an effective quick cover-up.
-
06 of 08
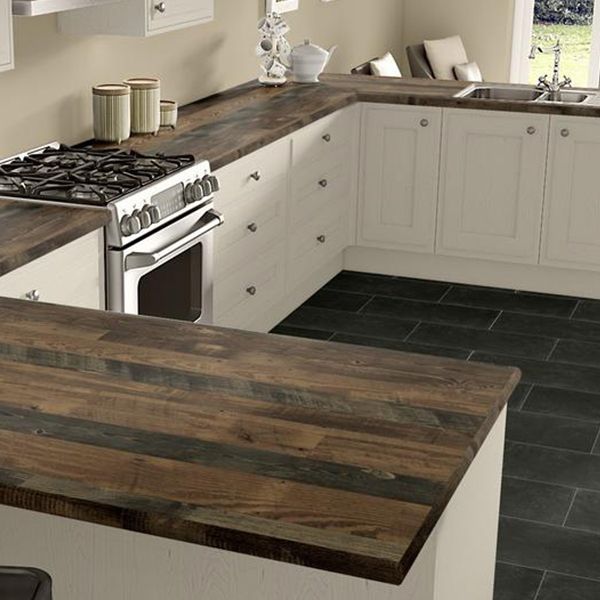
Add a Wood Overlay
The Spruce / Margot Cavin
If you've always wanted butcher block or are drawn to the beauty of a real wood countertop, now's your chance to have it. You can cover your old counters with wide planks of solid hardwood or even hardwood or bamboo plywood.
Solid hardwood is more durable and repairable than plywood (with its very thin top veneer layer), but plywood comes in larger pieces and is less expensive.
Bamboo plywood offers the best of both worlds. This material has a thicker top layer than plywood (for durability and repairs), and it comes in 4-by-8-foot sheets, just like regular plywood.
This is a very custom makeover that requires some basic woodworking skills and tools. In short, you cut the main surface pieces to fit and glue them to the old counter (perhaps with screws driven up from below the old counter). Then you add a front edge made from the same material or use a solid hardwood edge to cap the layered edges of the plywood.
 A wood covering must be thoroughly sealed or oiled for stain- and moisture-resistance.
 -
07 of 08
Spray Paint the Countertop
Space_Cat / Getty Images
Spray-painting your countertop is not only fast; it produces a smooth finish that brush- or roller-painting cannot match. Spray-painting works well for laminate countertops and other surfaces that can be scuffed down with sandpaper.
Go with a matte finish spray paint since glossy paint shows scratches. Remove the sink and fixtures. If possible, move the entire countertop outside to avoid fumes and overspray in your home.
Approach painting your countertop much like you would when you paint plastic. Lightly sand the surface with fine-grit sandpaper. Clean off the dust. Then, spray on at least three or four coats, allowing each coat to fully cure before going onto the next coat.
Spray paint can last years on low-impact surfaces such as bathroom counters.
Be sure to avoid acetone (the main ingredient in nail polish remover), as acetone will haze or even remove some of the spray paint.
 Lay down a protective surface when using acetone-based products or use them elsewhere.
 -
08 of 08
Install Modular Granite
KatarzynaBialasiewicz / Getty Images
Modular granite, sometimes called granite or stone overlay, is a system of small, thin slabs of stone designed for covering old countertops. Instead of standard 12-inch-square stone tiles—and their numerous grout joints—modular pieces cover the entire front-to-back distance (counter edge to backsplash) of the countertop.
Modular granite pieces are about 16 to 18 inches wide, which means fewer joints between pieces, compared to tile. For those problematic inside and outside corners, there are special pieces made just for these sections, as well as optional edge pieces.
The cost of materials for a modular granite makeover may not be significantly cheaper than a solid granite slab, but you can save a lot of money by tackling the installation yourself.
A major downside of modular granite is availability.
 Modular granite isn't a thriving industry, so finding a supplier may be difficult.
Granite or Quartz Countertop Overlays
By
Lee Wallender
Lee Wallender
Lee has over two decades of hands-on experience remodeling, fixing, and improving homes, and has been providing home improvement advice for over 13 years.
Learn more about The Spruce's Editorial Process
Updated on 06/05/22
Reviewed by
Johnathan Brewer
Reviewed by Johnathan Brewer
Johnathan Brewer is a home improvement expert with over two decades of professional experience as a licensed general contractor specializing in kitchen and bath. He has been featured on HGTV’s “Super Scapes,” “Curb Appeal the Block,” “Elbow Room,” DIY Network's “House Crashers,” "This Old House," and OWN Network's Emmy award winning show, “Home Made Simple.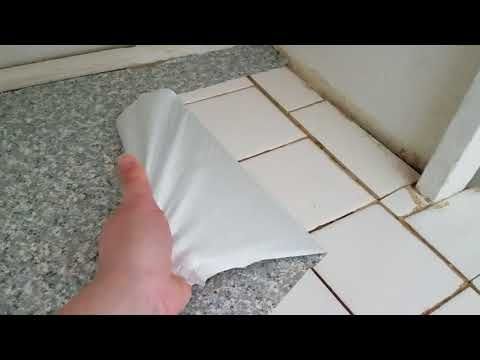 ” Jonathan is also a member of The Spruce Home Improvement Review Board.
Learn more about The Spruce's Review Board
Fact checked by
Jillian Dara
Fact checked by Jillian Dara
Jillian is a freelance journalist with 10 years of editorial experience in the lifestyle genre. She is a writer and fact checker for TripSavvy, as well as a fact-checker for The Spruce.
Learn more about The Spruce's Editorial Process
The Spruce / Kevin Norris
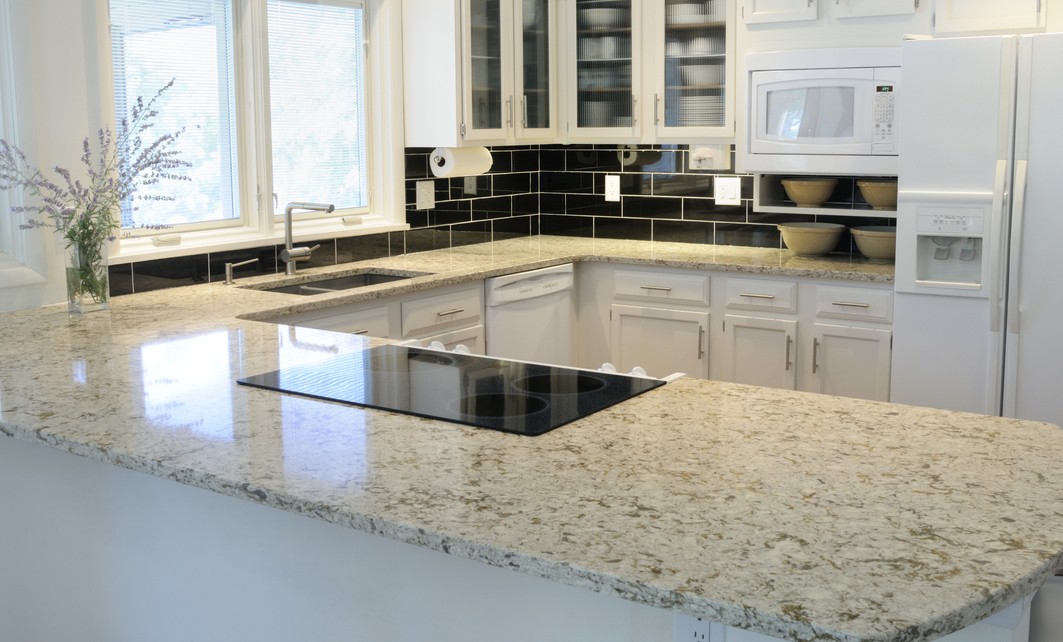
When your dated, tired kitchen countertops are in need of a change, it seems like you have just two avenues: replacing your counters with new countertops or repairing your existing countertops.
Most homeowners would love to have all-new kitchen countertops. But the high cost of countertops is often enough to put off some homeowners from buying. Repairing your existing countertops by painting or re-surfacing them is inexpensive but at the cost of poor durability.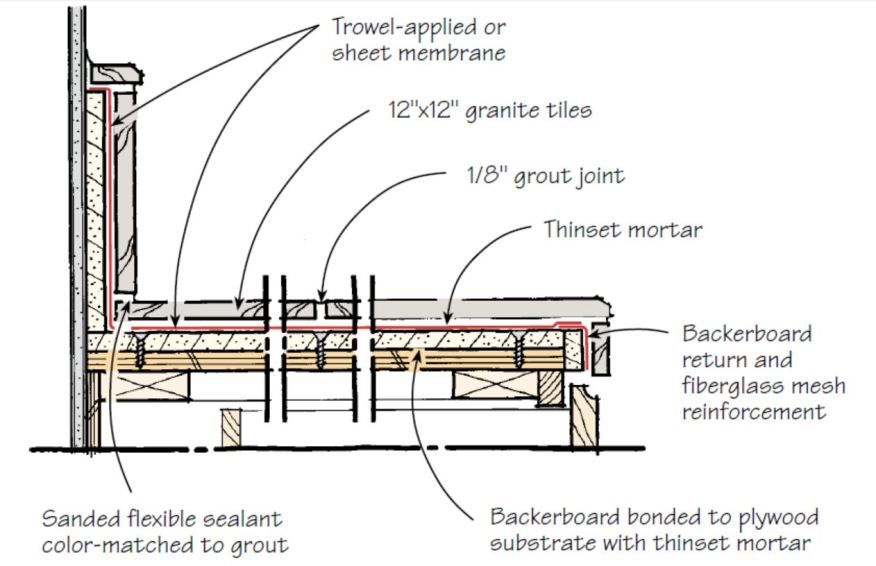
Instead, why not cover up those countertops with more countertop material? A small, niche industry makes granite or quartz countertop overlays that cover existing counters. A hard slab of granite, or quartz, including edges and backsplashes, goes on top of the existing countertop. These are variously called countertop overlays, granite counter units (GCUs), modular granite, or modular quartz, and they're great choices for primary homes, rental units, and investment properties alike. Read on for everything you should know about countertop overlays before you get one.
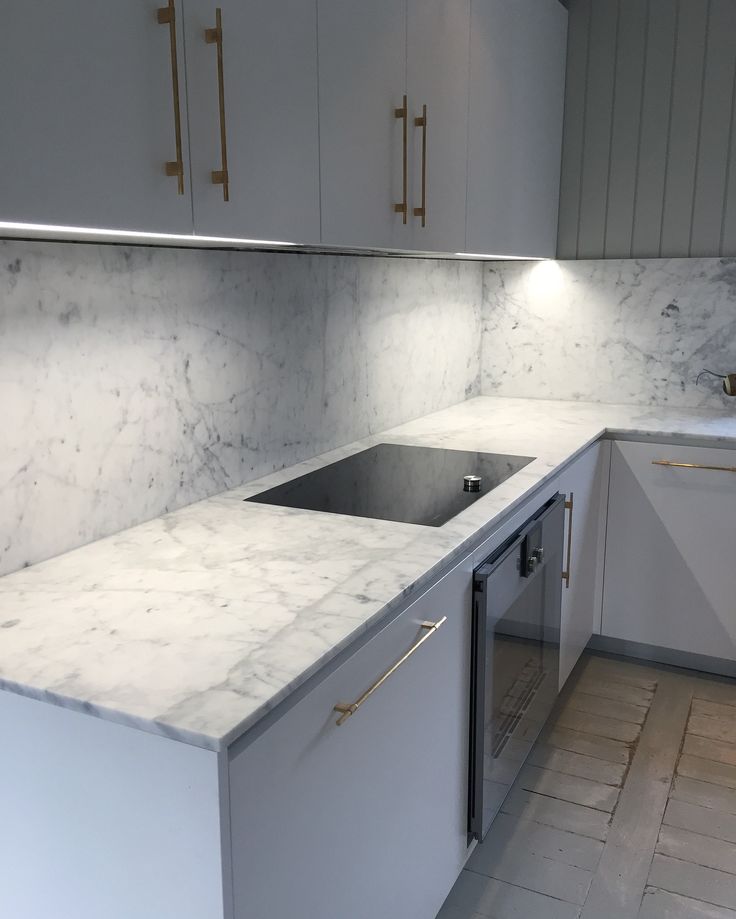
What Are Countertop Overlays?
Countertop overlays cover your existing countertop in the form of large, pre-cast slabs of granite or quartz countertop material.
Overlays are differentiated from countertop fixes such as Rustoleum's Countertop Transformations, a multi-stage liquid covering, or from thin, plastic adhesive sheets imprinted with an image of granite. Countertop overlays are true countertop material, just thinner.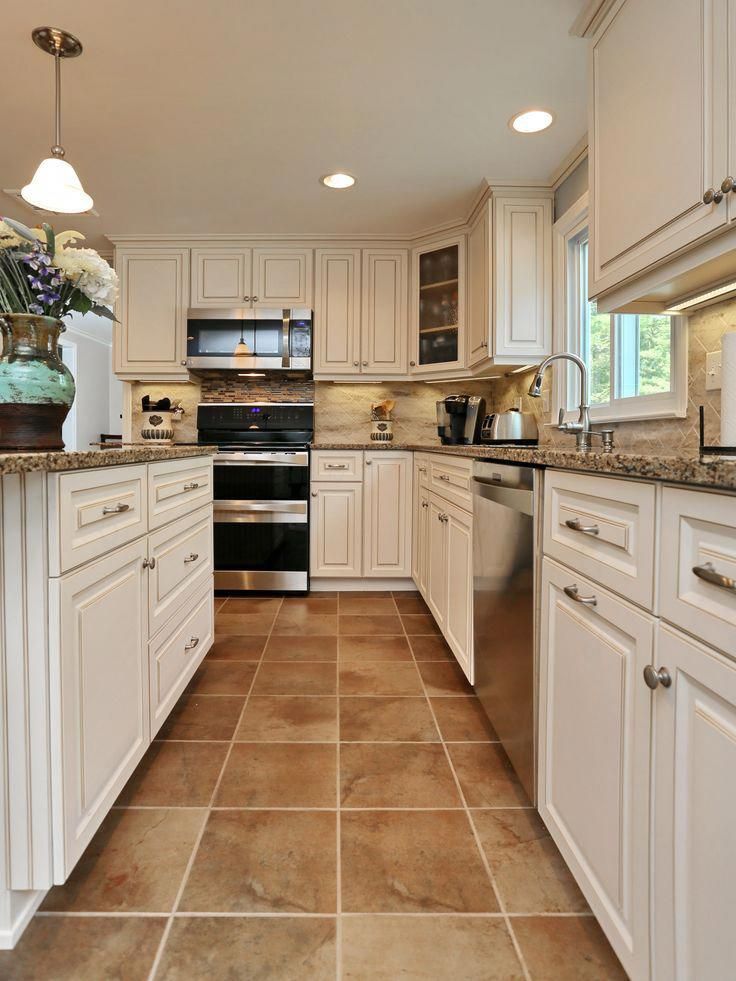
As long as you have a strong, stable counter, you can lay the overlay slabs directly on top. You can also remove your existing counter and lay down a new base of plywood.
Nearly any type of counter can be overlaid, as long as it is strong enough to support the overlay: tile, laminate, stainless steel, granite, quartz, concrete, and wood.
Countertop Overlay Features
- The countertop overlay thickness is about 13 mm.
- The countertop material is mold- and mildew-resistant.
- Most countertop overlays will have a front overhang or apron.
- Eased, beveled, rounded, and mitered (or straight) edges are commonly available.
- The rear of the countertop, or backsplash, can be built of the same countertop material.
- Orders are specially designed for the particular countertop; there are no stock overlay pieces.
- Besides being strong, the underlying base must be perfectly level. Overlay material is thin enough that it might be affected by base material variances.
- Overlays usually will work with undermount sinks and farmhouse sinks.
Minimizing Seams
Most countertop overlays need to create a seam, or several, within the general installation. This is especially true where countertop turns are involved. Many types of L-shaped kitchens, for example, will have an L-shaped section of countertop.
Some experts advise against choosing what are often called wild colors if you want the seams to disappear. This is because the distinctive patterning on one side will not be matched on the other side of the seam. Generally, though, most technicians know how to expertly blend two adjacent slabs.
Pros and Cons of Countertop Overlays
Pros
- Countertop overlays install quickly, usually within one day.
- Overlays are less expensive than full-sized countertops because they are thinner.
- Allows you to have premium quartz countertops without the high price tag.
- Less expensive than sending your existing counters to the landfill since you must pay for disposal costs.
- Greener and more eco-friendly than landfilling old countertops.
Cons
- Some seams may be visible.
- Countertop overlays are only as good as the underlying countertop base. If the base is weak, the overlay cannot be installed.
- Few companies sell countertop overlays.
- Does not work well on uneven surfaces.
- Colors and styles are far less than with full-size countertop materials (currently, Caesarstone Transform has 12 colors).
Countertop Overlay Installation Process
The entire process, from first measurements to project completion, can take up to two weeks.
- First, take basic measurements of your countertop area with a tape measure.
- After contacting an authorized dealer, a representative visits your home to take precise measurements and to initiate the order.
- Another company representative may need to visit your home again to firm up the measurements and to generate an estimate of the project's cost.
- Off-site, fabricators cut and build the overlays to the specifications.
- Right before installation, all plumbing should be safely disconnected.
- The materials are delivered to your home. Technicians install the countertop overlays. This process usually takes one day.
Countertop Overlay Manufacturers
The countertop overlay industry is a volatile one. High-profile brands such as BuildDirect's Panda, Lazy Granite, Kitchen-in-a-Box, and EZ Granite have come and gone.
Caesarstone Transform is the most prominent company presently producing countertop overlays. Caesarstone Transform products are not available on the open retail market. Homeowners need to go through an authorized dealer. Caesarstone also requires that authorized technicians install its product.
Making a tile tabletop with your own hands
- Home
- Articles
- Heading: Design
- Making a practical and original tile tabletop with your own hands
What is good about a tile tabletop?
A ceramic tile countertop, provided that it is done correctly, will be a real decoration of the kitchen and can last more than 10 years. It has a number of advantages:
- is resistant to moisture and does not wipe off, which allows you to wash and clean it if necessary;
- is resistant to scratches and abrasions;
- can be of different sizes, which allows you to create beautiful drawings or compositions;
- comes in a variety of colors and designs.
How to make a do-it-yourself tile countertop and what is needed for this?
Getting started, you should choose a tile that will look harmonious in the interior of the kitchen. If the room will be finished with tiles on other surfaces, then it is worth choosing materials that are compatible with each other. Thus, you can effortlessly make the interior holistic and harmonious. The color of the tile must certainly fit into the overall interior, and as for the size of the tile, you should definitely take into account the size of the room. nine0018
Tip. For large kitchen worktops, you can choose tiles 30x30 cm or even larger, but for smaller spaces, mosaic tiles (7x7 or 10x10 cm) are better suited.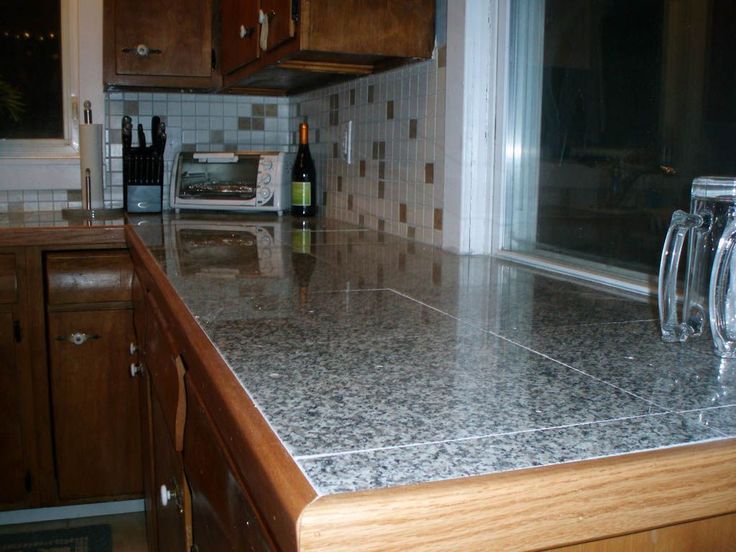
Before buying a tile, you should study its properties and pay attention to the surface of the material. If you choose tiles for finishing the countertop:
- with a relief pattern, then it will need to be washed more often, since dirt easily settles on its surface; nine0004
- with a smooth surface will not look as beautiful, but it will be easier to care for.
Tip. When choosing, focus on which tile you like best. Even if sometimes dirt appears, it can always be cleaned with detergents, a sponge or a brush.
Ceramic tile for worktop Accord
A more expensive, but reliable material can be porcelain stoneware tiles. The material visually resembles tiles made of natural granite or marble, but at the same time it is more affordable and practical. nine0018
Attention! Porcelain stoneware worktops are heavy and should only be laid on a solid base.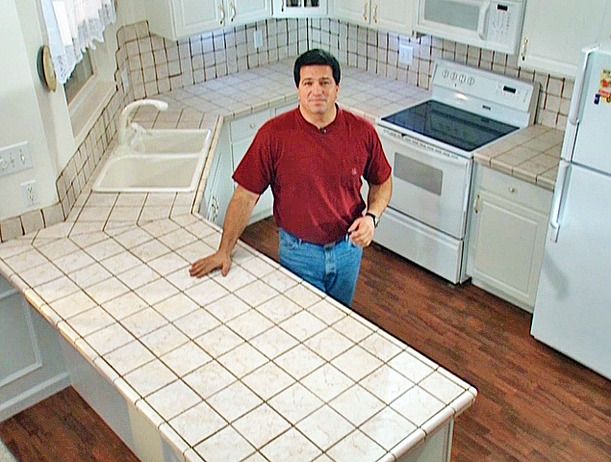
In order for the countertop to be fixed securely, it should be laid on a solid base. To do this, use dense sheets of chipboard. The chipboard base is laid already cut and has exactly the same dimensions and shape as the future countertop.
Tip. Before fastening chipboard sheets with self-tapping screws, they must be treated with special means that will protect the material from moisture and decay. Primers or impregnations (moisture protective) must be applied strictly in accordance with the recommendations in the instructions. And only after complete drying, the sheets can be attached to the cabinets for subsequent tiling. nine0037
How to fix the base?
The sheets processed and cut to the shape of the tabletop are attached to the cabinets after they are evenly installed. You can check with a level. If the base is not made of integral sheets, then the seams should not match, they are applied so that they are placed in different places.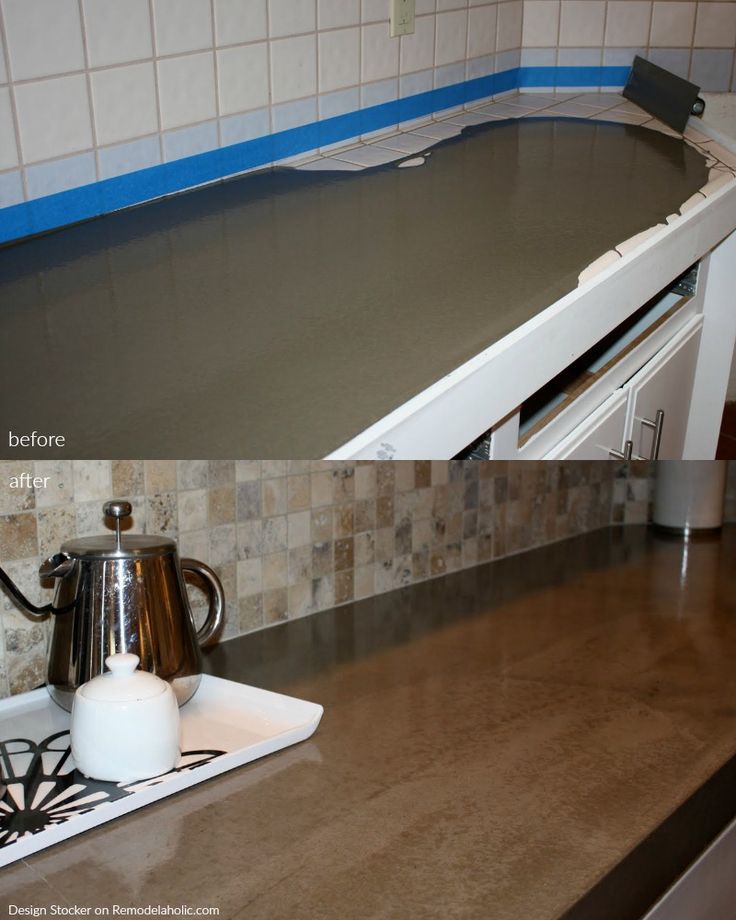
Attention . For more reliable performance of work, it is worth covering sheets of chipboard with special materials that do not allow moisture to pass through. nine0037
After attaching the sheets to their surface, it is worth applying markings. If the master does not have experience in finishing surfaces with ceramic tiles, then it is worth laying out a pattern from tiles without glue and preparing all the whole pieces before starting work, as well as cutting out the necessary elements at the edges or in the corners.
Side cuts, as well as the angle between the wall and the surface of the tile, should be carefully processed with metal profiles. They will ensure hygiene and make the surface of the countertop look neater. Profiles are fastened with mortar or liquid nails. Before finishing, it is worth measuring and cutting out all the elements. nine0018
Attention! Cut carefully. In order not to damage the glaze on the surface, it is worth sticking it with masking tape. And in order for the edge to turn out to be even, it is worth using a tile cutter.
Ceramic tiles for countertop Saint Tropez APE Ceramica
Covering the base of the countertop with tiles
After all the elements have taken their places, you can start the finishing process.
Ceramic tiles can be attached to a special adhesive, which is obtained by mixing dry matter with water in the specified proportions, or you can purchase a ready-made mixture. The solution is applied in an even layer on the prepared surface with a notched trowel. Work should begin with the most visible part of the countertop. nine0018
Tip. Special stops (crosses) should be installed between the tiles, which allow you to leave even seams. Each next row is laid only after the master checks the accuracy with a level.
After the glue or mixture has completely dried, grouting is carried out, but before that it is worth cleaning the surface of the tile from the remnants of glue or mortar.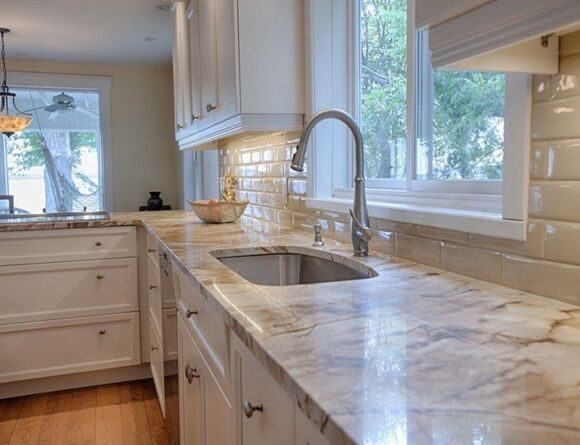
Tip. If the adhesive is difficult to rub off, then do not clean it off with metal objects and using force - this may damage the surface of the tile. It is necessary to wet the glue and wipe it with a rag or washcloth after softening it. nine0037
Ceramic tile for countertop Provence Kerama Marazzi
Grouting
Seams can be sealed with grout or a special epoxy resin, which will make the seams more resistant to moisture penetration, and the countertop itself more practical.
The agent is applied with a special soft (rubber) spatula so that the seams are completely filled. After complete drying, the seams are wiped with a damp sponge or cloth.
Finishing the countertop with ceramic tiles can take a long time, since each stage of work should be carried out only after the previous one has been completed. Work must be carried out carefully and consistently. If they have to be performed for the first time, then it is worth choosing a medium-sized tile and in the same color scheme, since the selection of a mosaic or panel pattern can greatly complicate the task for a novice master.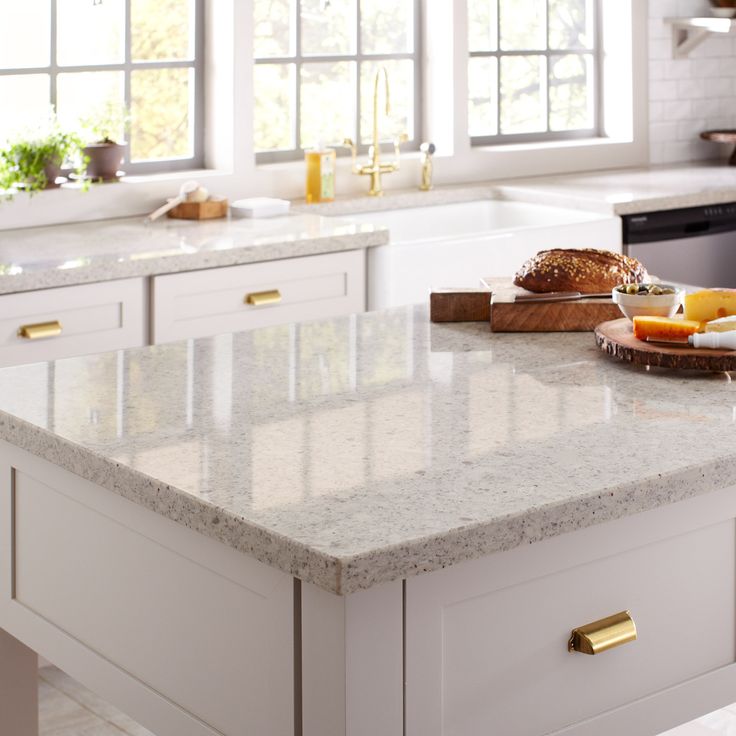 nine0018
The provided master class with a listing of all stages of work gives only basic recommendations. To learn more about how to cut tiles or how to choose a profile for finishing edges, you can view photos or videos.
A do-it-yourself tabletop made according to all the rules and taking into account all the recommendations will last a long time. At the same time, her appearance will delight not only the hostess of the kitchen, but also all guests.
budget projects with step by step instructions
how to make a tile countertop
So you suddenly have some ceramic tiles left over from a recent home improvement project in your hands. What can be done with all this good, not to throw it in the trash. Make your own table out of tiles , a good way to use up leftover material and end up with a practically brand new table! It's a win-win situation. However, it is not necessary make a table with tiles from scratch, you can use any old table with a strong frame. There are many options, you can make a table of tiles with your own hands for the street , for the kitchen, a coffee table with tiles . This collection contains several illustrative examples, where you will learn how to cover the countertop with tiles for almost any table. And how to replace the tiles and lay out a mosaic of tiles.
Garden table with tiles
Do you want to restore your garden table and are looking for a good idea? Then you have come to the right place. Here is an interesting project that will turn your garden table into a real Pinterest star! In general, here you will learn how to lay out a garden table with Portuguese tiles ! You must have seen them, Portuguese tiles. They are mainly used to decorate bathrooms and toilets. But such a tile is also suitable as a decoration for a garden table!
It's not difficult, the whole process is shown in this collage. nine0018
Depending on what material is made of, you can leave it outside in the summer in the sun, rain or bad weather. In the winter months, it is better to cover, otherwise the tiles may come off and damage the table. It will be a waste of all your work!
Photo source: ideefabriek.com/vrije-tijd/eyecatcher-betegel-je-tuintafel-met-portugese-tegels-diy/
Table with mosaic tiles
Today, many people are wondering how to lay out table mosaic from tiles . Read the article of the author of this project, he has a lot of useful tips. This step by step guide shows how to transfer a design to a table using the grid method. You will learn how to cut tiles to fit your design. Then instructions on how to mix the mortar and lay out the mosaic. This is a very fun project and when you're done you'll have a cool DIY Mosaic Table ! A few tips. Use a sponge or spatula to spread the mortar over all tiles. Be sure to apply grout around the outer edges and between each tile. Remove excess grout with a sponge, without digging grout between tiles. Let the solution dry for 30 minutes.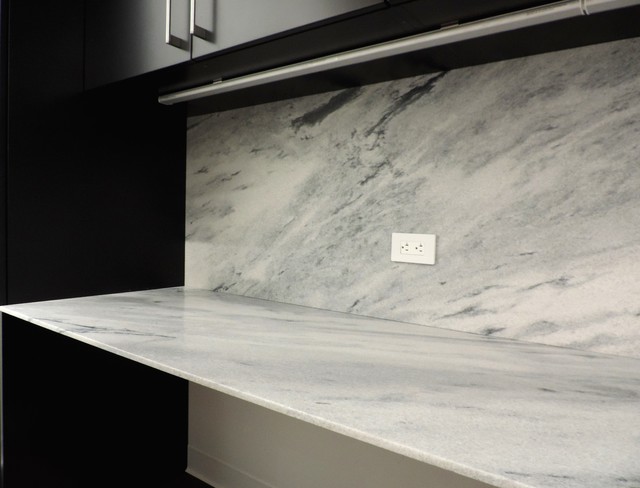 Spray with water mist. This will prevent cracks from appearing. nine0018
Jennifer and Kitty
Photo source: runningwithsisters.com/how-to-mosaic-a-table/
Top tiling
Give an old table a new life - the easy way is Top tile . This project is best for square or rectangular tables if you're not good at bending curves on tiles. Start with design, this allows you to create a pattern you like and determine how many tiles you will need and in what colors. Read the cladding instructions on the website.
- nine0004
- nine0003
- nine0004
- nine0003
Photo Source: www.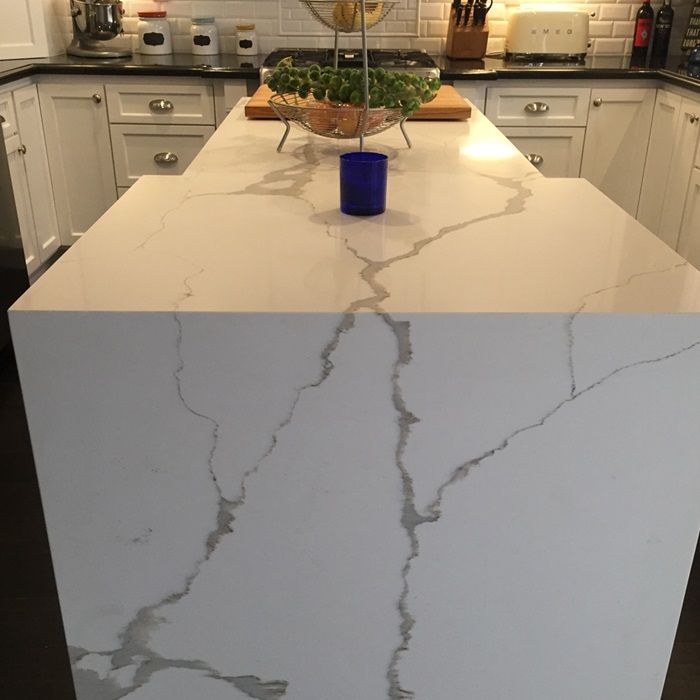 wikihow.com/Tile-a-Table-Top
DIY Tile Table Top
it is beautiful, practical and will completely change your table.
First place a thin piece of plywood cut to fit the table directly on top. Then lay the tiles on top of the plywood, trying to keep the edge the same along the entire length. Circle the tiles. Having an outline will help when re-placing the tile on top. mix the solution and apply, starting from one corner, moving gradually down. This tile is similar to working with puzzles, so try not to jump around, but work from one section to another. After the tiles are laid, let dry overnight. Tip: Don't put too much grout on the edge of the table. There will be a frame here, so be careful. Read about the decoration of the table in the instructions on the site. nine0018
- nine0003
Photo source: seekinglavenderlane. com/diy-tile-tabletop/
DIY tile table top
Chances are you have leftover tiles or chipped pieces from previous remodels. They just lie somewhere in a shed or garage and you don’t know what to do, but it’s a pity to throw them away. Think again! The remaining tiles are what you need to to tile the table and here you will learn how to realize this unique project.
First of all, you need to find a table base. Maybe you have an old wooden table or you can buy something cheap. Then collect all the tile pieces and arrange them by color, shape, size, or whatever you want. Mix and match to coat your countertop.
If there are broken tiles, you can arrange them as a mosaic. It will take some time, but when you are done, you will have a one of a kind table with mosaic tiles .
When you're happy with the design you've chosen, grab your glue and start tiling. You can cover only the top or more sides if the design and size allow. Do you have a simple wood and tile table that you would like to change a bit? Replacement tile is a great solution if you want to completely change the design. It's not that difficult, but the main thing is to start. Take a hammer in one hand, a chisel in the other, and after the first blow of the hammer there will be no turning back. Photo source: tarrasolarsky.wordpress.com/2016/02/16/makeover-dining-room-table/amp/ If you have leftover tiles from an old project, they definitely shouldn't go unused. Photo Source: www. Wait for the glue to dry before cleaning and polishing the new table. These are the basic steps that you must follow if you want to make table tiles with your own hands . You can put it in the gazebo, on the terrace, in the garden or indoors if, say, you need a tiled kitchen table. You also use this idea to make kitchen island with tiles .
Here is a picture of a beautiful kitchen table made of tiles in different colors and patterns. They all have the same dimensions, so combining the design was easy. It looks like a great kitchen island with practical shelves for storing dishes and other things.
Check out the collage below with step by step photos0331 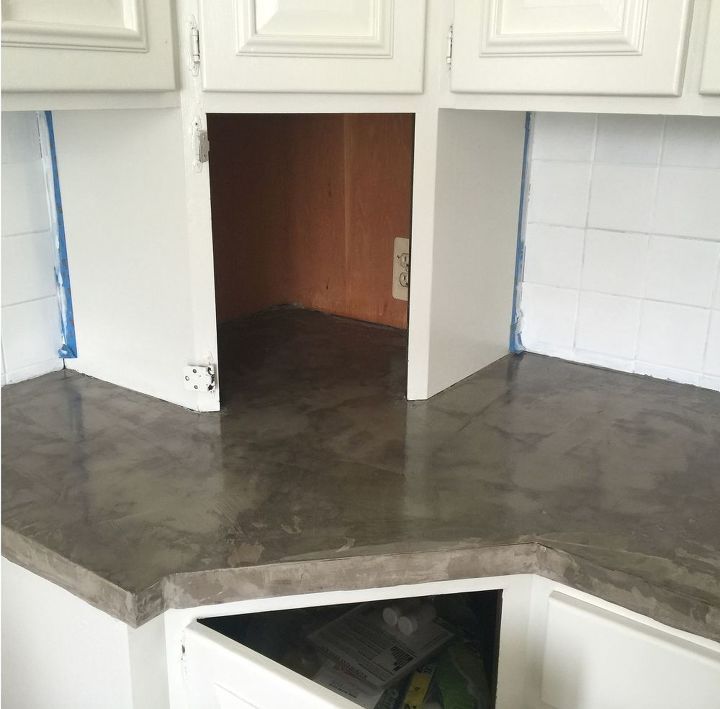 Seriously, when you mess up the table, all you have to do is move forward. Remove the entire tile from the table in this way, and I must say, this is a good sedative. Hammer blows are a great stress reliever. If you have never laid tiles before, you will be interested in learning all aspects of this business. Lay the solution on the table and spread, trying to keep in the center and not get on the painted edge. Then lay the tile according to the desired design and let it dry before grouting. This is basically everything. Then wipe everything, wipe it off and it will look great. nine0018
Coffee table tile top
 You can, for example, make a coffee table with tiles . It's a small, lightweight project and looks great.
Some information. Here the author made a coffee table with his own hands. But you don't have to, any old coffee table that needs a makeover will do. It is also not necessary to use tile stands, as in this project.
You can read the list of consumables that you will need on the website, the link is below. But remember, this is exactly what the author of the project used, there are many substitutes for some of the materials. This is only a way to make this table, and not a non-alternative method. nine0018