Ceiling moulding trim
39 Crown Molding Ideas - This Old House
Not all cakes need icing, but they’re arguably better with the sweet concoction. The same goes for a room decked in trim. Read on to steal these ceiling trim and molding ideas to add more style to your rooms.
Special thanks to the KB Classical Moulding catalogue, available at kuikenbrothers.com, for guidance on molding styles and history.
The Purpose of Crown Molding
It isn’t essential, but adding crown molding goes a long way in achieving old-house charm.
Crown Molding Designs
Here, we see what different styles of the trim—Federal, Greek Revival, Early American, Georgian, Colonial Revival, Traditional Revival and Craftsman—can do for your rooms.
Volume for a Low Ceiling
Photo by David PrinceSimple, elegant beading makes this Federal style crown molding help a low-ceilinged room full of feminine neutral accents read as voluminous.
The English-inspired style was popular after the American Revolution and into the early 19th century and characterized by its simple beads (small indented lines) and cavetto (concave) shapes.
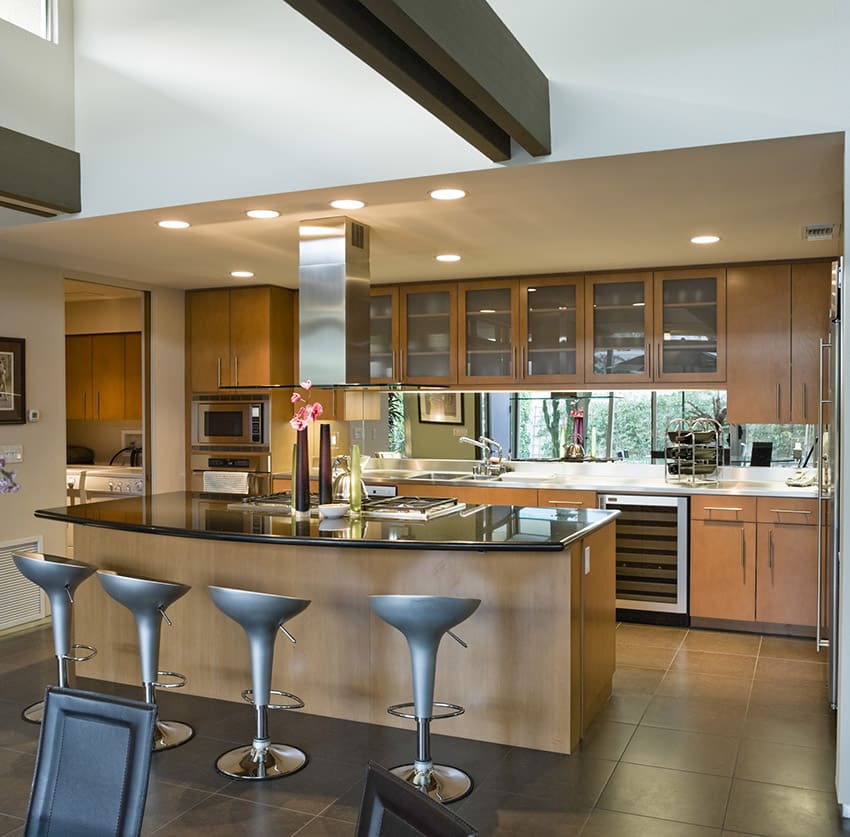
Bumped-Up Look
Photo by Gene PolluxIn addition to a four-foot bump out, visual cues like small-scale Early American molding help this reworked kitchen appear larger.
The cyma recta curve (concave at the outer edge and convex at the inner edge) where the crown meets the ceiling and simple beading makes this molding just enough of an accent for this bold-colored kitchen.
Upgraded Trim for Crisp Lines
Photo by Tria GiovanLike the rest of the house, this living room was in great shape but needed help. The homeowner hid the original built-ins' valances with new trim and installed Colonial Revival crown for a crisp, clean look reflected in the dentil mold of the room's mantel.
Typically reserved for nicer rooms of the home, this style harnesses a mix of bold (Greek Revival) and light (Federal) profiles for the best of both worlds. Crown profiles may include the S shape of an ogee and the double curved cyma.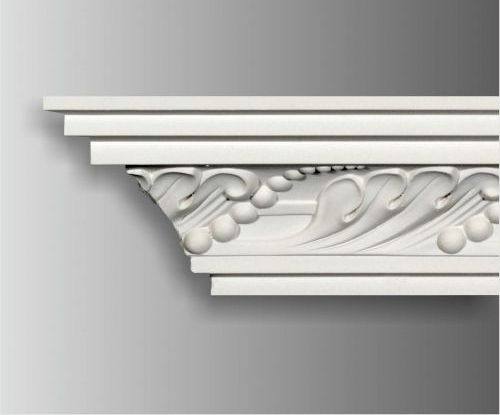
Uncrowded Crown Style
Photo by Tria GiovanOlder homes have smaller canvases for flourishes like generous crown molding, creating a crowding problem. So this sharp homeowner tacked on Classical Revival top trim on her kitchen cabinets only, providing more room for natural light around the sink.
This style, noted for its dignity and monumentality, makes for a significant style contribution. The bold scale is softened in the small space by the cyma recta (concave at the outer edge and convex at the inner edge) top and flat-front boards that tie the crown in with kitchen cabinets below.
Original Built-In
Photo by Tria GiovanA revived original three-corner cupboard becomes the room's focal point with the help of low-profile crown molding and other trim details.
Barely-There Crown
Photo by Anthony TieuliMinimal trim keeps this breakfast area looking cheery and finished without overwhelming it.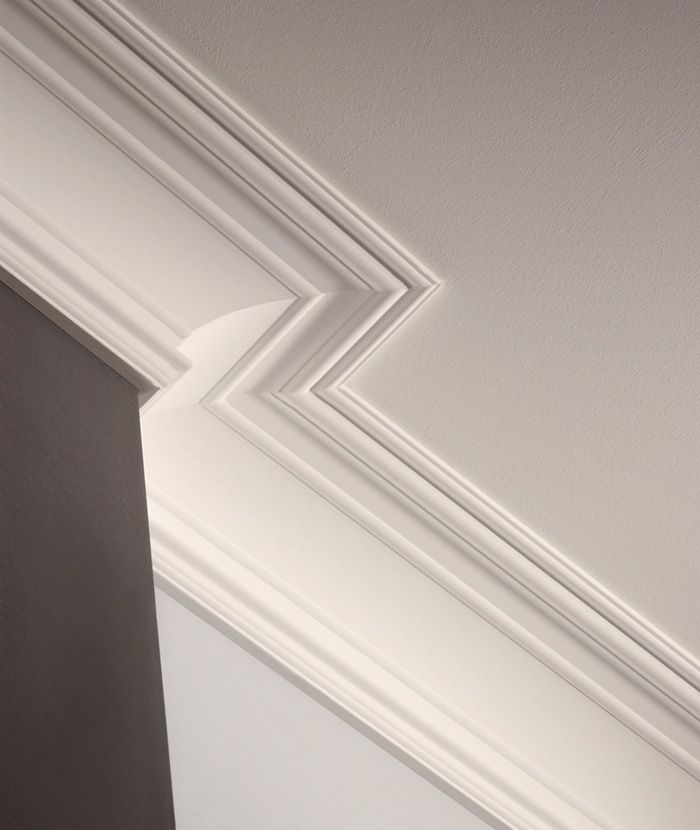
S-Shaped Crown for a Finished Look
Photo by Anthony TieuliA simple ogee (S-shape) crown molding—albeit a small dose—does wonders for putting the finishing touches on a bright redo.
Crown Hugging Odd Corners
Photo by Anthony TieuliSimple Federal crown molding makes this oddly shaped room feel cohesive.
Cohesive Kitchen Cabinets
Photo by David PrinceGlossy white cabinets and stainless steel appliances keep the kitchen area un-fussy in the open plan kitchen/dining/family room setup. Simple Early American-style crown molding—plus a little flourish atypical to the style at the bottom to join the cabinet tops—helps the eye roam to other parts of the open area plan.
Recreate the minimalist look by adding an intricate back bend at the bottom of the crown molding's flat casing to blend with the top of kitchen cabinetry.
Less Crown, More Impact
Photo by Julian WassIn some cases, using bold trim sparingly makes for a bigger statement.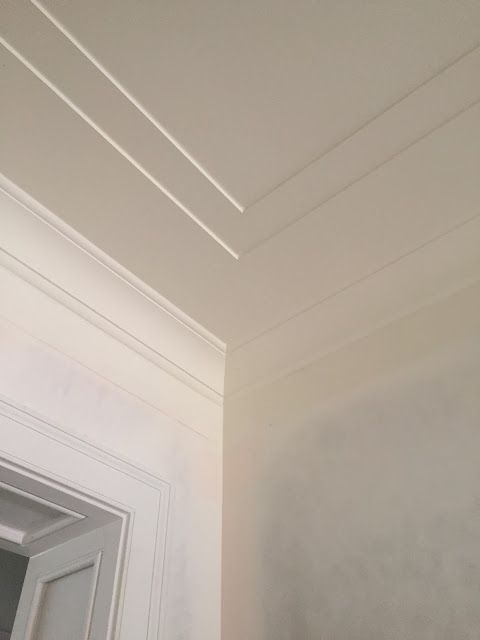 Here, Federal crown molding adorns a square column and cabinetry to highlight those structural elements.
Greek Revival
Photo by Julian WassBright white Greek Revival crown molding gives the eye a place to rest in this blue room absent of wall adornment, save for an awning-style window.
This simple profile is meant to look like the column and entablature decorations found in ancient Greek temples. Supersized ogee (S-shape) and ovolo (convex) curves appear often in this style.
Contrasting Casings
Photo by Julian WassAn arch in this master bedroom—modeled after an original built-in bookcase—is grounded by sleek Greek Revival crown molding.
Federal Old-Fashioned Feel
Photo by Julian WassFederal crown molding adds to other old-fashioned details that distract from the bath's modern amenities, like an air-jet tub.
Nautical Color Combo
Photo by Alex HaydenA houseboat gets the ultimate nautical treatment with gleaming stained trim against clean white walls.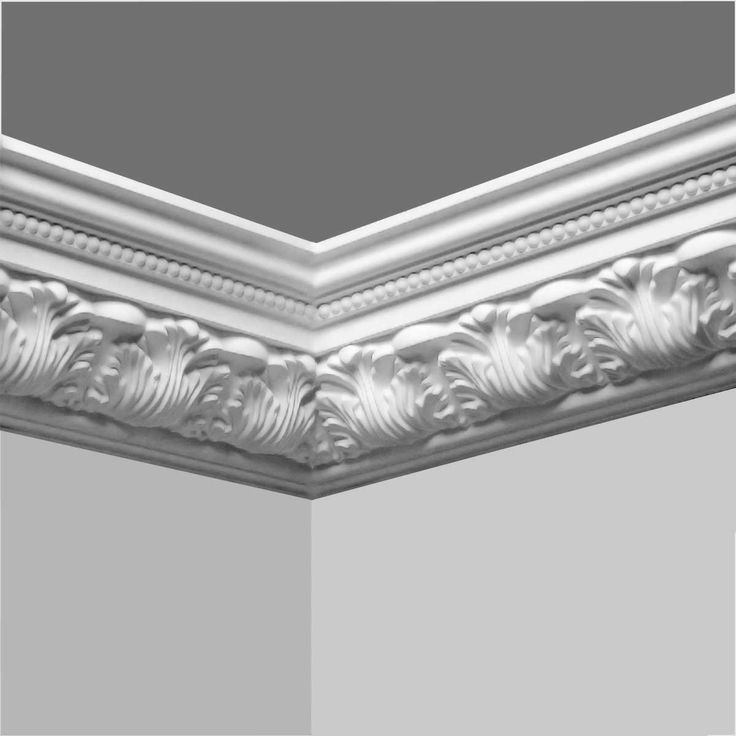
Minimalist Matching Trim
Photo by Alex HaydenMinimal Traditional Revival molding was the basis for this dining room's new sustainable fir window casings. Corner molding provides a little more ornamentation for the eyes.
This style is an evolution of the classical profiles from earlier in the 19th century, minimizing and simplifying them while enlarging the individual parts. Think Greek Revival with more details.
Brightened-Up Compact Kitchen
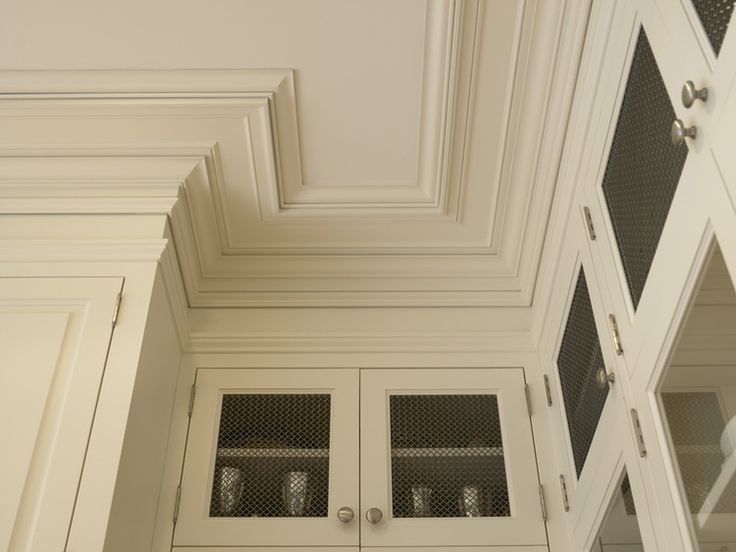
Photo by Alex HaydenA skylight and coffered ceiling decked in Federal trim lightens and brightens a tiny kitchen full of reclaimed finds.
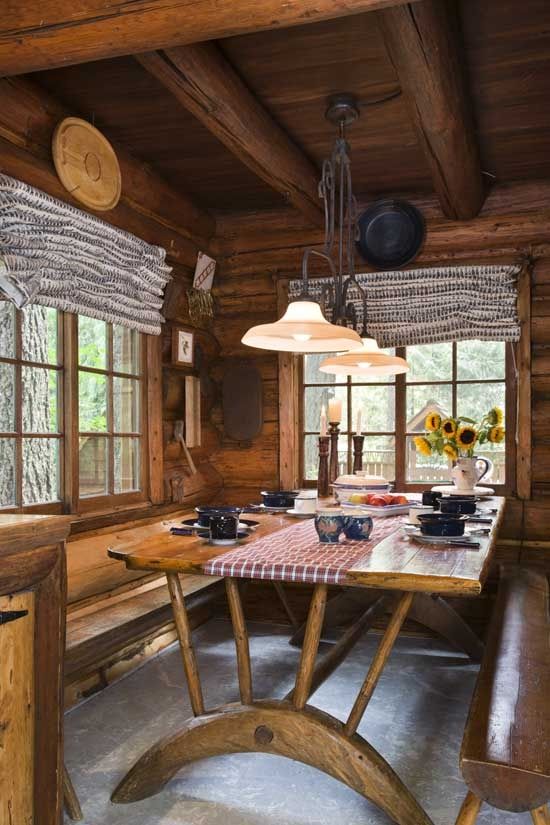
Heavy on The Wood Trim
Photo by Nathan KirkmanGreek Revival crown molding matches quartersawn white oak cabinets to balance out saturated yellow walls and ceiling, creating warmth in a cabin-reminiscent space.
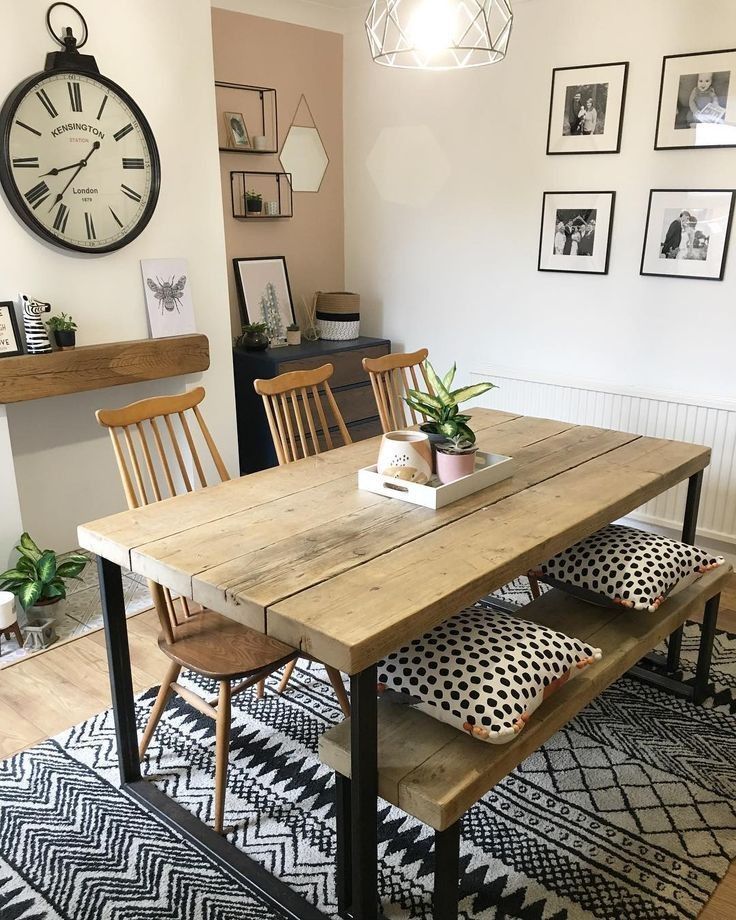
Pared-Down Crown
Photo by Nathan KirkmanBarely-there beading of Early American trim highlights a handsome Craftsman built-in banquette and dining table.
Standout Crown and Feet
Photo by Ken GutmakerLarge-scale Early American moldings were made to match substantial kitchen cabinetry feet mimicked from a vintage dresser.
Highlighted Beadboard
Photo by Ken GutmakerThe Traditional Revival crown molding in this former sunken living room isn't the only element that's seen beading. The weighty topper highlights a beadboard ceiling chosen for its vintage cues.
Crown Curtain Rods
Photo by Ken GutmakerExpand your crown molding horizons by using it to top off other room elements. Georgian trim with dentil details along the French doors and window tops significantly up the space's design, all while echoing the complementing trim just inches above.
This gracious 17th-century style is design-heavy down to the small square blocks of the dentil trim and other details.
Blended In Built-Ins
Photo by Alex HaydenSubtle Early American trim tops off the casing of a built-in, making the addition looks like it's always been there—even though crown molding is absent in the rest of the area.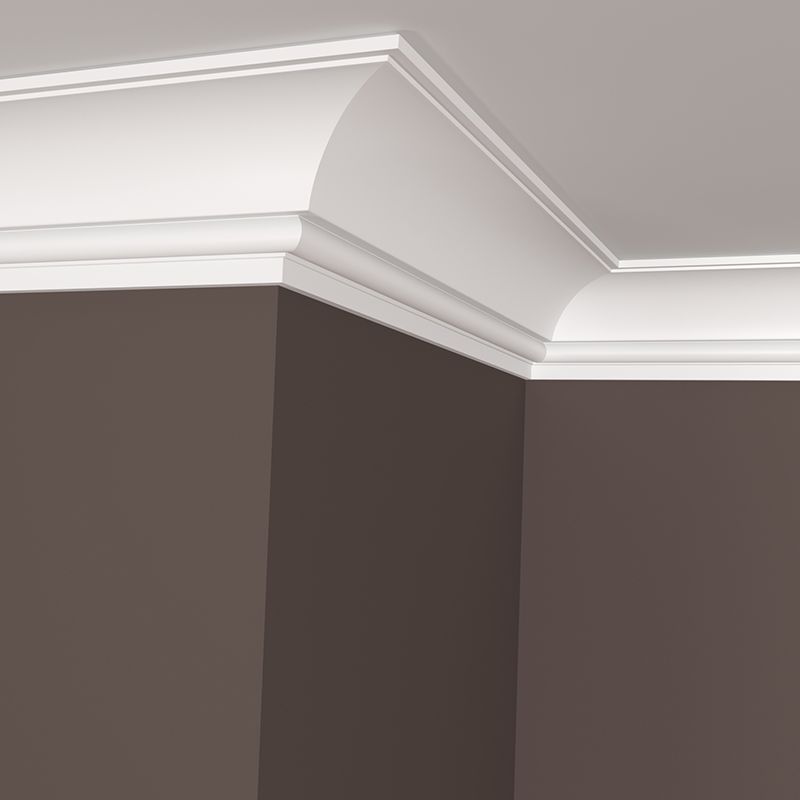
Early American Trim Gives New Ceiling Height
Photo by Alex HaydenLose a drop ceiling and there's no sense in skimping on the crown molding! Small-scale Early American trim draws the eye upward and makes up for all that new ceiling room.
Coffered Ceiling: Crown For Preservation's Sake
Photo by Paul WhicheloeGorgeous coffering serves as more than adornment. Designers added the feature to help preserve the pristine plaster ceiling from future water damage and cracks. Plus, the additional surface next to the beams allows for an ornate profile.
Greek Revival Kitchen Trim
Photo by Helen NormanBold Greek Revival trim tops off creamy yellow cabinets in this cheerful kitchen. Kitchen cabinet-topping crown molding lends cohesion to a room full of disparate features like the ceramic-tile backsplash and heart pine floors.
Flat-front Molding with a Shapely Mantel
Photo by Judith BromleyFlat-front molding with few flourishes—typical of simple Craftsman trim—lets the handsome mahogany mantel and its geometric features command attention.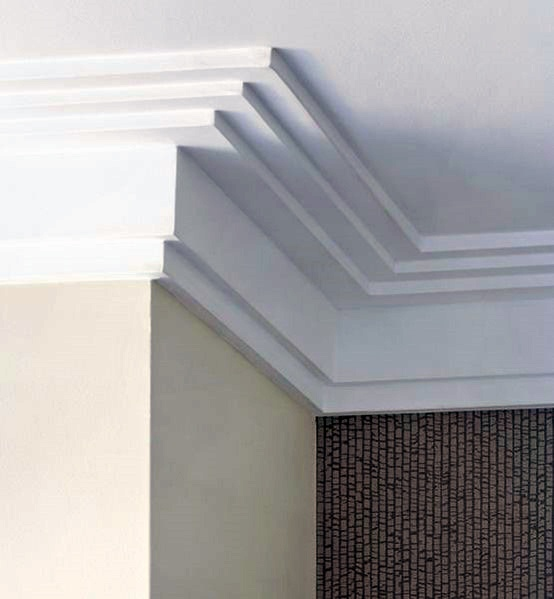
This relatively understated style is tied to the Arts and Crafts movement, which emphasized skill and craftsmanship, rather than the ornate details of previous styles.
Elegant Corner Block
Photo by Nathan KirkmanCurvaceous corner blocks in the front parlor create additional visual interest to the Colonial Revival crown and green built-in bookshelves.
Federal-Style, Simple and Masculine
Photo by Deborah Whitlaw LlewellynHomeowners added low-key Federal-style crown in a formerly dilapidated bungalow's living room for a masculine finish with few flourishes.
Layers of Molding
Photo by Laura MossSubstantial crown molding defines the ceiling and wall, and adds some much-needed ornamentation.
Custom Designs
Photo by Stephen KarlischStepped-up Traditional Revival crown molding complements the faux-old floral tile on the fireplace's cast-iron propane insert.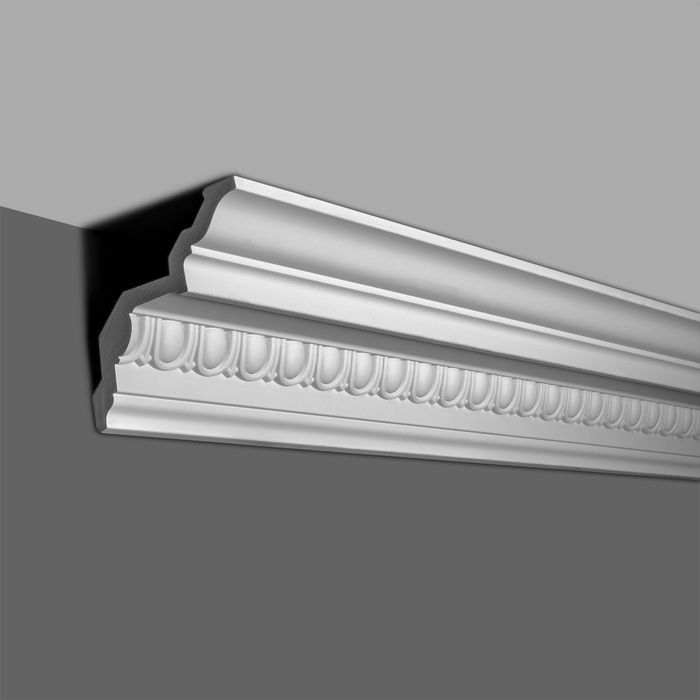 Molding built with flat fronts leaves room for custom-look flourishes, like the one pictured.
Framed Up Pocket Doors
Photo by Jurgen FrankLots of beading at play in the Federal crown molding frames up this dining room's entertaining features, the built-in China cabinets and arched pocket doors.
Georgian Style
Photo by Jill ConnorsGeorgian-style dentil molding—plus extra details—gives this fireplace the ultimate historical treatment. Coordinating crown and window cases dripping in detail and generous beading keep the eye roaming.
Make like a circa 1770's wealthy landowner and replicate the elegance of the Georgian style with buildable blocks, bed molds, dentil and hefty crown molding.
Chic Corner Blocks
Photo by Susan SeubertCorner blocks of Colonial Revival crown molding draw the eye upward to the vaulted, beadboard ceiling.
Rosettes
Photo by Timothy BellThe lighter side of Colonial Revival crown molding and period-appropriate wall color let rosettes on window casings and a classical mantel take center stage in this former frat house's master bedroom.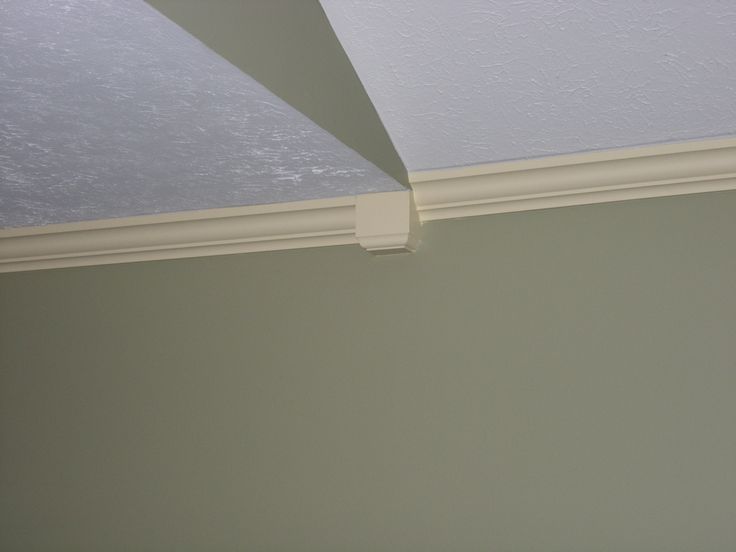
Crib with a Coffered View
Photo by Matt WittmeyerInspired by intricate Victorian plaster designs, a homeowner transformed a blank room into a nursery with a whimsical coffered ceiling. Federal molding with stepped details and corners provide lots for developing eyes to gaze upon.
The homeowner used a computerized router to cut patterns from MDF to use as bending forms. Then, he formed the coffering with a vacuum press, and seven pieces of poplar trim laminated, spending a total of 130 hours on the project.
Steel Beam-Disguising Crown
Photo by Susan GilmoreTwo essential steel beams—along with a grid of false beams—create a coffered ceiling. Pared-down Greek Revival crown molding complements, rather than competes, with the room's built-ins.
Obscure Garage Tell-Tale Signs
Photo by Wendell T. WebberFederal crown molding masks any remnants of this media room's former identity—a freestanding garage.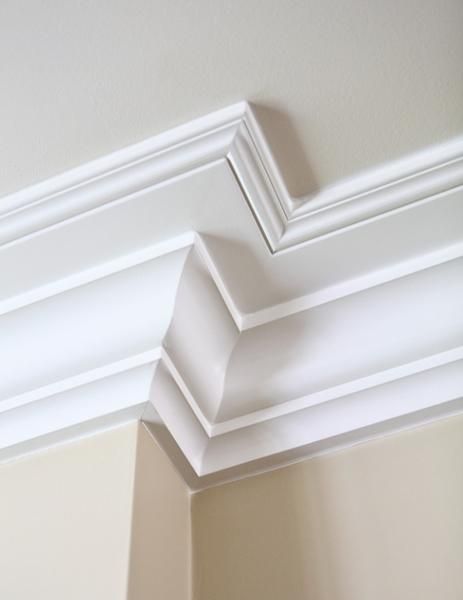 Built-in storage and plenty of beadboard throughout make the room feel like it's been there for years.
Refined Curve With Victorian Ambience
Photo by Matthew MillmanWide openings with casings were created in an Italianate San Francisco townhouse formerly split up into apartments for a brothel. Federal-style moldings bring a refined and cohesive look to the former place of ill repute.
Fine beading and intricately shaped openings will do the trick for a formal, Victorian feel, even in places of already good repute.
Early American Molding Offers Widened View
Photo by Wendell T. WebberHere, crown molding painted to match the ceiling makes the narrow room of the TOH TV Brooklyn brownstone open up visually.
Want to recreate the look? Opt for large-scale, simple Early American molding to get the optimal widening effect.
Types of Moldings - 10 Popular Wall Trim Styles to Know
Decorative Moldings
1/11
Moldings exist in myriad forms.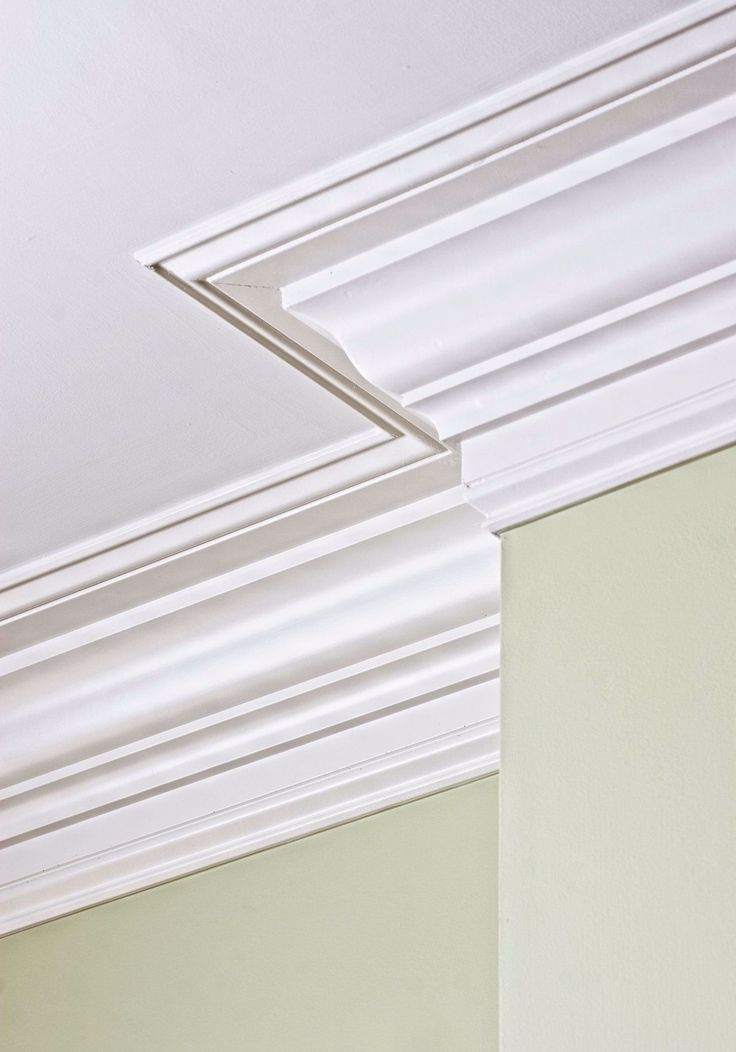 Each is designed for a specific purpose—framing a door, for example, or providing a visual transition at the junction of walls and flooring. So many types of molding decorate our homes today, it's often difficult to distinguish them—and learn which types you should purchase for your home remodeling project. But here's the good news: You never again have to be confused between batten and baseboard. Scroll through to discover your molding style, once and for all!
Related: 20 of the Best Pieces of Advice from Home Makeover Shows
istockphoto.com
Casing
2/11
Casing is designed to cover the unfinished gap between walls and door or window frames. Though different variations of door casing styles are readily found, the width of casing usually spans two or three inches.
Related: 18 Inviting Entryways We Love
istockphoto.com
Baseboard and Baseboard Styles
3/11
Used to trim walls where they join flooring, baseboards usually measure three to five inches.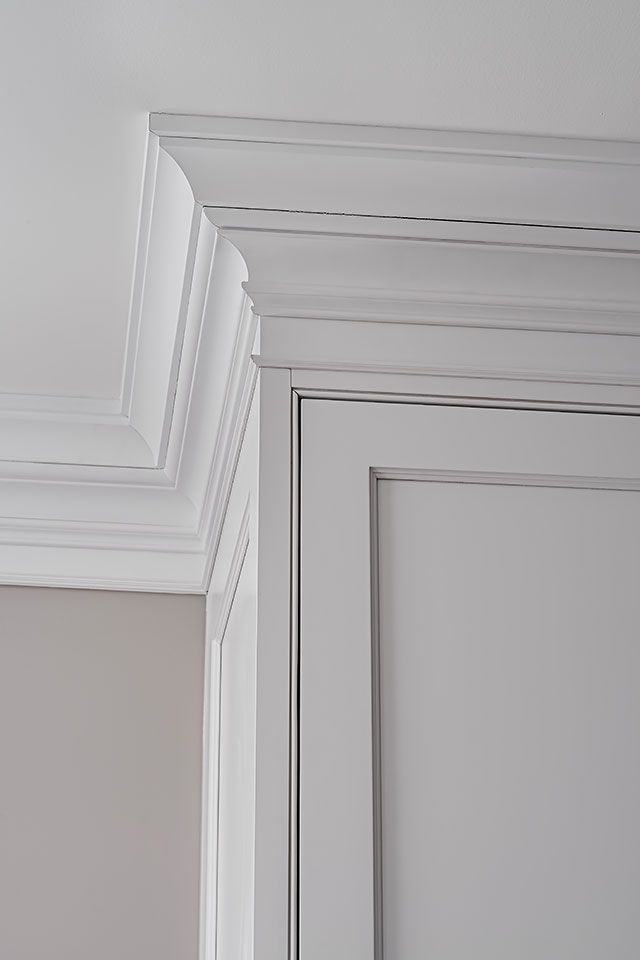 Baseboard styles are usually simple, and accented with a small piece of quarter-round (semi-circular) trim.
Related: 17 Times Shiplap Made the Room
istockphoto.com
Advertisement
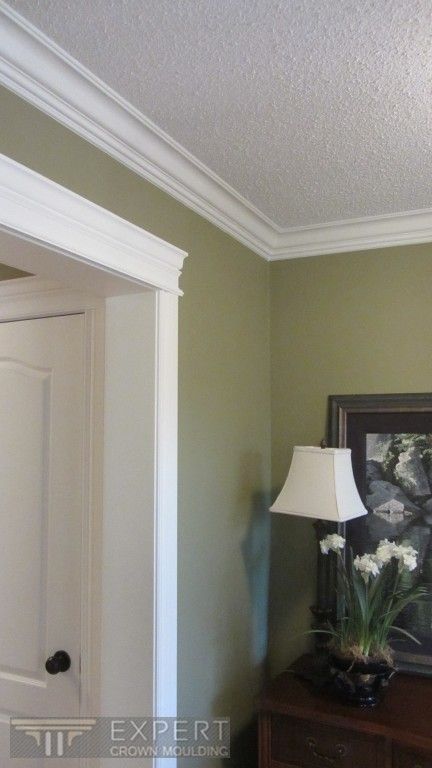
Crown
4/11
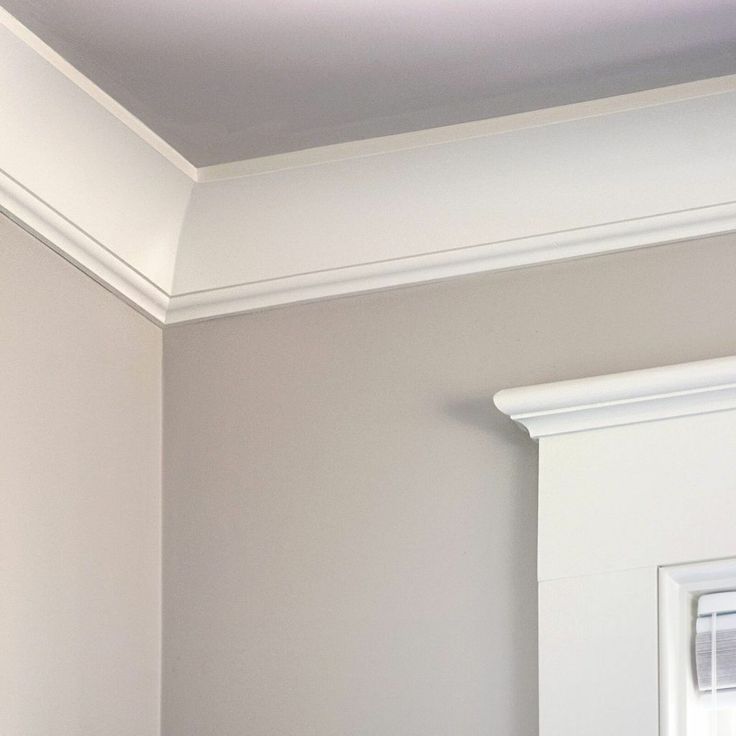
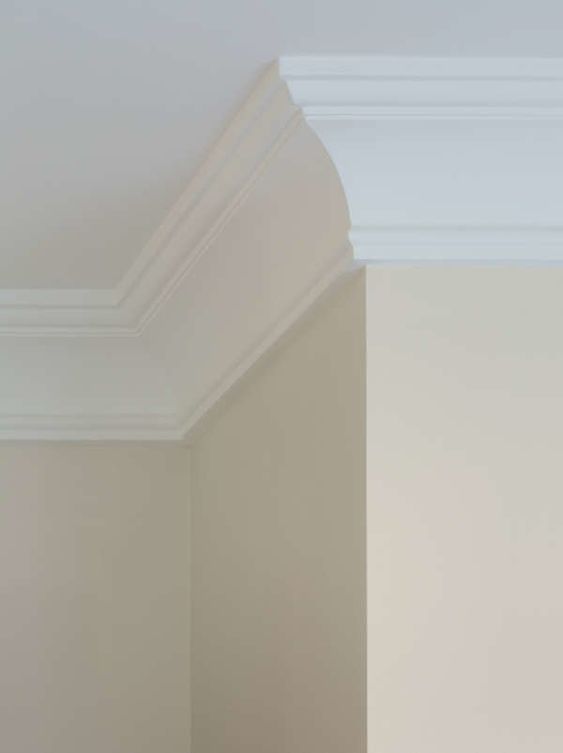
This molding is the "crowning" architectural feature of a room, as it decorates the transition between walls and the ceiling. Crown moldings, also known as cornice moldings, typically boast intricate silhouettes—although many types of crown molding exist.
Related: 10 Ways to Reinvent Any Room with Crown Molding
istockphoto.com
Chair Rail
5/11
Chair railing is functional molding meant to protect walls from being damaged by furniture. Of course, it can also serve a purely decorative function, delineating two different types of wall coverings—paint and wallpaper, for instance.
Related: 15 Frugal Ways to Furnish Your Home at Home Depot
istockphoto.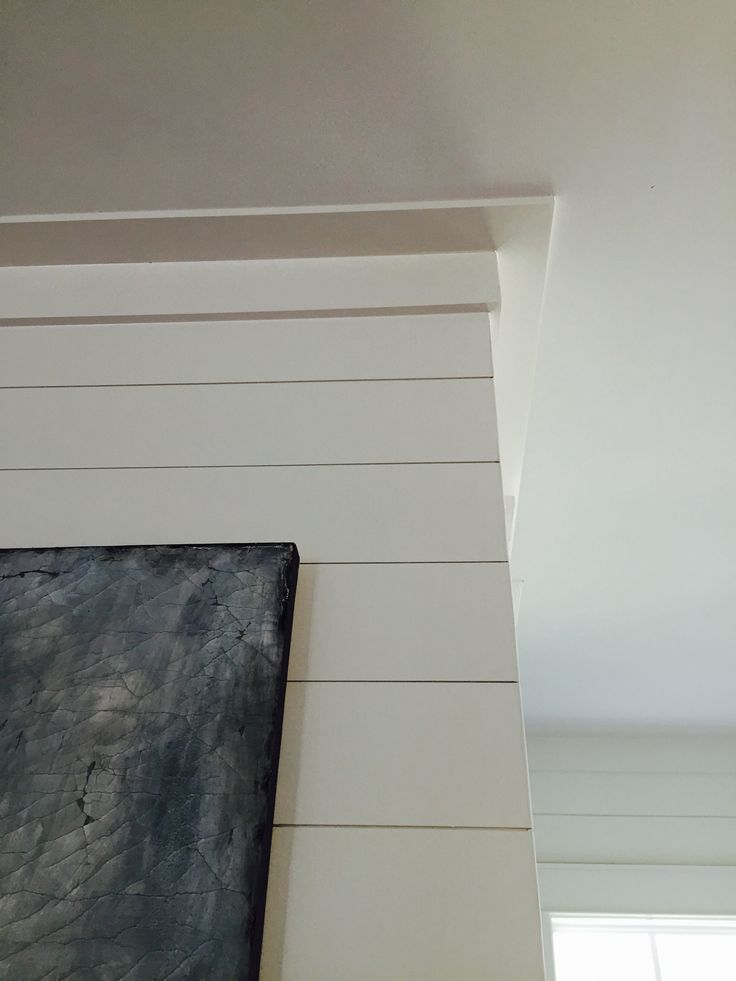 com
com
Picture Rail
6/11
Picture railing, like this one installed by A Beautiful Mess, allows artwork frames to be hung without nails having to be driven directly into the wall. Often combined with crown molding, this type of molding is one or two inches tall and appears seven to nine feet off the floor.
Related: These 9 Forgotten Home Trends Are Suddenly Cool Again
abeautifulmess.com
Advertisement
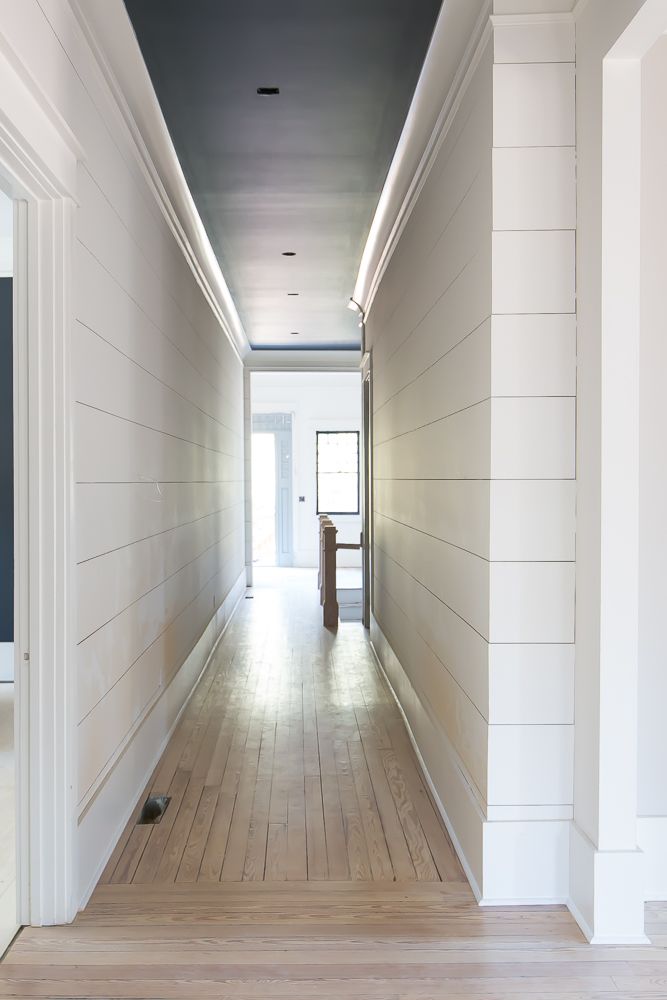
Cove
7/11
Also known as coving, cove molding is plain, concave-shaped trim employed where walls and ceilings meet. It can also be used on stairs, at the meeting of risers and treads. In essence, cove may be considered a less ornate version of crown.
Related: 21 Clever Tricks to Make Your Home Look Bigger and Brighter
istockphoto.com
Dentil
8/11
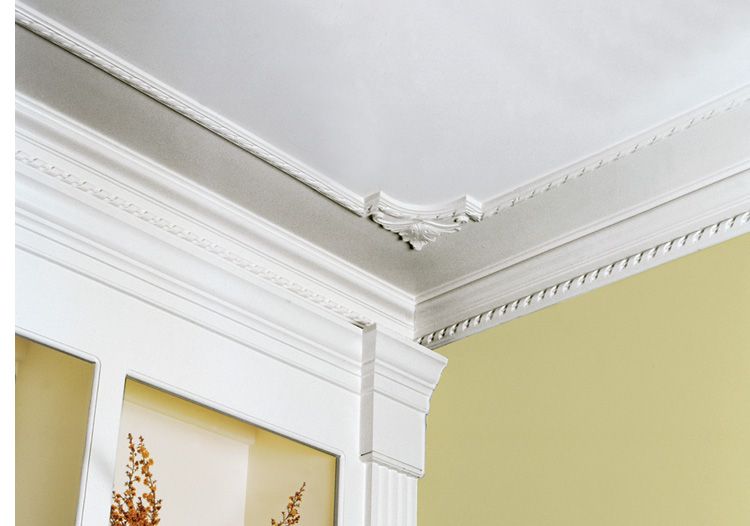
An ornamental detail with a Classical pedigree, dentil molding consists of small, evenly spaced blocks in a repeating pattern.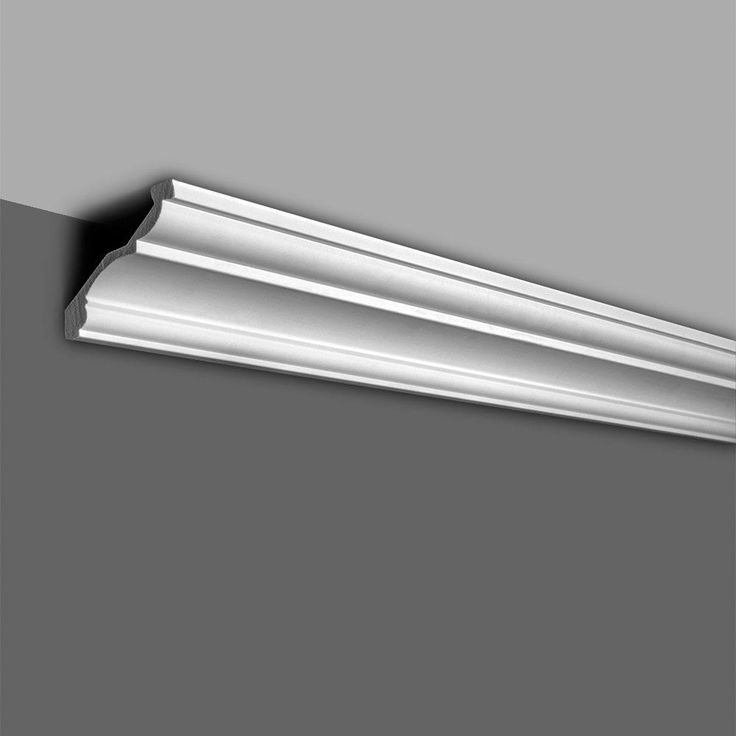 Incorporated into crown molding, dentils are frequently found in historic homes.
Related: 21 Totally Free Ways to Upgrade Your Home
istockphoto.com
Egg-and-Dart
9/11
Mostly seen together with crown or chair railing, egg-and-dart molding includes oval egg shapes (modeled after ancient Greek template ornament) alternating with V-like darts. Available on Home Depot; $18.72.
Related: 20 Best Ways to Spend $20 on Your Home
homedepot.com
Advertisement
Batten
10/11
Batten, also called board-and-batten, is a wall trim piece used to hide the joint between two pieces of paneling.
Related: 14 Easy DIY Living Room Updates Anyone Can Do in a Day
istockphoto.com
Bead, Pearl
11/11
Bead and pearl moldings are two different, though very similar, types of trim.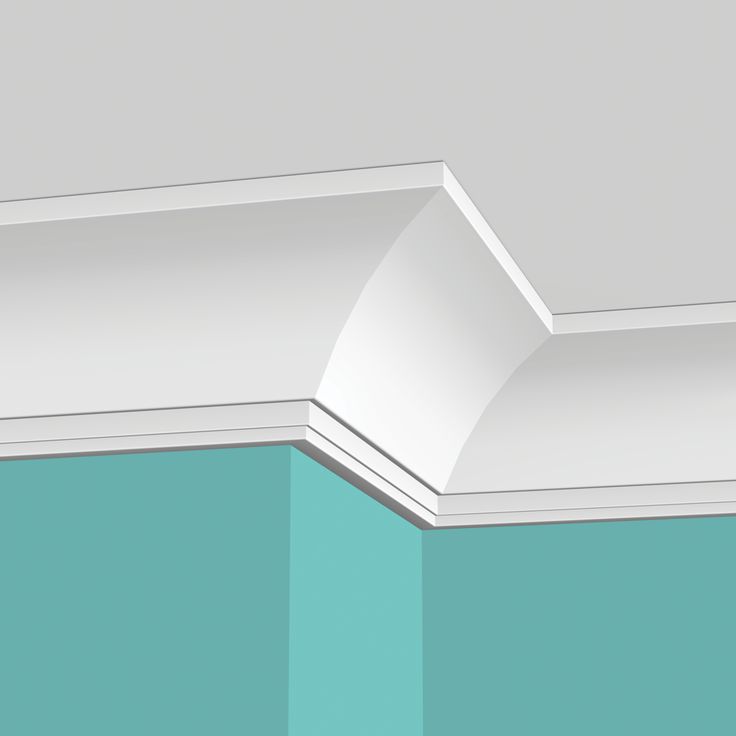 Both feature a row of small, symmetrical spheres. Paired often with other designs—leaves, darts, or spindles—this variety of molding typically accompanies crown or chair railing.
Related: 10 Best Ways to Spend $10 at Target
istockphoto.com
Don't Miss!
If you have the money to hire a handyman for every household woe, go ahead. But if you want to hang on to your cash and exercise some self-sufficiency, check out these clever products that solve a million and one little problems around the house. Go now!
types, polyurethane, gypsum, polystyrene ceiling stucco, ceiling stucco, chandelier stucco decoration, stucco ceiling, gypsum decor
Content:
What kind of ceiling stucco molding is there
From gypsum
From polyurethane
From expanded polystyrene
Types of stucco elements
Independent production of stucco molding from gypsum
Creation of molds on the ceiling
Filling and installation of stucco molding from gypsum
Specifics of mounting polyurethane and polystyrene products on the ceiling
Video
The classic style in the interior has no statute of limitations: it remains very popular, despite the emergence of numerous modern approaches to interior design.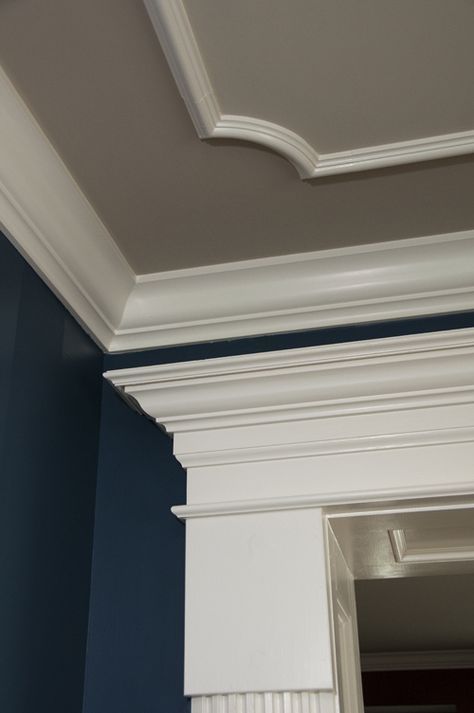 One of the ways to add additional rigor and sophistication to such a finish is to apply stucco molding to the ceiling.
What kind of ceiling moldings are there
Currently, three types of materials are used for the manufacture of ceiling moldings, which is the main criterion for classifying products into the following types:
- Plaster or alabaster.
- Polyurethane.
- Expanded polystyrene (from fine-grained foam).
In the process of choosing the right option, you need to know exactly about the advantages and disadvantages of each of the varieties.
Plaster
Gypsum is a traditional material for the manufacture of stucco ceilings. In the production process of complex elements, special forms are used. Frozen products are fixed on the base of the ceiling. Details of a simple shape can be obtained locally using a template. This procedure is painstaking and requires high professionalism from the performer.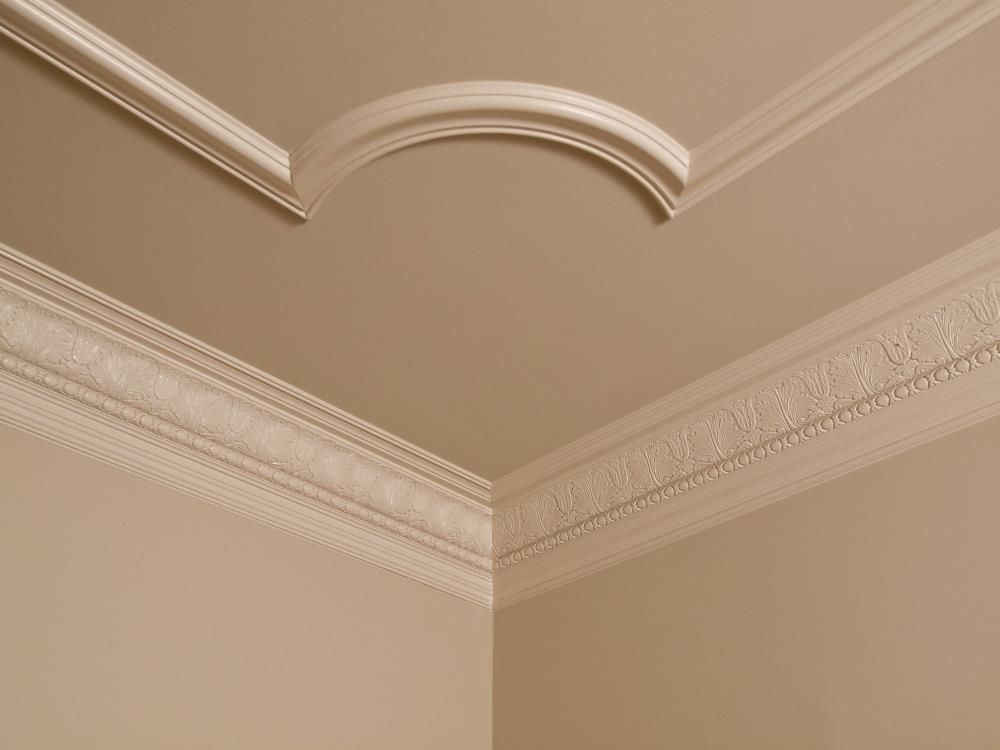 This is what explains the high cost of such finishes.
Strengths of gypsum stucco on the ceiling:
- Environmentally friendly and completely free of toxins.
- Gypsum is a non-combustible material.
- High decorative performance. The use of high-quality matrices makes it possible to impart very interesting tiny patterns to products.
- Possibility to use any type of paint material.
- Gypsum stucco can be made on your own, which will give you the opportunity to realize your own original ideas.
Weak sides:
- The complexity of the production of this type of molding on the ceiling.
- Significant weight of finished instruments. During installation, you have to use special glue or pins.
- Low resistance to high humidity and temperature fluctuations. These factors can cause the gradual destruction of the gypsum stucco finish.
If you have artistic skills and time, this type of finish can be made independently.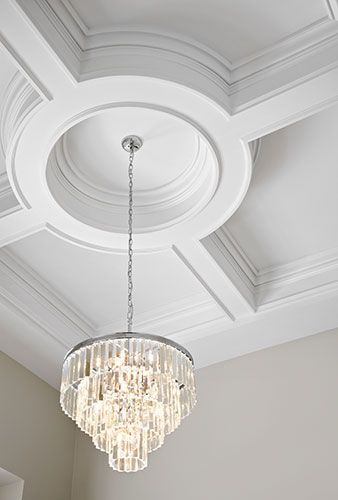 As a result, it becomes possible to significantly save on the payment of the work of the masters. The main thing is to do everything slowly and carefully. During operation, gypsum stucco elements can crumble and crumble. In order to be able to make a replacement for them, it is recommended to store the casting molds.
Polyurethane
To save time, finances and effort, instead of gypsum products, stucco molding is used on the polyurethane ceiling. Points of sale of finishing materials are full of a huge range of ceiling borders and other ceiling decor options from this inexpensive and reliable material.
Advantages of ceiling moldings made of polyurethane:
- Lightweight. This greatly facilitates the installation work.
- Easy to cut. For this, a sharp knife or a hacksaw is usually used.
- Strength, durability and resistance to high moisture.
- The absence of harmful toxins and unpleasant odors in the composition of polyurethane.
- Possibility of decorating with any interior paint.
- Resistant to direct sunlight.
- Anti-static and smooth surface. It does not collect dust and is easy to care for.
Material disadvantages:
- Polyurethane is combustible.
- Impossibility of self-production. We have to be content with the choice that is in the store.
Stucco molding on the ceiling under the chandelier made of polyurethane and gypsum looks very similar in appearance. The smooth surface of polyurethane specimens allows them to very realistically mimic products made of fine-grained gypsum. A small mass of decorative elements allows them to be used not only on concrete floors, but also on top of plasterboard suspension systems. A Chinese-made stucco ceiling will cost an order of magnitude cheaper, with lower quality. Experienced craftsmen do not recommend using it for interior decoration.
Styrofoam
Stucco molding on the foam ceiling is the most budgetary and popular option.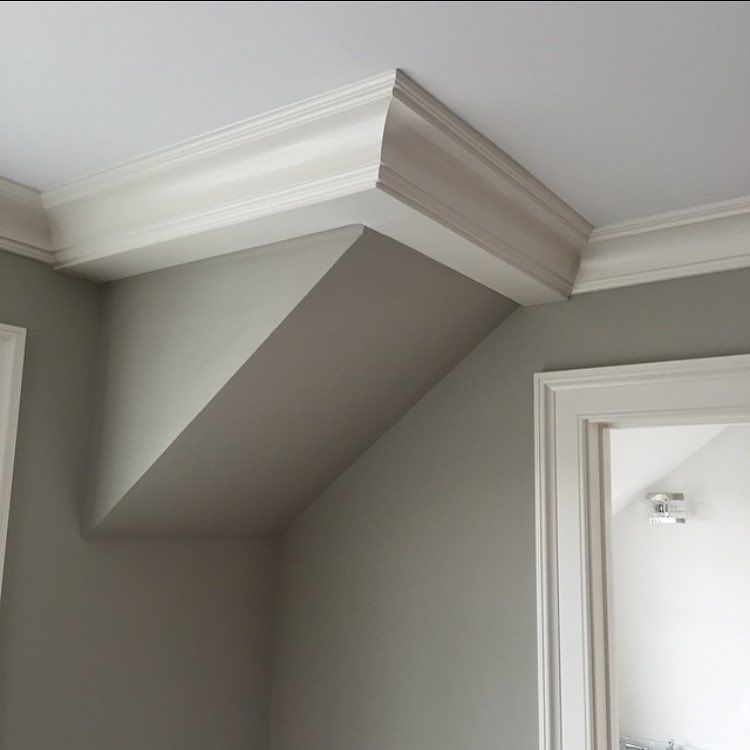 Expanded polystyrene is the same foam, but with a finer foam structure. The familiar ceiling tiles and baguettes are made from this material. Products of this type are characterized by a small mass, which makes it possible to use them on any ceiling surface (including stretch fabrics).
Among the advantages of polystyrene stucco elements are low cost, ease of gluing and resistance to moisture. There are also disadvantages - poor resistance to mechanical stress, the need for scrupulousness when wiping the surface, looseness of the structure (this contributes to the accumulation of dust). Polystyrene is classified as a combustible material, during which toxic gases are released. The choice of decor of this type is rather poor.
Polystyrene stucco is an indispensable attribute of budget repairs. If everything is done correctly and tastefully pick up decorative elements - this will significantly transform the ceiling surface. She will become an order of magnitude more elegant and beautiful.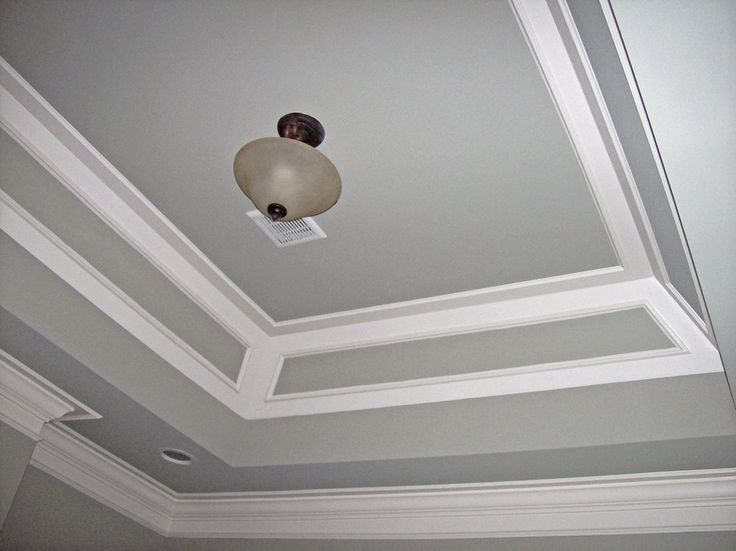 The plasterboard ceiling with stucco molding of this type looks very nice. To make polystyrene stucco more natural, it is practiced to paint its surface with water-based compounds. As for nitro enamels, it is forbidden to finish such products with their help (they contribute to the rapid destruction of polystyrene).
Types of stucco elements
Stucco is understood as a large group of decorative relief elements that are used in the decoration of ceilings. For their design, geometric patterns or floral ornaments, various convex images, etc. can be used.
To create a classic style, the following elements of stucco molding on the ceiling in an apartment are usually used:
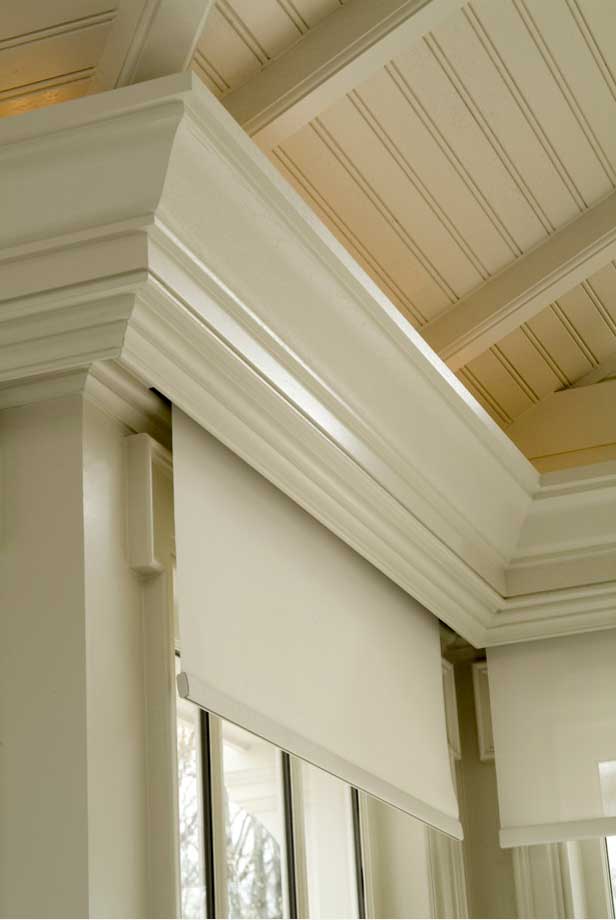
- Cornices . The most popular type of stucco decoration, with the help of which they make out the transition between the ceiling and wall surfaces. Cornices are smooth and embossed: an ornament is used to decorate the latter. Stucco on the ceiling and walls is laid in such a way that there are no cracks and gaps.
 Eaves with hidden lighting deserve special attention. For their manufacture, a ready-made polyurethane ceiling decor is usually used, when laid on the wall, a gap of 50-60 mm is left to the ceiling. Inside the bar there is a niche for fixing the LED strip. This type of luminaire provides beautiful illumination and a feeling of airiness of the ceiling.
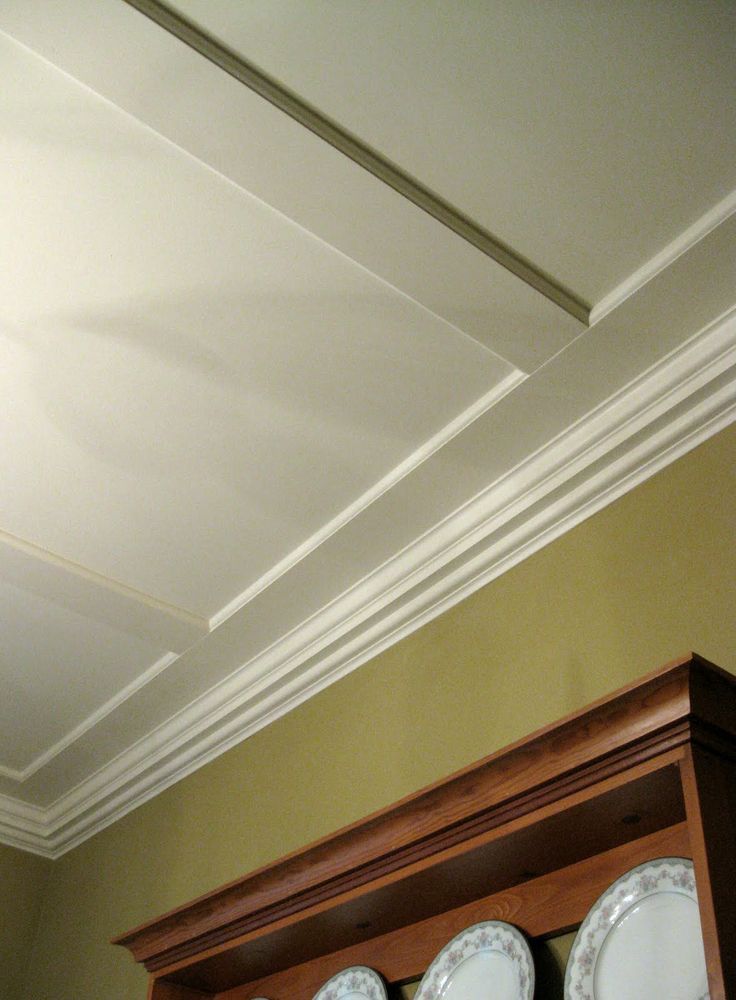
 - Moldings . Decorative elements of this type are also smooth or ornamented: this makes it possible to use them instead of cornices. As a result, the upper part of the wall acquires the necessary completeness. In addition, the molding perfectly masks individual ceiling irregularities, well emphasizing beams, niches or different levels.
- Corners . They make it possible to complement the cornices and moldings, giving them additional decorative characteristics. Corners are usually included with the cornice, repeating their pattern. This gives some scope for the installer to combine smooth cornices and corners with ornamentation, and vice versa.
- Consoles . Supporting products installed on ledges, columns, fireplaces and decorative panels. When finishing the ceiling, the consoles are usually combined with a cornice: this makes it possible to separate the ceiling base. This creates visual support for the ceiling beams.
- Sockets . Round or oval parts, smooth or ornamented. Rosettes are usually designed to hang a lamp or chandelier. An important point: the diameter of the outlet must be inferior to the dimensions of the lighting fixture, otherwise it will draw too much attention to it.
- Domes . Decorative hemispheres forming domed recesses on the ceiling. This creates the effect of space and height, changing the visual perception of the room in combination with other elements. The central area of the dome is sometimes decorated with a lamp: focusing the light allows you to increase the degree of illumination. Domed stucco ceiling decor is commonly used on suspended systems.
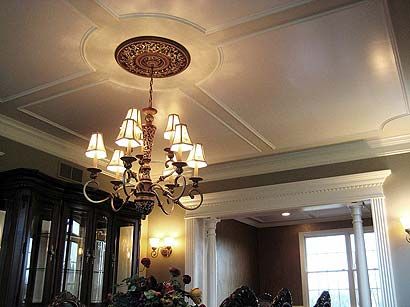
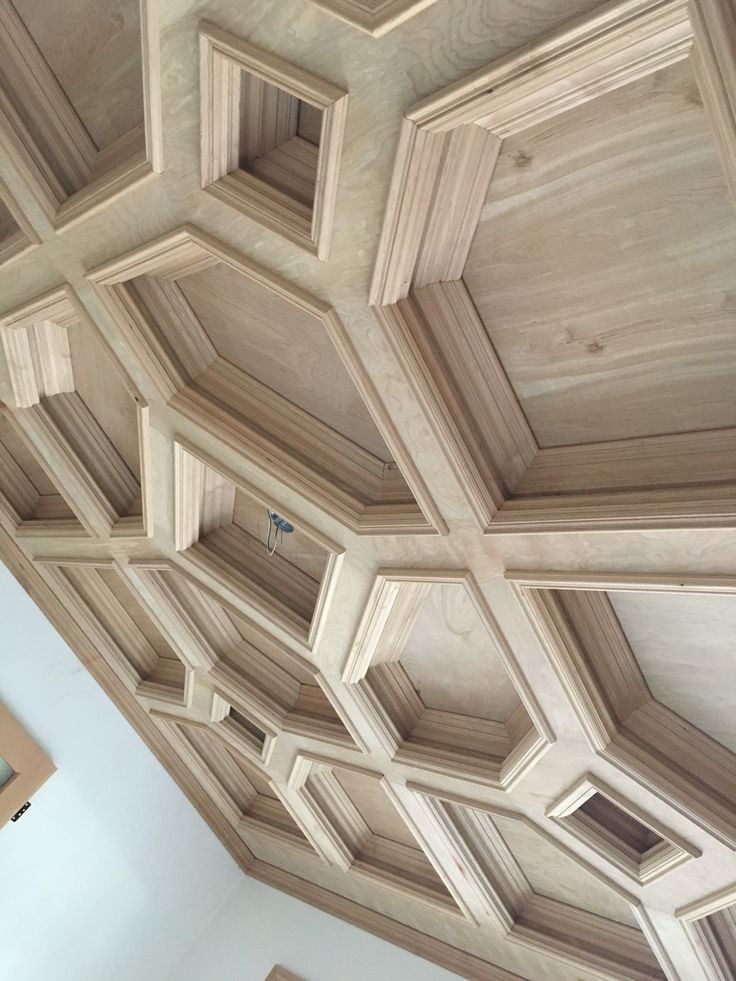
- Caissons . We are talking about analogues of a rectangular or square dome: they make it possible to equip a convenient niche on the ceiling. Used for zoning the room, giving the ceiling volume and depth. Lamps are often installed in the central zone of a niche.
- Ornaments . Decorative strips that can well emphasize and complement the ceiling with stucco in the apartment. Sometimes they echo the floral ornament of the cornice or rosette, or they have an original design. Ornamental details successfully highlight individual zones on the ceiling: they can be used to create a complex ensemble.
- Bas-reliefs and panels . In this case, the stucco composition is arranged on a separate section of the ceiling, basically embodying a complete idea or plot. It can also act as part of a more complex pattern. Using a panel on the ceiling, it is necessary to choose its dimensions as accurately as possible. It is very important to achieve its expressiveness, avoiding separation of attention from other elements.
It is quite difficult to create a single composition from individual elements: only experienced designers can do such a task. Before starting work, it is recommended to draw up a sketch of the placement of the stucco decoration on the ceiling in advance. For a design sample, you can take photos from the relevant catalogs.
Making your own plaster moldings
Making gypsum stucco moldings on the ceiling with your own hands refers to rather laborious procedures, consisting of preparatory measures (making molds), casting parts, installing them on the ceiling and finishing. The hardest part is making molds. To simplify the task, ready-made polyurethane or Teflon-coated metal matrices are sometimes used. However, the range of these products on sale is rather scarce, which imposes restrictions on the creation of original interiors. Self-production takes time and accuracy.
Creation of molds on the ceiling
To make a form, you need a sample to copy.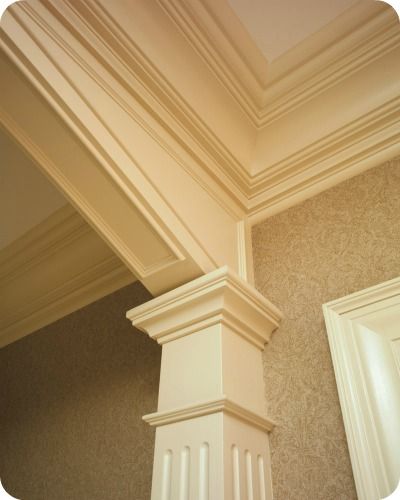 The element of the desired shape is best suited. For its manufacture, you can use plasticine or polymer clay. Alternatively, ready-made polyurethane or polystyrene matrices are commercially available. By purchasing one sample, you can use it as a guide for making the required number of plaster elements. This is the best option when there is a need for a large amount of complex stucco.
Before starting work, you need to stock up on the following materials and tools:
- Silicone and silicone grease to ensure casting accuracy.
- Gauze (as an option - fine mesh). It is used for reinforcement.
- Building plaster, cement and PVA glue. These components give the products the necessary rigidity.
- Wax lubricant. It is sold in the form of an aerosol and is used for mold processing, which makes it easy to remove frozen products.
- Narrow natural brush and spatula 30 mm wide.
- Silicone balloon gun and thick polyethylene film.
The mold making process consists of the following steps:
- Preparing the element to be copied . The copied sample is placed on a flat base, on top of which dense polyethylene is laid. If we are talking about a long product (cornice or molding), then the table may not be enough. In this case, a drywall sheet can be used as a base. To obtain an even shape, the surface is leveled horizontally using a level. The pattern to be copied is placed with the embossed side up. To process the element, a release agent is used.
- Preparation of silicone compound . This happens by carefully mixing acrylic silicone and silicone oil: this will make it possible to increase the plasticity of the substance. This moment is very important if it is supposed to cast stucco molding with a large number of small relief details. Simple smooth products are allowed to be lubricated with pure silicone.
- Spreading . To apply silicone grease, a thin brush is used, which makes it possible to thoroughly coat all small parts and fill in the recesses.
 Using a brush, it is convenient to get rid of air bubbles: if this is not done, after drying, ugly shells will appear on the surface of the products. Silicone must be smeared with all the walls, including the side and end. The thickness of the first layer is 5-10 mm: when applying, it is important to monitor uniformity.
 - Reinforcement . Two-layer reinforcement with gauze or soft mesh will help to give the silicone mold the desired strength. When cutting the material, it is necessary to leave a margin, achieving coverage of the entire area (including the sides). Before laying each layer, gauze is laid. It is not necessary to wait for the layers to dry.
- Edge reinforcement . When the reinforced silicone coating seizes, the weak areas are strengthened - the side edges and protrusions. To do this, use pure silicone, sold in cans. To level the silicone, use a finger dipped in water or a wet rubber spatula. It is necessary to ensure that the silicone grease covers all the sides and relief areas.
- Formwork . It is used for wrapping a silicone mold: a plaster “bed” will be laid in it in the future. For the manufacture of formwork, any improvised materials are suitable: wood, plastic, rubber, etc. The main condition is good rigidity. To smooth the roughness, use any smooth material (the same polyethylene). To lubricate the docking areas between the formwork and the silicone mold, the remaining silicone will come in handy: this will make it possible to protect yourself from the protrusion of the gypsum mortar.
- Plastering . In the process of preparing a gypsum mortar, ¼ of the cement is introduced into its composition: this makes the mixture stronger. To dilute the dry mixture, water with a small content of PVA glue is used: the finished solution is quite elastic. The solution must be stirred until it begins to set. Then it is placed inside the formwork. A brush is useful for smearing uneven areas. Using a spatula, you need to make neat holes in the thickness of the solution to remove accumulated air.
 It is important to avoid damage to the silicone layer.
 - Alignment . To level the last gypsum layer, a spatula is used: it must be held strictly horizontally. When the initial setting occurs, you need to check the horizontal level. In some cases, water begins to come out of the solution, which must be removed to ensure quick and uniform drying. To do this, the edge of the formwork is equipped with a drain hole.
- Drying and extracting . It usually takes 12-24 hours for a mold to dry, the size of the mold will affect the exact time. It is desirable that the room is maintained at room temperature and normal humidity. It is forbidden to use hot blowing of gypsum because of the risk of cracking. After drying, the formwork is dismantled with the removal of the remains of the gypsum mixture.
- Mold drying . The finished silicone mold must be carefully removed from the plaster "bed". If there are surpluses, they are cut with a knife. The elements must be dried separately for about a day until the moisture is completely removed and strength is cured.
 Having inserted the dry form into the “bed”, they proceed to the casting of decorative stucco molding for the ceiling.
Gypsum "bed" is made only in those cases when it comes to mass production of heavy elements. Small parts can be made with reinforced silicone.
Casting and installation of plaster moldings
Operating procedure:
- Applying silicone molds . Finished molds need to be cleaned of dirt. Next, the inner surface is smeared with a layer of release agent. It is important to ensure that there are no gaps (the substance should not accumulate in the recesses). Prepared forms are placed in one row on a horizontal base.
- Preparing and pouring mixture . Stucco molding is recommended to be made from gypsum of durable grades G4-G7, which are characterized by fast setting. For high-quality mixing, a construction mixer or a drill with a nozzle is usually used. First, an aqueous solution of PVA is prepared: it is gradually added to dry gypsum during kneading.
 The finished solution is poured into molds, using a soft brush for punching, and a spatula for leveling.
 - Remove finished products . The time for complete drying of the gypsum mortar is several hours. The dried elements must be removed from the mold, for which they use gentle tapping of the bottom. Having a good lubricant makes this task easier. The removed parts are laid out on a flat, dry base.
- Surface cleaning of parts . All flaws found on the surface of the blanks must be removed with a fine-grained skin. Large recesses are smeared with gypsum mortar. The back of the blanks must be equipped with a notch for better grip during installation. The surface is cleaned of gypsum dust and coated with a primer. The back part is treated with a conventional primer, and the outer part is treated with a mixture of primer and paint in a 1: 1 ratio. After drying, the front surface is painted with an interior composition.
- Ceiling decoration with plaster moldings .
For mounting very heavy products, several self-tapping screws are used, which are screwed into pre-made holes. Before this, markings are made on the basis of the ceiling for the installation of dowels. When screwing the caps of the self-tapping screws, you need to sink the cap into the stucco molding: this will make it possible to seal the attachment points with gypsum mortar and paint.
Specificity of installation of polyurethane and polystyrene products on the ceiling
Although the characteristics of these materials are different, a similar technology is used to install them. To cut stucco moldings for a polyurethane ceiling, a hacksaw is used. Polystyrene can be cut with a sharp knife. The following compositions are suitable as glue: liquid nails, PVA or polymer glue. When preparing the base for decoration on a polyurethane ceiling, they act in the same way as in the case of gypsum products. Painting and finishing works are carried out after the installation of products.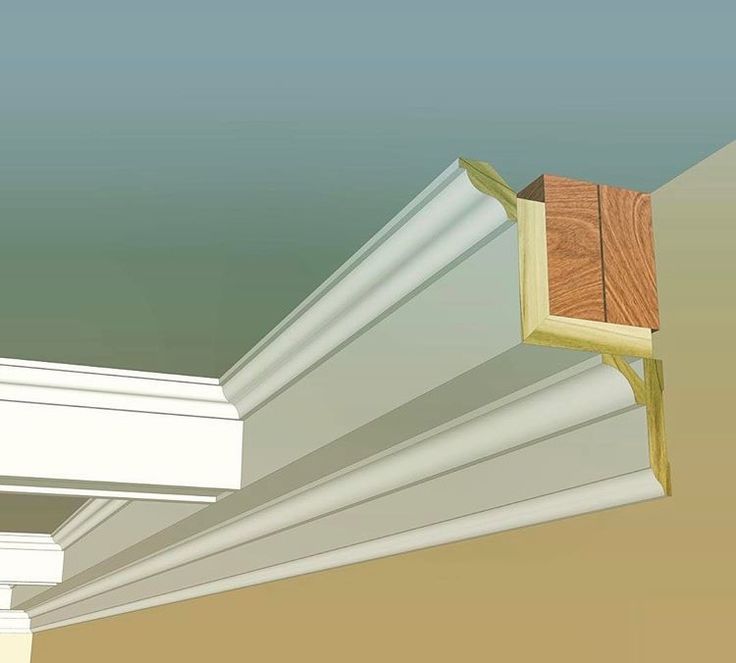 Polystyrene elements are often attached at the very end of the finishing work.
The most difficult thing when installing polyurethane stucco on the ceiling with your own hands is with joining the cornices in the corners: the slightest mistake causes a warp or the formation of an ugly gap. For ease of installation, it is recommended to mark the surface of the base. Having applied a layer of glue to the inner surface of the product, it is pressed tightly against the ceiling. Massive parts are additionally fixed with self-tapping screws. When the glue sets, the finish is primed and covered with a layer of paint of the desired color. To achieve a visual resemblance to gypsum decor, you can apply putty.
Ceiling mouldings
The stucco decoration technique has become more and more diverse and interesting over the years, while being quite accessible to consumers.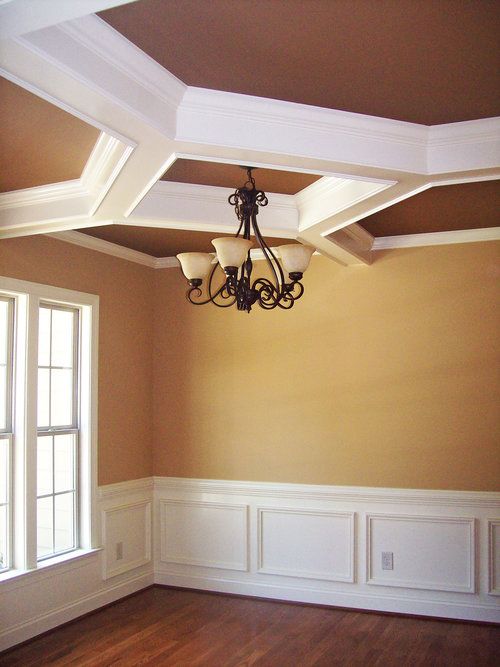 It is used both in decorating lush decorations and in modern interiors. For many centuries, relief decor has been combined with painting, making it possible to recreate original compositions from individual elements.
Today it is an opportunity to implement large-scale projects and technically complex compositions. An important advantage: the ability to eliminate excessive load on the basic structures. As an example, we can consider a demanded material - polyurethane, stylized as plaster molding. This is the best way to use it in a sophisticated finish and use it as a ceiling moulding.
Stucco moldings
It is important to pay attention to the choice of base. For this purpose, the following types of materials are used:
- plaster/alabaster;
- polyurethane;
- expanded polystyrene (fine-grained foam).
After evaluating the advantages and disadvantages of each of the presented types, it will be easy to choose the best option.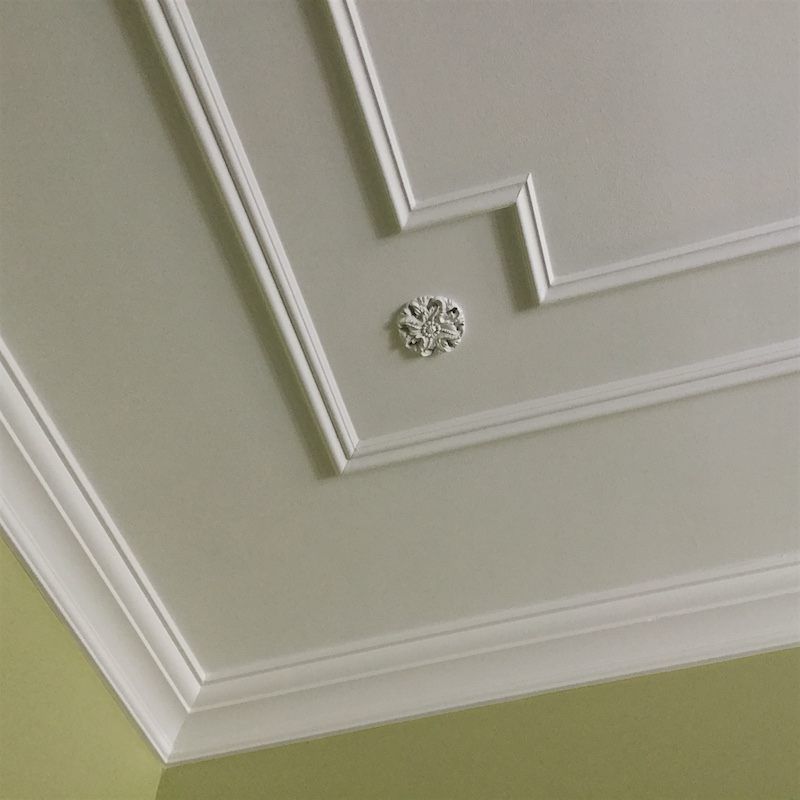
Gypsum
The use of this material is the embodiment of a long tradition. To create an interesting interior solution requires the professionalism of the master and painstaking work. The preparation of decorative elements begins with pouring into molds, and then, after solidification, they are attached to the surface. Professionalism is required from the performers, which explains the high cost of this solution.
Advantages:
- realization of original ideas;
- the possibility of using a wide range of paint and varnish coatings;
- non-combustible material;
- ecological cleanliness.
Of the minuses, labor intensity, the severity of finished elements are noted. The use of this version of the ceiling finish is recommended in dry rooms with a small temperature difference.
Polyurethane
This material is in demand due to the large assortment of decorative elements and the ease of installation.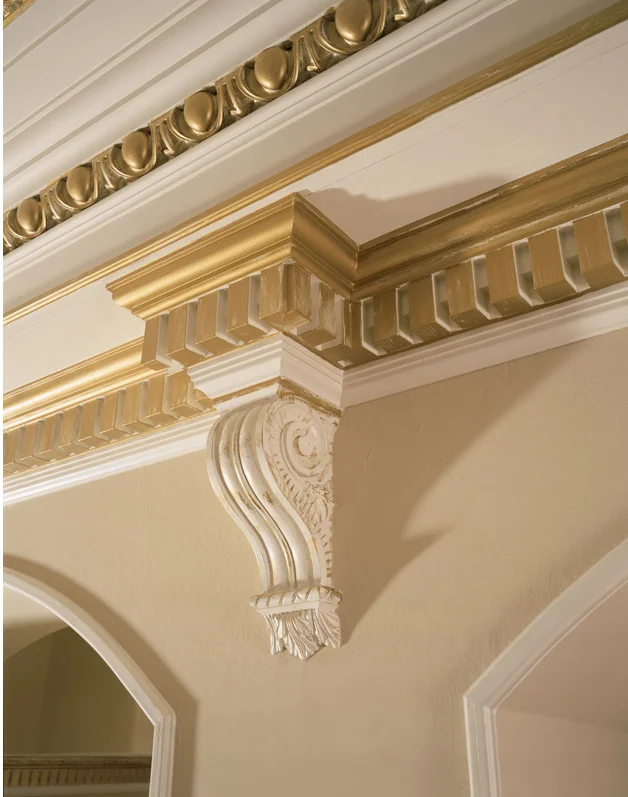 Financially profitable polyurethane is able to completely replace gypsum.
Advantages:
- high resistance to moisture and sunlight;
- no strong odors;
- does not vaporize harmful compounds;
- ease of cutting;
- light weight;
- antistatic.
Polyurethane cannot be made independently. Otherwise, this is the most versatile option for making the original decor.
Styrofoam
Polystyrene ceiling moldings are the most valuable attribute of an inexpensive repair. We are talking about the foam that is familiar to us, but with a fine marshmallow structure. Ceiling tiles and baguettes are created from this material. In addition to its low cost, expanded polystyrene is attractive due to its small mass and the possibility of being used on any surface of the ceiling, as is the case with stretch fabrics.
Of the shortcomings in the presence of flammability and a meager assortment of decor.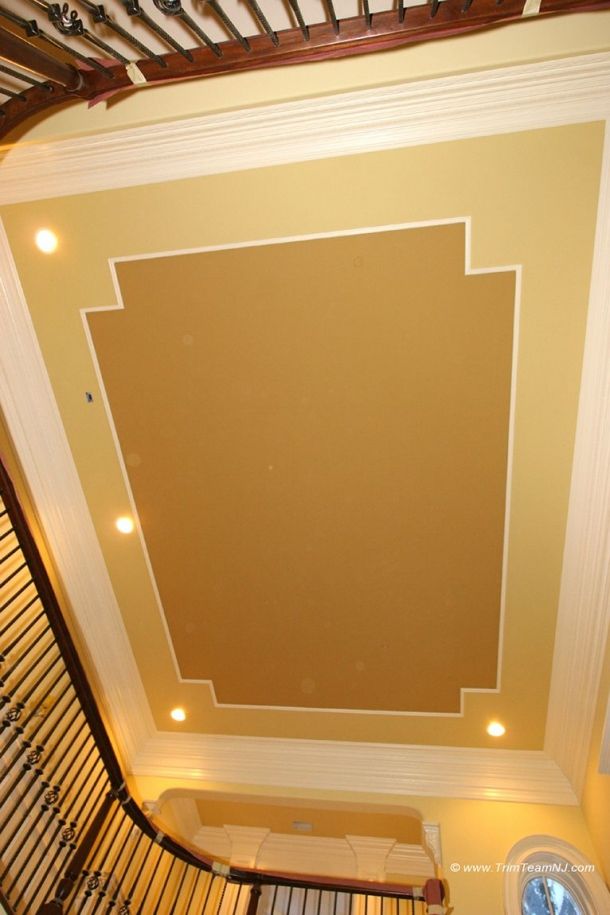 To ensure naturalness of polystyrene stucco, painting with water-based compositions is often used.
Stucco elements
When finishing the ceilings, craftsmen use an extensive group of decorative relief elements. For example, geometric patterns, convex images, floral ornaments, etc. As a rule, these are:
- moldings;
- pads, panels;
- twisted patterns;
- asymmetrical and symmetrical lines;
- straight rod, closed in a specific figure;
- sockets for lighting devices;
- domes and caissons;
- panels, bas-reliefs;
- figurines of animals, people, etc.
If the goal is to create a holistic composition of different elements, you should contact an experienced designer. He will not only draw up a sketch of the position of the stucco decoration in advance, but will additionally collect an approximate “picture” from specialized catalogs.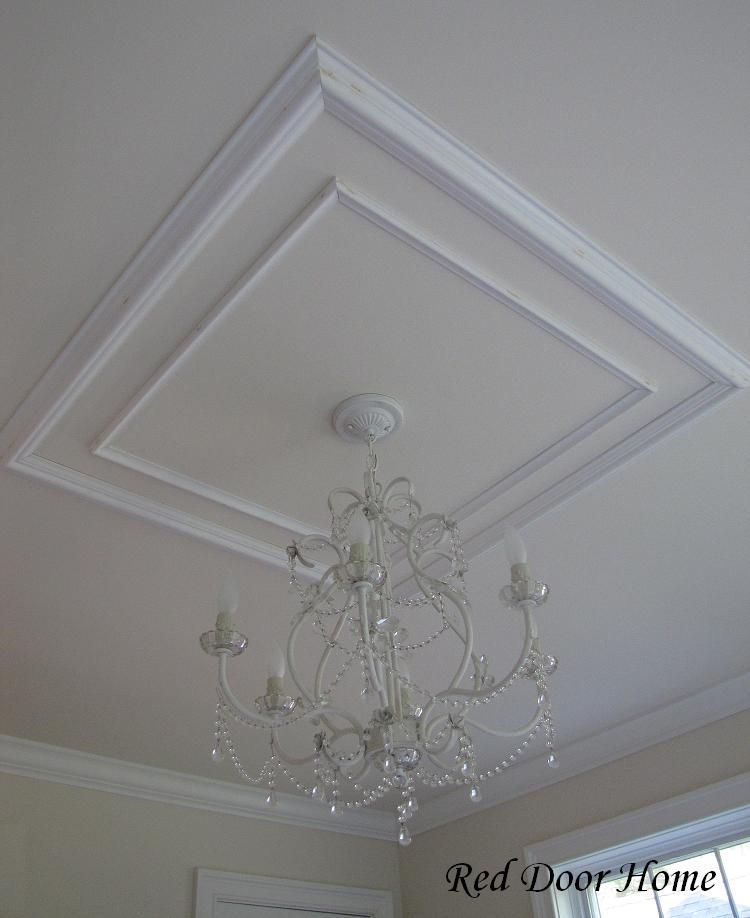
Display of design styles in ceiling mouldings
The ceiling can always be modified: make it higher or lower, visually expand or narrow. Stucco is deservedly considered an effective tool for achieving most of the goals for creating various styles. Baroque, Empire, Renaissance, neoclassical, art deco, modern - timeless classics that have found popularity in our time. Ordinary gypsum is able to appear in the form of a composition that will not leave indifferent any guest.
Take, for example, the pastel version: a colorful accent is created on the source using a shade, or a white color is left that harmoniously fits into the interior.
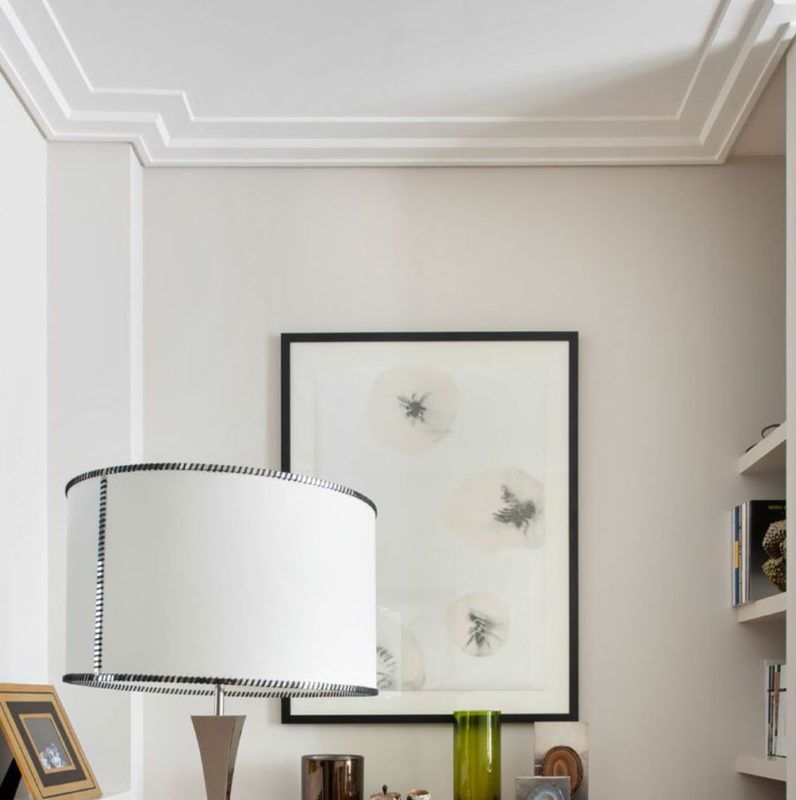
Stucco placement: modern ideas
The geometry of space is directly dependent on the location of the ceiling moldings. It can be the center, perimeter, corners and the entire ceiling. The center parts of a non-standard configuration under a chandelier or complex floral ornaments will look advantageous. Additional ideas:
- combination with current lighting types;
- stucco with gilding;
- artificial wear, aging, roughness;
- art painting and painting materials;
- geometric patterns;
- stucco flowers.
Learn more