Care for basil plant indoor
How to Grow Basil Indoors
Reviewed by
Kathleen Miller
Reviewed by Kathleen Miller
Kathleen Miller is a highly-regarded Master Gardener and Horticulturist who shares her knowledge of sustainable living, organic gardening, farming, and landscape design. She founded Gaia's Farm and Gardens, a working sustainable permaculture farm, and writes for Gaia Grows, a local newspaper column. She has over 30 years of experience in gardening and sustainable farming.
Learn more about The Spruce's Review Board
The Spruce / Letícia Almeida
In This Article
-
Growing Indoors
-
Care
-
Container
-
Soil
-
Repotting
-
Moving Outdoors
-
Frequently Asked Questions
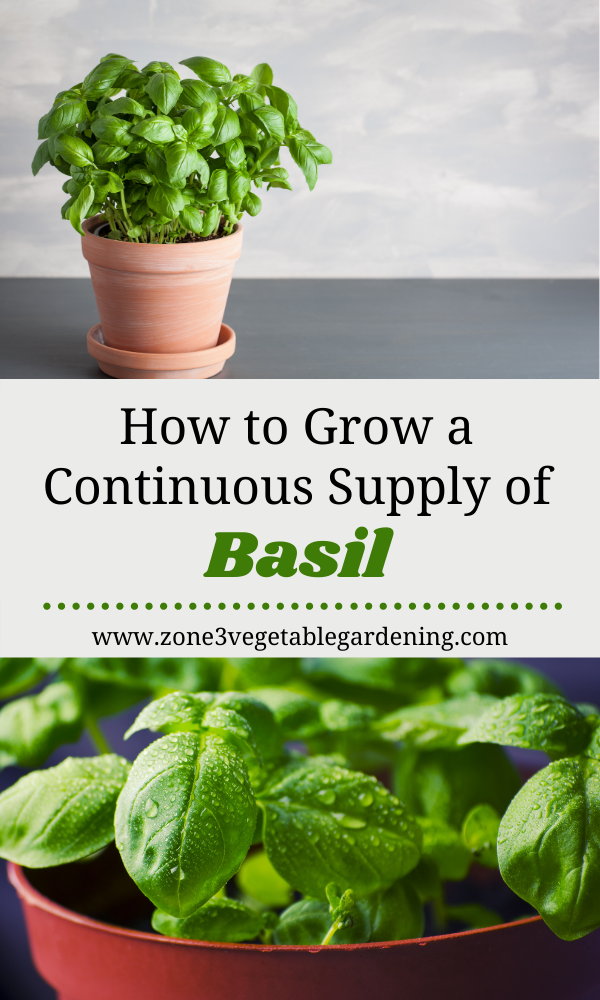
Basil is one of the easiest herbs to grow indoors, and its delicious flavor and culinary popularity make it a must-have for gardeners and cooks alike. With the proper conditions, basil grown indoors can be just as successful (if not more so) than plants that are grown outdoors. Best planted in early spring outdoors or year-round indoors, basil will grow quickly, establishing in just three to four weeks. The plant features small, shiny green leaves that grow in bunches and possess a very distinct aroma.
| Botanical Name | Ocimum basilicum |
| Common Name | Basil, sweet basil |
| Plant Type | Annual |
Can You Grow Basil Indoors?
As with many other herbs, basil is a true sun-lover—give it bright light each day, and it will thrive. Alternatively, basil does exceptionally well under grow lights, so you have the opportunity to increase your harvest and grow enough basil to keep your kitchen stocked throughout the year. Basil requires a pot just big enough for the plant, so starter plants can fit quite well in even the smallest apartment space.
How to Grow Basil Indoors
Basil is a uniquely rewarding plant to grow—it's relatively pest and disease-free and is delicious in both fragrance and taste. Basil's taste will change throughout its life cycle, becoming stronger as the plant flowers—basil that has flowered can still be eaten, but it may be a bit bitter. The herb responds well to pruning and topping, so feel free to use leaves as soon as the plant is established and has branched out.
Sunlight
Whether being grown indoors or outdoors, basil plants need ample light—at least six hours of full sun daily.
Artificial Light
If you're using fluorescent bulbs, keep your basil under them for 12 hours a day, with the lights about 2 to 4 inches away from the top of the plants. Be careful not to let the leaves touch the bulbs to prevent burning.
Temperature and Humidity
Keep your basil somewhere in your home that boasts an average temperature of 70 degrees Fahrenheit or higher.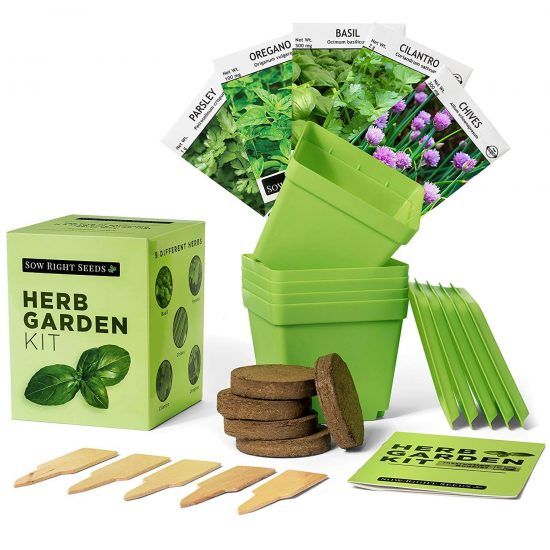 Avoid putting the plant anywhere it may be subjected to a harsh or cold breeze, like in front of an open window in the winter or near an air conditioning unit. Basil plants also like a fair bit of humidity, so mist your plant occasionally, especially if your home is particularly dry. If you find you need an added bit of moisture, you can place your basil container on a bed of wet river rocks to increase the ambient humidity around the herb.
Watering
For best results, aim to keep your basil plants regularly moist. Basil thrives best when it receives about 1 inch of water a week, but plants housed in containers often need a bit more than that. Water your plant once the top layer of soil has dried out, or when the plant shows the first signs of wilting (though it's best to not wait for that as a signal).
Fertilizer
If you've previously amended your soil with organic compost, there's a good chance that your basil plants won't need additional nutrients.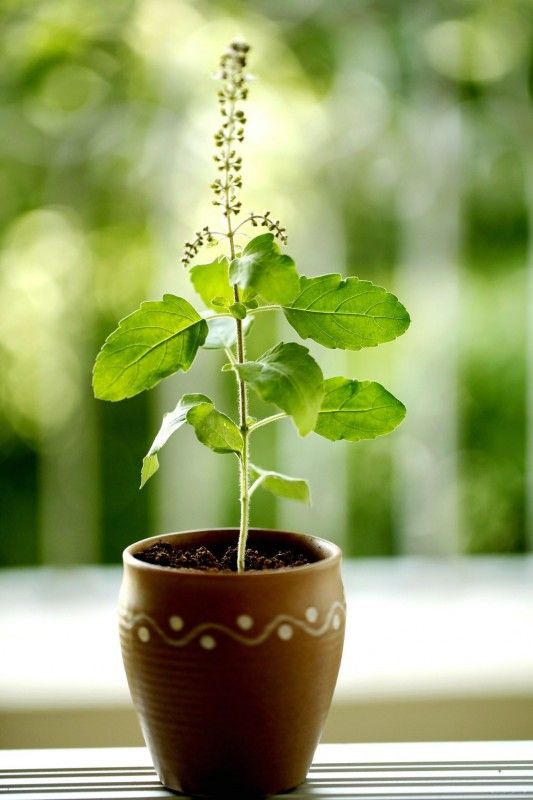 However, if you notice your plants aren't experiencing much growth, you can feed your basil plant once a month using a weak liquid fertilizer.
Pruning and Maintenance
Basil is a hardy plant that needs little maintenance. Well-drained soil, good air circulation, occasional watering, and plenty of sunlight are enough to keep a basil plant in good shape. Harvesting is effectively pruning the plant, as the leaves should be taken from the top down. Cut off individual leaves from smaller plants, or snip stems a few inches down for larger ones.
Container and Size
To avoid potential fungal growth on the plant, basil needs a container that allows for good airflow and excellent drainage. To this end, a fabric pot filled with high-quality potting soil can help basil thrive.
Potting Soil and Drainage
Basil plants prefer a soil mixture that is moist but well-draining. For best results, amend your potting soil with a bit of organic compost before planting your basil indoors.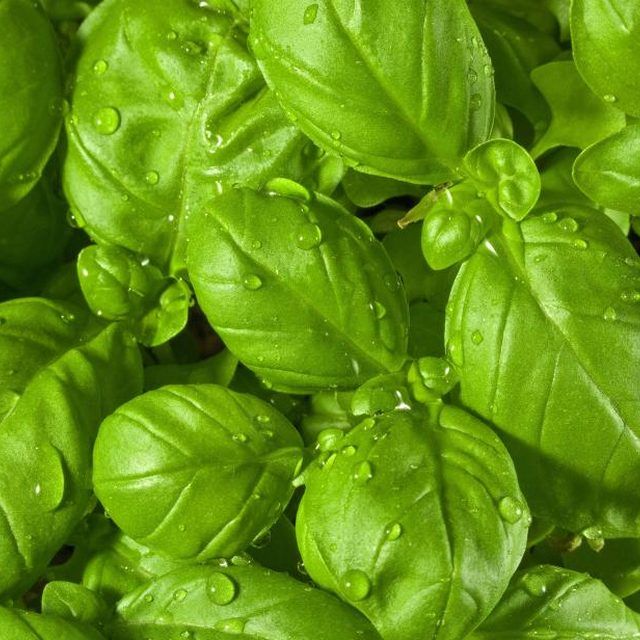 Beyond that, make sure to choose a pot for your plant that boasts ample drainage holes at its base so the soil doesn't get soggy or waterlogged.
Potting and Repotting Basil
Most people eat their basil before they can repot it. If you're growing from seed, step up seedlings from a seed starting tray after two weeks into a 4-inch pot, which will likely be their final home. Pinch the herb after the newly repotted plant is established to encourage more leaves. Basil responds well to pruning, but don't expect indoor plants to get quite as large as those grown outdoors.
Moving Basil Outdoors for the Summer
Basil doesn't like the cold. Move it outside only after temperatures are consistently about 50 degrees Fahrenheit. As winter approaches, bring basil inside before the first frost.
Watch Now: How to Grow Basil Indoors
Watch Now: 4 Simple Ways to Preserve Basil
The Ultimate Guide to Growing, Caring for & Harvesting Basil Plants
by Chris Lambton
A popular herb in both the kitchen and the garden, basil is one of the most well-known herbs grown in America. Technically known as Ocimum basilicum, basil can be found growing indoors and outdoors for use in a wide variety of dishes. One of the first herbs I plant in the spring, basil is easy to grow and perfect for tucking into herb, vegetable and container gardens.
In the article, you'll learn:
- What is Basil?
- Growing Basil from Seed >
- Planting Basil from Seed >
- Transplanting Basil into Your Garden >
- Basil Plant Care Tips >
- How to Harvest Basil >
- Varieties of Basil >
- Common Questions About Basil >
What is Basil?
Basil plants are a popular herb native to southern Asia and the islands of the South Pacific. This member of the mint family can be grown with little fuss. Considered a tender annual, the basil herb plant produces aromatic leaves that are commonly used in Italian and Mediterranean dishes. Basil seeds are also a popular Thai ingredient.
Because basil is an annual, it grows extremely quickly.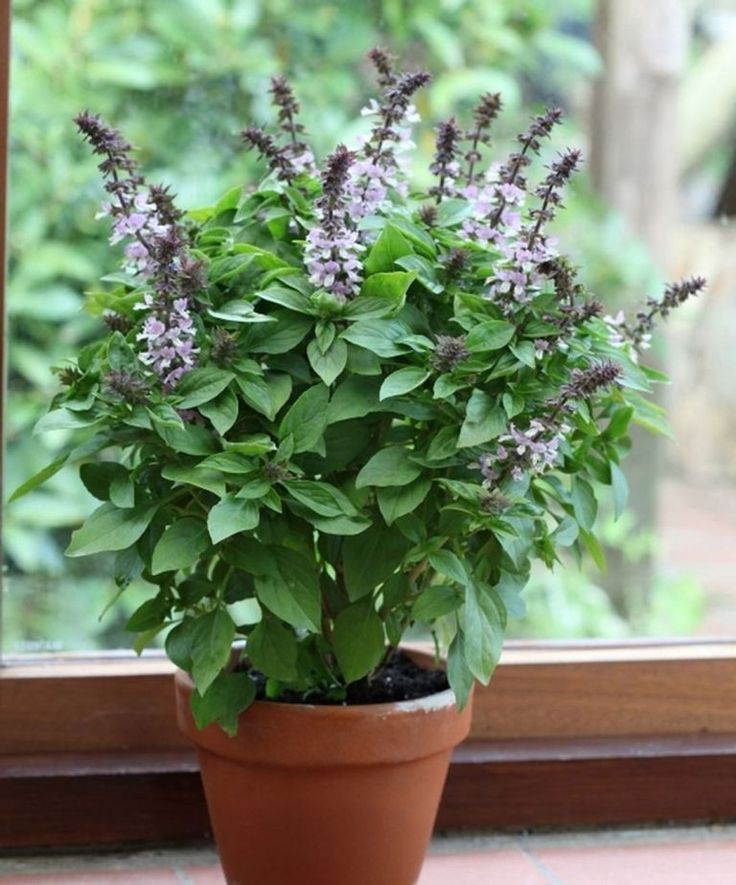 In fact, it can go from seed to harvest in as little as 3 to 4 weeks. This quick and easy-growing herb is an excellent choice for beginner gardeners.
Growing Basil from Seed
Most gardeners get a jump on the growing season and start growing basil in pots indoors from seed. You can grow basil from seeds sown indoors four to eight weeks before the last frost date. Basil is versatile and grows well in a wide variety of conditions. You can count on a decorative pot growing inside to do just as well as when you're growing basil outdoors, as long as your growing conditions are the same.
Step-by-step planting basil from a seed
Although the easiest way to start basil from seed is to direct sow it in your garden once the spring frost threat is over, I still like to start my basil indoors. It's a simple process that lets me get my hands in the dirt when I'm itching for spring but it's not quite yet warm enough to dig outdoors.
Materials Needed:
- Basil seeds
- Starter pots
- Starting container with plastic dome
- Seed starting mix
- Spray mister
Step 1
Prep starter pots
Prepare your starter pots by adding slightly moistened seed starter mix to about ½ to 1 inch below the top of your container. I usually do this by hand, as the pots are quite small.
Step 2
Add basil seeds to each pot
By placing a few seeds in the center of your pot, you can select the strongest plants after germination. Some seeds are duds and won't germinate. Adding a few extras to each pot will increase your odds of success.
Step 3
Cover the seeds
Use a ¼ inch of dry seed starter mix.
Step 4
Water
Gently mist your basil seeds with water. A spray bottle with a fine spray, a specialized garden mister or even a light spray from your faucet will dampen the starter mix and give the seed good contact with the soil.
Step 5
Provide humidity
Keep humidity in by placing your basil in a specialized plastic starting container with a plastic dome. You could also use a shallow pan and a bit of plastic wrap for a quick and inexpensive seed starting solution.
Step 6
Germination—Part 1
Place in a warm location where the temperature is approximately 70 degrees. You won't need to water the basil seeds again until after they emerge. Basil seedlings emerge in 7 to 10 days.
Step 7
Germination—Part 2
Once seedings have emerged, remove the plastic dome or plastic wrap and place the pot in a sunny windowsill. Keep soil moist with frequent misting. Once true leaves appear, select the strongest seedling in each pot as your main basil seedling. You can simply pinch the other seedlings off to remove them without disturbing the roots.
Step 8
Transplant
Use to 3- to 4-inch pots if the plants have 3 pairs of leaves and aren't ready to go outside. You can add a weak fertilizer solution for an added boost of nutrition.
Step 9
Moving outdoors
Move basil seedlings outdoors gradually to harden them off. This allows the basil to adjust to the harsher outdoor conditions. Once the outdoor temps are in the 70s, move the seedlings to a sheltered location outside for a week.
Transplanting Basil into Your Garden
Whether you purchased basil seedlings at your local garden center or started them indoors, once the weather consistently reaches 70 degrees, it's time to move your plants into your herb, vegetable or flower gardens.
Step 1
Choose a location with plenty of sunlight.
Basil thrives in warm temperatures and full morning sun. If you live in an area with scorching midday sun, try to give your basil light shade during the hottest time of day.
Step 2
Soil and placement
Amend the garden soil with plenty of organic matter to create a rich, well-draining foundation for your basil. The bed or garden container should be at least 8 inches deep for strong root growth. Space your basil plants 12 to 16 inches apart to allow plenty of sunlight and airflow.
Step 3
Dig and plant
The graduated marks a Fiskars transplanter make it easy to judge the correct depth for your basil transplant. Dig a 6-inch hold, and then place the basil seedling so that the root ball is level with the soil. Use the transplanter to fill in any gaps. Then, use your hands to press the soil firmly around your transplanted basil.
Step 4
Water
Water your basil and apply 1 to 2 inches of mulch to help conserve moisture and prevent competition from weeds.
Basil Plant Care Tips
Growing basil isn't a difficult task. With just a bit of care, you may even find you have extra basil to dry, freeze or gift to friends. Some of my favorite basil care tips for a bountiful harvest include:
Tip 1
Water regularly
Basil likes to stay moist and requires approximately 1 inch of water every week. Water deeply at least once a week to keep roots growing deep and the soil moist.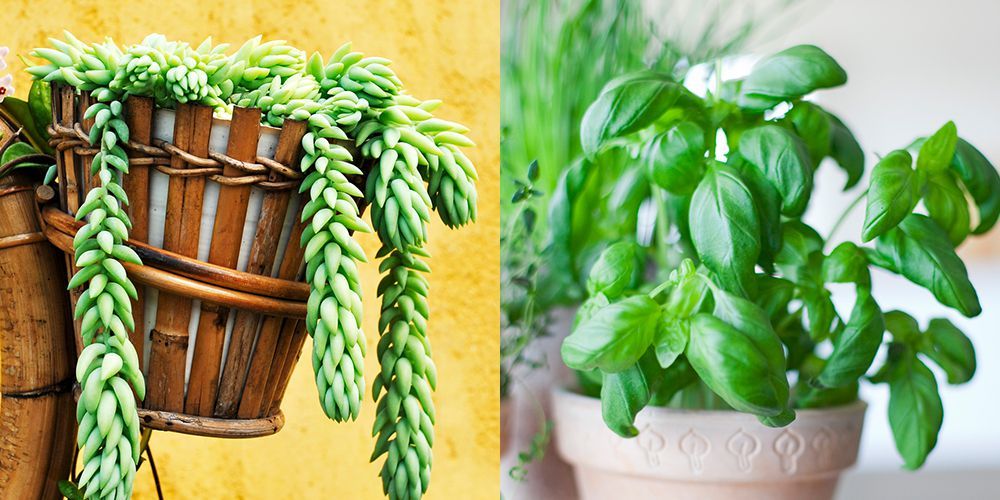 Basil growing in containers will need more frequent watering. Your goal when growing basil in a container is to keep the soil from drying out. The best time of day to water basil is early in the morning.
Tip 2
Fertilize lightly
Basil is a vigorous grower requiring very little to no fertilization. In fact, too much fertilization will kill the basil's flavor. If you choose to add fertilizer, a light application of a liquid fertilizer twice a season is all you really need for basil growing outdoors. If you're planning to grow basil in a pot and want to add fertilizer, your plants will require only a very weak liquid solution every 3 to 4 weeks to compensate for nutrients washed away by frequent watering.
Tip 3
Pinch back leaves
Pinch leaves from the tips of your basil as soon as the plant has two sets of true leaves. This encourages your basil to grow full and bushy.
Tip 4
Companion planting
Using this technique gives basil an excellent advantage. It may be an old gardener's tale, but many say, and I wholeheartedly believe, that planting basil with your tomatoes makes both taste better. Some of my favorite companion plants for basil include oregano, lettuce, tomatoes and peppers.
Tip 5
Avoid bolting
Also known as "going to seed," you can avoid bolting by keeping a close eye on your plant. Basil tends to bolt once summer days are consistently hot. You can prevent this by keeping the soil moist and providing light shade in the hottest hours of the day. You can also pinch off flowering stems 1 inch below the flower to keep the plant from producing seeds and becoming bitter.
How to Harvest Basil
Basil isn't harvested at a specific time – you generally just grab a few leaves as you need them. However, harvesting regularly will keep your basil rounded and less leggy. It will also help keep your plant from going to seed.
Harvest basil regularly. Even if you don't need it, keep harvesting consistently throughout the growing season. Aim for removing 1/3 of the leaves each month to encourage new growth. I add basil to many dishes during the summer, but I also find it freezes well in olive oil for use during the winter.
Snip the stem just above the point where two large leaves meet. I keep a pair of Fiskars snips tucked in my garden apron to create clean and tidy cuts whenever I'm harvesting basil. Make sure to enjoy your harvest with a fresh recipe of your choice!
Varieties of Basil
There are so many varieties of basil available, it would be easy to fill your entire herb garden with just basil. Here are a few of my favorites:
Sweet basil
A favorite variety that is the basil sold in most grocery stores. This variety features medium-green leaves with a slightly rounded shape.
Thai sweet basil
Featuring smaller, pointed leaves, Thai basil grows the same as any other variety, but you end up with a bit spicier leaf that keeps its flavor well for use in stir fry. The purple flowers are beautiful and edible.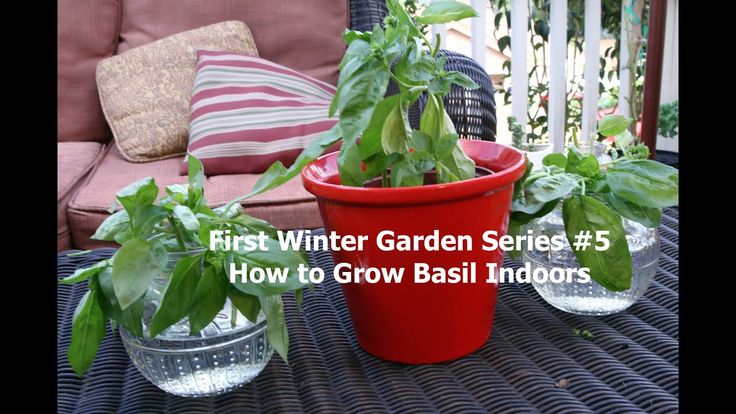
Purple basil
While this variety doesn't have a strong flavor, but it gives a gorgeous burgundy color to both your garden and dishes.
Lemon basil and lime basil
Both have a bright citrus flavor and can be used in a variety of marinades, sauces, desserts and teas.
Green ruffles
This variety looks nothing like traditional basil. The beautifully-ruffled leaves are mild and go well in salads.
Spicy globe
This small, mounding basil is the perfect variety for small spaces and containers. Although the leaves are smaller than other basil varieties, they are full of basil flavor.
Common Questions About Basil
How long does it take for basil to grow from seed?
Basil germinates in 7 to 10 days after planting. It's usually ready for harvest within 3 to 4 weeks.
Why is my basil plant wilting?
There could be a few reasons why you're seeing your basil plant wilting. Start by checking the soil. Basil prefers moist soil – not too wet and not too dry. You want the soil to be damp, not drenched. Although basil loves warm weather, a hot midday sun can be rather harsh. If you see wilting only during the peak hours for summer temperatures, you may need to add light shade over your basil plant.
How much sun does basil need to grow?
Basil grows best with at least 6 to 8 hours of sunlight each day. Part of knowing how to care for basil is watching the sun patterns in the location you are growing this aromatic herb. With proper sunlight, your plant will be big and beautiful for several months out of the year.
Is it better to plant basil indoors or outdoors?
Basil is a hardy herb that grows extremely well both indoors and outdoors. As long as the plant receives the proper moisture and sunlight, it will thrive in any location. I grow basil in containers both inside and outside, and I also love to tuck it into my vegetable garden boxes. Once you know how to grow basil in a pot, the possibilities for where and how you grow it are endless.
I have more basil than I can use – how do I save it?
You can air dry basil by bundling it and hanging it upside down. However, the leaves will turn brown. I prefer to freeze my basil by chopping it, placing it in an ice cube tray, covering it with olive oil. Once my basil cubes are frozen, I store them in an airtight container in my freezer. When I need a bit of basil in a dish, I simply add a cube or two.
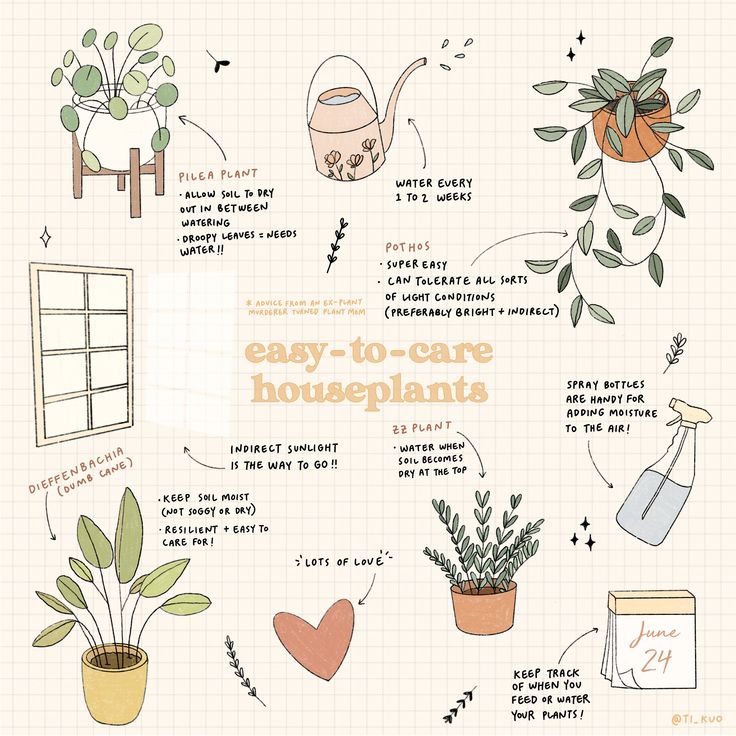
Basil on the windowsill: how to grow it correctly
Published:
Basil is a vitamin seasoning for various dishes. How to grow a plant in an apartment? Gardeners Anna Zorina, Victoria Karpukhina and Nikolai Zvonarev shared the secrets of growing crops on the windowsill.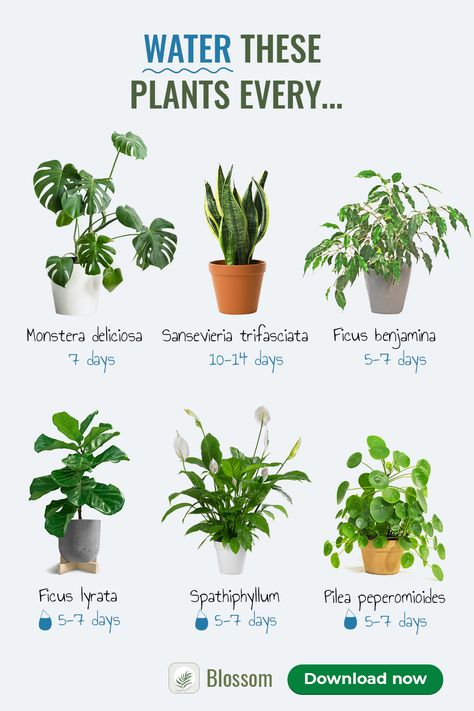
Peculiarities of growing basil on a windowsill
Basil is an unpretentious plant, grows in winter and summer, smells wonderful, contains useful vitamins and microelements, according to the author of the Great Encyclopedia of Spices, Seasonings and Herbs Victoria Karpukhina. nine0005
Can you grow basil in a window? Yes. Basil is easy to grow in a pot on a windowsill. The culture does not require special care and actively grows shoots from the main stem. They are used for food.
Secrets of growing basil on the windowsill
How to grow basil on the windowsill? Basil on the windowsill is grown from seeds, by cuttings and transplanting the finished bush into a pot. The best way to grow basil indoors is from seeds. Then it forms a lush bush and yields a green crop for almost a whole year. nine0005 How to grow basil on a window sill: Unsplash/Lesly Juarez
To grow basil on a window sill, follow these guidelines:
- Choose small-leaved and low-growing varieties of basil for planting, such as clove aroma, marquise, small-leaf, "beamy".
 Violet and Greek small-leaved develop for a long time and are more demanding in care.
 - Prepare green growing containers with drainage holes at least 15 cm deep to avoid picking plants. Basil is difficult to tolerate any manipulation of the root system and is sick for a long time after transplantation. nine0008
- Use ready-made universal potting soil. Be sure to mix it with garden soil (1:1) or biohumus (1:4). For long-term cultivation of basil, you will need a lot of nutrients.
- Display basil seedlings in a well-lit window facing south or southwest. Extend daylight hours for the plant in the autumn-winter period up to 12 hours. Author of the book "Spices. Growing, harvesting, application ”Anna Zorina advises using fitolamps to get enough light for plants. nine0008
- Keep the temperature in the room at least +20 °C, otherwise the basil will lose its aroma. There should be no drafts on the windowsill, from which the plant is sick and develops poorly.
- Take cuttings from the mother bush in advance to replace the old plant in time.
 A seedling grown from a cutting gives a crop of greenery within 3-4 months.
 - Cut off leaves and shoots after 2 weeks on cuttings. If the basil was planted with seeds, the crop will ripen in a month and a half. Cut the greens, leaving at least 4 leaves on the bottom of the stem, new side shoots will begin to develop in their axils. nine0008
- Pinch off the top when the bush is 8-10 cm tall to help it sprout side shoots and keep the flower spike.
When is the best time to plant basil on the windowsill? But this plant is light and heat-loving, therefore, in the autumn-winter months, it requires additional lighting and maintaining the optimum temperature.
When to plant basil on the windowsill? The best time to plant basil in a pot is late February and early March. During this period, there is an active awakening of seeds, and daylight hours increase. Basil seedlings do not have to create artificial conditions for development.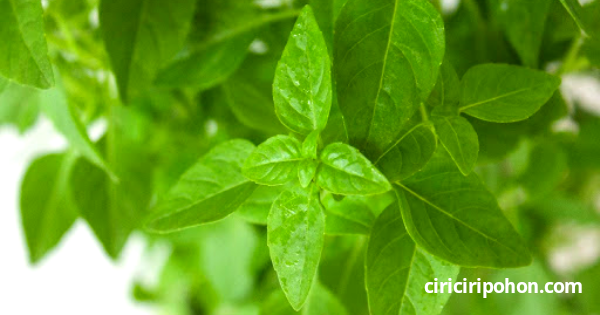 By the summer, the bush will grow up, and it will be possible to put it on a balcony or loggia, where there is a lot of light, air and heat. nine0005 Best time to plant basil: Unsplash/Janine Meuche
How to plant and care for basil on your windowsill
Basil germinates quickly from seed if you choose varieties suitable for growing indoors. For propagation of basil by cuttings, observe a certain watering regime, optimal indicators of temperature and humidity in the room.
In autumn, the basil bushes are transplanted from the open bed into pots and placed on the windowsill. But such plants very quickly throw out flower stalks. They will have to be cut to get juicy greens in winter. nine0005
How to plant basil in pots
Sow basil seeds step by step:
- Soak the seeds for faster germination in warm water for 1-2 days, change the water every 12 hours. Hold them in a weak pink solution of potassium permanganate for 2 hours and dry on a napkin.
- Fill prepared containers or pots with a drainage layer (2-3 cm) of expanded clay or pebbles.
 Lay the soil on top, do not add 3-4 cm to the edges of the container. Level the ground and pour plenty of water. nine0008
 - Sow the seeds in bulk at a distance of 5 cm from each other.
- Sprinkle a centimeter layer of earth on top and cover with foil for a greenhouse effect.
- Place the container in a warm place (+25-28°C) and air the crops every day until germination.
The first sprouts of basil will appear in 7-12 days. After the shoots appear, remove the film, and thin out the seedlings so that a distance of 10 cm remains between them. Place the container on a lighted windowsill. When the stems reach 5 cm, add a layer of earth (2-3 cm) to strengthen the young plants. nine0005
How long does basil grow from seed? The first crop (a couple of top leaves of the top) can be harvested 5-7 weeks after germination, when 5-6 full-fledged leaves appear. A plant grown from seed will take much longer to produce leaves than a seedling from cuttings. It will take 8-12 months for such a bush to fully mature.
When planting basil with cuttings, use the recommendations of Nikolai Zvonarev, author of the book Spicy Herbs. We plant, we grow, we harvest, we treat”:
- Take cuttings from the mother bush, breaking off shoots at least 5 cm long from the top or from the middle of the stem.
- Soak the cuttings in water for 1-2 weeks until roots develop at the broken point.
- Plant the germinated cuttings in pots and cut off the first greens after a couple of weeks.
Pluck out the top shoots in time to keep the bush green longer, then it will not bloom. Flowering basil is not suitable for human consumption.
Planting basil cuttings: YouTube / Yana Fedorova Popular videoHow to care for basil on the windowsill
Basil seedlings take a long time to gain strength until harvest. Plants in pots will need a schedule of watering, fertilizing, a certain temperature regime, proper lighting and humidity regime.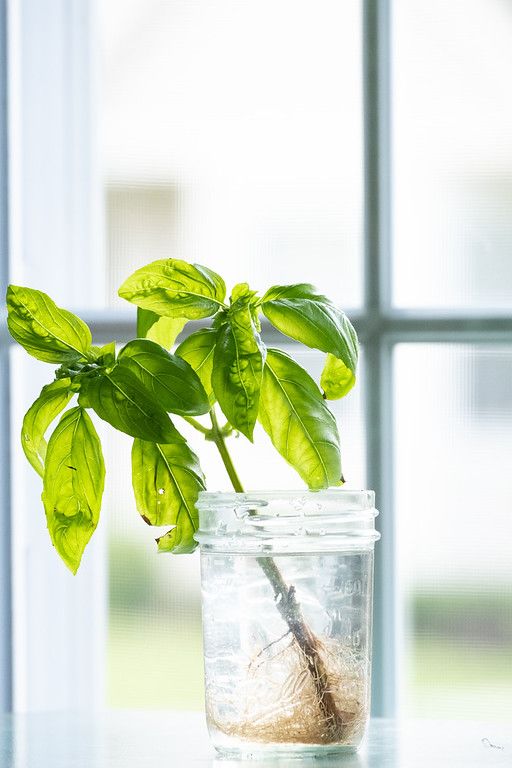
How to water basil on the windowsill? Water the basil correctly:
- in spring and summer - every morning, and on very hot summer days 2 times - in the morning and in the evening. In winter, it is enough to water twice a week;
- use only settled warm water;
- Periodically, and in summer every day, spray the plant with water from a spray bottle.
Basil bushes grow actively at a temperature of +20–25 °C. At the same time, they require direct sunlight for at least 3-4 hours a day and air humidity of at least 60%. When the window is open, basil is not left, because the plant is afraid of drafts.
So that the root system breathes and absorbs moisture, loosen the soil in pots with adult plants once every 2-3 days. If the potted soil is not too fertile, fertilize once a month using complex fertilizers based on humates. Spend the first top dressing when the plant releases lateral shoots. nine0005
Cutting of leaves and shoots is being carried out not only in order to use them for cooking various dishes. Frequent early pruning of basil allows you to grow a bushy bush with many succulent branches.
Every housewife can grow basil on a windowsill. The correct way of reproduction and care of the plant allows you to create a green garden in the house in a few weeks and use vitamin greens at any time of the year.
Original article: https://www.nur.kz/household/garden/1790656-kak-vyrastit-bazilik-na-podokonnike-sekrety-i-pravila-vyrasivania/
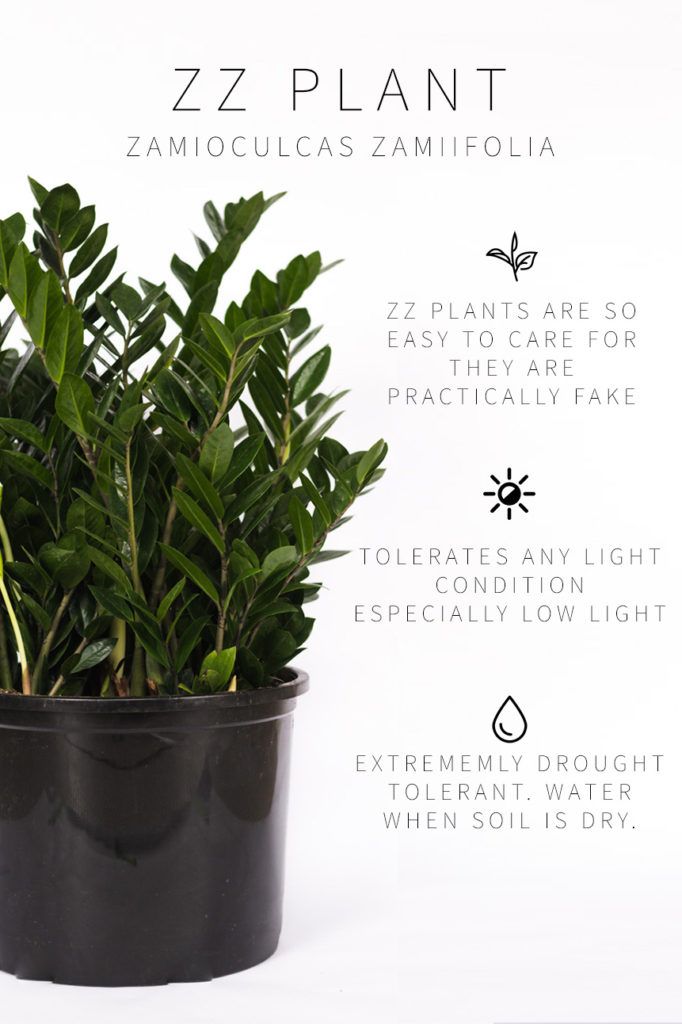
growing from seeds at home
Basil is one of the herbs that are excellent for home growing. This plant, rich in essential oils, is very unpretentious and is able to grow well at home throughout the year. Basil bushes look very decorative, and also have a pleasant aroma. It is basil that is recommended for the first experiments on creating a miniature garden on the windowsill.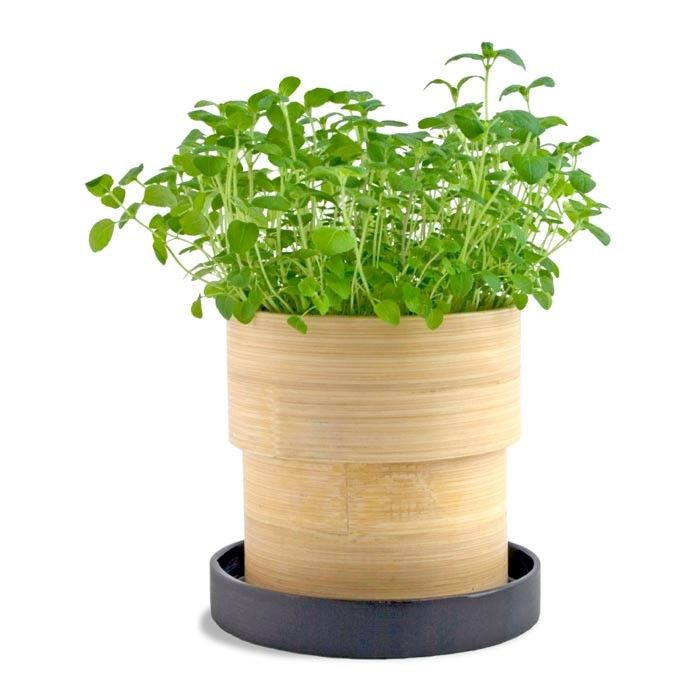 But in order for the bush to give a good harvest, you need to learn the basic rules for growing it. nine0005
1 Growing basilica from seeds
1.1 Seed preparation
1.2 Preparation of soil
1.3 Cowing Features
2 Care for Basilica at home
9000 2.1 Light2.2 Temperature 2.5 Top dressing
3 Harvesting basil
4 Alternative ways to grow basil
4.1 Use of temporary containers
4.2 Transplanting bushes from open ground
4.3 Basil from cuttings
Growing basil from seeds
There are many ways to get basil bushes - from cuttings or fresh shoots of a specimen growing in the garden, as well as using seeds. It is growing from seeds that can guarantee a good harvest when growing basil at home. Such bushes will be able to grow longer than those obtained vegetatively.
Any seed can be used to grow basil on a windowsill.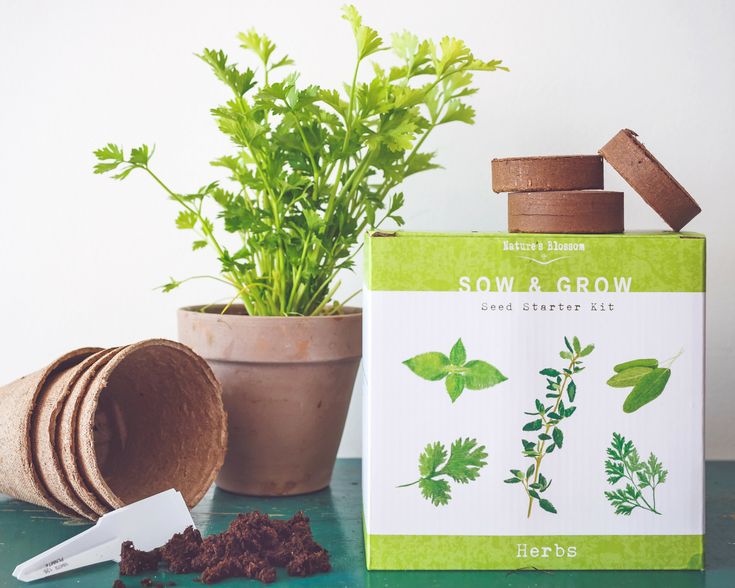 But certain varieties of this plant - purple and large-leaved - are distinguished by a longer development, and it will be more difficult to get a quick and plentiful harvest from them. Typically, compact and small-leaved varieties are used for growing in pots. You can sow several varieties at once, similar in size to bushes, but differing in ripening time. A number of varieties are specifically designed for sowing at home. nine0005
In addition to seeds, a suitable soil and container must be prepared. For basil, you will need a container with a volume of at least 1-2 liters, or a box with a depth of 15 cm or more. In such a container, seedlings can be located in increments of 10 cm. Another important condition is the presence of drainage holes.
Seed preparation
How to plant BASIL seedlings
Watch this video on YouTube
Basil seeds do not need to be processed, but it allows you to speed up the emergence of sprouts.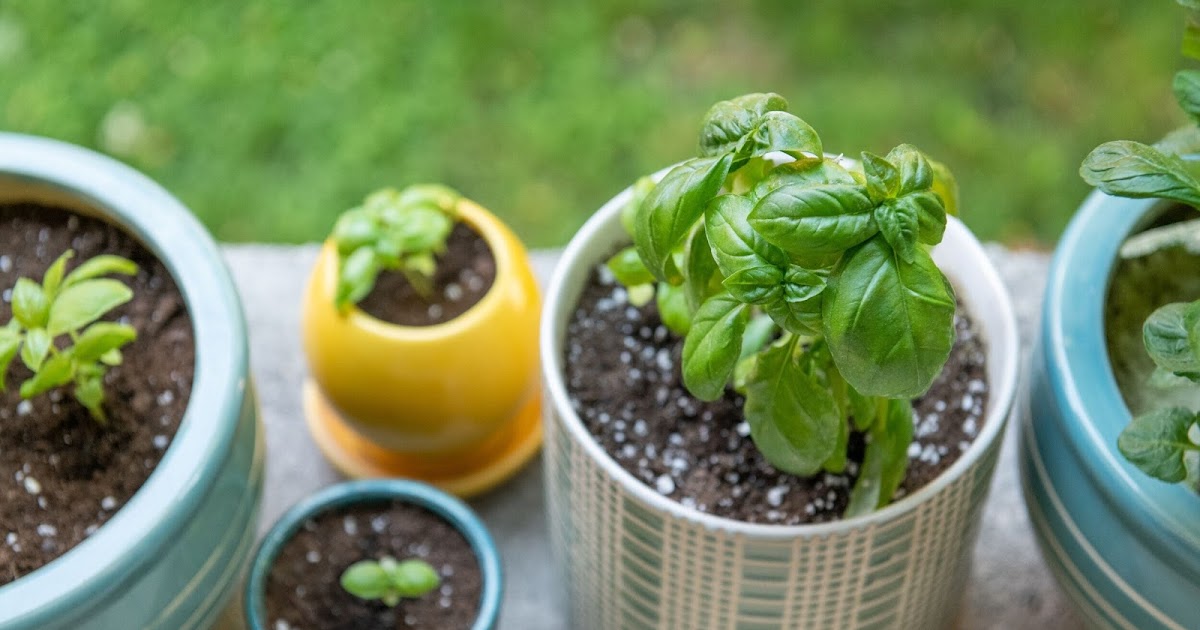 To do this, the seeds are soaked for 1-2 days in warm water, changing it at least once every 12 hours. This procedure will help remove the essential oil from the surface of the seeds. After such soaking, the seeds are kept for a couple of hours in a pale solution of potassium permanganate, and then slightly dried on a napkin for ease of sowing. Due to the small size of the seeds for drying, it is necessary to use a material that does not impede their subsequent extraction - for example, paper, and not a loose cloth. A toothpick will also help simplify the process - it pry the seeds when moving into the ground. nine0005
Soil preparation
Basil requires loose soil, a mixture of universal purchased earth with garden soil in equal proportions is suitable for its cultivation. Garden soil can be replaced with vermicompost by mixing it with a universal substrate (1:4) or with a coconut substrate (1:20).
Before sowing, it is recommended to decontaminate the soil by calcination (1 hour to withstand at a temperature of about 110 degrees), freezing or spilling potassium permanganate.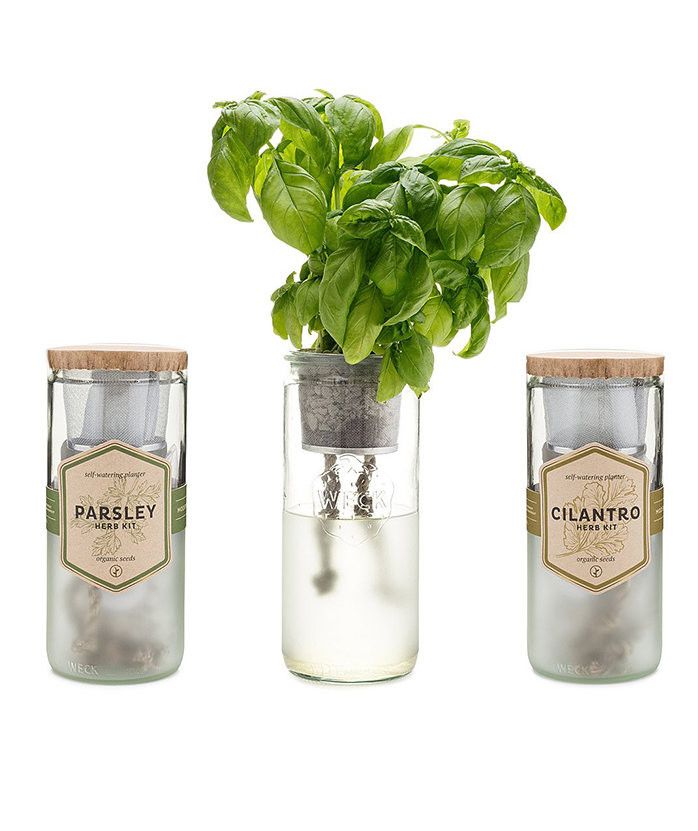 Such measures help protect seedlings from pests. After that, the necessary mineral fertilizers can be added to the soil. nine0005
At the bottom of the selected pot, it is obligatory to lay a drainage layer about 2.5 cm thick. The rest of the place is filled with soil, leaving about 3.5 cm to the edge of the container. The earth is carefully leveled and then watered.
Sowing characteristics
March is considered the best time to start growing basil. This plant loves heat and light, and in such conditions, its young bushes will develop more actively.
Basil seeds are sown, maintaining a distance of 2 cm, then covered with a centimeter layer of earth and covered with glass or a bag. Then the pot or box is transferred to a warm place and aired daily until sprouts appear. The seeds will not need watering, but if necessary, the soil can be gently sprayed. The timing of seedling emergence varies depending on the variety and growing conditions, and averages about 7-12 days.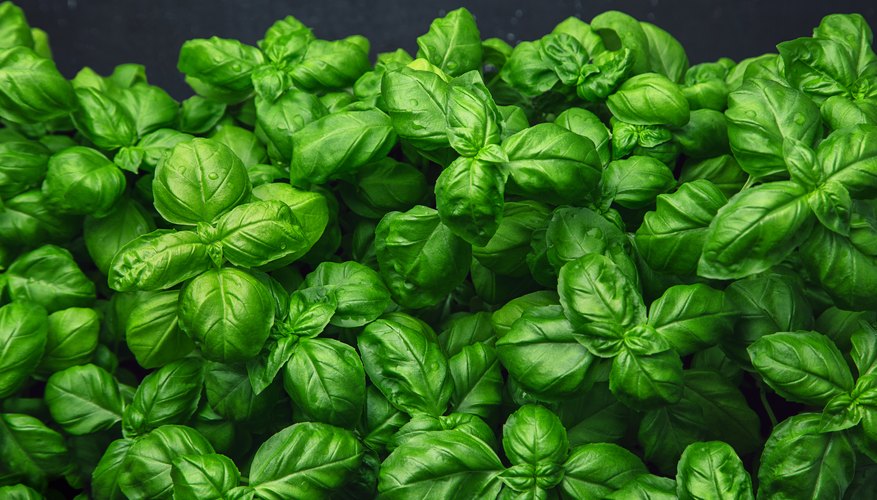 nine0005
When sprouts appear, the film should be removed, and the excess seedlings should be thinned out or transplanted into another container. At least 10 cm should remain in the box between the plants. If the basil grows in a pot, the number of bushes is calculated based on its diameter. Seedlings should not be cramped, but too deep a container will make it difficult for immature plants to develop. Seedlings should be kept in a well-lit area. When the bushes grow to at least 5 cm, a little earth can be poured into the pot so that the plants become stronger. nine0005
Caring for basil at home
When the basil is taken out of the "greenhouse", care for it will consist of regular watering, loosening and observing the necessary growing conditions.
Lighting
During the warm season, the basilica will get 6 hours of sunlight, but in winter the plantings will need additional lighting. From autumn to the end of winter, homemade basil will also need ample sun.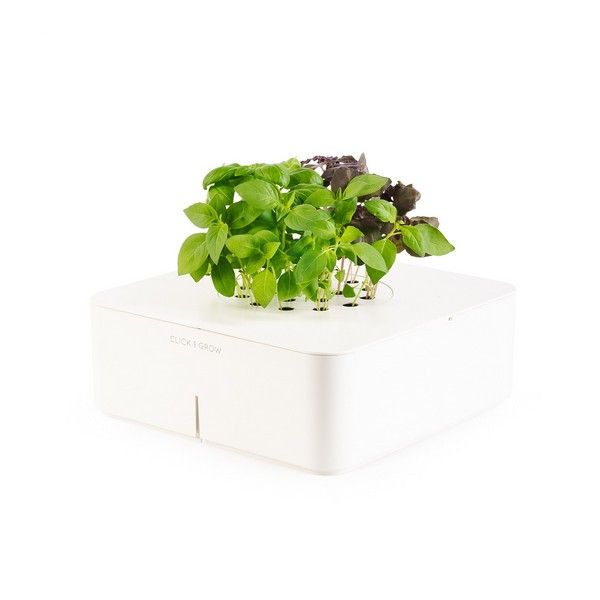 In order for the bushes to have enough light, artificial lighting is used, providing plantings with a 12-hour daylight hours. Warm white LED lamps (2700K) or phytolamps, which are kept 15-20 cm from the bushes, are suitable for basil. nine0005
Temperature
Basil prefers heat - 20-25 degrees, low temperature leads to loss of foliage aroma. It is especially important to protect plantings from cold drafts.
How to grow basil at home. Planting a basil. Basil at home in a pot. Garden at home.
Watch this video on YouTube
Watering
In the summertime, basil is watered daily, in the morning, trying to keep the soil constantly moist, but not waterlogged. In winter, if the room becomes cooler, the number of waterings is reduced to 2 times a week. nine0005
Humidity level
Basil can also be sprayed, this procedure is tried in the morning or in the evening on especially hot and dry days, using water at room temperature. High humidity will promote succulence of the foliage.
Top dressing
If basil grows in nutrient soil, top dressing can be omitted. As the soil is depleted, organic compounds, vermicompost or Agrolife preparation (1 tsp on the soil surface) are monthly introduced into the soil. Top dressing can be carried out after pruning. It is also recommended to periodically loosen the earth in a pot with adult bushes - this procedure will contribute to its enrichment with oxygen. nine0005
Harvest of basil
In order for basil to form more leaves and branch better, they try to cut it systematically by “plucking” the tops of its shoots. 5-7 weeks after germination, when about 4-6 full-fledged leaves appear on the seedlings, you can take the first crop by pinching off a couple of top leaves from the top. When the bushes grow a little more, pinch the top of the shoot above the place where small leaves begin to form from the sinuses. This procedure is repeated every few weeks. nine0005
If basil leaves are needed only in small quantities as a condiment, old lateral leaves are used for this. It is removed at the place of its attachment to the main stem. When pruning, always leave at least 4 leaves at the bottom of the stem. Pruning the lower shoots will lead to the development of the bush in height, which will lead to a decrease in yield. Buds should also be pruned. Greens are no longer collected from flowering bushes, so the buds are removed along with the two leaves below them. nine0005
Alternative methods of growing basil
Use of temporary containers
The convenience of the planting method described above lies in the fact that there is no need to transplant young seedlings. But the lack of space on the window does not always allow you to keep large containers for adult bushes there, while the seedlings remain small and fragile for collecting foliage. To save space, primary sowing is carried out in temporary pots. In this capacity, use any seedling container. When the bushes grow to 5-7 cm, they are transplanted into a permanent pot or box. nine0005
Transplanting bushes from open ground
In summer or towards the end of the season, you can simply transplant a young basil bush from the garden into a pot, this will save you the hassle of growing seedlings. From such a plant, foliage begins to be collected immediately after the final rooting, but it will begin to bloom faster, so seedlings are considered more productive. To prolong the growing season of such a bush, you will constantly have to remove flower stalks from it or form new plants by cutting cuttings from it.
Basil from cuttings
It's quick and easy to grow a basil bush using cuttings. In this capacity, non-lignified side stems or tops of shoots taken from an adult bush or even from purchased fresh greens are used. They are placed in water, replacing it daily. In such conditions, in 1-2 weeks, the branches should form roots, after which they are transplanted into a pot.