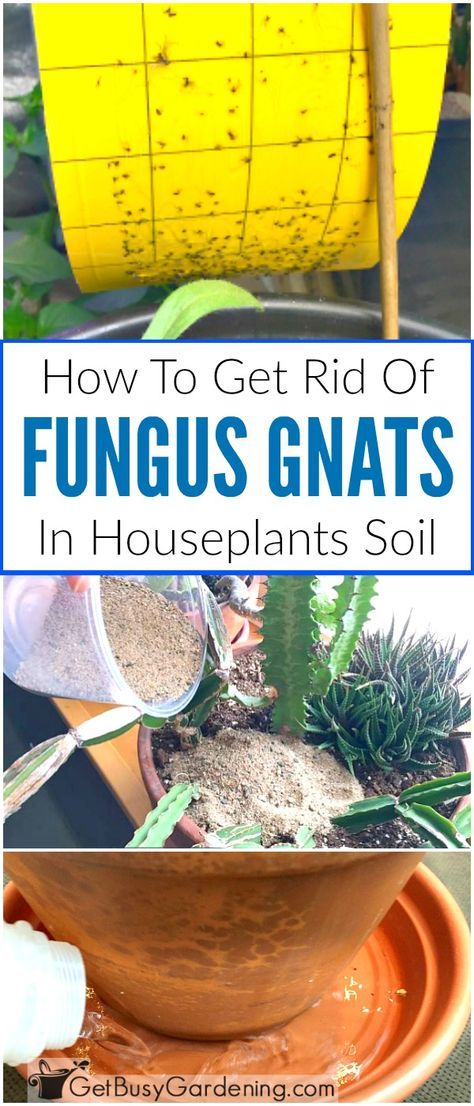
Can you use garden soil in a pot
Can You Use Garden Soil in Pots? [+ fixing common container mishaps]
28 shares
Believe me, I’ve been there. You just got home from the nursery with tons of gorgeous flowers to plant up your containers, and…
Crap… you forgot to buy potting soil.
Using garden soil in your containers can’t be all that bad… right? So you head for the shovel to dig up a couple scoops of soil from your garden bed to fill it up.
As tempting as it may be, you should not use straight garden soil in pots. When used in containers, garden soil gets very compacted. Garden soil also lacks the drainage & nutrients necessary to grow healthy, potted plants.
Types of Garden SoilsThere are many types of soil used in the home garden, each with distinct differences.
- Dirt from your own garden beds at home
- Bagged garden soil purchased at the store
- Compost
- Potting soil or potting mix
- Seed starting mix
The soil in your own yard consists of all sorts of goodness. But when you scoop garden soil or topsoil into a container, it doesn’t translate into a healthy container garden. Garden soil from your yard is very heavy and depending on your location will contain various amounts of sand, clay and/or silt. When it’s on the ground, it’s aerated by the worms, bugs and microorganisms that live in your soil. But, when used in containers, garden soil from your yard is too dense. It will get very compacted, causing poor drainage in your container which ultimately will rot the roots of your plants.
Bags of topsoil purchased from a store is comparable to what you’d actually find in the ground. The amounts of sand, clay and silt will vary depending on where the topsoil is harvested. The only difference between bagged topsoil and the soil from your yard is that bagged topsoil is shredded and screened to remove any large particles then processed to a looser consistency.
Both garden soil and topsoil are too dense/heavy and lack the nutrients needed for container plants.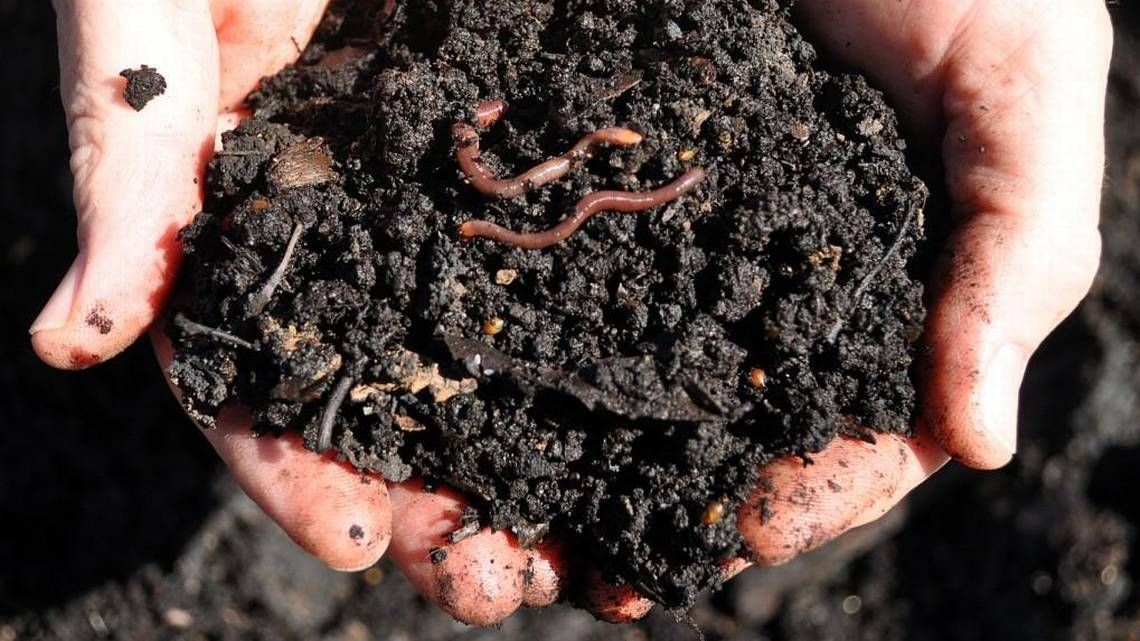
Bagged garden soil consists of natural topsoil or sand blended with bulky organic/woody material (like pine bark). Most garden soils are too dense to allow for good air and water movement when added to a container garden. Soils hold water very well in their small pore spaces and can drown roots—especially in shallow containers.
CompostMany websites will tell you that yes you can use 100% compost when planting containers. However, I have tried this in the past with bagged compost and it did not work out so well. If you make your compost from leaf mold, this may work out to be a lighter mix that will be suitable for containers. But, if using regular compost or bagged compost, I would recommend combining it with at least 50% soilless potting mix so it doesn’t get compacted.
Many gardeners will use compost as a replacement for peat in their homemade potting mix recipes— it holds moisture well, but not nearly as well as the peat.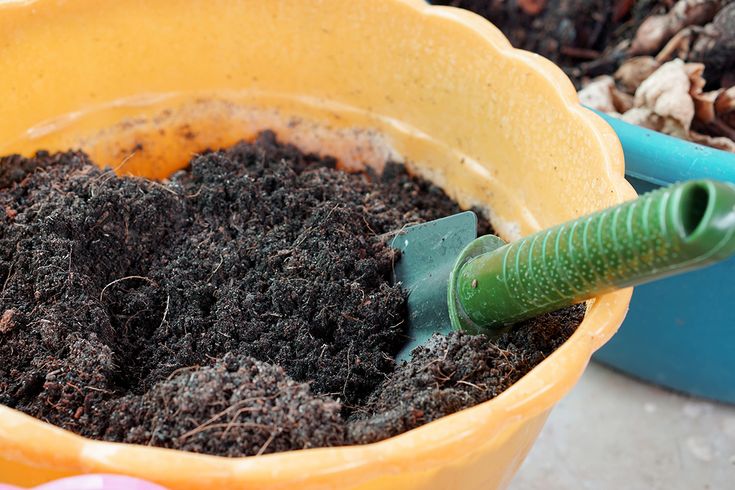
Potting mix or potting soil is the preferred option for growing plants, flowers and even vegetables inside pots.
Vendors might call their product a potting mix or a potting soil, but there is usually no distinguishing ingredient between them. The ingredients will be listed on the back of the bag.
Typical Potting Mix Contains:
- decomposed/woody material (around 50-65%)
- spaghnum peat moss (or equivalent)
- perlite and/or vermiculite
- fertilizer
- a wetting agent
It’s also important to note that potting mix is different than seed starting mix. Seed starting mix is used to germinate and grow plants from seed. There’s actually no “soil” in seed starting mix. Because of this, you really wouldn’t use garden soil or potting soil to make seed starting mix.
What Blooms with What?
Never know what to plant together? Find out with this FREE Plant Pairing Guide and become a pro at combining plants for the best garden design possible!
First Name
Email Address
We use this field to detect spam bots. If you fill this in, you will be marked as a spammer.
Garden soil can be used as the base of a homemade potting mix, but it should never be used straight in outdoor pots. Using any soil in a potting mix is not ideal, though. You are much better off using potting mix to make sure that you have the right balance of aeration, drainage, moisture retention and nutrition.
What happens if you use garden soil in pots?If you use garden soil, such as Miracle Gro Garden soil or Vigoro Garden soil you may run into some problems. Garden soil is simply too heavy, making containers much harder to move around than if you used potting mix. That extra weight will lead to compaction from watering. The compaction will not allow the pot to drain and there will be no air in the soil for your plants. Additionally, garden soil will lack the nutrients your plants would usually gain from the ground that a soilless potting mix puts in right in the bag for you.
If you are hell-bent on using garden soil, I would recommend amending the soil to improve the moisture retention, drainage, aeration and nutrient levels. Scroll down to the heading “What can I use in containers instead of potting soil?” to get some ideas.
I accidentally used garden soil in pots — Will it kill my potted plants?If you used soil from your yard, yes this can potentially kill your potted plants. But don’t worry, you can fix it! First, you’ll have to un-pot your plant. Instead of throwing away the soil that you put into your container, you can dump it into a bucket and amend the soil.
In the next section, I provide several amendment options.
Can you mix potting soil with garden soil?Potting soil can be mixed with garden soil for particular cases such as raised beds, but it’s not a good mix for containers. You will still need to amend the mixture.
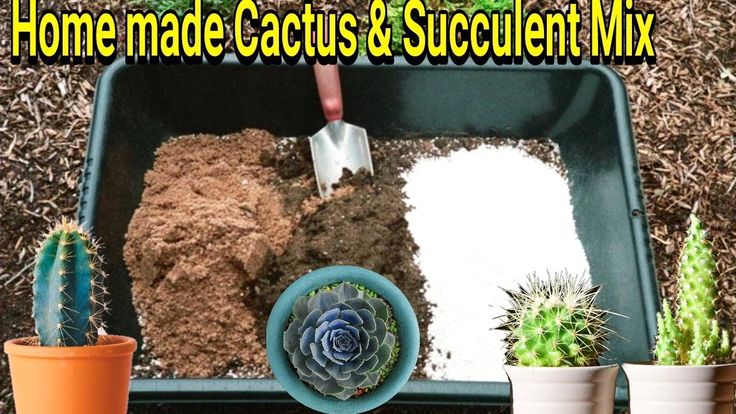
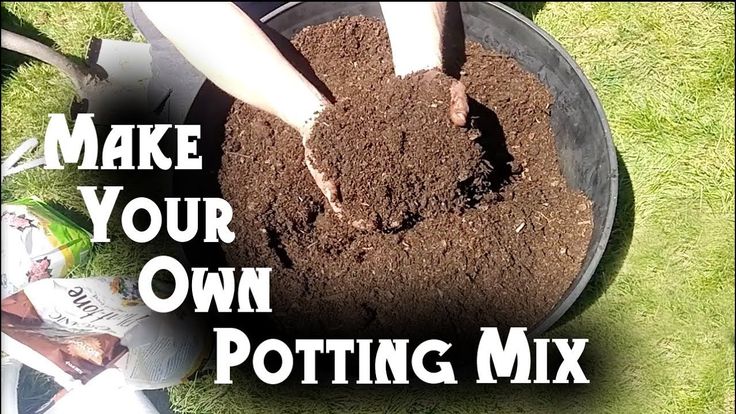
What can I use in containers instead of potting soil?You can actually make your own potting soil by combining various ingredients together. Most gardeners will use perlite or vermiculite with peat or sphagnum moss. The important thing to remember is that to make potting mix, you will need “ingredients” to retain moisture, promote drainage and aeration and nutrients.
I like to use the ratio of 1 part moisture retention material to 1 part drainage and aeration materials plus the appropriate amount of nutrients, which will depend on the fertilizer you use and the size of your container.
If you are wondering what materials to use and you just need a recipe, try this:
- 1 part woody material, garden soil or topsoil
- 1 part perlite (for drainage)
- 1 part coco coir (for moisture retention)
- bone meal (balanced fertilizer)
If you want to get creative, here are more options!
1. Aeration & DrainageWhat can you use for aeration & drainage in your mix?- Perlite: Perlite is a volcanic glass that’s heated at high temperatures.
 The heat causes the glass to expand, resulting in an odorless mixture that feels like tiny little balls of Styrofoam. It’s great for drainage.
 - PBH rice hulls: Available at a lower basic cost than perlite, PBH rice hulls dramatically reduce dust in the greenhouse mixing environment. Sterilized rice hulls are not a substitute for peat moss but replace perlite and vermiculite, the production of which requires fossil fuels.
- Horticultural sand: Horticultural sand is very gritty sand made from crushed granite, quartz or sandstone. It’s also called sharp sand, coarse sand or quartz sand. Because there’s a mix of gritty components, horticultural sand promotes drainage.
Moisture retention is another important component of soil used in potting mixes. Make sure that you always add a component for aeration & drainage along with a moisture retention component. If you don’t, your soil will become brick-like and so compacted that it can’t drain. This is not good news for your plants.
- Peat moss: Peat moss is the go-to for moisture retention in seed starting and potting mixes, but it’s not the most sustainable or eco-friendly option.
- Vermiculite: Vermiculite is natural mineral (magnesium-aluminum-iron) silicate, which basically means minerals compressed and dried into flakes, or pellets. It absorbs water and aids in moisture retention. Vermiculate is found in so many seed-starting mixes because it can protect seedlings from fungus. Vermiculite also has some drainage and aeration qualities, but not nearly as much as perlite.
- Coconut coir: Coconut coir (also known as coconut fiber, coco peat or coco coir), is my favorite alternative to peat moss. It has excellent water-holding capabilities and a pH level of 6 which will is good for most garden plants.
- Compost: Many gardeners recommend compost as an alternative to peat moss, but if you are using it in containers it will eventually become compacted in your containers and cause drainage issues.
- Leaf mold: Leaf mold is easy to make and can condition the soil and greatly improve moisture retention.
- Woody materials: Non-chemically processed woody byproducts of locally-sourced wood (such as wood fiber, sawdust or composted bark) can be a decent alternative to peat moss. But, it’s usually a less-than-ideal alternative because most wood isn’t locally sourced and can be chemically treated.
- PittMoss: Created by an inventor in Pittsburgh, PittMoss consists of reconstituted paper fibers with added proprietary ingredients.
- Worm castings: Worm castings are the waste from farmed earthworms, rich in nutrients and beneficial microbes. They can also hold 2-3x their weight (p35) in moisture.
For these reasons, I would recommend finding alternatives to use in your own garden.
7 tips for choosing the RIGHT plants
This FREE guide has 7 key questions to help you pick the perfect plants for your landscape. Pop in your email below for instant access.
Hey, since you’re already signed up for my emails, you may be interested in my Printable Garden Planner Kit. It includes 5 printable worksheets that you can use to plan and organize your landscape. Check it out here.
3. FertilizerPlants in pots need fertilizer if you want to them to thrive. Because they are in a contained space, they only have access to the nutrients that you put into the container. That’s why it’s important to add fertilizer to your DIY potting mix and make sure that you replenish the fertilizer often.
When you purchase fertilizer you’ll typically see 3 numbers on the label. These numbers represent the nitrogen (N), phosphorous (P) and potassium (K) or the N-P-K ratio. A fertilizer with the numbers 10-5-10 on the label means that the fertilizer contains 10% N, 5% P and 10% K. The remaining 75% of the bag’s weight is carrier product.
Nitrogen promotes optimum shoot and leaf growth, often at the expense of flower and fruit production. Phosphorous promotes strong roots and encourages fruiting and flowering. Potassium levels influence a plant’s heartiness and vigor. Learn more about fertilizer numbers. It’s best to find a balanced fertilizer that contains around equal parts of all 3 nutrients.
Here are some fertilizer recommendations for creating your own potting soil from garden soil:
- Miracle Grow All-Purpose Plant Food: This is an affordable and long-lasting fertilizer option that works well on most plant types. This is not an organic solution and contains chemicals so I’m also providing some alternatives.
- Osmocote: A common fertilizer used in container gardening, Osmocote contains 11 nutrients, slow-release feeding container plants for 6 months.
- Worm castings: Worm castings are the waste from farmed earthworms, rich in nutrients and beneficial microbes.
 In addition to moisture-retention qualities, the nutrients found in worm castings can last 6x longer (p35) than basic potting mixes.
 - Bone Meal: Bone meal is made from steamed and then crushed animal bones. It’s high in Phosphorous, important for root development and flower blooms and calcium and nitrogen, which are also very beneficial to plant growth.
- Blood Meal: Blood meal is dried and powdered animal blood. It’s used as a fertilizer to increase soil nitrogen levels — and without nitrogen plants simply cannot grow. Blood meal is one of the richest non-synthetic sources of nitrogen, which is a crucial component of plant cells and one of the basic components of chlorophyll, the substance that helps plants convert sunlight into sugars.
- Liquid Kelp: Liquid kelp, seaweed, or fish-based fertilizers provide a range of benefits for plant health and growth.
Using straight garden soil in your containers is not a good idea. Garden soil on its own lacks the drainage, aeration, moisture control and nutrients necessary to successfully grow plants in containers. When used by itself, garden soil or topsoil in containers becomes so compacted that water cannot drain.
In other words: the roots of your plant drown in the water and your plants die.
But the good news is that you can amend your garden soil in order to use it in containers. Is the effort worth it? I’m not so sure… but it is possible! Use a 1-1-1 ratio: 1 part garden soil, 1 part moisture retention component (like coco coir) and 1 part drainage & aeration component (like perlite) and a well-balanced fertilizer (like bone meal or osmocote). Once mixed, your garden soil is now suitable for your containers!If you have a go-to DIY potting mix recipe that you love, be sure to head over to the Facebook page to share it.
More DIY Garden Posts You’ll Love
- Redoing Your Landscaping? Read This Before Tearing Out “Old” Plants!
It’s tempting to tear out overgrown landscaping in lieu of something new and fresh.
 But removing mature landscaping can cost you a lot more money and time that you may realize.
 - 30+ Clever Curb Appeal Hacks Guaranteed to Make Your Neighbors Jealous
Pro curb appeal hacks to take your landscape to the next level and increase your property value. With 30+ tips and tricks, there’s sure to be several curb appeal hacks you’ll be excited to try!
- Creative Garden Ideas That Look Way Too Good To Be DIYs
These super creative garden ideas are almost too awesome to believe that they are DIYs. From wine bottle gazebos to fences made from old doors, unique garden project inspiration is inevitable.
What Blooms with What?
Never know what to plant together? Find out with this FREE Plant Pairing Guide and become a pro at combining plants for the best garden design possible!
First Name
Email Address
We use this field to detect spam bots.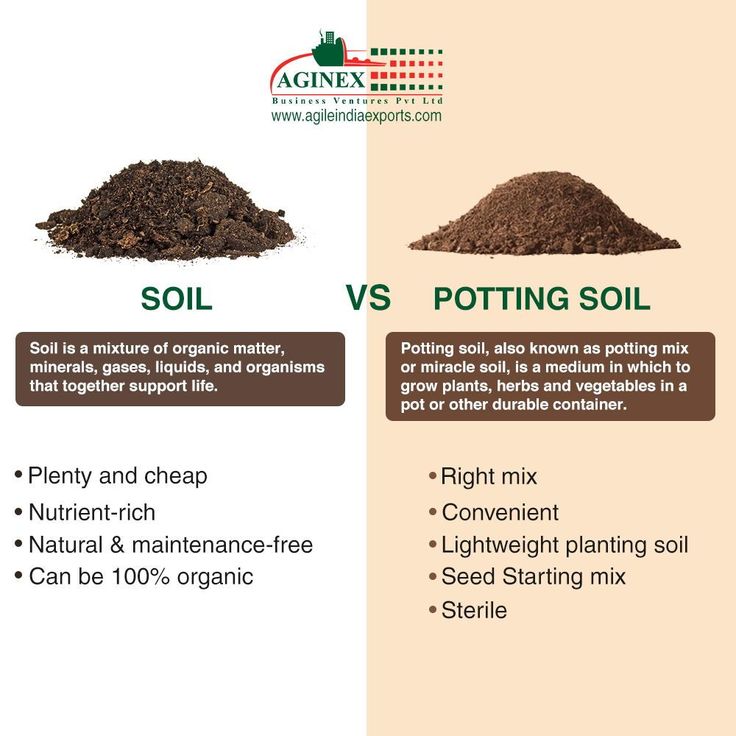 If you fill this in, you will be marked as a spammer.
28 shares
Can You Use Garden Soil For Containers
Home › Special Gardens › Container Gardens
Container Gardens
By: Laura Miller
Image by gkrphoto
“Can I use garden soil in containers?” This is a common question and it makes sense that using garden soil in pots, planters and containers should work. Unfortunately, there are many good reasons not to use this money-saving approach. Here’s why:
Can You Use Garden Soil for Containers
For the most part, garden soil can be the ideal medium for growing plants in the ground. The native soil in your backyard has a natural ability to drain off excessive amounts of rainwater, yet it can also retain moisture during dry spells. It’s full of beneficial insects, fungal colonies and even burrowing rodents to aerate and break down organic matter.
All these things work well together to provide in-ground plants with the things they need to grow and flourish. Yet using garden or topsoil in containers often has the opposite effect. Potted plants grown in garden soil typically languish. The main reason this happens is because garden soil is much more dense than media formulated for containers.
Try this little experiment: Fill up a medium to large container with a commercial potting mix and an identical container with an equal volume of garden soil. Notice how the one with garden soil is heavier? This is because garden soil is much denser than bagged potting soil. Dense soil is not only heavier, it has these qualities that make it undesirable when using garden soil in containers:
- Compaction – The creepy crawlies that keep our garden soil loose aren’t generally welcome in our potted plants. Without them, dense soil easily becomes too compact for ideal root growth.
- Poor drainage – Dense soil also slows down water flow.
 Using garden soil in pots can make it difficult to maintain the proper soil moisture levels, which can lead to root rot.
 - Lower oxygen availability – Root cells need oxygen to survive. Using garden soil in containers reduces the air pockets which make oxygen available to the plant’s roots.
In addition to these issues, using native topsoil in containers can introduce harmful pests, diseases and weeds to your potted plants. Native soil can also lack necessary nutrients or have less than ideal pH levels for the type of container plants you wish to grow. Amending small amounts of soil is more difficult, as exact measurements are required to balance nutrient and pH levels.
Alternatives to Using Garden Soil in Pots
Purchasing bagged potting soil is the easiest alternative to using garden soil in containers. While the initial outlay can be more expensive, the extra labor and cost of replacing plants can outweigh the purchase price of bagged soil in the long run.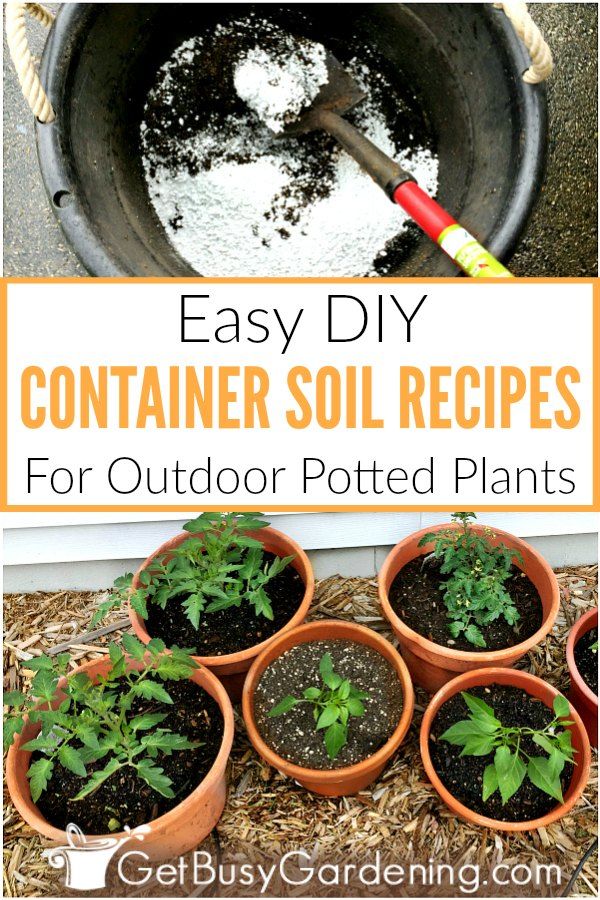 Additionally, premium potting soil can be reused providing you had no disease or pest issues.
Another alternative to using topsoil in containers is to make your potting soil. These mixes can be custom blended for seed starting, cacti and succulents, orchids or any type of plant you wish to grow. Here are a few ingredients that can be used when custom blending your own potting soil:
- Bark
- Coconut coir
- Organic compost
- Peat moss
- Perlite
- Pumice
- Sand
- Vermiculite
The growing medium you choose is the lifeblood of any container plant. If you opt for the best you can afford, you’ll give your plants the best chance for success.
This article was last updated on
Read more about Container Gardens
Did you find this helpful? Share it with your friends!
You might also like…
Garden soil for indoor plants and seedlings - FloweryVale.
 ru
ru
Garden land
We continue the theme of earthen mixtures for indoor plants. We examined the composition of purchased earth mixtures in a previous article. Now let's see if garden soil can be used for sowing seeds for seedlings and for transplanting indoor plants?
Of course, garden soil can be used not only for indoor plants such as clerodendrum, chlorophytum, pelargonium and many others, creating kokedama, but also for growing seedlings of vegetable crops such as tomatoes, cucumbers, peppers, eggplant, you first need to know a few rules:
1. Do not use land treated with various herbicides, such as Roundup. If in the garden, under the influence of external factors, the action of herbicides decreases, then in a flower pot such soil will oppress indoor plants and even destroy them.
2. For indoor plants, take the land from a clean fallow, it must be well cultivated, without weeds. If there are any, first remove all plant residues. Pick up pebbles and weed roots from the ground. Otherwise, the weeds will grow in the flower pot and start to oppress the plants planted in this land. Especially carefully choose the land for seedlings. Otherwise, pulling out the grass (and it always sprouts first) can damage delicate thin sprouts of seedlings or small roots.
3. Be sure to inspect the land selected for indoor plants for live insects and other living organisms: enchitreus, earthworms, centipedes, mower larvae, scoop caterpillars, nematodes, mealybug larvae, wireworm, Maybug larvae. And even visually making sure that there are no worm bugs, this land will need to be disinfected. The larvae of many pests are not visible to the naked eye, for example, what are thrips, whitefly, or even an ordinary earth mosquito worth! Freezing the soil gives a low effect, since many pests are perfectly preserved in the upper soil layer and begin to occupy our beds in the spring. Therefore, spill the earth intended for indoor plants with a solution of potassium permanganate. You can also steam the garden soil in a water bath, but this is too much additional trouble.
4. Some houseplants grow best in acidic soil. If you limed the soil on your site, then you will have to add more high-moor peat.
5. And even if you have fulfilled all the conditions, it is better not to use garden soil in its pure form. Depending on the choice of a houseplant, garden soil can occupy only a fifth or a third part in the earthen mixture. The rest of the additives should be turf or leafy soil, sand, expanded clay, high-moor peat, humus, pine bark.
Seedling land
Very often, for growing seedlings of flowers and vegetable plants: cabbage, tomatoes, peppers, we take the same land - the one that is at hand or we buy the first soil mixture that comes across, the one that is cheaper. Meanwhile, each type of vegetable needs its own land for seedlings.
For seedlings of early ripe varieties of white, cauliflower and Brussels sprouts, it is better to take land containing up to 5-7% mullein.
Peppers, eggplants and tomatoes prefer high-moor peat with mineral fertilizers or humus.
Cucumber seedlings are best grown on sod-leaf land. You can prepare it in the nearest forest even in winter. But experienced gardeners cut layers of sod for these purposes even in the fall where white clover grew.
Before sowing seeds, the sod is turned over, cut into pieces and seeds are sown in them. If you take into account the tastes of all the vegetable crops that you are going to grow, then your seedlings will turn out to be strong and hardy. After all, already in "infancy" she received all the necessary substances for good development.
So that the earth does not cake when growing seedlings, you can add sawdust doused with boiling water to it. They make the soil more loose, breathable, and besides, it is not very compacted after watering. At the same time, seedlings are developing successfully.
See also:
Formulation of soil mixtures for indoor plants
Composition of commercial soil mixtures and substrates for indoor plants
Hydrogel and plants
P. S. Is your house (basement, cellar) threatened by flood waters or is there a piece of land with a high level of groundwater? Then you just need a Grundfos sump pump. Grundfos drainage pumps are small, easy to operate, reliable, capable of pumping even polluted water with silt and plant particles up to 5 cm in size. Grundfos silent pumps can be installed right in the house to eliminate a household emergency.
Soil - how to reapply and is it dangerous? Photo - Botanichka
Specialized plant soil is not cheap and is usually enriched with nutrients that promote healthy plant growth. That's why it's so tempting to leave the old soil in the pot and use it next year. However, reusing soil is not always a good idea. Let's look at the dangers of old soil and how to make it safe.
Soil - how to reapply and is it dangerous?Problems with Reusing Plant Soil
Although reusing ready-made soil may seem like a good way to save time and money at first glance, used soil has many hazards for plants. Namely:
The old soil left in the container after growing the plants is usually depleted in nutrients. At first, new plants will develop from the root ball after planting. However, this food will not last long.
In addition to nutrients, the soil may lack minerals. Without minerals, plants will become weak, diseased, misshapen, and eventually die.
If plants previously growing in this soil showed signs of disease and died prematurely, you should not reuse the soil. Viruses, bacteria and fungi will live in the soil long after the plants have died.
These pathogens overwinter quietly in used soil and attack new plants the following spring.
Various pests can lay their eggs in safe, inconspicuous places, and in the ground they can be very difficult to see. If a pest infestation has killed your plant, do not save the soil it was growing in and discard the container if possible. There is a high chance that pest eggs/larvae are in the old soil and container.
Most peat-based potting soils are designed for only a year or one growing season. This is because the soil will begin to compact, preventing the soil from draining properly.
Another way to tell if the soil needs to be replaced is a white crust on the surface of the soil. Most often, this is manifested by the accumulation of salts, which can slow down the development of plants. To prevent this in the future, it is better to water with melt or rain water, which contains less salts than tap water.
Another way to tell if the soil needs to be replaced is a white crust on the surface of the soil. Most often, this is manifested by the accumulation of salts, which can slow down the development of plants. © sovkusomHow to prepare old soil for reuse?
If pests or diseases were not observed in the soil of the container last season, then the soil can be reused. There are several options for reusing old potting soil. However, it is very important to follow the correct steps for preparing the soil, otherwise it may cause some problems.
Preparation begins by removing old plants and all visible debris from the soil.
Remove all stem parts, large roots and fallen leaves.
Then pour the soil into a sturdy container or bag (plastic bags or buckets are ideal where it can stay all winter.
Make sure the soil in the pot is completely dry before storing.
Moist soil is an ideal environment for mold to grow and fungi, which destroy the soil, and can further negatively affect the plants.Another reason to pour and dry the soil is that at low temperatures, the planter may crack if it is left with the ground in the open air.Thus, removing the soil, you save decorative plant containers as well.0003
Wash all containers thoroughly with warm soapy water to remove pathogens or pest eggs attached to the sides of the containers. Allow containers to dry and store.
Dry soil weighs less and is easier to place in storage containers and transport to winter storage.
Once the primer is completely dry, place it in waterproof containers or bags and store in a cool place over the winter.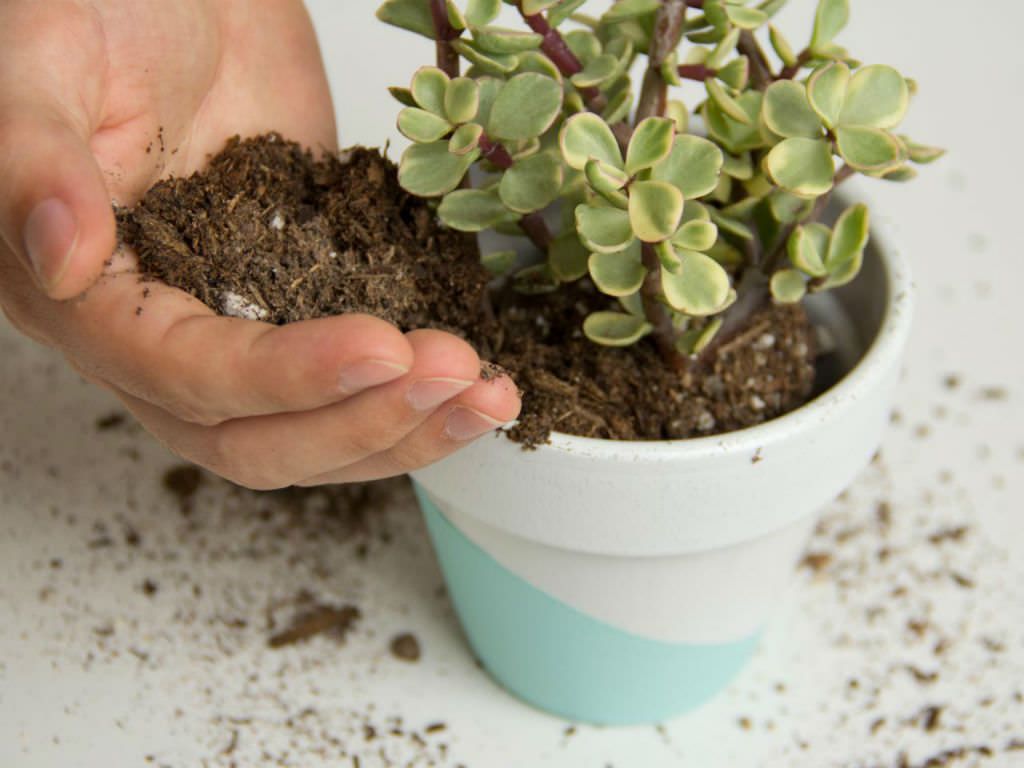 Exposure to low temperatures is beneficial because it kills some pests hiding in the form of a chrysalis or egg.
Dry and properly stored soil does not usually deteriorate over the winter. Check for soil odor before reuse to ensure no moisture has entered the container causing mold.
How to prepare old soil for reuse?How to sterilize old soil?
Solarize old potting soil in the spring to kill latent pathogens or pests that may have survived the winter. To do this, place the soil in a black plastic trash bag and leave it in the sun for at least an hour on the warmest and sunniest day of spring.
The temperature inside the garbage bag must be above 49°C to kill most pathogens and pests. Once the used potting soil has cooled down, the solarization process is complete and the potting soil is ready to be replenished with nutrients and minerals (by adding fertilizer or compost).
Steam sterilization of soil is another sterilization method.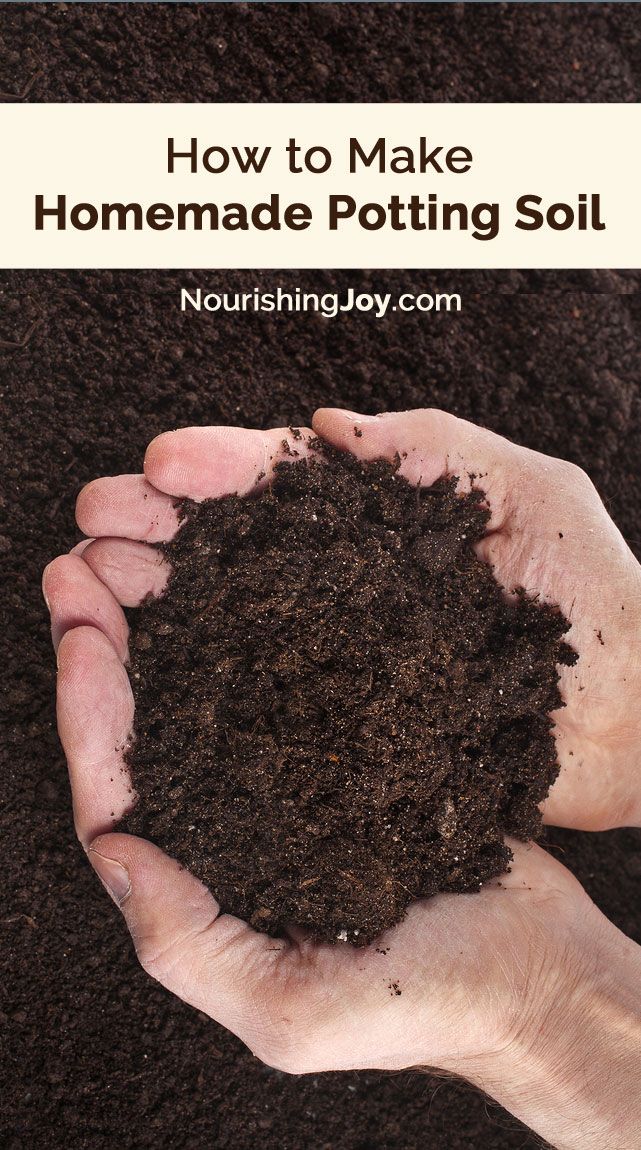 Steaming is considered one of the best ways to sterilize potting soil and should be done for at least 30 minutes or until the temperature reaches 82°C
Soil sterilization in the oven . You can also use the oven to sterilize the soil. To do this, pour some soil (about 10 cm deep) into a heat-resistant container, such as a glass or metal baking dish, covered with foil. Set the temperature to 100 degrees and the time for at least 30 minutes. Remove from oven and let soil cool without removing foil until use
How to sterilize old soil? © venskayadachaMicrowave soil sterilization . To use the microwave, fill clean, microwave-safe containers with damp soil—preferably a container with a lid (no foil). Make some ventilation holes in the lid. Heat the soil at maximum for 5-10 minutes.
Sterilization also destroys any beneficial soil microflora. After sterilization, it is best to revitalize the soil by re-introducing beneficial bacteria into it.
How to use old potting soil?
There are several ways to apply old disease- and pest-free soil:
Making a 50/50 mix of old and new potting soil is one way to get a healthy growing environment while saving money. You can also make a 50/50 mix of old soil and compost
If you have large containers, reuse the old soil at the bottom of the container. Next, sprinkle on the plant food, and then fill the container to the top with new soil
The old soil can be spread around the trunks of mature trees. While the nutrients and minerals are largely gone, the potting soil will slowly decompose and improve the soil structure. Sterile soil still contains perlite and humus, making it an easy cover for tiny seeds like carrots, radishes, beets, lettuce, and others. The soil also has water-retaining properties that promote better germination
Make a new raised bed using the layering technique. Place newspapers, cardboard, etc. on top of the grass inside the bed, then lay out the old soil, leaf litter, and other organic materials.