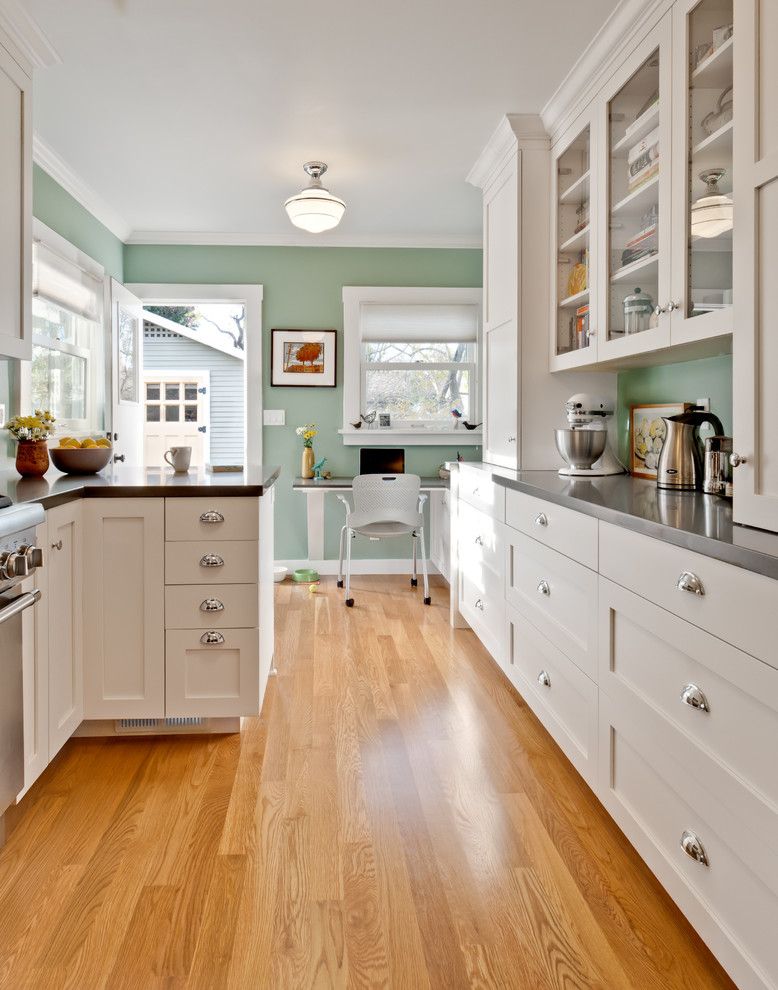
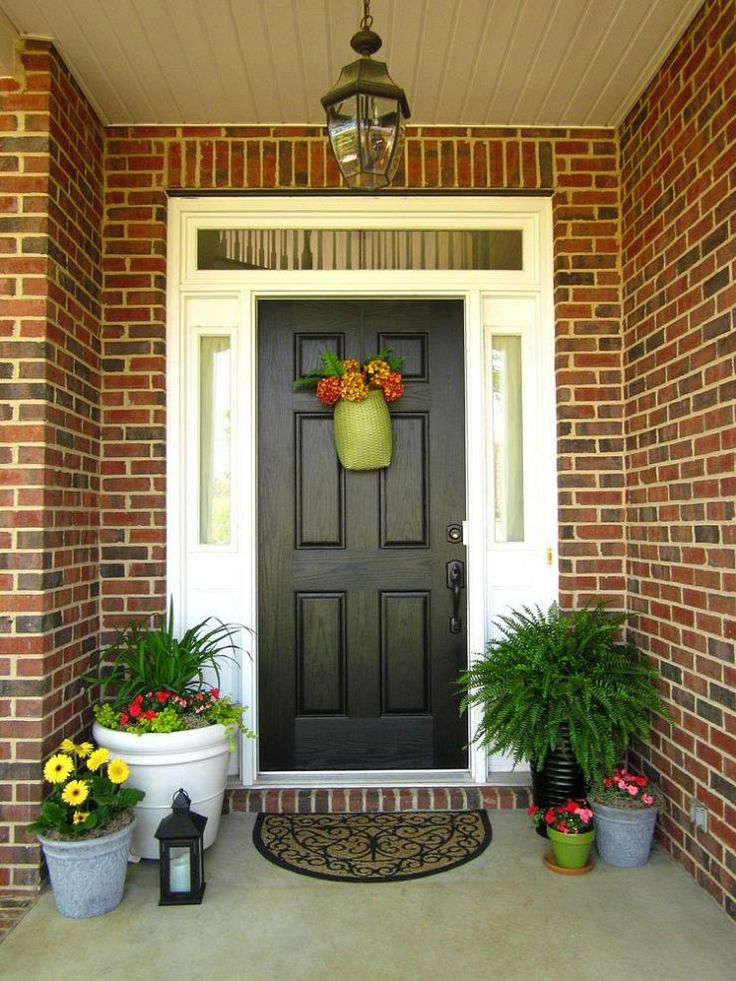
Paint kitchen cabinets green
Best Green Paint Colors for Kitchen Cabinets
Paint Color
7637 shares
- Share
- Tweet
Tired of white kitchens? Green may be your new favorite color for a kitchen! Check out all the examples below!
It may be no surprise that my favorite color is green. I’ve used green on my website branding for So Much Better With Age and Jamie Lundstrom Interiors.
And lately I’ve been toying with the idea of painting my kitchen cabinets green. I love the deep, rich color and it looks so good against whites, blacks, golds and woods making it a true classic kitchen color.
Now what shade of green would the best color be?
With so many green paint colors on the market, I’m sharing real life examples of green kitchens. Most have the paint color listed (unfortunately some do not) but I do share my favorite colors at the bottom of this post.
best Green paint colors for Cabinetry
I think it would be quite challenging to have a post on green kitchen cabinets and NOT include an example from Devol Kitchens. Their bespoke cabinetry comes in a variety of fun colors and they have many, many examples of beautiful deep shades of green like the ones below.
Design: Devol KitchensAnother beauty from Devol Kitchens. This hunter green is drop dead gorgeous!
Design: Devol KitchensPlain English Cupboardmakers kitchens are droolworthy at best. Their simplistic style is anything but simple.
Design: Plain English CupboardmakersKelsey Leigh Design Co created this gorgeous green kitchen with black countertops and gold hardware. I love the symmetry of the tall cabinets flanking either side of the range.
Paint Color:
50/50 mix of Ripe Olive and Pewter Green from Sherwin Williams
Design: Kelsey Leigh Design CoChelsey Freng‘s kitchen is beautifully simplistic. This is a stunning deep green without it being that super deep hunter green.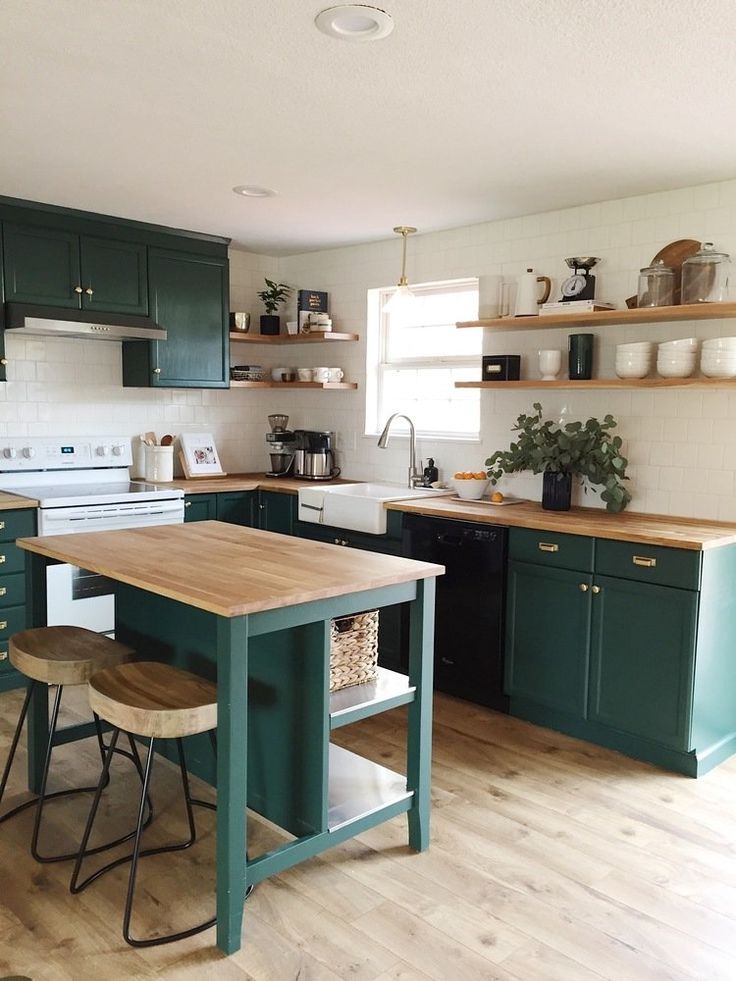 It goes so well with light wood accents.
Paint Color:
Pewter Green Sherwin Williams
Design: Chelsey FrengAngela Rose Home designed a beautiful green kitchen in the most gorgeous green/black color. In some photos, it looks nearly black. I love that!
Paint Color:
Rock Bottom by Sherwin Williams
Design: Angela Rose HomeJenna Sue Design Co. created this beautiful kitchen using a deep hunter green for the cabinetry.
Paint Color:
Peale Green by Benjamin Moore
Design: Jenna Sue Design Co.Heidi Caillier Design creates the most interestingly colorful rooms and her kitchens are the same.
I looked everywhere and could not find the paint color for this gorgeous kitchen!
Design: Heidi Caillier DesignElizabeth Roberts creates beautiful homes and this kitchen is no exception. The beautiful deep green goes perfectly with the gold light pendants and gold-ish marble countertops.
Unfortunately, I could not find a paint color for these cabinets either.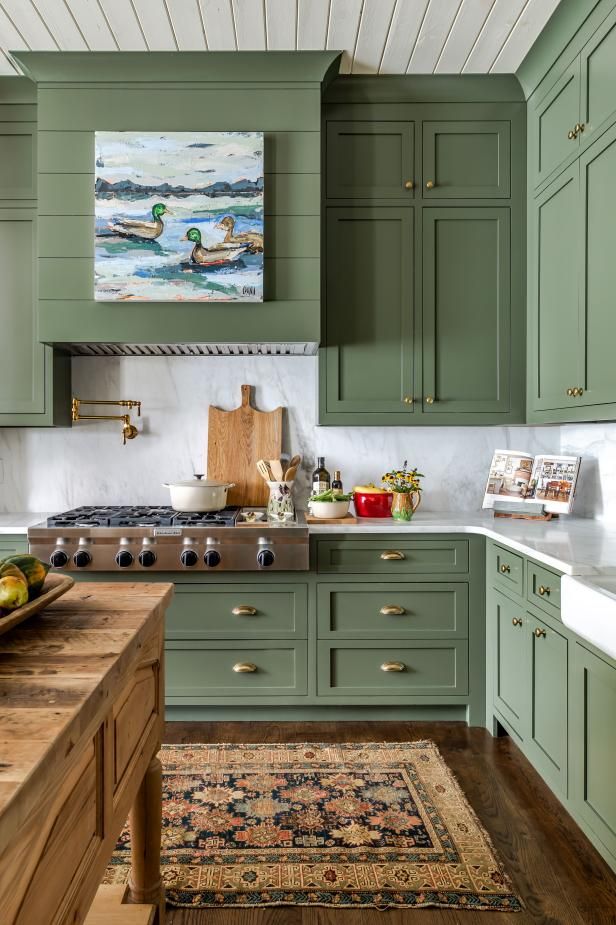
Studio Albertazzi created this stunning kitchen in this Vancouver home. Love how fresh it feels.
Unfortunately, I could not find a paint color for this kitchen.
Design: Studio AlbertazziRebecca Wakefield from Studio Fortnum shares this beautiful green kitchen and I’m loving the simple lines!
Paint Color:
Treron by Farrow & Ball
Design: Rebecca Wakefield of Studio FortnumJack Creasy and Bloomsbury Kitchens created this masterpiece of a kitchen. That marble against the green? Stunning!
Paint Color:
Minster Green by Farrow and Ball (but I don’t see it on their site so I’m not sure if this is an old color that they don’t sell anymore?)
Design: Jack Creasy and Bloomsbury KitchensMy Favorite Green Paint Colors for Kitchens
Now that you’ve seen the examples, here are my favorite green paint colors for kitchen cabinets.
Benjamin Moore
- Peale Green
- Cushing Green
- Avon Green
- Webster Green
- Saybrook Green
- Caldwell Green
- Lafayette Green
- Tate Olive
Sherwin Williams
- Laurel Woods
- Evergreen Fog
- Dried Thyme
- Green Onyx
- Retreat
- Pewter Green
- Jasper
Farrow & Ball
- Treron
- Lichen Green
- Calke Green
- Duck Green
Make sure to pin it for later!
What do you think? Are you ready to have your own green kitchen? Let me know in the comments below!
Click in case you missed:
Chantilly Lace by Benjamin Moore – The Best White Paint?
The Best Black Paint Colors from Benjamin Moore
Similar Posts
Decorating | Paint Color
Split Complementary, Tetrad, Triadic and Clash Color Schemes for Decorating
Check out how to decorate your home using split complementary, double split complementary, tetrad, triadic and clash color schemes! I’m sharing another part of my color theory series today. I’m going to be sharing examples of split complementary, tetrad, triadic color and clash color schemes. You definitely don’t have to decorate like this but if…
Read More Split Complementary, Tetrad, Triadic and Clash Color Schemes for DecoratingContinue
The 20 Best Green Paint Colors for Cabinets for 2023
Green is a popular paint color and a favorite color for many. If you want to add some color to a cabinet while keeping it modern, green is a great option. Here are my favorite green paint colors for cabinets!
Whether you are designing a kitchen or a bathroom, cabinet color is one thing that can date a space quickly. Luckily, it is also something that is easy and inexpensive to change.
If you are looking for a paint color that is dramatic and modern – green could be perfect for you.
I especially like a green kitchen island paired with lighter or wood toned cabinets.
But, there are so many shades of green! How do you pick one? Let’s talk about the best green cabinet paint.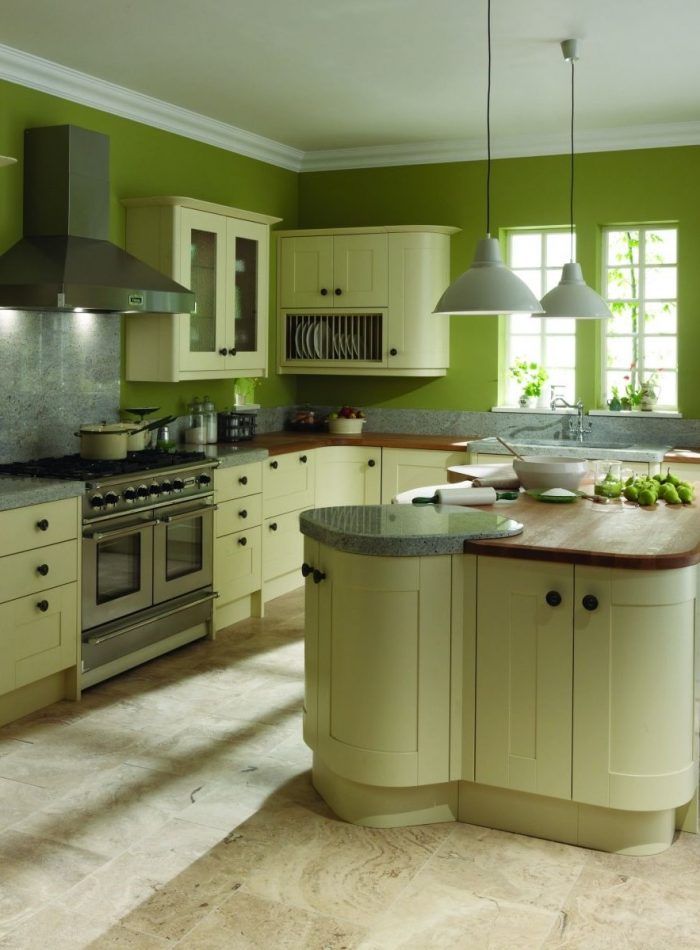
Be sure to read about the best paint finishes for cabinets here!
Is green a Good Color For Kitchen Cabinets?I love green colors for kitchen cabinets! Kitchen cabinets painted green are a great way to infuse personality and color into your kitchen – especially with neutral other choices. In most cases, a more muted shade of green will be best to keep it from looking overwhelmingly bright.
What Colors Go With Green Cabinets?Green in general pairs nicely with most other colors. Layer it with cool toned colors for more of a cottage or coastal look. Or, pair it with warmer tones for a cozier, homey vibe.
Green kitchen cabinet paint looks great with:
- White
- Lighter colors
- Natural wood tones
- Gold + metallics
I tend to steer clear of pairing red, purple or orange with green.
How to pick the best green kitchen cabinet paint color
There are few things to consider when selecting a paint color for your cabinets.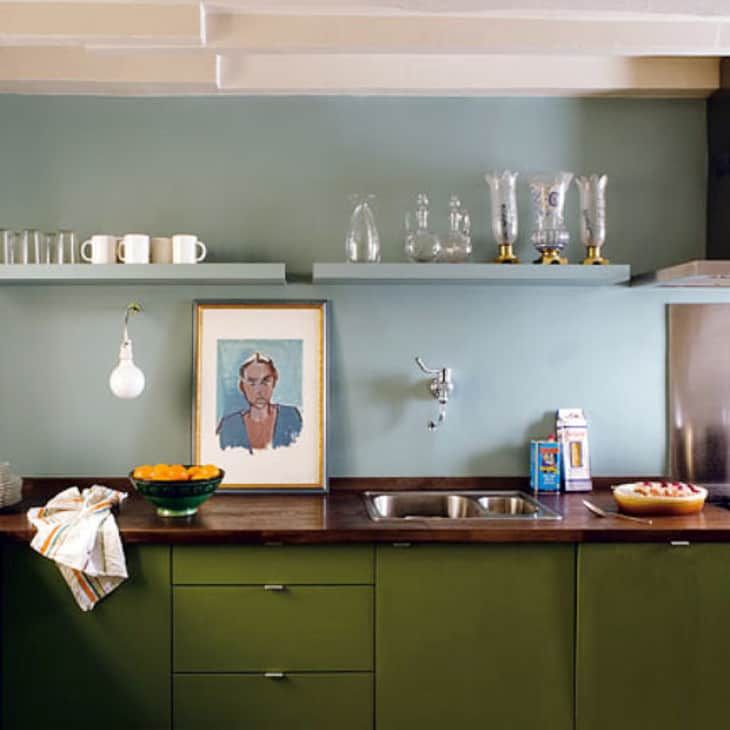
First is to pick a color family. Congrats – if you are here, it seems like you picked green 🙂
Then, think about colors within that family. Do you want something lighter or darker? Brighter or more muted? What undertones do you want?
Next, you want to get paint samples. I suggest buying at least three paint samples if you want to paint walls. Paint them on your walls in at LEAST three different spots each.
You want to make sure you have test spots near anything that is not changing, such as trim, carpet or flooring, or cabinets.
Now, let that dry (do 2 coats if it needs it) and then look at it over the course of at least 2 days. Look at it in morning, day, and evening light. Look at it with the lights on and the lights off.
All of these things effect how a green painted kitchen cabinets look in your home!
Green paint undertones
Green paint colors have either warm or cool undertones.
A warm green color will be an olive green.
A cool green color will be a blue-green.
In general whether you want an olive green or a blue green, I always recommend a green paint color with gray undertones. This makes the color more muted and not at all bright or neon!
I am excited to break down some of the most popular green cabinet paint colors with you.
The Best Green Paint Colors for Cabinets
There are tons of options for green hue cabinet colors. Here are some favorites!
The best sage green cabinet paint colors
See all of my favorite sage green paint colors here!
Behr Nature’s Gift
This is a beautiful earthy green. It’s slightly darker than light green, with both blue and gray undertones. It really transforms in different light!
See my review of Behr Nature’s Gift here!
Behr Laurel Tree
This is a sage green thats just slightly bright, but has gray undertones so it’s not neon at all.
See my review of Behr Laurel Tree here!
Benjamin Moore High Park
This is a medium-dark sage green color.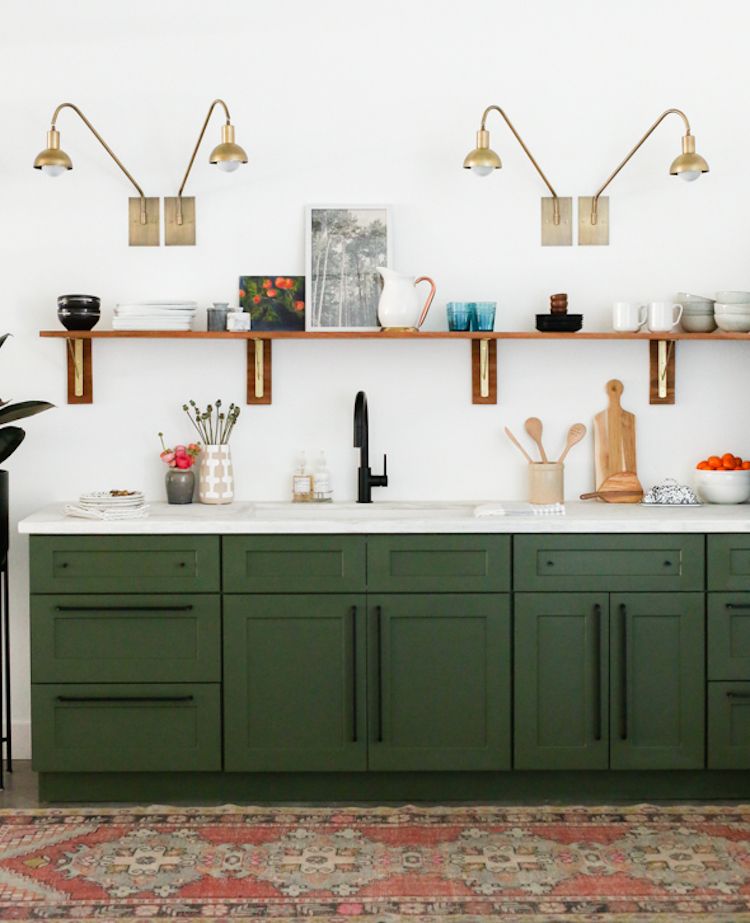 It’s a super on trend shade!
Benjamin Moore Night Train
This green color has a lot of gray undertones to it, making it not feel too bright. It instantly makes a room feel cozier.
Behr In the Moment
This is another green with a lot of blue undertones – but it is definitely green and not blue!
Sherwin Williams Coastal Plain
This is a lighter, bright, beachy green color. It almost reminds me of sea glass!
Sherwin Williams Retreat
This is a dusty olive green color, with a lot of gray to it so it doesn’t at all feel overwhelming.
Sherwin Williams Acacia Haze
This is a dusty olive green color. Perfect for a trendy, sage green wall!
Benjamin Moore Sage Wisdom
This is a brighter sage green, but it still has those gray undertones that keep it from reading neon or pastel. A great color depth if you want green on your walls without feeling dark.
Sherwin Williams Svelte Sage
This paint color has a lot of yellow and brown it it. It almost looks khaki next to all of these other greens! However, put it with neutrals whites and wood tones and it will look more green.
A great option for a more neutral, beige sage!
The best dark green cabinet paint colors
See all of my favorite dark green paint colors here!
Behr Trailing Vine
This is a true deep green wall paint color that I used as the background color for Luke’s jungle mural!
It has a bit more green to it than some of the other greens on this list – and it looks definitely green on the all, without being bright or neon at all.
Read my complete Trailing Vine color review!
Behr North Woods
This is a deep green color with muted undertones, so it doesn’t look too forest green but almost black on the wall, especially at night.
Read my complete Behr North Woods review!
Sherwin Williams Rookwood Sash Green
This is a very rich forest green. It has just a touch of blue undertones, and in cool light could look a bit teal.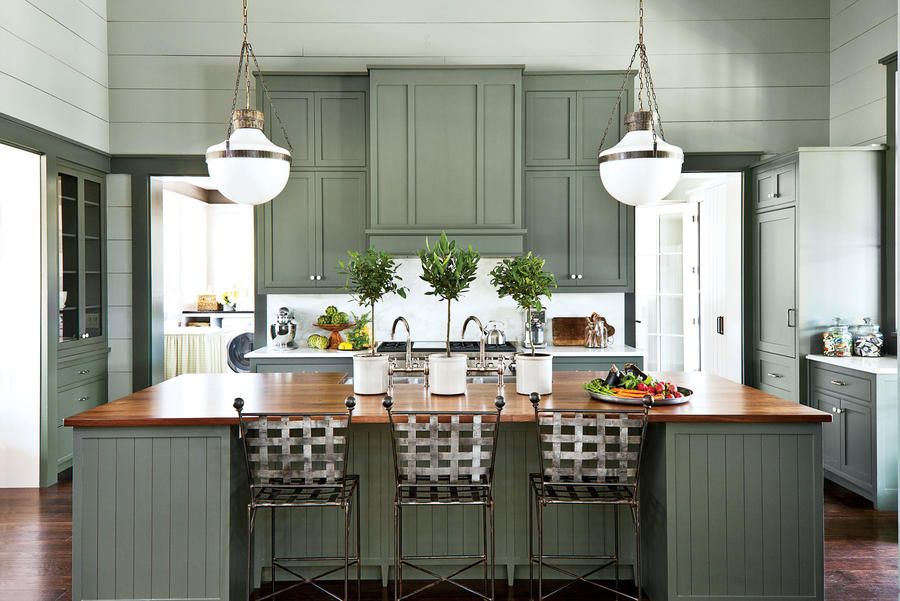 If you are looking for a deep green paint that feels cool toned, this is a great option.
Benjamin Moore Waller Green
I love that this green is very dark but not overwhelmingly green. It almost looks charcoal in certain lighting. It’s a great dark green wall color that can almost look neutral in the right lighting!
Sherwin Williams Pewter Green
This is the perfect earthy sage green paint color. It is gorgeous on the exterior of a home in an earthy, wooded lot!
This color is sort of on the border between mid-olive green and dark green, but I think it verges on dark green so I am including it here. It’s a great dark green interior paint color!
Behr Meteorological
This is an almost teal green color because it has a lot of blue undertones to it. This jewel tone is really rich and plays well with both warm and cool undertones.
Behr Black Bamboo
If you like an olive green, this is a great option. It’s dark but not too dark, the green tones really shine through.
Sherwin Williams Shade Grown
This beautiful deep green color has a vintage feel and pairs really nicely with metallic tones and light neutrals.
Clare Current Mood
This trendy color has a lot of blue undertones to it, making it a beautiful teal green paint color.
Behr Rainforest
This is a rich, true green color. It’s super dark making it moody and perfect for a small space.
Still not sure what paint color to choose?My Paint Color Formula ebook walks you through the painless process of expertly testing paint swatches to ensure you have the perfect color for your home.
Learn more about the Paint Color Formula here!
The best way to sample paint? Samplize!
Get peel-and-stick removable and reusable paint samples here!
Thanks for reading!
Sharing is caring!
6 painting steps and instructions
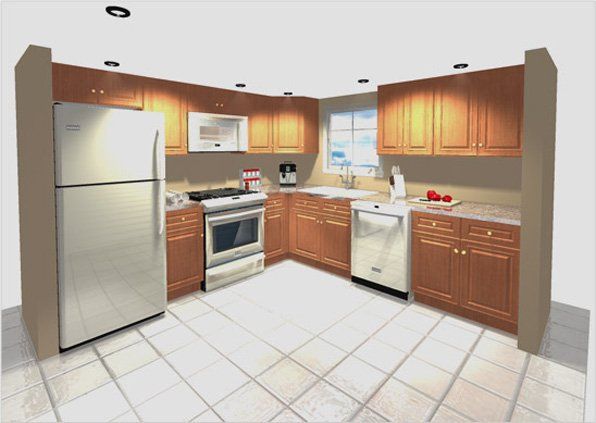
Kitchen cabinets are not always worth replacing, sometimes they are worth painting.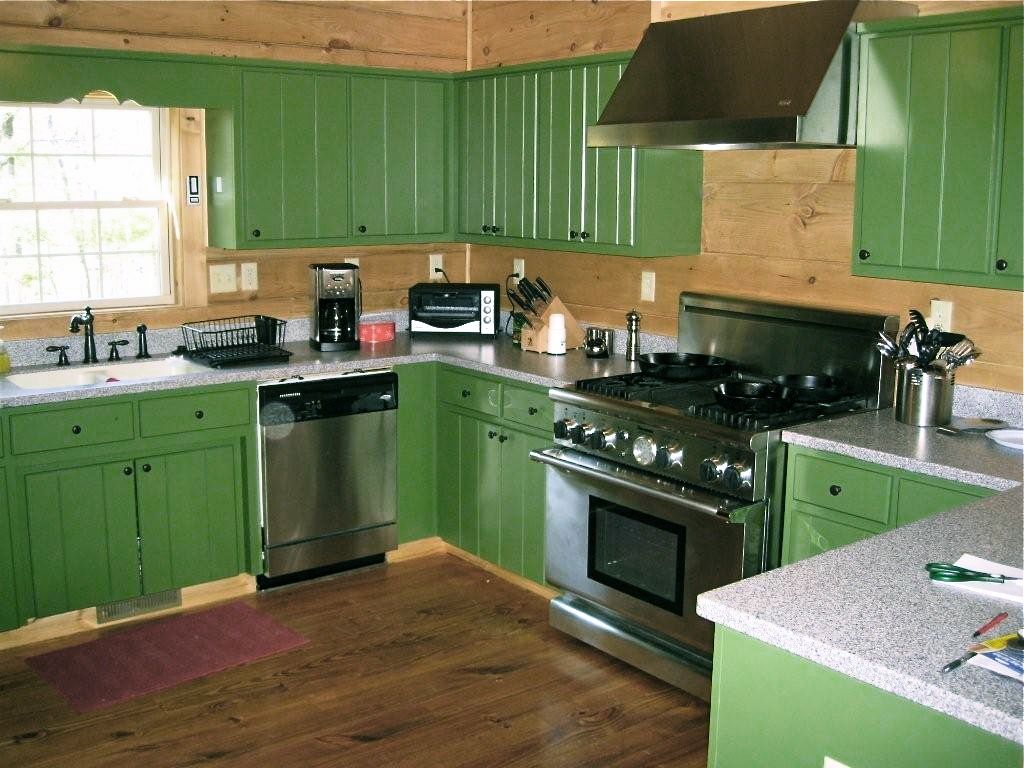 Renovation of kitchen furniture is now an extremely fashionable trend. Beautiful facades often have great potential that can be highlighted with the right paint. Before deciding to completely get rid of the old kitchen decor, take a brush or roller. It may turn out that painting furniture white will be the bull's-eye!
Article content
Replacing or painting kitchen furniture, what to do?
DIY is one of the fastest growing trends. Repairing old kitchen furniture, or rather painting it, which has already survived its best years, is a positive trend dating back to the good times when do-it-yourself was appreciated and individual appliances were respected. Better to repair than throw away, freshen up instead of replaced, right? Moreover, we will always have time to buy a new one, if there would be, as they say, money. And the easiest and most effective way to give the kitchen a neat look is to paint it with quality paint. Here's how to do it competently, we will discuss in this article step by step, in 6 simple steps.
Kitchen furniture wears out the fastest. High intensity of use, exposure to grease, stains, exposure to water vapor and, finally, the risk of damage means that after a few years we can notice more or less serious scratches or abrasions on the fronts of drawers and cabinets. On the other hand, such minor flaws do not necessarily mean that they need to be replaced. Kitchen paint is often a much better (and certainly cheaper!) way to replace it. It is enough to apply several layers, replace the handles or the countertop, to change a lot in the design of the kitchen.
If you decide to repaint the kitchen set and decide what color it will be, be prepared for the fact that you will have to change the textiles on the windows and the upholstery of upholstered furnitureWhat paint to choose for painting kitchen furniture
Of course, our mission has a chance of success if we focus on a quality product. Many people who start their adventure with do-it-yourself furniture repairs - kitchens and other areas - are in doubt about which product is being used.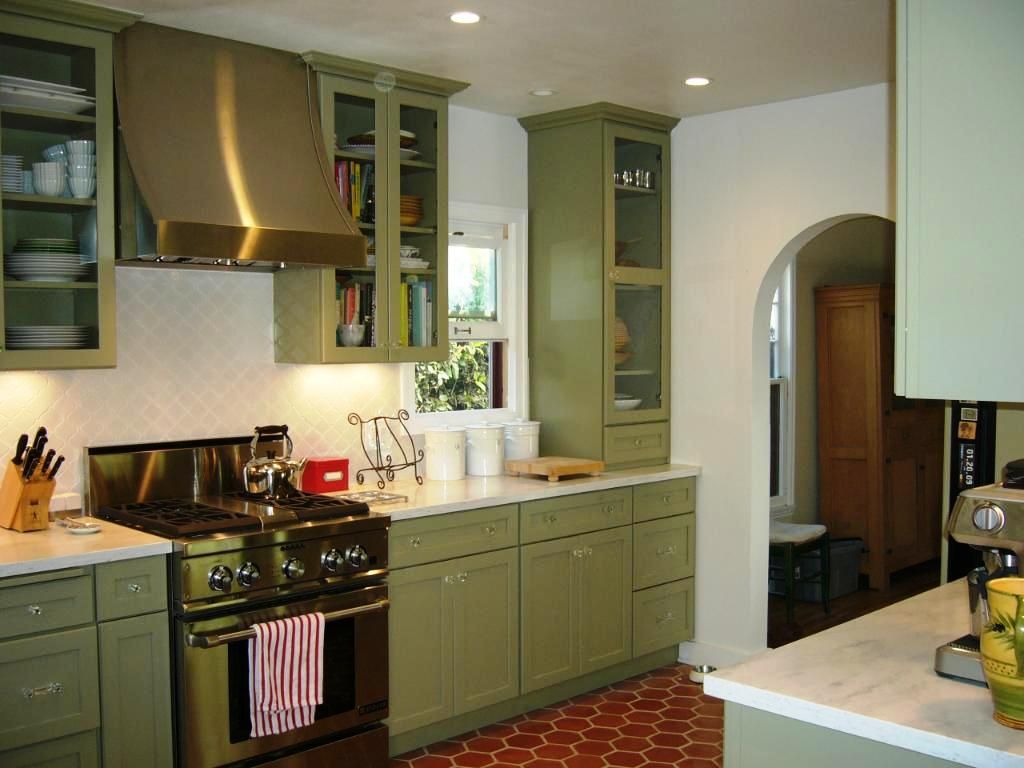 Do I need paint for veneered furniture or is it standard wood furniture paint? There is no single answer.
The manufacturer's recommendations and the product data sheet, which describes the applications, are of key importance. Usually, painting kitchen furniture made of MDF board, as well as veneered or even wooden furniture, requires us to purchase one product.
These are mainly acrylic paints, universal, resistant to a number of factors, including exposure to solar radiation or cleaning. Manufacturers often produce special paints for painting wooden furniture, which allow you to achieve the perfect visual effect and effectively protect the surface.
Applying enamel with a brush or roller is difficult. For painting kitchen facades with your own hands, it is better to choose auto enamel. It is available in pressurized cans to achieve an even coat without the hassle.Features of kitchen paints
To paint kitchen cabinets well, you need to consider the nature of the composition, water resistance, degree of coverage, and, of course, color.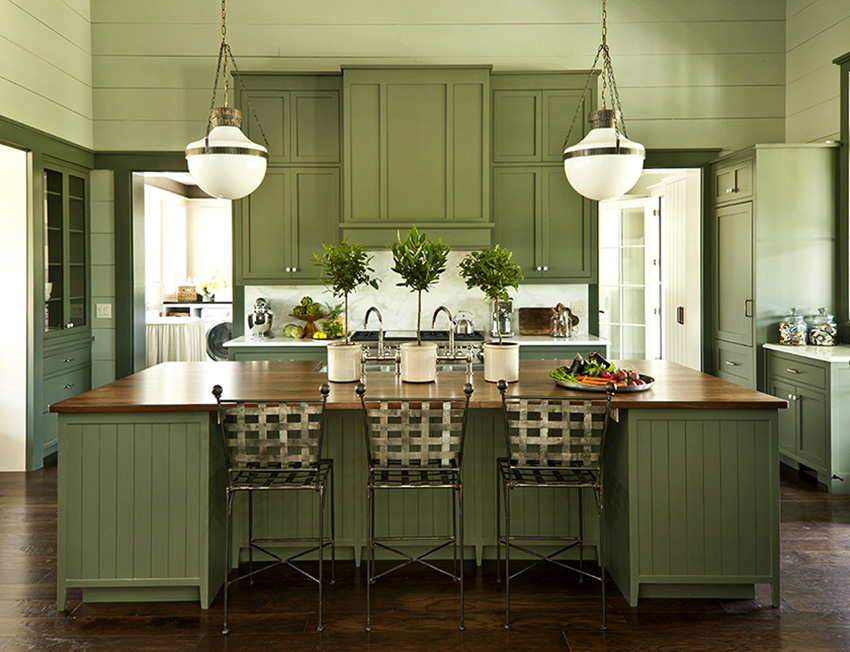 In fact, the choice is not so great:
- Oily - they are called so because the solvent for them is not aqueous solutions, but oily ones. This option is remarkably resistant to moisture and steam, it perfectly tolerates temperature changes. However, the structure of the paint is viscous, it is difficult to apply it. To repaint the facade well - without streaks, bumps and light spots, you need a lot of experience. In addition, oil formulations dry for a long time, and drying is accompanied by a heavy unpleasant odor.
- Acrylic paints. They use water as a solvent, so they are completely safe and hygienic. For the kitchen, it is necessary to choose waterproof acrylic compositions, otherwise the painted set will quickly lose its appearance. The composition lays down very easily and evenly, so painting the facade of the kitchen with your own hands is quite simple. In fact, waterproof paint is also washed off with each wash. However, this does not happen so quickly: visible abrasion is observed no earlier than after 500 cleanings
- Alkyd enamels - paints based on organic solvents.
 For the kitchen area, this option is considered the best, as it has excellent hiding power; safe, dries quickly and easily and does not wash off. The coloring layer is resistant to steam and condensate, does not absorb dyes and soot and is insensitive to temperature. All its advantages can be observed in finished kitchens made of MDF with enamel coating.
 - Repair paints (e.g. repair paint V33) . This is a special range of products for the repair of kitchen furniture and other surfaces (including ceramic tiles or even household appliances - depending on the type). They are easy to apply and provide a durable and very attractive surface.
Aerosol paint
The most convenient option for painting the facade of the kitchen at home is aerosol paint in cans, for example, acrylic or car enamel due to its heat and moisture resistance. Acrylic spray paint is durable, damage resistant and available in many shades.
Aerosol paint in cans is used in a variety of areas, including it is applicable in household and repair work for painting furniture. Low cost, ease of spraying and the ability to create a perfectly even coating make you choose this particular paint and varnish material and make it indispensable for repair and decoration.
Of course, spray painting will be more accurate. Here we must remember that during operation, part of the material will be sprayed to the sides. Therefore, it is necessary to cover everything around with a film so that the paint does not get. For a more saturated color, you can paint again after the first layer has completely dried.
A perfectly glossy finish can be achieved by applying several layers of varnish with intermediate polishing after each layer driesImportant! Before starting work, we protect all surfaces that we are not going to repair and paint, such as countertops, as well as walls and floors, it is advisable to cover them with masking film and stick with masking tape
Video - How to update an old kitchen
Choosing a paint color
For painting a kitchen set, you can choose one color or several, which is becoming very popular , it is important that the color scheme is in harmony with the overall interior. It will be easy for those who have taste, but for beginners in this business it will be a little difficult.
Consider the following options:
- Neutral solution . This includes all varieties of beige, as well as brown, black, gray and white. Combining these colors, it is quite difficult to make a mistake, you just need to carefully combine dark tones.
 The most common option: the upper cabinets are light in color, the lower cabinets are dark. This combination is more suitable for classic interiors.
 - It is important to remember that it is better not to combine only dark or only light colors. Do not forget about bright colors. So, black can be combined with red, light green, mint, pink, beige, white with blue, lilac, blue, beige with red, lilac with cappuccino color, burgundy with cream, white, wood color, etc. Two bright or two neutral colors is an interesting option, here you should rely on your taste. The theme of vegetables and fruits will look no less interesting.
- If you want to have an original interior, combine contrasting colors - yellow with lilac, orange with blue, blue with red or pink. For a more relaxed atmosphere - orange with red or yellow, green with yellow or blue with green.
- To date, the use of several colors at the same time has become widespread.
 For example, two calm shades can be “diluted” with a colorful detail. You can use a different color for each individual facade - your kitchen will be in retro style.
See examples in the photo below:
Read also:
Color solutions for the interior of the kitchen: Description and best examples of design
How to paint the kitchen headset: Repair in 6 stages
Painting kitchen cabinets is often a much better solution than buying a new low quality, inexpensive kit, especially if the furniture is still functional and easy to use. A universal, well-known and applicable principle in many areas, which can be applied to the repair of kitchen furniture: the most important thing is preparation. The final effect will depend on how accurately we prepare the equipment for further work.
1.
 Defect detection and minor repairs
 The first thing to consider is the furniture. We will check the condition of cases, facades, skirting boards, shelves, cabinets and drawers, we will check how serious the damage, scratches and cracks are. It is possible that they can be supplemented with a special mass (for example, with wood defects) or sanded with sandpaper. By the way, let's think about adjusting and profiling (and in some cases replacing) fittings, hinges and guides.
2. Preparation of surfaces for painting: matting
Of course, only a change in color will allow us to make a diametrical metamorphosis of kitchen furniture. To achieve a beautiful (and durable!) effect, let's first prepare the furniture for painting. To do this, we will disassemble the handles and handles, which will allow us to accurately perform the work. It will not always be necessary to disassemble cabinet doors. We can do this to facilitate repair work.
It turns out that the repair of kitchen furniture from different materials is basically very similar. The basis here is matting the surface, that is, rubbing with sandpaper and at the same time grinding all the bumps and reducing scratches. Why is it so important? If the surface is not rough, the new paintwork will not provide adequate adhesion. As a result, after a while, it will begin to flake off.
First we mat the furniture with coarse-grained sandpaper, then we smooth the surface and get rid of burrs with fine-grained paper. Such procedures will ensure perfect adhesion of the paint to the furniture.
A sander will greatly facilitate manual workWant to achieve the most even and durable finish? Then it is worth sanding the surfaces after each coat of primer, paint and varnish (except for top coats)
You can also use nail polish removers. To remove the PVC film, you will need a building hair dryer. With it, it is necessary to heat the film from the front side and carefully remove it from the facade. Please note that during the work a rather pungent odor will be released, so it is advisable to choose a non-residential premises for this procedure.
In addition, we prepare both veneered and wooden furniture for further work. In the case of veneers, first check their condition. If they stick out and start to come off, let's tear them off the facades. We remove all chipped paint and its peeling fragments from the surface of wooden furniture - if the furniture was previously painted.
Finally, remove the dust generated during operation with a vacuum cleaner, and then wipe the furniture with a damp cloth and detergent. Let's try to remove the grease that could affect the adhesion of the paint layer to the furniture3. Primer
The primer for plastic and wood differs in composition, so before you update the facade of the kitchen, consult with the sales assistant in choosing the right product. The quality of the primer determines how well the painting will happen. The substance must be applied in 2 thin layers.
Before applying the compound, arrange the parts so that you are comfortable.
After each application, it is recommended to wait until completely dry, and then treat the primed surfaces with sandpaper to even out the coating and enhance paint adhesion. After that, leave the product for a day.
4. The process of painting the set
We start painting veneered, plank or wooden furniture as soon as it is completely dry. We will need a small brush, a large brush, a narrow and wide roller - the size of the tools must be adapted to the specifics, furniture design, length and type of bristles and paint.
In the product data sheet, because each paint may have different requirements. The manufacturer's recommendations should also be followed when it comes to painting conditions, the number of coats or the time interval between one coat and another.
In order to paint the facade of the kitchen with high quality yourself, to avoid streaks and any other marks, it is recommended not to take too much paint on a brush and roller, to drive over the surface with smooth, even movements We start painting kitchen appliances from their hard-to-reach places, corners, corners and details. For this, a small brush is useful, thanks to which we can accurately cover the cavities or milling with paint.
Then we move on to painting large surfaces - use a larger brush or roller. We paint fragment by fragment, first with a brush, and then with a roller, covering the next parts of the furniture with paint.
Tip! The brush for painting the facade of the kitchen at home should be new. With it, it is easy to paint recesses, joints, corners, small details, in general, all those hard-to-reach places where it will be difficult or impossible to reach with a roller. For even application of paint, purchase a roller on foam rubber, and a special paint tray will make the work more convenient and will not absorb a lot of paint material into a brush or roller
5. Replacing the decor of the front of the kitchen set or getting rid of unnecessary elements
A brilliant trick that allows you to visually refresh the look of old kitchen furniture is to remove the front trim. In addition, think about replacing the legs (those covered with an overlay usually do not look very designer).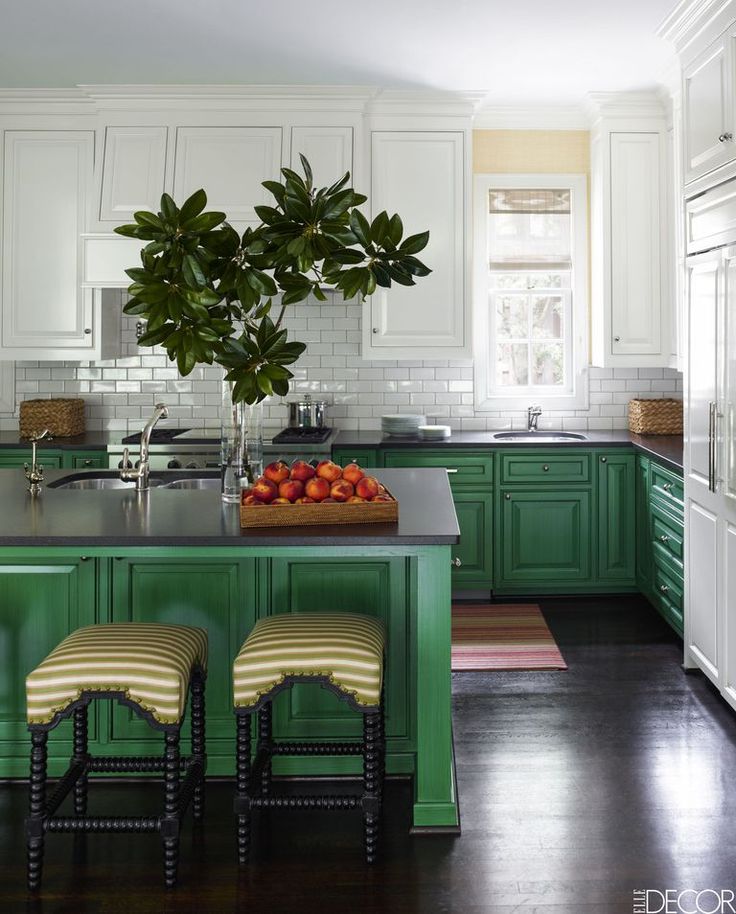 These two simple steps will allow you to optically shift the center of gravity: the floor will become more visible, and the body will become lighter, thinner and less massive.
Decoupage cards or napkins with a pattern are used here, you can take various pictures cut out from magazines, print some picture on a printer. We place the images on the facades, glue them on PVA, leave them to dry completely. At the end, we cover with a transparent varnish in several layers.
Even an inexperienced painter can decorate boring facades of a headset or hide local damages (scratches, chips, stains, etc.) with decoupage drawingsAdditional decorative processing
Additional materials help to create unusual effects on the surface, while the color scheme does not matter:
- Stencil or tulle allow you to create lace designs.
- Gleezal will be needed to create relief patterns.
- Masking tape and stencil are used when there are two or more shades when finishing.
- It is more convenient to display gold and silver patterns with a thin brush. This should be done after the varnish layer dries.
- With the help of an airbrush, artistic painting is carried out according to sketches.
- Cling wrap is a technique used to create marble surfaces. At such moments, the products simply glisten, while drawing veins and highlighting the relief texture.
- With a simple comb, it is easy to draw a relief graceful structure.
- Unique rustic facades are created by applying a rough canvas or mesh to the surface.
- Embossing - this technology is applicable with the help of bubble wrap. The surface will look like alligator skin when painted.
The main thing is a competent approach, and simple painting will give new life to an old set
Painting kitchen furniture with your own hands is a difficult process, but it involves the use of a creative approach. You will have to spend a lot of time, but the result will pleasantly surprise not only the owners, but also the guests who will visit you. There are no restrictions on the options used, everyone finds the closest option. It remains only to select the appropriate materials.
6. Replacement of accessories
Details, little things, small elements can make a significant, even diametrical change in the appearance of kitchen furniture. When planning a comprehensive kitchen renovation, do not forget about replacing handles. Thanks to this, it is much easier to achieve a given interior style. There are rustic and modern, industrial and classic pens in every store, just pick the ones you like best. Believe me, if the accessories are not rare and there is nothing valuable in their design, you should not bother with their repair.
Read also:
How to choose high-quality fittings for kitchen furniture
Video-painting of kitchen facades MDF
photos of example of furniture
Below are several photo submissions of the kitchen and after painting. Pay attention to how updated and bright the kitchen furniture has become, and how the interior of the kitchen has changed.
To summarize
How to repair and paint kitchen furniture, so that the result does not disappoint? First evaluate the range of damage and work required, then select the best paint product. Thanks to high-quality paint for painting furniture, we do not have to think about time-consuming, thorough repair and replacement of equipment. Why replace when you can extend life? All you have to do is change the color, tone or shade, plus a thoughtful selection of accessories to create your dream kitchen with interior design magazine furniture.
As you can see, painting a kitchen is not only a renovation, but also creativity. Now that you know how and how to paint the facade of the kitchen with your own hands, you can safely get to work. In the renovated premises it will be not only pleasant to be, but also to cook, wash dishes, meet and chat.
Video - Master class: how to paint furniture in the kitchen
How to professionally paint kitchen cabinets: tips
Learn to paint your wood, metal or laminated kitchen cabinets like a pro
Cabinets are the most prominent feature in any kitchen. If your kitchen furniture has lost its beauty, give it back a delightful look with a color update. Of course, you can replace cabinets, but this is an expensive undertaking. Repainting is a budget-friendly design change that can transform your kitchen.
Painting kitchen cabinets is a budget redesign option, but not as easy as you might think
Step 1: Planning
Painting kitchen furniture takes several days. Make sure you can allocate the amount of time you need for this project.
Next, you need to decide on the choice of primer and paint. Take one of the cabinet doors with you to the store, and the seller will help you choose the most suitable materials. Cabinets are subject to intense wear, so it is better to refuse to buy cheap paint, which will peel and crack in the future.
Repainting your kitchen cabinets is easy if you have the time and patience
Step 2. Color selection
You can coordinate the color of the furniture with the design elements already in the room. The chosen shade should go well with your appliances and the rest of the interior. Kitchen cabinets in rich colors such as cobalt blue and cranberry red are considered the main trend of recent years. Pastel colors have the ability to visually expand the space.
Another stylish option is a two-tone set. Upper cabinets are decorated in neutral tones while bold hues are used for lower cabinets. If you're not ready to experiment with rich colors, check out white - one of the most popular colors, highly sought after for its versatility and ability to give a classic look.
Choose from several color options, focusing on darker tones so you get the best idea of which shades suit you.
Step. 3. Removing and marking doors, drawers and fittings
Remove cabinet doors and drawers, making sure that the markings are present and correct. A piece of masking tape with a note about the location of the part will save you a lot of trouble in the future.
When you decide to replace worn-out equipment with new components, you must drill holes for them, and seal the existing ones with sealant and wood glue.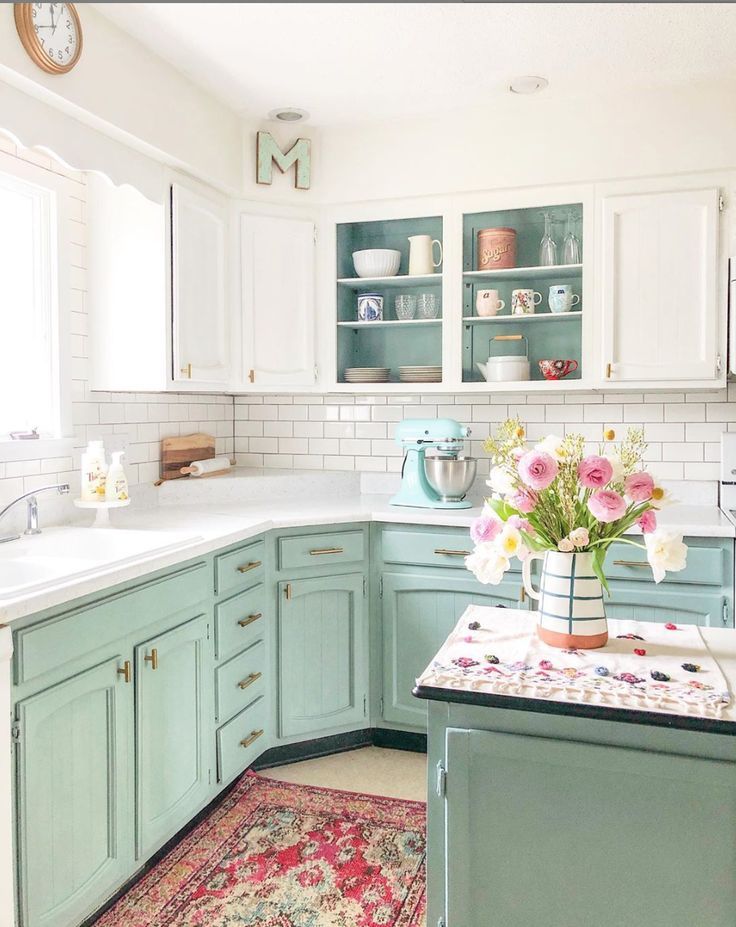 Store the hinges inside the closet so they don't get lost while you're painting.
Following the desire to paint cabinets without removing doors and fittings can lead to a significant loss of time
Step 4: Surface preparation
The kitchen is a utilitarian space that accumulates incomparably more dirt and grease than other rooms. They will prevent the paint from adhering to the surface, which is why it is so important to make sure that all cabinets and drawers are properly prepared.
A mixture of one part trisodium phosphate, found in the hardware store, with four parts water will effectively degrease any material. Use protective gloves and goggles when handling the cleaner. After cleaning, wipe the furniture well and let it dry completely.
Thorough cleaning and degreasing of surfaces is an important step in refurbishing cabinets
Step 5: Sanding
Sanding is required for final surface preparation, otherwise the paint will again not adhere well.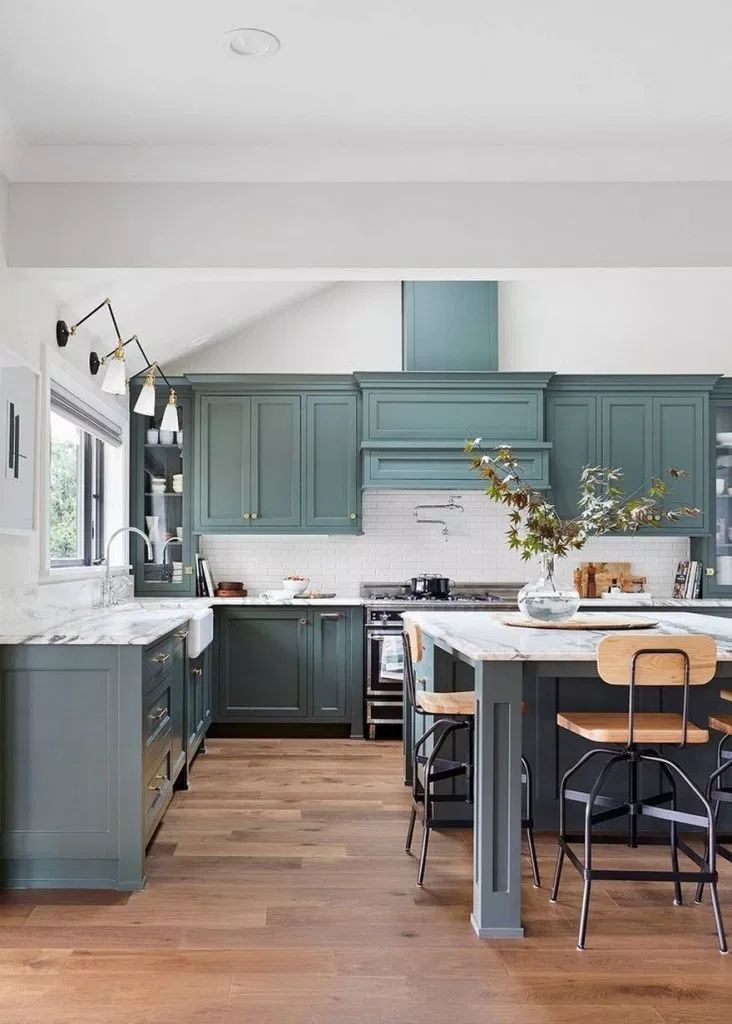 If the cabinets have already been painted before, but do not have any chips or peeling, just lightly sand them to a matte finish. But if there are places where the paint has come off, it is necessary to clean the surface to the state of untreated wood.
Cabinet surfaces should be sanded to a matt finish for better paint adhesion
Step 6. Primer
The primer chosen must be of good quality and suitable for the material of your cabinets (wood, metal, laminate). If you are going to be working on a dark or previously painted surface, a primer will help hide the old color so that it does not show through the new paint layer.
Apply masking tape to areas that do not need to be treated and cover surrounding objects with a cloth. Use a roller or brush to apply primer. Rollers are better suited for flat surfaces and allow you to cover a larger area. If the cabinets are decorated with carvings or other details, it is better to use a brush to process all the nooks and crannies.