Best soil potatoes
Growing potatoes in home gardens
- Home
- Yard and garden
- Find plants
- Vegetables
- Growing potatoes
Quick facts
- Buy disease-free seed tubers from a certified grower or seed distributor.
- Plant seed pieces as soon as the soil warms.
- Once the green shoots emerge, plan to hill soil up along plants as they grow.
- Potatoes require more fertilizer than other vegetables.
- You can dig new potatoes about seven to eight weeks after planting.
- Harvest mature tubers after plants have dried.
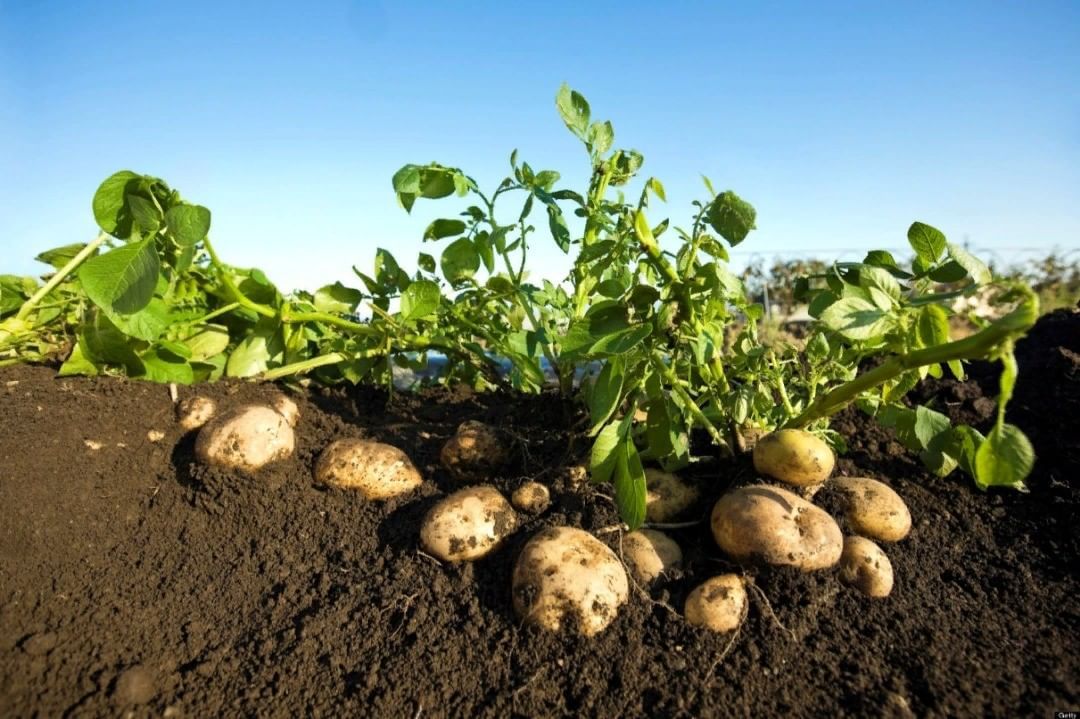
Potatoes grow from seed tubers, not true seed. They originated in the Andes and come in a variety of types, colors and shapes.
Generally, there are russet types that are starchy with brown skins and that are good for baking; red potatoes that can have white, yellow, or red and starchy or waxy flesh; white potatoes with white or yellow flesh; purple colored potatoes; and fingerling types.
Potatoes need sunny locations to grow well.
Soil pH and fertility
|
Selecting plants
|
Planting
|
How to keep your potato plants healthy and productive
|
Managing pests, diseases, and disorders
Many things can affect potato leaves, flowers and fruit.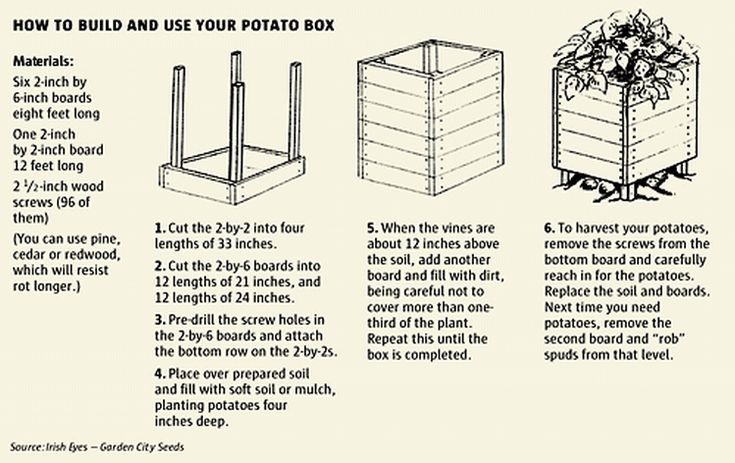 Changes in physical appearance and plant health can be caused by the environment, plant diseases, insects and wildlife. In order to address what you’re seeing, it is important to make a correct diagnosis.
You can find additional help identifying common pest problems by using the online diagnostic tools or by sending a sample to the UMN Plant Disease Diagnostic Clinic. You can use Ask a Master Gardener to share pictures and get advice.
|
Authors: Marissa Schuh, Extension educator, and Cindy Tong, Extension specialist
Reviewed in 2022
Share this page:
Page survey
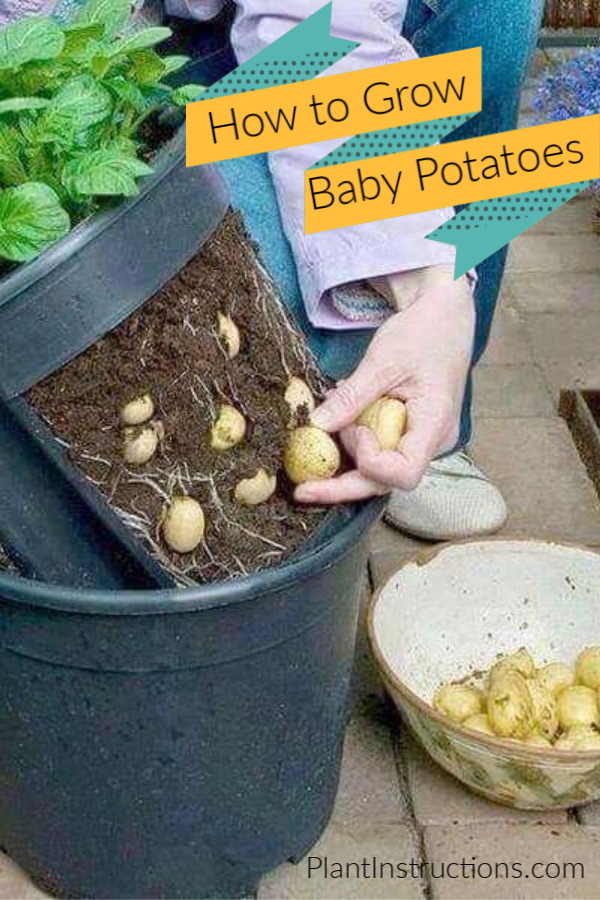
What is the best way to grow potatoes in containers?
Growing potatoes in containers is a great option for anyone who has limited space to garden, is concerned about what is in their soil or is looking for an easier way to harvest potatoes.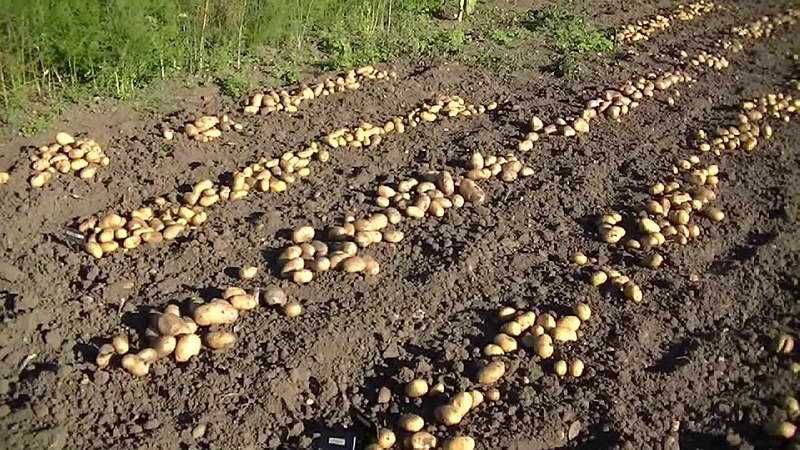 Almost any vegetable can be grown successfully in a container, and potatoes are no exception.
Though you may not harvest as many potatoes in a container as from garden soil, given the right growing conditions, a single potted potato can produce a considerable number of tubers. All it takes is growing them in a location that receives at least 6-8 hours of direct sunlight a day, choosing the right container and providing enough water.
Choosing and Preparing Seed PotatoesPotatoes in containers usually don’t get quite as big as their soil-grown counterparts. Rather than trying to grow large russet varieties, container gardeners will likely have better luck growing small “new” potatoes. Potato varieties are also distinguished from one another by how soon they are ready for harvest.
In general, mid or late-season varieties are better choices for containers than early-season types because they will continue to form tubers over a longer period of time.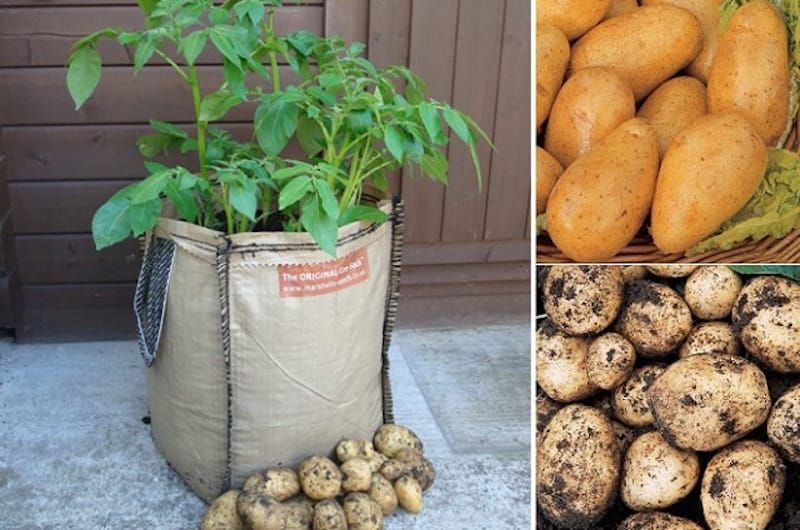 “Seed potatoes,” which aren’t seeds but small potatoes used to grow new plants, should be purchased from reputable seed catalogues or garden centers in the spring. Don’t bother trying to plant grocery store potatoes because these are often treated with chemical sprout inhibitors that will prevent new growth.
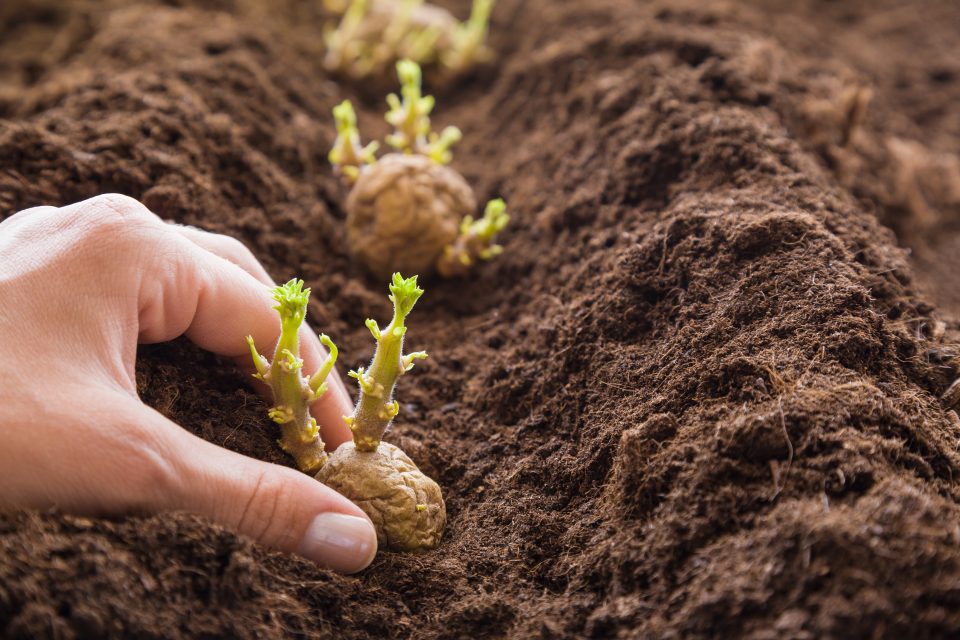
Twenty-four to forty-eight hours before planting, seed potatoes need to be prepared. Large seed potatoes can be divided into pieces to produce multiple different plants. As long as a seed potato piece has one or more “eyes,” it should grow into a new potato plant.
Potato eyes are small dimpled areas that contain vegetative buds. Large seed potatoes should be cut into 1-2” diameter pieces that have at least one eye, while small seed potatoes can be planted whole. Allow cut pieces to air dry for a day or two in order to reduce the chance of rotting.
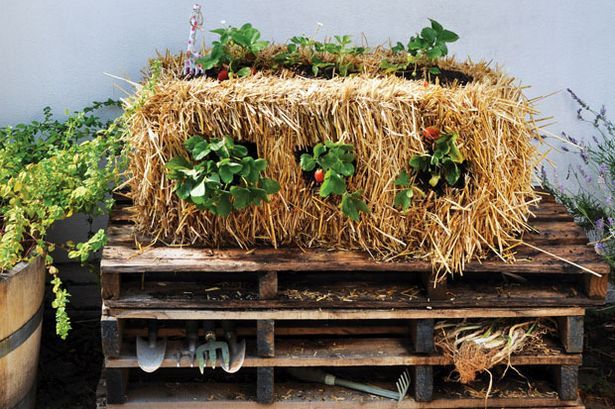
Picking a Container and Potting SoilA wide variety of different containers can be used to grow potatoes.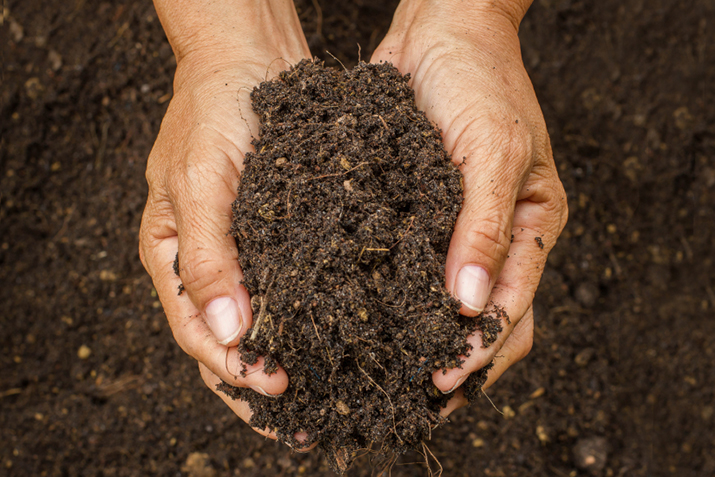 While it is possible to purchase ready-made potato towers or special growing bags, any opaque container with drainage holes will do, including barrels, garbage bins, plastic storage tubs and chimney flues.
An ideal container will be about 2-3 feet tall with a 10-15 gallon capacity. Avoid containers that are taller than this, because it could be difficult to water them evenly; the top portion of tall containers usually dries out long before the bottom, which can remain soggy and cause potatoes to rot.
Using the right potting mix is just as important as picking a good container. In the ground, potatoes grow best in fertile, acidic, well-drained soils. However, the same garden soils that are good for potatoes grown in the ground can be a poor choice for containerized plants.
Garden soil compacts easily, dries out quickly, yet drains poorly and can contain weed seeds and diseases. Instead, fill containers with a half-and-half mixture of “soilless” potting mix and quality compost.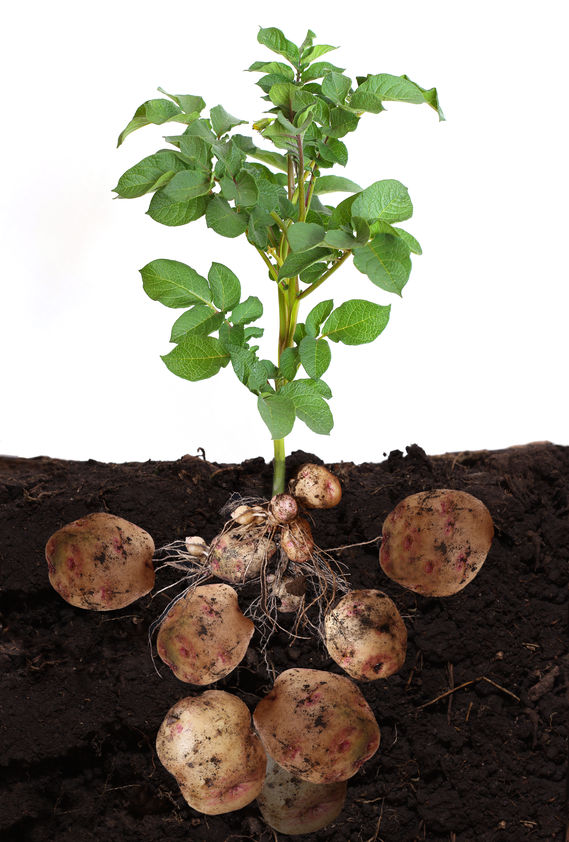 Peat-based potting mixes are lightweight, retain moisture and readily shed excess water, and compost adds important nutrients. Both pre-made soilless potting mixes and bagged compost are available at garden centers.
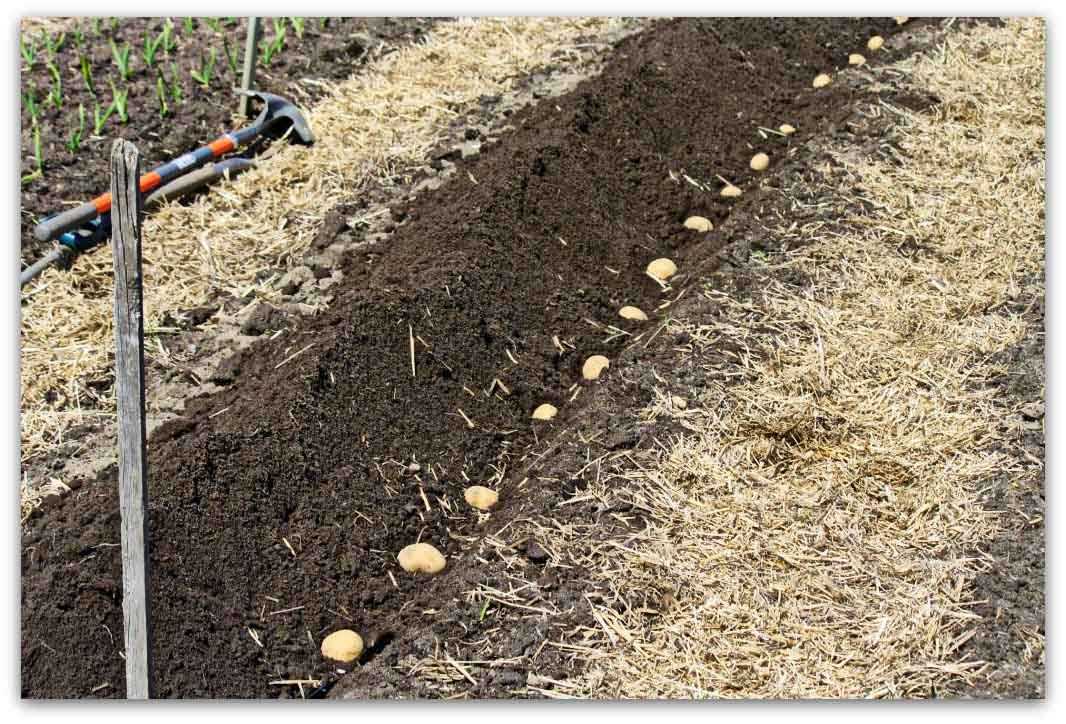
When it comes to planting seed potatoes, it is important to understand how potato plants develop. After a seed potato has been planted, it grows a main shoot. Rhizomes, which are underground stems, develop off the main stem and produce tubers at their tips.
This means that potatoes are formed above where the original seed potato was planted. When additional soil is mounded around the main stem of the potato plant, new rhizomes will form below the soil line and more tubers will develop.
When getting ready to plant, start by filling the container with about 6-8 inches of potting soil. Next, place seed potatoes within the container, spacing them about one foot apart. The number of seed potatoes to plant depends on the size of the container.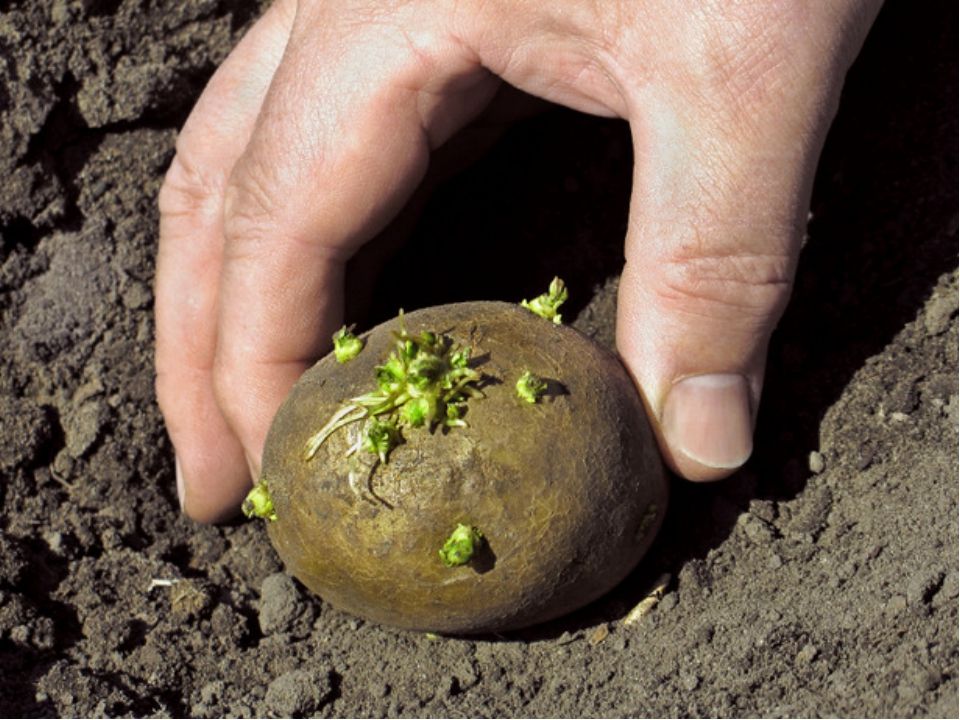
To maximize health and productivity, plan for five gallons of soil volume for each plant. After placing the seed potatoes, cover them with an additional six inches of potting soil. As the growing season goes along, continue to add more soil to the container, leaving six or so inches of foliage exposed at any given time.
Watering and FertilizingAdequate watering and fertilization is essential for heathy plant development. The potting soil in containers should be kept moist but never soggy. Water whenever the top 1-2 inches of soil feels dry to the touch, and apply enough water for some to escape out of the bottom drainage holes.
Potatoes require lots of nutrients throughout the growing season to produce new growth and quality tubers. Once shoots emerge, begin using a balanced soluble fertilizer once every couple of weeks.
Choose a product that has a higher middle number (phosphorus) than the first number (nitrogen), because while potatoes need nitrogen to grow heathy green leaves, having more phosphorus is important for tuber production.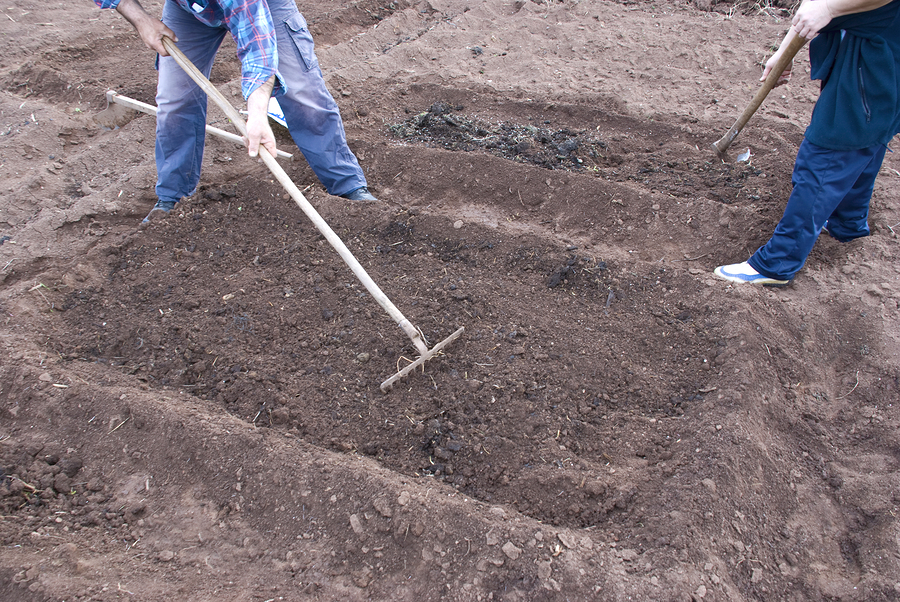 Synthetic fertilizers with a nutrient ratio of 5-10-10 are good choices. Organic growers can instead use a combination of fish emulsion, greensand, kelp meal and bone meal to feed their plants.
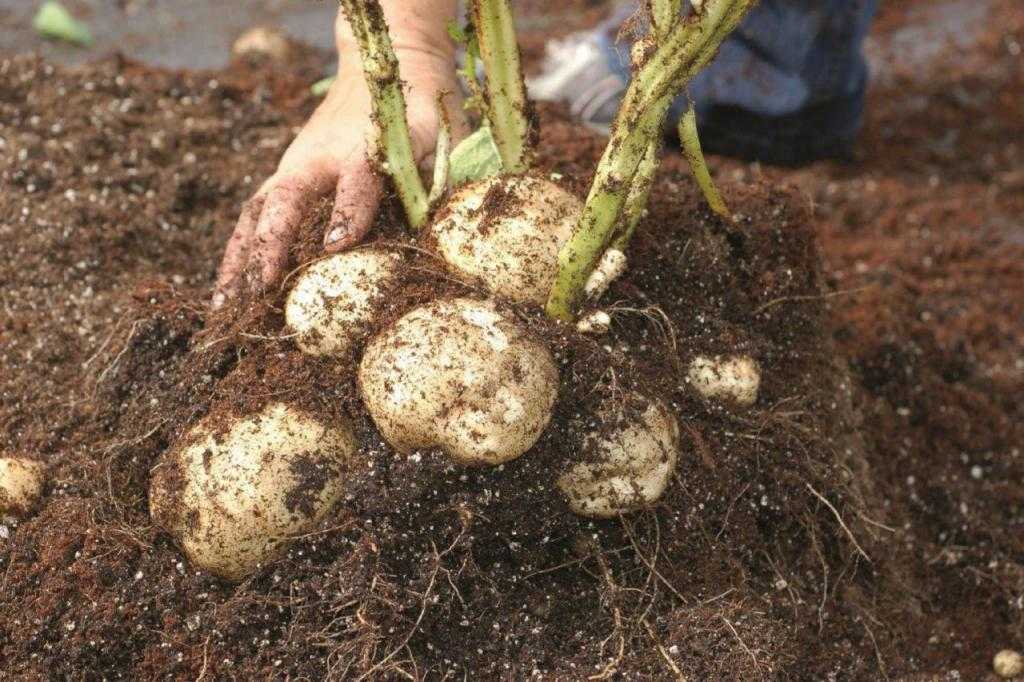
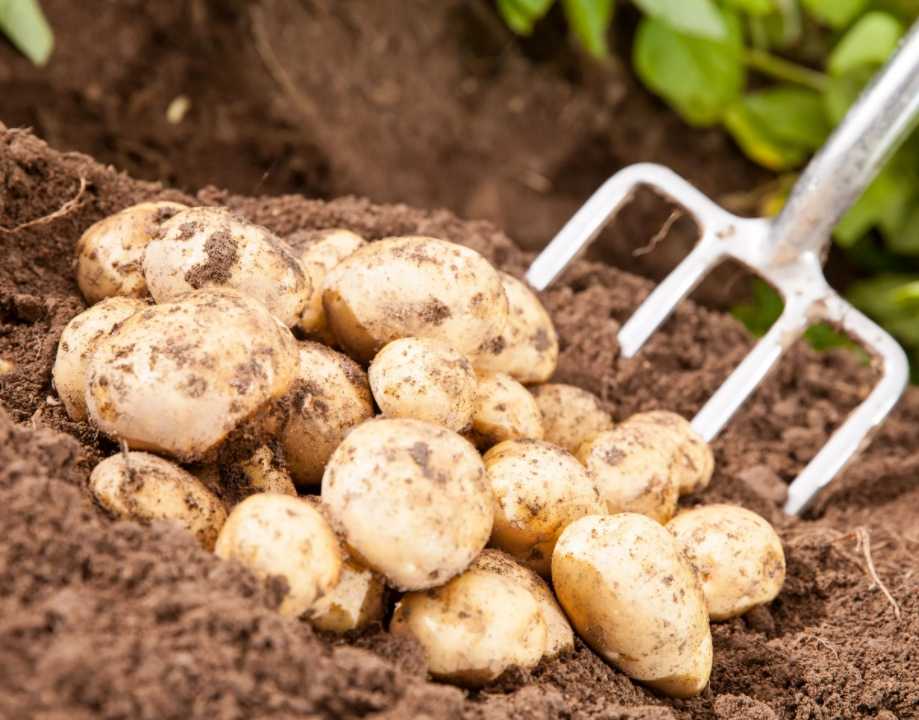
Mature potatoes can be harvested once the tops have yellowed and started to die back, or after the first frost in the fall. Often the easiest way to harvest container-grown potatoes is to spread out a tarp and tip the container onto it. Sifting through the soil should quickly reveal an abundance of tubers.
Handle the potatoes gently – they can bruise – and move them to dry in an area out of the light to avoid greening. Brush excess dry soil from potatoes but don’t wash them until you’re ready to use them. Washing can injure the skin and promote rot. Finally, store the potatoes in a cool, moist, dark environment such as root cellar or basement.
Got questions? The Ask UNH Extension Infoline offers practical help finding answers for your home, yard, and garden questions.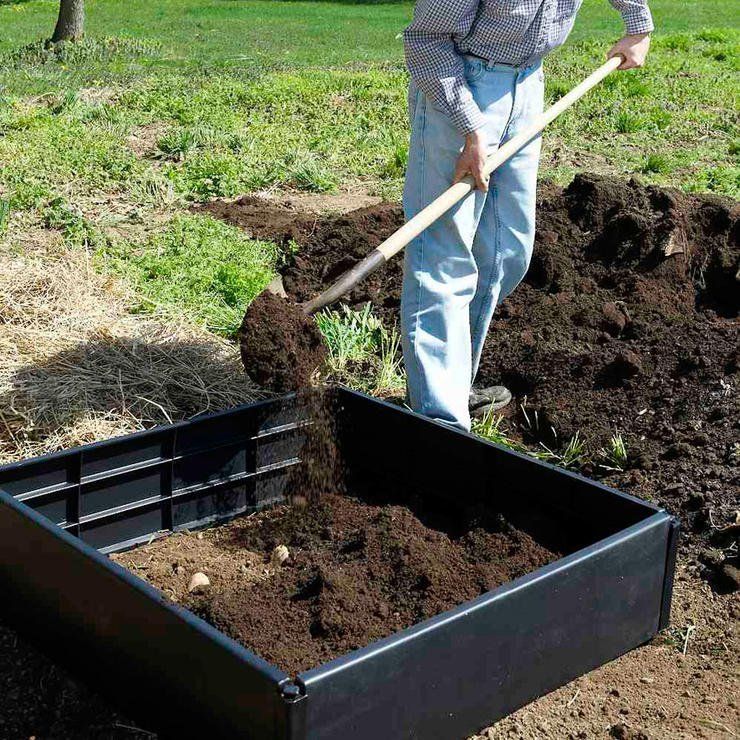 Call toll free at 1-877-398-4769, Monday to Friday, 9 a.m. to 2 p.m., or e-mail us at [email protected].
Soil for potatoes. Which is better? . My garden, vegetable garden. Piggy bank of country experience.
Content of Article
- 1 Choose a place for landing
- 2 Which section is
- 3 cunning of the site
- 3.1 Autumn preparation
- 3.2 Spring training
- 4 How to improve the soil for potatoes 9000 9000
- 5.1 Autumn work
- 5.2 Spring work
- 6 Choosing the right variety
Hello, dear readers!
If you think that preparing the soil for potatoes is easy - you dug a hole, threw a tuber and you're done, then you're wrong!
After all, if we choose a place on our site where the soil for potatoes is lean and depleted, then we will not get a good harvest, even if we choose the best varieties of potatoes and diligently take care of the plantings.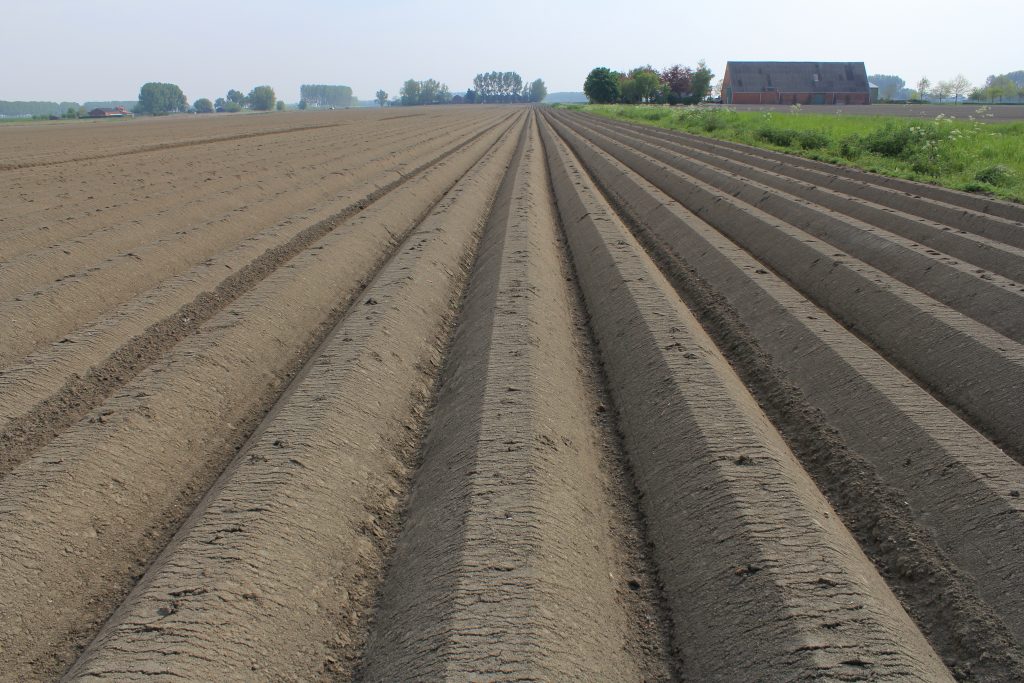
Potatoes are sensitive and tender. This plant requires us to know how to properly plant, and most importantly, the choice of soil and its preparation.
For a rich harvest, an integrated approach is important, the basics of which we will study.
Choosing a place for planting
If you delve into Internet resources, you can often read that potatoes love loose, light soil.
But such ideal lands are rarely found in our gardens. With a certain approach, potatoes can grow on almost any land.
Important! Experienced gardeners do not recommend planting potatoes in clayey, heavy soil. It is easy to determine - in the spring, melt water stagnates in such areas.
What about sandy soil? Such land is not particularly favorable, but with a competent approach, a rich crop of root crops can be grown on sandstone.
Sandy loam and loam are considered suitable.
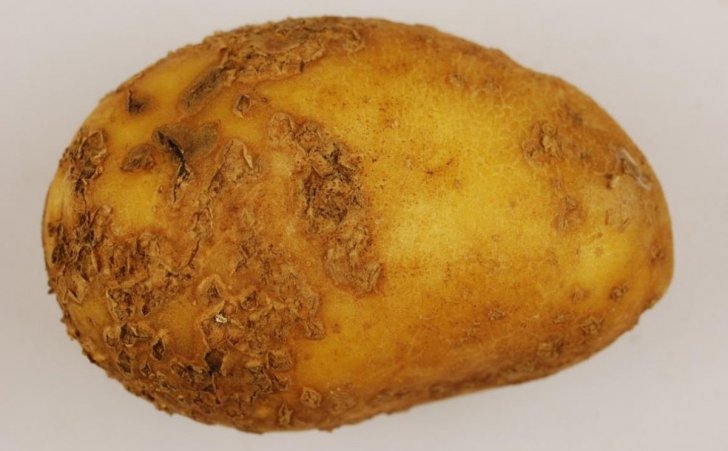
Important acidity .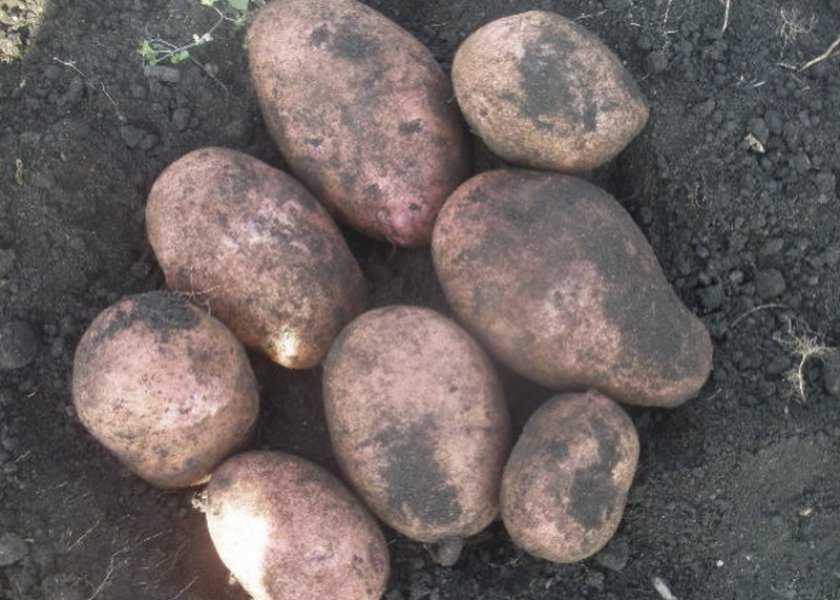 The ideal soil for potatoes should be slightly acidic (with a pH of 5.1-6.0).
The vegetable does not tolerate acidic or alkaline soils.
Do you know how to easily determine the acidity of a site?
Gardeners reveal their secrets:
- Weeds will help you! If the site is abundantly overgrown with wheatgrass, clover, coltsfoot or dandelion, then potatoes will readily take root on such land. Weeds are excellent indicators of the fertile layer.
- Bird cherry is an excellent helper. Take 4-5 bird cherry leaves and steam them with a glass of boiling water. Wait for the infusion to cool and throw a small lump of soil from the site into it. After a few minutes, consider the color of the infusion: if it has become reddish, the soil is acidic, greenish is slightly acidic (the most suitable for a root crop), and bluish indicates the neutrality of the earth.
But do not be afraid that the soil for potatoes in the area is not suitable for planting root crops due to acidity.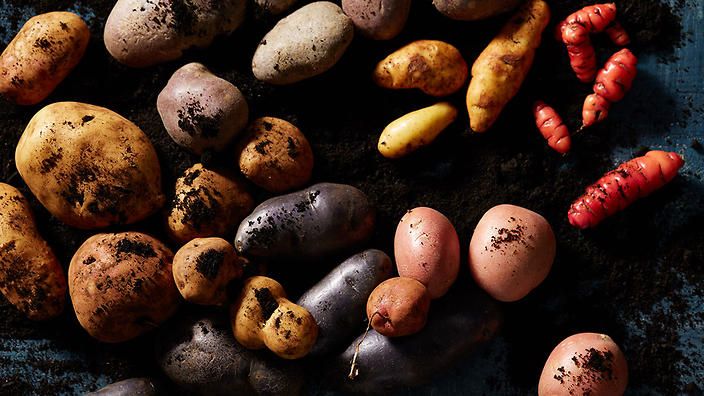
Any medium can be easily corrected by applying certain fertilizers.
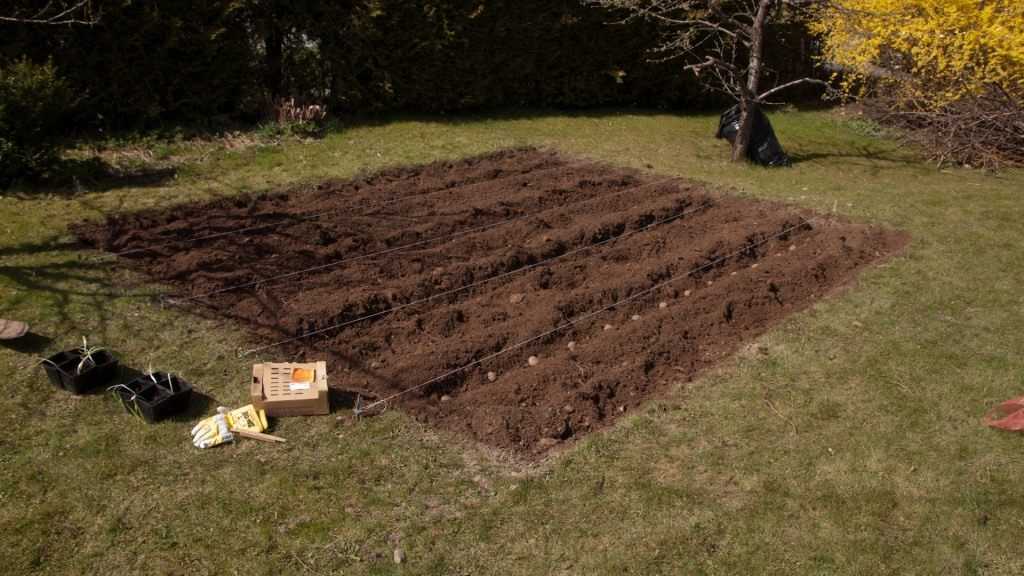
Which site is suitable
When choosing a site, select an unshaded area. The potato needs the sun, a constant shade adversely affects its root growth.
If the soil for potatoes is darkened all the time, then the crop will be, but small, with small tubers.
Protect the area under potatoes from the north with plantings of dense shrubs. Rigid shoots will reliably protect young plants from cold winds.
Humidity plays an important role as well. Lowlands are not suitable - they dry out late from melting snow, and potatoes love early planting.
It is absolutely not recommended to sow the root crop in wet soil - the potatoes will rot without starting to grow.
Constantly damp soil for potatoes will lead to the development of diseases and attract harmful parasites.
When choosing a site, follow these guidelines:
- Do not plant potatoes after bell peppers, tomatoes and eggplant.
 After such plants, pathogens of diseases dangerous for potatoes remain in the soil. The best predecessors: greens, beets, cabbage, cucumbers, carrots, oats and wheat.
 - Do not plant more than 2 potatoes in the same area in a row. The soil will already be exhausted and weakened. On depleted lands, potatoes will not please us, they will grow frail and barren. But, if it is impossible to comply with such advice, you can abundantly feed your site with peat, compost and manure.
Potatoes can grow on any soil. But be prepared to work hard to carefully prepare a "problematic" place for potato plantations.
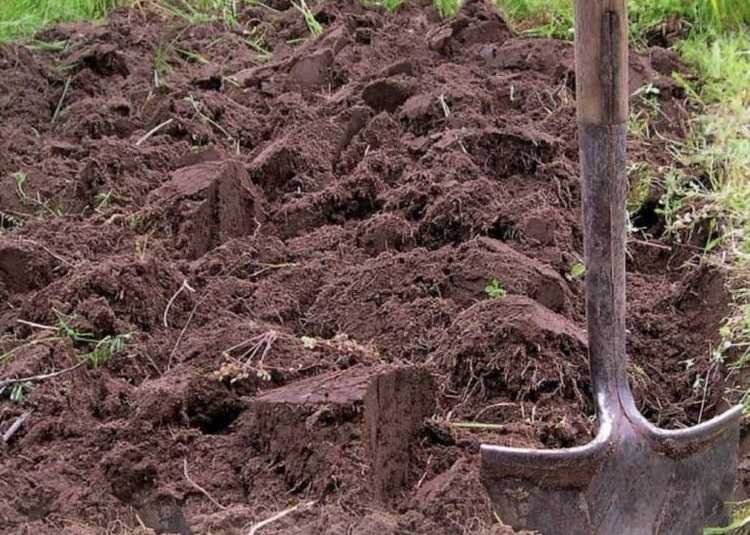
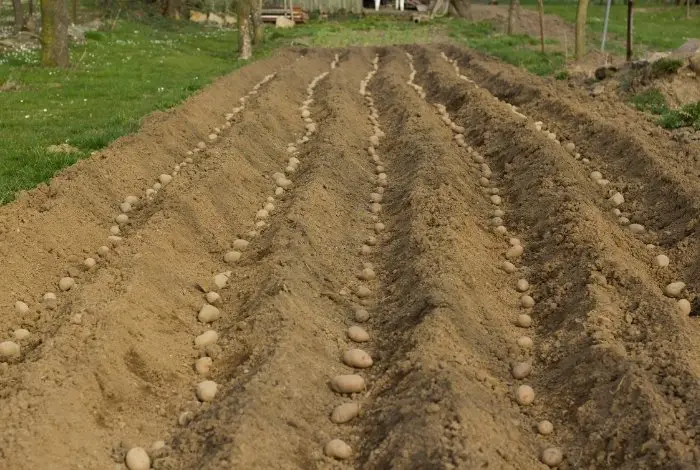
Tillage tricks
For a rich potato harvest, tillage begins already in the autumn months.
Remember that the root crop especially requires excellent drainage - its roots must breathe well!
In this case, the potatoes quickly form healthy tubers.
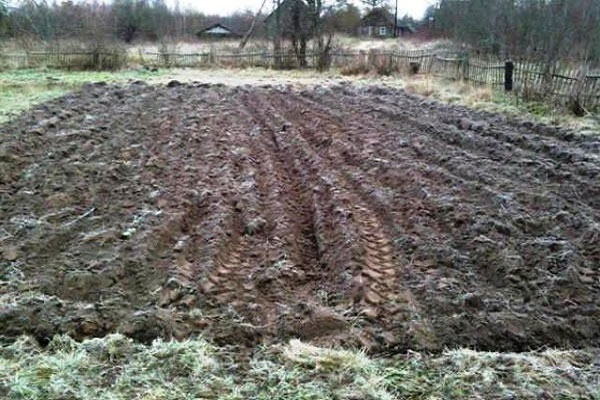
Autumn preparation
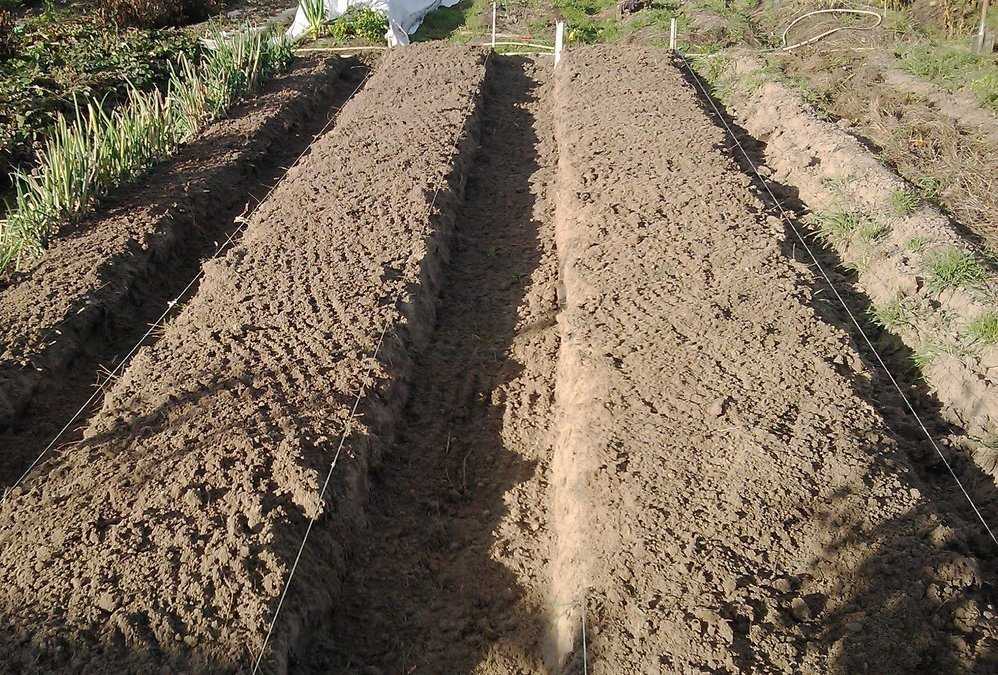
If the soil for potatoes in your garden accumulates melt water in the spring, the lowland should be “raised” and given a slightly convex shape.
So the flood will leave the site faster, and the soil will warm up sooner.
Along the edges of the potato ridges, additionally dig several grooves to remove moisture and lead them into a common deep channel.
Such an event is worth doing even if the garden is characterized by a high location of preferred groundwater. Otherwise, the soil will begin to "sour".
You can understand that the earth is turning sour by the following signs:
- the soil is gradually compacting;
- abundantly overgrown with moss, sorrel;
- becomes slightly bluish;
- becomes clay-like in consistency;
- begins to smell repulsive ("aroma" gives off sour).
How to grow soil for potatoes? It will be cheaper to pour crushed sand into the ground.
But do not pour it directly on future beds (if the site is not entirely clay).
It is necessary to add sand under the beds:
- At the place of future potato plantations, remove the top layer of fertile soil with a shovel.
- Dig a trench 40-50 cm deep.
- Pour sand in there, but not all the way to the top. Try to leave up to the required level of the future ridge 35-37 cm.
Do not throw away bad acidified soil. Loosen it and leave it aside.
During the year, such soil is aerated and loses acidity. Then it can be used for beds.
Soil cultivation for potatoes (if it is acidified) is carried out annually. After 3-4 years, the site will rise well and improve its fertile qualities several times.
Digging for the winter. An important procedure if the soil for potatoes is rough and waterlogged. Such a site must be carefully and deeply dug.
But do not break large clods - they will break up themselves under the influence of oxygen and frosty air.
Spread the manure after digging. But be sure to sprinkle the cakes with soil or sand up to a layer of up to 5 cm.
This method will lure a lot of earthworms in the spring (you yourself will pay attention to their plentiful number).
Worms are active generators of fertility, they will help turn any, even the most depleted area into a fertile one.
Attention! Fresh manure can only be used for pre-winter digging! In spring, it cannot be used, this leads to the development of fungal infections in plants .
Fertilizers. In autumn it is necessary to fertilize the ground in advance. Use organic matter (8-10 kg / m²).
If the soil is poor, doses can be increased to 15-17 kg. The effect will increase if potassium-phosphorus additives are added to the organic matter (4-5 kg per ton of manure).
Phosphorus-potassium supplements can also be applied separately just before digging the soil for potatoes
Better to use:
- superphosphate 20 g;
- potassium sulfate 25 g.
Potassium will help loosen the soil in the garden and make it crumbly. But chlorine can negatively affect the quality of the soil - it should be applied only in the fall.
When the soil is perfect . If you are lucky with the site and the land on it is fertile and has a suitable pH, you can do gentle preparation in the fall.
Instead of deep digging, plant ground plants (green manure) on the site.
They will help protect soil mineral additives from spring washout.
In the spring, green manure is dug up. Use sweet clover, peas, alfalfa, lupine, vetch.
Spring preparation
When the soil thaws in early spring and dries, the soil for potatoes should be well loosened 10-12 cm deep.
This procedure will conserve moisture and speed up the germination of weeds (so they will be easier to destroy during subsequent loosening).
The nuances of spring preparation of the garden depend on the quality of the land:
Sandy and sandy loam soil . In dry weather, such areas should be loosened 10-15 cm deep without overturning the upper layer layer.
Loamy, soddy soils .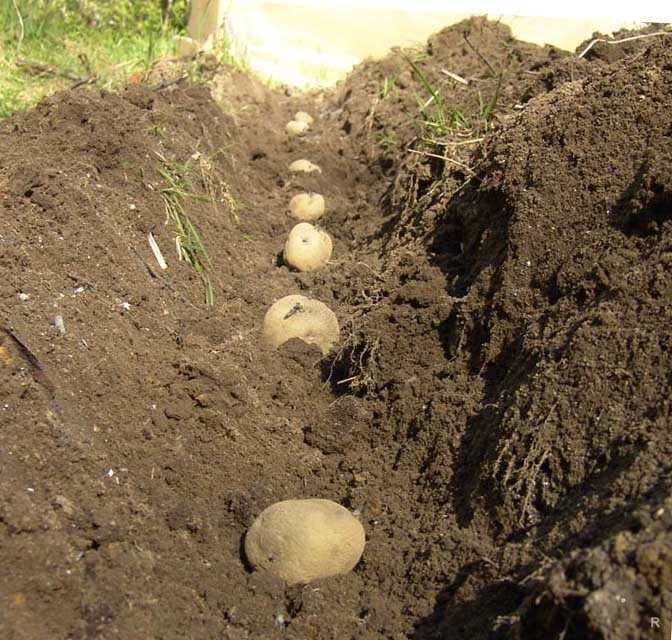 They must be treated twice:
- As soon as the soil dries. You need to loosen 15 cm deep.
- Just before planting potatoes. The soil is dug 30 cm.
The soil is then fertilized and leveled with a rake.
If the winter period is snowy and harsh, draw drainage grooves from the beds. But if the winter and early spring turned out to be dry, deep digging is not required. In this case, the soil is slightly loosened with a rake.
Deep loosening is done in the following way: the forks are stuck deep into the soil and tilted towards themselves, while planting the forks deeper into the soil.
The handle of the tool is then pushed forward, moving the top layer of earth away from you.
Then the topsoil is loosened 15-20 cm deep.
At the same time, compost, ash, mineral fertilizers and organic matter (mature manure or humus) are introduced into the soil under potatoes.
Finally, the area is leveled with a rake.
How to improve the soil for potatoes
Each land requires an individual approach, special tactics and strategy.
What kind of soil do you enjoy in your garden?
Loam/clay. Heavy and cold soil, it has little oxygen, quickly hardens and dries.
Such soil for potatoes requires abundant application of loosening products: compost (dung-peat), sawdust or sand.
It is better to store manure in heaps 80-90 cm high. Before getting to potato plantations, it is better to withstand it for 2-3 years, mixing it with straw, peat and earth from site .
Pour water over organic manure and put worms in it (try to find California ones).
These worms multiply rapidly and improve future compost fertilizer.
And so that the manure is not empty, grow pumpkins or squash on it.
Sour . The quality of such soil is improved by adding dolomite flour, lime or ash.
Dig up acidic areas to a depth of 35-37 cm (shovel bayonet).
Organics should be applied in the first year at a full bucket per m², in subsequent years at ½ bucket per m².
If you have insufficient manure, you can save rotted fertilizer. In this case, put manure only on the bottom of the hole and sprinkle it a little with soil (plant a potato tuber on top).
Sand . It is difficult to “drink” this soil for potatoes with water, the moisture is rapidly leaving.
To improve the quality of the land, manure-peat fertilizer is needed.
Compost retains mineral fertilizers and life-giving moisture well.
Peat bog . Such a site can please the owner if it is fertilized with manure mixed with potassium salts, ammonium nitrate and superphosphate.
These soils are characterized by low thermal conductivity, they are cold.
In the presence of cold soils (loamy, marsh-peat and clay), it is better to grow potatoes on warm ridges .
Lay bark and wood chips on the bottom of the prepared trench, top with a layer of manure, and then a layer of soil on top of it.
 Then the potato will please the owner with a big harvest!
 To summarize . Our potatoes love the warm sun and do not tolerate shade well.
If you place it in a shady place, you will not wait for the harvest.
The ideal soil for potatoes is light, warm and airy soils, sunlit loams. The acidity of the soil is about 6.5 pH.
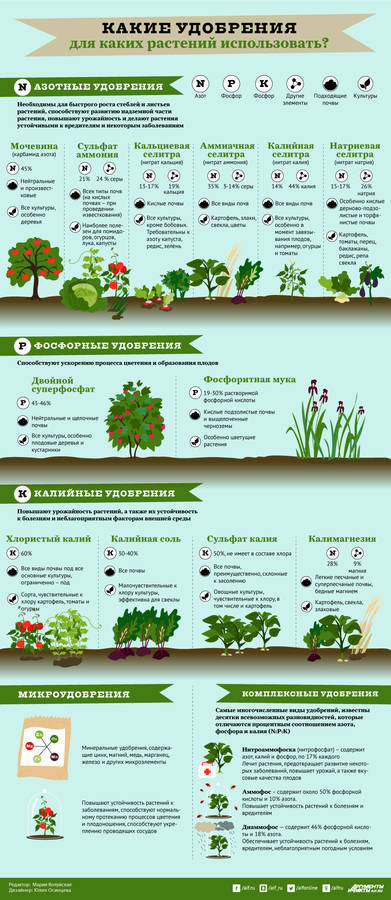
How to use fertilizer
All necessary fertilizers for the soil for potatoes can be applied in different periods (autumn / spring).
But only the autumn fertilizer will differ from the spring one.
Autumn work
The best fertilizer for a garden plot for potatoes in autumn is compost or manure.
Autumn Organics:
- Helps save the owner valuable time. Spring is already a lot of work!
- If the soil receives organics in autumn, the fertilizer will have time to overcook well during the winter period, which will help young potato tubers to fully absorb all the nutrients.
Experienced gardeners recommend applying organic fertilizers to the soil at the rate of 5-10 kg per m².
It is better to spread the autumn top dressing evenly over the area and do it before plowing.
In autumn, mineral additives are added along with organics (per m²):
- saltpeter: 12-13 g;
- potassium sulfate: 25-30 g;
- double superphosphate: 50-60 g.
Such a "live" top dressing helps to keep all useful trace elements for young potato sprouts.
Secret of northern gardeners . If the soil for potatoes in your garden is located in areas with a cool climate, use one trick of St. Petersburg gardeners.
For many years they have been successfully using sphagnum (marsh moss) saturated with a solution of mineral fertilizers as an autumn dressing.
How to do it:
- Dissolve potassium chloride (7-8 g), superphosphate (10-12 g), blue vitriol (3-4 g) and urea (6-7 g) in water (bucket).
 Instead of urea, you can use nitroammofoska (20-25 g).
 - Dip the sphagnum into the prepared solution and place it in the prepared holes, covering the moss with soil.
In the spring, when the potatoes are growing, their young roots will find the rotted nutrient mixture on their own.
This method is very good for increasing the yield and health of young potatoes.
Spring work
In the spring, top dressing for potatoes is carried out according to the following norms (the amount is given per hectare):
- ash: 4-5 kg;
- potassium sulfate: 1.5-2 kg;
- double superphosphate and ammonium nitrate: 0.5-1 kg each;
- complex fertilizers (nitrophoska: 4-5 kg, nitroammofoska: 2-3 kg).
If you didn't have time to fertilize the soil with organic matter in autumn, you can do it in spring too (at the rate of 5-10 kg/m²).
Potato soil requires mineral and organic fertilizers for a rich potato crop.

With the appearance of the first young sprouts, the plants will actively absorb the nutrients found in the ground.
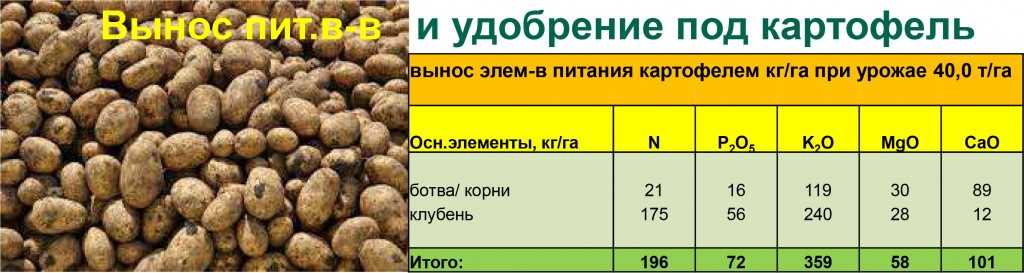
By applying certain fertilizers, it is possible to regulate the yield:
- The weight of tubers depends on potassium and nitrogen. If there is a lack of these substances in the soil, the potatoes will not be large.
- Phosphorus affects the number of root crops. With its insufficient amount, the mass of tubers will not change, but their number will decrease.
Therefore, if the plans are to grow potatoes for seed, gardeners reduce the introduction of nitrogen supplements and increase the amount of phosphorus.
In addition to root nutrition, potatoes absorb useful supplements through the leaves (by absorbing carbon dioxide from the air).
Evaporation of organic matter introduced into the soil in a timely manner helps to increase carbon dioxide in the air layer.
Important! The more humus in the ground, the richer the soil for potatoes in microorganisms that release carbon dioxide into the air.
 The more effective the nutrition of our potatoes becomes! Therefore, the use of compost, bird droppings, humus and manure is so important.
 Choosing the right variety
Successfully choosing a potato variety for planting in a particular area is a responsible and difficult task.
Breeders have created many varieties of potatoes, focusing on the characteristics of the soil.
What kind of soil is in your area?
Sandy . Such soil mainly consists of sand with a small amount of humus and clay.
Sandy soil is very loose, but this makes it easier to work.
These lands pass air and moisture well, warm up quickly, but cool down just as quickly.
Suitable varieties for sandy soil: Minerva, Rodriga, Slavyanka, Volzhanin, Rosara, Picasso, Typhoon, Latona, Ramona, Red Scarlett, Nevsky.
Sandy loam . Sandstones are similar to sandy soils in many ways, they also have excellent water permeability, but retain moisture and nutrients much better.
This soil contains a good supply of oxygen and nutrients.
Sandy loam soil for potatoes is suitable for the following varieties: Priobsky, Adretta, Istrinsky, Ulyanovsky, Sedov, Bimonda, Early Rose, Nikita, Detskoselsky, Romano.
Loamy . Loams are distinguished by a high content of clay with a slight admixture of sand.
Loamy soil suitable for horticulture, although somewhat "heavy".
These soils have excellent water holding capacity and breathability.
For loamy soils, experienced gardeners recommend planting the following potato varieties: Russet Burbank, Zhukov's Anniversary, El Mundo, Bafana, Colomba, Panter, Bettina .
Clay . Clay soil is considered fertile, but it is the most difficult to process.
Such soil retains moisture poorly, quickly becomes caked and coarsens.
In spring, clay soil does not dry out for a long time, so spring sowing in these areas is carried out later than in others.
Recommended potato varieties for clay soils: Berlichingen, Turquoise, Ideal, Lorch, Mira or Ora, Gatchinsky, Cleopatra, Lasunok, Rosara, Golubyzna, Lugovskoy, Nevsky, Zarevo, Lukyanovsky, Istrinsky .
Peaty bog . Peaty soil for potatoes is poor in mineral components; plant residues decompose very poorly in such soil. In order to improve the quality of peat-boggy areas, gardeners add sand and fertilizers, these lands are drained and limed.
Suitable varieties of potatoes include: Alpinist, Belorussian Early, Luck, Lyubava, Vodogray .
Sod-podzolic . Podzolic soil is unfavorable for growing any crop on it.
In such soil there is practically no fertile humus layer, and there are very few nutrients in it.
These lands simply “float” after rains and form a dense crust.
The owner will have to work hard to ennoble such areas.
Recommended potato varieties for such harsh conditions: Timo, Rosamunda, Nevsky Ozdorovenny, Gloria, Vital, Ostara.
Stony . Most of the soil is made up of dense rocks and small pebbles.
These lands are extremely infertile, although they warm up well and keep warm for a long time.
A significant disadvantage is the fact that there are no microorganisms in it, they are washed out too quickly.
Water also does not linger in stony soils.
But even such soil can be adapted for potatoes, you just need to make an effort. Experienced gardeners recommend the following varieties for sowing: Altair, Zhivitsa, Breeze, Vesnyanka, Atlant, Dubrava, Zhuravinka.
Pay attention to such potato varieties as: Archidea, Blakit, Vetraz, Vytok, Kolorit, Lasunok, Lileya, Neptune, Odyssey, Rosinka, Temp, Uladar, Universal, Yavar, Yanka.
They are versatile and adapt well to any type of soil.
Successful soil preparation on your site!
And how to prepare the potatoes themselves for planting, we will tell in the next article.

See you soon, dear readers!
You can also read about this topic:
Tags: potatoes
3 popular herbicides against weeds for potatoes: post-emergence treatment
It is no coincidence that potatoes have become the most common horticultural crop in our country. It is successfully grown in both hot southern and cold northern climates, and yields a rich . However, even he becomes vulnerable if he has to share a bed with weeds. It is to combat them that herbicides are designed.
Table of Table of Control
- What is herbicide
- Types
- Continuing
- Selective Action
- DOSTRODS
- MEDERATIONAL
- The most popular herbicides for potatoes
- Zenkor
- Lazurit
- How are weeds from weeds
- Effect of herbicidal processing of potatoes
- Other agents in addition to herbicides
Herbicides - this is a collective name of the chemicals.
Treatment with herbicides will help rid potatoes of weeds pest plants. The scope of their application is very wide - from industrial construction to purification of water bodies. However, they are most fully used in agriculture.
 According to the nature of damage to harmful vegetation, preparations are divided into two large subgroups :
- Internal action (systemic) - affect the entire weed plant.
- Outdoor action (contact) - are not absorbed by the root system of the weed plant, but affect its aerial part.
The effectiveness of various types of herbicides is also different. Thus, contact varieties, with rare exceptions, are used to control annual pests. But for more complex root systems of perennial weeds, internal chemicals are indispensable - they are able to kill the whole plant, reduce soil overgrowth in the next season. Often, herbicides of different types are used together.
Species
Preparations also differ in the spectrum of affected vegetation .
 This is very important to consider when choosing chemicals, as an unsuitable agent is able to remove along with weeds and plant potatoes.
 The Ministry of Health of Russia annually publishes a list of "Pesticides and agrochemicals" approved for use.
Continuous action
This type of herbicide is the most deadly, is designed to exterminate all types of plants on the treated area without exception . Also in agriculture they are called general exterminators, they fully correspond to their formidable name.
A continuous herbicide will destroy the protective shell of seedlings, which leads to the death of the future plant.In agriculture, chemicals of this type have a rather narrow application - the preparation of virgin soil for planting, when it is necessary to remove all the biological component from it without exception. It is not easy to find them in the conditions of the garden and vegetable garden , sometimes they are used for processing beds in the off-season.

Selective
In the vast majority of weed poisons are substances with a selective or selective spectrum of damage. They are a poison only for some plant species, while remaining harmless to horticultural crops. In turn, they are also divided into two types :
- Widely selective - fight certain types of flora, for example, all dicots, without touching monocots.
- Narrowly selective - do not affect whole plant species, but individual varieties within species; for example, Grodil struggles with bedstraw, but does not touch barley and other cereals related to it.
In fact, in the home garden almost exclusively selective preparations are used, therefore we will pay special attention to them.
Pre-emergence
Also known as soil treatment. From the name, their principle of operation is well understood - it is necessary to process the soil itself.
 In addition to penetrating weed tissues, some types of pre-emergence chemicals leave a thin film on the soil surface. The defeat of pests occurs when their sprouts come into contact with it.
 Popular pre-emergence products :
- Roundup - contains glyphosates; tillage takes place half a month before planting potatoes; sprouts and roots of weeds are affected.
- Centurion is a pre-emergence herbicide used to control monocot weeds such as grasses; saturated with cletodymes, absorbed by the root system of weeds, leads to rapid wilting of sprouts.
- Boxer - effective against all types of pest flora, especially often used for breeding dicots; its active ingredient is prosulfocarb.
- Boxer
- Roundup
- Centurion
Post-emergence
Also called foliar preparations, that is, those that affect the upper, aerial parts of plants.
 Most of them use phosphates as the active ingredient.
 Popular post-emergence agents :
- Shogun - used against cereal pests; saturated with propaquisafop, applied by spraying in the most active phase of the weeds' vegetation - formation of 4 leaves, stem height of 10 cm.
- Alpha-Mais - effective against dicotyledonous plants; destroys weeds in the period of 3-10 days after tillage.
- Tornado 500 - saturated with glyphosates, poisonous to all types of dicotyledonous and monocotyledonous plants; the beneficial effect of the drug lasts up to 30 days, regardless of the weather.
- Alpha Mais
- Tornado 500
- Shogun
Handling post-emergence herbicides is less demanding on the tillage process. So, in the case of their use, there are no strict requirements for compliance with the dosage.
 Even with a lower saturation of preparations per square meter of area, a beneficial effect occurs , but is expressed not in the complete destruction of weeds, but in a decrease in their germination and ability to form seeds.
 In 2017, the Russian Ministry of Health approved 291 herbicides for use in the countries.
The most popular herbicides for potatoes
The modern market is extremely saturated with preparations of various effects. But among the existing herbicides , there are several that are most loved by gardeners because of their ease of use and effectiveness. What drug to choose for processing potatoes?
Zenkor
ZenkorRefers to selective herbicides, completely harmless for nightshade, carrots, potatoes. The chemical is based on the substance metribuzin , which breaks down in the soil no faster than 3 months after treatment. The use of Zenkor is especially beneficial for the control of broad-leaved and cereal plants.
Zencor is available in both liquid and granular form.
An important advantage of Zenkor is the saturation of the active substance - 600 g/l. In addition to the defeat of sprouts, leaves a protective film on the bed surface after application . Works great in mixtures as it is compatible with a wide range of insecticides and pesticides.
Titus
TitusSelective, spraying should be done in the post-emergence period. The active substance is rimsulfuron, which blocks the process of acetolactosynthesis in the leaves. Equally effective against annuals and biennials . The first signs of weed death are noticeable after 3 days, and their complete death occurs no later than 15 days after treatment.
Titus is suitable for tank mix, but not compatible with phosphorus insecticides. It is very picky about humidity - with prolonged drought, the chemical consumption should be increased. May cause temporary yellowing of potato leaves.
 Not recommended for use on seed bushes.
 Lapis Lazuli
Lapis LazuliLapis Lazuli is an all-round product used for both pre-emergence and post-emergence cultivation of beds. According to the principle of action, it resembles Zenkor - the main substance is also metribuzin (700 g / l).
One of the strongest preparations, used strictly once per season , only in exceptional cases is double treatment allowed - before germination and after, when potato sprouts have reached a height of 10 cm or more. Lazurite should be handled very carefully - contact with the skin, mucous membranes, eyes or food is fraught with a deterioration in human well-being.
How weed control products are used
The effectiveness of soil chemicals is extremely dependent on the grower's compliance with a number of requirements for their use :
- uniform soil structure - large clods of earth are not welcome, preventing uniform distribution of the substance over the surface;
- humidity - it is desirable to moisten the soil before applying herbicides;
- embedment depth - no deeper than 5 cm;
- soil type – the activity of preparations will be lower in fertile soils, the saturation of which with humus exceeds 5%; preparations are more suitable for sandstones and other types of light soils;
- heat level - when the air temperature is less than 5°C, the efficiency is reduced.
It is also important to keep in mind that in circular farming - the annual rotation of crops in the garden - chemicals can interfere with the normal development of some types of vegetables. Before using herbicides, be sure to study the list of crops with incompatibility.
The effect of herbicide treatment of potatoes
The mechanism of action of herbicides of different types is not the same. It depends on their chemical composition and method of application. By the way the chemical manifests itself on plants, the following varieties can be distinguished :
- Destroy cell membranes - lead to drying of weed sprouts; The effect begins to appear immediately after treatment.
- Hormone replacement - mechanism of action of benzoic or acidic herbicides; destroys the connections of leaf tissues; the effect is weakly manifested in relation to grain varieties of weeds.
- Inhibition of photosynthesis - only against dicotyledonous weeds.
- Inhibition of the ability of cells to divide - chemicals of this type belong to chloracetamides; the action is gradual, first the plant weakens, then dies.
- Suppression of the synthesis of amino acids - leads to a stop in the development of the weed.
- Suppression of fat synthesis - immediate stop of development, drying of the plant within 15 days.
Unfortunately, the effect of the use of herbicides is also partially manifested in potatoes, especially with the wrong dosage or treatment procedure . To minimize it, you can supplement or partially replace chemicals with less aggressive substances.
Some types of weeds may become addictive to the active ingredients of the chemicals.
Learn more
- Dissolve potassium chloride (7-8 g), superphosphate (10-12 g), blue vitriol (3-4 g) and urea (6-7 g) in water (bucket).