Backsplash for kitchen stoves
Stove Backsplash - Etsy.de
Etsy is no longer supporting older versions of your web browser in order to ensure that user data remains secure. Please update to the latest version.
Take full advantage of our site features by enabling JavaScript.
Find something memorable, join a community doing good.
(1,000+ relevant results)
10 materials, looks and design tricks |
(Image credit: Maestri Studio Photograph: Nathan Shroder)
Stove backsplash ideas with style turn a functional feature into a chic one. Whether attention-grabbing because of its material, color, pattern, or texture, or a more understated design, a backsplash can be a beautiful part of the kitchen.
Of course, it’s a hardworking feature, too, protecting walls from splatters, splashes, and grease as you cook, so it’s imperative that a backsplash is easy to clean to make keeping the room pristine an easy task.
Considering the stove backsplash should always be part of your kitchen ideas in order to select a harmonious palette of colors and materials for the room, and we’ve gathered suggestions to inspire you here.
Stove backsplash ideas
The kitchen is a busy space, so stove backsplash ideas must be quick and easy to maintain, resist staining, and keep their good looks after being exposed to splatters, grease, and steam. Be inspired by these examples and draw on the expertise of designers in selecting your kitchen backsplash ideas.
1. Create natural shine
(Image credit: K Kong Design Photograph: Mali Azima)
A backsplash can be a striking feature even in subtle neutral color tones and with gentle shine.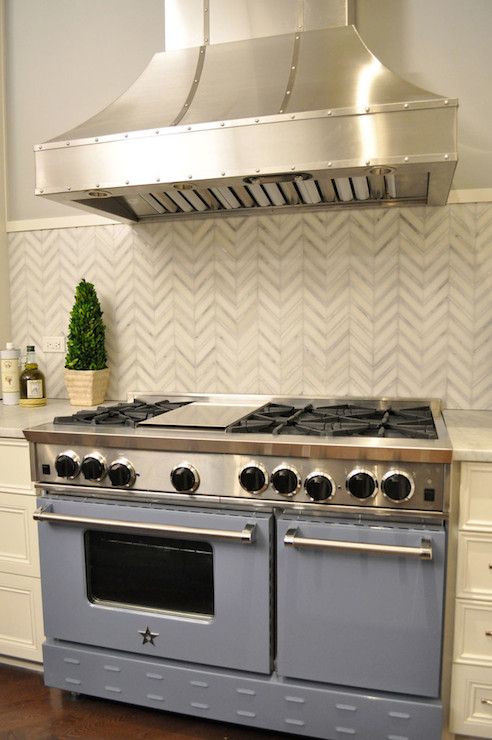
‘These kitchen wall tile ideas are wonderfully unexpected,’ explains Kristin Kong of K Kong Design . ‘They look like capiz shells but are back-painted glass. While it would never be practical to use real shells behind a range, these tiles provide the same look with all of the functionality and durability needed in a busy kitchen.’
2. Turn up the volume on color
(Image credit: Future/ Brent Darby)
The limited area of a stove backsplash makes it the spot to choose for a bolder version of kitchen color ideas you’ve used elsewhere in the room. Here, it’s a beautiful lime that draws the eye against a backdrop of cabinets painted in a nature-inspired take on green.
Select a tile with variations of tone like this one and the backsplash will be an even more arresting feature. This tile includes yellower tones alongside the lime hues.
3. Opt for industrial style
(Image credit: La Cornue)
Consider taking your cue from the detail of your appliance as part of your stove backsplash ideas.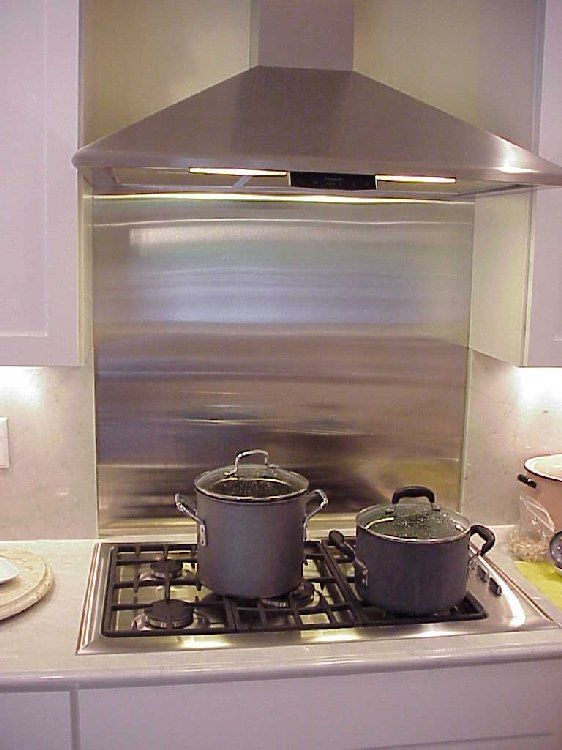 The metal trim of this iconic design is complemented by a metallic-effect backsplash that repeats its tones.
These tiles aren't actually metal backsplash ideas – in fact, they are porcelain tiles, which is a highly durable option. They’re stain and moisture resistant, and easy to clean.
4. Scale down for standout
(Image credit: JL Design Photograph: Leslee Mitchell)
Even in a room with an extensive tile backsplash, think about choosing a different design for the area behind the stove to distinguish this zone of the kitchen. In this kitchen the wall white kitchen backsplash idea is contrasted with the smaller scale backsplash above the stove, which features a range of neutral tones that complement the statement hood.
The change from the horizontal lines of the white tile wall to the verticals of the stove backsplash make it distinct, too.
5. Make maintenance simple
(Image credit: Mark Williams Design Photograph: Sarah Dorio)
In selecting stove backsplash ideas, it’s worth considering how much time will need to be spent on maintaining the appearance of the kitchen.
‘We like to use solid surface materials as a backsplash behind a stove because grout lines in a tile backsplash can sometimes be hard to keep clean,’ say Mark Williams and Niki Papadopoulos of Mark Williams Design .
‘In this kitchen, we used the same natural stone for the stove backsplash that we used for the countertops. Because the stove backsplash is so large and prominent in how we see our kitchens, using a beautiful material can add immediate luxury and sophistication.’
6. Give it a modern edge with stainless steel
(Image credit: Richard Gadsby )
Whatever the style of your kitchen, stainless steel is worth listing as part of your stove backsplash ideas. It’ll suit a chef’s style kitchen with an industrial aesthetic, but it could equally bring a modern edge to a room with traditional style, and its soft color can blend beautifully into a room with white cabinets and a wood floor.
It’s also a practical choice as a stove backsplash as it’s hygienic, simple to maintain, and hard wearing.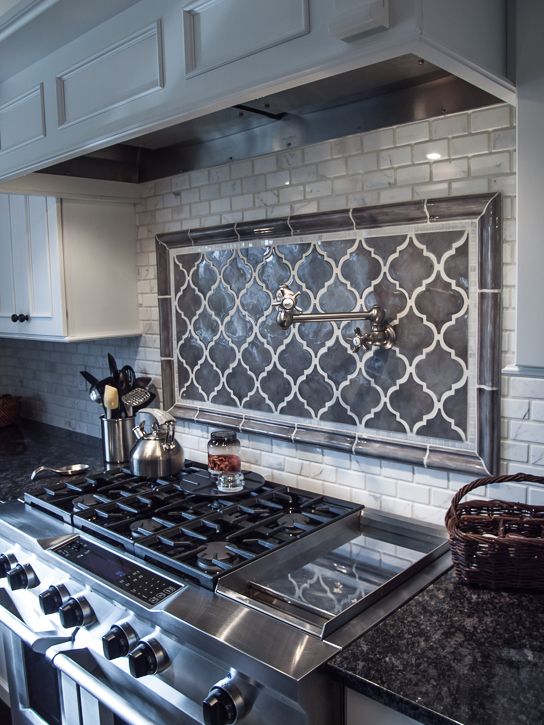
7. Opt for luxury
(Image credit: Kara Adam Interiors Photograph: Michael Hunter)
Marble’s a desirable kitchen material and using it as a stove backsplash can create a look of luxury in the kitchen.
‘In my old home, I wanted a white marble kitchen,’ says Kara Adam of Kara Adam Interiors . ‘I chose white marble slabs for my island and backsplash, and a Caesarstone for the peninsula (there isn’t a marble slab big enough for that peninsula). By using white marble on the backsplash, you can give the illusion of an all marble kitchen, even if other white materials are used.’
8. Add an accent color
(Image credit: Morse Design Photograph: Tara Carter)
Looking for stove splashback ideas that will prove a sound choice for any kitchen? ‘Keeping your backsplash simple will make the kitchen look and feel cohesive, regardless of size,’ says Andi Morse, founder and principal designer of Morse Design . ‘A simple subway tile always works, but I recommend changing up the color to instantly elevate and impact your space.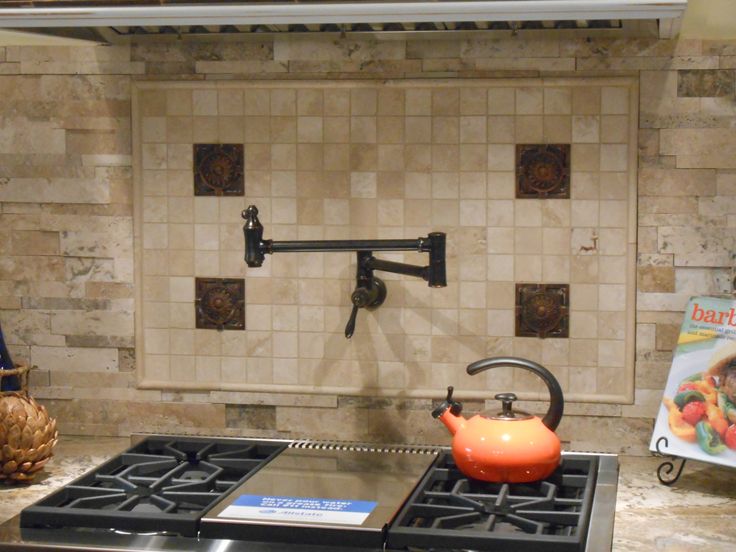 ’
’
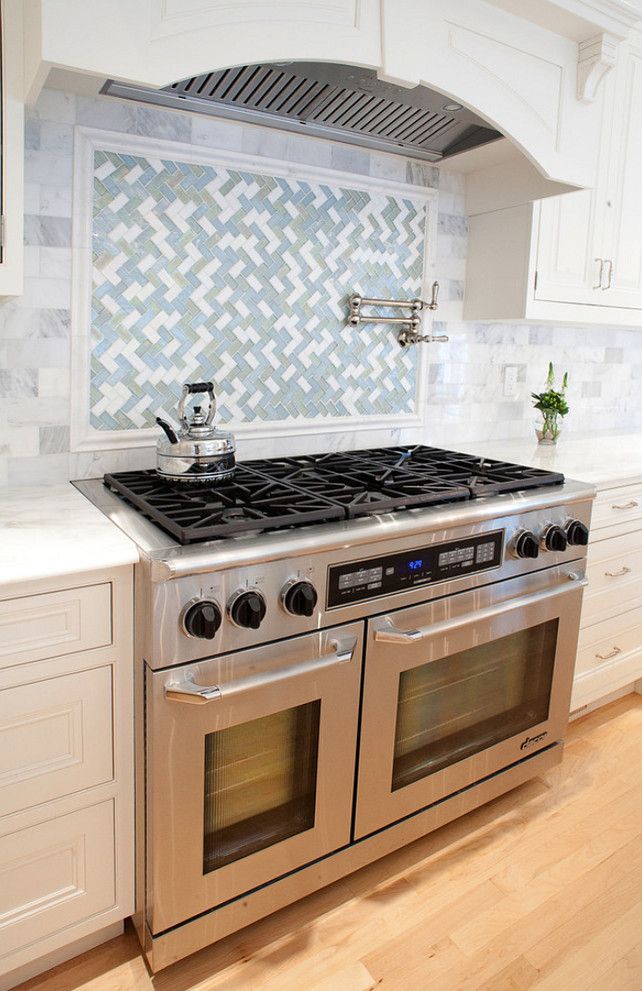
9. Play with pattern
(Image credit: Living with Lolo Photograph: Life Created)
In a kitchen with white cabinets and light-toned wood, stove backsplash ideas that add to the room’s subtle detail are required. The solution in this room is a design with elegant geometric pattern that catches the eye and adds interest without becoming overpowering.
Follow this room’s lead by extending the backsplash from the stove area to the entire run of cabinets to allow a motif like this to make an impact.
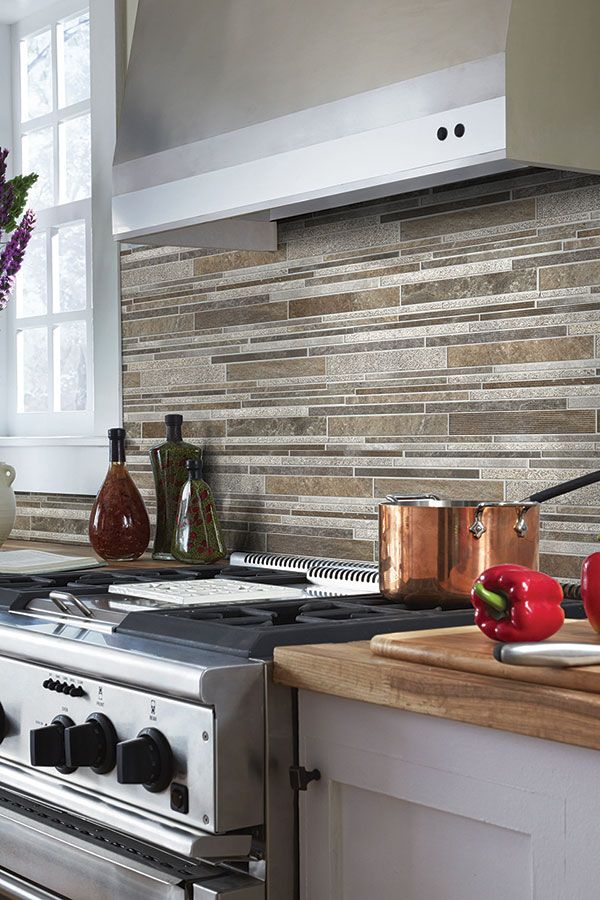
10. Showcase organic pattern
(Image credit: Maestri Studio Photograph: Jenifer McNeil Baker)
The veining of natural stone – and stone lookalikes such as quartz – are fabulous for countertops, but make even more of an impression when they’re used vertically as a stove backsplash.
If using natural stone, make sure that it is correctly sealed to avoid the possibility of staining which will compromise the look of the material.
Do I need a backsplash behind the stove?
A backsplash behind the stove is necessary to prevent the wall becoming marked, stained, or discolored by splatters and grease. It will also protect it from moisture. A backsplash also ensures that when a cooktop is set into a counter there’s no gap between the wall and cabinets below that could allow water to drip downwards.
If you have a freestanding range rather than a cooktop, there will be a small gap between the range and the backsplash. In this case, it’s worth installing a backsplash down the wall a little to avoid any visible wall surface.
What is a timeless stove backsplash?
A tile backsplash is a timeless choice for a kitchen. Subway tile is classic, but consider, too, square tile which has enduring style. As for tile options, both ceramic and porcelain are possibilities, but equally timeless are marble or slate mosaic; the former will create a more opulent effect, while slate might suit a more country style room.
Sarah is a freelance journalist and editor. Previously executive editor of Ideal Home, she’s specialized in interiors, property and gardens for over 20 years, and covers interior design, house design, gardens, and cleaning and organizing a home for H&G.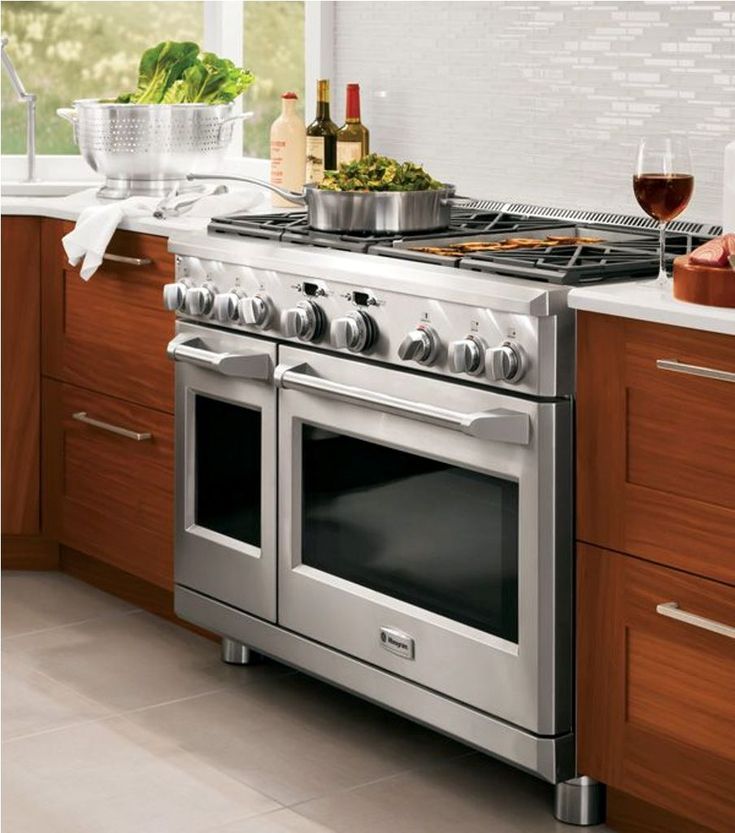 She’s written for websites, including Houzz, Channel 4’s flagship website, 4Homes, and Future’s T3; national newspapers, including The Guardian; and magazines including Future’s Country Homes & Interiors, Homebuilding & Renovating, Period Living, and Style at Home, as well as House Beautiful, Good Homes, Grand Designs, Homes & Antiques, LandLove and The English Home among others. It’s no big surprise that she likes to put what she writes about into practice, and is a serial house renovator.
What is the best way to make an apron in the kitchen and from what: expert advice and feedback
Finishing the working area in the kitchen requires a number of conditions. Culinary processing is a process that has a diverse and very strong effect: there is steam, and cold water, and splashes of hot fat, and dyes.
So not every material is suitable for a kitchen apron.
Kitchen backsplash requirements
Finishing must meet very high practical and aesthetic requirements at the same time. The hostess spends a lot of time in the kitchen, and if the person preparing lunch and dinner is surrounded by ugly worn-out items, the furniture is inconveniently located, and it is impossible to wash stains of grease and soot from the wall near the stove, you can forget about delicious dishes. nine0003
Ceramic tile for finishing the work area
This option can safely be called the most traditional and most popular. The “fault” for this is an extremely successful combination of user qualities, exceptional diversity and quite affordable cost. The main feature of the material is its low porosity. And since there are no pores, moisture will not be absorbed and bacteria will multiply.
This option has a lot of advantages, so this lining is being made and will be made for a long time to come. nine0018
The disadvantages of a ceramic tile backsplash include the complexity of installation. The tile is not flexible, so the surface for ceramics must be perfectly flat.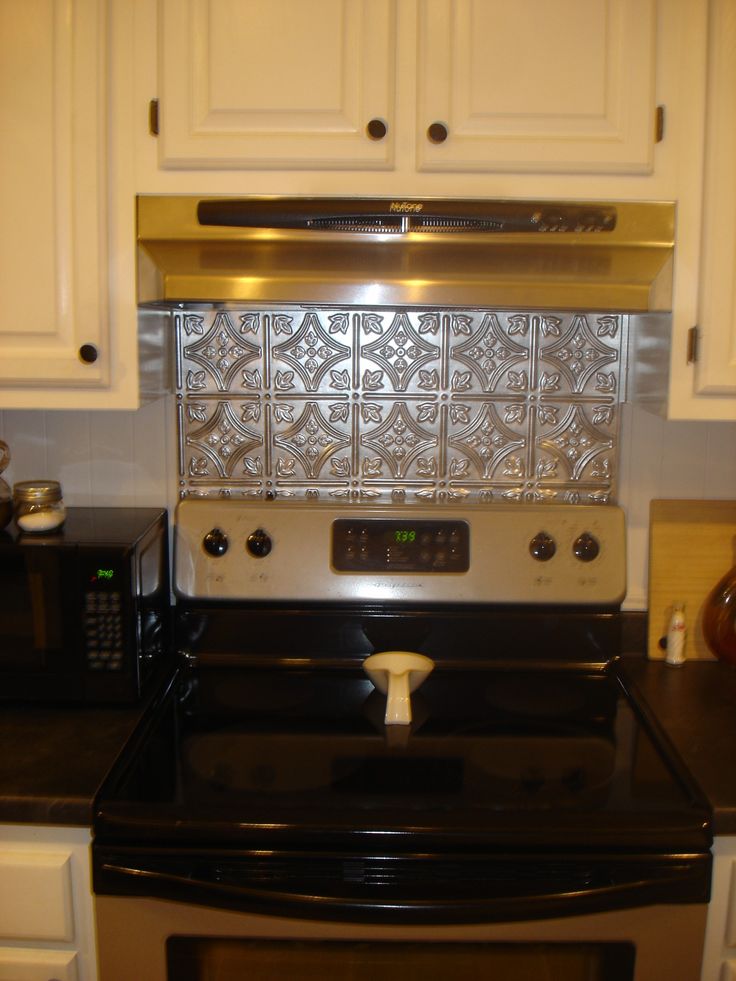 Yes, and styling is best done by professionals, there are a lot of subtleties in this matter.
Mosaic - a stylish option
Quite often, for lining a small kitchen, they suggest choosing a mosaic: a panel or ordinary masonry of small elements - 5 * 5, 7 * 7 cm. As a rule, ceramic tiles act as the basis, although you can use glass, a mirror or metal. Which option is better depends, rather, on the design of the kitchen. However, ceramic mosaic retains all the excellent properties of tiles, but with some reservations. nine0003
The decorativeness of the variant is undeniable: it is much easier to lay out a mosaic in the form of a complex ornament. And mosaic images will definitely not seem boring or trivial. In addition, unlike tiles, perfect alignment can not be achieved here: the elements are small and easily hide small defects.
In the photo - ceramic mosaic.The weak point is the seams between the tiles. Grout, unlike ceramics, does not differ in hygiene and accumulates more dirt.
But when laying large tiles, this disadvantage is minimized, but when laying mosaics, you will have to do additional processing of the seams, at least with a sealant. Moreover, expert reviews indicate that the grout loses its moisture-resistant qualities over time, so it must be periodically removed and the seams re-sealed, which, of course, I would not want to do. nine0003
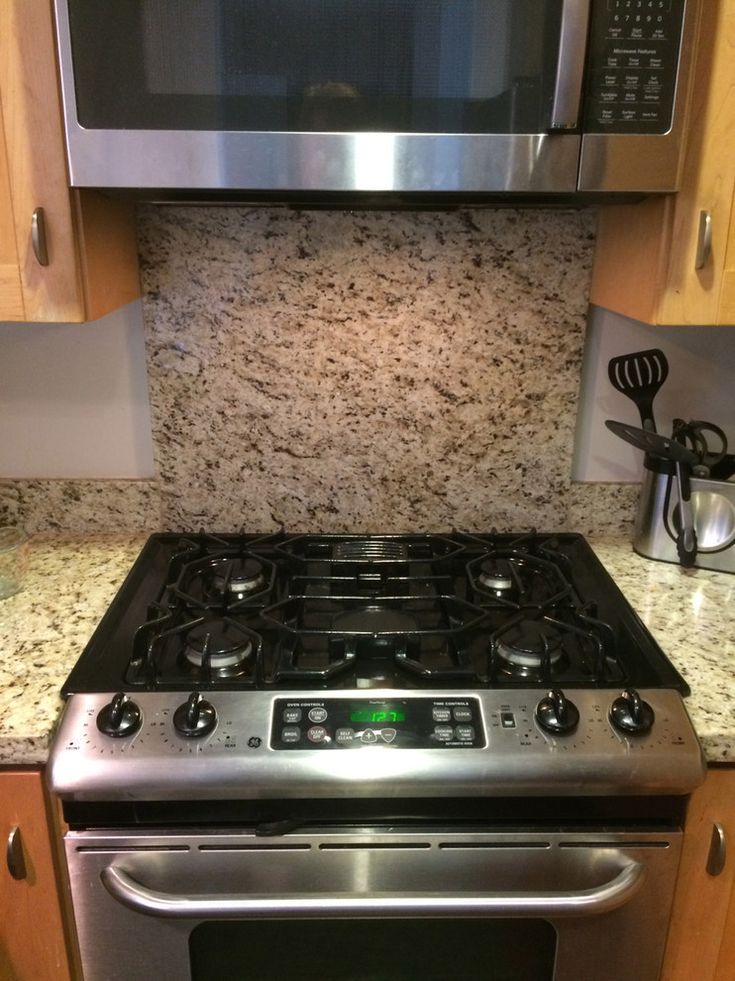
Natural and artificial stone
This name hides a lot of materials, and not all of them are suitable for the kitchen. The fundamental difference is the number of pores and the ability to absorb water. Material with minimum values is allowed. Which one is better is determined by the distinguishing features.
But marble, no matter how impressive it looks, is not suitable for lining a kitchen backsplash: the material is porous and absorbs dirt. Polishing reduces this effect, but in itself such a surface is short-lived. nine0003
- Granite and basalt - much more practical, but require washing with special products: the stone absorbs coloring pigments.
 Facing is better to choose a greater thickness than the same porcelain stoneware, since the strength of natural granite, oddly enough, is lower.
The main disadvantage of this option is not even the cost, but low maintainability. If the panel is damaged, it will have to be replaced. The installation of stone is also not an easy task: the material is very heavy, requires special glue, and size adjustment is almost impossible, with the exception of clinker tiles. nine0003
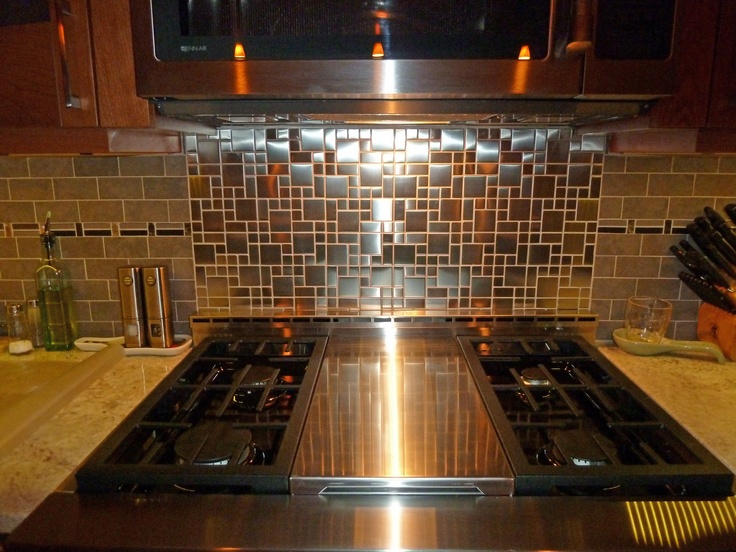
Aprons made of steel
This is an option for a modern kitchen in the style of techno, minimalism, high-tech, where the utility of the material is considered its best advantage. The custom finishes are excellent, although the decorative ones are noticeably lower.
- Solid stainless steel sheets or tiles, and sometimes even mosaics, are used for cladding. The last 2 options are much more interesting, since the surface of the steel can be made shiny, matte, embossed, which makes the apron much more attractive.
 In the photo - an example of a metal apron. nine0002
 - Steel finish is better in terms of strength: there is little that can affect this material. Temperature, water, steam, splashes of grease and so on have no effect. Of the chemicals, only strong acids are dangerous.
- Since steel does not contain any pores, it does not absorb dirt or water and, accordingly, does not contribute to the growth of bacteria.
As the reviews indicate, it is still possible to scratch the surface, and even abrasive products destroy the glossy finish. But if you choose a matte and embossed steel tile and make an apron out of it, this feature loses its meaning. nine0003
Glass aprons
Only impact-resistant or tempered glass can be used for this option, as ordinary glass is too fragile. The material is extremely popular, because it is not only decorative in itself, but also provides a lot of other design options. Glass can serve as a protective screen for any finish - from silk wallpaper to wine corks or solid wood, as in the next photo.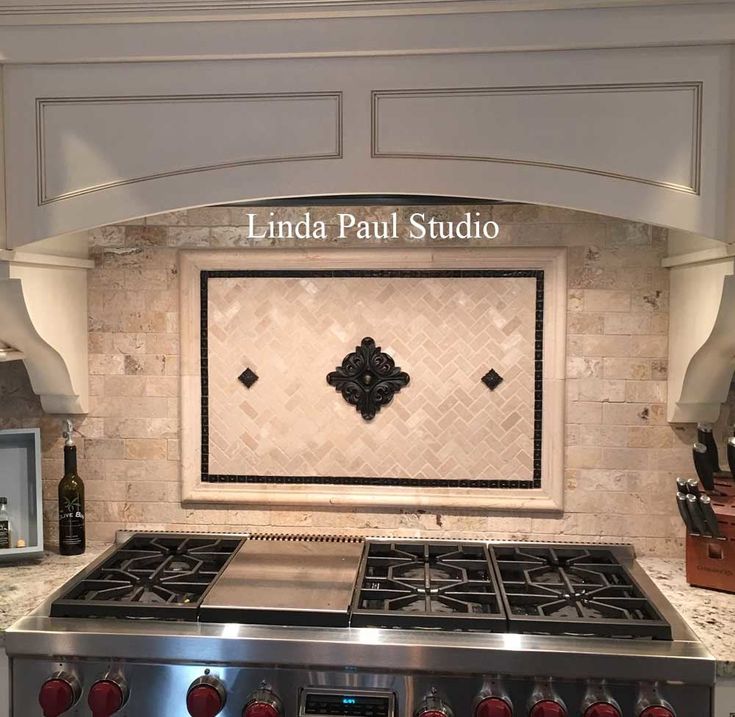
- It is difficult to overestimate the possibilities of glass itself: colored, frosted, transparent, with photo printing, with a pattern, relief pattern, painting, in the form of tiles and so on. What cannot be done with glass is to combine it with tiles. nine0047
- Impact-resistant glass withstands very high loads, although it is quite possible to scratch it. Do not use abrasives for cleaning. But glass is completely insensitive to the effects of temperature or humidity. The material does not absorb dirt and is quite hygienic.
- Glass apron - an option for modern styles: modern, hi-tech, eco. Its effectiveness is difficult to overestimate. In the next photo - a glass apron with photo printing.
The disadvantage of the solution is the complexity of installation and cost. To make the work area completely safe, the apron is mounted from a single piece of glass. And with a fair weight of this material and size, its installation is very difficult.
Only specialists can install a glass kitchen apron. The cost is also determined by the material: the procedure for tempering glass, and even more so triplex, is an expensive process. nine0003
Plastic aprons
Plastic is an extremely versatile material, so several options can be included in this category.
- Plastic panels are the most common option for kitchen cladding. However, in the working area, it does not show its best side, as evidenced by the reviews: PVC is sensitive to temperature, and near the stove it deforms rather quickly. The same thing happens with the finish near the sink, because there is too much dampness, and the plastic changes in volume under the action of water. As a result, the entire skin goes in waves and changes color. nine0047
Panels are quite suitable for finishing other walls, as they tolerate the general temperature in the kitchen. But at the same time, another factor should be taken into account: plastic, even self-extinguishing, belongs to combustible materials, and at a heating temperature above + 80–110 degrees Celsius, it is irreversibly deformed.
According to expert reviews, such cladding is allowed in a kitchen with an electric or induction stove, where the heat is still less.
Finishing with MDF panels
No less dubious option than plastic cladding. MDF is a chipboard, and has almost all the disadvantages of wood. The properties of the panels somewhat depend on the nature of the top finishing layer: it is difficult to say which one is better, since they are all quite sensitive to temperature.
In the photo - MDF with acrylic coating.MDF boards are more resistant to water and steam than wood and retain their geometric dimensions. However, the material wears out faster. The finish is mounted much easier: the plates are light, the fasteners need the simplest. nine0003
However, the mechanical strength for the kitchen is clearly insufficient: an accidental impact is enough to hopelessly ruin the panel. You can not discount the high fire hazard: the material burns perfectly, so near the source of open fire - a gas stove, its use is prohibited.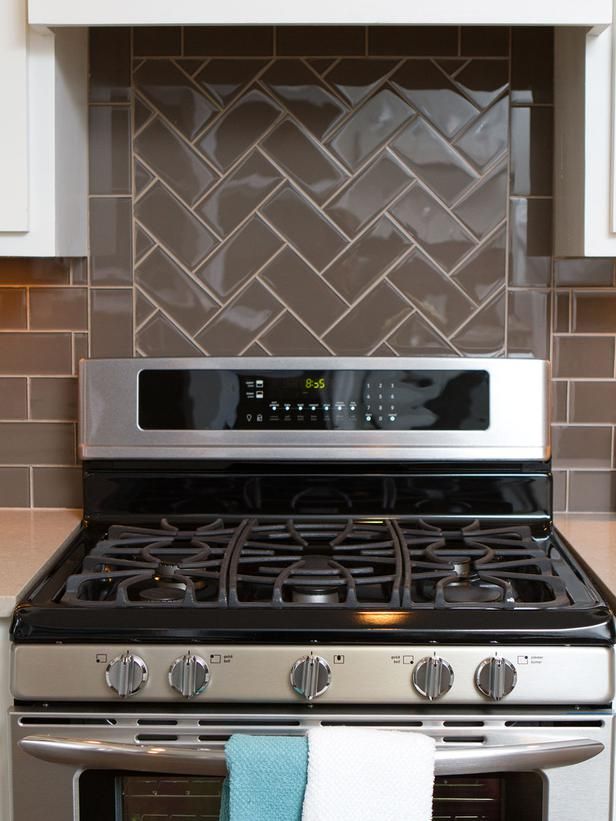
Apron trim available in many materials. And if they do not suit you for some reason, you can always find an alternative or use a glass screen as protection.
Do-it-yourself installation of a wall panel (apron) in the kitchen
The walls are protected from splashes, steam, fats and other contaminants that are formed during the cooking process, provide kitchen wall panels (apron or screen). Usually they are mounted together with the assembly of the entire headset, but they can also be installed separately when the old ones have fallen into disrepair or there is a desire to update the interior.
For details on how to choose a wall panel for the kitchen, read the article of the same name. nine0003
In this publication, we will tell you how to install a kitchen apron made of plastic, MDF (wood fiber board) and glass yourself, but we will not touch on models made of natural or artificial stone. Installation of stone panels technically differs insignificantly. But the material is heavy and requires the skills of repair work for cutting. If you plan to install them, contact the experts.
Despite the fact that laminated MDF is also covered with plastic and is called plastic, we distinguish between these two types of screen. Their installation is not essential, but it still differs. nine0003
How to prepare a wall for a kitchen backsplash
If you have just made repairs or the walls in the apartment are upholstered with drywall or tiles, you can proceed with the installation of the screen. But if there are irregularities, they must be eliminated. The appearance of the wall panel depends on the quality of the walls. MDF and plastic bend easily, so they can go in waves. If the fiberboard is not centered tightly against the wall, it can buckle and form a bubble. All this will spoil the impression of the interior. nine0003
There are 2 ways to prepare a wall for screen installation:
-
Putty the surface.
 Aligning it to the millimeter is not required, but significant differences must be eliminated.
 -
Assemble the crate as a base for the panels. To do this, you need wooden bars 10 * 40 cm or 20 * 40 cm. First, you make a frame out of them around the perimeter of the area where the apron will be located. Fix them to the wall with screws. Next, at a distance of no more than 50 cm, install guides. They will act as the basis for the panels so that the structure does not sag over time. If you plan to install roof rails, bars are also installed at their attachment points. nine0003
The kitchen is considered a room with high humidity. Although plastic panels are resistant to liquid, we recommend that you treat the wooden beams with an antiseptic. It is better to do this a day before installation, so that the product has time to absorb and the wood is completely dry.
As a cladding, you can use plastic or metal guides.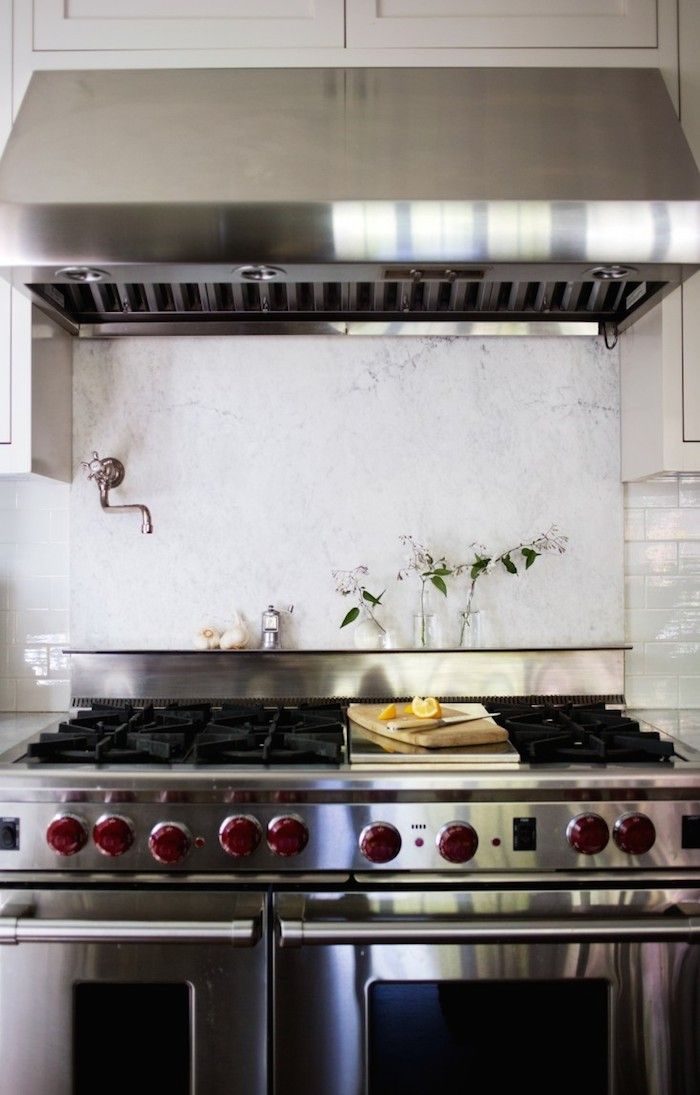 But they cost more. We talked about wooden material as the most affordable and inexpensive. nine0003
How to install a plastic wall panel: techniques and instructions
Installation of a plastic kitchen apron takes one day. This requires the following tools :
-
Roulette for measuring the size of the apron. Wall panels are produced in different heights and widths. If you have a linear headset, and the selected model is the same size as the area on which it will be fixed, you do not have to cut anything. However, this is more the exception than the rule. Usually you have to fit the screen to individual sizes and cut it if you have an L- or U-shaped headset. In addition, you need to make holes for the outlet. When you cut the slot, do not forget to remove the front of the outlet. nine0003
-
A hacksaw with fine teeth or a jigsaw. The second option is preferable, as you can make a cut faster and more accurately.
 But if you have never worked with a tool, limit yourself to a hacksaw.
 -
Silicone sealant and a gun for it to seal the joints if the panel is not monolithic. Do not neglect this recommendation, hoping to closely dock the lamellas. All the same, micro-slits will remain, into which grease and dirt will accumulate over time. On colored or light samples, this will become noticeable and will be reflected in the interior of the room. Silicone is not visible, and it will also provide additional tightness against wet and steam fumes. nine0003
The list of tools is supplemented depending on which installation method you prefer.
There are 3 technologies for installing a kitchen apron:
-
Installation on liquid nails. This is the fastest and easiest way, which is possible if you have a perfectly flat wall. Apply the composition to the lamella along the perimeter, then in a zigzag pattern over the entire surface. Press it firmly against the wall.
 Look in the instructions for how long it takes to fully set. During this period, try not to touch the apron. The technology has one drawback - it is impossible to dismantle the lamellas without damaging them. nine0003
-
The use of self-tapping screws. If you leveled the wall with cladding, the panel will have to be fixed with self-tapping screws. The attachment points are masked with decorative plugs. Some masters use this method to install the screen on a regular wall, without a frame.
If your walls are sheathed with drywall, be sure to use dowels.
nine0031
Fixation by skirting and top drawers. If you install the entire kitchen set, it is enough to press the apron from below and from above. To do this, it should be 1-1.5 cm above the bottom line of the hanging boxes. They will press the panel on top. From below, it will be pressed down by a plinth, which hides the junction of the countertop and the wall.
If the kitchen is large, the craftsmen recommend additionally fixing the screen with liquid nails. But it is enough to miss its central part without capturing the perimeter. nine0003
You can install an apron at any stage of a kitchen renovation. The set and wall panel are independent interior details. But if you mount the screen before the rest of the furniture, accurately measure the height of the floor boxes, taking into account the countertop.
The specifics of fixing the MDF apron in the kitchen
The installation technologies for plastic and MDF panels are the same. But the fiberboard has a peculiarity - its non-laminated parts deform and swell under the influence of water. When fitting the apron to the size of the room, it will have to be cut in any case. To protect the joints from water, corner, end and butt aluminum strips are used. They reliably protect the lamellas from moisture. nine0003
If the design of the kitchen does not involve wall cabinets, the end strips are fixed not only on the sides, but also on the upper cut.
How to install glass wall panel
The advantages of a glass apron are that it is already made in accordance with individual sizes and samples will be brought ready for installation. It is impossible to cut the product at home, so manufacturers agree in advance on the places for sockets and roof rails. nine0003
The process of installing a glass apron is simple. It is placed on the countertop, pressed tightly from the bottom with a furniture plinth, and from above - by hanging cabinets. If there are no drawers on the wall or you need to cover a part of the module or refrigerator located close to the stove with a panel, use silicone glue. It securely fixes the structure.
You can install the kitchen panel not only on the wall, but also protect appliances or the walls of cabinets adjacent to the countertop from contamination. This greatly facilitates cleaning and gives the kitchen a neat look. And with our recommendations, you will cope with this task quickly and efficiently, without resorting to the help of specialists.