Tiling behind stove
How to Choose Kitchen Backsplash Tile Behind the Stove
Hopefully you discovered a newfound love of cooking in the last year (there’s a silver lining, right?)! As much as we can all find joy in cooking and baking - and eating - we’re pretty sure no one enjoys the clean up that follows. Whether you’re an amateur cook, a seasoned chef with almost pro-level skills, or someone in between – making a mess while cooking is unavoidable. From spilling mixes on your countertop to splatters on your stove and walls, your kitchen can go from magazine cover fabulous to more than a little lived in with just one meal!
Cooking delicious meals is the sign of a well-loved kitchen, for sure, but any cook knows you pay the price for that tasty dinner or bunch once the time comes to clean up. Oil splatters and sauce spills can take a heavy toll on painted walls behind the stove, not to mention smoky residue from meals cooked in a pan! The natural solution is an attractive and easy to clean tile backsplash behind the stove!
Our Calacatta Gold Basket Pattern Mosaic Tile is after-picture worthy!
Why is installing backsplash tile behind the stove a wise decision to extend the life of your kitchen? Not only does easy-to-wipe-down tile prevent all the elbow grease from scrubbing, but also it can also set up the perfect look for your kitchen decor. A well-chosen stove backsplash will pull double duty, protecting walls from messes and splashes while creating a statement look in your cooking zone.
The options are just about infinite when it comes to choosing tiles for a stove backsplash , but you'll want to make some key decisions before you make your final choice. Which tile backsplash is the easiest to wipe clean? What style is your kitchen – do you want the same tiles to span the entire kitchen wall, or want a pop behind the range? How can you preserve your beautiful tiles while making the best use of your kitchen?
We created this post to guide you on how to find the perfect backdrop for your cooking area which can be a unique statement for your kitchen décor that meets all your design and cleaning needs, all at the same time!
Did you know that there are unique aspects of cooking zones that you need to take into account when choosing backsplash tile behind the stove? There are many styles that are stunningly beautiful, but may need extra steps to make them the best fit for that backsplash area.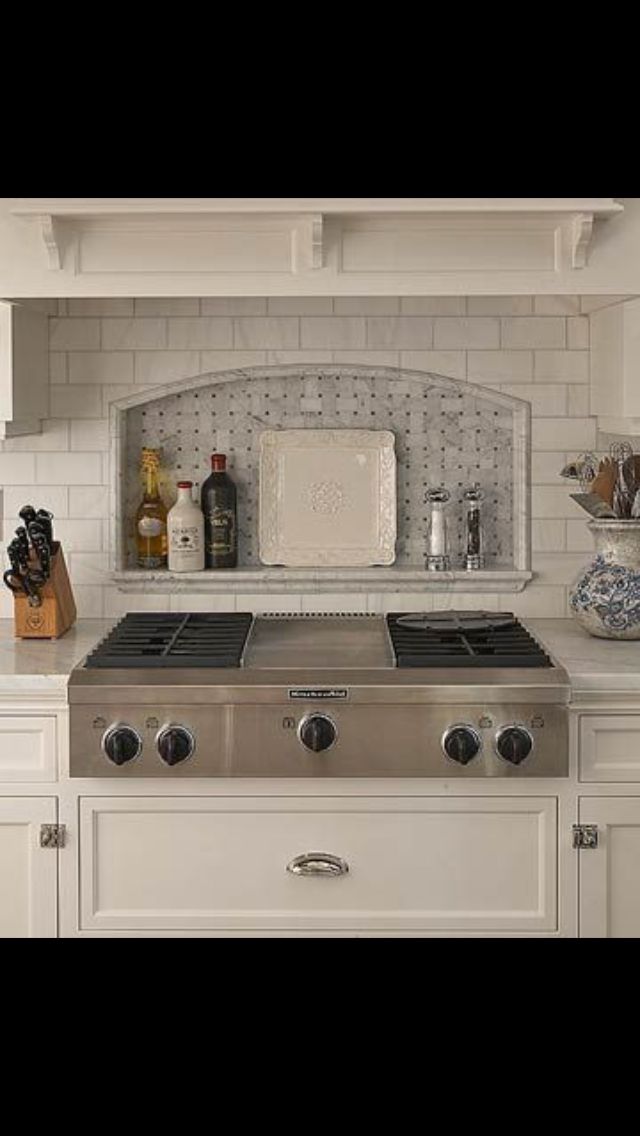 No matter how you manage cooking in your kitchen,
- Grease
- Heat
- Moisture
- Stains
will always have a sneaky way of making it into your stove backsplash tiles! That means you want tiles that look good, while being resistant to all of the above, or at the very least, easy to clean!
The following are the top contenders for a tile backsplash design behind the stove that will satisfy all your design needs while taking everything into account.
Read on for a guide to how each tile material performs in terms of cleaning and maintenance in a kitchen area, before you commit to your final backsplash design!
Glass Backsplash Tiles
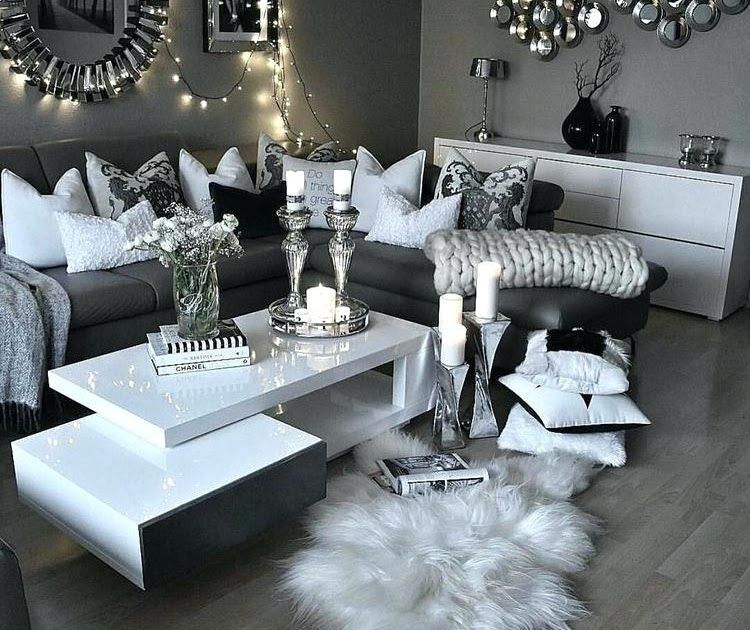
Instead of merely doing a backsplash, this kitchen runs Silver Glass Penny Round Mosaic Tile up to the ceiling for a glamorous kitchen wall decor– this high-shine glass tile kitchen backsplash catches the light and emphasizes modern interior style for a glamorous industrial home!
Glass tiles are easily wiped down after a marathon cooking endeavor, and are therefore a popular choice for kitchen designs.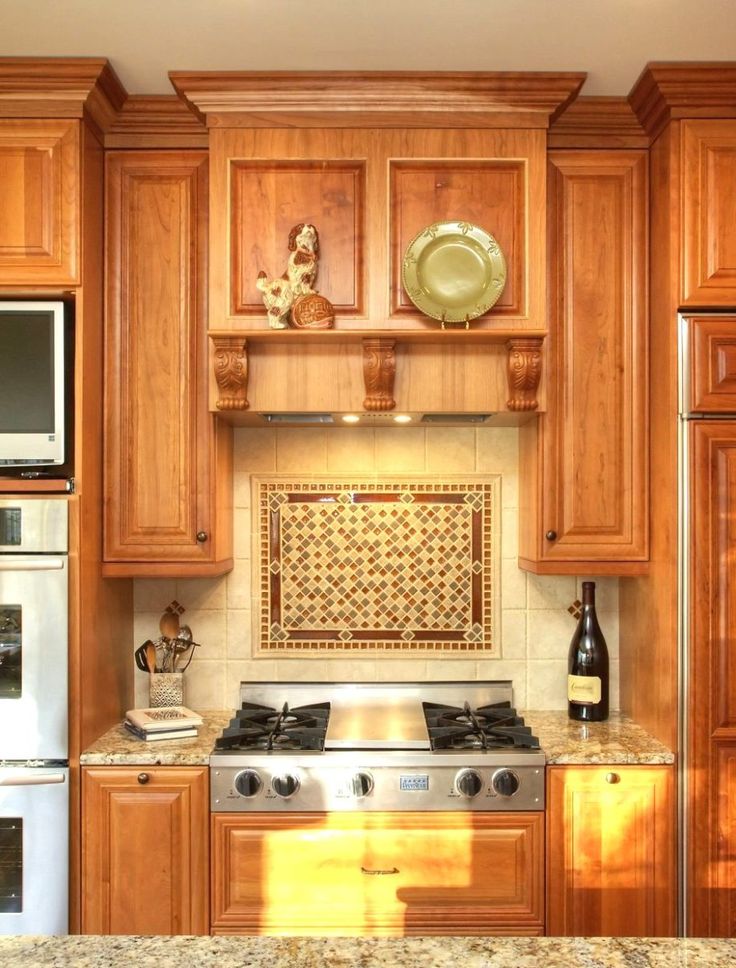 Even when your stove backsplash consists of multiple glass tiles of varying sizes, you’ll need very little time to remove even the toughest stains as the slippery smooth surface of glass requires only a damp rag to make your tile backsplash look new! Add the heat-resistant surface and plethora of color options of glass - what more can you ask for?
Pro tip: When placed behind the cooking appliances like your stovetop, certain types of glass tiles may need additional grout space to allow for the glass to expand as a result of the heat. Just be sure to thoroughly read the specs of glass tiles, and check with the manufacturer before undertaking the installation process.
Porcelain and Ceramic Backsplash Tiles
Beautiful wood look tiles create depth and dimension to this traditional kitchen style.
Ceramic or porcelain tiles for a backsplash behind the stove provides a durable, heat-resistant surface that combats inevitable oil splatters and sauce splashes, while offering tons of room for a creative kitchen wall décor. Usually with a cost effective price tag per square foot, and a vast array of colors and textures, these tiles are one of the best low-maintenance options if you’re trying to make things a little easier for yourself! With a Zellige tile backsplash surface, you won’t have to worry about scrubbing tomato stains off the walls even if you have a pure white tile backsplash such as in this elegantly clean kitchen design.
See our collection of Ceramic Backsplash Tiles to find the perfect color and finish for your kitchen!
Marble Backsplash Tiles
The beauty of Waterfall Azul Cielo & Thassos Marble Mosaic Tile Polished is well worth the little extra effort to preserve its beauty and elegance that can last for many years.
Marble tiles, on the other end of the spectrum, are attractive options for a beautiful backsplash design behind a stove, with a durable finish that’s naturally resistant to heat. Nothing leaves quite the impression as a luxurious marble and natural stone backsplash, but true beauty needs to be maintained and protected.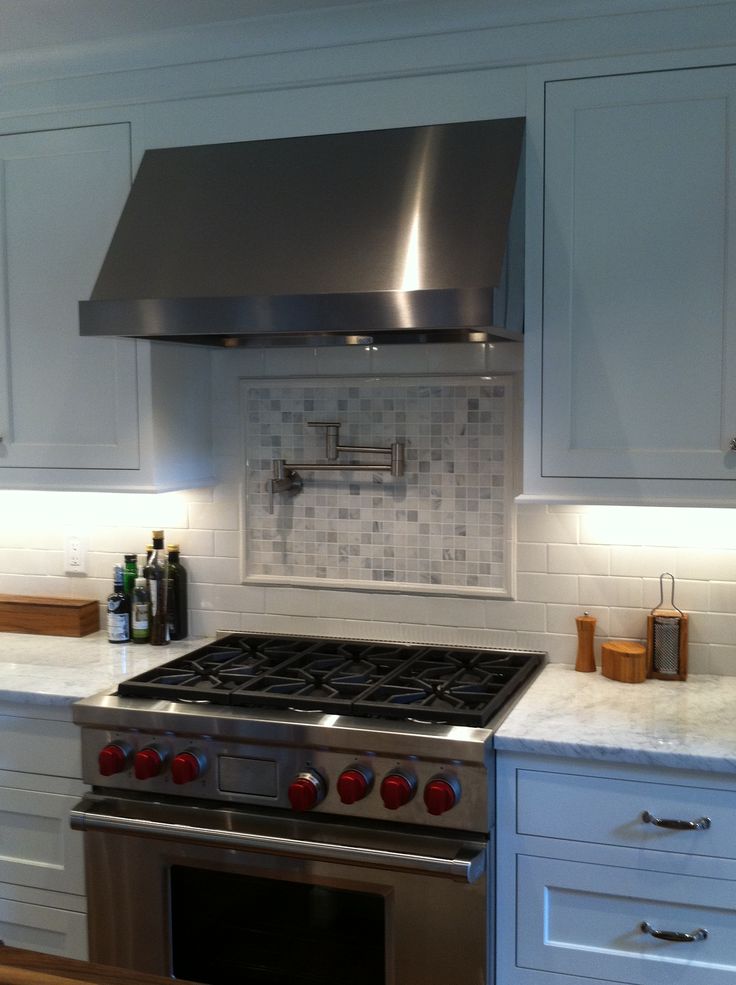
First, the more "natural" your stones are – meaning the more textured and rough – grease and stains are more likely to seek out the nooks and crannies in your tile backsplash. It’s a good idea to choose stone tiles with a smooth appearance, instead of textured or tumbled stones.
Second, whether you have marble, travertine, slate, or any other natural stone, you need to make sure your tiles are sealed on a regular basis to avoid stains being soaked up, as all natural stone tiles are porous.
At the end of the day, it’s well worth it to enjoy the sophisticated look that a stone backsplash adds to any kitchen décor! Whether you love a classic marble subway tile design or add an artistic touch with a marble mosaic pattern, there are endless and beautiful options to create the perfect look for your kitchen!
Designer Tip - White marble kitchens are consistently beloved for remodels and new build homes - the proper stone and tile sealant will ensure the best long life for your beautiful white marble tiles!
Shell and Pearl Backsplash Tiles -
Our Pure White Mother Of Pearl Tight Joints Square Mosaic adds a glamorous glow even tucked underneath cabinets behind the stove.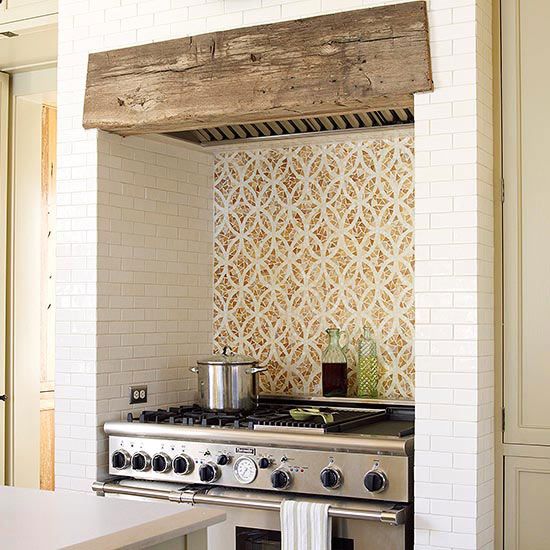
Mother of Pearl shell tiles have become a must have for glamorous homes! Despite their delicate and luminous glow, they’re a surprisingly durable tile material! This stunning natural material is trimmed from the inner surface of sea shells to bring a pearly finish to mosaic tiles. They pair beautifully with other favorites like marble, ceramic, and glass, or absolutely stun all on their own!
Although the pearl surface is extremely resilient - making it a natural choice to combat heavy duty scrubbing after you cook - it does require some care to maintain. It is always recommended that you seal your beautiful shell tiles to make sure they have the longest life possible. Avoid harsh chemical cleaners to keep from abrading the surface to make sure the shine stays as beautiful as possible! If properly sealed and cared for, you should be able to easily wipe up splatters from your Mother of Pearl backsplash tiles with a damp cloth.
Another perk of Mother of Pearl shell tiles for behind the stove? There are many groutless tile options available! Fewer grout lines means even less to scrub, another win-win.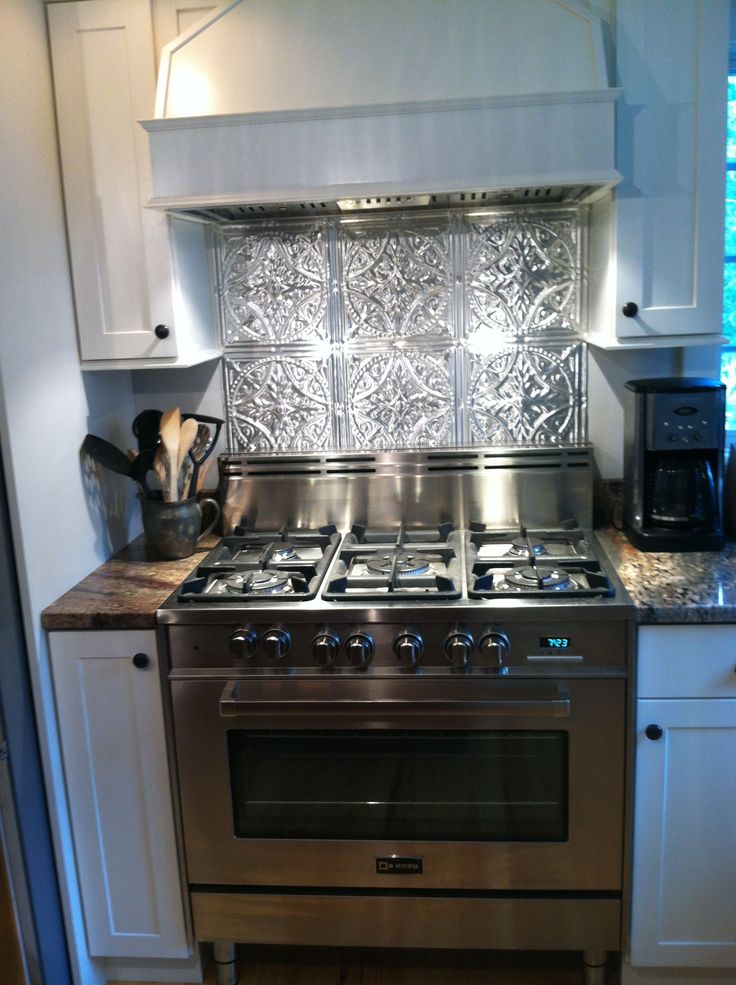 You may need to apply a small amount of grout to fill in between mosaic sheets, but these tiles create an otherwise seamless finish.
Once you’ve decided which tile material works best for your lifestyle, now it’s time for the fun part: scrolling through for design inspiration!
We know it’s hard not to feel a little overwhelmed when sky's the limit for a backsplash tile design, so browse our favorite picks to inspire your own makeover
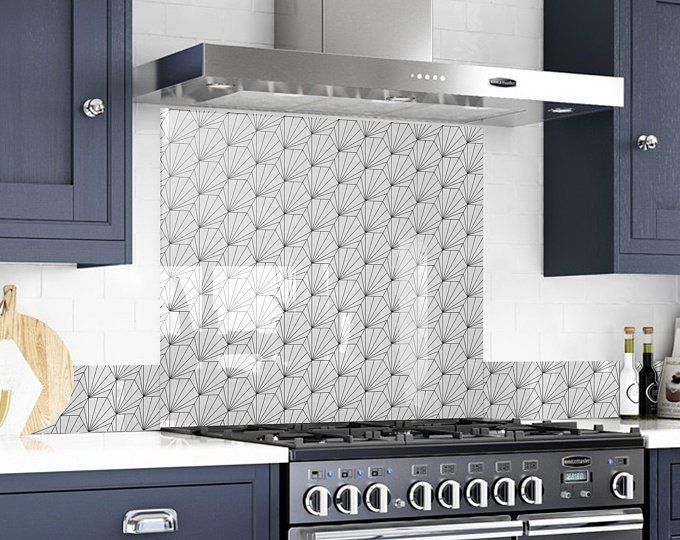
Get Creative with Patterned Tiles
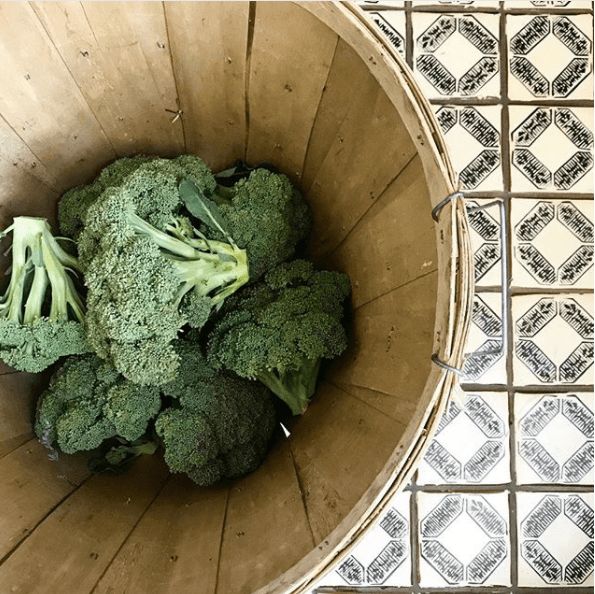
Whether your kitchen leans towards traditional or ultra-modern, a black-and-white patterned tile backsplash makes a bold design statement that keeps the rest of your décor mostly understated. The monochrome effect of Black and white weaved hexagon glass mosaic tile backsplash adds a graphic statement with a retro feel, just like a fun polka dot pattern in this modernly designed kitchen.
Time to Shine
Want to add some instant shine to the kitchen? Go with a glass tile kitchen backsplash and dress up your walls with the mesmerizing smooth surface of glass tiles that catches the light!! No matter what color you choose, the luminosity of a glass subway tile backsplash can transform any space by making it appear brighter and more appealing. Earthy yet vibrant, Stardust Suede 2x8 Glass Mosaic Tile creates a glass subway tile backsplash design with a pearly beauty to fit in modern to glam style. To add even more dimension to the reflective glass walls, line dark color subway tiles with white grout for a crisp look!
Affordable and Upscale Peel and Stick Kitchen Backsplash Options
Is cost a limiting factor in your tight renovation budget? You can still create an upscale vibe without spending a fortune with peel and stick backsplash tiles, such as Carrara Hexagon Peel and Stick Tile that looks surprisingly expensive in this kitchen design!
While a DIY project with peel and stick backsplash tiles is easier than you think, just keep the following few tips in mind to complete it in the easiest and safest way behind your stove area;
- Make sure there’s at least 8 ”- 9” between the burner and the tile surface, or a back control panel on the stove to provide distance.
- Always follow fire codes when installing your stove
- Peel-and-stick marble tile does not need to be grouted, but you can use an unsanded grout for touch ups if there are gaps between the discs.
- Once the peel and stick stove backsplash completely adheres to the surface – generally after 48 hours – it’s resistant to the heat of your stove.
- Ensure at least 2” of distance between the peel and stick backsplash tiles and other appliances that put off heat - such as toaster ovens, toasters, InstantPots, etc.
Ready for a DIY project this weekend? Discover more peel and stick backsplash tile choices for your budget-friendly upgrade and check out the ‘how to’ guide’ to learn all the tricks regardless of skill or experience!
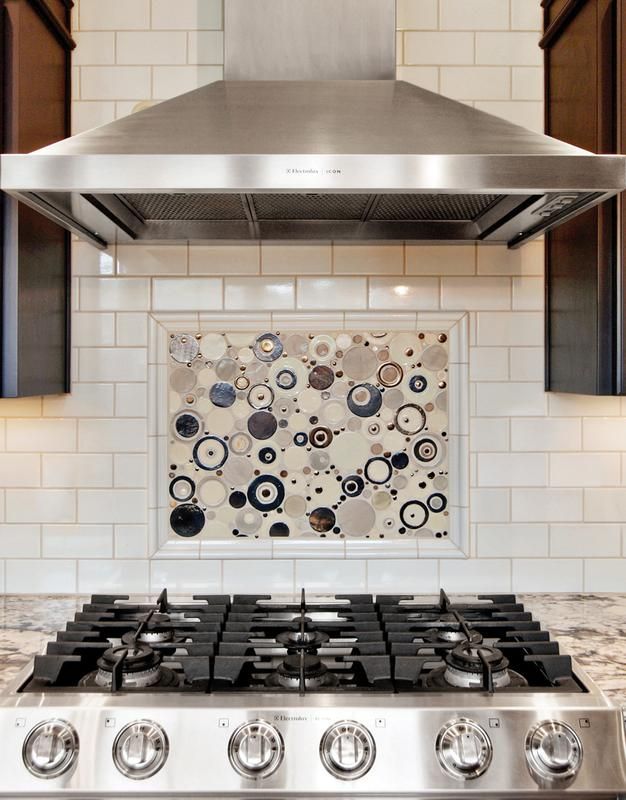
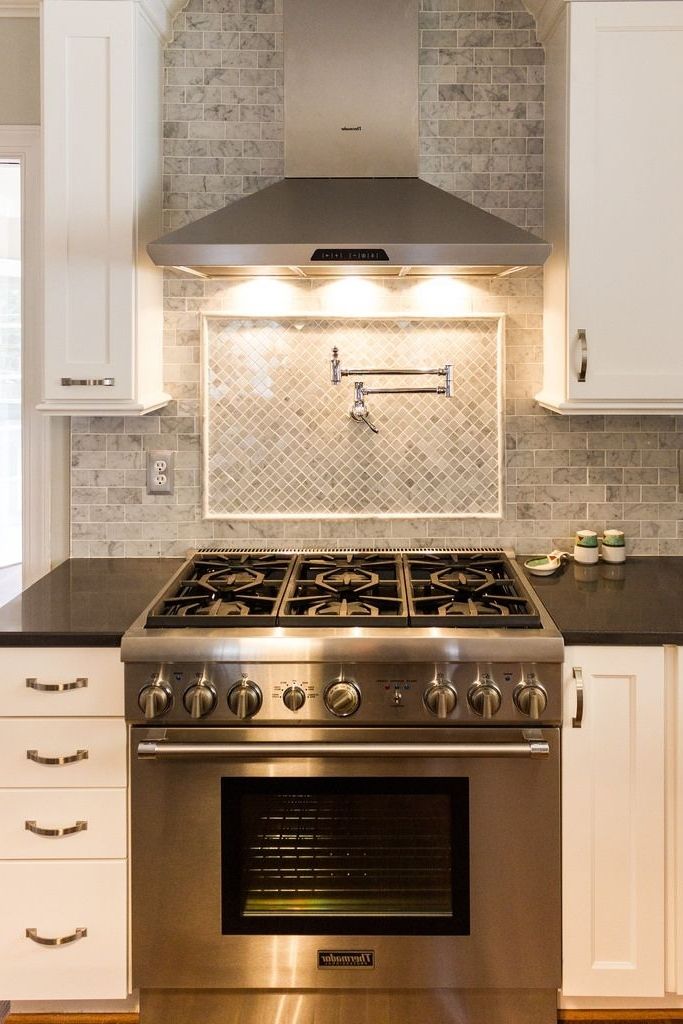
Add a Decorative Tile Insert
Looking for a one-of-a-kind design behind the stove? Build a decorative tile insert from scratch by creating your own pattern within a field of tiles and distinguish it from the surrounding tiles by choosing a different shape or size! You can add a decorative tile insert while sticking to the monochromatic palette of the room– this backsplash design behind the stove adds so much character to this all-white kitchen that it instantly becomes the distinctive feature of the whole décor! The beautiful patterns of Chateau White Spring Ceramic Mosaic Tile and Chateau White Square Ceramic Mosaic Tile pull all the focus, surrounded by Chateau White 3x6 Ceramic Tiles. Add the matching ceramic trim tile and you’re all set to create a backsplash medallion that will serve your style!
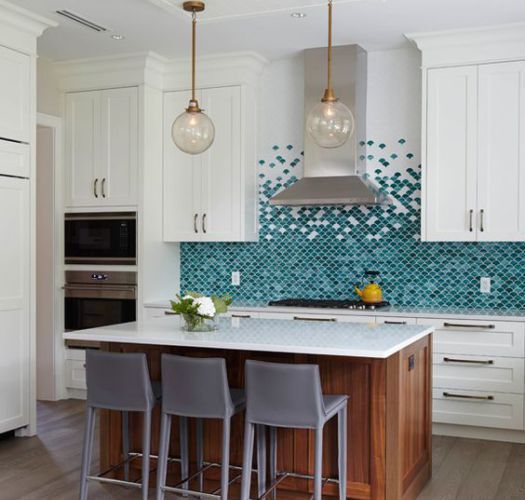
Go for a Splash of Color
Even a backsplash can be a work of art! If you're looking to add a punch of color to an otherwise neutral kitchen, consider a decorative tile medallion that looks almost like a painting. Creating a show-stopping kitchen backsplash design doesn't require a huge splurge. Feature only a touch of color and texture behind the cooking area – like in this kitchen where the vivid colors of Siesta Spanish Mosaic Tile transforms the whole kitchen surrounded by the subtle tone of White Matte Ceramic Subway Wall Tile 4x12. Break up the silence with a decorative tile insert in bright colors or artistic patterns, cut down on costs by pairing them with affordable white subway tile backsplash throughout the rest of the kitchen.
Create a Unique Tile Design
If you love the energetic look of chevron, herringbone, or diamond patterns, incorporate that motif into your kitchen with a geometric tile backsplash behind the stove. A geometric mosaic tile backsplash in white marble makes it easy to create iconic designs while keeping it subtle with similar hues. Take cue from this space, where white and gray marble stripes in Medieval Diamonds Calacatta Gold & Lagos Azul Mosaic Tile makes the kitchen backsplash design just noticeable enough without overpowering the neutral color scheme.
Earth-Friendly Elegance
Exercise your earth-friendly mindset with a recycled glass tile kitchen backsplash – such as in this kitchen backsplash where variegated pieces of White Leaf Recycled Glass Mosaic Tile add a contemporary feel to this small kitchen outfitted with white cabinetry and black countertops. Even if your home isn’t a place of sustainability, recycled glass tiles might be a great addition to a green kitchen that speaks some style!
The Sky is the Limit!
Why stop at the cabinets when you can extend your tile backsplash all the way to the ceiling? This is a great opportunity to make your kitchen feel taller and visually expand a narrow kitchen while creating a more ‘high end’ look. To create depth and drama by making the backsplash tile the center of attention in your kitchen décor, try to stay with a color that complements the overall scheme – such as how Azul Cielo Thassos and Carrara Mini Chevron Marble Mosaic Tile pairs well with the other surfaces in this neutral kitchen.
A Rustic Home Touch
Whether you’re going for a rustic look or a modern spin on a classic farmhouse style kitchen, wood-look tiles provide the perfect tile backsplash for a homemade touch with some extra warm charm! To bring in the homey feel of wood with a luxe appeal, a kitchen backsplash is designed with Roman Flower Wooden Beige And Carrara Marble Mosaic Tile– don’t you instantly get drawn into this warm kitchen? With wood-look backsplash tiles, you have all the moisture, heat and stain resistance of hardwood in the most striking styles!
The area behind your stove is the worst place to clean grease spots and food splatters, and any variety of mess that doesn’t get wiped right away.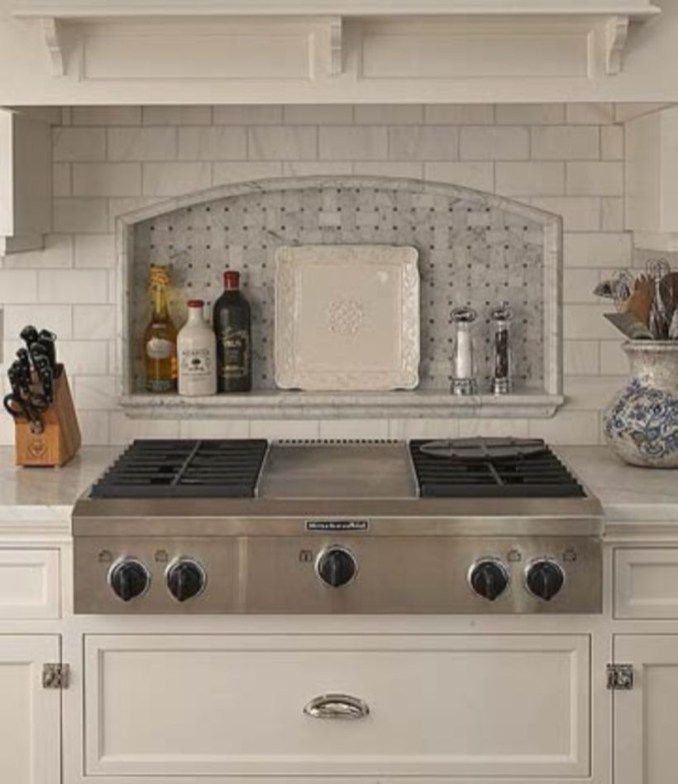 Choosing backsplash tile behind the stove is the perfect opportunity to create a surface that’s easy to wipe clean, and avoid your cleaning nightmares after cooking a meal. At the same time, it’s a great opportunity to be creative! With the more square footage of wall space above the range, don’t be afraid to spice it up with a showy centerpiece, play up with pattern or use the same tiles in a different way to make your kitchen décor stand out!
Got your stove backsplash ideas figured out? Share your favorite design ideas with us in the comment section below – we’d like to know!
Where Should My Kitchen Backsplash Start and Stop?
- O'Hanlon Staff
- Kitchen Remodel Planning
Kitchen backsplashes are practical and beautiful at the same time. They make for easy cleaning during those inevitable kitchen messes, and they add to the overall design of the kitchen.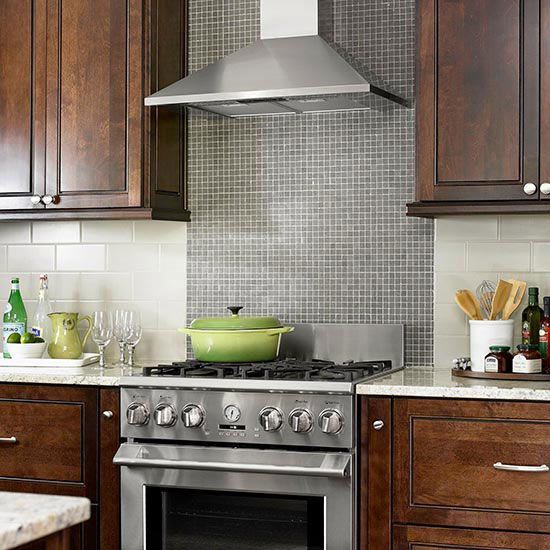 One question we hear a lot during our design consultations is, “Where should my kitchen backsplash start and stop?” The answer depends on your home, your aesthetic, your budget, and more. Here are some backsplash placement tips to help you decide for your home.
There are many factors that influence where your kitchen backsplash starts and finishes. You may have an obvious row of upper and lower cabinets that need a backsplash in between. For less obvious circumstances though, here are some guidelines:
- Put a backsplash anywhere food prep will occur. The main purpose of a backsplash is to make for easy cleanup. Run your backsplash along the walls of the kitchen adjacent to your food prep areas.
- Run your kitchen backsplash between upper and lower cabinets. The backsplash connects the two sets of cabinets, which helps the room feel bigger and more cohesive.
- Do not put a backsplash behind your fridge unless you can clearly see that wall.
 In most cases, the space behind the fridge is not visible anywhere in the kitchen. There is no need to spend money on labor and materials for a place you will not see.
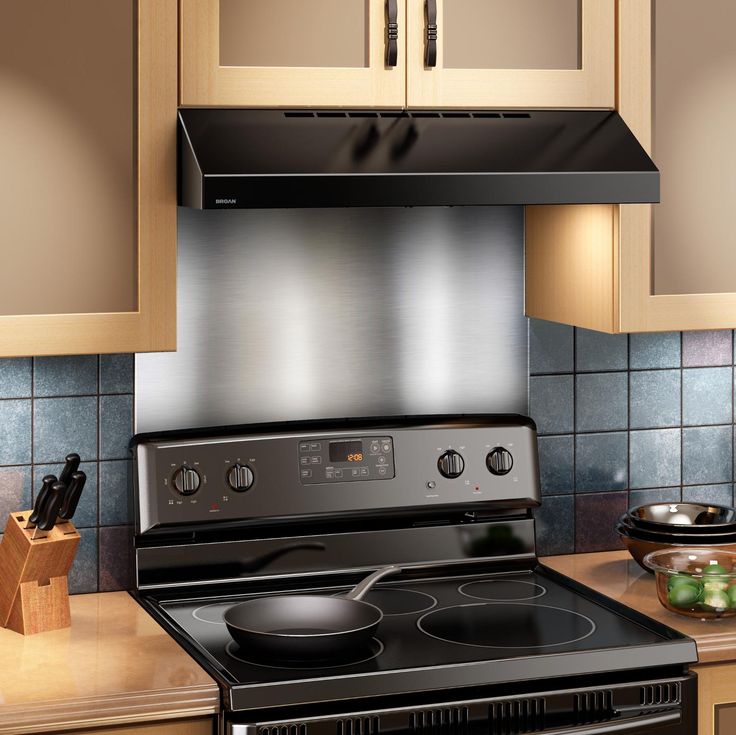
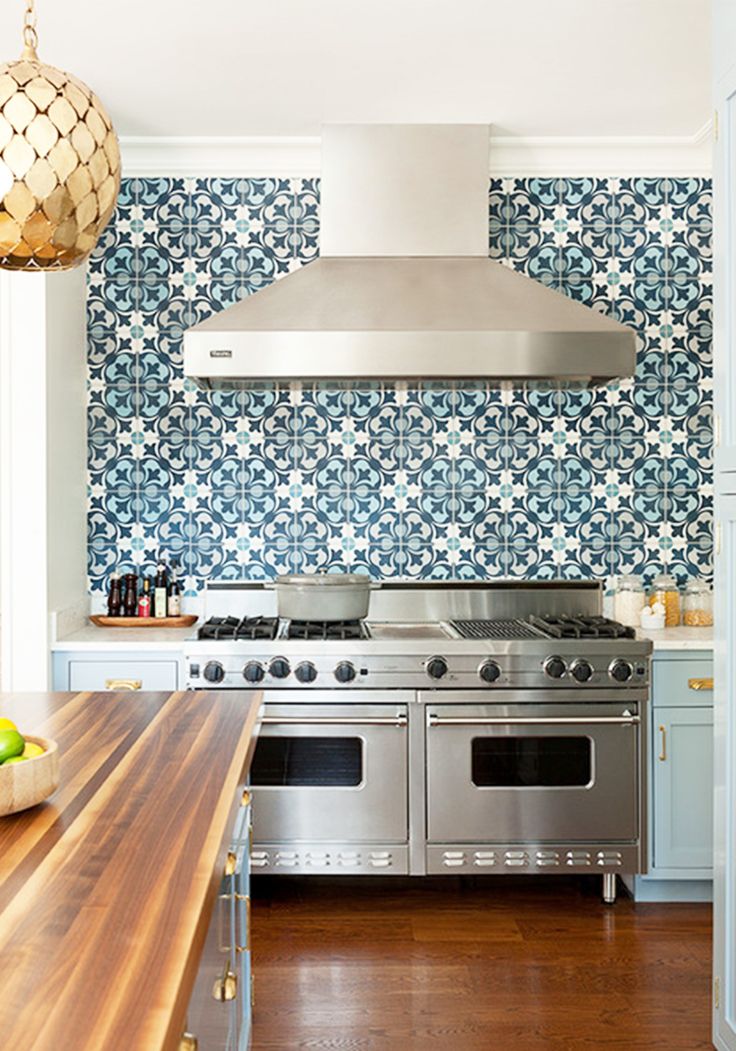
 - Do put a backsplash behind your cooktop and hood vent. Many homeowners will put accent tile behind their cooktop and hood vent to act as a feature in the kitchen. Grease, bubbling sauce, steam and other elements coming from your stove make for a messy cleaning job. Having a backsplash there will eliminate the headache.
- Use your cabinets to mark the end of your backsplash. You can extend the tile beyond the cabinets, but this marks a logical ending for the backsplash.
In terms of how high your kitchen backsplash should be, that’s up to you. Many homeowners stop their backsplash level with the bottom of their upper cabinets. However, some choose to take the tile all the way up the ceiling. This can make the kitchen feel taller, drawing the eye up the wall. It can also make open shelves and other features stand out, depending on the style of backsplash you select. Running the backsplash to the ceiling tends to create a more ‘high end’ look.
Since your backsplash makes up the bulk of the wall space in your kitchen, use it as an opportunity to create a focal feature. You could run mosaic tile vertically from your range all the way to the ceiling. You could have a set of accent tile above your sink. Don’t be afraid to do something a little different to make your kitchen design completely custom.
What If My Upper Cabinets and Lower Cabinets Don’t Align?This is one of the main reasons people ask, “Where should my kitchen backsplash start and stop?” If your upper and lower cabinets do not align, you have a few options. You could stop the backsplash where the upper cabinets end, but we usually recommend lining up with the base cabinets. You could also taper your tile or angle your stone backsplash to gradually connect the top to the bottom.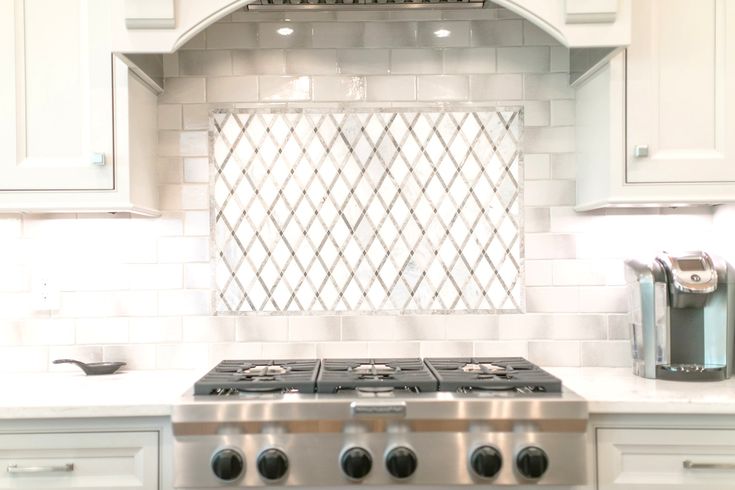 Yet another option is to line the backsplash up with the base cabinets, then run the backsplash all the way up to the ceiling. This is a good choice in open concept spaces because it helps establish a zone for the kitchen.
The best rule for kitchen backsplash placement is to look for a natural stopping point. This could be a wall, a window, a cabinet edge, or anything else in between. You can use tile edging trim or bullnose tile to create a distinct edge for the backsplash. You could also use a creative edge design, such as tapering a set of hexagon tile away.
If you opt for a full kitchen remodel with O’Hanlon Kitchens, we will discuss exactly where your kitchen backsplash should start and stop. Contact us online or give us a call at 443-285-0558 to schedule your design consultation.
- previous post: Pros and Cons of Waterfall Kitchen Countertops
- next post: 5 Tips for Choosing a Kitchen Accent Color
which one to choose for cladding (+photo)
Now there are many households, cottages, where various stoves and fireplaces are successful.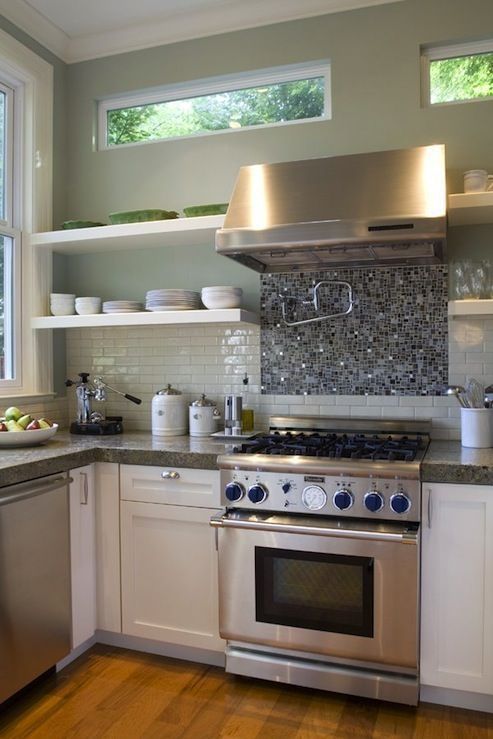 They perform a decorative role, and also provide optimal temperature conditions indoors. Very often, such designs do not have a very attractive appearance. To correct this significant shortcoming, a rather active method is used. Namely, tiles are used for stoves and fireplaces, which are used to line their surfaces. But such work requires compliance with certain norms and rules, which are also put forward for the material used.
Contents
- 1 Why clad the stove and fireplace?
- 2 Properties of tiles for stoves cladding
- 3 Rules for choosing
- 4 Marking
- 5 Various tiles
- 5.1 Tiles made of special clay (clinker) 9000 5.2 Terracial tile
9000 5.3 Majolika (Mayolika) 9000 5.4 perfeters
Why line the stove and fireplace?
In general, lining stoves and fireplaces performs many functions:
- As already noted, this is to give a more elegant decorative layer.
- There is a significant increase in heat capacity and heat transfer.
- It takes noticeably less time to heat up the room.
- Stove care is greatly simplified. The surface lined with ceramic tiles is very easy to wash and clean.
Furnace lining properties
Before choosing ceramic tiles for cladding, you must first find out what type of oven it will be installed on. There are many such designs, which are subdivided according to what material they were made of, what shape they have, and many other parameters.
Also, such products differ in the degree of heating. It can be: low, medium and high. This indicator is determined by the material from which the stove or fireplace was made. This is what imposes certain requirements that apply to the facing material.
The choice of tiles depends on the degree of heating of the stove Thus, it becomes clear that the tiles for the fireplace must meet certain mandatory characteristics.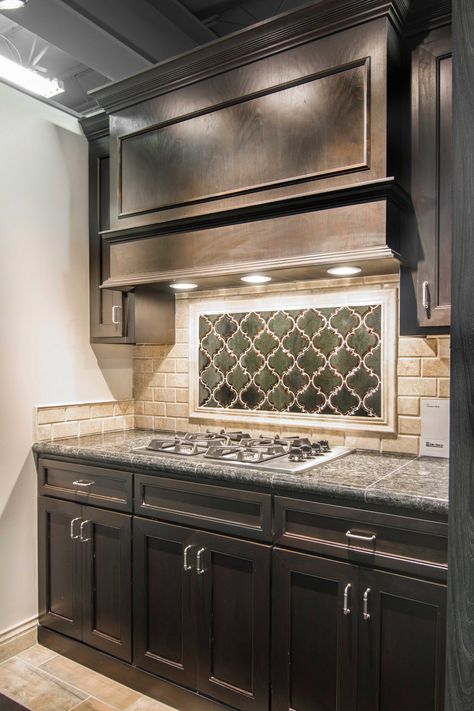 The main ones look like this:
- Any high temperatures to which it will be subjected should not have a significant effect on it. In general, almost any ceramic tile is suitable for cladding. But this is taking into account the fact that then it will be impossible to use the stove, otherwise the simplest thing that can happen is the destruction of the applied coating.
- It should accumulate heat well and give it away no less successfully.
- It is important that the coefficient of thermal expansion, which is available for the material of the heating product and the tile, is the same.
- High strength.
- Material thickness. The larger it is, the harder the tile for the fireplace (stove) will be. This will allow you to withstand significant loads.
- No harmful substances. The environmental component is very important. The fact is that when heated, many toxic components are released. Therefore, it is very important that they are not included in the composition.
- Wear resistance. Such an indicator indicates that the period of preservation of the decorative layer of its indicators will be significant.
- The porosity should be as small as possible.
- Moisture absorption must be minimal. High rates lead to the formation of numerous pores, and, consequently, to a decrease in rigidity.
- Fire and heat resistant.
Attention! In general, such materials must have special certificates. Only if they are available, we can say that the tile will meet the necessary parameters and withstand all the declared characteristics.
Selection Rules
Many craftsmen who are professionally engaged in facing the surfaces of stoves and fireplaces give the following tips for choosing the right stove tiles:
- The thickness of the ceramic tiles for the stove should be between six and eight millimeters. That is, each individual element must match each other.
- No geometric distortion should be observed. To determine this, you need to attach the products to each other. Any irregularities lead to the formation of a fragile structure, a change in decorative conciseness.
- All fireplace and stove tiles must be of the same color shade, unless otherwise specified.
- Any defective materials must not be used. The presence of cracks, chips may indicate a low quality tile.
A few tips for choosing:
- It is better to give preference to a square tile for the stove with a size of 12 * 12 cm. It has good rigidity and strength.
- Do not take the material in the estimated quantity. You need to take into account the safety stock. It should be up to 15% of the total.
- Any cracks on the product, even if they are on the wrong side, should be avoided. After cladding, such damage will burst, which will be displayed on the front.
Marking
Heat resistant tiles cannot be identified solely by appearance. It is very easy to make a mistake in this case. To prevent this, you need to pay attention to the existing markings. Although depending on the product itself, they may vary:
- There are numbers on the labels - 1,2,3. This indicates how many firings the tile has gone through. The bigger, the better.
- The presence of the letter "T" - indicates that the material has heat resistance.
- The letter "E" and the presence of a number indicates the moisture absorption that tiles for stoves and fireplaces have. This figure should not exceed three percent.
- The letters "A" and "B" are indicated on the labels of the clinker stove tiles. "A" - indicates that a technological manufacturing method was used, the quality will be higher.
There are many other designations, but they are more specific and need to be known for other jobs.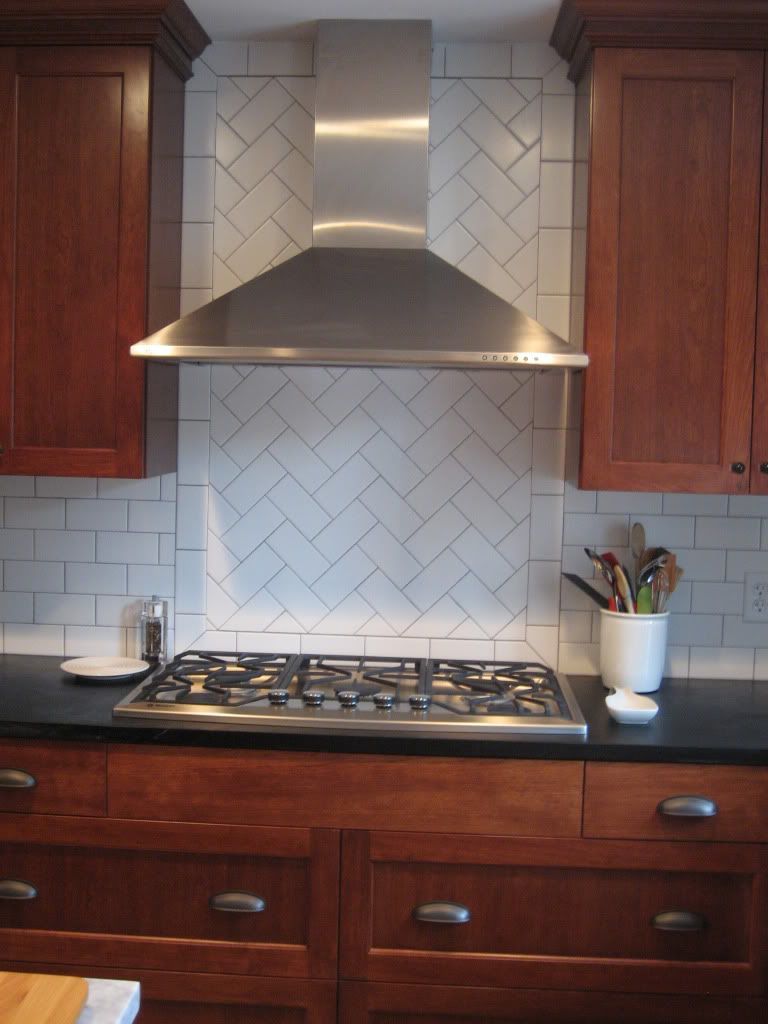
Different types of tiles
There are two types of facing material for stoves and fireplaces: artificial and natural. The former include products made from a single piece of stone that has the desired characteristics (marble, jasper). The second includes tiles that have gone through a large industrial process. It is made from extracted raw materials, adding, if necessary, the necessary components. Then the required size is formed and fired. It is this type that is most suitable as a facing material for furnaces. Such a tile has the necessary fire resistance.
There are several subspecies of this material.
Special clay tiles (clinker)
Stove lined with clinker tilesClinker tiles for stove finishing are produced in two types: unglazed and glazed. It has the following characteristics:
- full naturalness, unglazed clinker products do not have any additives;
- negligible moisture absorption, less than two percent;
- wear resistance and strength;
- clinker tiles are used for finishing high temperature surfaces;
- feels great when used outside buildings.
Need to know! Clinker tiles cannot be calibrated, so there is an error that must be taken into account.
Do not use clinker products for finishing inside structures. A very high temperature leads to the expansion of the material, which leads to the destruction of the applied layer.
Terracotta tiles
Refractory terracotta tilesMade from a special clay. Such a tile has shown itself well as a facing material for fireplaces (stoves). It has a fairly long history of use. It has the following characteristics:
- can be of various terracotta shades;
- available glazed and unglazed;
- has increased strength;
- very easy to care for;
- adheres to almost all surfaces;
- good heat resistance;
- large selection of textures and low price.
Majolika (majolica)
This is a more advanced material of the terracotta product. Their characteristics are almost identical. The difference lies in the fact that majolica has a thinner pictorial layer. This eliminates the possibility of numerous small cracks.
But, unlike terracotta tiles, majolica is not recommended for lining stoves and fireplaces.
Tiles
They have enhanced heat-saving properties. This is achieved due to the fact that there are sides on the wrong side.
This species has been known since very ancient times. But even now it has not lost its aesthetic properties. Glazed tiles are successfully used in the decoration of external surfaces. Unglazed products are perfectly used from the inside.
Beautiful tiled stoveThis material has the following properties:
- heat resistance;
- good heat dissipation;
- increased durability;
- high environmental friendliness;
- wide range of colors and shades.
This heat-resistant tile is excellent for rooms where the oven is not constantly heated. And also it lowers the heat, respectively, you can not be afraid to touch the surface.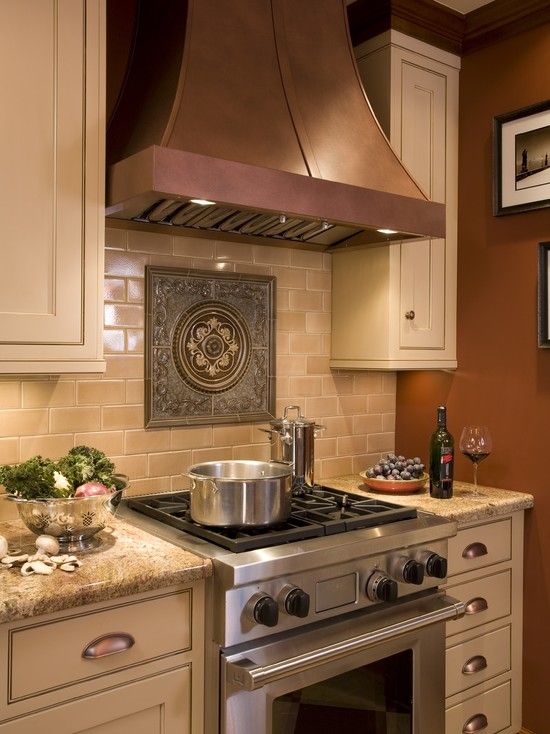 The only drawback of such a product is the high cost. Although many masters make tiles on their own.
In conclusion
Finishing stoves and fireplaces is quite an important process. There is a wide choice of facing materials on the market. They can be made of completely different types, but they must be united by one thing, they are all refractory and heat-resistant. This is the most important property, it is due to it that the desired result is achieved. Any high-quality heat-resistant tile, no matter clinker or terracotta, must have a certificate that confirms its properties.
Furnace tiling: step-by-step instructions
Furnace tiling Tiles for stoves and fireplaces Heat-resistant tiles
1. Ceramic tiles for stoves and fireplaces: advantages, main varieties
There are many varieties of ceramic tiles. So, for the bathroom, steps, floors, similar coatings are used. But for the lining of stoves and fireplaces, a completely different ceramic material is required, since we are talking about objects that operate at high temperatures. Accordingly, the facing material for their decoration must meet stringent requirements:
Only some types of tiles meet all of the above requirements. Let's consider them in more detail:
1. Terracotta. It is made on the basis of clay and is an environmentally friendly material. It is very durable - able to withstand impacts, practically does not scratch, withstands low temperatures, so you can safely use it for finishing furnaces located in very cold rooms. In addition, terracotta has excellent refractory qualities: it can withstand not only high temperatures, but also their fluctuations.
2. Majolica. In fact, it is terracotta, which is covered with a layer of glaze. This is an ancient material, which in the old days could only be afforded by the rich stratum of the population. Now it is used to add a touch of luxury to any stove.
3. Clinker. Is a kind of alternative to refractory bricks. It is made on the basis of several varieties of clay with the addition of fireclay and dyes.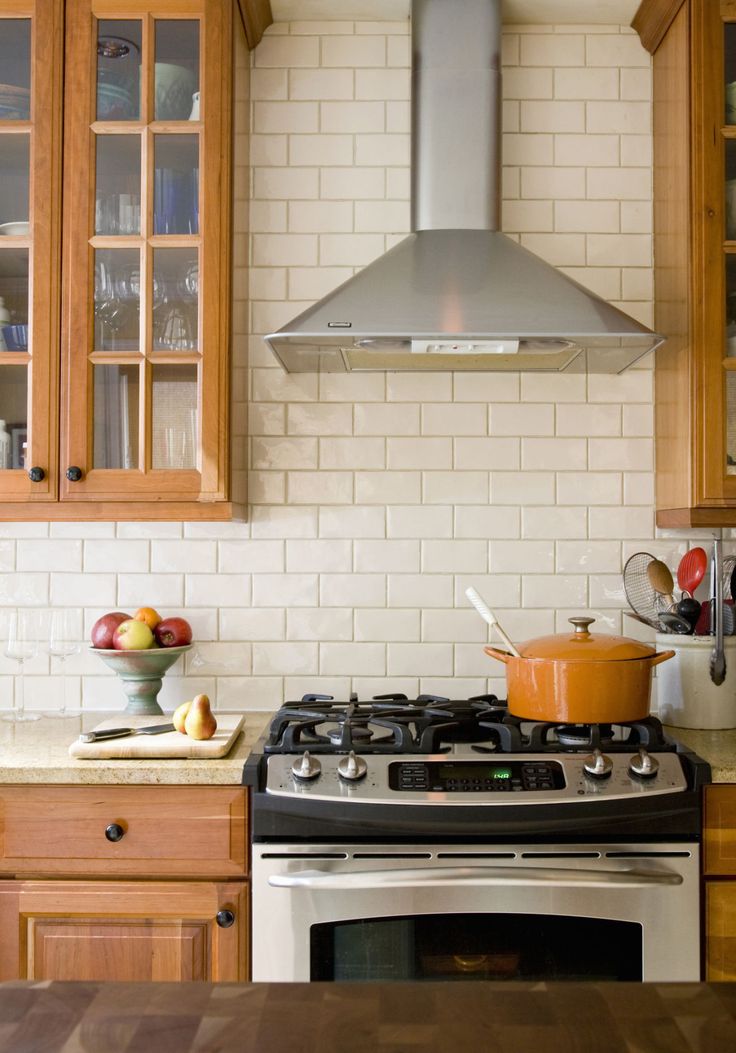 The mixture is pressed, and the finished tile is fired. The material is very durable, resistant to wear and has a large palette of beige shades.
4. Porcelain stoneware. It is quite complex in its structure: it consists of a clay-sand mixture with the addition of crumbs of granite, marble, metal salts, which is pressed under high pressure at high temperature. It has excellent thermal performance. In addition, the material is represented by a wide variety of textures and colors, which allows it to be successfully used to imitate all kinds of finishing materials, including terracotta and clinker.
Reliable and durable porcelain stoneware from the Colliano collection from the Kerama Marazzi brand is a good option for stoves and fireplaces.
5. Tiles. Used as an artistic decoration of stoves and fireplaces. Tiles are made, like terracotta, from clay, followed by firing. This material is good in operation at very high temperatures, has a high heat transfer, and is environmentally friendly.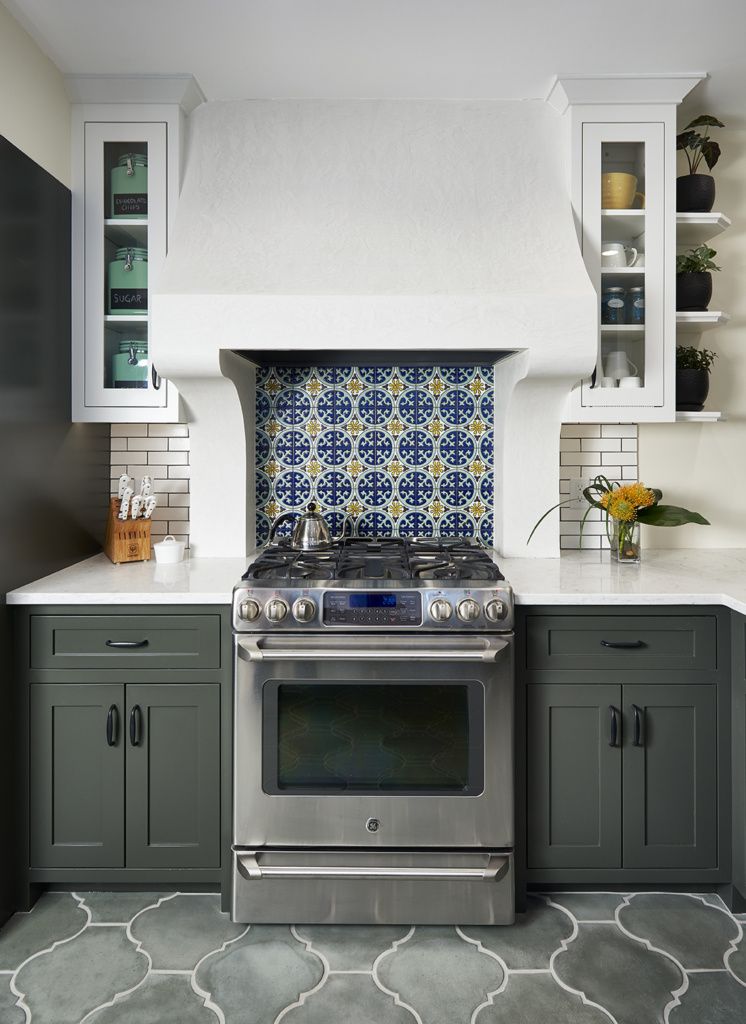 But at the same time, its cost is considerable, which makes it not very popular.
Popular tiles for stoves and fireplaces
Kerama Marazzi Russia
Porcelain tile Colliano ornament 30x30
Article SG914500N
Format cm 30x30
927 ₽
Watch
Ragno Italy
Porcelain tile Bistrot Calacatta Michelangelo 21x18.2
Article R4TA
Format cm 21x18
4 200 ₽
Watch
Italon Russia
Porcelain stoneware Sharm Evo Statuario 60x60
Article 610010000778
Format cm 60x60
3 025 ₽
Watch
Italon Russia
Porcelain tile Sharm Evo Calacatta 60x60
Article 610010000779
Format cm 60x60
3 025 ₽
Watch
Italon Russia
Porcelain tile Millennium Pure 60x60
Article 610010001451
Format cm 60x60
2 920 ₽
Watch
Marazzi Italy Italy
Decor D_Segni Colore Tappeto 5 20x20
Article M1L4
Format cm 20x20
4 620 ₽
Watch
Vitra Turkey
Porcelain tile Marmori Calacatta White LPR 60x60
Article K945331LPR01VTE0
Format cm 60x60
2 632 ₽
Watch
Vitra Turkey
Porcelain tile Marmori Cold Grezh 7LPR 60x60
Article K946536LPR01VTE0
Format cm 60x60
2 772 ₽
View
All collections of tiles for stoves and fireplaces
2.
 Laying ceramic tiles with your own hands. Preparation of necessary tools and materials
 The process of laying ceramic tiles is simple, if you follow the technology, use the right amount of material and carry out the installation correctly. Let's consider the process in detail.
Before starting work, it is important to determine the required number of tiles. To do this, we calculate the area of \u200b\u200bthe working surface, not forgetting also about tile joints, the size of which is 0.2-1 cm (their area is subtracted).
Tip!
Master stove-makers usually add about 15% to the calculated area - a safety margin for chips and undercuts, which are likely to appear during the tile cutting process.
It remains to prepare the necessary tools and you can start laying. So, for work we need:
-
chisel / perforator;
-
hot glue;
-
tile cutter;
-
several spatulas;
-
level;
-
grout;
-
primer;
-
cross stitches.
Basic tools for tiling.
3. Laying process: step by step instructions
Consider the technology of laying ceramic tiles step by step.
1. We prepare the work surface for laying new material. If the stove is covered with a layer of paint, it is removed with a wire brush along with dust and dirt. If the oven is covered with tiles, it is removed with a chisel, moving from top to bottom.
It is undesirable to break the old tiles, as this can damage the brick from which the stove is built. After cleaning the furnace from the old coating, it is necessary to deepen the masonry joints by 0.5-1 cm (to improve the adhesion of the solution).
2. In order for the new tile to hold firmly and not peel off over time, we level the oven walls with a metal mesh with cells no larger than 15x15 cm. We fix the mesh on the work surface with tension - a ceiling dowel is quite suitable for this purpose. After that, we process the oven surface with plaster - we use a solution based on sand, clay and cement in a ratio of 0.2: 3: 1. The final preparatory step is the primer. It is advisable to use a heat-resistant quality mixture.
Tip!
To reduce the amount of primer used without adversely affecting the quality of processing, you can walk on the surface with a damp cloth before starting priming.
3. Let's start laying tiles. Pay special attention to the first tile row - this will affect the evenness of the masonry as a whole. Keep in mind that masonry starts only from the bottom, and from the corner (any). To create a perfectly horizontal first row, it is advisable to place GVL sheets under it. We install crosses between the tiles, which will provide the same width. We apply the adhesive composition to each tile, distributing it with a notched trowel, then press the tile to the surface with our hands, gently tapping it with a rubber mallet. Experts advise not to lay more than three rows in one approach.