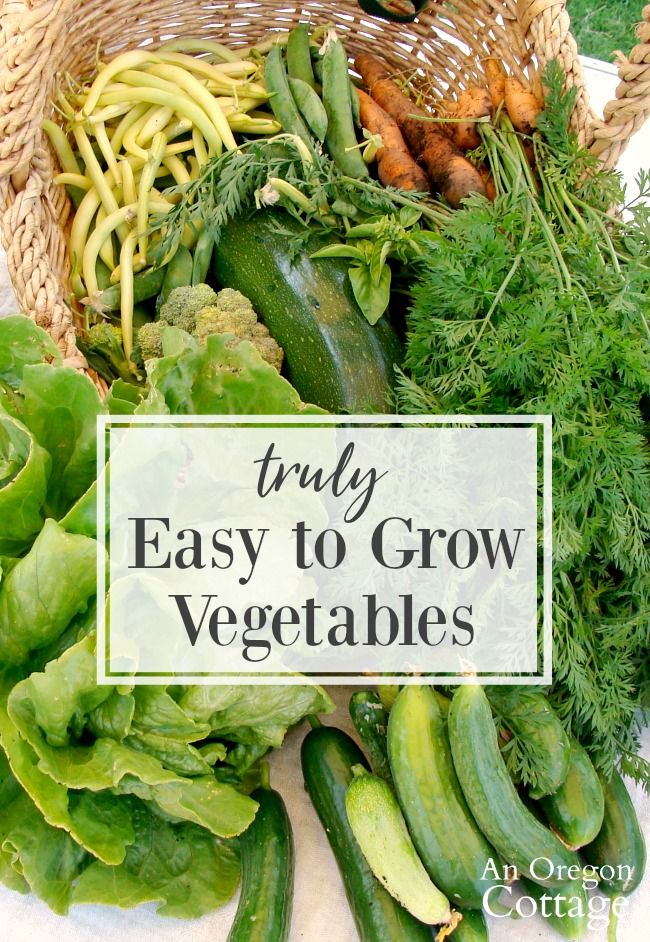
The easiest vegetables to grow
10 Easiest Vegetables to Grow in the Home Garden
Which vegetables are easiest to grow from seed? Growing from seed is less expensive and offers much more variety. Our list includes vegetable seeds that can be sown directly into your garden soil, but some are also suitable for starting indoors and transplanting.
Should I Grow Vegetables from Seed or Transplants?
There’s nothing wrong with starting your garden from small plants which you purchase (known as “transplants”)—in fact, many people do! In fact, there are a handful of vegetables that can be challenging to grow from seed and are best purchased as young plants from a garden store/nursery (tomatoes, for example, can be finicky to start from seed). Transplants also allow you to get a head start on growing tender vegetables such as tomatoes, peppers, and eggplants, which require a long, warm growing season.
That said—unless you have a short growing season—many vegetables are easy enough to start from seed at home.
Here are a handful of the benefits of starting from seeds:
- Seeds are much cheaper, especially in greater quantities. They often keep at least a couple years, and they can be shared with friends and neighbors, too.
- Seeds offer much more variety than the often limited choice of transplants in a nursery. Just take a look at these seed catalogs and let the dreams begin!
- Some vegetables do not survive being transplated from one place to another.
- Starting from seed means that you can sow seeds directly in the garden, which opens the door to growing crops such as corn, melons, squash, beans, and peas, which simply do not grow as well when transplanted from one place to another.
- Starting plants from seed means you can ensure they are healthy and strong right from the start.
This is not a complete list, by any means, but these are considered some of the easiest and most common vegetables that can be grown at home.
1. Lettuce
We’ve never known a garden that cannot grow lettuce.
Lettuce can be sown directly in your garden bed, or started indoors for transplanting. It’s one of the few crops that can be grown all year in our climate, but in hot weather it should be shaded and harvested at smaller sizes. Lettuce growth slows in shade; it is also slower to go to seed, or “bolt,” which means that it can be harvested for longer.
An endless assortment of leaf shapes and shades of green and red means you’ll never get tired of growing new lettuce varieties. Leaf lettuces can be cut as they grow, and you can enjoy several harvests from the same plant by just snipping off what you need each time.
If you want full heads of romaine and head lettuce to develop, thin them. Allow for 8 to 10 inches between plants. As you thin young plants, save the delicate small leaves for salads.
See our Growing Guide for Lettuce.
Pole beans require some sort of structure to climb! Photo by Smereka/Shutterstock.
2. Green Beans
Beans grow even in fairly poor soils, because they fix the nitrogen as they go! Bush varieties don’t require trellising, but pole varieties provide a more extended harvest. In cool areas, snap beans are easiest. In hot areas, lima beans, southern peas, and asparagus beans are also very easy to grow. All bean plants are fast growers and thrive in warm, moist soil.
See our Growing Guide for Green Beans for more information on planting and growing beans!
Peas! Photo by DigiCake/Shutterstock.3. Peas
Plant peas as soon as the soil can be worked—2 weeks before the average last spring frost for your region, if possible. To harvest a continuous supply of peas during the summer, simultaneously sow varieties with different maturity dates. Then sow more seeds about 2 weeks later. Continue this pattern, sowing no later than mid-June.
See our Growing Guide for Peas.
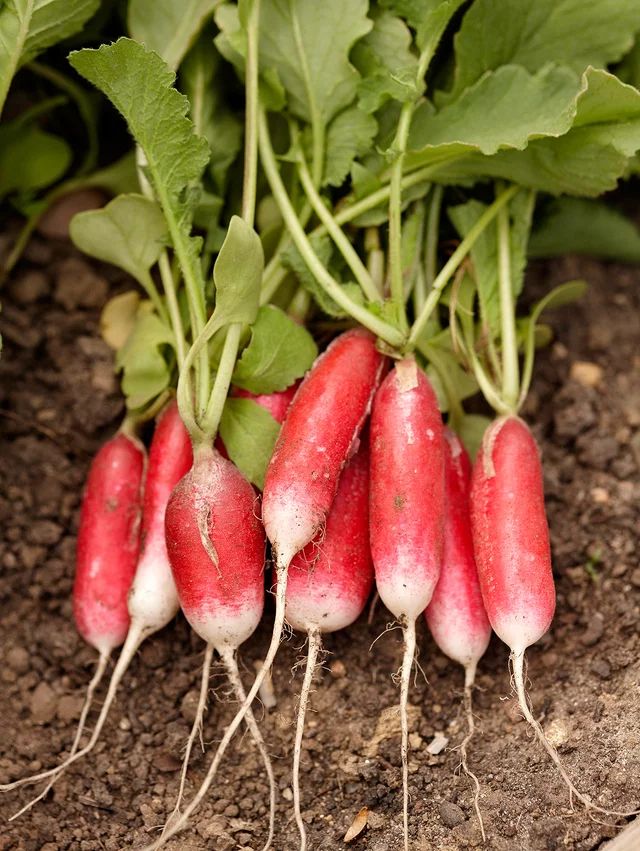
Radishes. Photo by Udra11/Shutterstock.4. Radishes
Radishes can be harvested in as little as 24 days after planting, and can be inter-planted with slower-growing vegetables.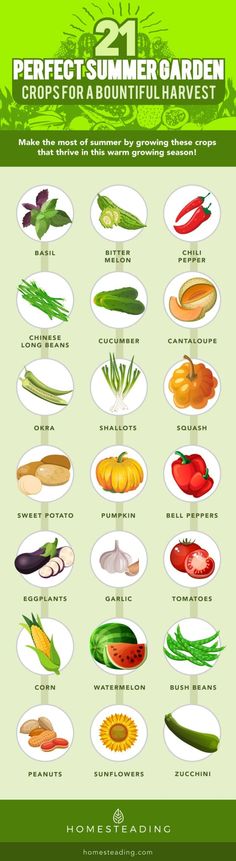 You can plant radishes as soon as you can work the soil in the spring.
Sow each seed 2 inches apart or more, or thin them to this spacing after they sprout. Cover the seeds with about half an inch of compost or soil.
Here’s a tip: Radish seeds are natural companions to carrots. Mix radish seeds with carrot seeds before you sow, especially if your soil tends to develop a tough crust. The quick-to-sprout radishes will push up through the soil, breaking it up for the later-sprouting carrots. As you harvest the radishes, the carrots will fill in the row.
See our Growing Guide for Radishes.
5. Carrots
We’re including carrots only because they’re super easy to grow as long as they’re planted in loose, sandy soil during the cooler periods of the growing season—spring and fall (carrots can tolerate frost). Not all carrots are orange; varieties range in color from purple to white, and some are resistant to diseases and pests.
Many beginners find their carrots are short and deformed. This is typically due to poor, rocky soil, so it’s important to provide soft, loose soil that drains well. Mix in some sand and really loosen it up. Also, it is essential to THIN carrot seedlings to the proper spacing so that they’re not overcrowded. Be bold! Thin those seedlings if you want carrots to form properly.
Learn more in our Growing Guide for Carrots.
6. Cucumbers
Prepare in advance for cucumbers; amend the soil with a fertilizer high in nitrogen and potassium to support the plant’s large yields. If possible, plant cucumbers in the sun next to a fence. The fence will serve as support for climbing and act as a shelter. Or plant them near corn. The corn will trap the heat that cucumbers crave and also serve as a windbreak.
See our Growing Guide for Cucumbers.
7. Kale
Like it or not, super-nutritious kale is very hardy and can grow in a wide range of temperatures. It can be harvested at many different stages, and the buds and flowers are edible, too! Mustards and collards are closely related to kale and are also easy to grow.
Set out plants any time, from early spring to early summer and kale will grow until it gets too hot. Plant again the fall, especially if you live in the southern United States. Another nice thing about kale is that it only gets sweeter after being hit by a couple frosts. Try kale baked, stir-fried, or steamed. Enjoy in salads, smoothies, omelettes, casseroles, or wherever you’d use spinach.
See our Growing Guide for Kale.
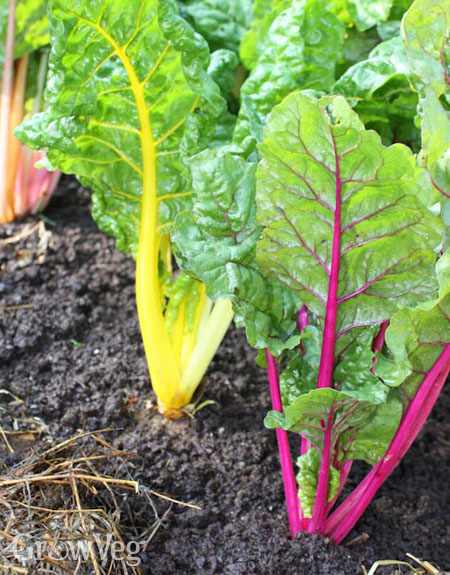
8. Swiss Chard
Swiss chard—or simply “chard”—is a member of the beet family. It does well in both cool and warm weather. It is a nutritional superfood, high in vitamins A, C, and K as well as minerals, phytonutrients, and fiber—plus, its rainbow of colors are beautiful!
See our Growing Guide for Swiss Chard.
Beets. Photo by Darasp Kran/Shutterstock.9. Beets
You haven’t lived until you’ve tasted beets you’ve grown yourself. We mean it! Nothing compares to garden-fresh beets, boiled or roasted until tender.
The quirky seed capsules contain two or three beet seeds, so the seedlings will always need to be thinned. Sow the seed capsules about an inch deep, and 4 inches apart.
Harvest the roots at any time up until they’re the size of a tennis ball. While you’re waiting for them to plump up, why not try a few of the leaves? They can be used just like spinach, giving you two harvests from one plant.
See our Growing Guide to Beets.
10. Summer Squash (Zucchini)
Summer squash and zucchini like well-composted soil and need plenty of space (plant them 3 to 6 feet apart in warm soil and lots of sun.) Soon enough, you’ll have so many zucchinis, you’ll be leaving them on neighbors’ doorsteps! Always water at the soil level—not the leaves—to avoid powdery mildew.
See our Growing Guide for Squash and Zucchini.
The above crops are some of the easiest vegetables you can grow, but there are many, many more veggies for you to try! Check out our complete library of Growing Guides for advice on planting all the popular vegetables, fruit, herbs, and flowers.
And now that you know which seeds are easiest to grow, see our Tips to Starting Seeds Indoors!
Free Online Gardening Guides
We’ve gathered all of our best beginner gardening guides into a step-by-step series designed to help you learn how to garden! Visit our complete Gardening for Everyone hub, where you’ll find a series of guides—all free! From selecting the right gardening spot to choosing the best vegetables to grow, our Almanac gardening experts are excited to teach gardening to everyone—whether it’s your 1st or 40th garden.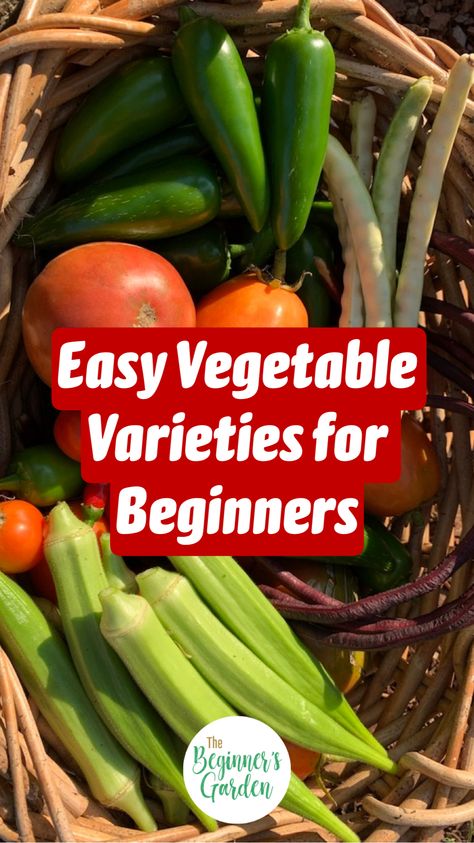
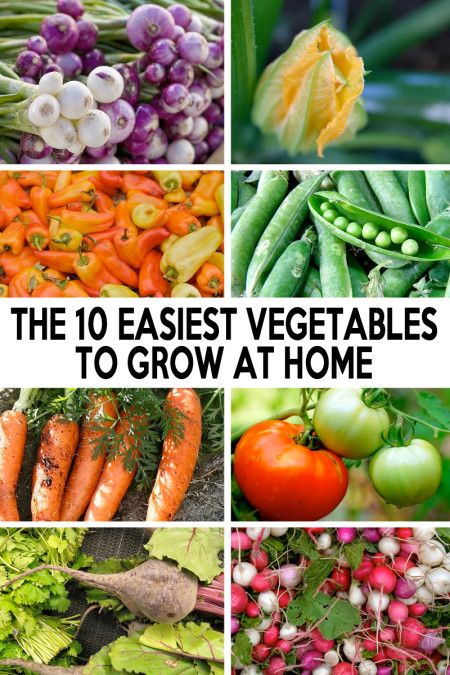
8 Easiest Vegetables to Grow (Even If Don't Know Gardening)
Raising a garden offers many benefits to the gardener.
It is much healthier to grow your own food. You are fully aware of what has gone into the product and know what you are eating.
A vegetable garden also saves a lot of money.
Many are intimidated to take on the task, but starting a garden can be simple if you grow the right crops. There are many that yield a great product and don’t require a ton of work.
To encourage you to start with this very rewarding task, we compiled a list of the easiest vegetables to grow, so that anyone can have success.
1. Lettuce
There are many types of lettuce that can be grown. You can grow leaf lettuce which is great for a mixed green salad.
You can also grow head lettuce such as Romaine or Iceberg.
The seeds can be found at most any general store and are very inexpensive. You also have the option of picking up lettuce plants at your local nursery.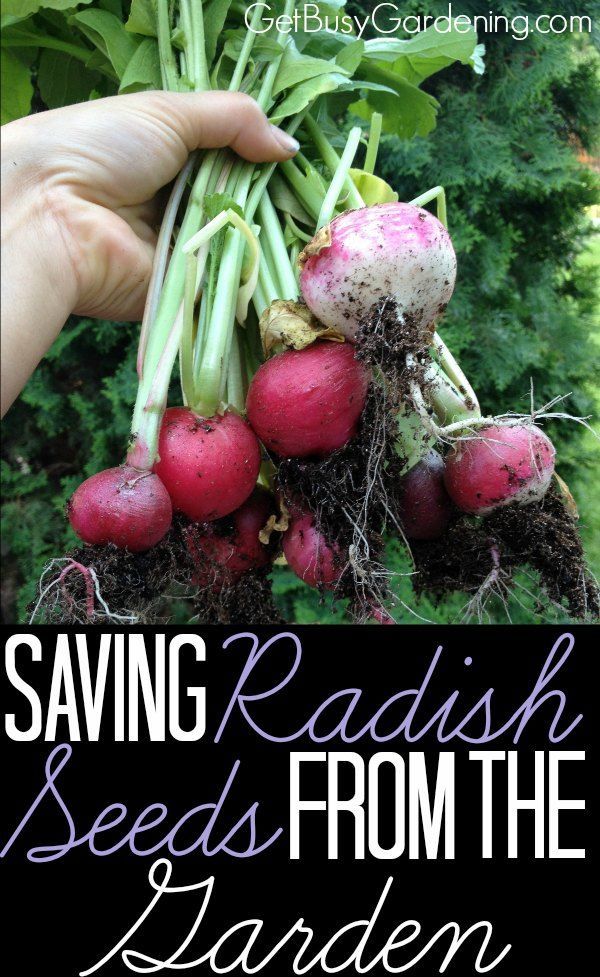
Lettuce is a cool weather plant so it can be planted in early spring or fall. Lettuce seedlings can actually handle a little bit of frost. As long as the temperatures don’t dip below 45 degrees Fahrenheit then the plants should do just fine.
If by some chance the temperatures do drop or if you experience some snow, just cover the plants with plastic or a sheet, and they should be fine. Lettuce can actually be grown year round in a cold frame greenhouse because of its hardiness in cold weather.
What makes lettuce so easy beyond the fact that it is cold resistant, is that it can be direct sown. When first learning how to garden, starting your own seeds can be a difficult task.
Here you can learn more about starting seeds on a budget.
Planting items that can be directly sown makes planting a lot easier. Just be sure to go over where you directly sowed a few weeks later. You’ll notice that some areas probably have too many plants clustered together.
It is important to thin a few of those out so the plants have room to grow.
The key to lettuce is that you can plant small crops at a time and keep fresh lettuce coming in for months. This technique also keeps you from being overrun with too much lettuce at once.
It is a good idea to plant a fresh crop of lettuce every two to three weeks during the growing season.
Planting chives or garlic between lettuce crops will help with keeping pests off of your crops as well.
Be sure to plant your lettuce in well-drained soil with compost. It will be ready to harvest when the lettuce appears full grown. It is best to harvest lettuce early in the morning.
As the day goes on the sun will cause your lettuce leaves to go limp which is not prime for picking.
Here is more information on growing lettuce and a bonus of growing lettuce indoors, as they are some of the easiest vegetables to grow.
| Harvest time | 65-80 days (depending on type) |
| Ideal temperatures | 45-75 °F |
| Planting time | Spring, Fall |
| Spacing | 6-18 inches (depending on type) |
| Germination time | 2-15 days |
| Light preferences | Sun or partial shade |
| Best companion | Carrots, radishes, beetroot |
2.
 Spinach
Spinach is a very easy crop to grow and deserves a top spot in the easiest vegetables to grow list.
It is much like growing loose leaf lettuce. You will need to plant it in well-drained soil with compost. It can be planted in full sun or light shade. It is best to direct sow spinach.
When you plant your spinach seeds, you will need to go through and thin where you planted a few weeks later. Just be sure to remove any area where you see clusters appear.
Spinach can be planted year round in most climates as it is very cold weather friendly. It can actually survive in weather as low as 15 degrees Fahrenheit.
Here we have more information on growing Spinach.
| Harvest time | 40-50 days |
| Ideal temperatures | 35-75 °F |
| Planting time | Spring, Fall |
| Spacing | 8 inches |
| Germination time | 6-21 days |
| Light preferences | Sun or partial shade |
| Best companion | Cabbage family, strawberry |
3.
 Green Beans
Green beans are a simple plant to grow with an abundant harvest. They are another plant that you will need to direct sow.
There are many different types of green beans so you’ll need to decide what you are looking for. Some people love half runners. They are very tender beans, but they literally run along a vine.
You’ll need to be sure to grow these along a homemade trellis for easier picking.
You can get an idea of how to make a trellis here.
If you decide to plant half runners be advised they have strings. This means when you pick them and are going to fix them to eat you will have to string them.
You can learn how to do that from this video:
Other than learning how to do these few simple tasks, they are very simple to grow.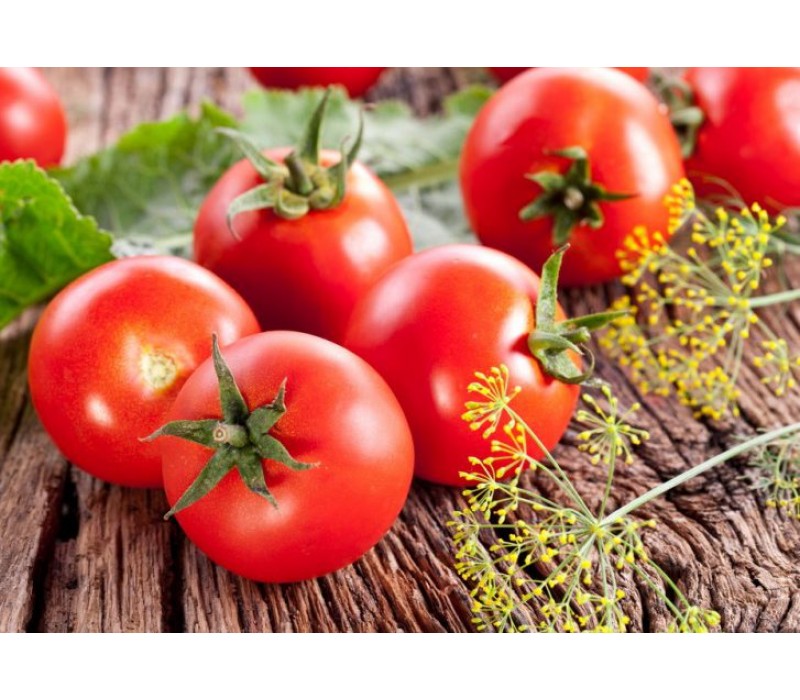
For those that don’t want to worry about stringing beans or picking beans from a vine, then a bush bean might be right for you.
The name explains them completely.
They are beans that the plant bushes out instead of running along a vine. You can just go along your row of green beans and pull them directly off of the bush. They also don’t usually have strings on them.
In order to plant green beans, you will need to plant them in well-drained soil where they will get adequate sunlight. Place a thick layer of compost over the row. Then you will directly plant the seeds into the compost.
Go over the row with a hoe or rake and lightly cover the seeds with the compost.
In a few weeks you will have tiny green bean plants sprouting in your garden.
Green beans require adequate water. You will notice when they need water as they start to shrivel up. If your green bean plants start to turn yellow it will be because your soil is lacking nitrogen.
You can buy blood meal or bone meal and place it around your plants. If you have rabbits, their poop will do the same job usually. Green beans are also a favorite for bugs to munch on their leaves.
If you see this, you can set bug traps like this one as a natural alternative to pest control.
| Harvest time | 55-65 days |
| Ideal temperatures | 55-85 °F |
| Planting time | Early summer |
| Spacing | 6 inches, 18 inches (row) |
| Germination time | 8-16 days |
| Light preferences | Sun or partial shade where hot |
| Best companion | Potatoes, cabbages, radishes, peas |
4. Cucumbers
Cucumbers are another simple plant to grow. Some people really like them while others don’t. The important thing to remember about cucumbers is that even if you don’t like them on a salad, you might enjoy putting them in a jar as a homemade dill pickle.
When planting cucumbers, you can either plant them in your garden or plant them in containers.
Cucumbers can be planted directly into the ground, started indoors three weeks before planting, or you may purchase cucumber seedlings at your local nursery.
Either way, they are a warm weather crop that should be planted after the last spring frost.
If you choose to plant cucumbers in your garden, plant them in well-drained soil with ample sunlight. Be sure to use compost when planting them as well.
Cucumbers are a vine so as long as you give them ample space for their vines to run you will have ample amount of cucumbers. This is another plant that creating a trellis for their vines to run along would be a good idea.
If you decide to plant them in containers, you can plant regular full sized cucumbers or buy a different variety. They actually make a patio cucumber meant specifically to be grown in containers on a patio. If you decide to use this method, fill the bucket with dirt and compost.
Plant one cucumber plant per bucket. Be sure to place them in the sun and water the plant regularly. It is a good idea to fertilize your cucumbers every month or so.
Once the cucumbers grow to full size they are ready to be picked.
| Harvest time | 48-65 days |
| Ideal temperatures | 70-85 °F |
| Planting time | Summer |
| Spacing | 12 inches, 3 feet (row) |
| Germination time | 4-13 days |
| Light preferences | Sun or partial shade |
| Best companion | Beans, carrots, parsley, cauliflower |
5.
 Yellow Summer Squash
Summer squash is another one of easiest vegetables to grow. It is recommended that you either start your squash seeds indoors or buy squash seedlings for a quicker harvest.
When planting squash be sure to plant them with compost into well-drained soil. Squash enjoy the sun so planting them in direct sunlight or where they will get majority sun throughout the day is important.
Squash grow on a vine as well so be sure to give them ample room for their vines to run. This can be done through a trellis or left to run along the ground.
Water your squash regularly and fertilize once a month or so and your squash should do just fine.
You will know the squash is ready to be picked when they have turned yellow and the stem is easy to break off of the plant.
| Harvest time | 48-65 days |
| Ideal temperatures | 70-90 °F |
| Planting time | Summer |
| Spacing | 12 inches, 3 feet (row) |
| Germination time | 6-12 days |
| Light preferences | Sun or partial shade |
| Best companion | Peas, beans |
6.
 Root Vegetables: Radishes and Carrots
Root vegetables are usually pretty easy to grow. Radishes and carrots are the easiest vegetables of them. I love to grow these vegetables because again, they can be directly sown into the ground or grown in a container.
I actually prefer growing these in containers.
The key to growing successful root vegetables is not overcrowding the seeds and have loose enough dirt for them to grow in. If you decide to plant these vegetables in the ground, you will want to be sure to really make the dirt loose when planting.
Be sure to plant in compost as well.
Radishes and carrots need to be direct sown. Once the seedlings start coming up you will need to go through and thin any clusters so your plants will have room to grow.
If you have clay or other really clumpy dirt, you will need to choose a variety of carrot that is stubbier so it can grow to full capacity without having to push through all of that hard dirt.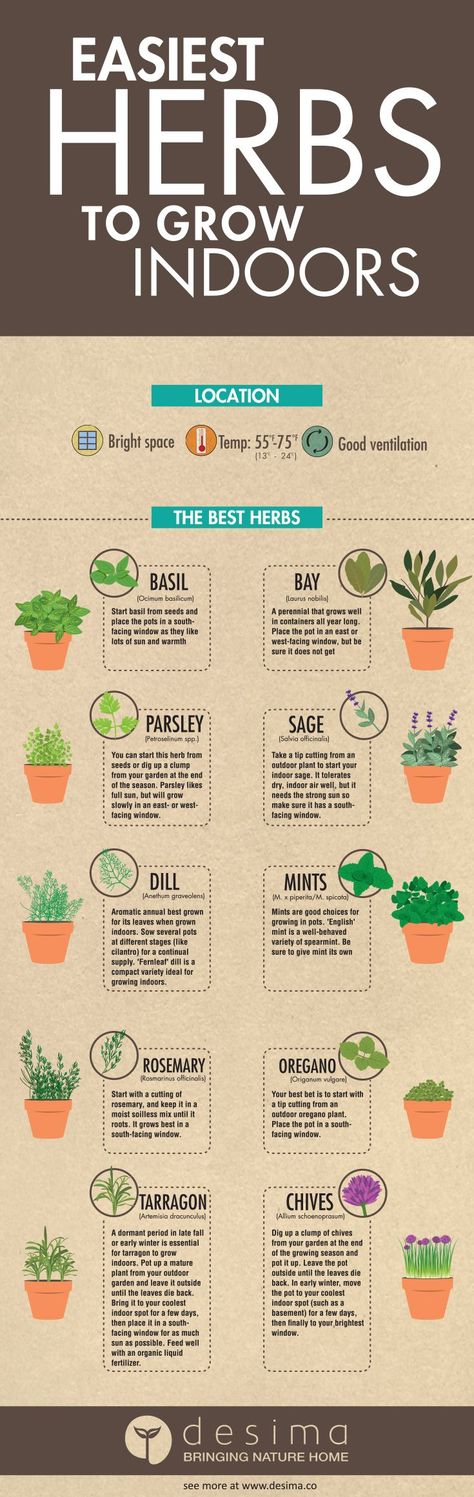
If you have good, loose dirt then you should be able to grow full size carrots with no problems.
Radishes can grow to full size regardless.
Maybe you have clumpy dirt but desire to grow full size carrots. That is where container gardening comes into play.
You will need a large container such as a 5 gallon bucket or planters that you could plant a tree in. Fill the bucket with loose dirt and compost. Then you will plant your seeds. You will have to go through a few weeks later and thin out the clumps of seedlings.
Be sure to water your vegetables as needed in the containers. Fertilizing once a month is a good idea as well.
Whether you decide to plant your root vegetables in the ground or in a container, knowing when to harvest is still the same. When the tops of the radishes or carrots get to be big, green, and bushy it is time to pull a few to test the size.
If you pull them, and they appear full grown then it is safe to harvest. If you pull a few to test, and they still have some growing to do then keep watering and fertilizing for a few more weeks.
Then go back and test your product again.
| Harvest time | 60-80 days |
| Ideal temperatures | 60-70 °F |
| Planting time | Spring, Summer, Fall |
| Spacing | 3 inches |
| Germination time | 6-21 days |
| Light preferences | Sun or partial shade |
| Best companion | Peas, lettuce, tomatoes |
7. Bell Peppers
Bell peppers are a very flavorful vegetable that are terribly easy to grow.
Again, these plants are recommended to either be started indoors 4-6 weeks before transplanting outside or to just be purchased as seedlings from your local nursery.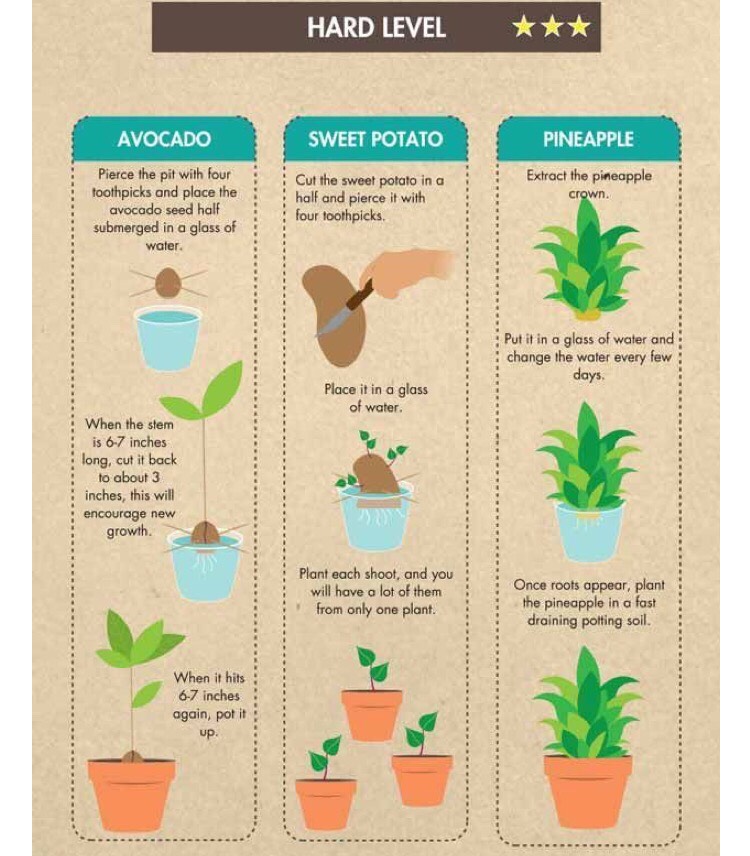
Bell peppers love heat! Do not plant them until after all threat of frost has passed.
Be sure to place them in direct sunlight where they will get the most sun all day long. You will need to plant them 4-6 inches apart into well-drained soil and be sure to remember the compost. Then you water them regularly and fertilize on a monthly basis.
Be sure to keep down any weeds that grow around your pepper plants.
That is all there is to it!
In a few months you’ll see beautiful peppers. You’ll know they are ready for picking when they turn bright green (or yellow or red….depending upon what color you planted.)
When they are first starting to ripen they will have a lighter shade of their color. Once they turn that bright, waxy color then they are ready.
If you see them starting to fade then you have let them go too far.
| Harvest time | 60-80 days |
| Ideal temperatures | 70-90 °F |
| Planting time | Early summer |
| Spacing | 18-36 inches |
| Germination time | 8-25 days |
| Light preferences | Sun > 6 hours |
| Best companion | Basil, onions, carrots, radishes |
8.
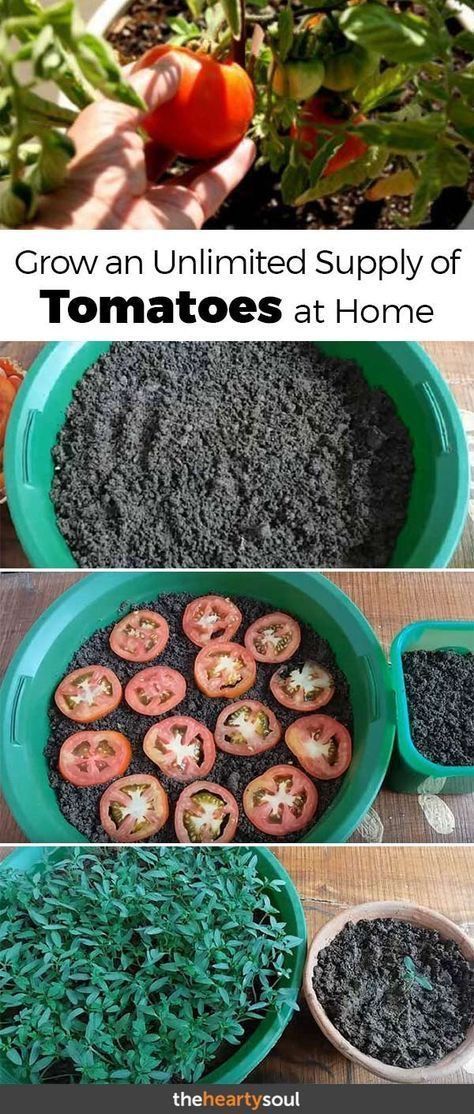
 Tomatoes
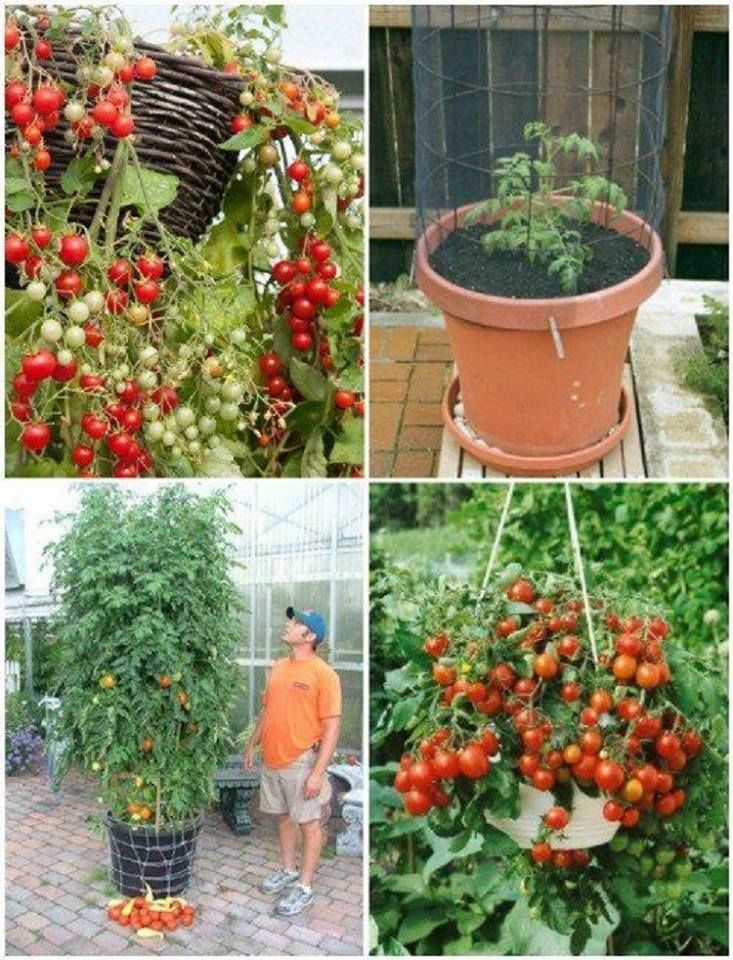
Tomatoes are one of the most sought after produces during the summer time. The reason is because there is no comparison when it comes to homegrown tomatoes. They taste like nothing on a store shelf anywhere!
The amazing thing is that tomatoes are super easy to grow too.
Just like peppers, it is recommended that they be started indoors 4-6 weeks before transplanting outdoors. Otherwise, just pick up the seedlings that have already been started at your local nursery.
Tomatoes come in all varieties from Beef steak tomatoes, to yellow tomatoes, to purple Cherokee. The list goes on and on. Try all types until you find the one that thrills your taste buds because they all grow the same.
Once you have your seedlings, plant them in full sunlight in well-drained soil. It is important (just as with the peppers) to be sure that all threat of frost is gone before planting.
Tomatoes love the heat and hate the cold!
Be sure to add your compost around each plant when planting. Tomatoes will need to be watered regularly and fertilized monthly.
If you see your tomato plants turning yellow they are lacking nitrogen. All you will need to do is add some bone meal or blood meal around the base of each plant and water them. This should help add back the nitrogen that your plant is missing.
That is all there is to growing tomatoes. If you water, they will grow.
Once your tomatoes have turned their proper color and have grown to a good size then harvest them and enjoy.
The only thing that needs to be mentioned in planting both tomatoes and peppers is that you should never plant them together.
Bees will cross pollenate your peppers and tomatoes. This will ruin the flavor of your tomatoes. Be sure to plant a row of tomatoes, then plant another row or two of another crop, and then plant your peppers.
They can be in the same garden, but they need a few rows to separate them.
Planting your own garden can be so fulfilling.
Placing food on the table that you raised from start to finish is quite the accomplishment. Though growing a garden may seem complex, some of these easiest vegetables will give any beginner success.
| Harvest time | 60-100 days |
| Ideal temperatures | 60-90 °F |
| Planting time | Early summer |
| Spacing | 18-36 inches |
| Germination time | 6-14 days |
| Light preferences | Sun > 6 hours |
| Best companion | Chives, basil, carrots, peppers |
And that is our list of the 8 easiest vegetables to grow, with a clear guide on what to do and when, so you can have great success with your garden.
Was this article helpful?
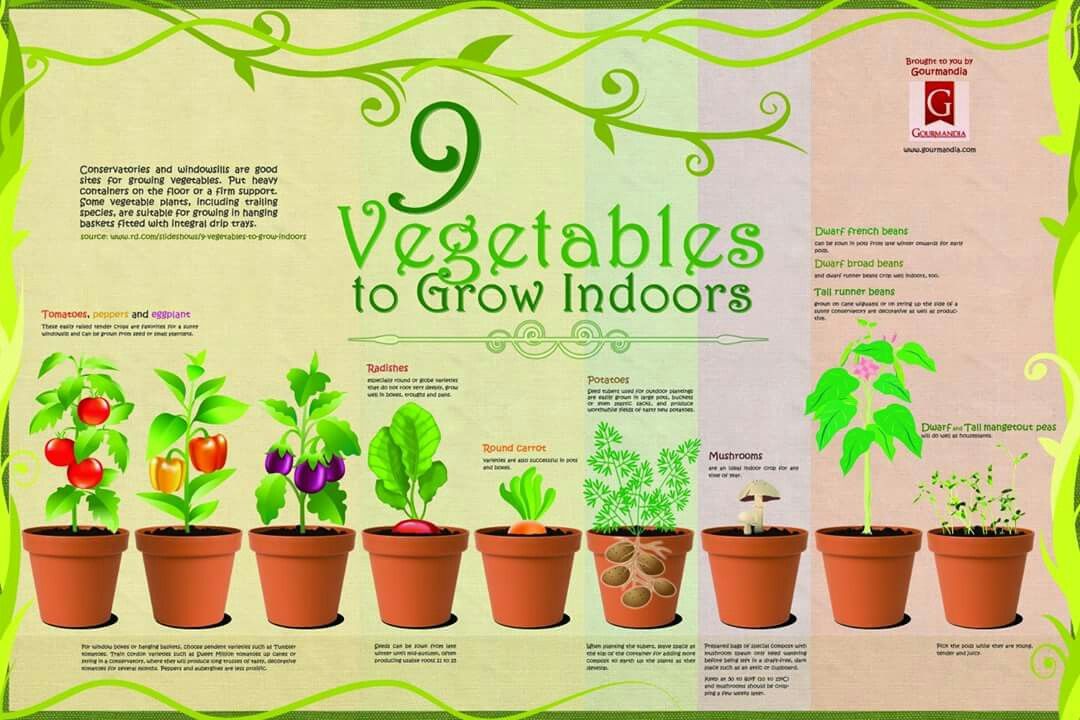
Yes NoHow to grow something edible on the windowsill? — Meduza
With the beginning of a real, non-calendar spring, even city dwellers who are far from gardening often have a desire to grow something that can then be eaten.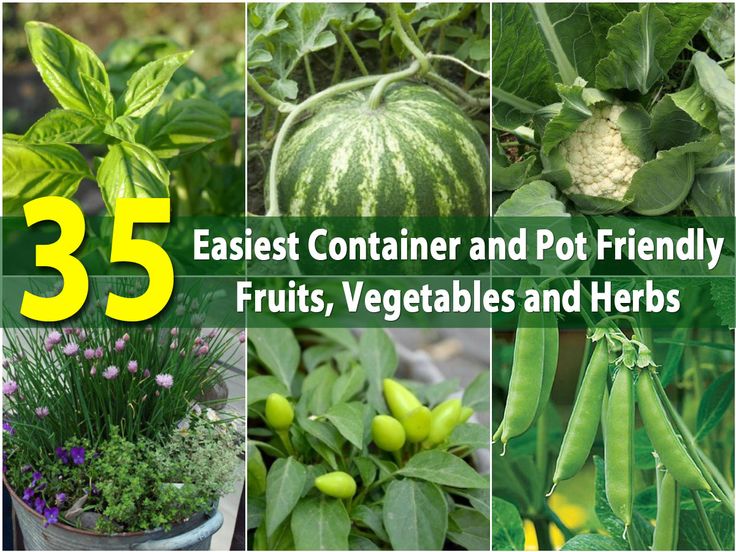 And the May holidays are a good time to try. How to arrange a small garden on the windowsill without spending too much effort on it - in the Meduza instructions.
1. Decide what you want to grow
A big plus of "sill" and balcony gardening is that you can try to plant anything - small scales protect against serious disappointments. nine0003
You should focus mainly on common sense and general information about the life cycle of plants. For example, you can experiment with planting fruit seeds endlessly, but you should not seriously count on the harvest - and certainly not this year. So if you want to try something grown with your own hands, you should pay attention to vegetables, garden strawberries (colloquially - strawberries) and herbs.
Growing the latter is not only pleasant, but also reasonable - rosemary, for example, is usually sold in huge (and expensive) bunches, and is used very little in cooking. Basil, mint, noble laurel, watercress grow well at home. nine0003
The easiest vegetables to grow at home are cherry tomatoes, cucumbers, hot peppers. It is interesting to grow legumes - peas or beans.
Growing root crops on the windowsill is not very convenient (for obvious reason - they need a lot of land), but if you really want your own carrots - there are special "round" varieties. You can safely plant beets - but it is better to use its leaves for salad.
Briefly: You can try to grow anything at home, but you will definitely grow herbs, tomatoes, cucumbers. nine00212. Find the right variety of seeds or ready-made seedlings
There are two ways to grow vegetables and herbs - the hard way and the easy way. The first implies that you plant the seeds yourself, wait until the seedlings appear and get stronger and plant them in separate pots. The advantage of this method is that you choose the variety yourself (the variety of ready-made seedlings in garden centers is usually small) and you can fully see the amazing process of turning a seed into a real plant.
nine0003
The general rules for choosing seeds are simple: the package must be intact, the seeds must not be expired (the expiration date must be clearly read on the bag). Pay attention to the size of the plant (they should also be indicated on the packaging) - for example, tomatoes should be undersized, no more than 50 cm. Be prepared for the fact that you may not grow at all what is indicated on the packaging - especially often this happens with the same tomatoes, when the "dwarf" varieties grow under two meters.
It is better to choose varieties that are parthenocarpic (fertilized without pollination) or self-pollinated - then you will not have to work as a bee, pollinating flowers with a brush. nine0003
It is more convenient to grow non-stepping tomatoes - they do not need to break off the side shoots that appear in the axils of the leaves. Such shoots are called stepchildren - they thicken and overload the bush. If stepchildren are still formed on your tomato, they need to be broken off so that all the forces of the bush do not go into the leaves.
With ready-made seedlings, everything is much simpler - not only because you do not need to grow it, but also because there is not much to choose from. Do not be afraid to buy tomatoes that have already grown fruits - this does not mean at all that this is the last harvest, such bushes can bear fruit until autumn. Sometimes they do not even need to be replanted - it happens that the bush is already sold in a large pot. nine0003
Garden centers often sell herbs, and you can also look at the vegetable section of grocery stores - there are quite decent bushes in pots that you can plant at home in the ground.
In short: the easiest thing is to buy ready-made seedlings from garden centers3. Prepare the place and tools
Think about where you are going to put your plants - free up window sills or space on the balcony. Clean your windows - dust blocks a surprising amount of light. nine0003
If you are going to grow seedlings, you will need special cups or plastic mini greenhouses.
They can be covered with the lid included in the kit - this allows you to maintain humidity. But it is important not to forget to ventilate the seedlings.
Many stores sell special peat pots - in theory, they allow you to plant seedlings in a permanent place without injuring the roots. But practice shows that such pots dry out very quickly and do not always decompose well. nine0003
In addition, you will need pots or containers where you will plant plants in a permanent place. Please note that they should have holes at the bottom so that excess water does not stagnate.
At the bottom, you will need to pour material that will provide drainage - it can be broken brick, gravel and even foam, but it is most convenient to use ready-made and very inexpensive expanded clay sold in stores.
The next item is the primer. It is also better to buy it, because the land from the street can add a lot of excess to your crop - from pests to heavy metals. nine0003
If you are going to grow cucumbers or, for example, peas, you will need special structures that the plants will cling to.
Prepare a container in which you will settle the water (keeping the water for one or two days at room temperature is the easiest way to reduce its hardness).
If you intend to leave the house for several days, pay attention to special devices that allow you to water your plants less often - these can be blown glass or plastic balls or figures into which you can pour water for future use. Or ceramic cones - they are stuck into a pot and connected to a container of water. nine0003
Briefly: you will need a bright place, a pot with a hole, expanded clay and soil4. Follow the simplest rules of agricultural technology
There are a lot of different rules and tricks in growing plants, but for a start you can get by with the basics.
If you grow seedlings yourself, read carefully what is written on the seed packet. The general rule when planting is this: the larger the seeds of the plant, the deeper they are planted in the ground.
Do not thicken the plantings - if too many seeds have sprouted, feel free to remove the extra ones. nine0003
Don't forget to water the plants, but don't let them get too wet. If your plant is completely wilted, but not yet completely dry, try watering it several times during the day - it is quite possible that it will recover.
Do not be afraid of "chemistry" - for plants it is the same food as edible plants for us. The easiest way is to buy a suitable complex fertilizer and breed it in accordance with the instructions.
Be sure to check your plants for pests and fungal diseases. Keep in mind that shock chemicals cannot be used in an apartment or balcony - carefully read the instructions for the products. Of the relatively safe drugs for the treatment and prevention of fungal diseases, you can use "Fitosporin", for pest control - "Fitoverm". Please be careful about your own safety, do not forget to wear gloves and follow the correct dosage and use of drugs. nine0003
Brief: don't forget to water and feed the plants.Remember that everything is good in moderation
5. Bonus. How to grow basil?
Basil is green and purple - the former is used more in European cuisine, and the latter in Eastern. Both can be grown at home, but purple can turn green from lack of lighting. The variety should not be tall and better - small-leaved. The rest depends only on your personal preferences. nine0003
The potting soil for basil should be fairly light, so if you happen to have coconut fibers or clean sand on hand, add them to your potting mix. In addition, the earth can be spilled with a solution of "Fitosporin" or "Alirin" to protect future seedlings from the fungus.
Spread the soil in plastic cassettes or small pots, sow the seeds evenly and lightly cover them with earth (no more than half a centimeter). Water the plantings, cover them with a transparent lid, glass or film and put them in a warm place. nine0003
Seedlings will appear in about 10 days. Seedlings are very demanding on the water regime - a lack of watering will kill it very quickly, and an overabundance can lead to the development of fungal diseases.
That is why it is better to grow it in small containers, which are much more difficult to fill. At high temperatures and lack of sun, the plants stretch very quickly, so it is better to put the seedlings in a cool and bright place if possible.
The first leaves of basil are cotyledons. When the first pair of true leaves appears, the seedlings can be transplanted into a large container (pick up). This is done as follows: you need to carefully pry off the sprout, trying not to damage the root too much, and transplant it, deepening it to the cotyledon leaves. As a rule, when picking, the root is pinched a little, but in basil it is very small, and microtraumas inevitable during transplantation will be enough for the development of the root system. nine0003
The plant will need to be sprayed and placed in a cool, not sunny location. The next day, it will already be possible to water it a little, and when it recovers from the transplant (you will immediately see this from the leaves), put it in a permanent place.
Then you can safely wait for the harvest, not forgetting about watering and temperature control. When the plant grows up, you can safely start pinching off the top for salads - this will even help form a beautiful strong bush. It is better to cut off the emerging flowers in order to prevent flowering - the leaves and stems, as a rule, coarsen with it. nine0003
Tatyana Polivanova
Which vegetables are the easiest to grow - TOP 10
Sowing for seedlings, picking, health pruning, pollination, grafting, fertilizing, pinching, pinching - how much a gardener needs to know, his head is spinning! Is it possible to do something faster? So that special care is not required, so that it grows on its own, so that it is planted and forgotten, just know to harvest.
It could be simpler. There are vegetables, as if specially invented for beginners in gardening. With minimal labor, time and nerve cells, they grow, bear fruit, delight the summer resident and add invaluable experience points to his piggy bank.
What vegetables are easiest to grow in the country? Here are our top ten hardiest crops to grow...
Horseradish
This vegetable tops our list of the easiest plants to grow. It is a perennial, grows on any soil, loves the shade, grows rapidly from the rhizome. So quickly and briskly that gardeners prefer to plant horseradish in a limited area (otherwise, they will later have to destroy the excess growth, and this is not so easy).
To plant a horseradish, a couple of its rhizomes about twenty centimeters long are enough. First, they dig a hole to a depth of forty centimeters and prepare obstacles: someone from the sides lays out a hole with slate, plexiglass, carbonate, tin, etc.; someone digs a bucket without a bottom into the ground. Roots are planted inside. All that is required of the gardener after germination is to water the leaves in dry weather. nine0003
And if no barriers keep the horseradish in the territory allotted to it and uninvited bushes appear in the wrong places, they get rid of them with the help of ordinary salt.
Read about how it's done HERE.
Rhubarb
Another perennial that grows well in the shade and propagates by division. If your dacha neighbors grow rhubarb, ask for part of the root. Rhubarb grown from the root will get stronger faster and please with thick juicy stems. But it is not difficult to grow rhubarb from seeds, only the first harvest will have to wait a couple of years. nine0003
Before planting, the rhubarb rhizome is dipped in ashes and planted at a depth of 5-8 centimeters. Seeds can be sown both in spring (in April) and in autumn (in September) to a depth of 1-1.5 centimeters. When young seedlings grow up, the best ones are selected from them and transplanted to a permanent place. In the future, it is enough to water the bushes if necessary.
And to obtain more tender petioles, the rhubarb bush is covered with a bucket or a large pot without a bottom. The leaves are outside, and the stems are in the dark.
Without light, they take on a beautiful raspberry-pink hue and become even tastier. nine0003
A rhubarb bush lives and bears fruit for about 10-12 years.
Lettuces
All kinds of salads, chard, spinach and sorrel will provide the whole family with fresh vitamin greens at the very beginning of summer. And no tricks with planting and care: mark the grooves, shed the soil, scatter the seeds, sprinkle them with soil and wait for the shoots.
Lettuce, spinach and chard prefer full sun but will tolerate some shade. Sorrel grows remarkably well in the shade. If you cut the sorrel at the root at the beginning of flowering, new fresh leaves will soon grow. Thus, you can get two crops of sorrel per season. nine0003
Beetroot
Of all the root crops, only the cultivation of beets does not cause any particular difficulties. The only thing beets don't like is acidic soils.
But this problem is also easily solved (read more about this in the article How to grow sweet beets).
Beetroot loves the sun, but tolerates some shade well. And it happens that she doesn’t even get her own ridge: she is planted along the edge of potato, onion or strawberry beds.
Beet seeds are sown directly in open ground in May. Emerging seedlings must be thinned out after the appearance of the first true leaf. This procedure cannot be avoided, because several plants grow from one seed at once. What is pulled out can be safely transplanted to another place - it will take root and give a harvest. nine0003
Beets are usually watered once every three days, more frequent watering is required only in very dry summers.
Green onions
Feather onions are grown by children in kindergartens, and that says it all. What could be easier? He stuck the bulb into the ground, watered it, and after a while it was time to cut off the first green feathers.
Bulbs can be taken from the remnants of winter stocks (but there is a danger of getting arrows with seed boxes instead of greens), and best of all - from ordinary onion sets, which are sold all spring in any garden store and in almost every supermarket. nine0003
Bulbs are planted at a distance of 10-15 centimeters, again, you can not allocate a separate bed for them, but combine plantings with other vegetables. In dry weather, onions are watered on greens once a week.
Peas
Children love peas straight from the garden, they can be dried, canned or frozen for the winter. And who does not know about the wonderful ability of peas to enrich the soil with nitrogen? Well, how to refuse such a wonderful vegetable in every respect?
Peas are unpretentious, they can be planted on any free piece of land, they will give a harvest both in the shade and on poor soil. In the first half of May, pea seeds (pre-soaked or dry) are sown in a garden bed.
Young plants need regular watering, and when they grow to fifteen centimeters in height, support will be required. So that the pea stalks do not fall into the furrows, a peg is installed in each corner of the bed and the bed is wrapped around the perimeter with twine or cord. A few more pegs are stuck in the middle of the ridge - now the peas have something to cling to. nine0003
After harvesting, pea vines are cut and placed in compost, and the roots are left to rot in the ground. Next year on
cabbage will grow well in this bed.Radishes
In our time, when weather fluctuations remain a mystery even for meteorologists, it can no longer be said that growing radishes is easier than steamed turnips. Radishes need a real spring, that is, not too long daylight hours and not too high temperatures. But still, the radish is not so capricious as not to include it in our rating of the most unpretentious vegetables. nine0003
It is possible to plant radish seeds very early, even on a snow crust.
In a greenhouse or greenhouse, to obtain an ultra-early harvest, radishes are sown in the second half of March, and in open ground - in April. At first, crops are covered with agrofiber to protect against frost and pests. The covering material is removed when the root crops begin to grow larger.
The only (but what!) argument against growing radishes is the cruciferous flea. This hungry goat is able to cleanly eat all the leaves and deprive us of the harvest in just a matter of days. Therefore, early sowing of radishes in a greenhouse is still preferable. nine0003
Read more about how to get a big harvest of radishes here: //dachnye-sovety.ru/vyrashhivanie-radisa-kak-dobitsya-urozhaya/.
Spring beans
Green beans or green beans are a godsend. In a good year, four bushes can feed a large family, and even fill the freezer with healthy green (purple or yellow) pods. Bush varieties do not require high trellises and are very simple in agricultural technology.
Beans are planted in early summer to avoid frost. Before sowing, beans are recommended to be soaked for a day. The planting pattern is as follows: 30 centimeters between bushes, 50 centimeters between rows, 3 centimeters deep. nine0003
Already in July, beans will begin to bear the first harvest. It is important here not to yawn and collect the pods while the seeds in them are not ripe, then the asparagus beans will bear fruit continuously until September. The gardener is required to water the bushes 3-4 times a month and loosen the row spacing 2 times a month (or mulch the plantings and forget about loosening and reduce watering).
All the secrets of growing green beans can be found here: //dachnye-sovety.ru/kak-vyrastit-struchkovuyu-fasol
Potatoes
Usually a potato field occupies a large area of a dacha and makes the summer resident sweat. But if you don’t chase volumes, but plant just a couple of ridges of potatoes, you can get a crop without any extra effort.
At the beginning of May, we spread the tubers (seed or cut into several large pieces) along the furrow at a distance of 30 centimeters from each other and cover with earth.
If the rains don't do all the work for us, the potato beds will have to be watered three times a day: after germination, at the time of budding, and immediately after flowering. nine0003
To avoid the difficult operation called "double hilling", it is necessary to regularly mulch potato beds with straw or grass clippings - this is much easier. You can generally try to grow potatoes under straw.
Finally, we must not forget the Colorado potato beetle. So that our potatoes do not end up in his gluttonous belly, we will either have to spray chemicals or keep potato bushes under close supervision and destroy beetles and larvae at their first appearance. nine0003
Zucchini
All that zucchini needs for stable fruiting is a sunny place, warm weather and lack of prolonged rains.
Learn more