Stick on fireplace tile
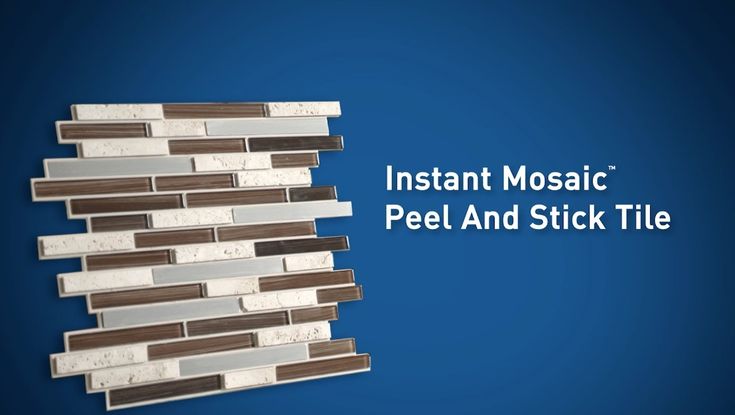
Peel and Stick Tile Fireplace
Etsy is no longer supporting older versions of your web browser in order to ensure that user data remains secure. Please update to the latest version.
Take full advantage of our site features by enabling JavaScript.
Find something memorable, join a community doing good.
(1,000+ relevant results)
Fireplace Remodel Ideas Using Peel And Stick Tile
Fireplace Remodel Ideas Using Peel And Stick Tiles
Why I waited so long to give my old fireplace it’s much needed makeover is beyond me. But in my defense, I am so indecisive. So so so so so indecisive. How I managed to decide on three names for my children is amazing in itself.
It wasn’t that I absolutely hated the hunter green fireplace surround that was there when we moved in, but it was more of a distraction to me. It was the first thing that my eye went to in our living room.
(This post contains affiliate links. You can see my full disclosure here)
I had so many ideas with this fireplace but I just couldn’t put my finger on what I wanted to do. Did I want to just slap some paint on the existing tile and call it a day? Did I want to hire someone to come bust it out and replace it with real marble? Did I want to attempt that myself? (That was a big fat no). Did I want to turn it into a stone fireplace? Did I want to try to stencil over it?
Did I want a modern look? Did I want a traditional look? Did I want a contemporary look?
And then I found it….exactly what I needed…
Let me repeat myself…Heat resistant peel and stick tile.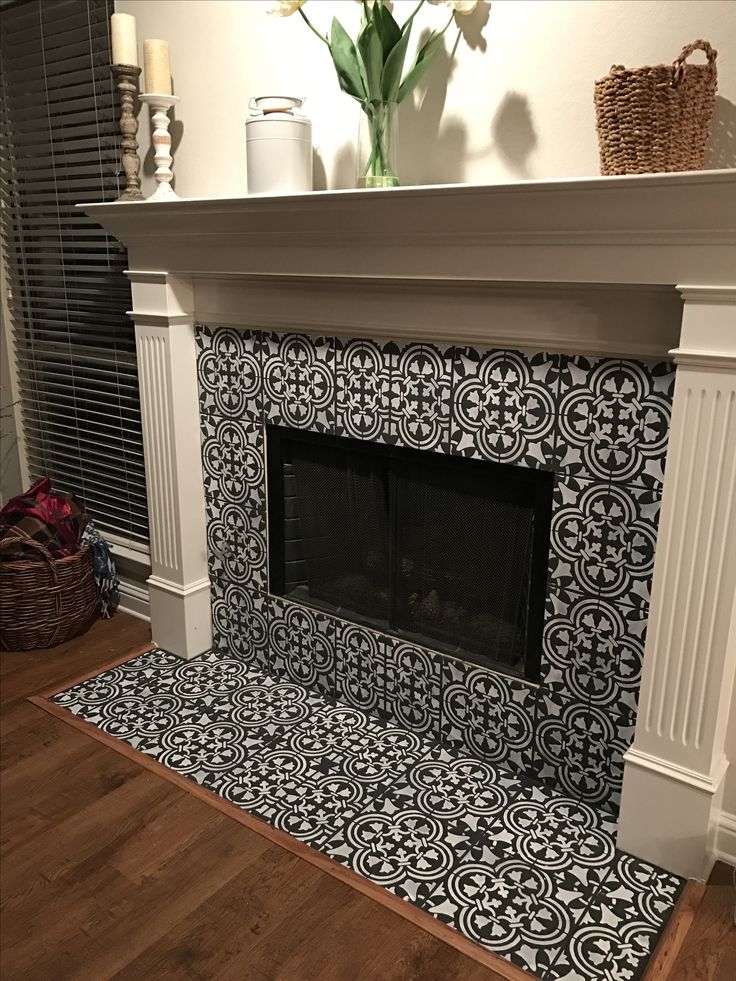 The word “heat resistant” in the description is what got my heart beating happy beats and was the best part of this whole makeover. I have looked at peel and stick tiles before for this project but worried the backing would melt like sliced cheese in a grilled cheese sandwich on my tile surround. But heat resistant got me all giddy. I knew this was going to be the easiest way for me to transform my fireplace.
I hit “add to cart” and the rest was history
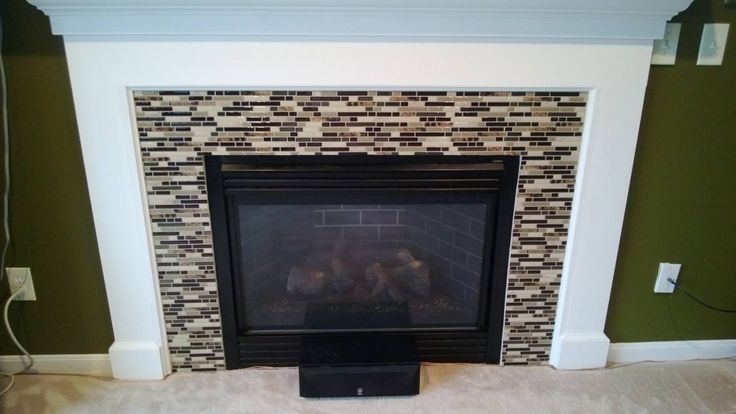
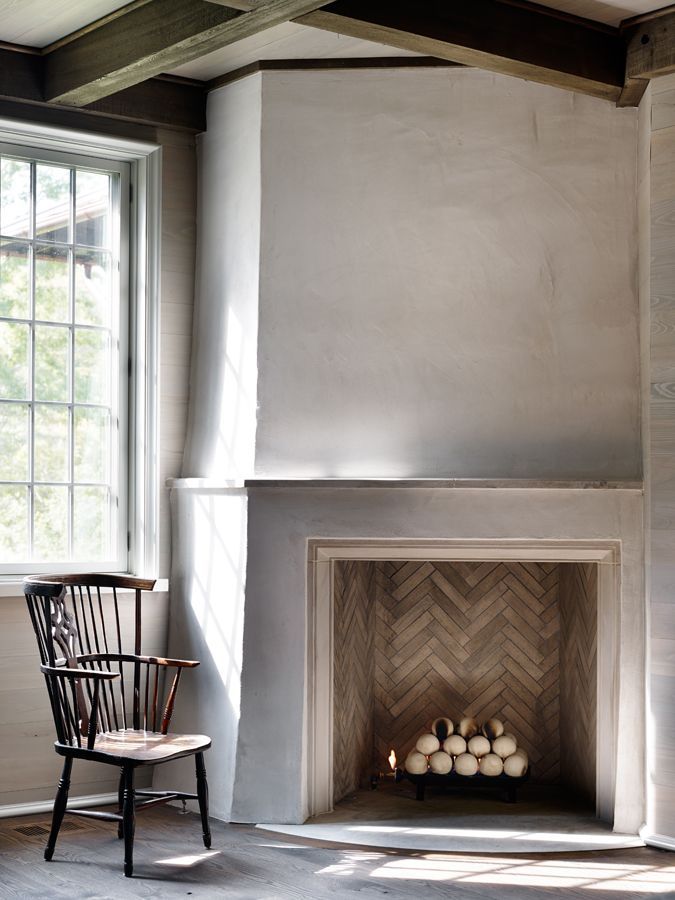
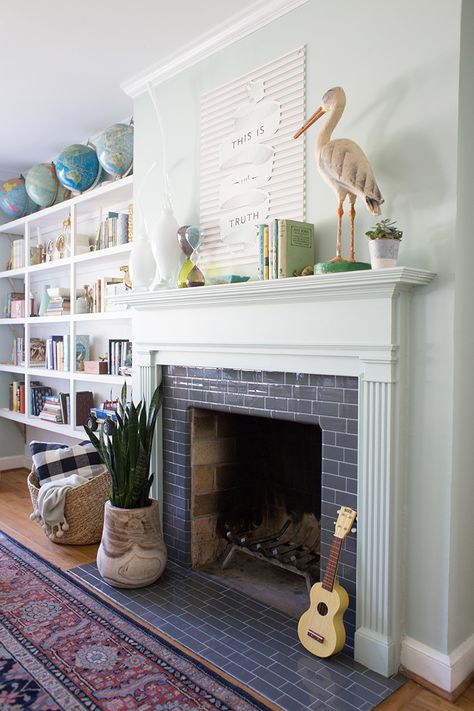
But first, a before. This was a picture I found on my phone shortly after we moved in.
And now, the after
It’s amazing what some paint and stickers can do to a room, am I right?
I love when good ideas and DIY projects go my way.
DIY Fireplace Makeover: How to makeover your outdated fireplace on a budgetHow To Apply Peel And Stick Tiles On Fireplace
Disclaimer…
I am not a professional. I have no idea if these heat resistant tiles will actually not melt like cheese in a grilled cheese sandwich either. Our fireplace is a gas fireplace and the flames are pretty controlled and we keep the glass door shut when the fire is burning. We also use our fireplace maybe three times a year. But the next time we use the fireplace, I will be sitting beside it with a fire extinguisher…and then I will come back and report what happened. That’s what good bloggers do..
**UPDATE!! Good news… I am so happy to let you know that we have had plenty of fires in our fireplace and so far, so good! The tiles did get warm but they are still stuck on my fireplace with no damage to the tiles.
****
I have purchased a sample of another brand of peel and stick tiles for our backsplash years ago and while it was pretty, it was definitely more flimsy than what I used on our fireplace. This stuff is pretty strong and thick.
With that comes consequences though…it was a little bit more challenging to cut than I had hoped for and the herringbone pattern was a bit tricky. But man it was worth it.
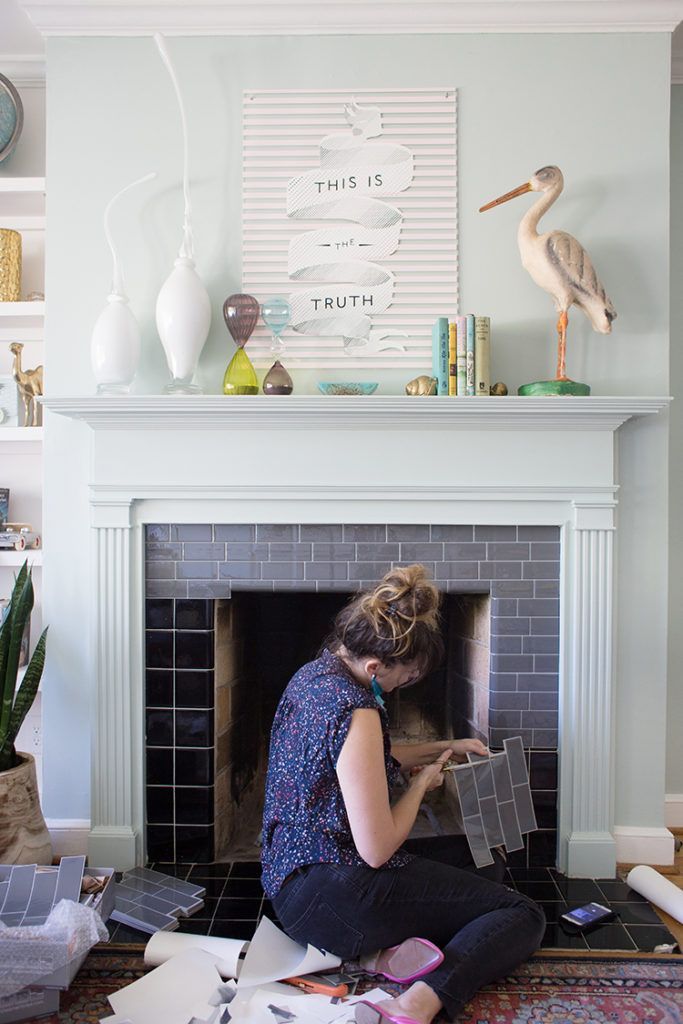
Here are some of my pointers if you ever decide to use these tiles. Remember they are literally just heavy duty stickers.
(Some of these pictures were taken quickly with my iphone as I was attempting this project so some shots aren’t the best quality.)
Here’s what the tiles look like straight out of the pack. There is a YouTube video somewhere showing how to install these but it wasn’t the most helpful.
–Clean your surface well before you apply them.
I just used soap and water but if I were a good DIYer I would have used TSP instead.
-Find yourself a good pair of scissors.
I actually used my fabric scissors since they are sharper but for this project a brand new pair would work. A strong razor or box cutter just wasn’t working for me.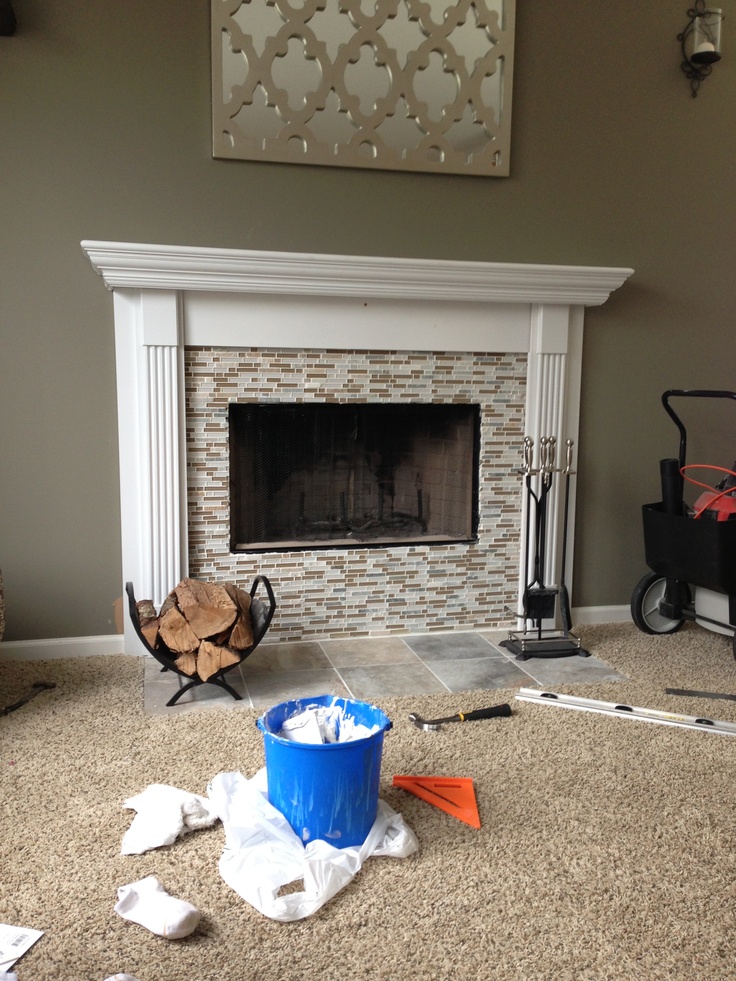 The razor was fraying the edges where I would cut no matter what side I tried to cut on. Maybe it was operator error but regardless, scissors will be your best friend.
Here is what the razor did to my tiles
I recently helped out a friend with her fireplace using these exact tiles and I used a heavy duty paper cutter and it was such a better idea than scissors.
-A level and cutting mat might help
Like I said, the herringbone pattern was a bit tricky to get lined up and nothing was level on our fireplace. Well, at least that is what I kept telling myself. I used a dry erase marker to make a line where I needed to cut along. After I made my cut, I would immediately wipe off the marker. You might need to use some elbow grease. I would test an area first, though. One dry erase marker was more stubborn than another one.
Yes, you can also draw your line on the back of the tile and in hindsight I should have done that but this was my first rodeo.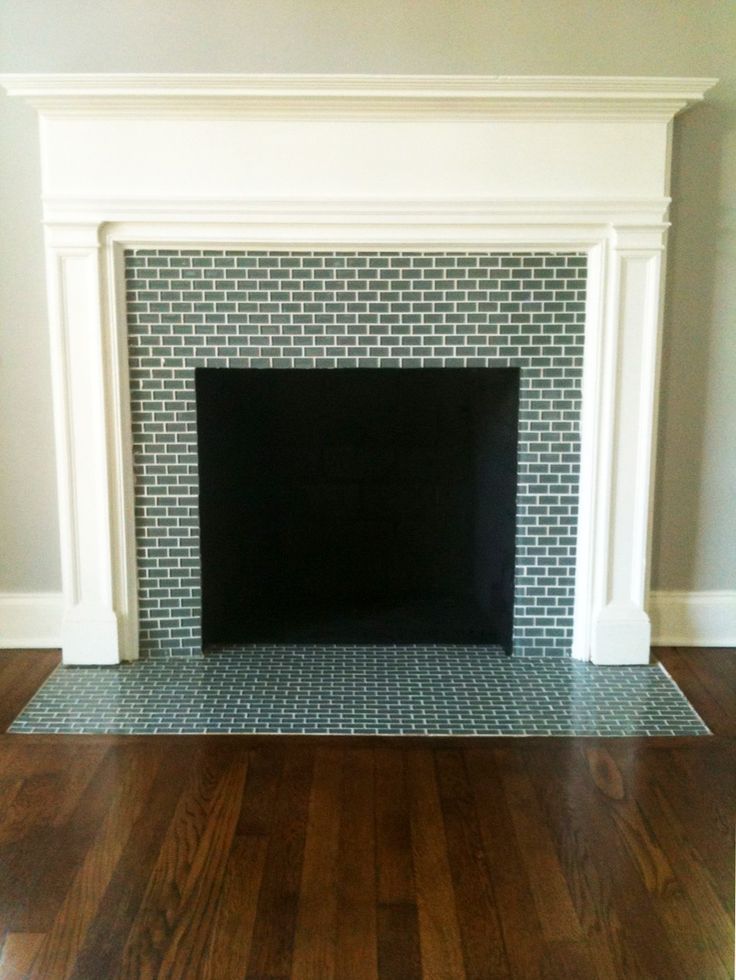
Another easy way to cut your tiles is to use a paper cutter. I actually used a paper cutter when I was helping a friend with her fireplace and it was so much easier than scissors.
-It will not be perfect
Just know this. I am not a professional and I have never done anything like this before. If you get up close and personal you will see mistakes. And because things were not level on my mantel and because I am sure I was doing something wrong, I had to add some trim to my mantel to cover up some mistakes. And some mistakes were bigger than others (oopsie daises)
You can also use some caulk as you would with real tile but I needed more than just caulk. I cut my trim to size and then used wood glue to adhere it to the mantel.
You can also use some caulk as you would with real tile but I needed more than just caulk. I cut my trim to size and then used wood glue to adhere it to the mantel.
It’s like magic
This project was worth it. Is is perfect? Not at all. Is it better than it was before? 100% yes…and that is all I care about. Will these tiles stay up forever? I am not sure but we’ll find out.
A beautiful fireplace shouldn’t cost you a lot of money….it just takes one great idea….and I really think I gave this fireplace a new life with this update.
(I also painted the floor tile to look like marble. You can read about that post here)
Fireplace Mantel Decor
I am just as excited with the decor on my mantel as I am with the rest of the fireplace. I have struggled with this mantel for a long time and since the day we moved in for many reasons. I think the original green tile was distracting me from loving anything I put up on the mantel. Once I covered the original tile, I knew exactly what I wanted as my fireplace design. I wanted neutral colors with pops of black.
I’m trying to embrace the less is more movement in my home decor. One large statement mirror and two sconces is all I really needed. I also gave the mantel a fresh coat of white paint to clean it up a bit.
Mirror//Sconces
The mirror is amazing. It’s huge and so affordable. The frame is rubber which might sound odd but it reality, it’s genius. Because of this, the mirror is not heavy and the rubber prevents it from slipping on my mantel.
I do plan on hanging the mirror soon on my mantel but I need reinforcements..aka my dad. Two short Italians are better than one when it comes to hanging big objects.
The sconces might be my most favorite thing on my mantel though. Why, oh why, did I wait so long to add them to my mantel?? They are not hardwired into my wall. I just used the magic light trick I learned from Nesting With Grace. I did something similar to the sconces in my hallway. This time though, I had to use flameless candles. The puck lights were too big to sit flat in the light.
I currently have these candles in my lights but plan on switching them out with these rechargeable ones. We fly through batteries in this house to begin with. No need to add to the problem with my home decor.
I also added in some warm wood tones and gold to warm up the space for fall but I didn’t need to go crazy.
For the first time since we moved in, this fireplace looks exactly like I had thought it would once I got my hands on it. Sometimes you just need to start. And once I started I couldn’t stop until it was done. And now I sit on my couch in my family room and just stare at my fireplace.
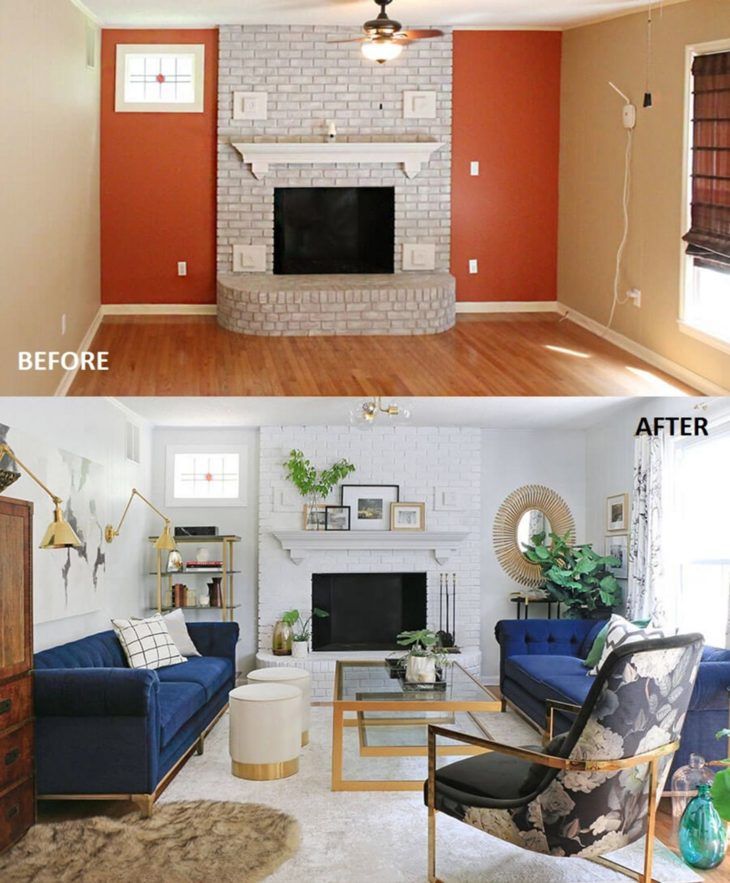
Oh you want one more before and after?
OK, fine twist my arm
I mean, come on!!
Click on any image to shop:
Turn on your JavaScript to view content
Fireplace Remodel Using Peel And Stick TilesIf you want to save this for later, you can pin it here:
You Might Also Like
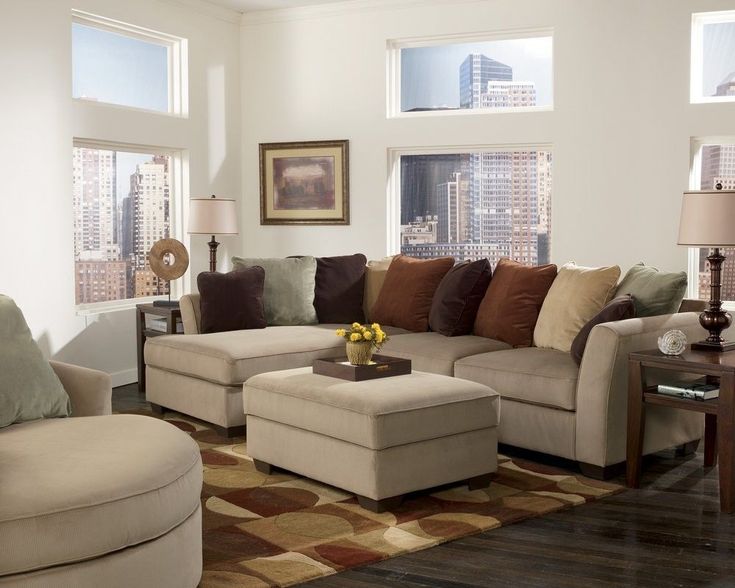
Small Living Room Decorating Ideas With A Sectional
Cheap Flooring Ideas (That Do Not Look Cheap)
How To Paint Tile (To Look Like Marble)
Choosing glue for finishing a fireplace with tiles
Finishing a fireplace with tiles Perhaps many have come across a situation where it is necessary to finish the surface of a finished fireplace or to repair an old structure. There are many materials to do this job, but choosing the right tile adhesive for fireplaces is especially important. There are several types of adhesive bases that can be used in the work. The choice depends on the mounting plane. This will be discussed in this article, you will have the opportunity to see photos and videos on this topic and choose the right tile adhesive for stoves and fireplaces.
Content
- 1 Select the tile glue for the fireplace
- 1.1 Requirements for glue
- 2 Stationary fireplace of brick
- 3 solution of clay
- 9000 3.1 Rules for preparation
Choosing fireplace tile adhesive
Fireplace tile adhesive is selected based on several factors. And first of all, this is the material to which the elements and the environment will be attached.
Requirements for adhesive
So, our choice will be determined by several parameters.
- First of all, this is the temperature regime. If the fireplace will run on solid fuel, then we need a material that can withstand it. In this case, then pay attention to the maximum application temperature.
- If the product is located in an open kitchen, be sure to take into account the temperature difference, which can be quite dramatic. Moreover, the adhesive base must withstand high humidity.
- Also pay attention to the material from which the base is made - the adhesive must also be suitable for this parameter. This is especially true for adhesives made from dry mixes.
 It is easy to make a mistake in choosing, carefully read the instructions for use.
 - Consider the weight of the tiles. If it is decorative, then the range of glue selection is large. But if you are using natural stone, remember that the adhesive must also support this weight. Here it is better to use a clay or cement base. Dry mixes may not hold up.
- Depending on the manufacturing components, the adhesive can be of synthetic or natural origin. Far from any finishing material will normally transfer the connection with synthetics - consider compatibility.
Brick fixed fireplace
Many people have this design, it can be located both indoors and outdoors. It's no secret that the cladding is best made from the same material from which the masonry is made. In this case, it will perform the connection qualitatively and last a long time. All the cladding work can be completely done by hand, but it is important to do it right. Simply “sticking” an element will not work, it can quickly fall off.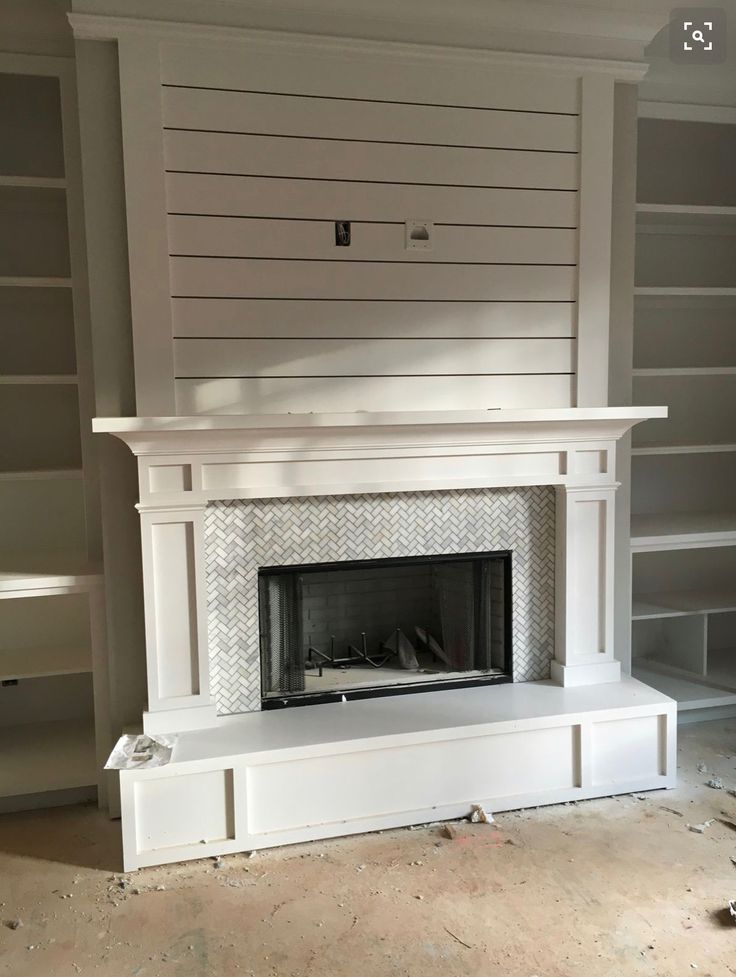
Clay Mortar
Fireplace tile adhesive made of this material will meet all requirements. It can be used for both outdoor and indoor fireplaces. But such glue must be properly prepared.
Cooking rules
The whole process can be divided into several steps. Only by following these directions carefully will you be able to make a really good base.
- Fireplace tile adhesive contains three components, the percentage of which we need to determine. We will have a composition based on clay, sand and water.
- First we need to purchase clay and determine its fat content. So we can understand what and how much as a percentage should be put into the solution. To do this, roll up about ten balls with a diameter of about 1 cm and let them dry completely. Each element is made in a different proportion.
Clay mortar must be elasticAttention: All balls should be numbered, after preparation and testing, you will have to determine which option suits you.
In order not to forget, write down this data.
- After it has completely dried, drop the balls one by one on a hard surface from a height of 1 m. The one that has not broken or deformed and will have the correct ratio of components.
- Now we take the clay and sift it through a sieve, which should have a cell of the order of 5 mm. With this action, we will remove unnecessary pebbles and make the composition homogeneous. The cooking container should have a straight bottom and walls without ribs, this will make the batch much better.
- Pour the clay into a container and fill it with water. Leave it like this for a day. It should be completely saturated with an aqueous solution and become elastic. Masters say that the clay should "turn sour".
- After a day, we knead the base with our hands. We remove small pebbles and knead the clots. Clay after this work should become homogeneous.
- Now we add sand, for such a composition it is better to use mountain sand, and before loading it should also be cleaned through a sieve.
 The proportion has already been determined. Stir the solution when adding sand.
 - After that, take a drill with a nozzle and start mixing. We should get a completely homogeneous mass. It is this tool that will allow us to achieve the desired consistency.
- The resulting composition should resemble fatty sour cream. You can not overdo it, otherwise the tile will "float". If you make the mixture too thick, then when laying, all the pores will not be able to fill. Follow this.
Attention: If you use coal or peat in the fireplace, then 10% fireclay powder should be added to the fireplace tile adhesive. The combustion of these materials gives a fairly high temperature. When fireclay is added, the glue will be able to withstand it.
Dry mix adhesive
Fireplace tile adhesive can also be made from this component. The price of the material is quite different. Before buying, carefully read the instructions for use. If the fireplace is located outside, you should pay attention to the temperature regime of use, not all powders tolerate low temperatures.
Attention: If buying in winter, avoid street vendors. After freezing, the adhesive loses its binding properties and becomes unsuitable for use. It will also be difficult to stir, which will prevent you from achieving a uniform composition.
- Pass the dry mixture through a sieve, separate the debris and knead the lumps.
- Pour fireclay powder into a container and start adding the dry mix. At the same time, stir.
- After that, we take a drill with a nozzle and, adding water, bring the composition to the state of sour cream. It must be elastic.
It should be noted that such a mixture does not endure elevated temperatures for so long, therefore, with such masonry, coal and peat should not be used as a furnace material. Limit yourself to wood.
Cement mortar
If your fireplace is made on a cement base, there is no question of what to glue the tiles to the fireplace. A suitable base would be a cement mixture. Its price is low, and the preparation is not difficult.
- Cement, sand and water act as components for such a solution. You can use both mountain and river sand. Cooking is carried out according to a certain scheme.
- Fill the container with sand and then add the cement. This should be done in the following proportion; for M300 the ratio of sand and cement is 3:1; for M400 1:1 and accordingly for M500 1:5;
- Stir without adding water.
- Now add water and mix again until the mixture is homogeneous.
Caution: When you have achieved uniformity and the correct viscosity, the slurry begins to "set" and the sand sinks to the bottom of the container. To avoid this, add about 100 g of any washing powder to the batch. Then the mass will be homogeneous throughout the laying time.
Proper surface preparation
Now let's figure out how to glue the tiles on the fireplace.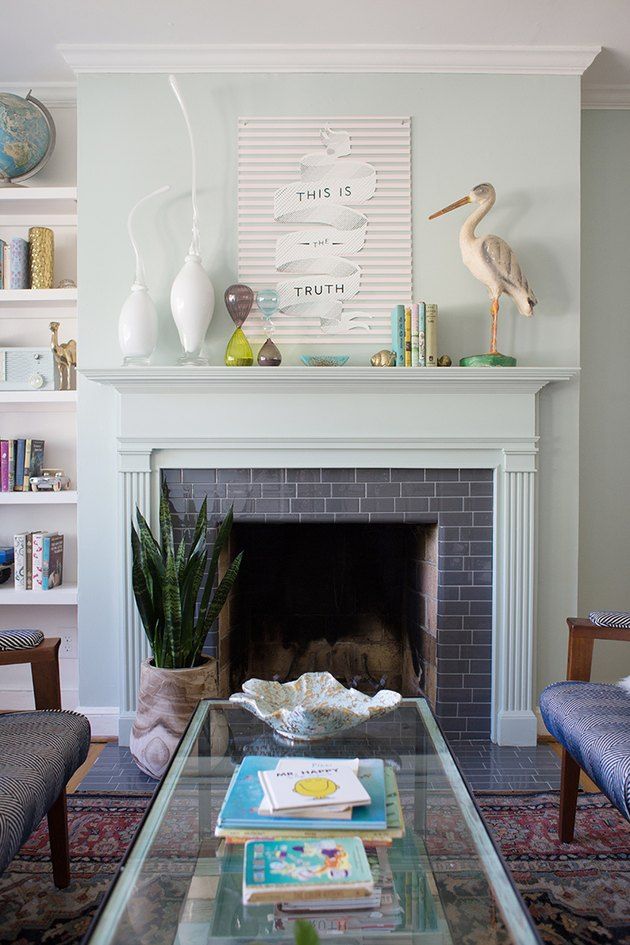 In order for the structure to stand for a long time and not be damaged over time, the surface should be properly prepared. It is enough to follow a few recommendations.
- Always carefully and base plane from the previous coating. To do this, you can use a brush for metal. Hard bumps should be removed with a grinder.
- For good adhesion of surfaces, the masonry seam should always be deepened by 1 cm. This can be done with a chisel and a hammer.
- If the base plane is very uneven, you will need to apply a large layer of mortar. If it exceeds 1 cm, fix a metal mesh on the surface and insert nails into the seam with a hammer. But if the solution is prepared with high quality, you will have to drill holes with a drill.
- Natural stone masonry elements can be quite heavy. In this case, you should use hooks that are attached to the grid. They will not allow the details to "float" on the solution.
- Always prime the surface before starting work.
 This will make the connection the best quality. Apply a deep penetrating liquid and cover a couple of times. Mounting can be started after the surface has completely dried.
This is how glue is prepared and applied for fireplace tiles, stoves - everything can be finished with these compounds. The main thing is to adhere to the technology for preparing the adhesive base and the installation rules.
Adhesive for decorative and electric fireplaces
Ordinary glue can also be used for such constructions. Please read the instructions carefully before purchasing. If the fastening of the tiles will be done on a drywall portal, then the glue should be selected accordingly.
Attention: A primer is always used for good bonding of surfaces. Pay attention to which one is most suitable for the selected adhesive. This will determine the life of the structure.
- When attaching tiles to the fireplace, always use crosses, they will help to make the seam correctly and evenly.
 Also, the angle of attachment will always be necessary and not move.
 - Never apply adhesive to a tile surface before you have tried it on and adjusted it to dry.
Now you know how to choose and prepare a fireplace tile adhesive. The main thing is to know firmly what requirements you place on the product and what it consists of. Take your time and make your choice consciously.
How do you like the article?
Alexey Petrovich
Ask a question
How to glue decorative stone on walls correctly and economically
Decorative stone is a practical and fashionable finish for the fireplace area. To stick it with your own hands will help the advice of professionals. Stenpo and Leonardo Stone shared their useful experience: 16-year-old supplier and 13-year-old manufacturer of the material.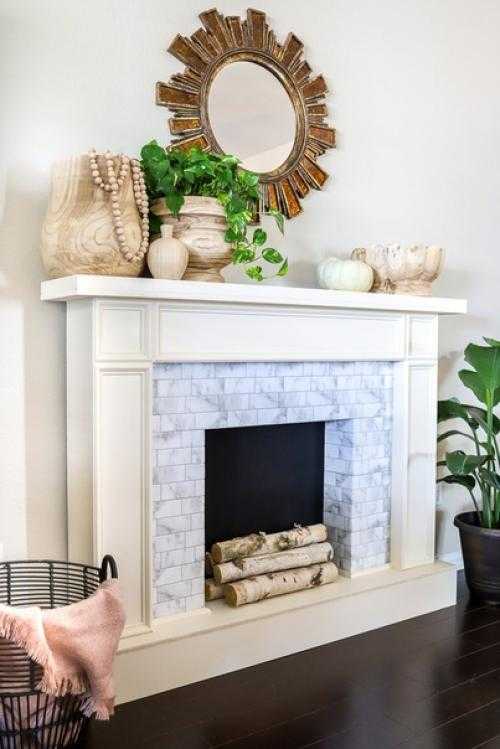
Sections of the article will prompt answers to the following questions:
- How to choose a stone for a stylish room and durable cladding?
- What you need to know about artificial stone walls?
- How to achieve a level haircut without an expensive laser level?
- Do I need to buy grout and when can I do without it?
- How to join stone with wallpaper, and make "brickwork" clear?
- How to prepare the stone for laying and spread the adhesive without lumps?
- How to decorate the protruding corners of the fireplace portal or room?
- How to glue a stone from plaster and cement, saving on tools?
Choosing a decorative stone
Today, classic portals are placed against the background of "brickwork" in the style of techno, and modern niches are complemented by "wild stone" in the spirit of "rustic" country. Colors help to fit the cladding into the interior: shades of the floor or furniture.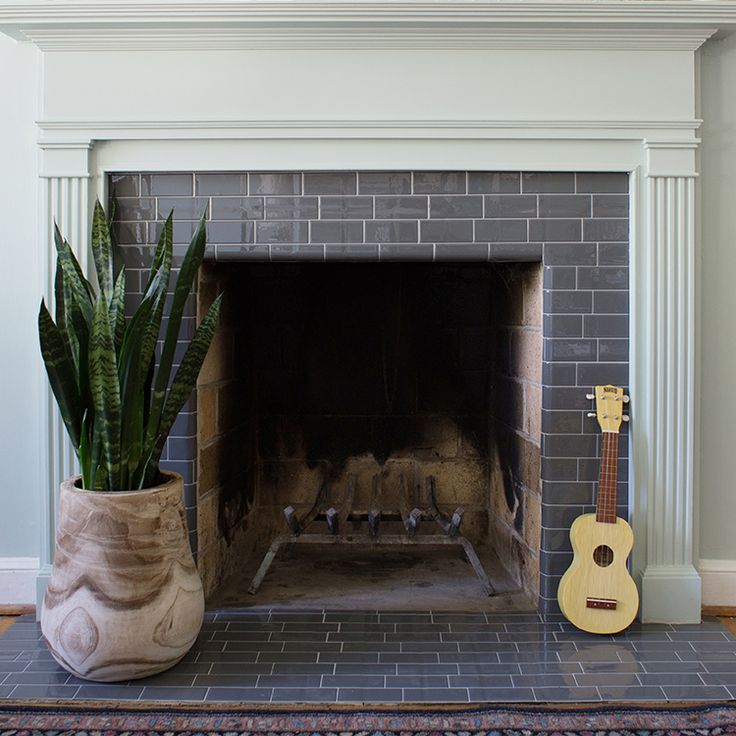
Fashionable "brick" wall and classic electric fireplace are united by similar shades
Stylish design is created by tiles of the same series, but in different colors: to match the portal, to match the sofa and to match the rug. We mix them before styling to get an exclusive pattern.
Thin and light "pebbles" of plaster will expand the city living room. The spaciousness of a private house will be emphasized by solid concrete with large embossing. For facing a modern fireplace in a drywall niche, we choose lightweight concrete tiles.
Preparing a wall for decorative stone
We level concrete-brick walls for tiles with plaster. It is not always possible even for experienced craftsmen to hide differences from 2 cm behind the “masonry”, and the strength of the finish suffers. To stick lightweight concrete on drywall, we duplicate the skin.
Decorative stone is glued on a layer of primer matched to the material of the wall
To repeat the design in the photo, you will need two types of primer.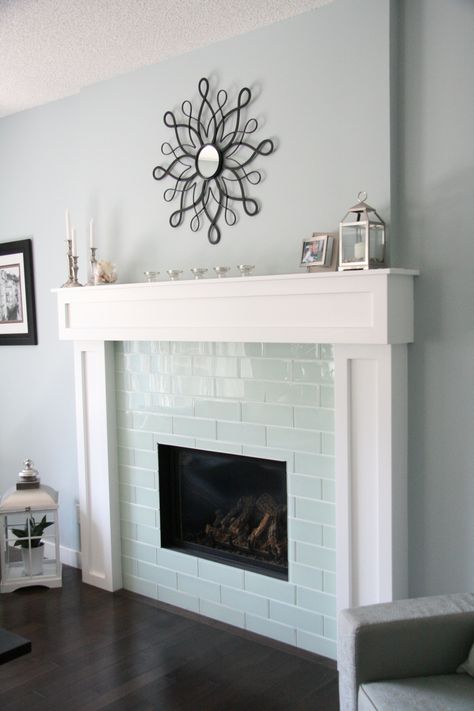 We will cover the portal under the bio-fireplace with a mixture for drywall, and with a concrete contact - a complementary wall in the kitchen-living room.
We cover the concrete wall once. On drywall and gypsum plaster, we apply the primer in two or three layers, completely drying each. GKL seams can not be puttied, but filled with glue when laying. But you can’t save on the primer: the finish will not hold.
How to glue decorative stone evenly
Let's lay out at least 2 m² of tiles from different boxes on the floor: even batches of the same color can differ in shade. Let's mark the dry wall: one tile is placed between two horizontal lines. For the "bricks" at the top and bottom, add "seams".
The decorative stone will stick easily and evenly, if the wall or portal is marked in advance.
The laser level will replace an inexpensive chisel cord. We pull it between 2 marks, hook it on ourselves and let it go sharply to immediately get a line the entire length of the wall.
Let's draw vertical lines, taking into account trimming. The pieces on the sides of the wall should match in size, and the width of the seams should repeat the horizontal allowances. If there are the necessary screws on the wall, we will make holes in the tile for them: in concrete - with a drill, in plaster - with a clerical knife.
Preparing decorative stone for laying
Sawing tiles according to the cut size, sanding the underside and edges. Smooth gypsum "bricks" can not be overwritten, but simply pressed into the glue, saving on grouting. When sawing off the details for the corner joint, we hold the hacksaw at an angle, as in the photo.
We cut off the decorative stone according to the shape of the layout, clean the edges and the underside of the sagging
We cut the gypsum with a hacksaw for metal, concrete - with a circular saw grinder. We clean the gypsum with an emery cloth, for concrete we use a metal brush, achieving a smooth surface.
"Cement milk" from the back of the concrete must be removed. We will remove dust from the finished inside, cover with a primer and dry completely. Otherwise, a couple of hours after laying, the decor will be on the floor. Gypsum tiles do not need to be primed.
Decorative stone and X-Files
If the paper trim lags behind the "stone" wall, you need to blame not the wallpaper, but the tile adhesive. Out of place, the dried solution forms bumps on which the paper does not hold. Masking tape insures against their appearance.
Masking tape and tile separators will help to lay the stone carefully with your own hands
We protect the joints of the walls with a strip of adhesive tape before laying the row and tear it off before the glue dries. We will make economical dividers for large tiles ourselves from the remnants of building materials.
Concrete "bricks" are separated by identical wedges during laying, otherwise the lining will slide.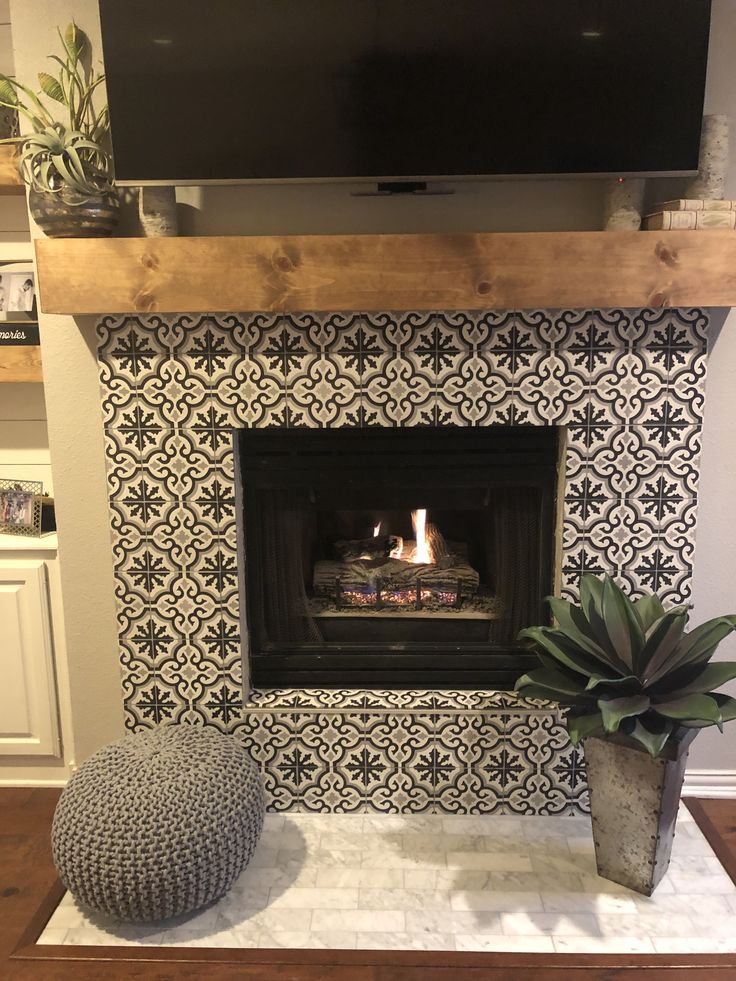 To save on shop crosses, we will cut wedges from the remnants of moisture-resistant drywall or wooden planks along the width of the seam.
Adhesive for decorative stone: spread without lumps
"Will we ever start finishing?" - you ask. Immediately after the full preparation! The life of the glue is only 40-60 minutes. From the moment the dry powder enters the water, there will be no extra time, so we make the solution last and with high quality.
A well-diluted glue makes it easier to work with your own hands and saves the time of the master
Sift the powder into a container with water and marvel at the number of lumps on the sieve. If we interfere with concrete glue with a drill, we draw a spatula along the walls of the bucket and remove the excess in the center.
Mix a small amount of gypsum tile adhesive with a spatula, also removing excess from the walls. The finished solution resembles thick sour cream. A "brick" of gypsum can also be glued to liquid nails or silicone, but then the seams will have to be overwritten.
How to glue decorative plaster stone for beginners
We glue the tape to the joint with the adjacent wall along the height of three rows of tiles. With a straight spatula, apply glue to the wall: a layer of 2-3 mm along the drawn horizontal lines. We cover the area for laying two or three tiles in a row.
To glue the gypsum stone evenly and without grouting, follow the procedure
Press two tiles into the adhesive strip from above and below, indented to the seam. We remove excess mortar from the seams with a spatula. Exactly in the middle we put the third tile and press it.
While pressing the tile into the adhesive, move it slightly left and right so that the mortar covers the ends of the “brick”. The composition protruding from the seams is removed immediately. As soon as three tiles are glued to the joint with the wall, remove the adhesive tape: when the solution hardens, it will be too late.
How to stick a decorative stone on a corner
The protrusion of a wall or a niche for an electric fireplace is made out with special corner pieces. They can be found in a box of concrete tiles or you can make your own. To do this, use a single flexible stone or two fragments of ordinary gypsum.
Two types of decorative material are suitable for finishing external corners. We heat the plastic part with a hairdryer. When the "brick" begins to bend, we crush it with our hands in the shape of an angle.
We form the cladding directly on the wall covered with adhesive. If the tile is not flexible, watch the joints. The “brick” sawn at an angle rests with the cut against the whole one in order to hide the home cut under the factory edge. We press the parts at the same time, and the corner will be solid.
Decorative stone concrete stone: saving without mistakes
We place concrete tiles on a metal profile fixed to the floor. We start a row with a corner with a finished corner piece. We apply glue both on the wall and on the tile with a straight spatula with a layer of 5-10 mm. We “comb” the solution on the tile with a comb. We press the fragment to the wall.
Save on tools for laying concrete stone will help home analogues
A rubber hammer to test the strength will replace a screwdriver with a rubberized handle, and a syringe for filling joints - a durable plastic bag with a cut corner.
In a seamless installation, the mortar must protrude from both the top and sides of the tile to connect the "pebbles". We knock with a screwdriver on the glued fragments. A loud sound will warn you: there is 10 minutes to remove the part from the wall and add glue to the voids.
Fill deep joints with grout. We put it in a bag and squeeze it into the seam. We level the dried composition with a spatula or a flexible strip of tin, cut out of a can along the width of the seam. The finished wall can be coated with impregnation, varnish or paint matched to the material.