Steps on how to plant a tree
How to Plant A Tree the Right Way - 7 Steps for Getting it Right Every Time
With a little luck and good timing, sometimes simply sticking a tree in the ground and walking away can be enough for it to survive. But knowing how to plant a tree the right way, will ensure success every time. In my book, there are 7 steps for planting success which I share below.
Suffice it to say, I’ve learned these all-important st eps mostly by trial and error. It’s always the best way to learn, especially when it comes to gardening.
Trees have been described as the lungs of the earth for good reason. Without them, there would be no life on this planet. That’s reason enough to plant as many as we can. But when you learn just how important they are for so many reasons, you begin to understand my passion for trees and why we need more.
That’s led to a lifelong crusade to encourage people to plant more trees. Or even one. So it only stands to reason how thrilled I was to team up with Lands’ End recently to encourage everyone to #PlantATree in celebration of Earth Day this year.
So whether this is your first tree planting, or you’ve planted a forest by now, we’re always learning. Knowing how to plant a tree the right way — especially now, considering such unprecedented climate conditions — will ensure your efforts will not be in vain.
To give you the whole story, check out this video we created to walk you through how to plant a tree the right way, along with the 7-steps for getting it right every time.
The Best Time to Plant a Tree
Trees (and shrubs) can be planted any time of the year that you can dig the proper planting hole. However, there are better times than others for multiple reasons.
Suffice it to say, the more time you can put between when you plant a tree, and the arrival of summer, the better. That makes fall the very best time of year to relocate trees and shrubs or plant new ones. Early spring is a popular time as well.
An easy way to know if your hole is at the right depth is to take your shovel handle and lay it across the grade. The top of the root ball or tree flare should be at or above the handle level.
How to plant a tree the right way – follow these seven important steps:
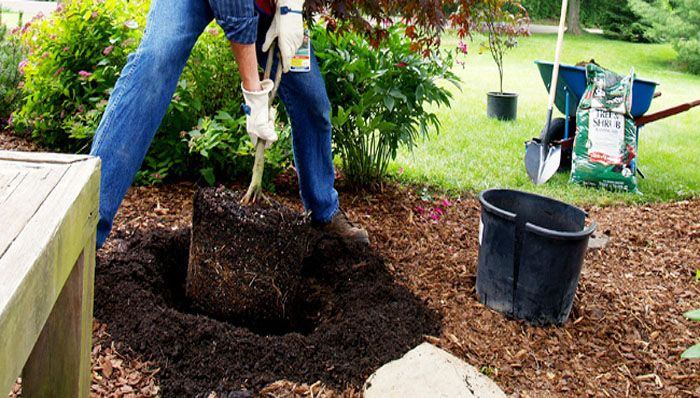
-1. Prepare the proper planting hole. When preparing any hole for planting, make it three times wider than the current root mass but never deeper than the plant was growing in its previous environment.
An even better guide with trees is to look for the flare of the trunk near the soil level. Don’t place the tree in the planting hole so deep that any part of that flare is covered with soil. The truth is, even nurseries sometimes put plants in containers too deeply. There have been many times where I’ve actually had to pull away soil to find the base of the trunk flare and true surface roots. Make a habit of checking this.
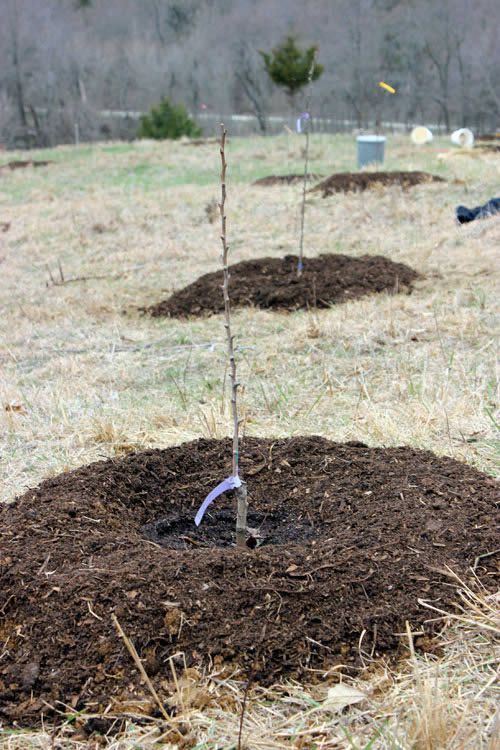
-2. Plant high. I go even one step further by placing trees and shrubs in their new environment with up to 25% of the root ball higher than the surrounding soil level. I then taper soil up to cover all the roots and add a generous layer of mulch above that. Newly disturbed soil tends to settle and shrubs and trees planted at grade can quickly settle below grade and succumb to root rot or disease.
In my book, it’s always better to plant a tree or shrub slightly high and allow the area to drain away rather than for a plant to sit in a bowl and collect excess water.
Don’t be afraid to break up the roots of a pot plant tree or plant to free them of their circular growth pattern. In fact, you must. Failure to do so now (your last chance) can doom your plant to lackluster performance at best.
-3. Inspect the roots and disturb when necessary. Once the plant is out of its container, look at the roots. If they are densely bound in a circular pattern or have started growing in the shape of the container (even slightly), break up the pattern.
It’s vitally important to stop this pattern now. The biggest mistake you can make at this point is to place a rootbound plant into the ground as is.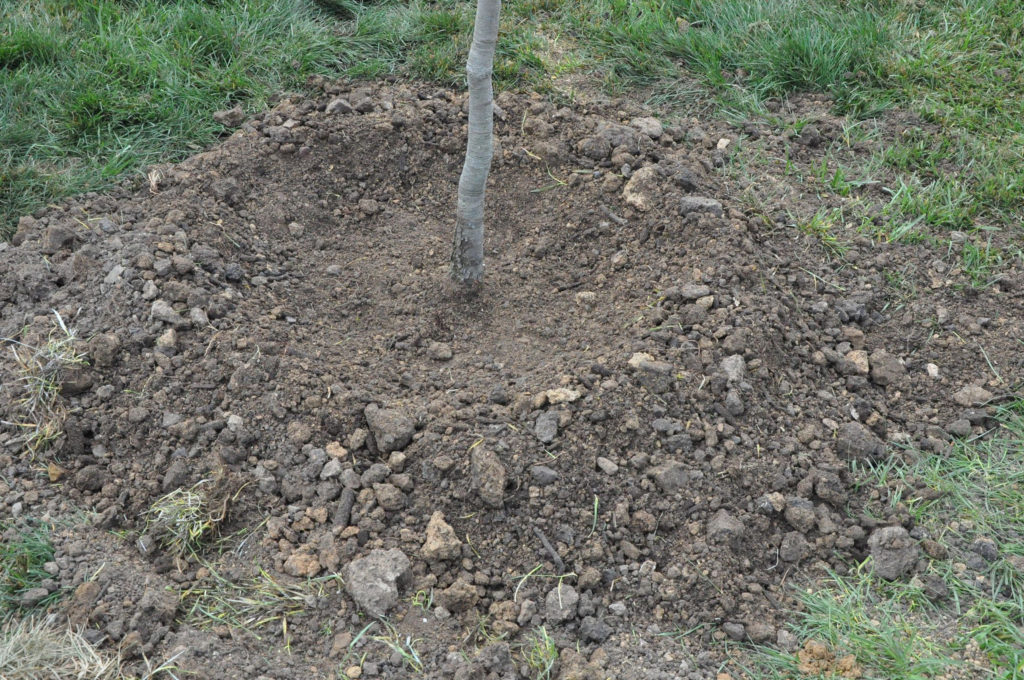 Unless you break up the pattern, you’ve likely sentenced the plant to a slow death. At a minimum, it will likely never establish or reach a fraction of its potential.
Don’t worry about hurting the roots or losing soil as you break the roots apart or even cut some away. Better to give them a fresh start than allow the constrictive pattern to only get worse below ground. While you don’t want to be any rougher than necessary, do what you must to arrest the pattern.
I often scratch my fingers across the sides and bottom of the root mass in mild cases. In more severe situations, I’ll slice up the roots vertically with a pruning saw, hack off the bottom inch or so, and or pull apart the root mass to clearly create new opportunities for non-circular new root development.
Unless you can dig a hole large enough for the eventual mature root zone and amend the entire area, simply backfill with the existing native soil.
-4. Don’t amend the soil. Contrary to traditional planting methods, contemporary research indicates that you should not amend the hole with additional organic material (unless you intend to amend the entire area where roots will eventually grow). Roots growing in amended soil rarely venture into harder native soil. The long-term affect is a smaller root system, reduced growth and a less hardy plant.
Instead, simply break up the clumps in existing soil, remove the rocks and backfill. Studies show plant roots growing in only the native soil actually did a better job at establishing and expanding beyond the original hole.
I find the best and easiest way to eliminate air pockets during planting is to blast the backfilled soil with a stiff stream of water after refilling the hole about half way. Then again after all the soil has been added back.
-5. Eliminate air pockets. While you could lightly tamp or hand-pack the soil around the plant roots to ensure good soil-to-root contact, I prefer to add a stiff spray of water to the hole after backfilling half way. Not only does it provide needed moisture but the water also helps eliminate air pockets that could otherwise result in dead roots or worse (without compacting the soil too much). Finally, water again gently but thoroughly once all the soil is in place.
-6. Add mulch. Starting about two inches from the trunk (leave this area exposed), place roughly two inches of organic matter such as shredded leaves, or ground bark or nuggets around the plant, at least out to the drip line. Further is better. Mulch helps retain much-needed moisture and helps keep roots cooler near the surface—a very important requirement for newly installed plants.
Perhaps the most important step during the planting process is to keep up with the watering until your plant is fully established. That can take longer than you think. Soaker hoses or drip irrigation on automatic times makes this an easy process.
-7. Water Properly Until Established. The most important job you will have after planting is to keep plants and trees well watered until established. This can take weeks to months, to even a year or more in some cases. But don’t worry. You can put this part of the process on auto-pilot. (I’ll tell you how below.)
The key to proper watering and establishment is slow and deep irrigation. It’s not practical to do that by hand. The only way to establish trees properly through irrigation is with soaker hoses or drip irrigation.
The slow and deep irrigation allows the soil around the roots to saturate, so the roots have time to absorb the moisture, while avoiding excess runoff. Short, manual blasts of water from an overhead hose or sprinkler system simply don’t come close to providing the same effectiveness for water delivery.
I water newly planted trees every day for about the first week. For the next two weeks, I ease off to about every other day. Then gradually ease back from there.
However, there’s a fine line between watering enough and watering too much—especially with large trees that arrive with root balls wrapped in burlap. These trees have lost all their feeder roots when dug from the ground. Providing adequate water is critical to their survival and establishment.
That said, I’ve killed more than one tree like this by overwatering. Even if you prepare a large planting hole, when drainage is poor, the root ball may be sitting in water and literally drown. There’s no easy way to know how wet the soil is deeper into the planting hole.
The best advice I can offer is to pay close attention to how the tree responds (and all your plants for that matter). While it’s common for them to lose up to half their leaves to transplant stress (a normal part of the process), more can indicate a potential problem.
If you sense the tree is responding poorly, and you are watering consistently, you’re likely over-watering. If the leaves are turning brown, drying up, and falling off, and the soil appears dry, water more.
To add to the challenge, soil that appears dry at the top may be very wet a few inches down. And the opposite is true as well. All the more reason it is important to apply your detective skills based on observation and knowing how much or little you’ve been watering.
In the first few weeks, soil that is moist but not soggy is your target range. And depending on what you’re using to deliver the water will affect how long you need irrigate per session. So there’s no simple answer.
Put Watering on Auto-pilot
One of the best time-savers you can find to lighten the load and put your irrigation duties on auto-pilot is to use soaker hoses and/or drip irrigation combined with portable battery-operated timers. I cannot stress the importance and time-saving benefits enough!
Fertilizing
If you plant to fertilize, I don’t suggest doing so until you know your trees or shrubs have taken to their new environment through successful establishment.
All energy should be concentrated on root development first. Adopt the walk-before-you-run approach. But even then, I still like to play it safe by using a slow-release, non-burning organic fertilizer that won’t over-tax my plants.
While all the above steps are essential, your active engagement in monitoring newly planted trees for signs of distress over time will be the ultimate deciding factor in your tree planting success.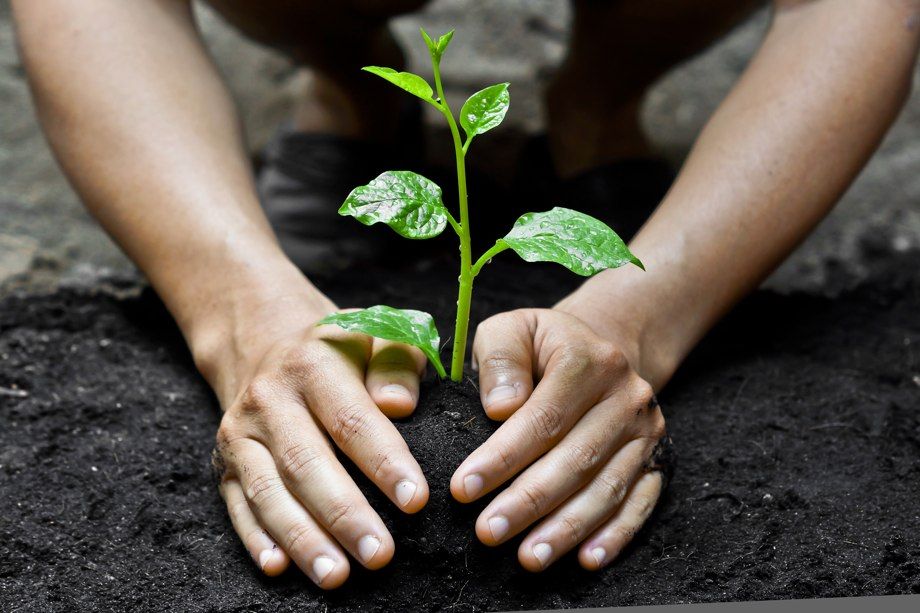 Make any necessary adjustments in real-time, and you can likely reverse a potentially downward spiral into a tree that will live a happy and very long life.
Please join me this Earth Day and let’s all #PlantATree.
About Joe Lamp'l
Joe Lamp'l is the Host and Executive Producer of the award winning PBS television series Growing A Greener World. Off camera, Joe dedicates his time to promoting sustainability through his popular books, blog, podcast series, and nationally syndicated newspaper columns. Follow Joe on Twitter
How to Plant Trees in 5 Easy Steps
Planting trees in the backyard is a great way to add beauty, shade and privacy to any landscape. But if done incorrectly, your new greenery might not make it through the winter. That’s why the best way to plant a tree is to do it right the first time.
If you’re not sure how to plant trees correctly, don’t worry. Our step-by-step guide, complete with tree planting tips from the Arbor Day Foundation and other urban forestry experts, will show you how it’s done.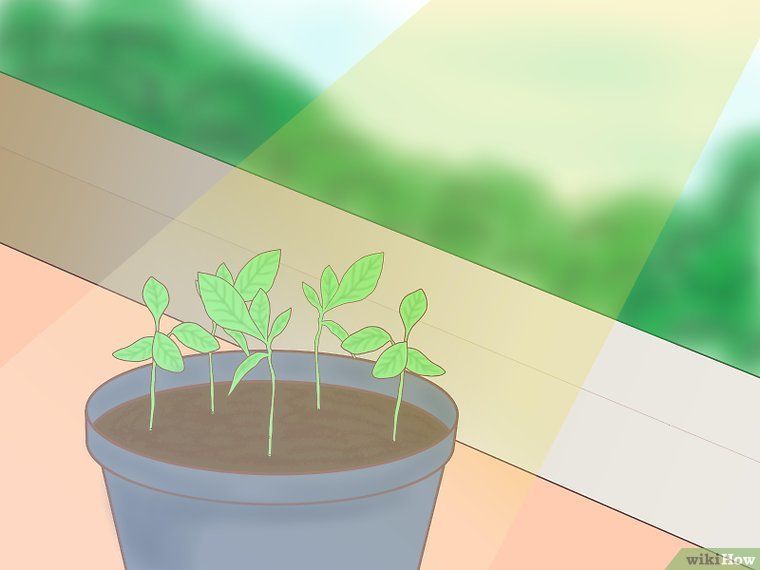
How to Plant a Tree Step by Step
Tree Planting Tools and Materials
- Shovel
- Trowel
- Pruning shears
- Mulch
- Tree stakes (optional)
1. Find the Right Spot
One of the most important tree planting tips is to create a solid foundation for your new foliage. To find the best spot for your tree to grow and thrive, you’ll want to know a few things about your tree first.
The City of Pella, Iowa recently rolled out a 2018 Tree Rebate program to encourage urban tree planting. We asked Community Services Director Jeanette Vaughan about things to keep in mind when choosing a spot for a tree:
Tree Planting Tips:
Know Your Tree’s RequirementsSunlight: Sunlight helps trees photosynthesize. Some trees need full sunlight (more than six hours a day), while others can live with less. Find a spot that provides enough light for your tree.
Moisture: To keep a tree’s roots healthy, it’s important to plant them in an area with the right moisture levels. If your tree needs drier soil, find a spot in your yard that’s well drained. If it prefers soil that’s wetter, place it in the lowest spot of your yard, where rainwater collects.
Height: “Trees GROW,” says Vaughan. “Keep in mind the mature size of the tree when picking a location for planting. Stay away from power lines and underground utilities.”
Canopy: The canopy is the top layer of leafy cover on your tree. Some tree’s canopies can grow to be very wide, so make sure your tree has room to grow up and out.
Root Spread: A tree’s roots can be large and powerful. They can even cause foundation damage if planted too closely to your home. “Keep your tree away from the edges of sidewalks or driveways so that the roots do not heave your concrete or asphalt,” says Vaughan. “Roots also like to grow into water and sewer lines so steer clear of those areas as well.
”
Jeanette Vaughan | City of Pella, Iowa
Additionally, you’ll need to decide whether you’ll be planting bare-root trees or planting container trees.
We asked the experts at the Arbor Day Foundation to explain the pros and cons of each:
Bare-Root Trees| Pros | Cons |
|
|
| Pros | Cons |
|
|
Pete Smith | Arbor Day Foundation
2.
 Dig the Hole
When it comes to the perfect tree planting hole: “Wider is better, deeper is not!” says Smith.
Digging For Bare-Root Trees: Your hole should be large enough for its roots, but should not be deeper than the graft union. The graft union is the large notch on the trunk near the base of the tree – it’s the point where your tree was grafted onto another plant’s rootstock.
Digging For Container Trees: The hole needs to be wide enough to allow the roots to grow, but shallow enough to let oxygen and sunlight to reach the tree’s base.
To find the perfect depth for your container tree, measure the root ball, says Bryan Spencer. Spencer is the Parks & Forestry Superintendent of Oconomowoc, Wisconsin, a city that has been nationally recognized as a Tree City USA Community by the Arbor Day Foundation since 1993.
Tree Planting Tips:
Measure the Root Ball to Find the Right Depth“Make the hole two to three times wider than the size of the ball.
Find the root flare – the place where your tree begins to widen at the base – and measure from there to the bottom of the ball. That should be the depth of your hole, minus about an inch to allow for watering and settling. Lay a shovel handle over the hole to make sure the ground hits the tree below the root flare.”
Bryan Spencer | Oconomowoc Forestry Division
If you’re in the middle of a landscaping overhaul, there are many ways to dispose of the bramble. Find the best yard waste disposal solution for your backyard makeover.
3. Prepare the Roots
The health of your tree’s roots will determine the health of your tree down the line, so this step is key for knowing how to plant trees successfully.
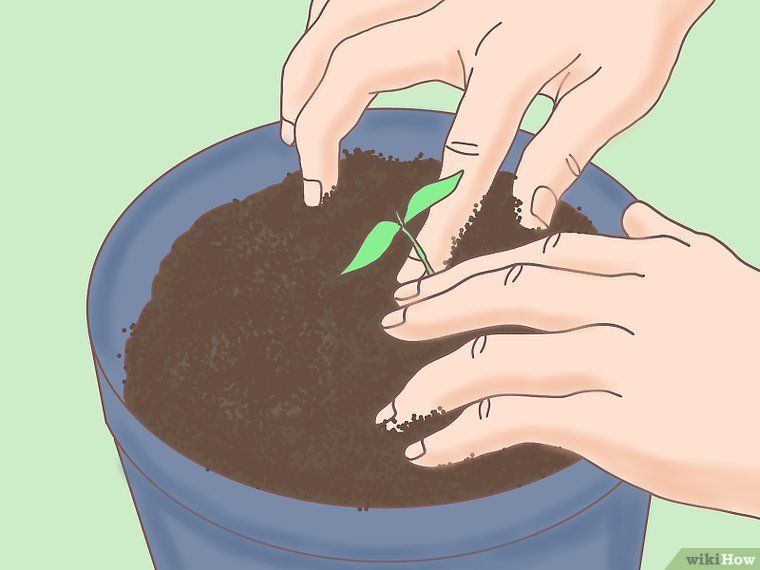
Root Prep for Planting Container Trees: Loosen the root ball to promote strong growth after planting. If the roots are tightly coiled around each other, prune the bottom of the root ball until they are free. This will prevent circling roots, which can starve the tree of water and important nutrients.
Root Prep for Planting Bare-Root Trees: Soak the roots in water for one to two hours before planting. If the roots are extremely dry, soak them overnight. Do not soak them for longer than 12 hours. Prune the roots just before planting to encourage new growth.
Tree Planting Tips:
Don’t Carry Container Trees by the Trunk“Handle container trees carefully by the root ball. If you jostle the trunk around, you could break up the root ball. Once the root ball is broken up, it exposes the roots to air which can dry out the tree and create stability issues.”
Bryan Spencer | Oconomowoc Forestry Division
4. Plant Your Tree
Now it’s time for the main event – planting your tree.
Before filling in the soil, make sure the tree is completely straight. Have a friend walk around while you hold the tree in place to ensure it isn’t leaning to one side.
How to Plant Container Trees:
- Place the root ball into the hole.
- Make sure the trunk flare – where your tree begins to widen at the base – is above ground.
- If your hole is too deep, partially fill it in until your tree sits at the right height.
- Firmly but gently fill in the soil around the root ball.
How to Plant Bare-Root Trees:
- Using soil from the hole, build a mound in the center for your bare-root tree to sit on.
- Position the roots on top of the mound.
- Dump soil on top of the roots, leaving no air pockets.
- Firmly but gently fill in the remaining soil, keeping the graft union uncovered.
Tree Planting Tips:
Common Tree Planting MistakesWe asked the Arbor Day Foundation for a list of common mistakes made while planting trees:
Planting the Root Ball Too Deep: The first tree roots should be visible at ground line.
Adding Fertilizer: Your new tree won’t want to expand its roots beyond the rich soil, which can stunt its growth. “Just use the soil from the hole,” says Smith.
Not Watering Right Away: The planting process is a stressful ordeal for a new tree; be sure to water it immediately after planting.
Not Protecting the Trunk: Remove all grass near the trunk and add mulch to protect it from mowers and string trimmers.
Pete Smith | Arbor Day Foundation
5. Mulch and Water Your Tree
Once you’ve filled in your soil, it’s time to give your tree a little TLC.
Create a ring of mulch around, but not over, the base of your tree. “So many homeowners create a ‘volcano’ of mulch around the trunk, but this can harm the tree down the line,” says Spencer.
“Create a donut of mulch around the tree instead.”
Water your tree generously inside the mulch ring. This will concentrate the water near the base of the tree and help release the mulch’s nutrients into the soil.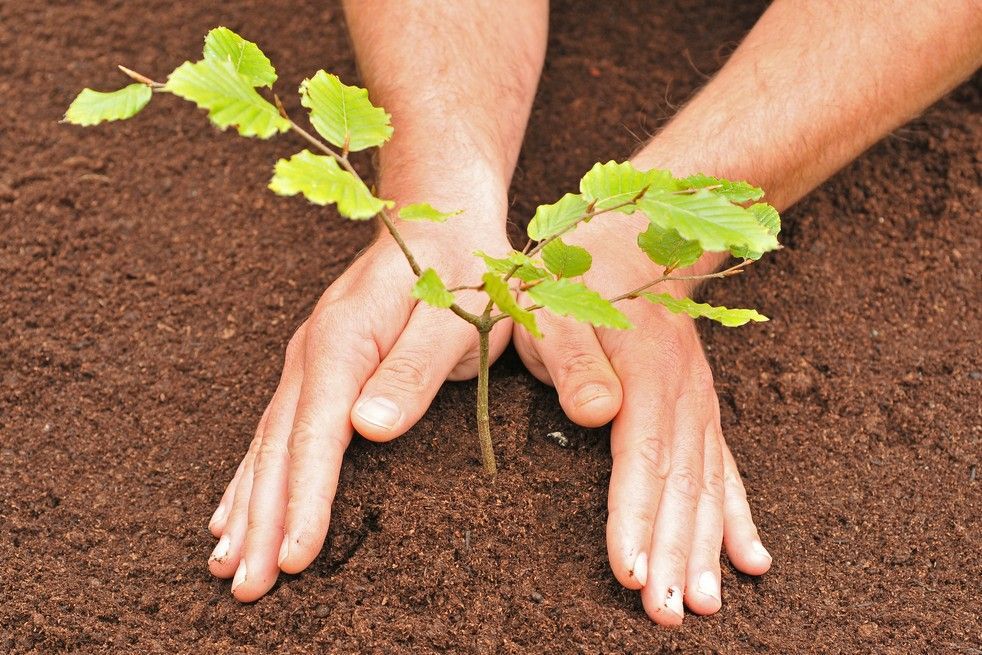 Watering your new tree thoroughly can also remove air pockets that might have occurred during the planting process.
Tree Planting Tips:
Don’t Stake Your Tree Down Unless Necessary“Generally, you don’t need to stake trees. But if you do, do not stake it for longer than one year. If you do, it won’t allow your tree to develop a flexible trunk. This can create a weakness point in the trunk which can cause it to snap during high winds.”
Bryan Spencer | Oconomowoc Forestry Division
Tree Planting Guide: Frequently Asked Questions
How much does it cost to plant a tree?Planting a tree is a fairly inexpensive backyard project. Most of the costs are in buying the tree itself, which can range from as low as $20 to $100 or more, depending on the tree and the nursery you purchase from.
Tree maintenance and pruning can be expensive if your tree ends up becoming too large for its location or is not suited for your local climate. To keep maintenance costs low, purchase a tree that will do well without much extra help. “The best advice for beginners is to choose trees that are native to the area in which they live,” says Vaughan.
“Check with your local Department of Natural Resources, as they typically have tree lists available that can help folks pick the best tree for their area.”
What’s the best time to plant container trees?Container trees should be planted in the spring or fall, well before summer or winter temperatures set in. This allows your tree’s roots to take hold without the stress of seasonal highs and lows taking their toll.
What’s the best time to plant bare-root trees?Early spring or late fall. Bare-root trees must be planted while dormant after their leaves drop and before their buds sprout. Because bare-root trees have no soil to protect their roots, it’s important to plant them soon after receiving them. It’s a good idea to have your location picked and the hole dug before your tree arrives.
Newly planted trees should be watered once a day for the first two to three weeks, and then once a week for the next year. Usually, trees need about 10 gallons of water per inch of trunk diameter. So, if your tree’s trunk is 2 inches around, it will need about 20 gallons of water per day.
Since a standard garden hose pushes about 17 gallons of water per minute, you will need to water your tree, using no attachments, for just over a minute to hit its daily 20-gallon minimum.
How do you grow a tree from a seed?Growing a tree from a seed is doable, but it’s a little more complicated than you might think. Most seeds are dormant and need to be stratified before being planted. This means that they must spend time in cold, but not freezing, temperatures in order to reach their growth stage.
There are two ways to plant a tree from a seed: the natural method or assisted germination.
The Natural Method: Sow seeds in late autumn, typically about one inch deep in the soil. This allows the seeds to undergo the stratification process naturally during the cold winter months.
Assisted Germination: Seeds must be refrigerated to mimic the effect of a cold winter. Place your seeds in a sealed plastic bag with a moist paper towel and place it in the refrigerator at around 33 to 38 degrees Fahrenheit for a period of one to three months – the length of time will depend on your tree species.
Once stratification is complete, your seeds can be planted and grown wherever you’d like in your backyard. For a more in-depth tree planting guide for this method, check out these tips from the experts at Tree Help for how to plant a tree from a seed.
Planting Trees: The Greenest Home Improvement of All
There is no greener home improvement project than planting a tree. From providing homes and shade to helpful local wildlife to cleansing the air around them, the list of benefits trees provide is long.
So if you’re looking for a way to add beauty and value to your home while giving back to Mother Nature, it’s time to start digging.
Looking for tips on how to maintain your new foliage and the rest of your yard? Check out How to Create a Beautiful Backyard.
Finished planting your new tree? Post a picture in the comments!
How to plant a tree? Step-by-step instructions
To the question "How and when is the best time to plant a tree?" not so easy to answer. There are several factors: the type of tree that you want to see on your site, as well as the climate in which you are going to grow a seedling. We will help you decide on the time of landing and tell you how to choose the right one.
What species are the trees divided into?
Conifers: pines, spruces, firs, larches, cypresses and sequoias. They are also called evergreens.

Select planting period and suitable tree
Spring. In the southern regions, spring planting is sometimes carried out at the end of March, in central Russia - in April or at the very beginning of May, in the north - closer to the beginning or in the middle of May.
Autumn. In the middle lane of Russia, autumn planting is carried out from mid-September to mid-October, in the northern regions - from early September to early October, in the southern regions - from October
The choice of season depends only on the type of seedling.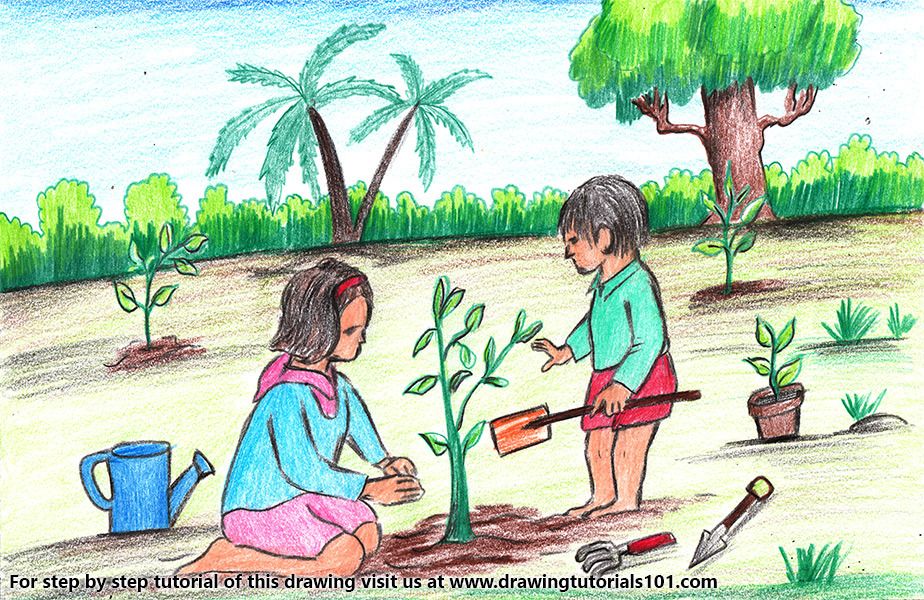
Want to harvest? Pay attention to fruit trees : apples, pears, apricots, sweet cherries, plums, cherries, mountain ash and sea buckthorn.
Plant stone and pome trees in the spring.
Plant winter-hardy apples and pears in autumn.
Soil composition: clay loam, less often sandy loam.
Soil reaction: stone fruits (except cherries) and opex-bearing - neutral and slightly alkaline soils; apple and pear - neutral and slightly acidic soils; cherry - acidic soil.
Tip: To determine the acidity of the soil, just buy an indicator stick from a gardening store and follow the instructions on the package.
More interested in aesthetics? Choose decorative species that can be both coniferous and deciduous. This group includes thuja, Canadian maples, magnolias, Ola apple trees, junipers, barberries and many other types of trees and shrubs.
Spring plant birch and oak.
How to determine the composition of the soil:
- take a handful of earth;
- wet it with a little water;
- mash with your hands to a dough consistency;
- ball with walnut opex;
- roll it into a cord;
- roll it into a ring;
- compare result.
Important! : After you have decided on the breeds of seedlings, make sure that they get along, and be sure to keep the necessary distance between them. The larger the adult plant, the more space it will need in the future.
Universal rules for planting a tree
Step 1. Select the optimal planting time, taking into account the climate and tree species. For example, in spring in central Russia, trees are planted from April 1-10 to May 1, and in autumn - from October 1 to 20. By the way, container plants can also be planted in summer: they are sold together with earth clods and their root system is not so vulnerable.
Step 2. Choose a good place: for this, be sure to read the compatibility tables and the distance between the trees. Do not forget that some breeds love the sun, others love the shade, and this must also be taken into account.
Step 3. Prepare the site: clean it of dirt and dig a hole. As a rule, the pit is equal to the size of the ball from the root and the earth, multiplied by two.
Step 4. Place the bottom layer of earth and fertile soil in separate piles. Align the inner surface of the pit and loosen the bottom well by 15 centimeters in depth and add 20 centimeters of fertile soil.
Step 5. Place the seedling exactly in the center of the hole and ask someone to hold it level. Gently straighten and spread out the roots.
Step 6 Constantly break up the clods and tamp the earth.
Step 7. Fill the hole halfway and fill it with water. When the liquid is completely absorbed, top up the earth to the top, firmly tamp down and build watering holes around the trunk.
Note: The radius of the hole depends on the amount of water it has to hold. For example, an apple tree will require a hole, which will include two buckets, and a cherry is enough for one. Step 9 You will untie the seedling only in a year, two or three, depending on how successfully the tree has rooted.
Step 10. Now remember to water the sapling generously until it gets stronger. The norm of daily, and then monthly watering depends not only on the breed, but also on the age of the tree: for example, a seedling needs 30-50 liters of water, and a three-year-old jet05.
Tip: In the first year after planting, water the seedlings as the soil dries out (in acysy, once or twice a day). Gradually reduce the frequency of watering and completely stop watering the tree in the second or third year, depending on the breed.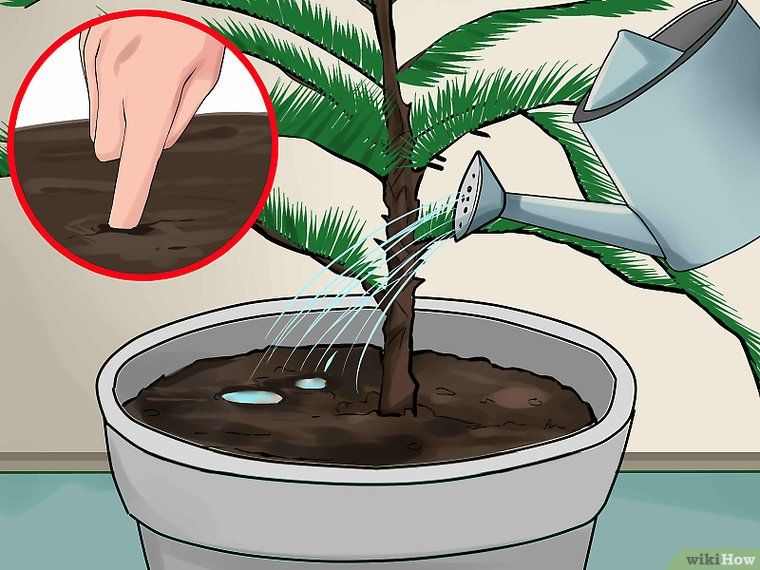 Make an exception on very dry days or during the period of fruit ripening.
How to plant a tree - Lifehacker
May 15LikbezAdvice
Follow Lifehacker's advice, and the tree will definitely take root.
Share
0How to find the best planting site
Most trees will thrive in flat areas where moisture does not stagnate. If there are no such conditions, you must first level the places of future landings - add or remove a layer of soil and walk along the surface with a rammer. Drainage at the bottom of the planting pit will cope with waterlogging of the soil.
Place trees on the south and southwest sides to provide adequate lighting. It is also important to keep a distance between seedlings - as they grow, they should not obscure each other and interfere with development. Therefore, keep in mind what size they will reach in the future, and take this into account when marking out plantings so as not to get dense jungle instead of a beautiful garden.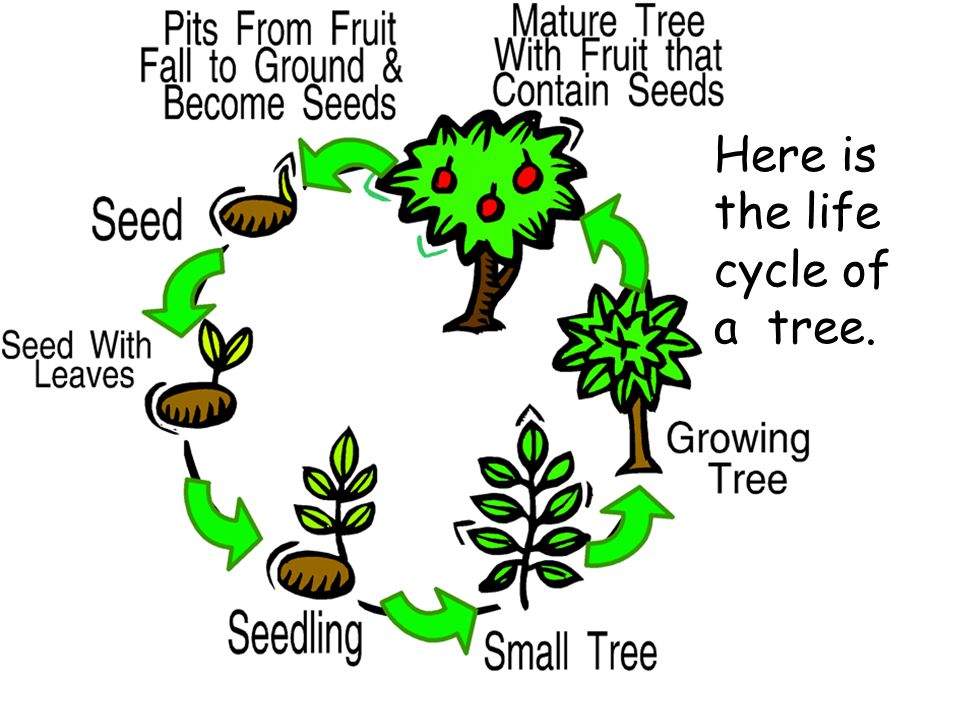
For example, vigorous apple and pear trees can reach a height of 5-6 meters, so they should be placed 4-6 meters apart. The height of undersized ones, as a rule, does not exceed 2-3 meters, and they can be planted at a distance of 1.5-3 meters. Plums, cherries, cherries, apricots and peaches need a distance of 3-4 meters.
At the same time, vigorous trees should be planted at a distance of at least 5 meters from residential buildings and 4 meters from the neighbor's fence. The distance for medium-sized people is at least 2 meters, for short people - at least 1 meter.
Think in advance where and what kind of trees you want to plant, and only then go for seedlings.
How to choose seedlings
For young trees, it is better to go to trusted sellers or specialized nurseries, which guarantee good quality seedlings and their conformity to the variety.
It is better to choose the so-called zoned varieties: they are specially bred taking into account the climate in different regions. For example, trees suitable for cultivation in the south are unlikely to overwinter in the central zone.
The optimal age of the seedling is from one to three years. Of course, older plants look prettier, and it seems that they will bear fruit faster. But the older the tree, the larger its root system. This means that it will suffer more from digging and transplanting to a permanent place, and this will not have the best effect on survival.
Seedlings can be sold with a closed and open root system. In the first case, they will be planted in pots or containers with soil. The roots of such trees are protected and continue to develop, so after landing in a permanent place, the tree will take root faster. Another plus is that such trees can be planted during the entire growing season.
Seedlings with an open root system lack these advantages. When choosing them, it is necessary to ensure that the roots are protected from drying out: they are covered with wet sawdust or are in a container with a special clay mash.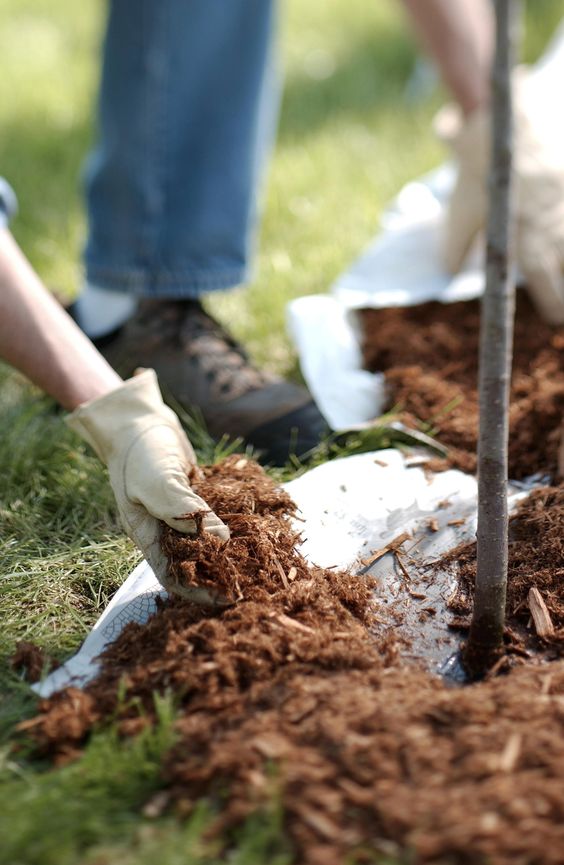 The buds of such trees should be alive, but dormant.
Whatever root system you choose, pay attention to the condition of the trunk and root collar - the places where the roots directly connect to the trunk. They should not have mechanical damage, dark spots, traces of fungal diseases and rot.
Image: Garden Guide / YouTubeWhen to Plant a Tree
Closed-rooted trees can be planted from early spring to late autumn, from April to October. In the spring, you have to wait until the snow melts, and the temperature stays above 0 degrees. In summer, avoid too dry and hot weather. But in the fall, you need to have time before frost.
Bare-rooted trees should preferably be planted in a dormant state, in early spring or late autumn, when the temperature does not fall below 0 degrees. At this time, the kidneys are asleep.
When choosing a time, be guided by the climate in your area. In the south, it is preferable to plant trees in autumn: the heat here can come already in early spring, and therefore young seedlings can get sunburned before they have time to fully take root. In the central regions, you can choose both seasons due to the temperate climate. But in the north, spring tree planting will be the best option - this way you will exclude the death of a fragile seedling from severe winter frosts.
In addition, it is important to remember that for planting in late autumn, only winter-hardy varieties should be selected. Otherwise, the tree runs the risk of freezing before it begins to take root.
How to store seedlings before planting
Seedlings with a closed root system do not require special preparation. If you do not have time to plant them in the fall, in winter they can be stored in the basement or on a glazed balcony at a temperature of 0 to 4 degrees Celsius.
With seedlings with an open root system, things are a little more complicated. If you buy them in late spring or summer, when the buds are already budding, plant the trees as soon as possible, rather than trying to save until autumn: this way they are more likely to survive. If you buy them in the fall and plant only in the spring, place the roots in plastic bags with damp peat or sand and send them to winter storage. All in the same basement or on a glazed balcony.
How to prepare a planting hole
For spring planting, it is better (but not necessary) to prepare a hole in the fall. So the soil has time to settle, and the nutrients are evenly distributed. For autumn gardening, you can prepare a hole at any time, starting in spring, but not less than a month before the planned planting of a tree in the ground.
Dig a hole of the right size
Image: Igor Bilevich / YouTubeThe diameter of the planting hole should be twice the diameter of the seedling's root system, and the depth should be three times the length of the roots. When digging, you need to lay off the upper, fertile, layer of soil on one side, and the lower one on the other.
Make a drainage layer
Shot: Igor Bilevich / YouTube This is necessary if groundwater is high on the site - in such cases it is often flooded in early spring. Expanded clay, broken brick or crushed stone is suitable for drainage. At the bottom of the pit, you need to put at least 10 cm of material. This will protect the roots of the seedling from rotting.
Fill in fertile soil
Shot: Igor Bilevich / YouTubeMix the excavated topsoil in equal proportions with peat, compost or humus. If the soil in the area is clayey, you can add another part of the sand. For additional nutrition, add 50 g of wood ash and 15–20 g of nitroammophoska. Pour all the components together with the soil to the bottom of the pit, mix well again and pour plenty of water.
Wait for the ground to settle
This will take at least 14 days, or even better, wait a month. By this time, the soil will have time to settle down enough, and the planted tree will subsequently not go deep into the ground after rains and watering.
How to plant a tree
After the soil in the hole has settled, slightly loosen the soil at the bottom of the hole and start planting the seedling.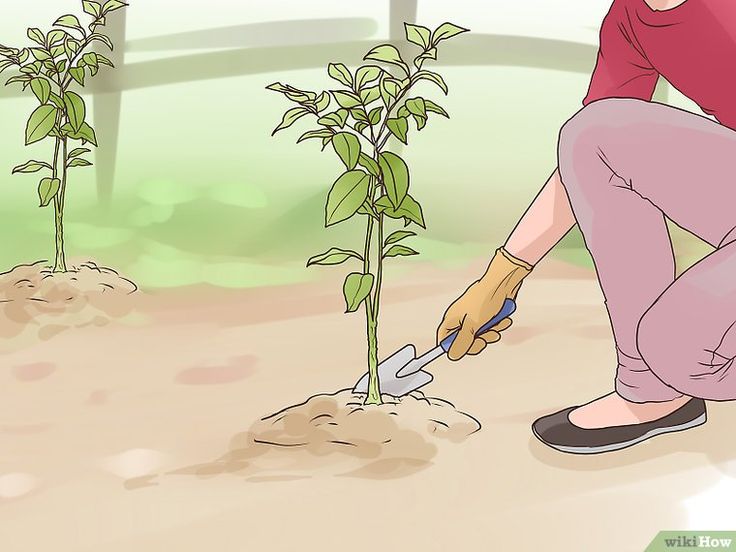
Place the tree in the hole
Image: Igor Bilevich / YouTubeThe root collar should be flush with the ground. If it is lower, there is a risk of rotting and even death of the tree.
In order not to make a mistake, you can put a long board or stick on top of the pit. If the neck is lower, add fertile soil to the bottom of the pit, if higher, dig out unnecessary soil.
Gently straighten the roots of the tree so that they point to the sides, not up. Sprinkle them with earth, slightly compacting the soil around the trunk.
Install the stake
Image: Hitsad TV / YouTubeCarefully drive the stake, 1.5–2 m long, into the soil so that it is sufficiently stable, and tie the trunk to it. This will give the tree the support it needs until it gets stronger.
Water the seedling
Image: Hitsad TV / YouTube Make a watering hole 5 cm deep, 20-30 cm in diameter, around the trunk by removing the soil from the center to the edges with a hoe or small spatula.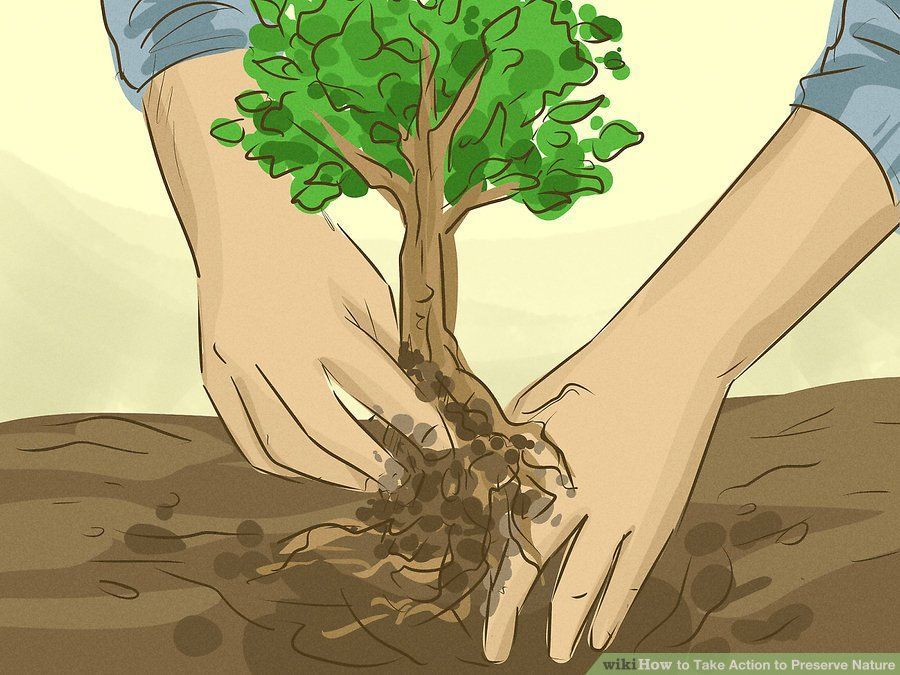 Gently pour plain water into the hole in small portions, allowing it to soak. For a young tree, two buckets of 10 liters will be enough.
Mulch the trunk circle
Shot: Alexander Kvasha / YouTubeThis technique will prevent the soil from drying out and prevent weeds from germinating. Peat, compost, dry leaves, wood chips or rotted sawdust are suitable as mulch. They need to be poured in a layer of 3-5 cm around the trunk along the diameter of the landing pit.
How to care for a tree
In the first year, caring for a young tree does not cause much trouble. It is enough to follow just a few simple rules:
- Cover the trunk of the seedling from the root to the lower branches with garden whitewash to protect the young bark from sunburn.
- Refrain from top dressing, because all the necessary nutrition was introduced when planting in the ground.
- Periodically loosen the soil around the trunk and remove weeds.
- In severe drought, water the tree liberally.
Learn more