Sloping walkway ideas
61+ Sloped Backyard Ideas on a Budget [You'll Love the Photos!]
Feeling a bit daunted by making something beautiful out of your sloped backyard? Don’t panic! We’ve got all the best ideas for landscaping a sloped garden on a budget!
Some of the most beautiful and creative garden ideas I’ve come across have been on sloped land. Having extra height and different levels gives you much more scope to create intriguing features in your yard.
So whether you want to spruce up your backyard slope – or if you’re looking for a fun outdoor project, then you’ll love these landscaping ideas.
Let’s look at some of the best-sloped backyard ideas on a budget!
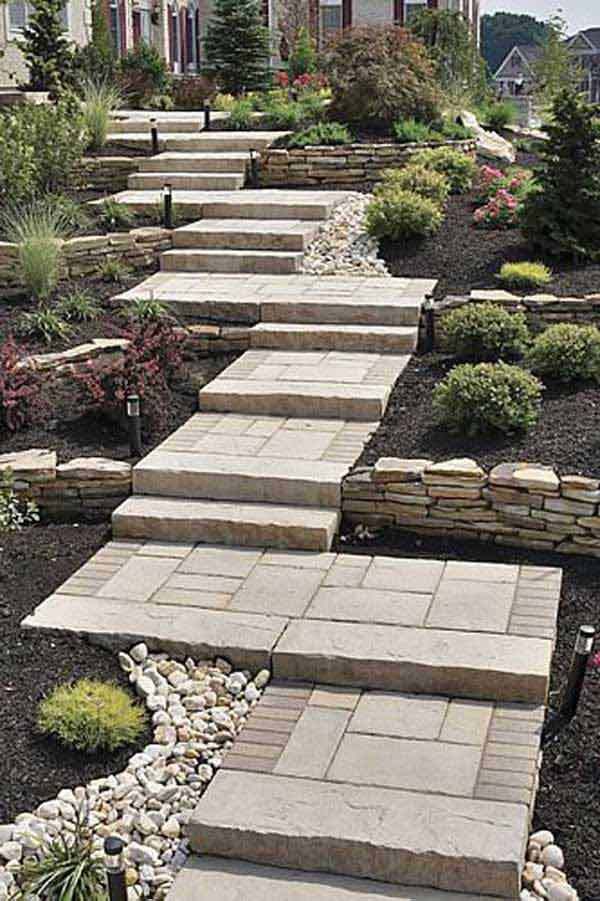
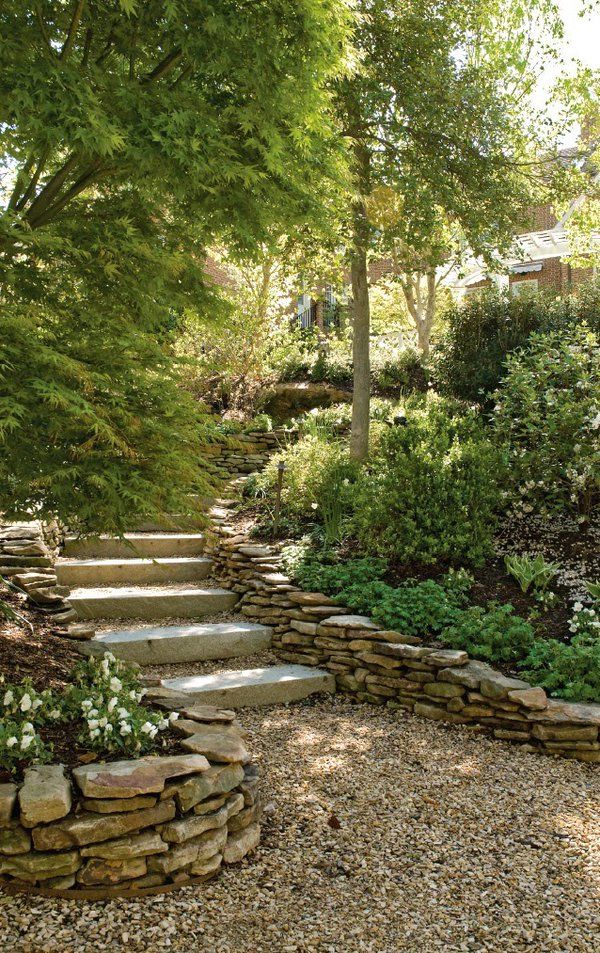
1. Stone Slab Path for Sloped Backyards
I love this legendary sloped yard from the Green Thumb Blonde’s blog. The added flower garden looks peaceful, serene, and it makes perfect use of the real estate. The stone steps also look charming.This stone staircase would make a great feature in any sloped backyard. Stone slabs can be relatively inexpensive, or you may even have some lying around your land.
2. Easy Raised Garden Beds for Sloped Land
Raised vegetable garden on a slope by Deeply Southern HomeI love raised garden beds because it’s easier to manage rogue weeds! Even if a few weeds sprout up – it’s straightforward enough to spot them when they’re inside of your raised garden bed.
Building raised beds on a slope is a genius use of space and uses less building materials – especially compared to constructing them on flat land.
3. Upcycled Sloped Backyard Water Feature
Check out this borderline-genius yard slope feature from Pilgrim and Pie. I’ve never seen more creative usage of watering cans. Or a backyard slope!The best thing about having a sloped backyard garden is that the water runs downhill! A downhill slope eliminates some friction when creating a great upcycled water feature, such as this innovative watering can design.
Read More – How to Make an Epic Bubbling Rock Fountain!
4.
 Turn Your Slope Into a PlaygroundImage By Ashville Playgrounds
Imagine how much fun the kids will have in this sloped-garden-turned-play-haven! Installing a playground is a great use of the natural slope of your backyard.
5. Sloped Backyard Seating Deck
By Pretty Pink Patch on InstagramDon’t think you can’t have a flat area to sit outside just because you live on a slope! Wooden decking is a quick and inexpensive way to create a level seating area for a sloped backyard.
6. Turn Your Slope Into a Beach
Image from SunsetThis is such a wonderful idea for your sloped backyard! If you love going to the beach, you’ll love this idea. And so will your pets!
The creator, Bud Stuckey, built this 100-square-foot beach for less than 200 bucks, in two days!
7. A Waterfall Cascading Down the Slope
Tutorial and images by HometalkYou’ll be totally obsessed with this idea. Whether you’ve always wanted a waterfall (me, me!) or you’ve never considered it before – this full tutorial with photos will get you excited about the idea!
This waterfall cascades down a long slope and ends in a koi pond. And the best thing? The tutorial shows you exactly how to do it yourself, in your own backyard!
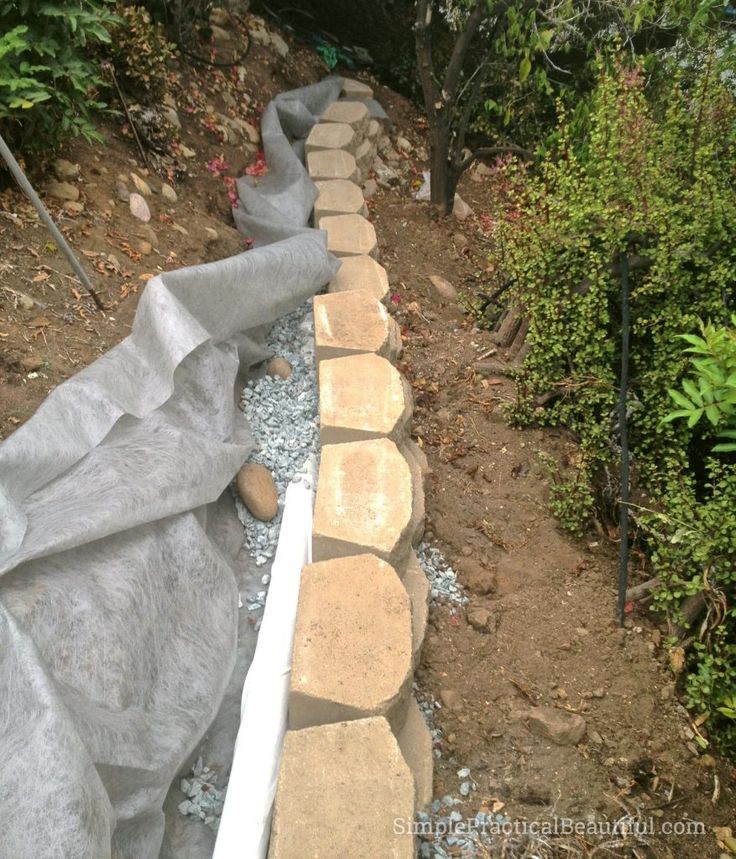
8. DIY This Rock Retaining Wall
Image and tutorial at HometalkThis is a full tutorial, with pictures, instructions, and a video! Learn how to build a rock retaining wall just like this one in your own sloped backyard.
It’s ultra-cheap to DIY, too!
9. Terraces for Sloped Backyards
By Reverie Interior Design on InstagramBring a Mediterranean vibe to your yard with some simple terraces. Plants such as rosemary and lavender will thrive in these rocky conditions and bring color and fragrance to your outdoor areas.
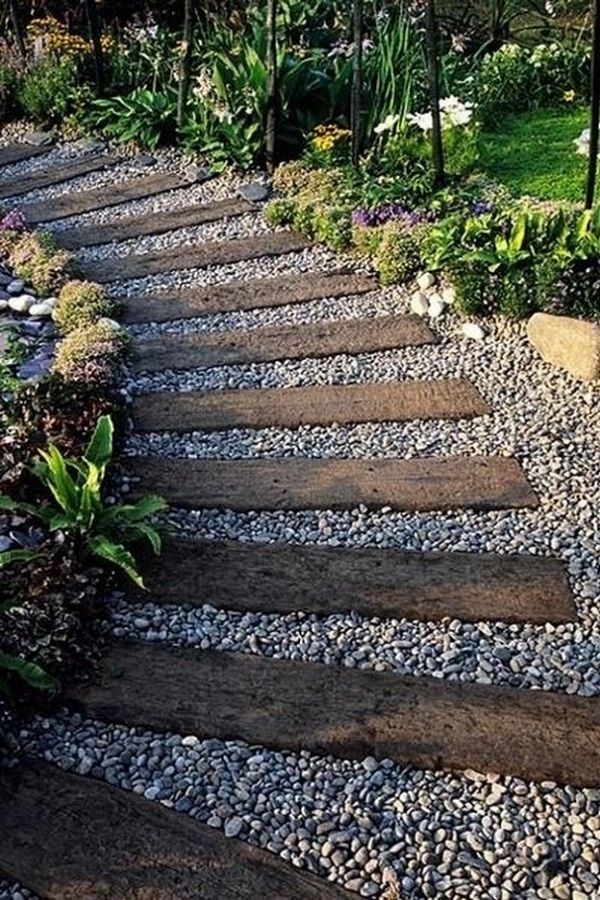
10. Budget Path for Sloped Backyard
Here’s an excellent example of loose stone (gravel) stairs to accommodate an upward slope. Read more about how to build steps on a hill from the Scrappy Geek blog!Putting in some simple wooden supports is a quick and easy way to build steps into a slope. You can either fill the steps with gravel or use topsoil for a cheaper option.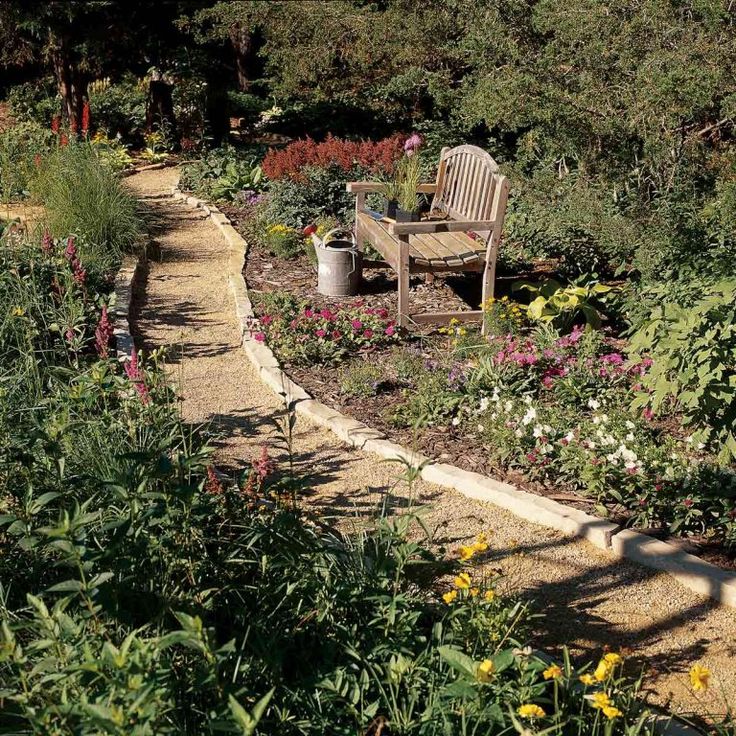
Read More – How to Make a Beautiful Rockery Garden!
11. Sloped Garden Flower Trail
By White Flower FarmCreate a spectacular point of interest with a beautiful flower trail through your sloped backyard with this tutorial by White Flower Farm.
12. Add a Stone Bench Seating Area With Fire Pit
Image and by Irytek102 on Reddit – see the full photo gallery here.What an incredible way to make use of your sloped backyard! It’s not hard to imagine many wonderful nights under the stars, lounging with family and friends, the firepit crackling before you…
A great idea!
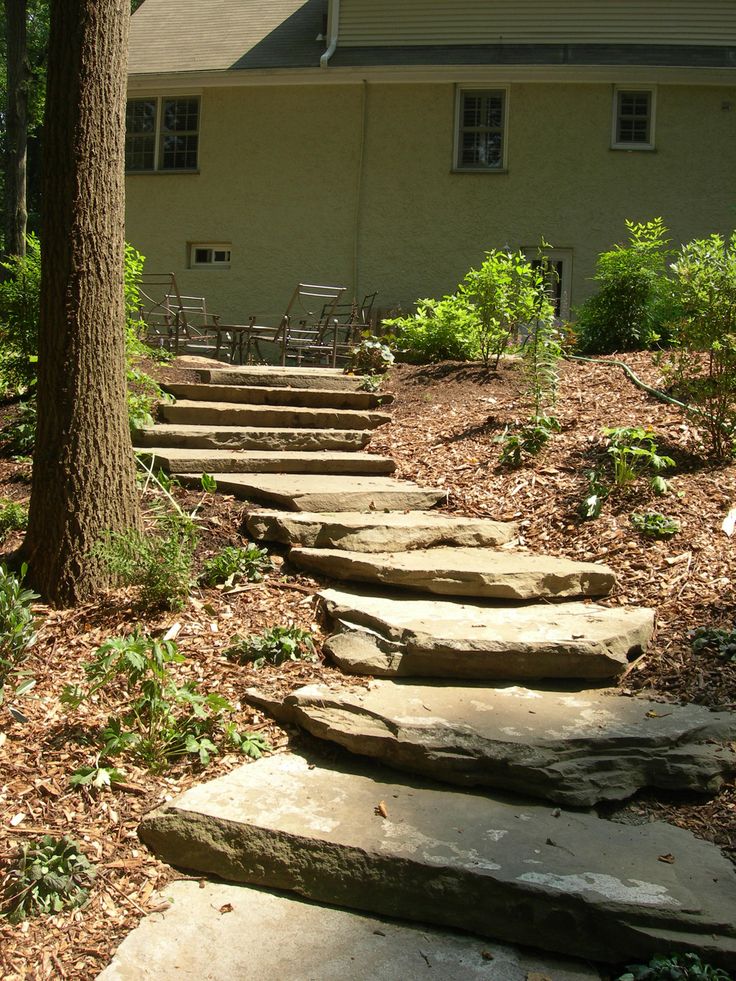
13. Carve Rustic Stone Steps Out of the Hillside With Flagstone
Image and full tutorial by Jaime HaneyJaime Haney lists all the steps to your very own set of flagstone steps on his blog, with plenty of photos to show you how to go about it. These stone steps fit beautifully into the natural landscape and would make a stunning addition to any sloped backyard!
14.
 Use Pallets to Create Gardens on a SlopePallet garden idea photo at Hometalk
Julia didn’t like her sloped garden… It was hard to mow and harder to keep it looking nice. She stumbled upon the idea of using pallets as gardens.
Julia isn’t done yet. She’s planning on adding more pallets and stepping stones – then maybe adding vegetables next year.
A fantastic, budget idea!
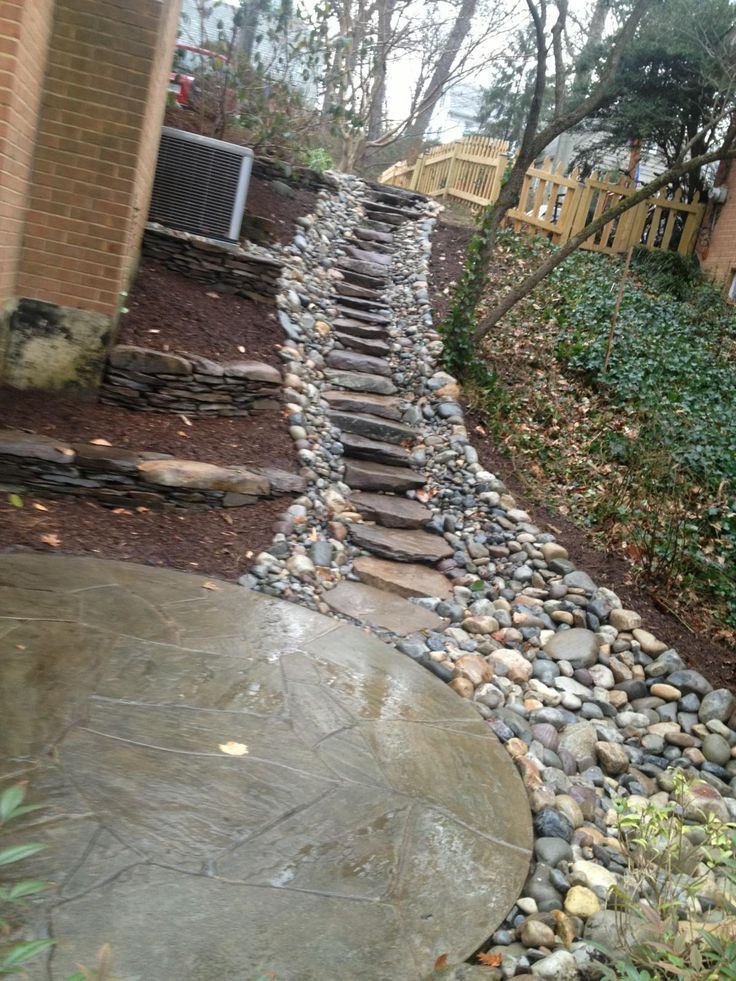
15. Budget Pond for Sloped Backyard
Using the sloped ground to create a pond gives you so much more scope to get creative, adding in waterfalls and streams running through your yard!
16. Control Run-Off With Stone
By Denise on HometalkLook at how Denise controls water run-off in her sloped garden!
She needed a beautiful idea to help control the flow of the heavy, erosive Arkansas rains. The idea above is one of her downhill paths which winds through a variety of relaxing herbs.
17. Increase Your Space With Raised Beds
By DIY Design FanaticThese raised gardens, built by Pam in her Carolina garden, are a great way to increase your usable space on a slope!
See how she went about it on her blog.
18. Build a Picnic Table That’s Always Level
Image by HometalkHere’s a simple hack to build a picnic table for your sloped backyard! You can easily DIY this with simple shelf brackets and a tabletop.
19. Build a Shade Garden on a Slope
Shade garden on a slope. Image by Hometalk.This is a lovely idea for a budget shade garden in your sloped backyard. Plant hosta, painted ferns, coral bells, variegated Jacob’s ladder, and Astilbe for a natural, work-with-nature approach.
20. Low Maintenance Lawn Alternatives
Clover is one of the most underrated cover crops for your homestead. Check out the guide from Treehugger for more tips on clover laying – and why clover is sometimes better than a grass lawn!The big problem with sloped lawns is how to mow them! Get around this problem by planting a low-growing alternative lawn, such as clover or creeping thyme.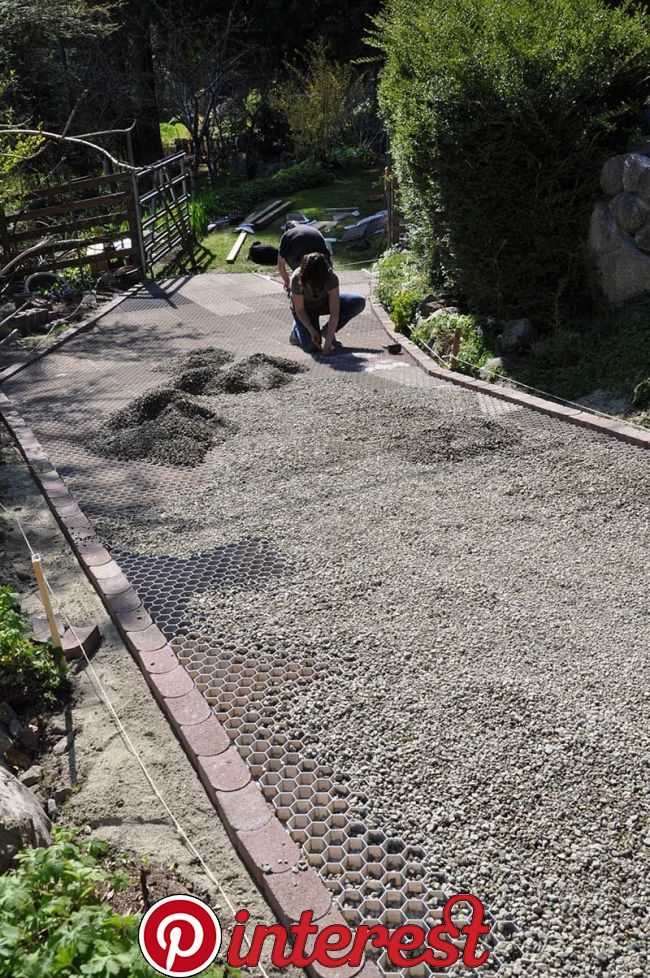 You can buy premium quality, Oregon-grown white clover seed on Amazon!
21. Sheltered Seating Area for Sloped Backyard
If you’re not opposed to masonry work, then this breathtaking sheltered seating from SecretGardenOfMine is one of our favorites. It looks cozy – and private!This sheltered seating area would be great for anyone on a tight budget, as long as you’re not afraid of a bit of hard work! If you don’t have any bricks handy, you can make the retaining wall from reclaimed wood instead.
Read More – How to Easily Stop Weeds From Growing in Rocks!
22. Sloped Backyard Rock Garden
By Happy Haute HomeHere’s another brilliant landscaping idea for sloped gardens. I love the rocks – I feel like they add a massive amount of personality to the sloped yard!
Rocks are a great way to add structure and help prevent erosion in a sloped garden. Interplanting your rocks with fragrant herbs and flowers will bring scent and color to your yard.
23. Low-Cost Woodland Trail
By marieanned1 via InstagramTrees are a great way to retain soil and prevent erosion on sloped land. A woodland trail can be very cheap to plant, especially if you have a source of trees such as willow to take cuttings.
24. Children’s Play Area for Sloped Land
By garykidson via InstagramAnother great advantage of sloped land is that you can get creative with the kid’s play area. A longer slope equals a lengthier slide, perfect for hours of outdoor fun!
25. Sheltered Fire Pit Area
By Olive BranchI love how the firepit rests within a slope! I think this adds to the privacy of the fireplace and also makes the party feel more exclusive. Awesome!
Building a fire pit in a sheltered area on your sloped land is a clever way to stop smoke blowing everywhere at your next BBQ.
26. Stock Tank Swimming Pool Built Into the Slope
Image and design by Cuckoo4DesignI love the creativity of this sloped landscape! Who else wants to go for a dip? Having a hilly yard was never so relaxing – and refreshing!
Don’t think you can’t have the luxuries in life just because you’re on a tight budget!
This excellent swimming pool built into a sloped backyard derives from a stock tank. You may be able to pick a secondhand tank up for very little money or even barter or swap!
Read More – How To Build a Roaring Cinder Block Fire Pit Grill!
27. Create a Gorgeous Retaining Wall Garden
Create a tiered garden with retaining walls at different heights, complemented by gorgeous, lush plants that cascade over the edges. (See our post on the most stunning cascading plants for retaining walls!)
I could see myself grabbing my morning cuppa and meandering through this peaceful landscape!
28. A Slope of Flowers
Completely fill your slope with gorgeous flowering plants for a wall of flowers. Add scented flowering plants to make it even more impressive!
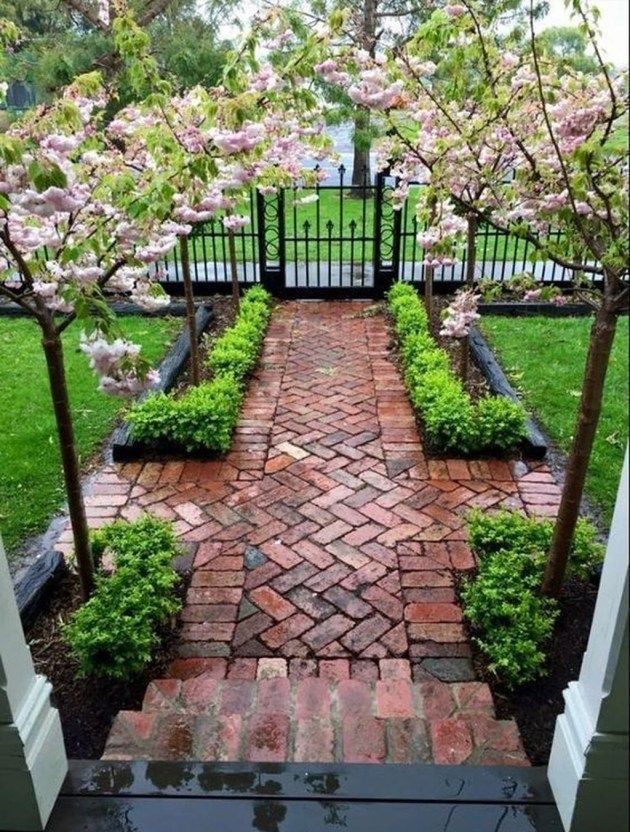
29. An Inviting Path Up the Slope
Image by Backyard ReflectionsThis is a very impressive design idea for sloped backyards! The lawn path, meandering through stone retaining walls, looks incredibly inviting – I just want to skip up there! Add a seating area up the top for the ultimate backyard relaxation.
30. Use the Natural Slope as a Waterfall
Make your sloped backyard work for you and with nature by adding a waterfall feature! Birds and wildlife may come to visit and you’ll love the sound of trickling water in the background.
31. Create a Classic Landscape With Natural Stone
Natural stone and big rocks create this lovely landscaped garden on a slope. Add lots of creeping plants to turn it into a rockery the neighbors will be envious of!
32. Use Centerpieces to Break the Slope
Break up the slope with big centerpieces. Include big, natural rocks, pots, shrubs, and trees.
33. Rock Walls to Level the Ground
Build rock retaining walls at different heights to go with the slope of your backyard. Increase your space and create an interesting centerpiece at the same time.
34. Vertical Rockery
Create a vertical rockery retaining wall with big rocks and drought-hardy plants, succulents, and creepers.
35. Succulent Water Landscape
Go from drab to fab with this water feature, surrounded by succulent plants.
36. Go All-Out With Style
This sloped garden has been turned into an incredible, drought-hardy wall of beauty. Use Yuccas or Pandanus trees for some vertical interest pieces, and lots of colored-foliage plants.
37. Retaining Wall Surrounding the House
What an amazing design idea! This project would take a fair bit of time but the result is definitely worth it. The gorgeous rock wall adds a beautiful, gigantic raised garden to your backyard and it complements the house.
More Sloped Backyard Ideas on a Budget
Feast your eyes on these amazing photos of sloped backyards and use the inspiration to turn your own slope into a masterpiece!
38. Giant Slip and Slide
By Hometalk39. Terrace Your Slope
By Hometalk40. DIY Stacked Stone Garden Wall
By Hometalk41. Build a Fort on a Slope
By Asheville Playgrounds42. Terraced Backyard
By Fresh Perspective Landscapes43. Cave With Slide
By Hometalk44. Amazing Tranquility on a Slope
By Paradise Restored45.
 Stairway to Heaven
46. Hillside Slide
By Momtessorilife47. Rock Garden on a Slope
Via Bobvila48. Native Plant Wonderland
Via Bobvila49. Artwork on the Hill
By Gro Outdoor50. Build a Deck
Via Hometalk51. Stabilize Your Slope With Pallets
By Good Life Permaculture52. Gardens With Trellis
By Living Hillside53. Chicken Coop on a Slope
By Barbara Pleasant54. Horse Trough Hillside Garden
By Rain Barrel Garden55. Learn to Landscape a Steep Slope the Permaculture Way
By Good Life Permaculture56. Stunning Sloped Garden Design
Image by Cultiverity57. Mulch It Well
By Yes I Talk to Plants58. Retaining Wall With Plectranthus
By The Indigenous Gardener59. No-Mow Slope With Wild Grasses
By The Indigenous Gardener60. Use Groundcover Plants to Hold the Slope
By The Indigenous Gardener61. Make It Maintenance-Free With Helichrysum and Gazania
By The Indigenous GardenerSloped Backyard and Hilly Landscaping FAQ
Adding cement steps or a concrete walkway is one of the best ways to upgrade your sloped garden.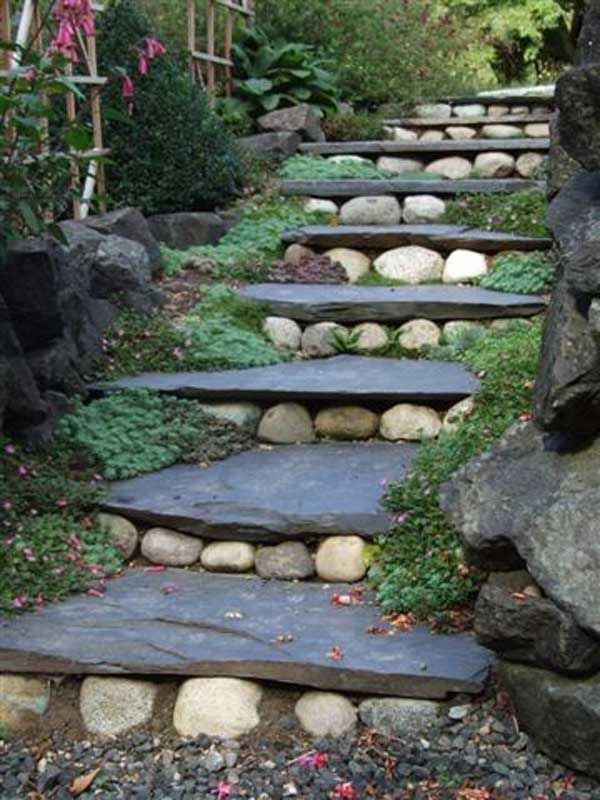 If you don’t have the most significant landscaping budget, then there are other alternatives. No worries!
We spend oodles of time researching the best landscaping ideas for sloped backyards.
We also have a ton of experience getting our hands dirty – and we’re happy to share our best sloped backyard insights with you.
Let’s begin!
Is It Bad to Have a Sloped Backyard?
Not at all! Sloped yards might take more effort in landscaping, but you have many more creative opportunities when gardening on a hill.
One thing to be aware of with a sloped backyard is where the water runs off. If the land is sloped downhill towards your house, you might end up with a flooded home! However, the correct drainage should sort this problem out.
How Do I Make My Sloped Garden Look Nice?
Most good things take time and effort, and that includes making your sloped garden beautiful! Start small by focusing on just one area rather than embarking on a massive and daunting landscaping project.
The quickest way to add some interest and features to a sloped garden is to install rock (or stone) steps and add a line of flowering plants or shrubs alongside them. Add some solar lights, and voila – you’ve got a sloped garden feature!
What Can I Plant In My Backyard Slope?
When planting on a slope, consider that water and soil retention may differ from your flatter land! The sloped ground may dry out more quickly, and nutrients may run off the soil.
Look for plants with a healthy root system that will anchor them into the ground. The strong roots will help them to stay put in heavy rainfall and reduce soil erosion.
Perennial plants work better than annuals on sloped land, as they will provide ground cover all year round. My favorites would be edible perennials, such as globe artichokes, interplanted with herbs and smaller fruit bushes.
How Do You Prevent Erosion on a Sloped Yard?
There are two ways to prevent erosion on a sloped yard, either by strategic planting or by landscaping the area.
Using plants is the most natural method of preventing erosion. Roots of trees, shrubs, and plants will hold onto soil and even improve the quality of the dirt over time.
If you have a severe erosion problem, then you may need to give nature a hand. Use supports made from wood, brick, or rock to retain soil, particularly in areas with a high level of water runoff.
What Is the Best Ground Cover for a Hillside?
If you are looking for ground cover for a hillside, look for low-growing plants which spread quickly. Ideally, you don’t want to be mowing or strimming your hillside more than necessary, so plants that are low maintenance work well here.
To cover bare ground on a hillside quickly, scatter seeds of fast-spreading plants such as clover or mustards. You could also consider sowing a wildflower mix to attract beneficial pollinators to your garden.
These majestic stepping stones are one of the best ways I’ve found to upgrade your backyard slope instantly.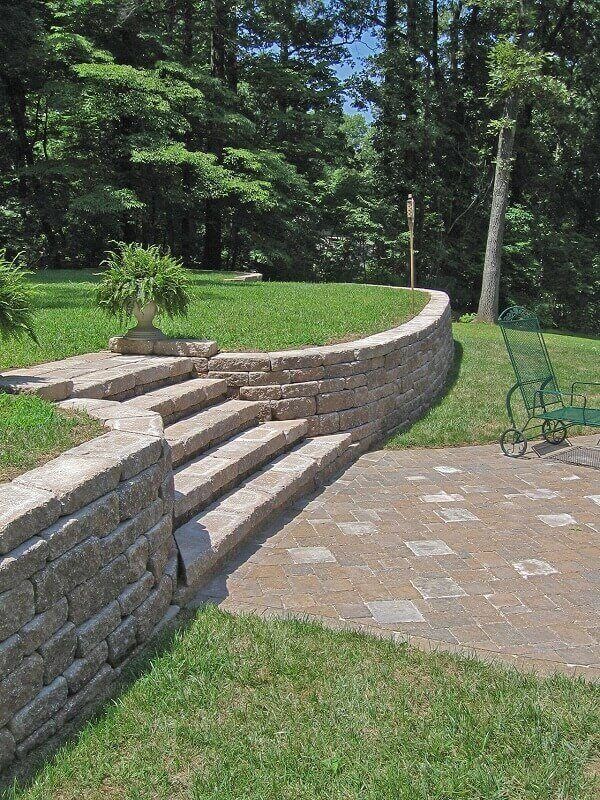 Excellent for rockery gardens or simple footpaths!
What Are Your Favorite Sloped Backyard Design Ideas?
This alpine slide looks like it takes serious work to build from scratch. However, it’s one of the most elegant methods to complement any slope, hill, or incline!We’re always trying to find sloped hill ideas from homesteaders all over the world!
If you have some sloped hill ideas that we haven’t thought of yet – please share!
Also – let us know which sloped hill ideas are your favorite? Does anything catch your attention?
Thanks again for reading!
Please have a great day!
Read More – 21+ Epic Texas Landscaping Ideas for a Flourishing Texan Garden!
Turtle Stepping Stone
Garden Turtle Stepping Stone - Cast Iron!
$24.00 $21.17
Want an awesome-looking stepping stone with tons of personality for your sloped yard? I love the detail on these turtles!
These cast-iron stepping stones are heavy-duty and are roughly 13-inches long by 9-inches wide and 1/2-inches thick.
Get More Info
We may earn a commission if you make a purchase, at no additional cost to you.
10/12/2022 05:32 pm GMT
Author
Backyard Slope Landscaping Ideas - 10 Things To Do
Break Out in Tiers
1/11
Creating several tiers on a sloped property can help manage erosion and give you the opportunity to layer different plants and landscaping elements for a cohesive design. Whether you use railroad ties, stone pavers, or concrete to form the tiers, they will make a dramatic impact on the overall look of your property.
Related: 9 Clever Landscaping Hacks for Your Best-Ever Yard
istockphoto.com
Build Some Stairs
2/11
If you choose to let vegetation cover your sloping property in glorious abandon, impose a little order by building a set of stairs leading up to flatter ground.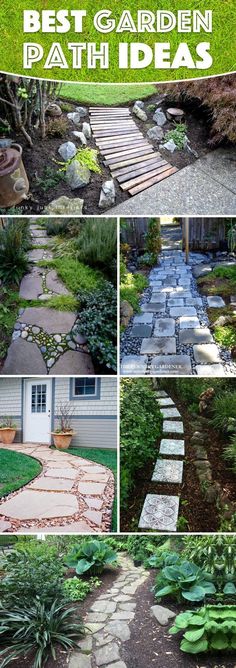 Whether you opt for a wooden staircase or concrete steps, this garden feature will blend into the landscape far better if it’s surrounded by plantings on either side.
Related: 12 Perfect Plants for Lining Your Pathway
istockphoto.com
Make a Natural Staircase
3/11
Use a natural material like stone to create a stepped pathway through your sloping property. A stone stairway will complement surrounding plantings and help anchor your landscaping design.
Related: 7 Thrifty Designs for a DIY Walkway
istockphoto.com
Advertisement
Design a Waterfall
4/11
If you’re ambitious, use the height that your hilly backyard provides to your advantage, and build a sensational water feature. The soothing sound of water will bring a relaxing air to your outdoor space, turning it into your own private oasis.
Related: 10 Outdoor Living Ideas to Steal from California
istockphoto.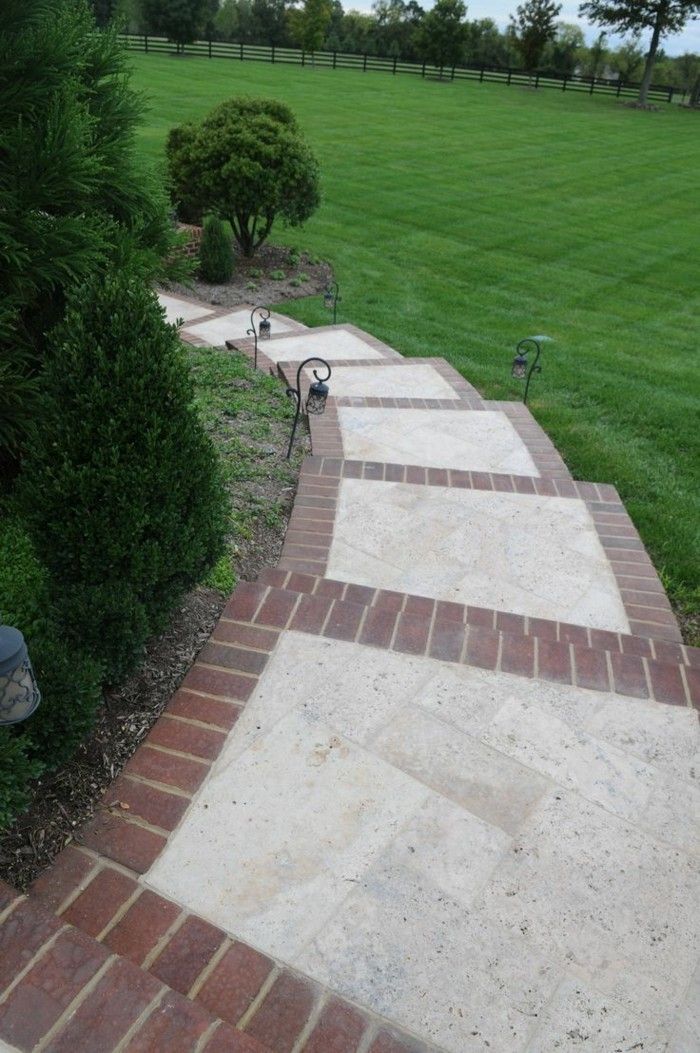 com
com
Lay a Winding Path
5/11
A winding or switchback path can make it much easier—and safer—to explore a sloped piece of property. A meandering pathway also provides an attractive focal point and draws the eye through the landscape.
Related: 10 Inspiring Ideas for Your Side Yard
istockphoto.com
Erect a Retaining Wall
6/11
You can make a sloping property more functional by cutting away a portion of a hill and installing a retaining wall to hold back the soil. This is a great opportunity to create a dedicated planting area behind and along the retaining wall, while reclaiming a portion of your yard for an expanse of grass on level ground.
Related: Edge Your Beds: 11 Easy Ideas for Landscape Borders
istockphoto.com
Advertisement
Cultivate a Rock Garden
7/11
Hillsides can pose a landscaping challenge for plants, which can suffer from the soil erosion or poor drainage typical of sloping properties.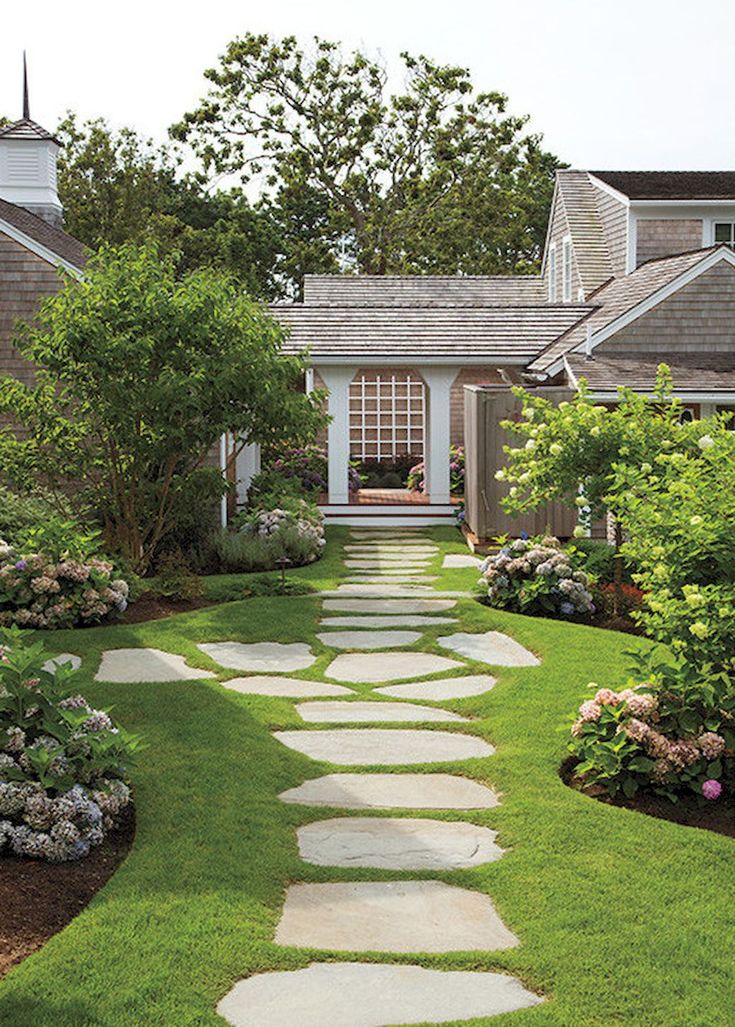 When you arrange rocks of varying shapes and sizes on your hillside, you create a stable base for rock-loving plants like stonecrop, ornamental grasses, and creeping ground covers. A rock garden looks lush and satisfying to the eye, and reduces your maintenance load in the yard.
Related: 25 Plants for Your Easiest Garden Ever
istockphoto.com
Devise a Destination Fire Pit
8/11
Building hardscapes into a sloping property is a common and rewarding landscaping practice. When a design culminates in an alluring destination like a fire pit, you’ll draw visitors through your yard and transform what might otherwise be neglected space into the place to be.
Related: No Money to Burn? 9 Fire Pits You Can Afford
istockphoto.com
Install Veggie Beds
9/11
You can take advantage of unused real estate on a slope that gets full sun by installing raised beds for vegetables.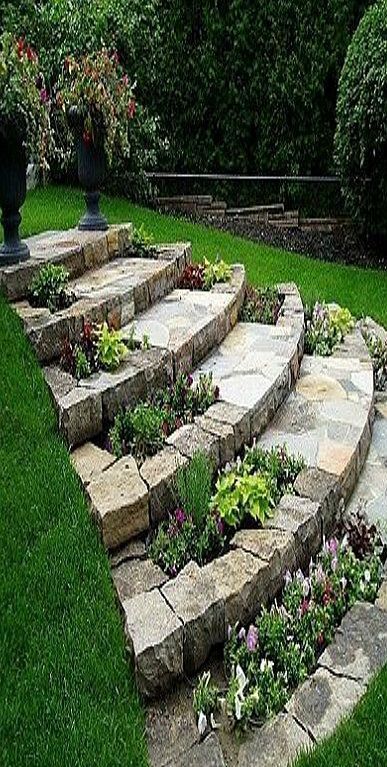 Deeper sections of the beds can be used for root vegetables that require more soil, and the shallower portions will be perfect for herbs and vining plants.
Related: 13 Creative Designs for Easy DIY Planters
istockphoto.com
Advertisement
Rely on Native Plants
10/11
Festooning a hillside with plants that are native to your area can help make maintenance easier in a spot that would be difficult to mow and landscape. With native plants, you can be fairly certain that they’ll be successful without much help from you, and they will help reduce erosion by providing a network of roots to hold soil in place.
Related: 25 Amazing Plants That Are Native to North America
istockphoto.com
How to Cope with a Slope
11/11
With the right plan, even a steeply sloped backyard can be useable and enjoyable.
bobvila.com
Don't Miss!
If you have the money to hire a handyman for every household woe, go ahead.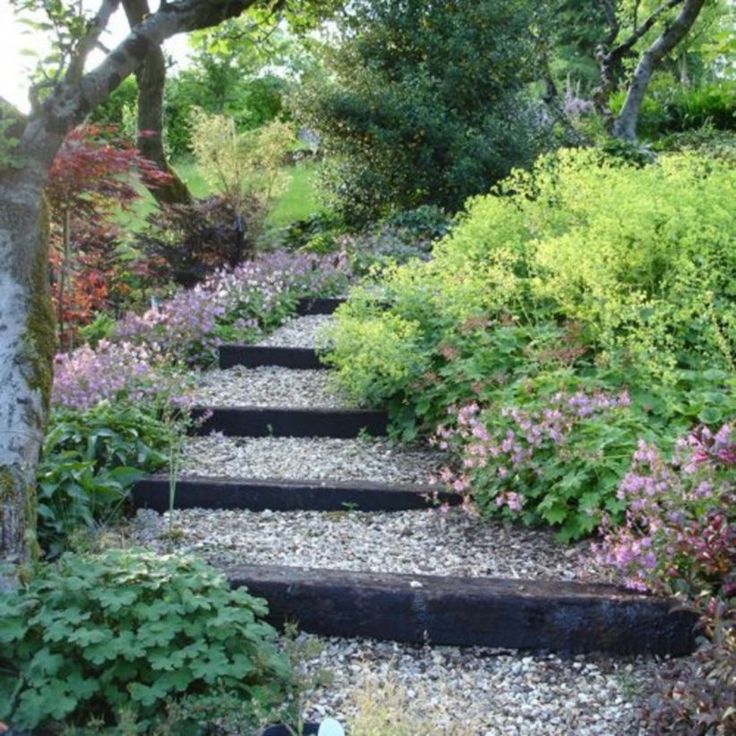 But if you want to hang on to your cash and exercise some self-sufficiency, check out these clever products that solve a million and one little problems around the house. Go now!
If you have a plot with a slope, then here are ideas, photos, tips for you. irregularities and
what ideas, the designer modifies this relief beyond recognition , but as soon as I opened the word, the topic always turned up easier and my lazy brain instantly clung to it, like a saving straw :).Well, there is nowhere to go, very rarely in our relief areas with a slope in Minsk and the Minsk region you can do without design, ideas, retaining walls, stairs, terracing and so on. So, let's figure it out together!
Basically, in such articles they write how cool and beautiful it is, then they add that you are very lucky, because you have a site with drops, create, everything is in your hands. All these parting words are abundantly “fertilized” with a huge number of ideas and a bunch of beautiful photographs from all over the world, and at the end of the article, some masochists definitely recommend smearing stones with kefir to root moss in retaining walls. But it doesn’t make it any easier for us, really :)
Since I like to understand fundamentally everything that includes the words design and landscape, this article is no exception. My main task will be not just sorting out ideas that are more misleading than helping , but rather an analysis of real practical experience that sets you up to understand and feel the characteristic and technical techniques that can help in solving planning issues related to your relief area, where is the retaining wall or stairs just a tool like other elements of improvement.
So be patient and let's deal with this difficult relief topic.
Pay attention in this context, the aesthetics of the stairs is very important, but I will not touch on this important issue within the framework of this material, since Dima has already tried and described everything in detail in this article - the stairs on the site.
First, let's find the beginning. Pay attention to this drawing, it clearly demonstrates the possibilities and consequences of the same relief. Which do you like?
What do we feel when we build a house and equip a plot when we see obvious relief differences? Surely we assure ourselves to think about it later during landscaping work. But after each rain, washed away soil and exposed small ravines remind of the inevitable.
Approximately the same feelings of anxiety are transmitted to me when I am engaged in the construction and improvement of these relief areas in Minsk and the Minsk region. And at the first meetings with customers, a clear emphasis and hope can be felt in the conversation. - "What do you think Dima, it is necessary to make retaining walls or you can do without them." You can easily, I answer, in your case, bring 60 cars of earth and fill up the lower part of the site right up to the roof of the already built bathhouse :)
Where do these fears come from!? It's simple, all people are mostly visual, and in this case they perceive the volume of their site statically and visually. Therefore, when we have a flat area, we perceive it expressively and whole, we easily navigate in further actions. Another thing is when our site has a clear slope and relief differences, which raises many questions: where to place a retaining wall, what to build, hire people or do it yourself, how to link everything into one whole, what and where should the stairs be, whether drainage and so on.
All of these factors prevent us from clearly seeing our site as a whole. And we, at the subconscious level, want to align everything and evenly divide it into terraces.
Have you ever wondered why there are so many TO-18 loaders in Minsk!? provide site planning services.
Machinists who plan our sections say - “so, now I’ll plan exactly here and then I’ll level it, don’t be afraid the owner will be like a runway.” And imagine if they thoughtfully approached the change in the relief, suggesting what to preserve and what to strengthen, our sites would noticeably change.
Dima-Dima again idealistic nonsense, tractor drivers thinking about harmony and compositional integrity in landscape design, they don't even know such words.
Hence the main consequences in the form of a banal layout and a heap of ill-conceived monumental structures on the site with which one has to live in the future. How to avoid this?
- First, stop perceiving elements (stairs, retaining walls, slopes) of terrain change as an existing problem in the form of self-sufficient volumes. It is necessary to perceive them as a logical, natural continuation of the relief of the site, where they are not dominant, but subordinate elements of one general idea. Here, without a hundred grams, ugh, you can't do without a plan!
Work out in detail on the master plan the possible options, thereby you will force your consciousness to perceive the area with the drops as a whole. Remember the plan provides an excellent opportunity for to see the interaction of all the fragmented elements and details, which is difficult to see in reality on the site.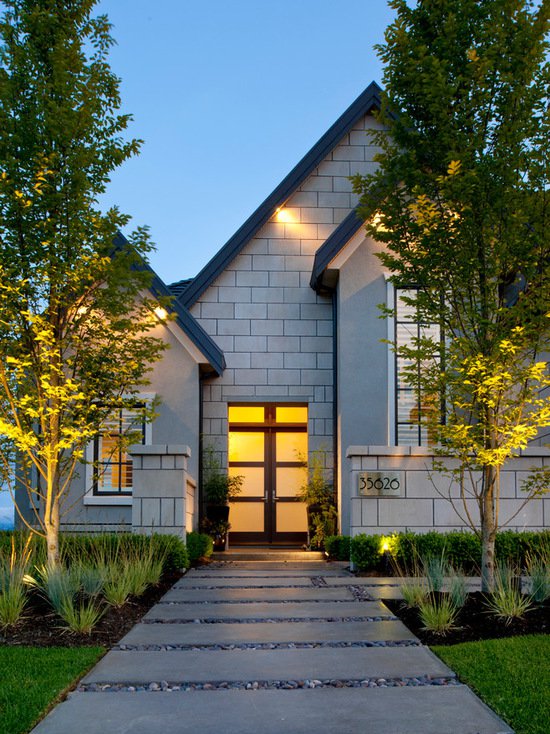 Each of you has his own manifestation of the relief, someone is in a lowland, someone has a tangible difference along the border line between neighbors, someone thinks where to put a house on a slope, and so on ad infinitum.
It is the hand-drawn plan that becomes a tangible breakthrough in the understanding of the site. Your, as it seemed to you, problematic topographic feature, now you can embrace it completely before your eyes, print 10 copies, edit over it with a marker, offer different options until you feel an interesting development of the scenario.
Further, working with the plan, you must constantly ask yourself the question, how else can I beat this drop?
- And here to start It is important to indicate where the household is located? If in your case the landscape is the dominant factor and you have chosen the site because of its views and the beauty of the surrounding landscape.
Then our goal is to further develop this theme and enhance the perception of nature.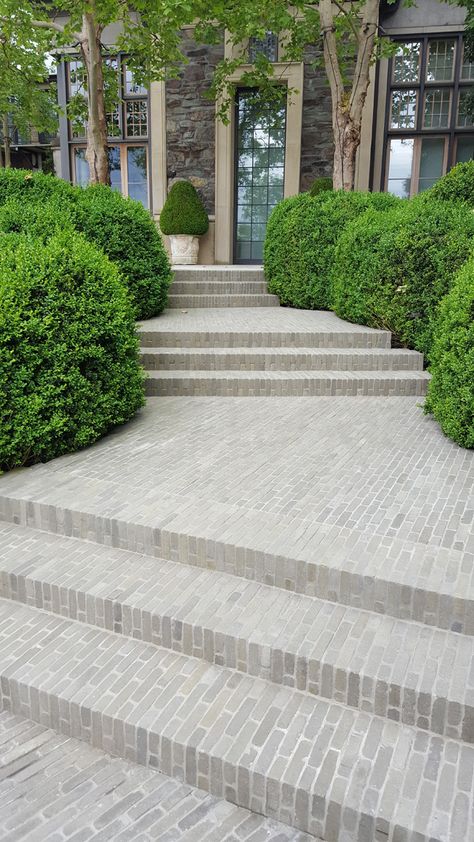
Make it the main goal and the general theme of your site. So at this stage it is important to know the circulation of traffic on the site (I hope you have already drawn a plan where the paths, bathhouse and other volumes will be!), set priorities - highlight the main movement, that is, from parking to the house, from the house to the bathhouse and secondary paths for walking around the garden, what is this for ?!
Look, many of the relief areas where I was engaged in construction and landscaping in Minsk had already filled “supports” in the entire width of the site from fence to fence. Moreover, the main movement to the lower part occurred only through one-twentieth of the retaining wall where there was a staircase, and for the rest of the length the tiled retaining wall with a parapet was an alien element and destroyed the usable space?
Don't you think that it is much cheaper, more logical, and most importantly, more organic to arrange a fragmentary retaining wall and stairs, and beat the rest of the drop using geoplastics and slope terracing.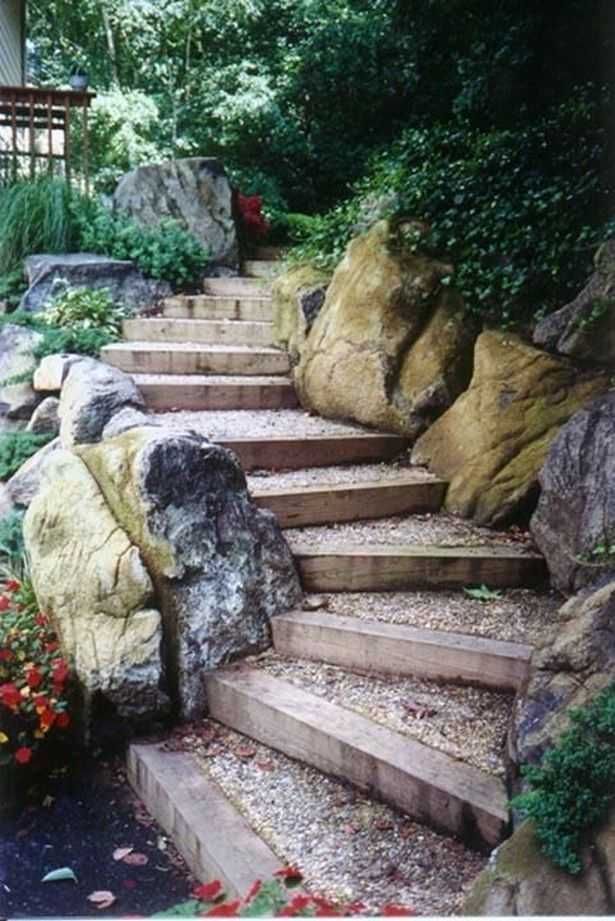
In this context, we are reinforcing our main goal to make the site feel as natural and organic as possible .
These slopes are subsequently ideal for creating a rock garden and lend themselves very well to landscaping with lawns and various crops that strengthen the upper horizon. In which you can design step-by-step stairs made of natural stone, arrange interesting patios, plant trees and shrubs, in other words, use them for their intended purpose.
The story on this topic, until I forgot. One early morning a man called me and asked me to urgently come to his site in order to solve the drainage problem, which was not related to landscape design. Arriving at the site in Tarasovo, I began to conduct hydrological surveys, and at that time he lamented for a very long time over the fact that he had chosen this site for building a house in the Minsk region. And now on its site with a strong slope at the very bottom there is always water and interferes with the construction work of the bath complex.
The granulometric composition of the soil of this area is loam, and besides, with a high COG. The customer insisted on carrying out drainage work. His house was being built for sale, and this wet moment confused potential customers. I offered him to turn the disadvantage into a distinctive feature. Namely, let a stream with a waterfall go down the slope and arrange a lake with fragrant water lilies near the bathhouse from below, attach a terrace on pillars to it.
Stormwater collected from the house is also to be dumped into this lake. On the spot, on the “knee”, I sketched out the concept and design of his site with a slope for him. At first, he was distrustful of this idea and probably thought “what kind of idiot this Dima is and who entrusted him with the level,” but then he apparently realized that for the same money for reclamation that he would dig into the ground, you can get elements that enrich the artistic site value. Accordingly, its liquidity in the real estate market will increase.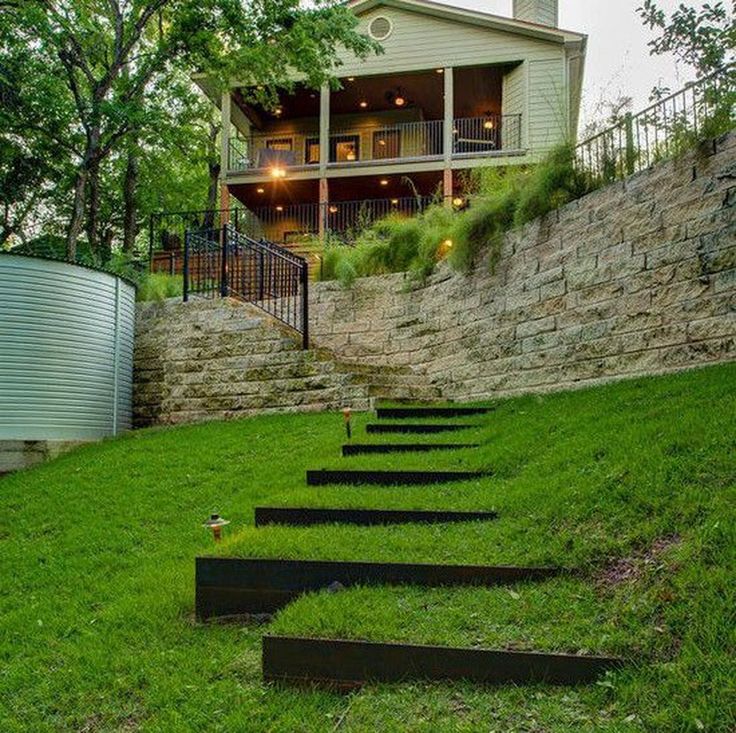 Subsequently, he applied for a project on this topic.
Remember, when you develop logical and characteristic themes on the site, then it will a priori look natural and beautiful.
Moreover, by manipulating the terrain, you enrich the variety of views from different vantage points. Make perspectives on other volumes of your garden semi-hidden and fascinating, gradually opening up.
Here is an example of the characteristic development of geoplastics. A customer contacted me with a request to find ideas for a site with a slope, and subsequently for pouring retaining walls, arranging a rolled lawn. His house was located behind Zaslavl among beautiful views of the hills, meadows and forests (this relief area in the region of Zaslavl and Logoysk in Belarus is commonly called Belarusian Switzerland) Moreover, he has no neighbors from all sides (lucky man). The house was built in the half-timbered style and lined with earth on all sides, and on three sides it is surrounded by terraces for admiring the Belarusian landscapes.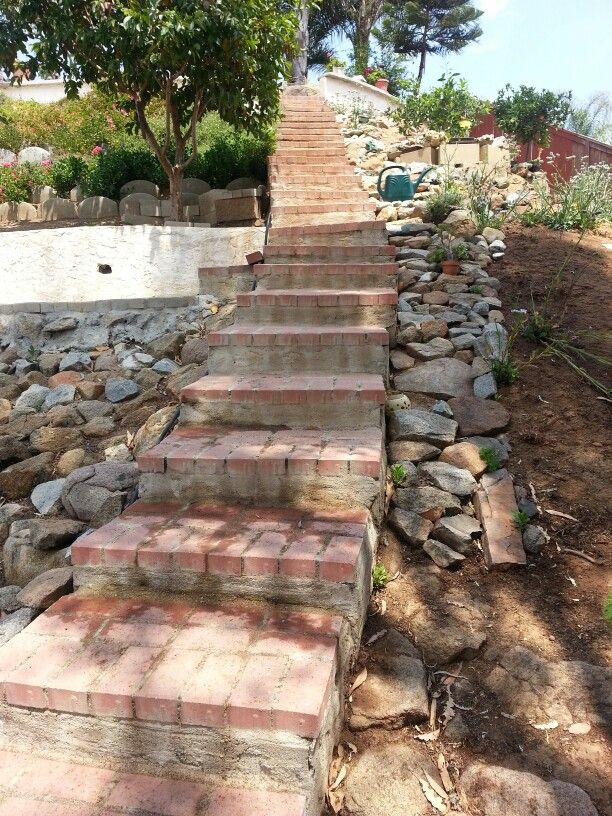
Having admired all this beauty, I didn't even think to fill in the retaining walls. I already intuitively knew what to do and was completely immersed in thoughts of how to technologically transfer the characteristic landscape motifs to the site of my client. As a result, the entire landscape around the house was designed in the form of green slopes with stones. In general, what is in the window is in the store.
- It is quite another matter if the plot is with a slope in the city or suburb of Minsk with a large number of neighbors .
In these conditions, our sites are limited geographically. We no longer have 25 acres, but usually 10 or 6 :( Every meter is important here. In this case, we need to work more carefully with the plan and think over the landscape design in detail.
And here we can safely state that we are part of society. In such dense urban, suburban and cottage areas, we feel like in an aquarium! dimension is the official entrance group in front of the house.
The second dimension is the area behind the house, and the third is the most sheltered, the most intimate for relaxation and reflection.Wind, noise, bustle is somewhere higher………
In this case, the sloping area is very good for us, since the descent is always identified with shelter and protection. And with proper zoning of the site, we can develop and enhance this feature of and eventually get a chamber patio, a small lawn or a gazebo by the pond, hidden from prying eyes, that is, our main requirement is to create isolation.Here is a good example.
Small plot on all sides densely populated by neighbors . I, while planning and designing a garden in Raubichi, Minsk region, isolated the most remote corner even more, and strengthened the feeling of intimacy by a general decrease. Moreover, he revealed and enhanced the characteristic natural features of the site with a slope, equipping from top to bottom a stream that flows into a pond under the terrace in the patio.The dimensions of this cozy patio repeat the dimensions of the terrace near the house. Everything is made from natural materials. Everything is focused on solitude and relaxation after a week of work.
- Important . In the city and the suburbs, natural materials - wood, stone, earth, plants, water - become even more important than in a distant village, where we are surrounded by all these textures in the literal sense. Therefore, make the most of natural materials to enhance your ecological island.
Let's look at a common planning mistake
Look, we can do it traditionally, just order the construction of a concrete retaining wall in Minsk, thoughtlessly pour it and we will get a lower terrace, or just 2 pencil cases crushing the most important area of the garden.It looks very disharmonious, but most importantly, these pencil cases subsequently determine the structure of landscape design.
In this example, we organized a retaining wall in the most active traffic zone in the form of a closed courtyard near the bathhouse, and designed the second part, where there is much less traffic, in the form of a descending slope that can be formed in the form of a rock garden or other volume. Such an arrangement will strengthen the relationship with the house and the bathhouse, create a much more harmonious development of landscape design, and in the future your stay will be much more comfortable. It turns out and saved and strengthened.
Important. Use the golden section rule. If you decide to combine a retaining wall with a natural slope, stick to the one-third rule. That is, either the slope occupies 2/3, and 1/3 is a support with a ladder, or vice versa. Use the laws of similarity and identity. Use the dimensions of the house and materials for facade decoration in the dimensions of retaining walls, patios, terraces.
Let's say you have a house with a width of 11 meters. If this size is used in the dimensions of the retaining wall, patio, gazebos, then such a direct interaction unites disparate volumes. Your main task is to avoid fragmentation of unrelated elements.
Example “island” . I designed and built this zone in the form of a semicircle, which forms the lower island where there will be a gazebo and around the lake. Please note that on the side of the retaining wall there is a bridge for connecting two ponds, and the composition will be completed by a waterfall falling into the lake from the retaining wall.
This example demonstrates a fragmentary retaining wall with stairs leading to the bath complex, I organized the rest of the area in the form of a natural slope.
Practice shows that many individual developers do not consider one of the best and more logical options for placing stairs, retaining walls and leveling the height difference on their site, on the side of the house, let's look at this option.
Each house has passages between the wall of the house and the fence on both sides, usually narrow.
These passages are ideal for the construction of stairs and retaining walls
1) With this arrangement, the stairs with the retaining wall will be located in narrow, little-used areas, as a result of which this gives us the opportunity to use the most important area behind the house without drops and heaps of concrete walls, for example, for family lawn.
2) There are many more options for technologically linking the landscape design with the design of the stairs, retaining wall or a group of stairs, terraces, as there are two verticals, a fence and a house wall. In which runs of stairs can rest. In addition, it is easy to use structures for vertical gardening.
And here is a clear example of a 1.5 meter difference, equipped on the sides of the house.
When designing the space of your site, always try to perceive retaining walls as an important element that must form any isolated zone .
That is, retaining walls are always more harmonious when they predetermine or highlight the neighboring volume with their shape.
Being engaged in landscape design and construction of this site in the Minsk region, I attached double importance to all retaining walls. Please note that in addition to its direct task - holding the rock garden soil, it is part of the "yin-yang" zone, that is, a structural continuation of another zone. You may ask what came first, an egg or a chicken :) In this example, it doesn't matter, what matters is a well-thought-out drawn landscape design plan that allows you to work out the neighboring volumes in detail.
The next example on this topic. Pay attention to what faceless entrance groups we have and landscaping in front of cottages in the Minsk region. We just put the road board right under the line and that's it! In this context, I designed this group in the form of a low stone retaining wall giving the shape of a wave, which, firstly, fulfills its direct task - cuts off the roadway from the local area, and secondly, forms cozy lawns with plantings, clearly demonstrating that landscape design is here begins in front of the house and gradually intensifies throughout the entire relief area.
Once again, the most important thing is not to make a common fatal mistake, do not divide the most important part of your garden behind the house “stupidly” into fires, you can always find an interesting, and most importantly more organic development of the scenario. Moreover, imbued with the idea that the places of change in the slope of the relief must necessarily be emphasized or strengthened.
Just think, for the same money that we “swell” into concrete in Minsk, thereby deteriorating the artistic value of our suburban area, we can create, for example, a floating terrace, deck or gazebo towering over the slope of the site. The entrance to which we will densely plant with vines, leaving only a narrow passage.Entering it, we will see the views and perspectives that we design. Such a terrace or patio will become the main and favorite feature of your relatives and neighbors, as well as a distinctive feature of your relief area , because in this case, the structure in the form of a terrace on an inclined area equally belongs to heaven and earth, isn’t it wonderful?! Well, at least not trivial.
Do not give up, look for exactly those features that are inherent in your terrain and terrain, enhance them and enjoy the result. And if you have a very complicated “puzzle”, drop the plan and photo of the site to my mail, I love embossed puzzles.
It would be absurd to answer all the questions regarding the planning of plots with a slope within one article. The most important thing that I wanted to convey is that, in fact, for the same money you can get a completely different result, so look, think, implement.In the second part, we will analyze the different options and materials for retaining walls on the site.
Don't be greedy, share the link to the article on social networks. Thank you, always your artist-designer Lomat Dima. MinskCurrent advice: How to add a useful article to your browser bookmarks: Press "CTRL+D". It's convenient and works in most browsers, try it now.Budget friendly garden path ideas gardening tips and tricks for gardeners
Agnes Agnes 26 March 2014
Instead of formal garden paths that require a lot of effort and money, why not try one of these casual ideas? Not only are they.
In any case, they will fit absolutely into any garden interior, and they will also look as if they were created by Mother Nature herself. We conditionally divide the design options for garden paths into three groups:
- paths covered with gravel or mulch
- paths paved with smooth stones
- "overgrown" paths.And now let's talk about each type and its subspecies separately.
Informal garden paths . These kinds of tracks do not have a clear shape or structure. As a rule, they are covered with gravel and with all their appearance they seem to emphasize how simple and cheap maintenance of the entire garden plot is. Yes, and making such a path is as easy as shelling pears: you just need to remove the sod layer, cover the bare soil with special fabric garden material and fill it with gravel or mulch on top. They can be both sinuous and completely straight. Often, such paths are still sprinkled with sawdust in small quantities. The contours of such a garden path can be beautifully designed using artificial gravel of a contrasting color, decorative mulch, washed stones or even ordinary rubble - there would be a desire and imagination, and there will always be a use for such materials.
Mulch . Bark chips, wood chips, and other types of organic mulch look great as garden path covers in any kind of garden, giving them a completely natural look. On the other hand, these materials are much lighter than gravel, so over time they crumble over the site, losing the clarity of the contours. But mulch is much cheaper than the same pebbles. Mulched paths decompose, being a natural organic material, so such paths will have to be renewed at least once every two to five years. In addition, there are nuances with their use: mulch, wood chips and bark cannot be used on damp soils with poor drainage.
You can buy mulch in handy bags at any specialized garden center, although you can save a lot by spending a little time looking for reliable local suppliers. And if you have a large enough lot, it will of course be much cheaper to buy in bulk than it is to buy lots of packages. These paths should be at least three feet wide and about three inches deep.
Gravel. If you plan to make long paths, it is better to use gravel, preferably washed. This material lasts forever, so you hardly have to spend energy updating tracks. Sometimes you can spend a little time weeding the weeds that have made their way through the stones, but their number will be negligible. If you plan to use lawn mowers on the path or roll a wheelbarrow along it, choose gravel instead of smooth pebbles. The jagged edges of the crushed stone are in close contact with each other, forming the most compacted surface. In addition, individual pebbles of rubble are less likely to fly out of the total mass to the side.
The price of gravel for garden paths varies depending on the type of stone and its size. Before buying, take the trouble to measure the approximate length and width of the proposed path to show your measurements to the supplier - he will help calculate the amount of gravel needed, because it is usually sold by the ton.
Even if the track is short enough, do not neglect the calculations of professionals. By and large, a gravel path will cost you about the same amount as a mulch path, as long as it is no more than three feet wide and three inches deep.
There are also a few restrictions on creating a gravel path. You should not use them right at the entrance to the house, as stones can inadvertently get inside. If your area has snowy winters, a gravel path may not be the best option. You are unlikely to enjoy clearing it of snow and ice. Such paths should end near the lawn or flower beds.
Borders and edging. Gravel and mulch paths need to be edged, otherwise the pavement material will somehow spread through the garden. You will also have to take care of the borders or edging to make the garden path look complete from a design point of view. You can use the following types of edging:
- plastic landscaping is quite cheap. In addition, they are easy to install - it does not take too much time.
If you don't want to look at the edges of the edging, mask them with flower plantings along the path.
- steel or aluminum edging forms a clearer shape, giving the track a neater look. Of course, they are more expensive than plastic elements, but they are better suited for areas with an inclined surface.
- brick and stone edgings are attractive and versatile. But they are quite expensive. Yes, and with the installation will have to tinker a lot.
- a concrete curb is somewhat cheaper than a stone one, but in all respects it is in no way inferior to it. New types of concrete curbs, made in the form of stone fragments - the best alternative to a real stone curb!
Landscape Timber is an economical alternative to stone and concrete edging. They look especially advantageous on a slightly inclined surface, if they are installed in the form of small steps.Mulch & Gravel Path Tips
- If the path is long, purchase or rent a cutting torch to remove grass and sod.
To remove the sod layer from short paths, you can also use an ordinary shovel.
- The height of the edging must be at least an inch higher than the surface of the covering material on the track.
- Be sure to cover the soil with a special cloth covering material before spreading the covering material to control the growth of weeds. Never use plastic. It will retain water, as a result of which the track will constantly be in a damp state.
- If you want the path to be dense enough to accommodate lawnmowers and other gardening equipment, use crushed stone to create it.Single stone paths
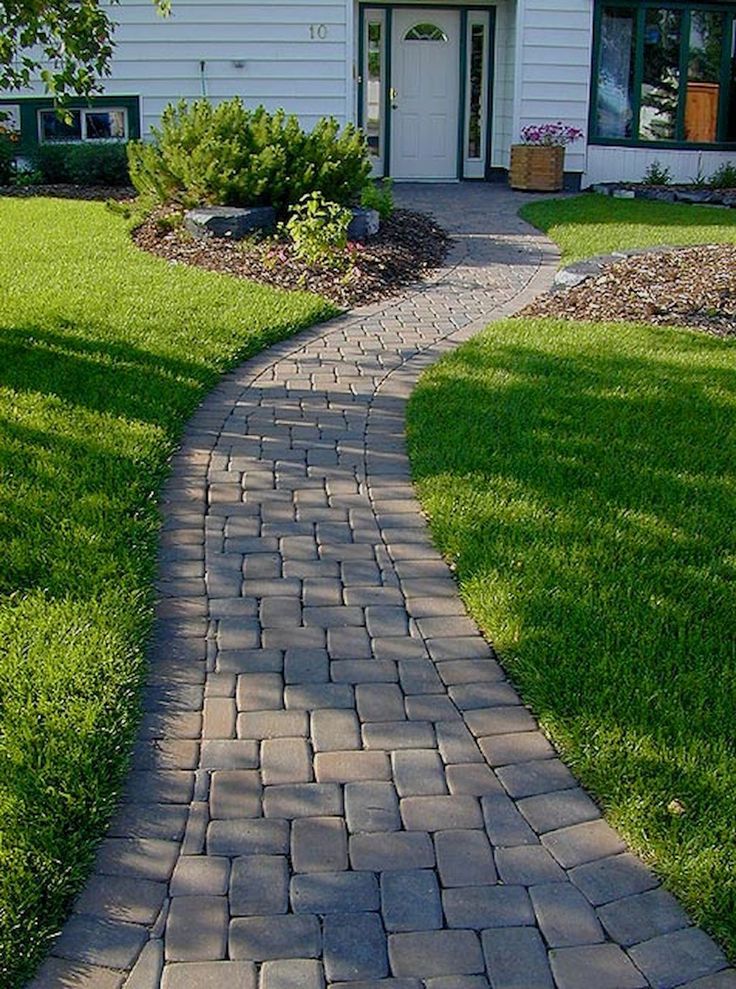
Garden paths of this kind are very inexpensive . And they are also very easy to make even on your own - just stick stone "steps" into the grass.
Single stones are the quickest and easiest way to create a pretty path. Stones practically do not have to be buried in the soil, that is, the violation of the existing ecosystem is minimal. And although the stones are quite heavy, this fact is undeniable.
Given the presence of gaps between the stones, you do not have to spend a lot of effort on deepening the stones at the same level. The same gaps allow you to save on the number of stones for the path. Ideal are flat stones two inches thick and eighteen long. Look for a local supplier of landscape supplies in your area - it will be cheaper, and you won’t have to bother with delivery. If the track is long, it is still better to leave the calculations to professionals. And if you also live in an area with natural stone debris from, say, mountains or rocks, then you won’t have to spend money on materials.
Single Stone Path Tips
- Arrange the stones so that the distance from the center of one stone to the center of another is at least twenty-four inches. When you have finished setting the stones, give them the desired shape with a non-carbide diamond wheel.
- if you want the stone to "lay" evener, at least an inch of sand should be lined under it. Sand is much easier than soil.
- the surface of the stone must rise above the level of the soil by at least an inch."Overgrown" paths
Ground cover plants will always look attractive in between pieces of limestone. As you know, under any stone path it is necessary to “put” a layer of gravel in order to prevent the rapid germination of weeds. In the case of “overgrown” paths on gravel, you immediately save money, since gravel is completely excluded - our goal is just the opposite - the germination of grasses. And the absence of gravel means saving money on gravel itself, the forces spent on gravel transportation, and time for its uniform laying. Of course, without such a base, the stones will move a little over time, but the grass growing through them will hide this. And another advantage is the absence of the need to level flagstone.
Fortunately, perennial creeping groundcovers that can survive constant movement and still grow successfully between rocks are abundant.
Learn more