Repair cast iron fireplace
How to Restore a Cast Iron Fireplace
When it comes to restoring an old cast iron fireplace, there are a number of obstacles you might find in your way. From rust and old paint to cracks and broken parts, you’ll need to make sure you clean and care for it properly to ensure your restoration goes smoothly.
So, where do you start? We’ve put together a complete guide to restoring a cast iron fireplace, with tips on how to address each issue you might come across.
Read on to find out more!
How to Restore a Cast Iron Fireplace
To restore a cast iron fireplace, you will need to follow these steps:
- Clean away any rust on the surface
- Strip away old layers of paint
- Repair any cracks by professional welding
- Re-paint or polish as desired
Click to skip to which one is relevant to you, or read the full guide below.
How to clean a rusty cast iron fireplace
Cast iron fireplaces have one enemy that you always need to be on guard for – rust!
Rust is one of the biggest concerns when it comes to restoring a cast iron fireplace. If any moisture comes into contact with the metal surface, unsightly rust can quickly develop that can really spoil the look of your fireplace if you don’t correct it.
Luckily, cast iron is incredibly durable. With the right care and attention, you can easily clean rust away from your fireplace and get it looking as good as new.
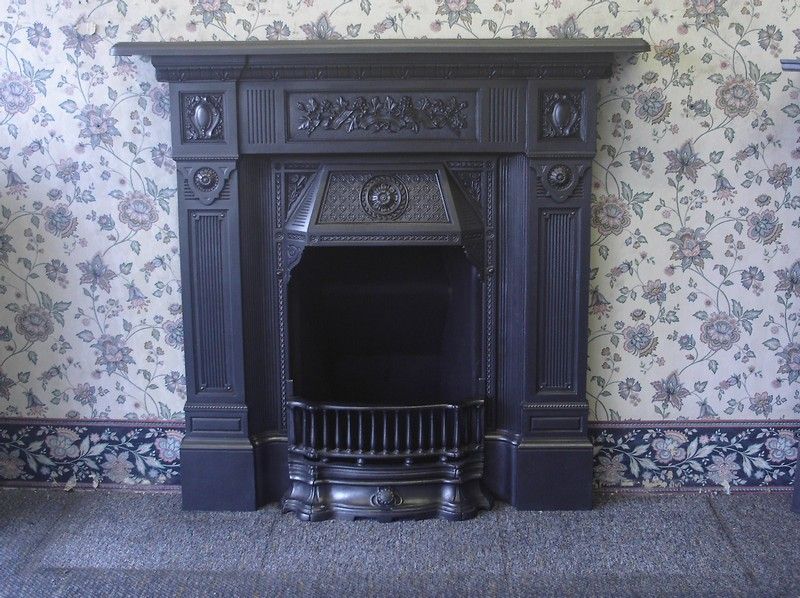
Pictured: Carron Tweed Cast Iron Combination Fireplace
To clean rust from your cast iron fireplace, you will need to gather the following materials and tools:
- Protective gloves and mask
- White vinegar or rust remover
- Medium grit sanding paper
- Steel wool
If you only have small spots of rust showing, you might not need the entire list. Start by simply soaking your cleaning cloth in some white vinegar or rust remover and rubbing away at the areas of concern. In some cases, this alone can be enough to remove the rust and reveal the original cast iron below.
If your rust is tougher than this, you will need to enlist the help of your sandpaper or steel wool. Using circular motions, buff away at the rust, wiping occasionally with your white vinegar-soaked cloth to check what it looks like. To get into nooks and crannies, a wire brush can also help. Be careful not to over-sand spots and leave noticeable patches in the surface.
Once you have finished removing the rust from the fireplace, use a cloth dampened with water to cleanse away the traces of vinegar. Then dry it thoroughly with a towel to ensure no moisture is left on the surface – or that rust will be back with a vengeance!
Finally, it’s important to add a protective layer to your cast iron fireplace to keep rust from developing in the future as a result of moisture and humidity. You can apply a rust-proof metal paint and primer, or if you’d rather a more authentic restoration, a black grate polish.
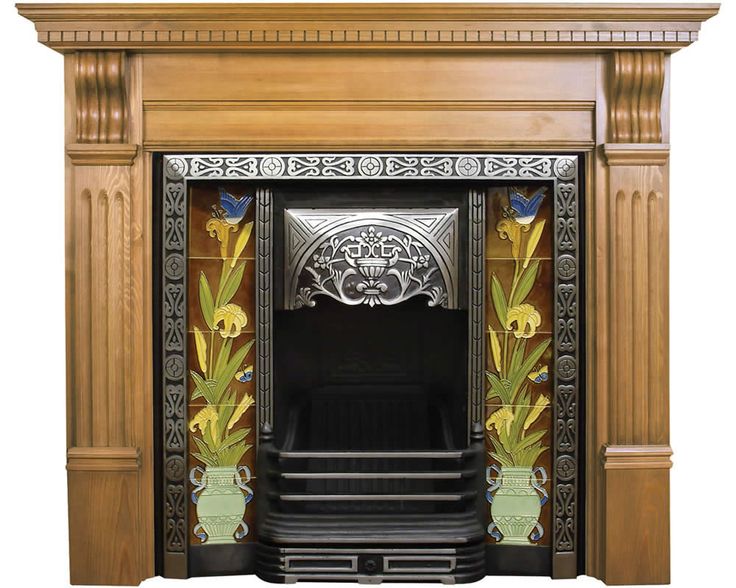
Pictured: Gallery Collection Prince Tiled Cast Iron Fire Insert
Stripping paint from a cast iron fireplace
When restoring a cast iron fireplace there is often a second barrier in your way – paint.
Whether it is an accidental spillage or a misguided makeover, all is not lost if you are faced with an unwanted layer of paint over your cast iron fireplace.
Again, you will need to get hold of some materials, including:
- Protective dust sheet for your carpet
- Gloves and a mask
- Paint stripper and brush
- Plastic scraper
- Cleaning cloths
- Sandpaper or steel wool
- White spirit
- Towel
Before you start stripping paint from your cast iron fireplace, consider the scale of the job. If you are looking at multiple layers of paint built up over the years, this restoration is going to take some serious elbow grease! Similarly, if there are a lot of intricate details in the cast iron, you might find it fiddly to get the paint off.
If you think the DIY restoration work is going to be too much, you can look into carefully removing the fireplace and getting it professionally sandblasted. This is the most effective way of stripping paint from cast iron, but it will cost you more.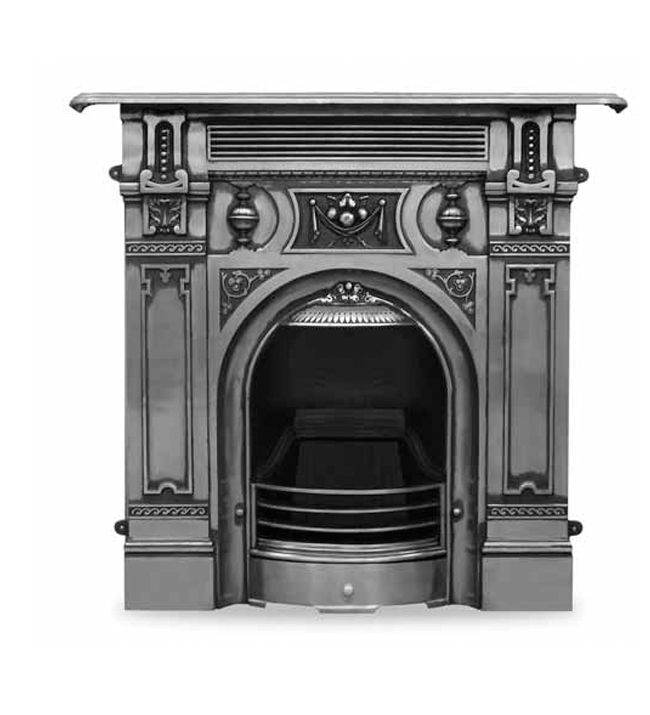
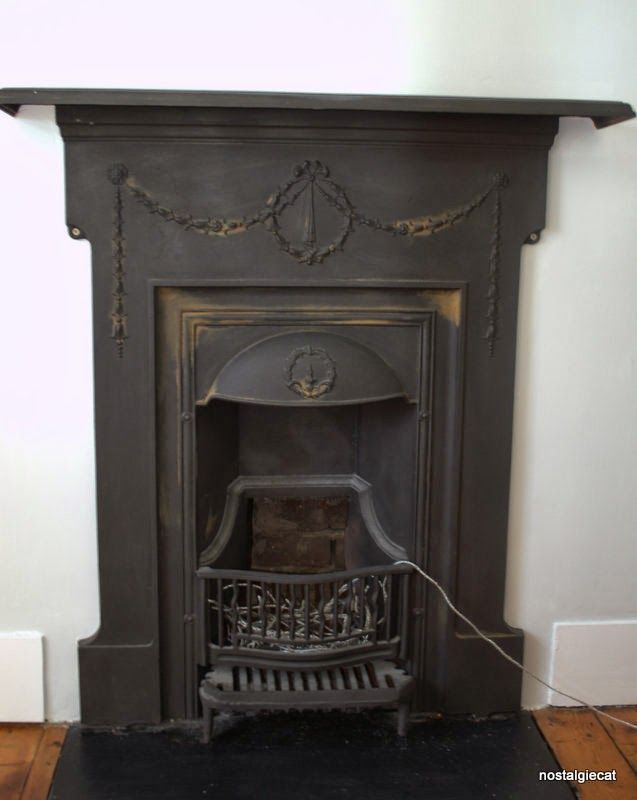
Pictured: Carron Morris Cast Iron Combination Fireplace
So, if you want to try stripping the paint and restoring your fireplace yourself, follow these steps…
- Lay out your protective sheets and put on your mask and gloves.
- Apply a layer of your paint stripper according to the package instructions. Check it is suitable for use with cast iron first.
- Wait for the paint stripper to work – read the instructions to find out how long this should be.
- Once the paint stripper has done its job, get to work on scraping the paint away.
- Wipe the paint stripper away with white spirit.
- If any paint still remains, repeat this process until it is completely removed.
- Use your sandpaper or steel wool to get into corners and details, being careful not to damage the surface
- Wipe the restored cast iron with a damp cloth, dry thoroughly and repaint or polish as you wish
It is important to wear a mask and keep the area well ventilated as you do this in case the paint contains lead.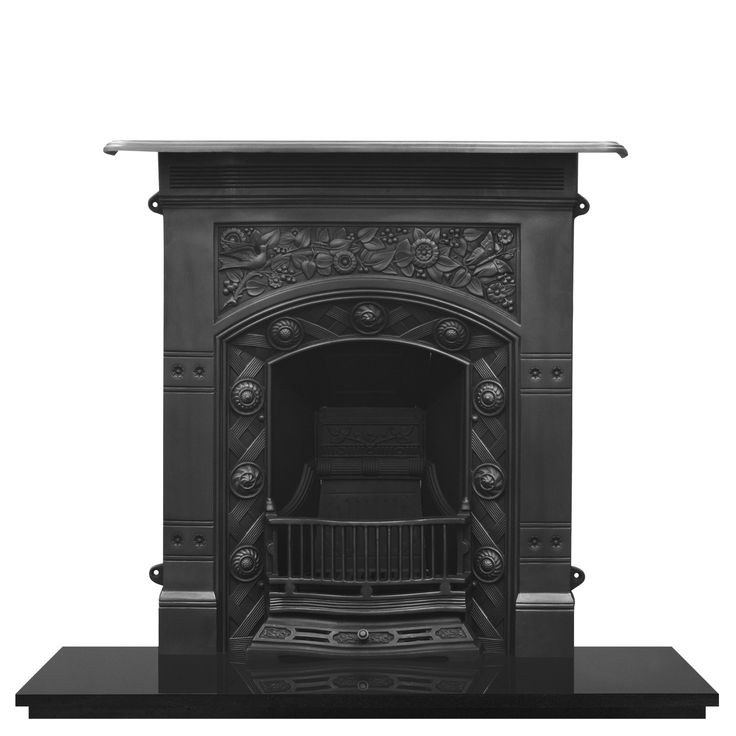
If you are going to repaint your cast iron fireplace, you might not need to remove every trace of paint, but just enough to even out the surface and sharpen up the details.
Pictured: Gallery Palmerston Cast Iron Fire Surround
Repainting a cast iron fireplace
You don’t have to restore your fireplace all the way back to its original appearance. If you wish, you can repaint your cast iron fireplace once you have thoroughly cleaned it and removed traces of rust or old paint.
With your bare cast iron fire dry and ready to be painted, you will first need to prime it. An oil-based metal primer not only provides a surface for your paint to bond to, but also seals the cast iron to prevent it from rusting. The best paint to use on cast iron is one with an oil base that blocks out moisture. There are paints designed specifically for use on metal which should be suitable.
You can find oil-based spray paint to paint your cast iron fireplace with, too. Oil-based paint can be difficult to apply and takes a long time to dry, so this might make your fireplace restoration a little easier.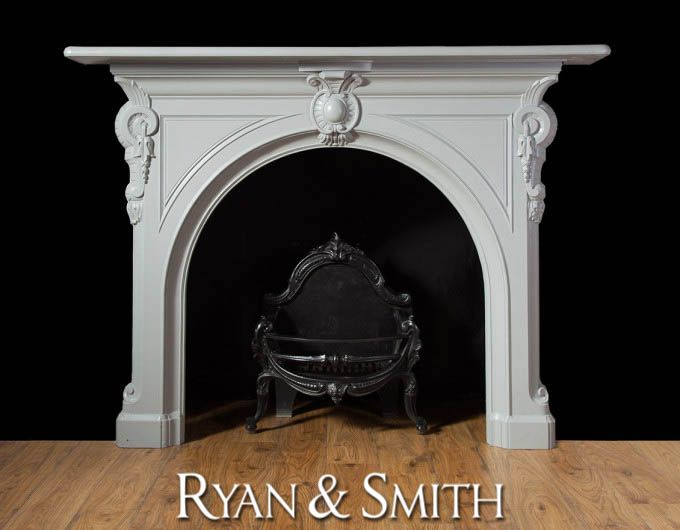
Pictured: Gallery Collection Normandy Cast Iron Tiled Insert
Cracks in a cast iron fireplace
Finally, when restoring your cast iron fireplace you might also come across some cracks in the surface.
Cracks in a cast iron fireplace often need a professional welder to fix them. Cast iron doesn’t respond well to sudden high temperatures, so will need to be heated up carefully before it is welded back together and allowed to cool down gradually. This isn’t something you can do at home, so it’s best to get a skilled craftsman to do it to avoid causing any further damage.
Restoring a Victorian Fireplace to Former Glory
When it comes to restoring a cast iron fireplace, sometimes it might need more than just a little facelift – you might want to make a few changes to fully restore it to glory.
If your cast iron fire surround is beyond repair, or you want to give it a more thorough refresh – it might be that you want to replace it completely. It doesn’t have to be cast iron, either. Wooden fire surrounds, agean limestone fire surrounds and marble fire surrounds are all ideal for restoring a Victorian fireplace.
Pictured: Gallery Roundel Wooden Fire Surround
It is also possible to replace your cast iron fireplace tiles, which can also give your restoration a boost, or find replacement cast iron fireplace inserts and cast iron fireplace combinations.
Looking for more fireplaces? Shop our full range online now at Direct Fireplaces to find excellent prices with free delivery available.
Shop Cast Iron Fireplaces Now
Shop Cast Iron Fire Surrounds Now
Keep reading on the Direct Fireplaces blog…
A Guide to Getting the Perfect Period Fireplace in Your Home | The Best Traditional Fireplace Ideas | How to Remove an Old Fireplace Surround and Fit a New One
How to Restore Cast Iron Fireplaces | Home Guides
By Neil Greenlees
Furniture and decorating styles change frequently, but in many homes, cast iron fireplaces provide timeless focal points around which these changes take place. A well-presented cast iron fireplace could prove a deal clincher if you are competing for a house sale with an otherwise identical dwelling in the Bay Area. A bit of good old-fashioned elbow grease will bring your fireplace back up to its former glory. Once the job's done, a little regular maintenance will keep the fireplace in good condition.
Cleaning the Fireplace
-
Cover the floor around the edge of your fireplace with drop cloths. This will protect your floor covering from soot and ash.
-
Put on a face mask and goggles before removing all debris from the fireplace. If the cinders and ash are completely cold, lift them out by hand, and place them straight into a trash bag. However, if they are still warm, use a metal shovel to transfer the cinders and ash to a metal bucket. Allow the fireplace to cool completely before continuing.
-
Sweep the entire surface of your cast iron fireplace vigorously with a wire brush to get rid of any remaining debris.
 Dampen a cotton cloth with a few drops of mineral spirits, and wipe down the fireplace's surfaces with it. This will remove fine dust.
 -
Examine your clean fireplace carefully for any signs of damage or missing parts. Make sure it has a raised hearth underneath the fire and a decorative hearth to the front.
-
Inspect the rear of the fire for any cracks or holes. If you find one, fill it with fire cement using a trowel. Also use the trowel to remove any excess cement, thereby giving the surface an even appearance.
-
Examine the grate to establish whether it should be secured to the fireplace. If this is the case, you will need either screws or wire loops.
Restoring the Cast Iron
-
Remove flaky covering from the cast iron using fine grade steel wool or sandpaper. Begin in an inconspicuous area to establish how much work is necessary. Clean right down to bare metal if the surface covering is very flaky and cracked.
-
Apply a commercial grade paint stripper if you cannot clear away all the covering with steel wool or sandpaper. Leave the paint stripper in position for the time recommended by the manufacturer, then use a spatula to remove all traces of the metal covering.
-
Wipe the bare metal with a cloth dipped in mineral spirits and thoroughly wrung out. This will neutralize the surface after the use of paint stripper.
-
Apply black stove paint to the cast iron fireplace. Follow the manufacturer's instructions carefully in terms of the drying times and number of coats.
-
Apply grate polish when the paint is thoroughly dry. To seal the surfaces, apply nonflammable linseed oil with a soft cloth.
-
Attach the soft dusting brush to your vacuum cleaner and remove all dust and other debris from the mantel and your cast iron fireplace's surrounds. Apply polish to the wood, and buff to a shine.
References
- Do It Yourself: Maintaining and Cleaning a Cast Iron Fireplace
- Bricks and Brass: Restoring a Fireplace
Tips
- For a more eco-friendly way of cleaning and neutralizing the cast iron metalwork of your fireplace, use white vinegar instead of mineral spirits.

- Maintain your cast iron fireplace by vacuuming it regularly.
Warnings
- Always use a face mask and goggles when removing large quantities of debris from your fireplace. This will prevent you breathing in ash and also protect your eyes.
- Always wear gloves to protect your hands when lifting debris out of your fireplace.
- If you intend to set a fire in the grate, have the chimney swept before doing so to ensure there are no blockages to send smoke back into the room.
Writer Bio
Belfast-based Neil Greenlees was made redundant in March 2009 after working as a reporter for 26 years. For most of his career he was a senior journalist with ''The Ulster Star," a weekly newspaper covering the Lisburn and South Belfast areas. Greenlees holds the National Council for the Training of Journalists Pre-Entry Certificate.
Cracked Fireplace Back Slab Repair
Some people refuse to use their existing fireplace just because the solid back wall (slab) is damaged and unsightly. Strong heat over time can damage the back plate of the fireplace. If the cracks are large, it may need to be replaced, but thin cracks can be repaired. After all, a working fireplace is a rather valuable thing that is worth it to restore it.
Chimney Back Stove Repair: Process Brief
Let the hob cool down for at least 48 hours, then brush off the soot. Using a small trowel or trowel, widen the cracks so that their cross section takes the shape of the letter "V". Clean them with a brush from dust and moisten with water to improve adhesion to the solution. Cover the cracks with refractory mortar, remove the excess with a trowel, and then level the mortar with a brush, wetting it with water. Allow the solution to dry for several days before lighting the fireplace.
Dismantling the old fireplace slab to replace it
If you are going to replace the back slab, first measure the width of the chimney and order or buy the same new one. Standard sizes are 400 or 450 mm, but larger slabs are also available.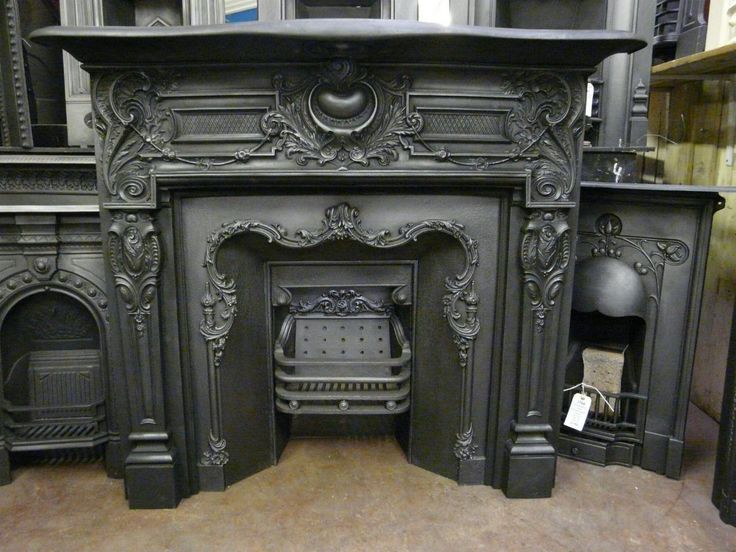 Before dismantling the old back plate, cover the floor with an appropriate blanket and the ceramic tiles in the hearth with thick cardboard. When dismantling the grate and the rear plate, wear a protective mask and goggles.
See also:
The grate can both stand freely on the hearth of the firebox, and be attached to it with threaded connections with dowels (plugs) made of asbestos cord and refractory mortar. In the latter case, moisten the junction with water, a metal chisel. Then use a hammer and chisel to break up the old back plate, starting at one of the corners. Split the cracks as they appear so that large pieces can be removed. nine0003
Take care not to damage the firebox and its rim when breaking the mortar joints at the edges of the rear plate. Do not touch the asbestos cord seal between the rim of the firebox and the edge of the rear plate. Behind the slab you will see a heat-insulating backfill made of broken bricks, gravel, etc. Cut it out with a chisel and hammer so as to completely free up the fireplace space.
Installing a new rear plate
A new rear plate is sold as a whole, ready to be installed in a new furnace. It may need to be cut in two to install in an existing fireplace. A recessed line runs across the slab, showing where the slab can be cut. This can be done by gently tapping along the line with a stone chisel and a hammer, or you can use a grinder (angle grinder). The two pieces can then be easily inserted into the firebox opening in the stonework of the fireplace. nine0003
See also:
Mortar preparation
Mix a diluted mortar with 1 part lime and 6 parts building sand. Apply bedding under the bottom of the stove by placing mortar with a trowel against the back edge of the hearth. Replace the bottom of the rear plate by pulling it forward so that it rests lightly against the asbestos cord seal at the edge of the firebox frame. Check the verticality of the plate.
See also:
Installing the slab
Cut two pieces of corrugated cardboard to the shape of the bottom of the rear slab and place them directly behind the slab.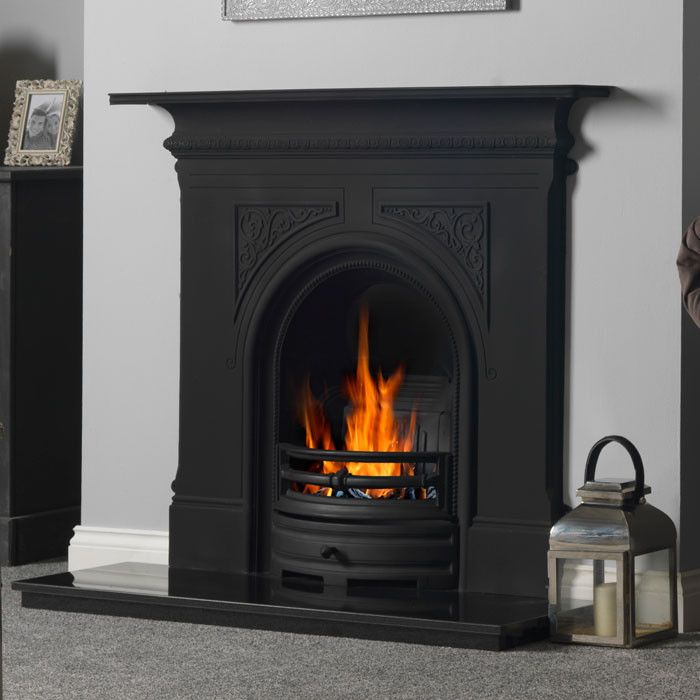 Fill the gap between the cardboard and masonry with a light concrete mix of 6 parts vermiculite and 1 part cement. Alternatively, you can use 1 part lime, 2 parts sand, and 4 parts broken brick (from an old broken back slab) as the mortar infill. With either of these mortars, fill the gap to the top edge of the bottom of the back plate, tamping the mortar down with a block of wood as it fills. Using a trowel, apply a layer of refractory mortar (pre-mixed heat-resistant mortar, sold in plastic buckets or cartridges) to the top edge of the bottom of the back plate and place the second part of the plate on top of it, carefully aligning both halves with each other. Remove excess mortar with a trowel and smooth the seam with a brush dipped in clean water. nine0003
See also:
Continue filling the space behind the slab with mortar (or mortar with aggregate), ramming it until the entire space is filled. Use masonry mortar to form a sloped surface from the top edge of the back plate to the back wall of the chimney.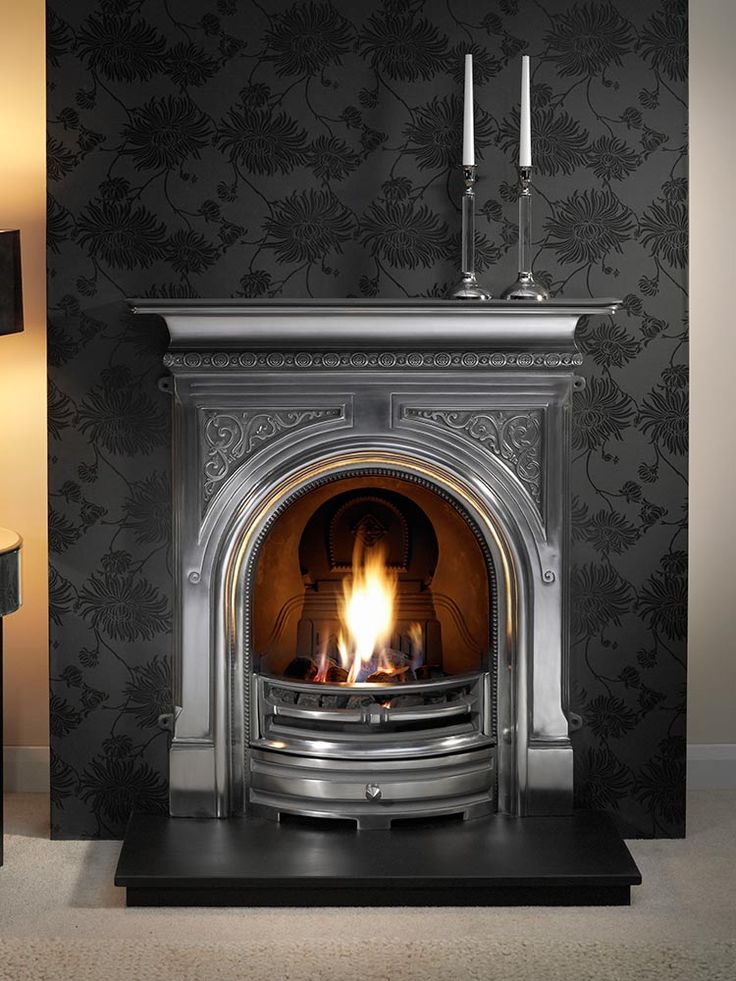 This bevel is called the smoke ledge. Its bevel should be parallel to the rear surface of the lintel of the opening of the furnace hole. These two surfaces form a smoke hole or throat (hailo) with a distance of approximately 100 mm between them. Hailo draws smoke and gases from the firebox into the chimney. nine0003
- Carefully level the chimney with a trowel, and on the sides, grout any gaps that could become areas for soot accumulation.
- Finally, patch the gap between the new back plate and the edge of the firebox with refractory mortar. Then put the grate in place.
- Mortar seal between rear plate and firebox must be replaced if cracked or broken, or when installing a new plate.
Wearing a face mask, chip away the old mortar with a chisel and hammer and remove the debris, exposing expansion or expansion joints (seals), which will most likely be asbestos cord. If they are intact, do not touch them. If they are damaged, cover the floor with plastic sheeting, spray the asbestos with water, cut out the damp seal with a sharp knife, and put it in a plastic bag marked accordingly.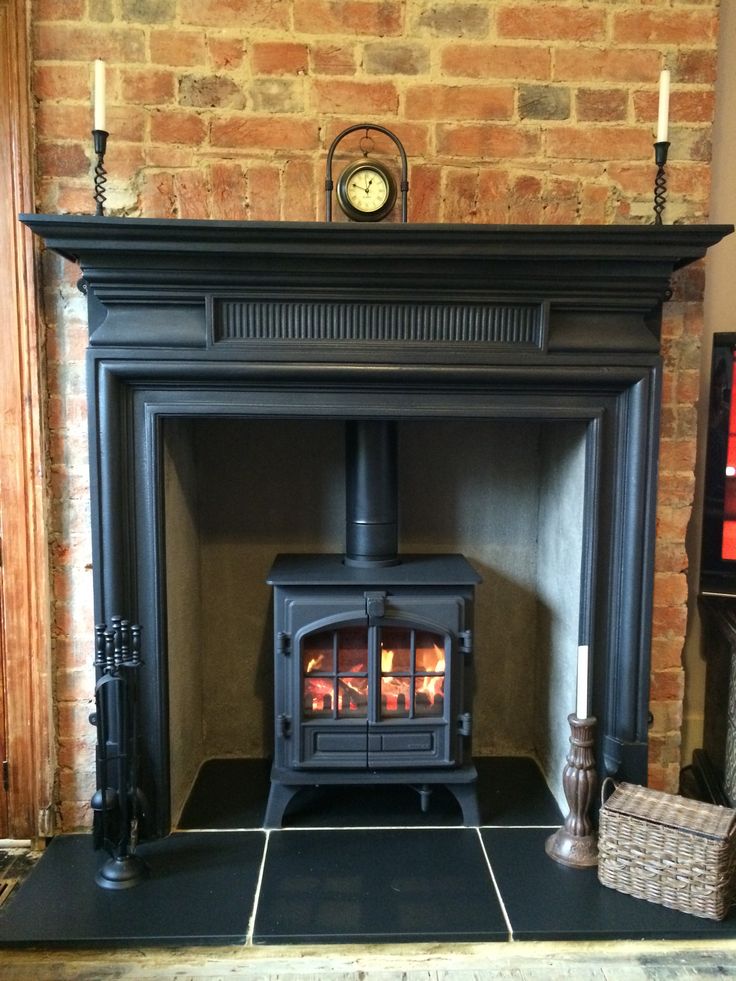 nine0003
See also:
Carefully roll up the film to discard, and with a damp sponge—not a vacuum cleaner—carefully pick up asbestos particles and dust. Seal the remaining expansion gaps with fiberglass cord, brush the seams with a brush or brush dipped in clean water, and seal them with refractory mortar flush with the edge of the furnace opening. Smooth out the grout with a brush. hole in masonry.
Do-it-yourself fireplace repair: simple tricks
People who have a dacha or a country house, at least once, but dreamed of their own fireplace. This noble item gives not only comfort, warmth, but also serves as a real decoration. However, such a massive item needs proper maintenance. It is not always possible to avoid malfunctions in its operation. Sometimes you have to resort to the help of professionals. But in a house where a skilled craftsman lives, you can easily repair fireplaces with your own hands.
The ease of the process of such repair work depends entirely on the complexity of the breakdown. It may be a simple defect, or it may be a serious malfunction. However, step-by-step instructions will help to correctly carry out not only simple repairs, but also make a fireplace with your own hands. As the saying goes: the eyes are afraid, but the hands are doing. It is not at all necessary to be a specialist and a professional in your field in order to cope with the task - to repair a fireplace. (See also: DIY mini fireplace)
Remember the process of the initial laying of the fireplace
It is very good if you initially built the fireplace with your own hands, or personally supervised the process of laying each brick. Thus, in this way, it will be much easier to fix the malfunction.
When the laying process was going on, it probably occurred to you that some part of the system might break, the masonry might crack, the chimney might be clogged, etc. These assumptions are not to be feared. It is necessary to initially carry out an analysis of the potential reliability of the future design in order to make the most effective repair if necessary. nine0003
It is even better when all the elements that make up the fireplace system are thoroughly known. Then the upcoming repairs will not be difficult at all. I must say that it is difficult not to face the need for fireplace repair. Unless the most ideal operation of this unit will save the fireplace from early or late repairs. But, unfortunately, not everyone manages to observe the rules for proper use of the fireplace and proper care. In addition, the durability of the fireplace will also depend on the quality of its initial laying, heating systems. It is very important to pay attention to the production of fireplaces, their heating elements, to make sure of their quality. (See also: DIY fireplace inserts)
Over time, malfunctions and malfunctions will still occur. They need to be eliminated in a timely manner, which is called "hot pursuit". And, most importantly, this is possible without even resorting to the services of specialists.
What can you do yourself?
It is worth noting that self-troubleshooting of the fireplace is limited to certain types of repairs.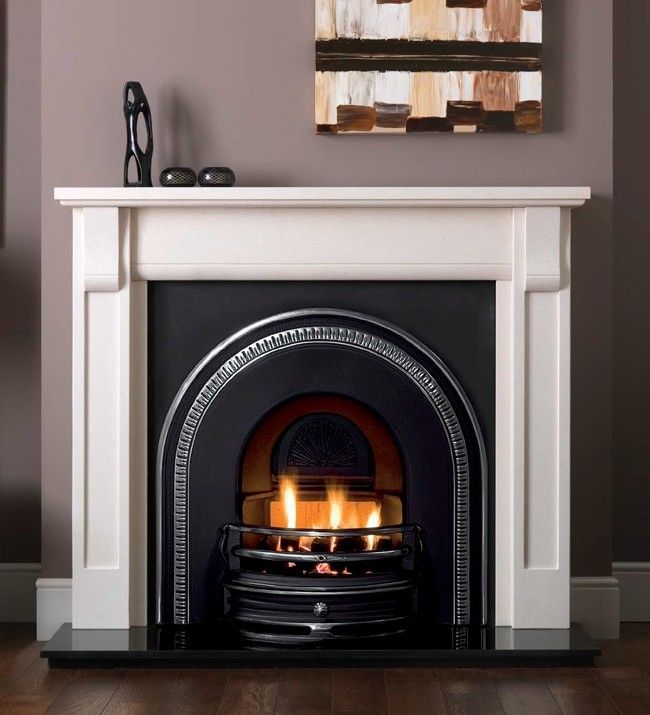 Advanced cases require a professional approach, or none at all. Unfortunately, the diagnosis of a complete malfunction can also be made for fireplaces. nine0003
So, the simplest types of repair work on fixing a fireplace, which everyone can do: (See also: How to make a fireplace from a stove)
- Masking, covering cracks formed on the brickwork;
- Whitewash;
- Replacement of brick elements;
- Reinforcing firebox doors;
- Replacement of old grates with new ones;
- Repair of blower doors;
- Damper repair;
- Strengthening tiles; nine0046
- Valve repair;
- Elimination of gaps between the massif of the fireplace and the cast iron stove;
- Removal of blockages in the chimney system.
Apparently, there are a lot of small works. Fortunately, there are many more of them than serious and complex ones.
But those types of work that require more thorough training, and at least a little experience in fixing fireplaces:
- Fixing water heating boxes;
- Repair burnt cast iron stoves; nine0046
- Complete replacement of a broken tile;
- Removal of blockages in the chimney system;
- Elimination of a general malfunction of the chimney system;
- Fuel chamber lining replacement.
Difficulty of repair
The above types of work are usually referred to as light and medium difficulty. As for the light types, they can be entrusted to any person who knows how to handle tools, giving him a few recommendations. Simple repairs can also be called current. They are simply necessary for the fireplace during its many years of operation. nine0003
The complexity of the repair largely depends on the type of heating system, the correctness of the initial laying. An important role is played by the size of the fireplace. (See also: Do-it-yourself fireplace decorating)
Medium-sized repairs require reading and memorizing the instructions. But it can also be mastered by every owner of the fireplace.
There is also a third degree of difficulty - major repairs. This is where you need to turn to the experts. However, if you are used to doing everything with your own hands, then at least consult with professionals in the repair of heating fireplace systems. nine0003
Routine repairs
This type of repair is the most common. Moreover, it is impossible to do without them. Of course, bio-fueled alcohol fireplaces, equipped with additional features, require a minimum of maintenance. But still, every fireplace has a need for maintenance to one degree or another. Anyone can handle whitewashing, covering cracks. But how to eliminate other, often occurring malfunctions, should be figured out. (See also: Do-it-yourself fireplace stove)
For example, replacing the firebox door requires special skills. Having mastered which, you can easily do such work yourself. The firebox door is carefully removed from the masonry at the same time as the frame. This must be done without affecting the main array. If you notice that the door legs have become unusable, they should also be replaced.
Next, the masonry site is cleaned with ordinary water, the door with the frame is installed back. After such a process, seams are often formed that need to be embroidered. In place between the door and its frame, for safety reasons, it is recommended to leave a small gap. nine0003
Another type of maintenance is repairing cracked fireplace tiles. Here you need a plaster solution. Fireplace construction specialists recommend using a solution based on aluminum and potassium alum. You can also use a ground solution by mixing it with egg white.
If the tiles are very old, they need to be completely replaced. After removing the old elements, the vacated space is cleared. On the cleared place, you need to install a ramp with a clay-crushed stone solution. And only a new element of the tile is installed on the ramp. nine0003
Medium repair
Medium repair focuses on fixing more serious problems than the current one. However, most manage to cope with it on their own. For example, to eliminate the blockage, you need to use a simple wire. With its help, you can remove the blockage.
Be sure to change the lower part of the heating chamber in time. To do this, you must first sort the brick. The lower part of the heating chamber is particularly susceptible to wear. As a result of the next wear, the process of fuel combustion is incomplete. The seams of the main array are filled with crushed stone or sand. Otherwise, gases will enter the dwelling. nine0003
It is very important to carry out these types of repairs in a timely manner.
Installation of fireplace portals
Installation of a portal on a fireplace also belongs to the types of fireplace repairs. Portals of fireplaces come in different types. Most preferred are polyurethane. The main thing is also to make the right choice of heating system. It is worth paying attention to the company Mr. fireplace. Polyurethane fireplaces are safer and may require fewer repairs. In addition, they are extremely difficult to disable. nine0003
Do-it-yourself installation of polyurethane portals is not difficult. There are two ways to install this.
- Installation of polyurethane on cement mortar using glue and adhesive mixture;
- Installation of polyurethane by means of fasteners on self-tapping screws or screws.
It should be noted that it is easier to independently install the portal, guided by method No. 1.
For installation in the first way, you need:
- Clean surface;
- Spread the adhesive evenly on the wall surface;
- Attach the stucco and press it against the wall in such a way as to control the correctness of the patterns of the elements without disturbing the decor of the fireplace;
- Leave to dry.
Mounting details
Polyurethane portals are easy to install. But you need to observe some nuances in the process of work:
- Particular attention should be paid to the preparatory work to clean the surface from dirt and dust. Important! It should be not only clean and dry, but also as smooth as possible.
 Therefore, plastering work is indispensable; nine0046
 - Polyurethane elements must be left in the room for at least 24 hours prior to installation. This is necessary to adapt the finishing material;
- Before installing the material, it is better to lay out the pattern of the elements on the floor. Fireplaces, the contours of which are not executed correctly, will eventually have a not quite aesthetic appearance.
The most important thing to remember is that you need to take care of your fireplaces! After all, they are your family cozy hearth! There are types of fireplaces that will not tolerate a bad or indifferent attitude towards them at all. For example, Elite fireplaces are the dream of the owner of a country house. And if it came true, it is extremely important to prevent this work of fireplace art from becoming unusable. All rules for its proper use must be observed. nine0003
And then, you will know firsthand how pleasant it is to spend the evenings with your family, relatives, loved ones near a crackling cozy hearth.