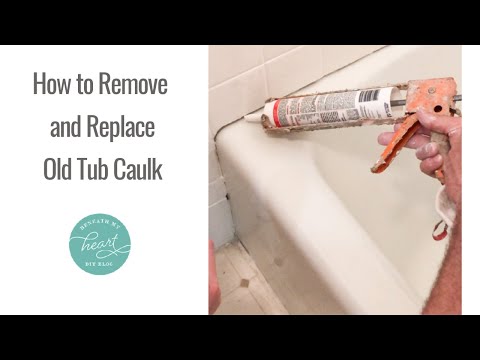
Removing shower caulk
The best tricks: How to remove caulk
Before many repairs and installations, you must remove old caulk. A clean surface is essential in keeping those cracks and crevices free of moisture and unsightly buildup. Here’s how to remove caulk and get rid of ugly residue for a fresh start and surfaces that look dazzlingly new.
Caulking windows and other areas can get messy. Learn the best ways to remove caulk and keep it clean.
- How to remove caulk: What to know
- How to remove caulk from a bathtub
- How to remove caulk residue
- Recommended products
How to remove caulk: What to know
Caulking is important for keeping bathrooms, kitchens, and other household areas clean and damage-free. Caulk is used to fill cracks and seal joints around windows, doors, plumbing, siding, and fixtures. This prevents air, water, dust, or other materials from infiltrating seals and keeps things tight.
Good caulking can be the finishing touch that makes a difference between a sloppy fix or a clean, professional installation. We recommend Loctite Polyseamseal Acrylic Caulk with Silicone, a high-quality acrylic caulk formulated with extra silicone for a durable, powerful seal. It sets quickly, is easy to apply, and locks out moisture, air, dirt, or any other penetrating materials.
But with time, even the best caulking can get dingy or lose its seal. Before undertaking many household projects, such as installing new fixtures or tiles, it may be necessary to remove existing caulk. It can be a time-consuming process, but it’s worth doing right.
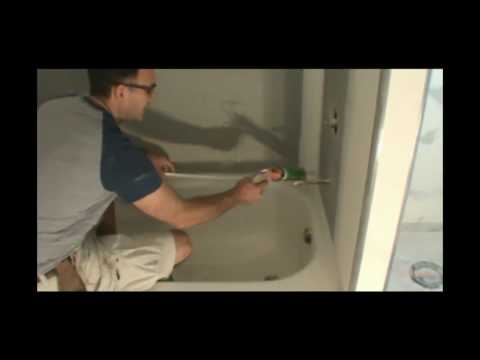
How to remove caulk from a bathtub
Moisture, soap scum, and other types of build-up are inevitable in bathrooms. To refresh your bathtub’s look, or to prepare for installing a new one, you’ll have to strip away the old caulking. Peeling off that gunky old caulk can be a nasty job, but doing it right will result in a bathtub that looks sparkling fresh. Follow these simple steps for how to remove old caulk from your bathtub.
- Soften the caulk.
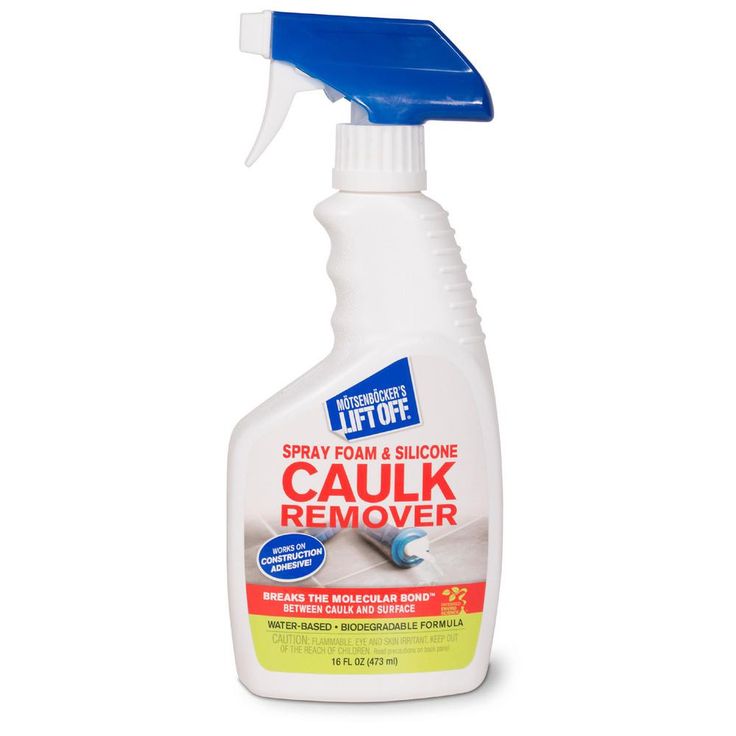
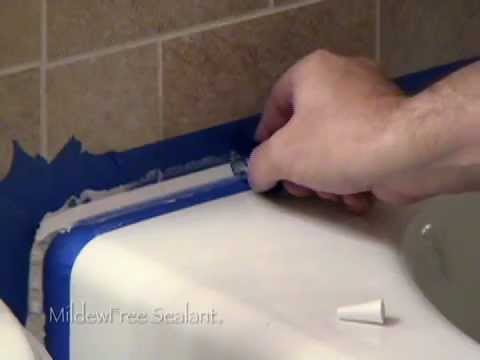 One way to do this is with a commercial caulk remover. The remover will weaken the caulk’s inner structure, making it easier to pry the caulk away. However, caulk removers aren’t necessarily compatible with all materials, so be sure to heed your product manufacturer’s instructions. In these cases, you’ll have to physically remove the caulk.
 - Strip the caulk. There are a few methods for doing this. You can use a utility knife or putty knife, slicing through the caulk and peeling it away. For multiple layers of caulk, needle-nosed pliers might work best. There are also specialized caulk removal tools designed to tear away caulk cleanly. The important thing is to exercise care not to dig too deeply and scratch your tub’s surface. And always take extra precautions when using sharp tools. Go slowly, use protective equipment, and be safe!
- Clean the surface. Once the caulk is removed, clean the area thoroughly of any scum or residue.
 For most surfaces, brush the area with a cloth dampened with bleach, or a non-ammoniated cleaner, to kill mildew. More damage-sensitive substrates may require cleaning with gentler substances such as a denatured alcohol. When using caulk remover, be sure to check manufacturer instructions for details on best materials and methods for cleaning. Let surfaces dry completely before beginning to apply any new caulk.
For a long-lasting, mildew-resistant seal in kitchens and bathrooms, go for Loctite Polyseamseal Tub & Tile Adhesive Caulk. This versatile, easy-to-use acrylic-based sealant creates a flexible, watertight seal that’s easy to paint or clean, making it perfect for bathtubs, showers, and sinks.
Before repairing or installing sinks and tubs, make sure surfaces are residue- and moisture-free. Silicone caulks, glues, and sealants need dry, clean surfaces for durable seals.
Removing old caulk from a bathtub can be a hassle, but it’s important for clean and fresh new seals.
How to remove caulk residue
Getting rid of old caulk can be challenging. Because caulk is meant to seal tightly and strongly, stripping it off can be a painstaking task, but it’s vital for a clean foundation for your new caulk. On top of all that, removing caulk can leave behind unwanted residue. Here’s how to remove caulk residue.
- Make it soft. Before chiseling away at that caulk residue, soften it as much as possible. For acrylic or latex-based caulk, you can use a commercial caulk remover to loosen the caulk’s bond with the substrate. For silicone caulks, use a liquid remover specifically formulated for use with silicone. For more sensitive materials, or if a caulk remover is unavailable, try mixing a strong powdered cleaner and warm water into a paste, then apply carefully to the caulk with a cotton swab.
For painted, lacquered, or finished surfaces, denatured alcohol may work better than mineral spirits. Caulk remover may also be a good option, but always test solvents on a small, inconspicuous area first before diving in.
Whatever substances you employ, always be sure to wear protective gloves and work in a well-ventilated area. Avoid spills and take appropriate precautions with any flammable materials.
- Clear it off. Start with a cutter knife, slicing the vertical and horizontal flanks of the caulked joint. Once the main triangular portion of the caulk is removed, clean the flanks using a damp abrasive sponge or scrub brush. If stubborn residue refuses to come off, scrape it with a razor blade, but exercise care not to scratch the surface underneath. Avoid using sandpaper, as the caulk will stick to the coarse grit and leave you with a gummy mess. Once the flanks are clean, you can continue with removal of sealant in the joint depths.
If necessary, clean off mold or mildew with warm water mixed with bleach or ammonia-free detergent. Rinse surfaces thoroughly with warm water.
- Caulk away.
 Once the caulk residue is removed and the surface is dry, you’re ready to apply a new caulk. For a tough, strong multipurpose sealant for any job, look for Loctite PL Heavy Duty Sealant. It’s simple to use and creates durable, flexible seals that last a lifetime, both indoors and outdoors. Perfect for tubs and showers, sinks, countertops, tiles, trim, and baseboards, as well as sealing around windows, doors, and siding.
Check out this video to learn more about how to use Loctite PL Heavy Duty Sealant for all your caulking and sealing needs:
Knowing how to remove caulk residue isn’t just about being tidy. Any caulk left on the substrate will prevent new caulk from adhering and may lead to moldy buildup. Do it right now and circumvent problems down the line!
When household fixes gets messy, it’s important to know the best way to remove caulk residue.
Want to get straight to work?
Check out Loctite’s line of powerful sealants for any job here.
Recommended Products
Back to top
How to Remove Old Caulk From a Tub, Shower, or Sink
By
Bob Formisano
Bob Formisano
Bob Formisano is a licensed architect and builder with nearly 40 years of experience building new homes and restoring older homes. One of his specialties is repairing old systems dating back to the 1920s, including galvanized water pipes, knob-and-tube wiring, and more. His home repair articles for The Spruce span more than 10 years.
Learn more about The Spruce's Editorial Process
Updated on 12/07/21
Reviewed by
Johnathan Brewer
Reviewed by Johnathan Brewer
Johnathan Brewer is a home improvement expert with over two decades of professional experience as a licensed general contractor specializing in kitchen and bath. He has been featured on HGTV’s “Super Scapes,” “Curb Appeal the Block,” “Elbow Room,” DIY Network's “House Crashers,” "This Old House," and OWN Network's Emmy award winning show, “Home Made Simple.” Jonathan is also a member of The Spruce Home Improvement Review Board.
Learn more about The Spruce's Review Board
Fact checked by
Jessica Wrubel
Fact checked by Jessica Wrubel
Jessica Wrubel has an accomplished background as a writer and copy editor, working for various publications, newspapers and in public libraries assisting with reference, research and special projects. In addition to her journalism experience, she has been educating on health and wellness topics for over 15 years in and outside of the classroom.
Learn more about The Spruce's Editorial Process
The Spruce / Liz Moskowitz
Project Overview
Before applying new caulk around your bathtub, shower, or sink, you must first remove the old caulk. New caulk doesn't stick to old caulk, so if you fail to remove the old stuff, the new caulk can't form a watertight seal, leaving the potential for moisture to seep into areas where you don't want it.
The best way to remove caulk is through a combination of chemical caulk remover and manual tools. Chemical removers require some time to soften the caulk, so if you are in a hurry or don't want to use chemicals, you can also remove the caulk with hand tools alone.
Warning
Always use plastic tools to remove caulking. Otherwise, you may scratch or mar the surface of the fixture.
One easy way to start the process of caulk removal is to use a caulk removal solution, such as the products made by 3M, DAP, and other brands. This chemical remover destroys the bond between the old caulk and the tile, tub, or sink, making it very easy to pry out of cracks and crevices.
A small bottle of liquid caulk remover will remove about 20 linear feet of caulk—enough for most bathtubs. Follow the manufacturer's instructions for use.
How to Remove Old Caulk From a Tub, Shower, or Sink
Equipment / Tools
- Plastic putty knife
- Caulk removal tool or razor scraper
Materials
- Chemical caulk remover
- Rubbing alcohol
- Cloths
The Spruce / Liz Moskowitz
-
Apply the Chemical Caulk Remover and Let Sit
Squeeze chemical remover onto the old caulk bead, so the caulk is covered completely.
Let the caulk remover sit on the caulk as directed by the manufacturer's instructions. Some users report that it helps to allow the product to set overnight for maximum effectiveness.
The Spruce / Liz Moskowitz
-
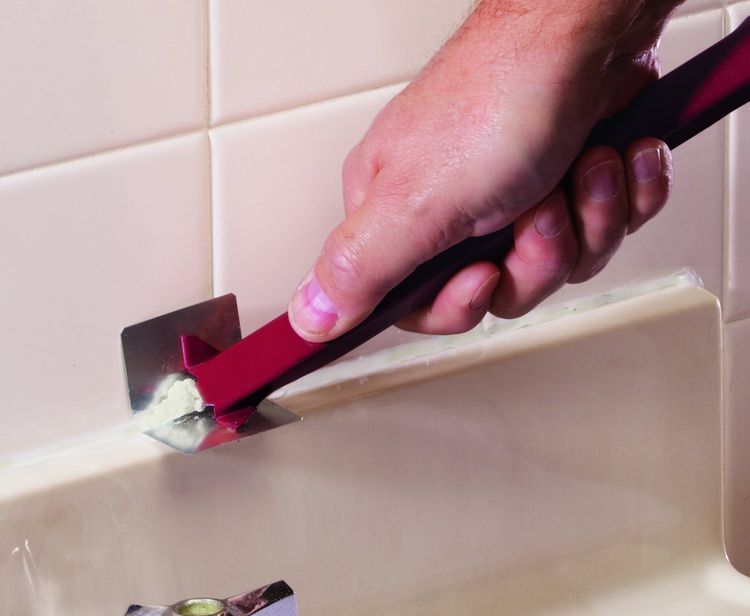
Scrape Away the Caulk
Use a plastic putty knife or other tools to scrape away the old caulk. If possible, try to peel it off in strips as you scrape.
Inspect the area thoroughly, and remove any remaining caulk residue with the tool.
 A caulk removal tool or razor scraper can be useful at this point. To clean up the old caulk remnants, use a shop vac to thoroughly pick up any debris.
 The Spruce / Liz Moskowitz
-
Clean the Surfaces
Clean the surfaces thoroughly with a clean cloth moistened with rubbing alcohol. The cleaner the area, the easier it will be for the new caulk to bond properly. Let the surfaces dry completely before applying new caulk.
The Spruce / Liz Moskowitz
Caulk Removal Tool
Several manufacturers make caulk removal tools, which sometimes come in kits that include tools for applying and smoothing new caulk. The better tools are made of plastic or polished steel that won't scratch surfaces and have angles and blades designed to scrape caulk out of narrow crevices and corners. One excellent tool from Hyde has a corner scraper blade that is reversible and replaceable to ensure you always have a sharp tool.
Caulk removal tools can be used by themselves, but they are also great as the second step after applying chemical caulk remover.
Razor Scraper
Another tool that works well is a good old-fashioned razor scraper. The trick here is to use a very sharp blade and to make sure the blade edge is flat on the surface to prevent scratching. A razor is ideal for getting behind thin smears of old caulk.
In general, it is best to scrape behind both side edges of the caulk bead to separate it from the surface, then try to peel it off in long strips. To prevent scratching, be careful not to let the corners of the blade contact the surface. Keep the tool at a low angle—almost flat to the surface—at all times. Acrylic and fiberglass surfaces are especially susceptible to scratching.
How and how to remove the old sealant and apply a new one
: 154830
How and how to remove the old sealant and apply a new one
Even if you do not renovate the bathroom, pay attention to the condition of the sealing seam of the silicone sealant on the sink or bathtub rim. Even modern sanitary silicone sealants specially designed for use in the bathroom or in the kitchen, over time, can be affected by fungus and mold, and even just darken and change their previously attractive appearance.
If you decide to renew a previously applied sealant, but do not know how to properly remove the old sealant layer and apply a new one, then this article is just for you. There is nothing complicated in replacing the old sealant, and we will show you step by step how to do it correctly and easily.
In damp areas such as bathrooms or kitchens, mold or fungus can form on the joints between ceramic tiles, so it is best to grout with fungicidal additives.
| Mold on the side of the bathtub | Mold on the side of the shower pallet |
Passes of the bath, shell, shower or shower pallet, where water flows water or any other places, where water flows out water or any other places, where water flows down the water or any other places where the water doesn't evaporate fast enough, which creates ideal conditions for mold to grow. Mold in this place, as a rule, looks like small, dark (to black) spots.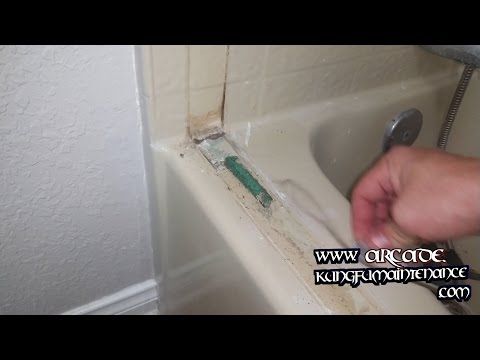 At first glance, such darkening can be mistaken for ordinary dirt, but this is not so.
How and with what to remove the old layer of sealant
Mechanical method of removing old sealant
As a rule, the largest layer of old sealant is removed mechanically, and small residues that are difficult to scrape off with a knife are removed using special chemicals.
Removing the old sealant from the bath rim
Removing the old layer of silicone from the seams is a rather laborious task. You can try using a regular knife, screwdriver or razor blade. The mechanical method of sealant removal, despite its complexity, does not guarantee thorough cleaning. But nevertheless, special knives and scrapers to remove the sealant will cope with this task most carefully and without damaging the surfaces.
It is worth noting that many manufacturers produce sets of such special knives, along with plastic nozzles, of various shapes. Putting on such a nozzle, the sealant removal knife turns into a spatula for uniform application of a new layer of sealant.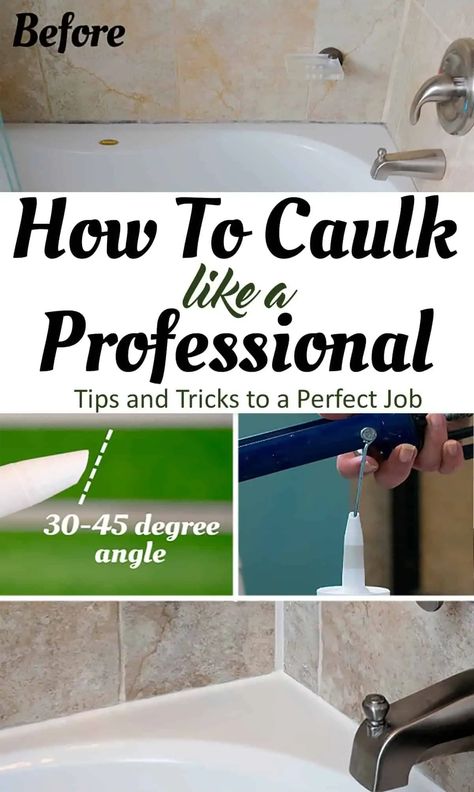
Knives and Scrapers for Sealant Removal
Chemical Removal of Silicone Sealant
An easier and more reliable way to remove old silicone sealant is to use a silicone cleaner in conjunction with mechanical cleaning. Using special chemicals to remove silicone will not only thoroughly remove all traces of sealant, but will also protect the surface of the bathroom, tile or sink from scratches and chips. In addition, it will help to avoid accidental injuries to the hands, which are not so rare with the mechanical method of sealant removal.
Dow Corning OS-2 Silicone Cleaner
Special chemicals are very helpful in removing old silicone sealant: Penta-840, Dow Corning OS-2, JVR Refinish Silicon Stop, Lugato silikon entferner, Mellerud silikon entferner, Standox silikon entferner remover, Sili-kill Silicone Remover, McKanica Silicone Caulk Remover Gel, Soudal Silicone Remover, Titeseal and Tytan Silicone Cleaner, and many more.
And simpler (folk) methods can also be useful if you can’t buy a special tool.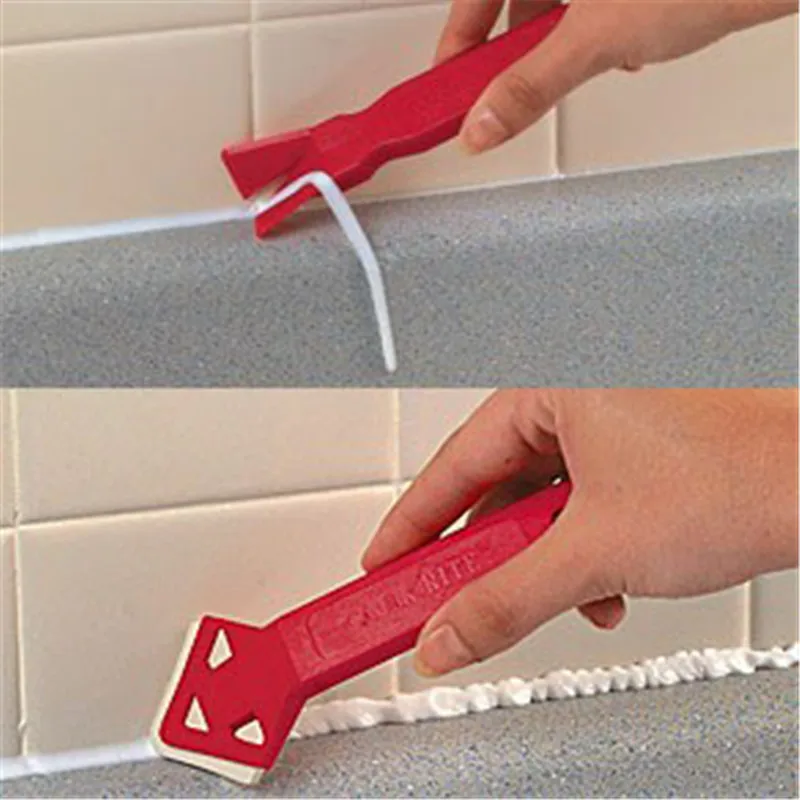 White spirit thinner and gasoline will help soften and help remove the sealant.
The cleaner composition is applied to the sealant joint in such a way as to provide a layer thickness 2-3 times thicker than the silicone layer. After applying the cleaner, it takes time for the silicone to dissolve, depending on the thickness of the layer, the waiting time can be from 1 to 8 hours. To save cleaner and reduce the time it takes for the sealant to dissolve, you can carefully cut off the available layer of silicone. After the solvent has finished working, the silicone can be wiped off with a cloth or a spatula made of plastic or wood, so as not to damage the surface. If necessary, the whole procedure can be repeated.
Procedure for removing sealant and applying new sealant
A few illustrative examples of removing old sealant and applying new sealant will help you determine the sequence of actions.
Example no. 1
Use a sharp tool or special scraper to remove the old sealant. This must be done carefully so as not to scratch the sink, but at the same time deeply and carefully so that no traces of the old sealant remain. You can also remove the old sealant with the help of special chemicals.
Thoroughly clean the surface of dust and dirt before applying new sealant. Degrease the surface with alcohol or White Spirit thinner. After the surface is prepared for applying a new sealant, you need to decide what will be more effective and better in your case. Apply the sealant immediately or pre-paste the place of application with masking tape, colored tape or electrical tape. The main point is to provide a better and even layer of sealant after it is pressed in and excess is removed.
You can evenly smooth the sealant with your finger, but a better seam is obtained if you use a special plastic spatula to apply the sealant.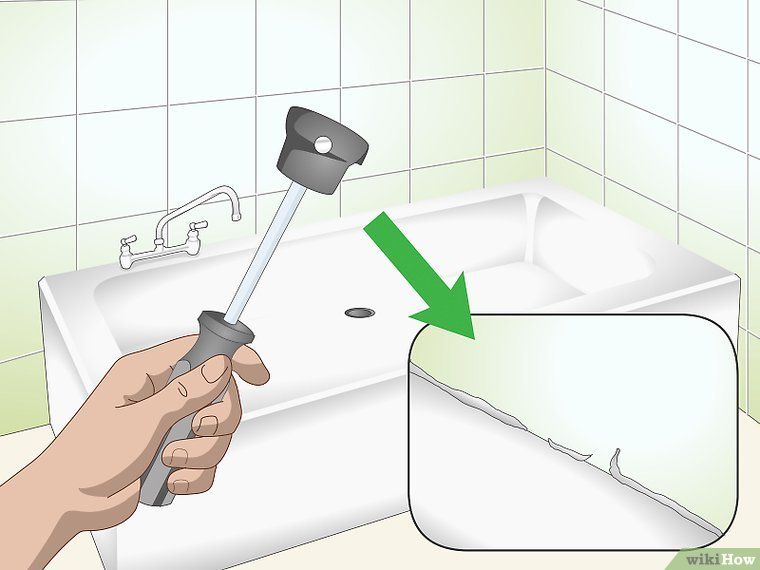 Special sets of spatulas for applying sealant are sold, they are also called spatulas for silicone. They differ in different thicknesses, edge angles and shapes, for better formation of the sealant seam.
By the way, it would not be superfluous to say that there are also special nozzles on sale that are put on directly on the sealant tube and allow you to apply and level the sealant in one pass.
Nozzle for applying and leveling sealant
Example No. 2
Tags: sealant, how to remove sealant, how to remove silicone sealant, apply sealant, remove old sealant, knife to remove sealant how to remove silicone sealant
To write comments 9
Share a link to the article on social networks
You can leave your comment
Share your opinion, what do you think about what you read?
If you did not like the article, write the reason in the comments.
You may have noticed an error or have questions, write about it.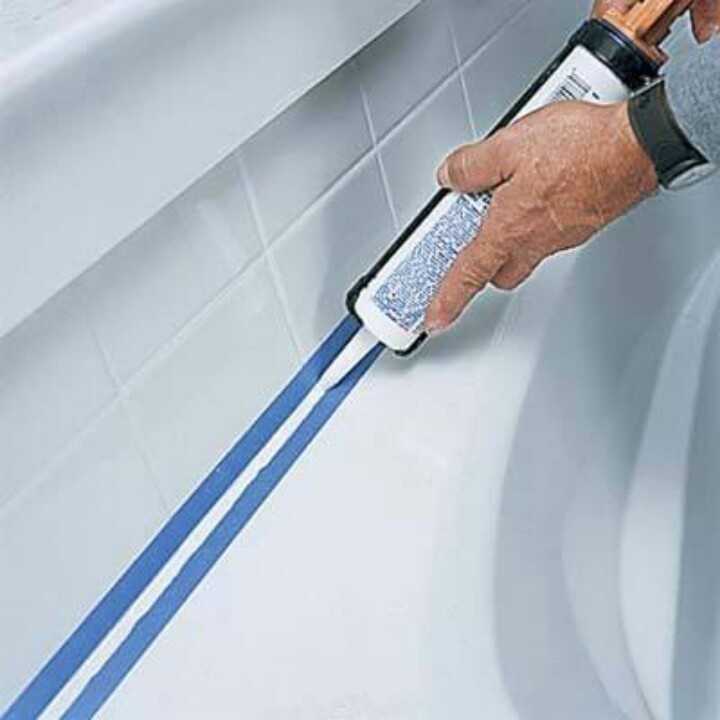
Only knowing your opinion, it will be possible to improve and supplement the article.
How to remove silicone sealant from bathtubs, tiles, showers?
Skip to content
Search for:
Construction site
Author Anatoly For reading 6 min Views 17.1k.
Silicone is a very common material used in bathroom, swimming pool, refrigerator, oven and other places.
But after repair work or long-term service, its surface darkens, collapses, partially peels off from the surface, fungus and mold begin to form, the seam becomes leaky, passes water, and then the question arises - how to remove silicone sealant?
Builders, aquarists, motorists and many others use silicone adhesive in their work, as this agent is almost universal.
Contents
- Silicone sealants
- Where is silicone sealant used?
- Chemical methods
- Mechanical (force) methods
- Removing silicone in the shower, bath
- Removing silicone from various surfaces
Variety of silicone sealants
Specialists divide these funds into two types: one-component and two-component. One-component products are usually used for domestic needs, and the second option is for industrial purposes.
One-component sealants, in turn, are as follows:
- Sealants spec. amine-based appointments - alkaline;
- Acid Sealants - Contains acetic acid. A specific aroma can be heard when working with the product. It is a versatile low cost sealant that can be used almost anywhere except cement and marble materials. In addition, this type of sealant accelerates the corrosion process of many non-ferrous metals, so they should not be used together;
- Neutral sealants can be used on all surfaces as they contain alcohol or ketoxime instead of vinegar.
Where is silicone sealant used?
Sealants vary in use and purpose. Plumbing adhesive is used for bathroom, shower repair, sealing home plumbing.
For the manufacture of glass products, for aquariums and stained-glass windows, glue-sealant is used.
This material adheres well to surfaces, fills voids, withstands heavy loads and is highly durable.
Aquarists, builders, pool owners use a sealant with antifungal additives in their work, on the surface of which fungus and mold do not form.
Solvents give silicone sealant its tackiness and elasticity, making it adaptable to any surface in bathrooms, showers and other areas.
Video:
That is why the old silicone is very difficult and sometimes impossible to remove from the surface.
Whichever sealant you choose, you should be aware that this adhesive is almost permanently attached to the surface, and it is often very difficult to remove it completely and accurately.
There are several ways to remove silicone sealant without damaging the surface.
Chemical Methods
There are many products on the market today that remove old silicone sealant that coats mold and mildew from tiles, tiles, glass and other surfaces.
These products are available as a paste, foam, aerosol and solution.
Be sure to read the product instructions before use, and test it on an inconspicuous area in the bathtub or shower to see if the surface of the shower stall and other sanitary ware will react to the product.
Ensure that the chemical will not corrode tile, enamel, paint or other surfaces.
If you choose an aerosol, be sure to wear a mask and gloves when working to protect yourself from harmful fumes.
Video:
After some time after applying the product, the adhesive will become soft and its residue, which is covered by fungus and mold, can be easily removed from the shower, bathtub, glass using a blade or other tool.
If traces of product appear on the coating, they can be removed with a solvent. Now wash the treated area with detergent and wipe dry.
Mechanical (force) methods
This sealant removal method is only suitable for surfaces that are not afraid of damage. For tiles, mirrors or glass in a shower or aquarium, this method of removing the adhesive is unacceptable.
For work you need to take a pumice stone and a knife. Large pieces of glue are removed with a knife, and then the remains are removed with fine-grained sandpaper or pumice.
At the end of the work, treat the surface with cleaning agents.
If the adhesive cannot be removed, commercially available agents such as acetone, mineral spirits and other solvents can be used to remove it.
First scrape off the old adhesive with a knife or scraper, then moisten the surface with solvent and leave for 30-60 minutes for best effect.
The silicone will become like gelatin, now use a sharp knife to remove it from the surface.
If necessary, the procedure can be repeated several times, and if the contamination is very old, the solvent can be applied overnight.
Video:
You can also remove the old sealant, on which fungus and mold have formed, with the help of salt, which is applied to wet gauze and gently clean the surface with circular, unhurried movements.
Then wipe the surface with soap and water.
Removing silicone in the shower, bath
In the bathroom and shower, all seams must be sealed, and silicone is often used for this.
Due to high humidity, mold, fungus and plaque appear on its surface over time, and the question arises, how to remove silicone from the surface of a bathtub or shower cabin?
Mechanically remove silicone sealant in the shower or bathroom.
Using a spatula, knife or other suitable tool, remove the top layer of glue.
Next, remove the bathroom or shower cubicle, if the adhesive has not been completely removed, it must be cut.
From the removed plumbing, remove the remaining adhesive with fine sandpaper using soft circular motions so as not to spoil the surface.
Mounting holes are cleaned with a screwdriver, the surface of walls and plumbing is wiped clean with a cloth.
The enameled surface must not be cleaned with abrasive products, as it will not be possible to restore it after scratches.
Various chemicals are used to clean an enameled bathtub, a wide range of which is available at any hardware or hardware store.
Video:
But with an acrylic bath, you can remove the adhesive both mechanically and with the help of auxiliary tools.
If you decide to use chemicals to clean your acrylic bath, test them on a small area.
Removing silicone from various surfaces
If you need to remove adhesive residue from the glass surface of a mirror or shower, you can first do this with a blade.
This must be done very carefully so as not to scratch the glass, and the whole process will take a lot of time.
Glass sealant can also be removed with benzine, mineral spirits, and other inexpensive special products.
To remove silicone residue from sanitary tile, carefully cut off the adhesive layer with a knife or blade so as not to damage the surface of the tile, and then apply gasoline or white spirit with a rag.
After a while the silicone will soften and can be removed with a wooden scraper.
You can also rub kerosene into the silicone until the adhesive is soft and easily peels off the tile, but this process will take a lot of your time.
If you use special tile products, make sure that after using them, the tile will not crack or fade, especially for colored tiles.