Remove textured paint from ceiling
How to remove texture from a ceiling |
(Image credit: Getty Images)
Removing texture from a ceiling is a laborious job, but it is one that DIYers can take on easily themselves.
A textured or ‘popcorn’ ceiling was a popular feature in many mid-century homes, providing an aesthetically pleasing finish and helping to disguise imperfections in the plasterwork beneath.
However, practically speaking, textured ceilings can be tricky, as they also hide complex problems such as leaks and damp issues.
If you’re ready to remove your textured ceiling, take a look at our expert guide. We guarantee the process is a lot easier than you might expect.
How to remove a textured ceiling
You may want to remove a popcorn ceiling – in which case you may want to consult our dedicated guide – or perhaps you just want to remove a textured ceiling you previously installed or inherited from your home's previous owners. Whichever, these easy step-by-step instructions will help you complete the task with ease.
1. Prepare to remove a textured ceiling
Because of its unique coating, removing the texture from your ceiling will create plenty of dust. Therefore, certain steps and preparative measures must be taken. It is important that you cover the entire room in protective sheets or painter’s plastic before you start.
‘Protective gear is a must’, explains Nicholas Smacchia from Westchester-based company Plastering by Nicholas , so ensure you have goggles and a face mask to hand.
2. Consider any harmful chemicals
Before embarking on the project, it is advisable to take a small sample from your ceiling and have it tested for both lead and asbestos content. Trying to sand or remove either of these materials can be hazardous to your health.
However, there are some dedicated products which are safe to use, even if harmful chemicals are present.
Andrew Chviers from Eco Solutions suggests using their X-Tex product as it ‘encapsulates the fibers and prevents them getting airborne.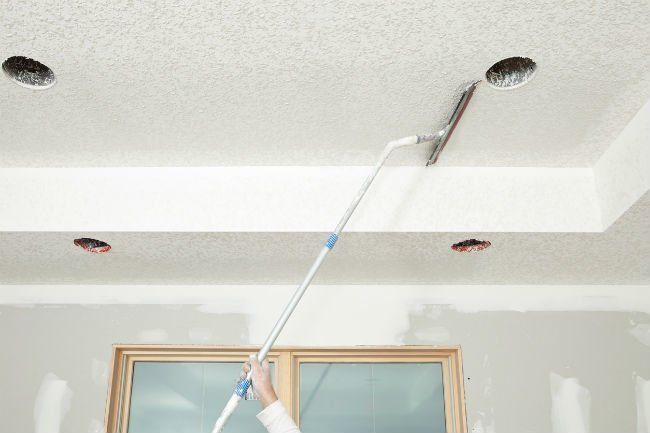 ’ ‘It is called a working wet system,’ he confirms.
3. Use the right tools
Whatever method you use, you’ll need a good quality scraper or putty knife.
Sharad Gaurav, product manager at paint suppliers Purdy suggests using their Bent Pole Scraper . ‘This 3-inch stiff blade will help remove texture from a ceiling and can be attached to the Purdy PowerLock Extension pole to easily reach various ceilings heights.’
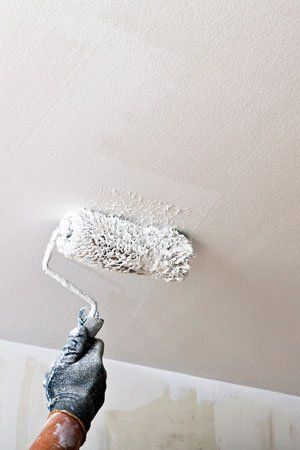
4. Use a dedicated product
As with texturing a ceiling, application is key when it comes to working with a specific texture removing product.
Andrew Chivers recommends using a product. ‘It can be applied to the (ceiling) surface, covered with plastic film and left overnight.’
This process will soften both the textured paint and the textured ceiling. The next morning you can start removing the texture ‘using a long handled blade scraper’, confirms Andrew.
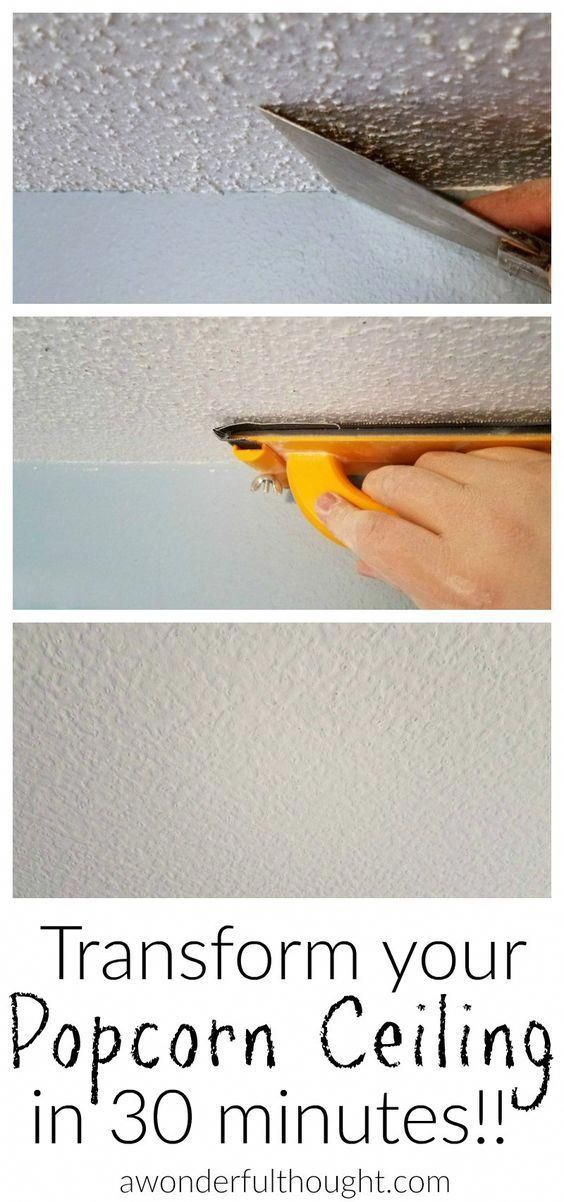
5. Remove texture with a scraper
If you'd rather avoid chemicals you can, of course, use traditional methods to remove a textured ceiling. Start by spraying the ceiling with water to soften the material, though bear in mind that if you have previously painted the ceiling, the water may not penetrate the paint to soften the texturing material beneath.
Plasterer Nicholas Smacchia suggests ‘scraping off the high points’ first. Then work with your scraper from the middle of the ceiling and move towards the walls.
Be careful not to use too much force as it can lead to cracks and damage.
‘Be sure not to gauge the ceiling with the blade edges (of your scraper) as they can be sharp.’ confirms Sharad from Purdy.
6. Repair and sand
Once all the texture has been removed it’s important to repair all cracks with a joint compound. Then you are ready to sand and start painting.
However, to achieve a really smart finish, Nicholas Smacchia suggests ‘applying two coats of premixed drywall compound then sand smooth prior to painting.’
Can a textured ceiling be smoothed?
Although it is likely to be more expensive, you can hang drywall ceiling to cover texture, and then plaster a ceiling, choosing to take on the tasks yourself or calling in a professional.
Another option is to use a dedicated finishing plaster product. Be sure to assess your project first, as many of these products only hide small bumps and contours, and may not be able to smooth over deep texture.
Steph Hendries is a freelance journalist who has contributed to many different interiors websites including Homes & Gardens, Ideal Home and Livingetc. She has also worked on a range of social content for property brands such as Zoopla and Boomin. Steph writes for Homes & Gardens Solved section, concentrating on DIY, how to, cleaning and organizing content.
How we Remove Textured (& Heavily Painted) Ceilings in Hours
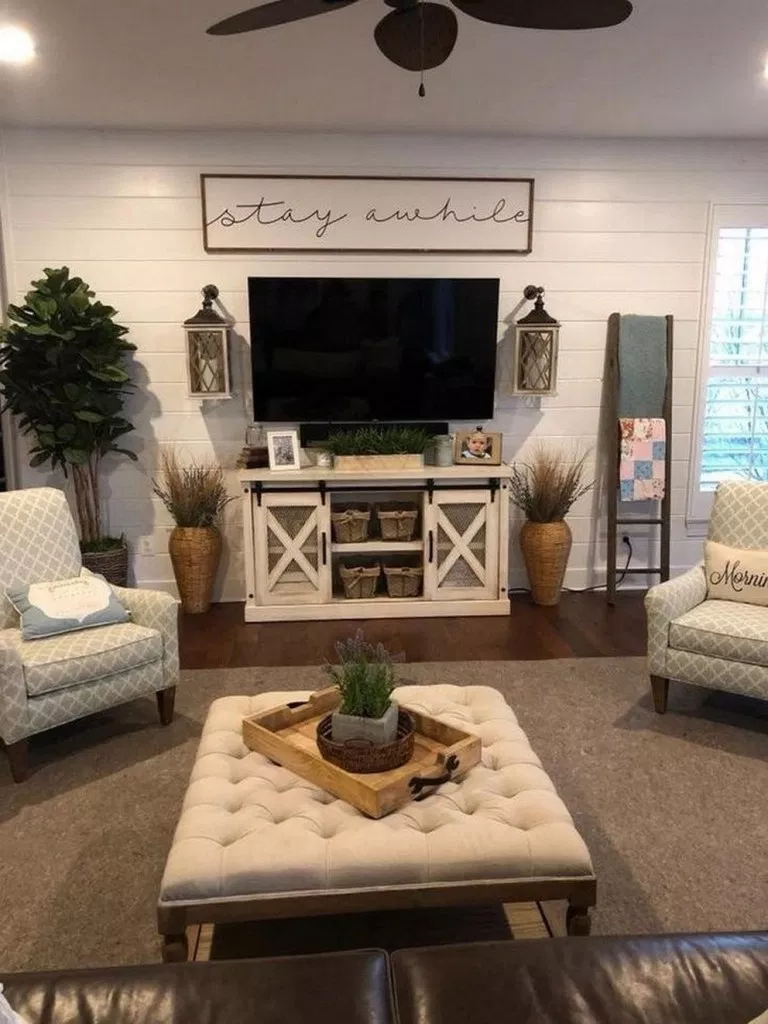
Even before we bought our 1980’s home in Mississippi, we talked about and researched how we could remove the textured ceilings, or more specifically stomped ceilings. There is nothing wrong with textured ceilings, we just love the look of flat ceilings and thought it would make the home feel refreshed. It’s totally a personal preference!
I did research on people in the Columbus, MS area to remove the ceilings for us because we really didn’t want to do it ourselves but it was really difficult to find someone. I called five different companies and none of them would answer their phones! When I did finally reach someone, they quoted me a minimum of $8000 for our 1600 sq ft house (I think it would’ve been closer to the $10000 range with our vaulted ceilings in the living room). I get it, it’s a pain in the rear kind of job, takes a good chunk of time and creates a huge mess but $8000 to remove textured ceilings was absolutely not going to happen for us. Our money is better spent elsewhere. We decided that if the textured ceilings were going to go bye-bye, we’d be the ones removing them.
I did a bunch of research on how we would go about this and came across a few methods that we tried out. Our ceilings are even more difficult than the typical popcorn ceilings because they have been painted probably 4-5 times on top of the texture. That makes it way more difficult to remove. If your ceilings aren’t painted with multiple coats, you could most likely get away with following this method!
We tried this and it didn’t work as beautifully because of the paint (isn’t it so satisfying to watch?!).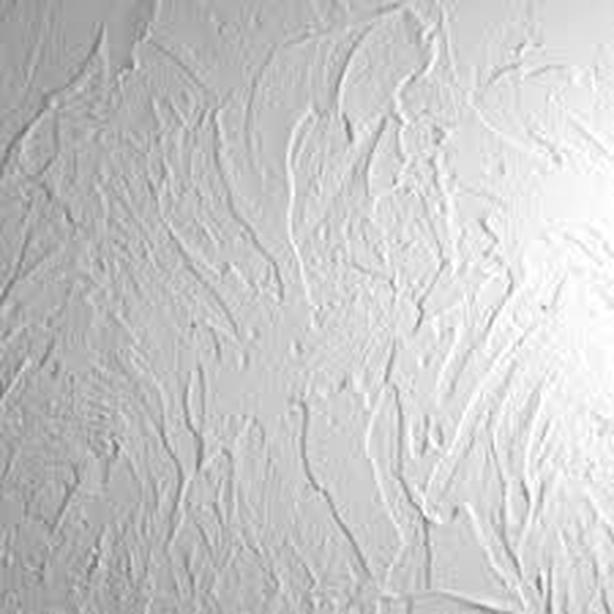 We ended up taking over two weeks to do the first room we started this on. There were so many gouges in the ceiling we had to go back and patch and our hands were so tired. We tried the same method on the entryway hoping that we could get it removed quicker and easier with a better putty knife and spray, but we had the same result as before. For Ellie’s nursery we knew that we had to try a different method or else we would have gone insane (or more likely would have just given up and decided to keep the rest of the ceiling the way they were). We tested a few new methods until we found one that was quick and relatively easy, albeit messy, and finished the rest of the ceiling. We feel like now that we’ve got it locked down, we’re able to share with you how you can do it too! With this method we are able to remove the textured ceilings in one room in about 4 hours.
** If you are doing this in an older home, I’d recommend first testing it for asbestos using a kit like THIS.
This is what we started with:
And this is what we finished with:
What we use:
- Drywall sander
- Course (60-grit) sanding discs
- Finer (80-120) grit sanding discs
- 16 oz bottle filled with Thieves + vinegar + water
- Floor scraper
- Ladder
- Plastic sheeting
- Safety glasses
- Mask
- Gloves
- Clothes you can get messy
- Joint compound
- Putty knife
What to do:
- Start by prepping the room.
 This takes a good bit of time but it’s worth it, trust me. If you have carpet, cover it with plastic and any openings that you don’t want dust to escape from, remove the light fixture, air vents, blinds, etc. and cover those openings as well. We didn’t cover the floors in this room because it’s easier for us to just vacuum it up and these floors will be replaced in the upcoming months so we weren’t worried about them! A good tip I got from quite a few readers – if you plan on replacing the floors at the same time, don’t even worry about covering them. Remove the texture from the ceiling and then roll up the carpet with the mess on it and haul it out. The mess is cleaned up AND the floors are ready for their replacement! Yay for efficiency.
 - Scrape the big peaks off using the floor scraper. You might be able to get away with using a putty knife for this but in our case to cut through all of the paint, the sharper blade was necessary. Don’t dig too hard into the compound/paint.
 You aren’t trying to remove all of it with this step, just the peaks! If you accidentally create a gouge with the knife, don’t worry, we’ll fix that below (but the less gouges, the less amount of time it’ll take!). The reason for this step is to prevent the sharp peaks from shredding the sandpaper in the next step.
- Using the drywall sander and the course grit sandpaper, sand away the remaining compound/paint working in small sections. Swap out a fresh sheet of sandpaper when you notice the current one becoming less effective. As soon as the drywall begins to appear under the joint compound, stop and move to the next section. The coarser grit sandpaper can easily tear up the paper layer of the drywall if you aren’t careful. Notice in the picture below how there are a lot of spots with just a very very thin layer of compound left.
- Once you have completed the entire ceiling, go back over all of it with the fine grit sandpaper, removing any remaining joint compound.
 No need to completely remove the compound along the seams where the drywall pieces meet, or where they filled in the holes of any nails/screws. It should be pretty obvious where these are since there will be a long line of compound that is flush with the drywall (see photo below).
 - We then had to scrape about 1/2″ of the entire edge of the ceiling next to the crown moulding by hand using a spray bottle and putty knife because our sander couldn’t reach there.
- Using a putty knife, fill in any gouges or nicks with joint compound. Let it dry completely.
- Sand down the areas you filled in with joint compound using a sanding block.
- Wipe down the ceiling with a damp cloth to remove any dust, and clean up your mess, it’s time to paint! We have painted all of our ceilings after removing the texture with this paint in a flat finish. It takes us two coats without priming to get good coverage. You can find our plans for the rest of this room HERE!
I really really hope you guys find this helpful and that is helps you achieve the feel you’re going for in your home. Until next time!
Turn on your JavaScript to view content
I sincerely appreciate you all shopping through my affiliate links like the ones included in this post. I make a small commission when you purchase through these links at no extra cost to you. These funds help support my family and allow for us to produce better content for you all. I can’t thank you enough for supporting all that we do!
Pin this image to save the post for later:
Removal of other old coatings
If the wall or ceiling to be pasted over has been previously painted or wallpapered, it will not take long to prepare the surface for the new finish. But if the surface is covered with textured paint, ceramic or polystyrene tiles or wall panels, it will take more work to remove the old finish and restore the surface to its original appearance.
Textured finishes are applied in different ways, depending on their type. For textured painting, mainly thick water-based paints are used, which make it possible to create a relatively low relief.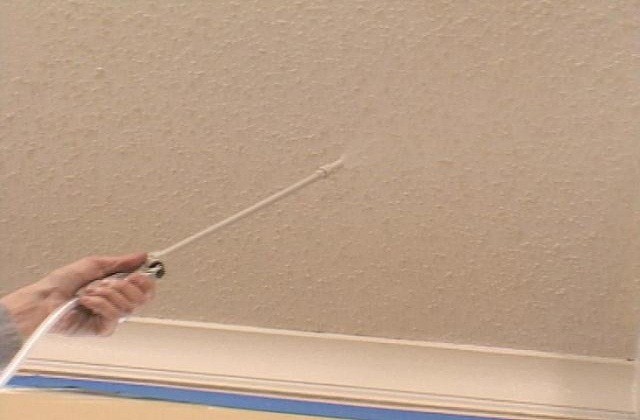 It can be removed with a special composition. Some textured finishes made with powders or ready mixes are best removed with a steam wallpaper remover. After he softens the mixture, it is easy to scrape it off the wall.
Never attempt to remove a textured finish by sanding. For two reasons. First, a huge amount of very fine dust is formed. Secondly, the old types of textures contain asbestos fiber as a filler, it is necessary to avoid any actions that can transfer it into the atmosphere - this is harmful to health.
There are two solutions for tiles and wall panels. They can either be completely removed or covered with a layer of plaster. The first solution will require a significant update of the surface, with the second, the internal volume of the room will decrease somewhat, and there will also be some complications with door and window openings.
Removal of textured finishes
To remove textured paint, brush liberally with a special proprietary solution. Rub it well into the paint and let it soak in.
When the paint has softened, scrape it off with a wide blade scraper. Do this with gloves, and when processing the ceiling, also wear safety glasses.
After removing the bulk of the coating, clean the remaining paint stains with a wire cloth, dipping it in the same solution.
Finishes based on powders or ready mixes should first be softened with a steam wallpaper remover. Never attempt to remove this type of finish by sanding.
Removing ceramic tiles
On a fully tiled wall, break one tile with a hammer to create a launch pad. On partially lined walls, start at the edge.
Use a wide stone chisel and a sledgehammer or heavy hammer to crush the old tiles on the wall. Then lightly plaster the surface and smooth
Removing polystyrene tiles
Remove the tiles from the ceiling using a scraper. If they were planted on a solid layer of glue, temporarily cover them with construction paper.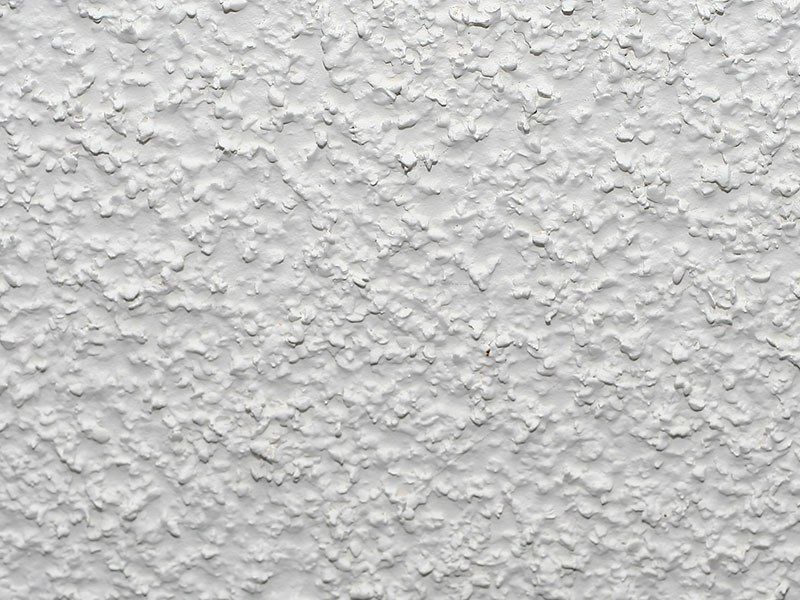 For a better finish, apply a layer of new gypsum plaster and drive nails through it into the ceiling beams.
If the tiles have been set on separate spots of glue, loosen the old glue with a hair dryer and remove it with a scraper and a wide blade.
Removing panels from walls
The last board was fastened to the wall with nails hammered into its front side. Drive these nails deeper with a beard and remove the board.
The rest of the boards were fastened with countersunk nails driven into the tongue. Tear them off the wall with a nail puller or pry bar.
Finally, tear off the purlins from the wall and pull out the nails driven into the wall with a carpenter's hammer or nail puller, placing a protective block.
How to remove old paint from wood
Before painting a wood surface that already has one or more previous coats of paint on it, remove the old coating using household tools. If you do not know how to remove old paint, use the step-by-step instructions.
First, prepare the wood for painting by sanding and impregnating it with a primer. By choosing the right tools and calculating the effort, you can process up to a meter of painted surface area in 10-20 minutes .
The specificity of wood as a working material is its softness (depending on the species and quality of the wood). When preparing a wooden surface for painting or varnishing, determine whether the entire layer of old paint needs to be removed or the product can be treated partially. Consider the following characteristics of the paint to be removed:
- thickness - single coat may not be removed. Lacquer (dye) is applied to it easier, it holds better, and the wood does not lend itself to harmful effects once again. At the same time, the creation of very thick layers is fraught with a decrease in strength and density - they are easily destroyed at the slightest mechanical impact
- invoice (may not match the quality and functionality of the new coating)
- color - if a layer of new paint is not thick enough and dense enough, the old one will show through or change the color of the new one (for example, overlaying blue and red colors will give a purple tint)
- Age of application of the old coating - it may peel off on its own.
 Painting without removing the old layer, which is peeling, will “make” the treated area bumpy
What is needed to remove old paint from a wooden product?
Inspect the condition of the treated surfaces, the structure and quality of the wood, make sure that the product is suitable for further use. Based on this, select surface treatment methods, dress appropriately (in work, protective clothing) and take special means. Before removing the paint from the wood, prepare the product accordingly (one of the methods that will be discussed later).
To remove the paint and prepare the surface for various operations, use the following tools and a set of materials:
- chemical impregnation for cleaning surfaces from paint and varnish substances
- hair dryer used for building purposes
- grinder with grinding disc or drill with abrasive attachment
- sandpaper, small spatulas
- protective equipment against toxic substances
How do I remove old paint from wood-based products?
To safely and accurately remove old paint from wood, gentle methods and tools are used that cause minimal or no damage to the wood substrate. Before the paint is removed from the wood, it is treated:
- chemically
- mechanically
- temperature
Removing paint from wood with chemicals
Chemical products are the quickest and most convenient way to remove cracked paint from wood substrates. In a specialized store, you will find a product based on potassium carbonate and lime. The jar contains instructions for the correct application of the substance to the surface, as well as an explanation of how to remove the old paint. Use a soft bristled roller or brush to apply the product to the painted product. After a few minutes, use a small construction spatula to remove the paint from the surface.
The disadvantage of this method is the need to isolate the product from other household items before removing the old paint from the wood. The applied agent is very toxic and easily impregnates everything around (it is best to linger on upholstered furniture and thick wallpaper, fabric upholstery). Removal of old paint must be carried out in protective ammunition.
How to remove paint with heat and abrasives?
Before repainting a product, learn how to remove paint from wood using temperature. This method is simpler than the previous one, but more dangerous, as it can cause a fire in the paintwork. The method is based on the fact that when exposed to temperature, the paint begins to decompose and release gas. It penetrates and accumulates under the coating, causing the paint to bubble and completely separate from the wood base.
To thermally remove old paint from a wooden surface, use a construction iron or hair dryer. The hair dryer works like a normal one, but it has very high temperature modes for heating the air. In the second case: the foil is applied to the surface, warmed up with an iron from above, and then removed along with a layer of unnecessary paint.
The easiest way to remove old cracked paint is mechanically using:0068
This generates a lot of dust, so bring protective breathing masks and a gown to safely remove old paint from wood.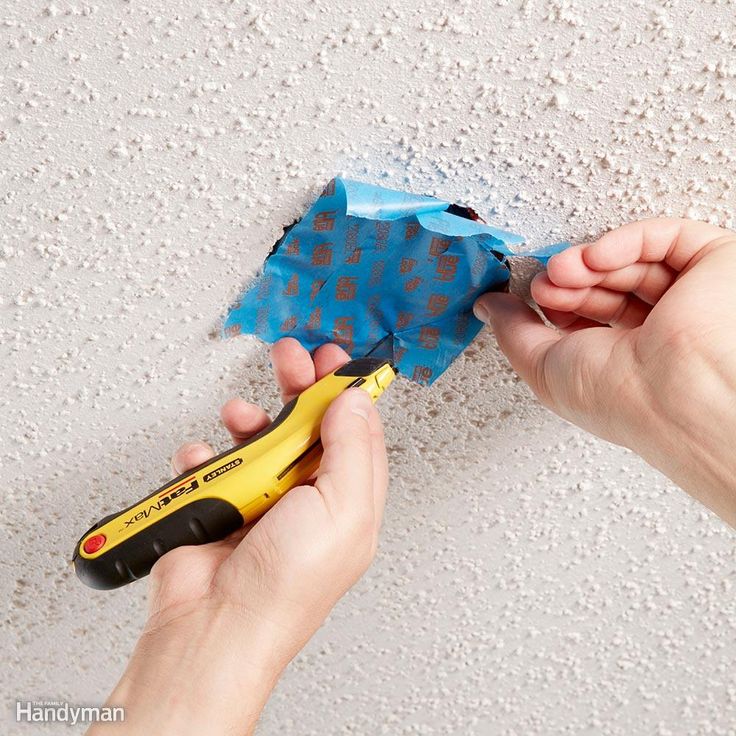
Unsafe methods of cleaning wood from old paint
It is not recommended to use open fire (gas burners) to heat the paint layer. This leads to the ignition of the coating material, and then the wood itself. In addition, some types of wood emit special resins during heat treatment, due to which you will not be able to repaint the product later.
Any kind of product pre-treatment can lead to unpleasant consequences if you do not follow the safety rules and work without protection. If the product can be taken out into the open, then it is advisable to do this before removing the old paint from its wooden surfaces. This will help you avoid the extra hassle of cleaning the house, as well as unpleasant odors obtained after the chemical treatment of a wooden item.
Should old cracked paint be removed from the product?
Pretreatment of the wood prior to painting further contributes to the effective application of the new paintwork.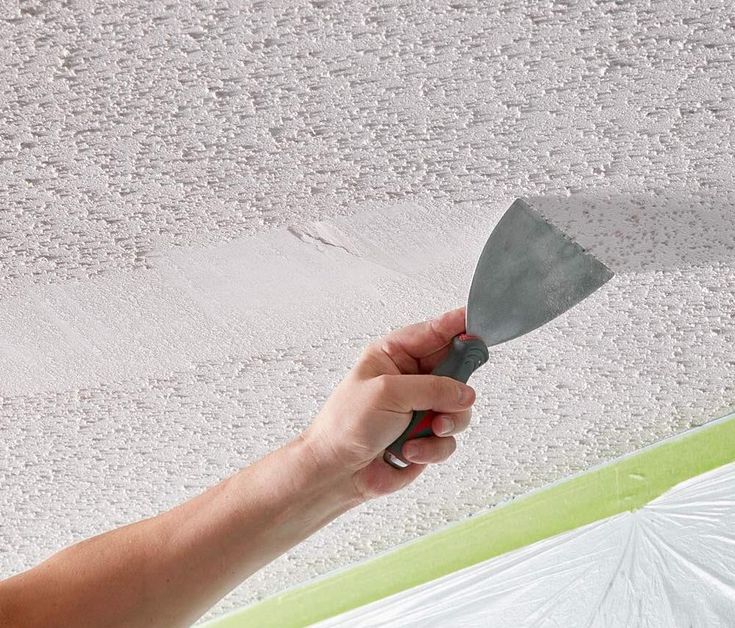 Inspection of the wood surface will help you determine how the old paint should be treated and stripped, and whether it should be done at all. Removal of the coating is necessary if:
- it is cracked, blisters appear
- several coats have already been applied to the surface, causing the coating to become uneven, bumpy
- the previous version was of a different quality / texture or color. This may have a negative effect on the final result of painting, or the latter will lie unevenly, lag behind, etc.
You need to prepare for the fact that removing paint from the surface is a laborious process that will require a lot of effort and time. If you do not know how to remove paint from wood or do not want to bother with such work, contact qualified craftsmen.
Anastasia's task "Apartment repair master"
from 4 000 ₽
Thanks to Oleg for a job well done, about a week has passed since completion, everything is holding up perfectly, not the slightest complaint.