Protect outdoor spigot freezing
How to Prevent Outdoor Spigots From Freezing
By
Bob Formisano
Bob Formisano
Bob Formisano is a licensed architect and builder with nearly 40 years of experience building new homes and restoring older homes. One of his specialties is repairing old systems dating back to the 1920s, including galvanized water pipes, knob-and-tube wiring, and more. His home repair articles for The Spruce span more than 10 years.
Learn more about The Spruce's Editorial Process
Updated on 08/02/22
Reviewed by
Richard Epstein
Reviewed by Richard Epstein
Richard Epstein is a licensed master plumber with over 40 years experience in residential and commercial plumbing. He specializes in estimating as well as design and engineering for plumbing systems, and he works for one of New York's largest union plumbing construction companies.
Learn more about The Spruce's Review Board
Fact checked by
Jessica Wrubel
Fact checked by Jessica Wrubel
Jessica Wrubel has an accomplished background as a writer and copy editor, working for various publications, newspapers and in public libraries assisting with reference, research and special projects. In addition to her journalism experience, she has been educating on health and wellness topics for over 15 years in and outside of the classroom.
Learn more about The Spruce's Editorial Process
The Spruce / Sarah Lee
Project Overview
Worrying about outdoor spigots freezing every winter is something that most homeowners can relate to. But this doesn't have to be such a perennial problem.
If you have a standard spigot, there are simple winterizing steps you can take that make it unlikely you'll have a problem with freezing. You can also go a step further and replace a standard faucet with a frost-proof faucet.
What Is a Frost-Proof Faucet?
A frost-proof (also called "freezeproof" or "frost-free") faucet provides better protection against freezing and eliminates the need to winterize the faucet—other than removing the hose.
Keep reading for two ways to prevent your outdoor spigots from freezing during the wintertime.
Equipment / Tools
Winterizing a Standard Spigot
- Bucket
- Channel-lock pliers (if needed)
Installing a Frost-Proof Faucet
- Screwdriver
- Channel-lock pliers
- Tape measure
- Tubing cutter or hacksaw
- Caulk gun
Materials
Winterizing a Standard Spigot
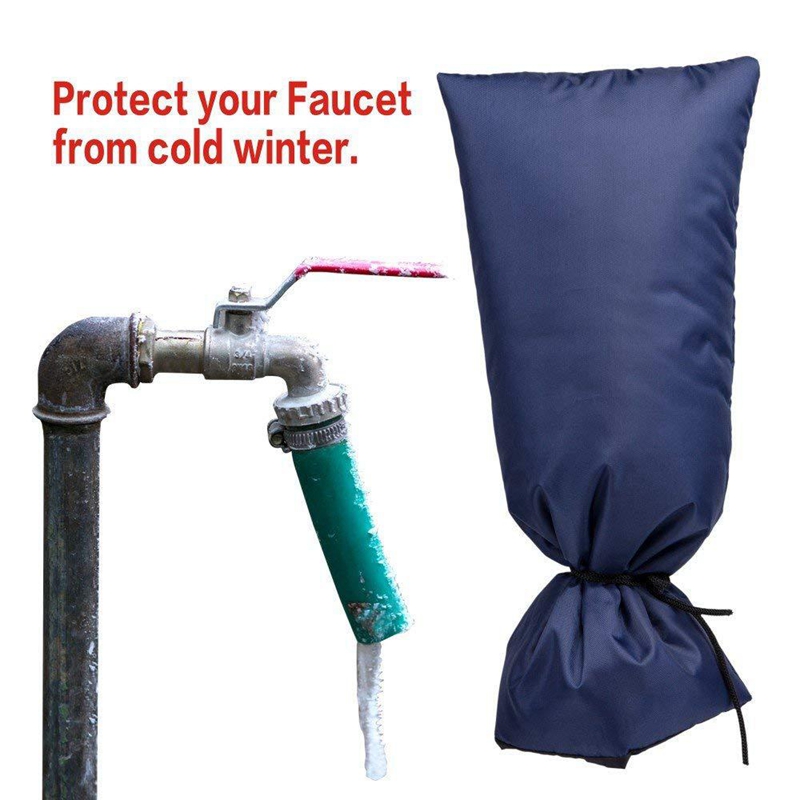
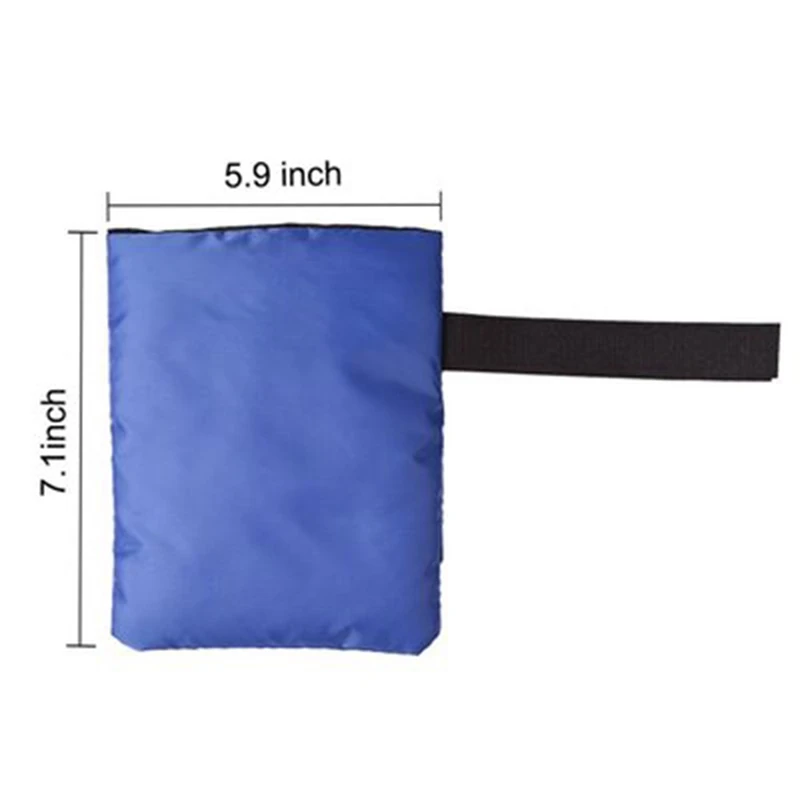
- Insulated faucet cover
Installing a Frost-Proof Faucet
- Frost-proof faucet with push-fit connector
- Sandpaper or emery cloth
- Corrosion-resistant screws (if needed)
- Exterior caulk
The Spruce / Sarah Lee
How to Winterize a Standard Spigot
-
Remove the Hose
If there is still a garden hose connected to the outdoor faucet, remove it from the spigot, drain any residual water in the hose, coil it up, and store it in a dry location.
The Spruce / Sarah Lee
-
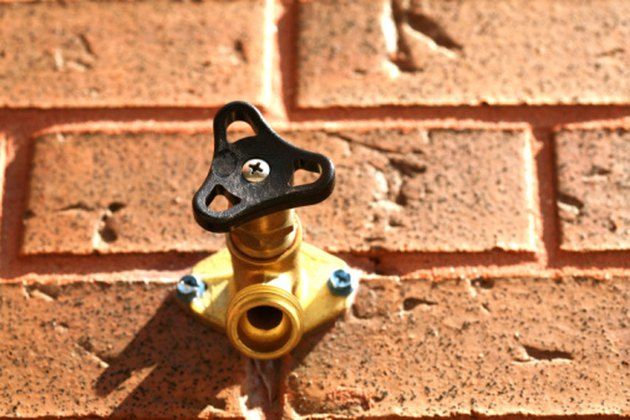
Shut off the Water
Locate the control valve on the water supply pipe leading to the outdoor spigot. If you have metal water pipes, this is usually a brass ball valve located several feet from the outside wall. Turn the handle on the control valve clockwise until it stops. If the valve has a lever-type handle, turn the lever so it is perpendicular to the pipe.
Tip
As you can see, preventing a standard (not frost-proof) spigot from freezing requires a shutoff valve on the supply pipe leading to the faucet. If your spigot does not have this kind of shutoff valve, it's best to install one to simplify annual winterizing tasks.
The Spruce / Sarah Lee
-
Drain the Spigot
Fully open the outdoor spigot and let all residual water drain out of the pipe. If the water trickles and never fully stops, the indoor shutoff valve is faulty and must be replaced. Close the spigot valve.
Hold a bucket under the shutoff valve and remove the bleeder cap on the valve, if it is equipped with one. You may need pliers to loosen the cap. Let all residual water in the line drain into the bucket. Reinstall the bleeder cap, and tighten it snugly.
The Spruce / Sarah Lee
-
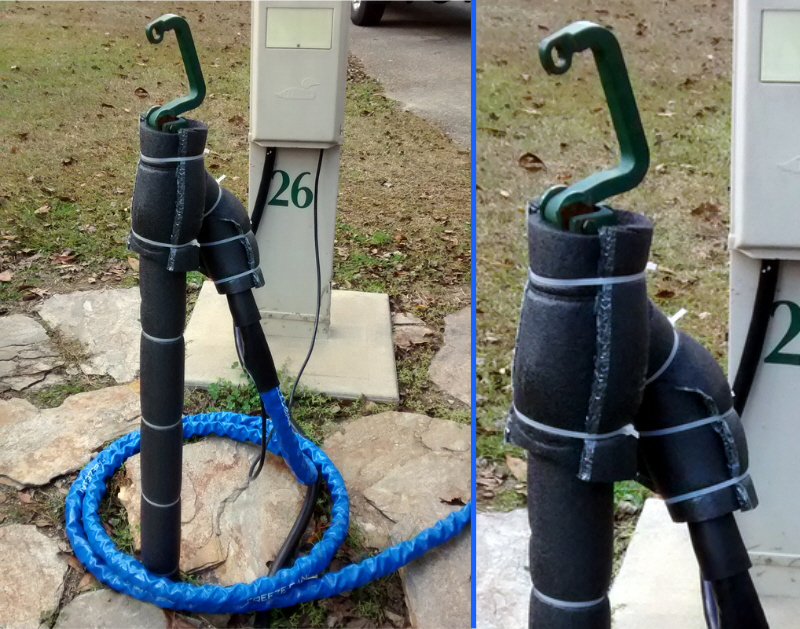
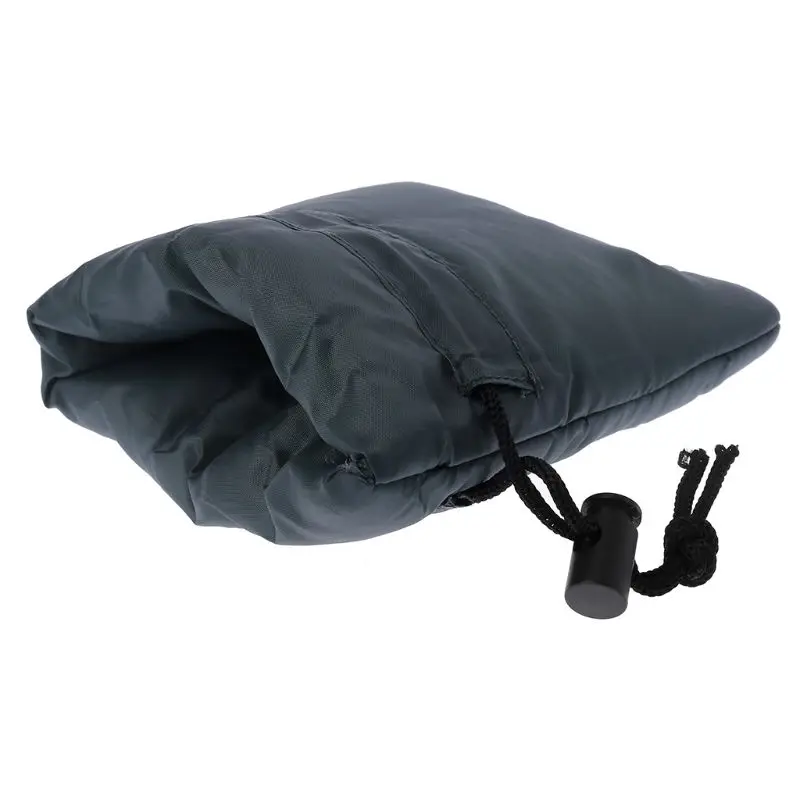
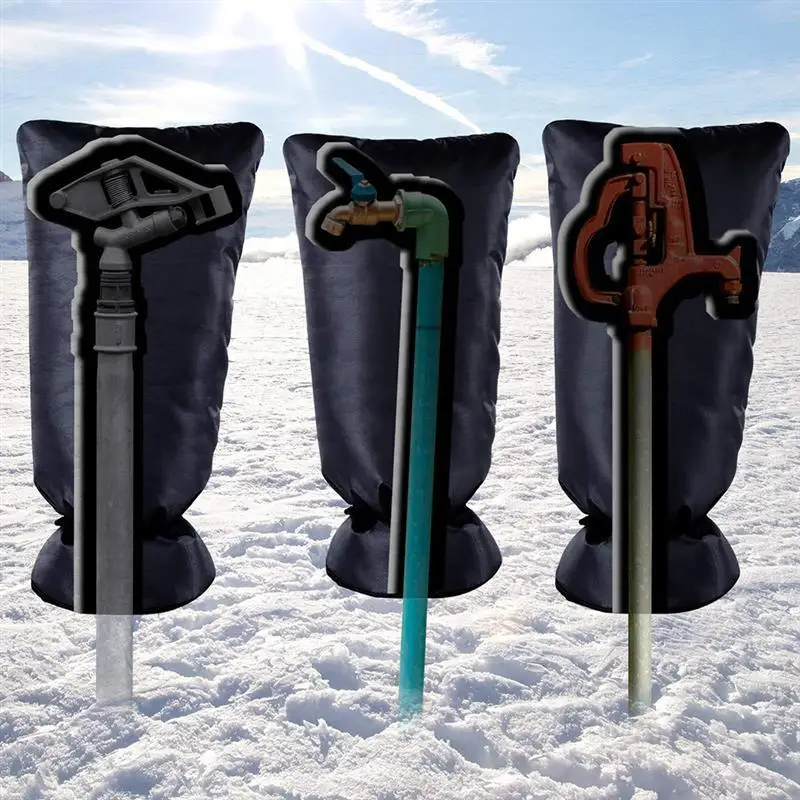
Install an Insulated Faucet Cover
Add an insulated faucet sock or faucet cover to the faucet, if desired. Although these covers don't create any heat of their own, they do trap a small amount of heat radiating from the house, and this is usually enough to prevent the faucet from freezing and bursting—especially if you have also followed the recommended steps for draining the pipes.
The Spruce / Sarah Lee
How to Install a Frost-Proof Faucet
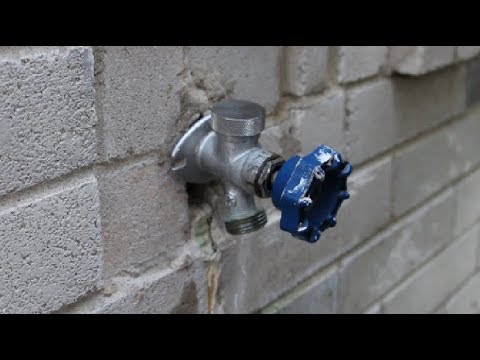
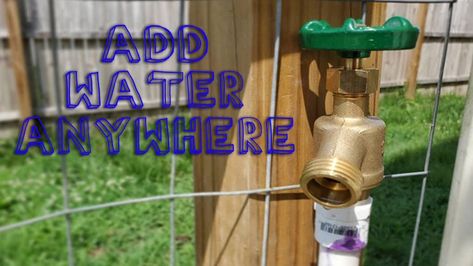
The surest way to prevent an outside faucet from freezing is to replace a standard faucet with a frost-proof one known as a sill-cock. These faucets are controlled with a long rod that extends into the home, where a cartridge or compression valve controls the flow of water.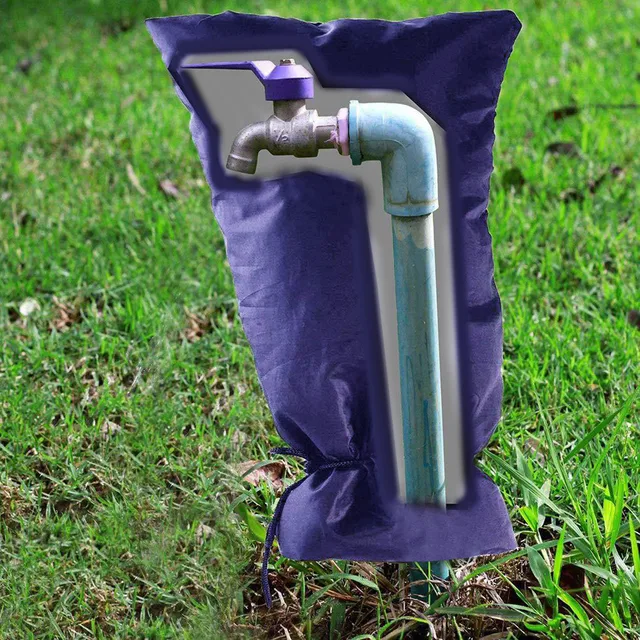 Since the valve itself is located within the safe warmth of the home, it is almost impossible for it to freeze.
A frost-proof faucet is a 6- to 20-inch unit with a hose spigot and control handle at one end and a connector on the other end of the tube for attaching to the indoor water pipe. As a further safety measure, these faucets are designed to be self-draining; when you shut off the faucet handle, any residual water in the long stem will drain out of the tube.
These faucets can be attached to the plumbing pipe with a compression, soldered, PEX, or push-fit connection. For most people, it's best to buy a faucet with a push-fit style of connector, such as the SharkBite brand. This will be the easiest install, as it requires no soldering and can be used with any type of water supply pipe.
If you have trouble finding a frost-proof faucet with a push-fit connector, you can use a standard threaded type, and then use a female threaded-to-push-fit transition fitting to join it to the water pipe.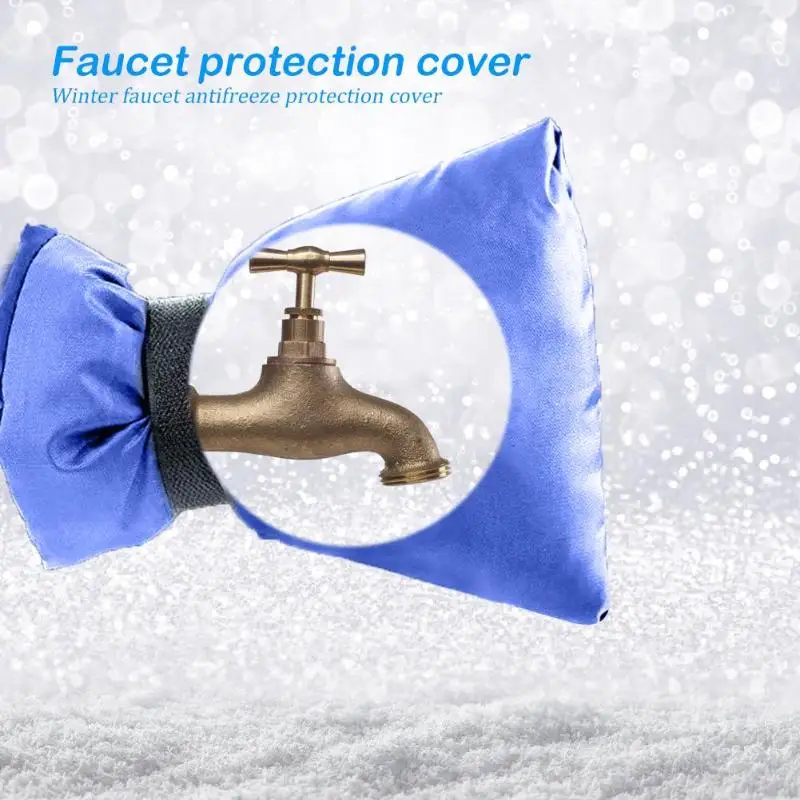 If you have PEX tubing in your home, there are also frost-free faucets that are fitted with PEX-type connectors.
Warning
A project of this scale is best left only to professionals or experienced DIYers: Do not attempt this unless you are confident in your plumbing skills.
-
Shut off and Drain the Water
Turn off the water to the supply pipe leading to the outdoor spigot. If the water pipe does not have its own control valve, you must turn off the water to the entire house, using the home's main shutoff valve.
Open the outdoor spigot and drain the remaining water from the supply pipe.
The Spruce / Sarah Lee
-
Remove the Old Spigot
To remove the outdoor faucet spout, start by removing any mounting screws, then turn the spout counterclockwise to unscrew it from the end of the pipe. You may need to use a pair of channel-lock pliers to twist the faucet spout. Pull the faucet out from the wall on the exterior side.
 Purchase a new frost-free faucet of the same size. It is important that the length and diameter of the pipe match the old faucet.
 The Spruce / Kevin Norris
-
Prepare the Water Supply Pipe
Because of the long valve stem on a frost-proof faucet, it is usually necessary to cut the water supply pipe where the tube of the faucet will connect to it. Use a tubing cutter (for copper pipe), a hacksaw (for galvanized steel or PVC pipe), or a PEX tubing cutter for PEX pipe. Remove and discard the cut-off section of pipe running to the outside of the house.
Debur the inside and outside of the cut end of the water supply pipe with sandpaper or emery cloth. Make sure the outside of the pipe is clean and smooth so it can accept the connection fitting on the new frost-proof faucet.
Mark the end of the pipe at the push-in distance specified by the manufacturer (usually about 1 inch from the cut end of the pipe).
The Spruce / Kevin Norris
-
Attach the Frost-Proof Faucet
Insert the frost-proof faucet through the wall from the outside and position the spout so it is right-side-up.
 Go inside and push the faucet's fitting end straight onto the pipe, pushing as far as the fitting will go. It should reach the push-in mark on the pipe, indicating the pipe is fully inserted into the fitting.
 If you are using a standard threaded-type faucet, screw on the push-fit transition fitting to the faucet's tube first, before attaching it to the water pipe.
From the outside of the house, secure the faucet flange to the wall surface using corrosion-resistant screws, which are usually provided with the faucet.
The Spruce / Kevin Norris
-
Test the Faucet
Open the valve on the faucet, then turn the water back on at the shutoff valve and allow water to run freely out of the faucet spigot. Open and close the faucet spigot several times to confirm that it is working properly and that there is no leaking where the faucet tube connects to the water pipe.
When satisfied that the faucet works correctly, seal the joint between the faucet flange and the house wall with exterior caulk.
The Spruce / Kevin Norris
How to protect an outside faucet from freezing in winter
(Image credit: Getty Images)
It's the time of year when you need to find out how to protect an outside faucet from freezing – if they haven't already.
Sure, a frozen faucet is annoying, especially if you were hoping to give your car a wash or your winter garden ideas a watering once the frost had lifted. But in fact, a faucet that's frozen over can be much more than just an inconvenience – it can do some serious damage to your home's plumbing.
So, what are the problems a frozen faucet can pose? The most common case scenarios are a burst pipe, a broken valve, a broken joint – or all three, if there was enough water left in the tap.
As Steve Allen, technical expert at Harvey Water Softeners , explains, 'although a garden faucet is outside of the property if it becomes frozen it can cause a joint inside the property to come apart and leak.'
How to protect an outside faucet from freezing in winter
Outside faucets – or garden taps in the UK – in winter are often overlooked when people take measures to protect their homes from the consequences of getting frozen pipes – but protecting them needn't be difficult, as we demonstrate below.
1. Close the shut-off valve indoors
Typically, an outside faucet will have a shut-off valve inside the property, and it's water remaining in the pipe leading up to this valve that's the problem. Water expands when frozen, and if the frozen water has nowhere to go, it will destroy whatever's constraining it.
For this reason, it's very important to shut off the valve that lets water flow into the faucet over the cold winter months – before the first frost.
2. Drain the faucet
Once you've shut off the supply, open the faucet to let water drain out and air flow in. This air supply will ensure that any water that does remain in the faucet after it's been shut off has room to expand.
3. Insulate the outside faucet
Of course, not all homes have an isolation valve for the outside tap; many older homes only have one valve that controls all water supply to the house.
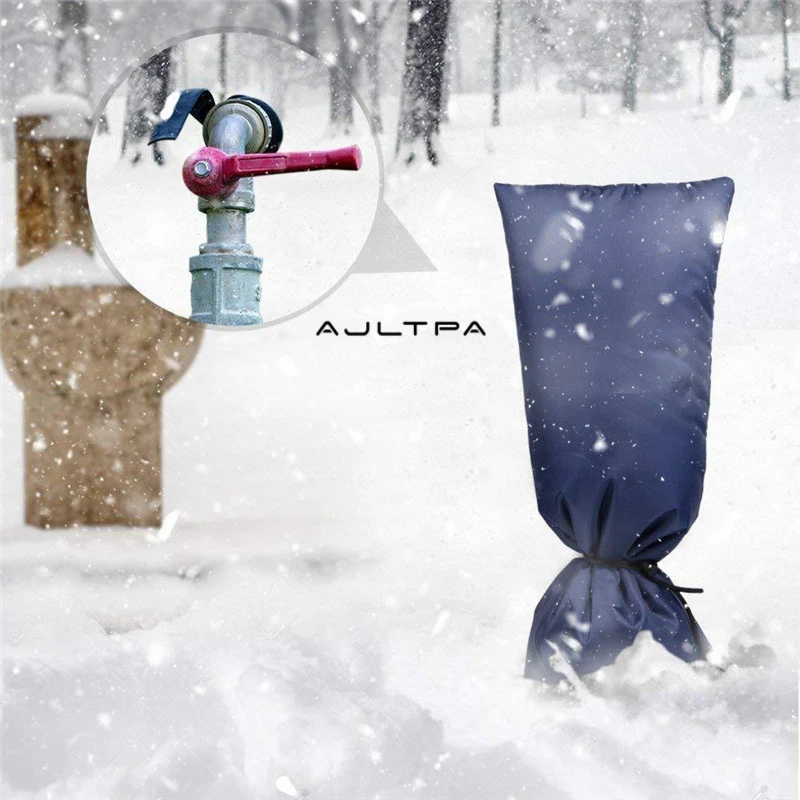
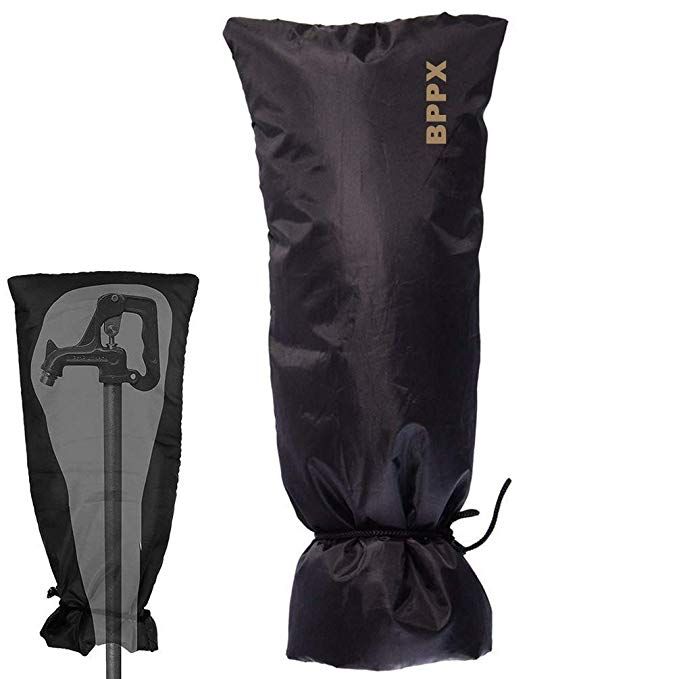
In this situation, you'll want to insulate your outside faucet to prevent it from freezing over – as well as the surrounding pipework.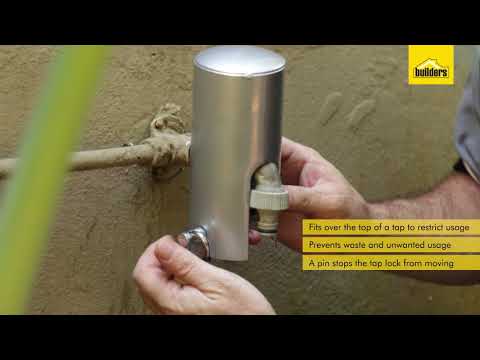 'Purpose made tap covers are available from most DIY stores', as Steve Allen points out. They're inexpensive and will provide enough protection in most cases.
Bear in mind, however, that damage caused by frozen outside faucets may not show until the spring when the water is turned back on – so take time to look for leaks when you do this.
4. Put a insulated cover over the faucet
Covering an outside faucet is a good idea if you want to add an extra layer of protection or you can't completely empty your pipes. You can buy insulating faucet covers which can ensure that no water remaining inside freezes. Combine this with insulated tubing for pipework and you are providing good protection to protect an outside faucet from freezing in winter.
5. Disconnect the garden hose, too
Photo by John Nzoka on Unsplash
(Image credit: John Nzoka/Unsplash)
If your water-filled garden hose is left to freeze it can only exacerbate the problem, so disconnect it, drain it and put it away until spring comes. This won't just stop your outside faucet from freezing – it will protect the hose too, since plastic splits when it expands.
At what temperature does an outside faucet freeze?
An outside faucet will freeze when the outdoor temperature reaches 28ºF (-2ºC) or lower, so it is well worth keeping an eye on night time temperatures in particular as fall progresses, as early frosts often happen at night or in the early morning.
What happens if my outside tap freezes?
And if you're a little too late, and your outside faucet has already frozen over? Don't panic: this doesn't automatically mean that it's already caused a burst pipe or broken valve.
Try wrapping it in a towel that's been soaked in hot water, or gently pour warm (not hot) water over it to unfreeze it. If nothing is working, calling your plumber is the best course of action, before the problem gets worse.
Can I claim on insurance if an outside faucet freezes?
Many people wonder whether if the worst has happened, and a pipe has burst, they could claim insurance.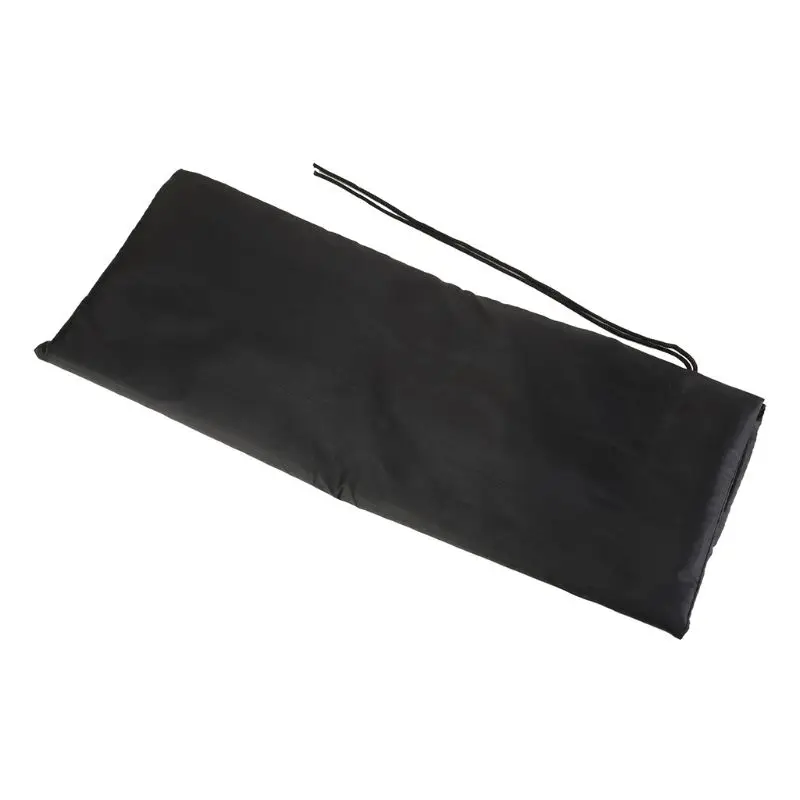 There's a mixture of good and bad news here: yes, most home insurance plans will cover your home against damage caused by burst pipes. Insurance expert and director at One Broker , Shaun Lenton, explains: 'The majority of insurance policies provide cover for damage to a homeowner's property and contents caused by a burst pipe.' That said, always check your policy as it is not always the case.
Shaun also adds, however, that 'the damage to the pipes themselves is not necessarily covered, particularly if the failure is related to age or general wear and tear.'
In other words, if your frozen outside faucet causes a burst pipe or valve, it's most likely you'll have to pay for the repairs, so you really don't want it freezing over.
Lucy Searle has written about interiors, property and gardens since 1990, working her way around the interiors departments of women's magazines before switching to interiors-only titles in the mid-nineties. She was Associate Editor on Ideal Home, and Launch Editor of 4Homes magazine, before moving into digital in 2007, launching Channel 4's flagship website, Channel4.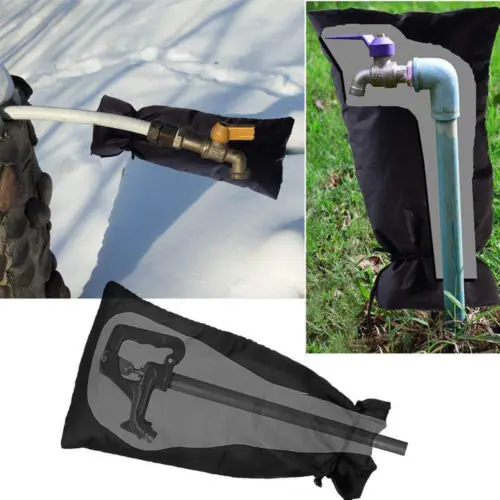 com/4homes. In 2018, Lucy took on the role of Global Editor in Chief for Realhomes.com, taking the site from a small magazine add-on to a global success. She was asked to repeat that success at Homes & Gardens, where she has also taken on the editorship of the magazine.
Own Plumber - Three-way valve and its application
In modern heating systems, a three-way valve is used quite often, since it is a means of quality control of the coolant - by temperature, and not by flow. After all, supplying optimally heated water to radiators is the best way to save energy. Thermomixing taps have other useful features, which you can learn about from this article.
But first we need to consider how the three-way valve works, as well as understand its internal structure. nine0003
Varieties and purpose of thermostatic three-way valves
First, it should be noted that thermostatic three-way valves are divided into several types according to the principle of operation:
- mixing;
- spacers;
- changeover.

The purpose of each of the three types of devices can be judged by the name. The first ones mix two coolant flows with different temperatures, the second ones separate them, and the third ones are engaged in switching water in different directions. Outwardly, it is not difficult to recognize each variety, usually the principle of operation is depicted on the case in the form of a picture. This is what a three-way mixing valve for heating looks like:
A similar designation is on the spacer. As for the switching taps, there may not be an image on their body, but there are significant external differences in shape.
Dividing (left) and diverting (right) valves
By mixing or dividing the flows, the optimal temperature of the heating medium is achieved, which is used in various circuits of the heating system. Switching is used in gas double-circuit boilers, when heated water must be sent in turn to different heat exchangers. nine0003
Design and operation of three-way valves
To understand what the thermomixing three-way valve of the most common saddle type consists of and how it works, you should study the diagram below. Inside the brass body with three nozzles, 3 chambers are cast by casting, the passages between which are blocked by poppet valves. They are fixed on one axis - a rod coming out of the body from the fourth side.
The principle of operation is as follows: when the stem is pressed, the passage for one flow will begin to open and gradually close for the other, as a result of which water of the required temperature will be obtained in the mixing chamber of the valve. It leaves the brass body of the element through the third nozzle. The pressure force on the rod is adjusted by a thermal head with an external temperature sensor installed in accordance with the diagram. nine0003
The whole process should be explained in more detail. Imagine that insufficiently heated coolant is supplied from the hot water side. Then the mechanism passes it on, and the third pipe is closed. The remote sensor is filled with a temperature-sensitive liquid and is connected to a reservoir (bellows) inside the thermal head by means of a capillary tube.
When the sensor heats up, this liquid expands, its volume in the tube and bellows increases, as a result, the latter begins to press on the three-way valve stem. The moment of pressing is determined by the adjustment on the scale of the thermostatic head, set to the desired temperature. After that, cold water from the third branch pipe is mixed with the heated water flow and the temperature of the water at the outlet of the thermal valve remains unchanged, although the coolant continues to heat up at the inlet. nine0003
If the inlet water continues to heat up, the thermostatic valve can close the inlet completely and open the side flow to maintain the set outlet temperature. In this case, the rod drops to its lowest position. As soon as the sensor detects the cooling of the coolant, the head will slightly release the stem, the valve seat on the hot side will open and the mixing of heated water will begin.
The method of adjusting a three-way valve with a thermostatic head with a sensor is the most popular, because it is quite accurate and simple, and does not require electricity. nine0003
Using actuators for three-way valves
In addition to the thermostatic head, the valve can be controlled in other ways. The first of them is manual, when the depth of pressing the rod is determined by the rotation of the handle outside the body. Not the best option and is only suitable if the temperature of the water entering the nozzles is unchanged. Another option is control using a servo and electric drive that receives commands from the controller. To work together with different drives, another type of valves is also used - rotary, whose device is shown in the figure:
There is a certain similarity with a ball valve, only the working rotary element has a different hole shape in order to pass the coolant in two directions at once.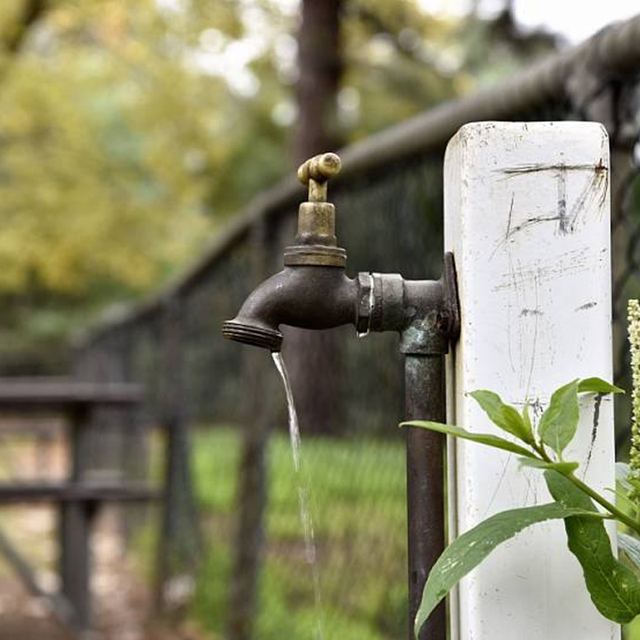 The principle of operation here is simple: the axis rotates to the required angle, rotated by the drive. The latter is controlled by a controller that receives pulses from one or more sensors. Typically, valve actuators are installed in complex or automated heating systems with weather control.
Diagrams for connecting a three-way valve to a heating system
When there is an understanding of what a three-way valve is and how it works, you can consider various connection schemes, depending on the purpose and role of the element in home heating. A thermostatic mixing valve is installed in the following cases:
- To protect the solid fuel boiler from the effects of condensate and thermal shock after sudden power outages.
The heating medium in the underfloor heating circuits must be heated up to no more than 45 °C, which is ensured by a mixing unit with a three-way cock. nine0003
- To maintain the required temperature of the coolant in different parts of the system.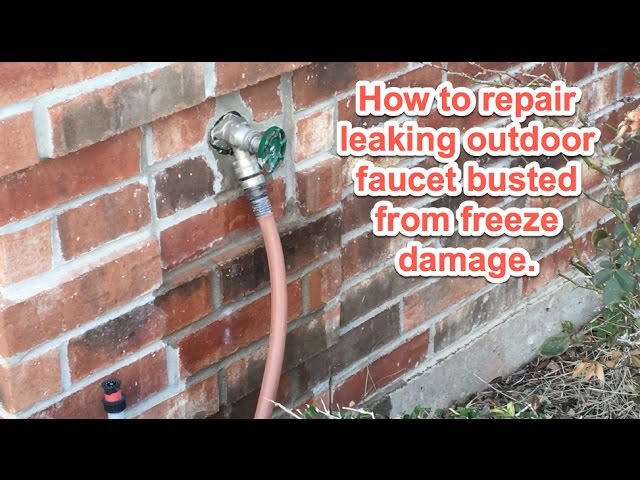
- In order to protect the solid fuel heating unit from the formation of condensate, it must not be allowed to supply cooled water from the radiator network to the boiler tank during its heating. To do this, use the following scheme for connecting a boiler with a bypass and a three-way mixing valve:
The scheme works like this. While the heat generator has not warmed up, the water circulates in a small circle through the bypass. When the coolant in the return is heated to 50-55 ° C, the valve begins to open and mix in the cold coolant from the system. When the heater enters the operating mode, the bypass is closed and the entire flow goes through the radiators. nine0003
In an underfloor heating system, this element performs the same functions. The circulation pump drives the coolant through the heating circuits until it starts to cool. As soon as this happens, the sensor and the thermal head will work, after which the three-way valve will add hot water coming from the boiler to the closed circuit.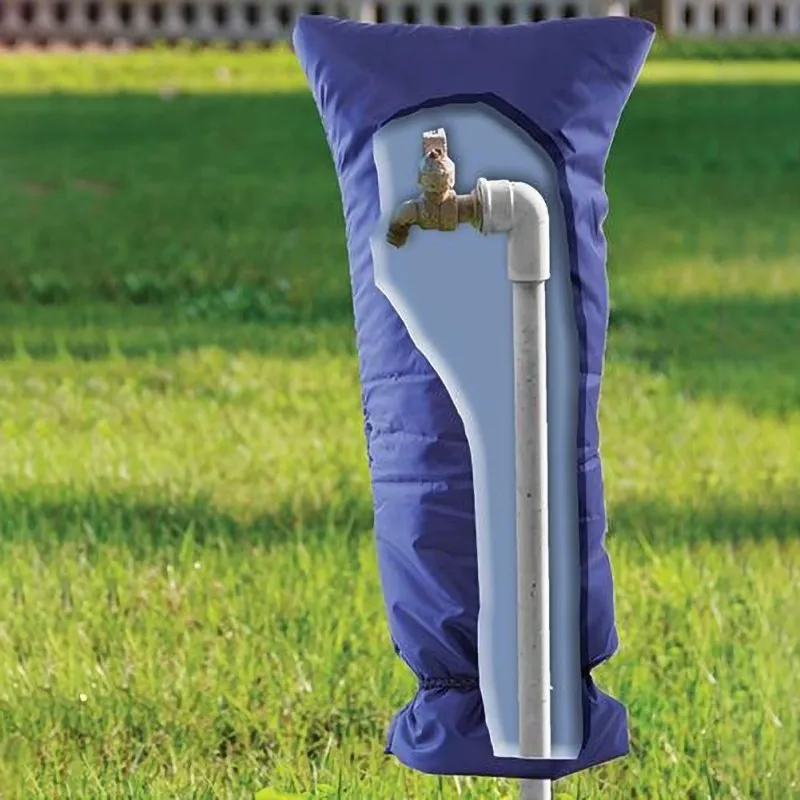 How to properly install the underfloor heating collector, pump and valve with your own hands is shown in the diagram:
The next example of using and connecting this important part is tying a solid fuel heat generator and a buffer tank, which is a heat accumulator. To warm it up as a whole quickly enough, the temperature of the supplied coolant should be from 70 to 85 ° C, which is not needed at all in a radiator heating system. It is precisely the three-way valve installed behind the tank together with a separate circulation pump that helps to lower it. nine0003
Important. When installing the mixing valve, remember that the pump must be located on the side where the always open branch pipe of the three-way valve is located.
The complex heating system of a large cottage can have many consumers connected by means of a hydraulic switch and a distribution manifold. Moreover, a coolant with a different temperature must be supplied to each of the circuits.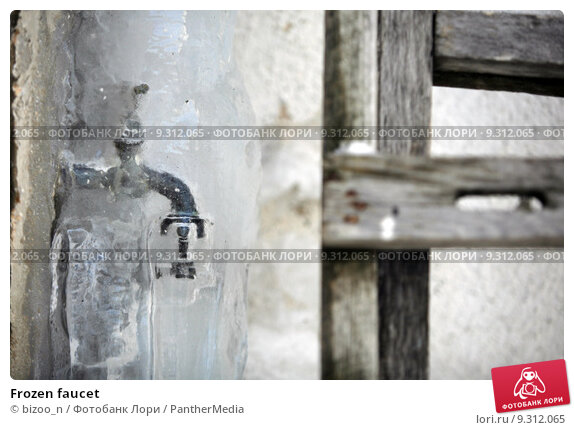 The highest is needed for an indirect heating boiler, so there are no control valves on the supply line to it. Other consumers need a colder coolant, and therefore they are connected through three-way valves. nine0003
Budgetary elements with a fixed water temperature
In simple heating systems of country houses that receive thermal energy from a TT boiler, it is allowed to install a simplified three-way valve that operates autonomously. For work, he does not need a thermal head with a temperature sensor, and there is no stem there. The control thermostatic element is installed inside the housing and is set to a certain outlet water temperature, for example, 60 or 50 °C (indicated on the housing). nine0003
This type of thermomixing valve always maintains a fixed outlet temperature of the heating medium, this setting cannot be changed. Hence, there are pluses and minuses in the use of such fittings:
The advantage of is a lower price than the cost of an assembly with a thermal head. The difference is significant - about 30%.
Disadvantage of - heating of the outgoing coolant cannot be controlled. When the element is factory set to 55°C, it will always deliver water at this temperature of ±2°C. nine0003
Tip. Before buying a valve of a simplified design, carefully read the technical documentation for a solid fuel boiler, it often indicates the minimum return heat carrier temperature. More information on the use of such fittings can be found here.
Conclusion
Thermostatic three-way valve is a very useful thing in the heating system of a private house, which allows you to efficiently use the heated coolant, and therefore save fuel. In addition, this simple detail plays the role of a safety element for solid fuel boilers and allows them to extend their service life. nine0003
types, laying methods, calculation, standards
Hose line is a pipeline line of one or more fire hoses interconnected and used to supply a fire extinguishing agent to the fire site.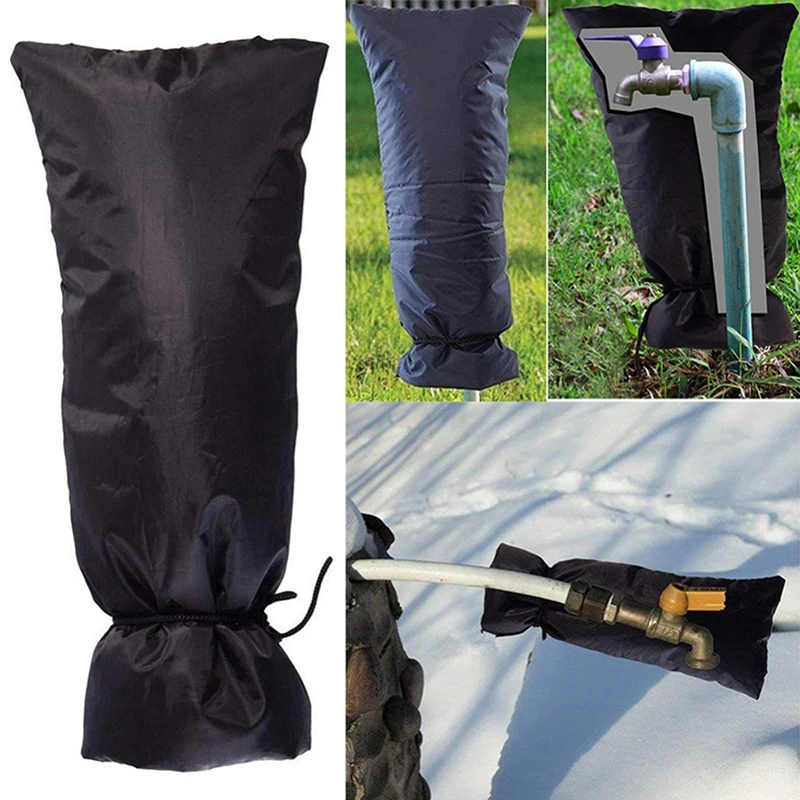
Types
In practice, various types of hose lines are used: Hose lines Hose lines can be laid in one line without branching or in several lines with branchings. Hose lines consisting of suction or pressure-suction fire hoses are called suction or suction and delivery . Suction (pressure-suction) hose lines are designed to take water from a water source using a fire pump or a motor pump. Pressure hose lines serve to supply a fire extinguishing agent, usually water, under pressure to the fire site. The system of hose lines is laid, observing the requirements of maximum use of the power of fire equipment (fire pumps), reliability of water supply (in case of a hose break or failure of fire trucks) and the shortest deployment time. Sleeves of various diameters are conditionally designated by letters: Hose lines extending from the branch are numbered: Main hose line is a hose line that runs from the pump to a junction or directly to a fire extinguishing agent supply device (barrel, foam generator, etc.). The main hose line is designed: Working hose line designed to connect branching with trunks or foam generators. When laying hose lines, the following rules must be observed: 1. Choose the most convenient and shortest path to the position of the trunks. This makes it possible to reduce the consumption of hoses, reduce the time of laying hose lines and reduce pressure losses in the hoses. nine0003 2. Lay the hose line from the pump to the fire or vice versa, depending on local conditions, so that it speeds up the laying and requires less effort. If for any reason it becomes necessary to lay hoses from the fire site to the pump, then you should first leave some supply of hoses at the fire site, and then lay the line. 3. Avoid laying hoses over sharp objects, burning or smoldering substances, in places where acids, alkalis or chemicals are spilled, which can damage the hoses and disable them. 4. Lines should be laid in buildings in such a way that exits, stairwells and other paths through which people will exit and property will begin to be evacuated are not clogged with sleeves. In stairwells, hose lines should be laid mainly between flights of stairs. This will free the stairs, speed up the laying of the line with the shortest sleeve length. on the sides of the street or road, so that it is not an obstacle to traffic. If it is impossible to avoid crossing the hose lines by transport, then they should be protected from damage (at the crossing points) by hose bridges, boards, bars, etc. If it is necessary to lay the hose line through the railway track, the hoses should be placed under the rails between the sleepers. nine0003 If this cannot be done at the time of combat deployment (so as not to delay the supply of water to the fire), then simultaneously with the laying of a hose line over the rail tracks, it is necessary to prepare a second line under the rails or above them at such a height that would ensure unhindered movement of railway transport. 6. Hose lines should be laid perpendicular (at right angles) to the walls of the building in which the fire occurs, avoiding laying them along the burning building near its walls. This will eliminate the possibility of damage to the sleeves when dismantled structures are thrown out of windows or from the roof of a building. nine0003 7. If it is necessary to lay a hose line through the fence, make a hole in it into which to stretch the hose. If this is not possible, then the hose line is laid over the fence; in this case, a sleeve saddle or some soft material must be placed under the sleeve so that there is no sharp bend. With the same rules, you need to lay the sleeves through the windows. Sleeve knee (saddle): 1 - sleeve; 2 - knee (saddle) 8. To save hoses on branch lines, the branch should be installed as close as possible to the place of fire, but only in places where it cannot be damaged and does not interfere with movement. At the branch, it is necessary to leave a supply of sleeves of different diameters for quick replacement of damaged sleeves or extension of lines. 9. When laying hose lines on the roof or in the attic outside the building, the hoses should be placed against the walls. 10. To save the hoses when laying the lines, it is not allowed to twist the hoses and sharply bend them, as well as dragging the hose line along the ground and hitting the nuts on the ground or on any objects. 11. When laying hoses indoors, choose the shortest paths, make sure that the hoses are not pinched in self-closing doors, between equipment and other objects. nine0003 12. If hoses of different quality are laid, it must be remembered that closer to the pump (where the pressure is higher) stronger hoses should be in the hose line. 13. All vertically laid hose lines are fixed with hose delays for any strong structures at the rate of at least one delay per pressure hose . The speed of laying a hose line also depends on the correct calculation of the length of the hose line and the number of hoses required for laying. 14. The branching is usually installed outside the building at some distance from the wall so that it does not interfere with traffic, as well as the entrance and exit of the burning building. When laying the suction hose, care must be taken to ensure that sand, earth, etc. does not get into the connection points, damaging the tightness. Do not allow sharp bends, mechanical damage to the sleeves, it is forbidden to move the sleeves by drawing. nine0003 FORBIDDEN! Dump parts of dismantled structures onto hose lines, as well as dump pressure hoses from roofs and upper floors of buildings. Sleeves must be carried by firefighters and descended from a height using ropes or other devices. In order to avoid hydraulic shocks and ruptures of pressure hoses, water should be supplied to the hose line by gradually opening the valves of the pump discharge pipes and branches. FORBIDDEN! nine0092 Rapidly increase the pressure in the fire pump, as well as abruptly shut off the fire hose. If defects are found in the sleeves (fistulas, punctures and ruptures), it is necessary to use universal or tape clamps in fire conditions without replacing the damaged sleeves. Special attention should be paid to operation of hose lines in winter , especially at low temperatures: Determination of the maximum distance (length of the hose line) for the supply of fire extinguishing agents is set out in the material: "Methodology for conducting fire-tactical calculations. nine0003
Trunk
 nine0014
 Working line
Laying rules
 If it is not possible to bypass such places, the laying of the sleeves must be carried out on the flooring of boards, iron or any other materials that would protect the sleeves from damage. nine0003
 nine0003
 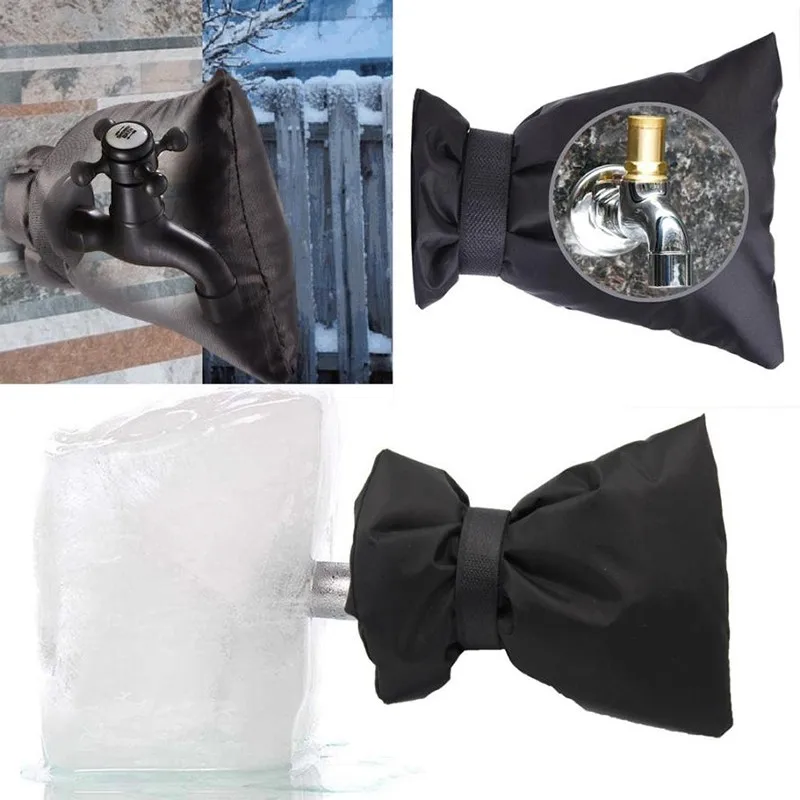 When laying a horizontal line for 18 linear meters, one sleeve 20 meters long is required. When laying a vertical line, one sleeve is required for approximately four floors of a residential building or two or three floors of an industrial building. When laying sleeves along flights of stairs, approximately one sleeve is required for 2 floors of a residential building, and two sleeves for 3 floors of an industrial building. nine0003
 Protection
 To do this, for some time, water must be drained through the free pressure pipe of the pump, then, at the maximum speed of the pump shaft, direct it into the line. It is also recommended to lay a reserve line along with the main trunk line using rubberized sleeves. nine0014
 Calculation
 " In addition, we recommend that you familiarize yourself with an informative video on the topic:
 Deployment standards according to PSP
Type of combat and special clothing and equipment Time, sec. nine0092 Performance conditions ex. chor. 3.1 Delivery of the RS-50 shaft at a distance of 40 m from the dispenser installed on the hydrant 15 17 19 1. Fire equipment stacked one meter from the dispenser. The barrel man is standing near the equipment. 
2. Completion: the hose line is laid and connected, the piper is at the specified position. 9029nine 3.2 Laying of the main hose line with a diameter of 77 mm by one contractor for: 1. Rolled sleeves stowed in compartments of a fire truck.
2. Completion: the hose line is laid (without branching) and connected to the pressure pipe of the pumping unit, the pipe operator is in position. 3 sleeves 45 50 55 4 sleeves 70 80 nine0314 90 5 arms 105 120 135 6 arms 140 160 180 7 arms 210 235 265 3.3 Laying of the main hose line with a diameter of 77 mm, calculated from 2 performers for: – 5 arms 65 70 75 6 arms 79 80 90 7 arms 105 115 125 8 arms 125 140 155 10 sleeves 200 220 240 15 sleeves 440 460 500 3. 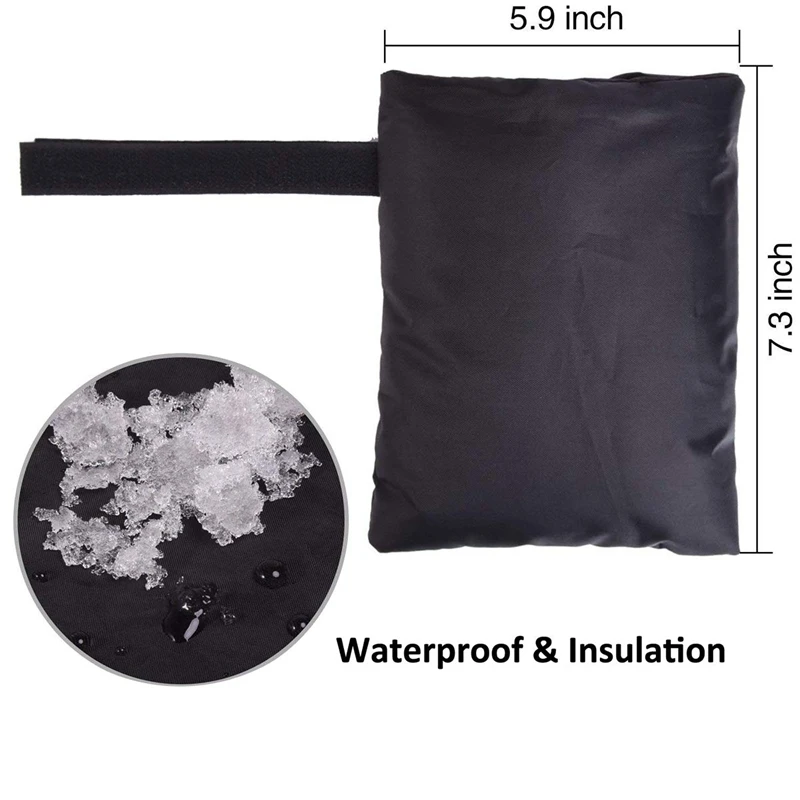
Learn more