Planting onions seed
Grow Onion - Seed Savers Exchange
How to Grow Onions
A culinary staple, onions are an essential vegetable in American gardens. Onions, like other members of the Allium family, are biennials, producing seeds in their second year of growth. The bulb (or common) onion has brown, yellow, or red skin and is round, elongated, or flattened. Bunching onions (or scallions) are harvested small.
When and How to Start Indoors
Plant onion seeds indoors 8–10 weeks before transplanting them outside just before the average last frost date in your area. Seeds should be sown ¼ inch deep. Onions require an open and sunny site, fertile soil, and good drainage.
Time to Germination
Seeds will germinate in 4-10 days when started indoors.
When to Transplant
Transplant outdoors just before the last frost.
Spacing Requirements
When transplanting your seedlings, space them at least 6 inches apart. Plant onion seedlings in the least weedy part of your garden; onion seedlings are small and do not compete well with weeds.
Special Considerations
Before the last frost, make a large furrow in your soil, at least 4 inches deep . Water this furrow before planting your seedlings to make transplanting easier.
Common Pests and Diseases
Several bacterial, fungal, and viral diseases can affect onion growth. Insect pests can also be a problem to various degrees in different parts of the United States. Plant your onions in a well-drained space. Diseases and fungi such as Fusarium basal rot, white rot, and Botrytis neck rot can affect crops in storage. Crop rotation can help prevent these diseases.
When and How to Harvest
The tops of bulb onion plants fall over naturally once the bulbs have matured. When half of the tops in a planting have fallen over, lift all of the bulbs and place the pulled plants in a warm, dry place (away from direct sunlight) to cure.
Eating
Onions have limitless potential in the kitchen and are indispensable for flavoring savory dishes. Onions can be roasted, fried, pickled, sautéed, and combined into dishes in dozens of other ways. Bunching onions, especially, are perfect for salads, pastas, and soups. Onion jam or compote is a great way to use a flush of red onions that will not store as well as white or yellow onions.
Storing
Cure onions for two to three weeks after harvesting by storing them in a warm place away from direct sunlight. When the onions feel paper-dry on the outside, clip off the tops and roots, and lightly brush off loose soil before storing the onions in a cool, dry place. Arrange them in a single layer or hang them in mesh bags. Always handle onions very carefully; the slightest bruise will encourage rot. Properly cured onions will store for 6–8 months in a root cellar or cool basement.
How to Save Onion Seeds
Onion seeds are not typically difficult to grow or to collect, but keep in mind that they are a biennial crop, meaning that they seed once every two years.
Life Cycle
Biennial
Recommended Isolation Distance
When saving seeds from onion, separate varieties by at least 800 feet up to ½ mile. To produce seed from onion, select as many perfect onions as you can spare for seed production and store them through winter in a cool, dry, dark place. Replant them in early spring at the same bulb depth and spacing as when they were harvested.
Recommended Population Sizes
To ensure viable seeds, save seeds from at least 5 plants. To maintain a variety over time, save seeds from between 20-50 plants.
Assessing Seed Maturity
Watch first for flowers and then for seed heads to form during the late summer of the second season. Wait for the seed heads to dry. Most of the flowers will be dry, and the seeds will begin to fall out on their own.
Harvesting
After the plants bloom and seed heads begin to dry, gather the heads in a paper bag. Most of the seeds will fall out on their own; shake the bag to free the remainder of the seeds.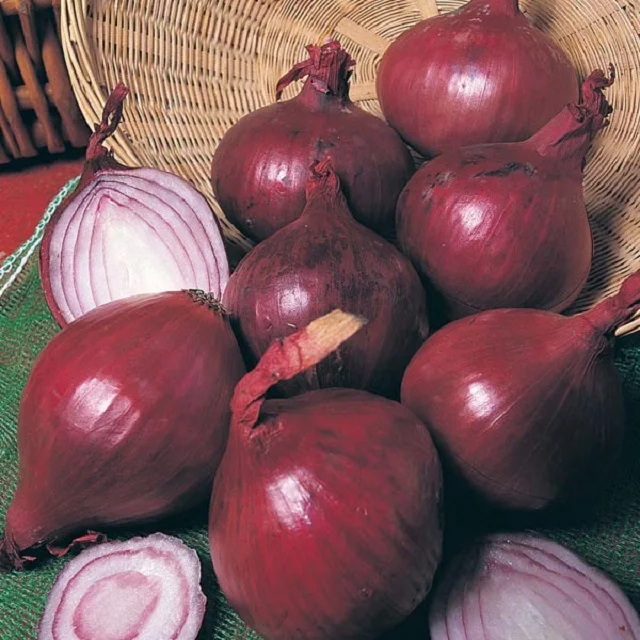
Cleaning and Processing
Separate the seeds from the stems and other matter that makes up the seed head. Allow the seeds to air-dry for a few days before storing the seeds in a cool, dry place.
Storage and Viability
When stored in a cool, dark, dry place, onion seeds will remain viable for 2 years.
Download the PDF
from Seed or Sets to Harvest ~ Homestead and Chill
As strange as it may sound, onions are one of our favorite crops to grow! They’re highly underrated. It’s easy to grow onions, once you know how! Few pests bother them, and the plants are forgiving and versatile – since you can harvest and use these alliums at many different stages along the way. Not to mention, onions are the ultimate garden-to-table crop. Just about every killer soup, stew, sauce, or stir fry begins with a familiar foundation: sauteed onions and oil (or butter). Toss in some garlic? Now we’re talkin’.
Read along to learn how to grow onions from seed, seedlings, or sets. This article will teach you everything you need to know, including how to choose the varieties that will grow best in your garden, when and how to start onion seeds, plus tips for transplanting and ongoing care. Then we’ll talk about how to harvest, cure, store, and preserve your onions too. Spoiler alert: homegrown onion powder is outstanding!
When to Grow Onions
Onions are generally considered a ‘cool season crop’ because onion seedlings like to start their life when conditions are still cool. Then as the weather warms up, they switch to focus their energy on bulb formation. Therefore, spring is the best time to plant onions in most places. If you hope to grow onions from seed, you’ll need to be prepared to get a jump start and plant seeds during winter. After sprouting onions take three to five months to reach a mature size, depending on climate and variety.
Gardeners with mild winters can also grow onions in the fall for a winter harvest. Here on the temperate Central Coast of California, we can grow onions essentially year-round! In colder climates, it is also possible to plant onion sets in fall but allow them to overwinter and harvest mature onions in the spring to early summer. In that case, plant onions when the soil is still warm – at least a month before your first fall frost date. That gives them time to establish healthy roots before they go dormant for the winter.
All in all, it may take a little experimentation to figure out the best time to grow onions in your particular climate and garden. One very important key to this puzzle is to choose the right type of onions to grow for your area!
Take zone 9 for example. According to our planting calendar, zone 9 can start onions in early winter and transplant (or sow outside) in late winter. Then, zone 9 gardeners can sow more onion seeds outside in late summer to early fall. If you need a planting calendar, get one here! We’ve created free printable calendars for every USDA hardiness zone.
TYPES OF ONIONS
The difference between bulbing onions, green onions, scallions or spring onions
Red, yellow, white, sweet… In addition to the various colors and subtle flavor differences, traditional bulbing onions can be enjoyed in a variety of ways – depending on the age they’re harvested! Before forming large bulbs, immature onions may be picked and used as green onions – also known as scallions. If you allow them to mature a little longer and form a modest (but still underdeveloped) bulb, then they’re considered spring onions! Gather up a cluster of young green onions, spring onions, or scallions, and now you have a handful of bunching onions. Note that there are also varieties of slender non-bulbing onions; a true “green onion”.

Short-day, long-day, and day-neutral onions
In addition to size and color, different onion varieties are further classified as either short-day, long-day, or day-neutral onions. They’re grouped by the number of daylight hours required to trigger good bulb formation. It is important to choose and grow onion varieties that are a good fit for your location! Otherwise, the onion bulbs may fail to successfully develop. Non-bulbing green onions aren’t as fussy about exact daylight hours, though all onions like plenty of sun!
- Short-day onion varieties will form bulbs once daylight hours increase to 10 to 12 hours per day. They are ideal for southern gardeners where daylight hours are consistently shorter throughout the growing season compared to the longer days up north. If grown in the north, short-day onions may go to flower too early in the season as the days become increasingly longer – resulting in stunted, small bulbs.
 Short-day onions are rumored to be sweeter than long-day. Some popular varieties of short day onions include Red Burgundy, Grano, White Bermuda, Southern Belle, and ‘Yellow Granex’ (also known as Vidalia).
- Long-day onions will form bulbs once they’re provided 14 hours of daylight or more. Without sufficiently long days, they will not form bulbs. Long-day onions perform best in the northern half of the US and Canada. Yellow Sweet Spanish, Walla Walla, Calibra, Southport White Globe, Rossa di Milano, Red Baron, Red Carpet, Cortland, and Sweet Spanish White are a few awesome long-day onion varieties.
- Day-neutral or “intermediate day” onion varieties form bulbs with 12 to 14 hours of daylight, and are perfect for folks gardening in the middle of the United States. Check out these intermediate day onions: Cabernet, Gladstone, Sierra Blanca, Talon and Red Amposta.
Not sure which to choose?
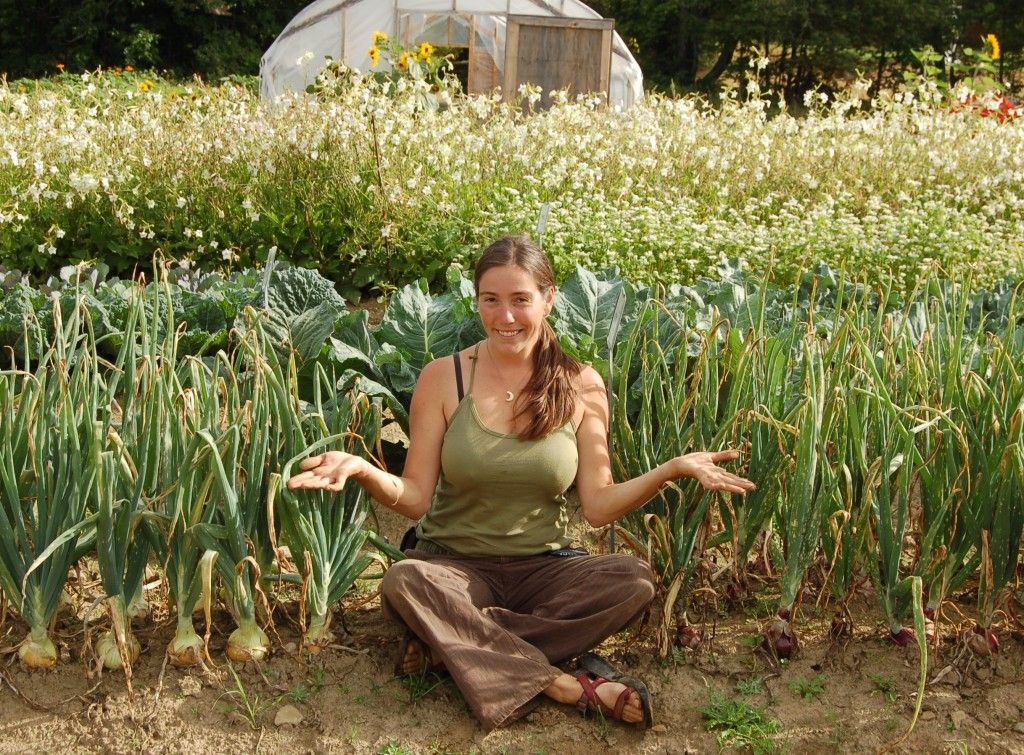
As a (very) general rule of thumb, short-day onions grow best south of the 35th parallel, and long-day onions do well north of the 35th parallel. Many onion varieties will specifically state which latitudes they’re best suited for. Ironically, our garden is located almost exactly on the 35th parallel – just a squeak north at 35.1216° N. We grow impressively large Walla Walla onions (a long-day variety) during the early spring to summer. Yet they don’t do as well for us as a fall-planted winter crop when the days get shorter. If you’re also close to the boundary, have fun experimenting with a wide variety!
Where each type of onion grows best. However, see the black star? That’s where we’re located, on the California Central Coast, almost right on the 35th parallel. According to this graphic we should be growing short day onions… but we grow stellar long-day onions here too! So, if you’re close to a latitude border or in the central “intermediate” area, don’t be afraid to experiment. Yet if you’re in the far north or far south, stick to long day or short day onions (respectively). Thanks for the great map, Johnnys Seed!
Should I grow onions from seed, seedlings or “sets”?
There are three main ways to grow onions: from seed, seedlings, or by purchasing onion sets.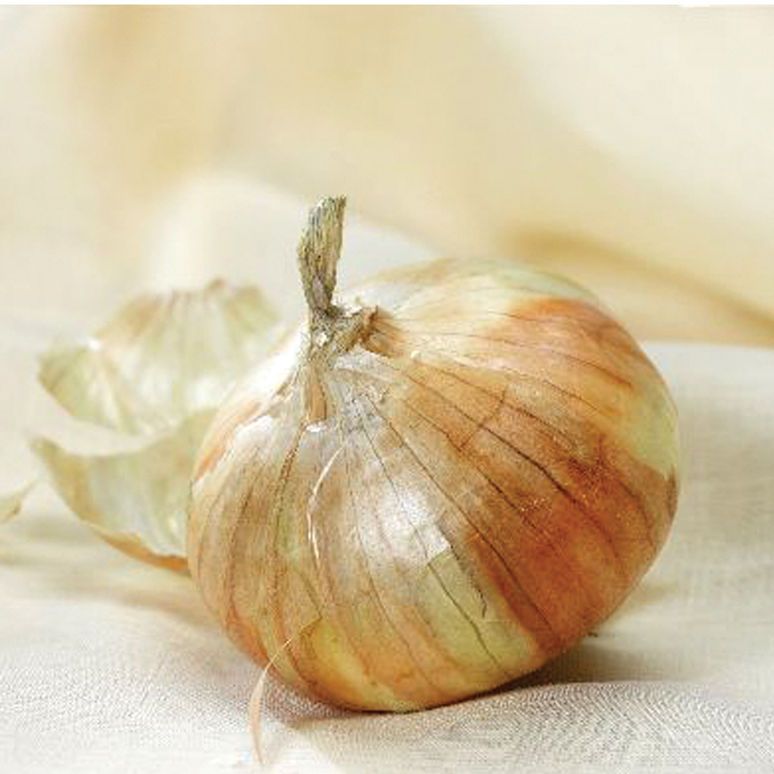 Every gardener has their preference between the three! We like to grow onions from seed, or from seedlings we buy at a local nursery. Growing onions from seed is easy, and allows you to choose the exact varieties you want to grow! Purchasing started seedlings or sets is also a great option, and will give you a quicker start than seed.
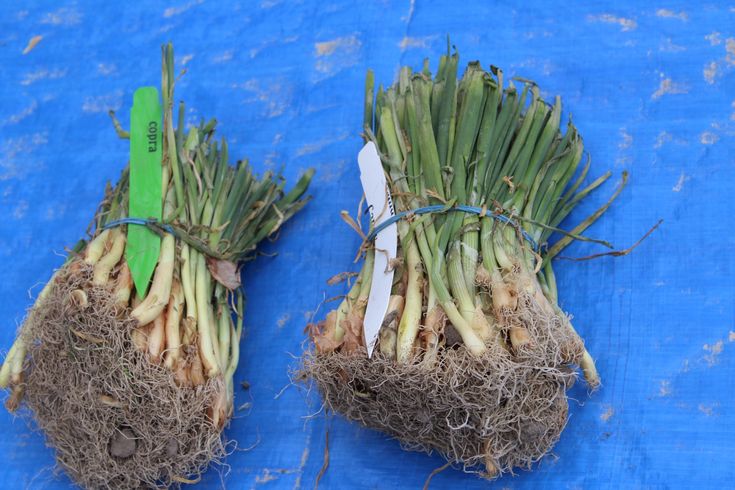
Onion seedlings are like small green onions, recently started from seed (within the last couple months). You can grow your own, or purchase seedlings at your local garden center.
In contrast, onion ‘sets’ are small, dry, immature onion bulbs that were grown from seed the previous year. They were allowed to partially develop, harvested as a tiny bulb, and kept dormant to later sell or plant as “seed” – though they’re not really seed. Because they’re on their second year of life (and onions are biennial), onion sets have the tendency to bolt more readily or result in underdeveloped bulbs. When an onion ‘bolts’, it prematurely sends up a flowering stalk and then forms seed.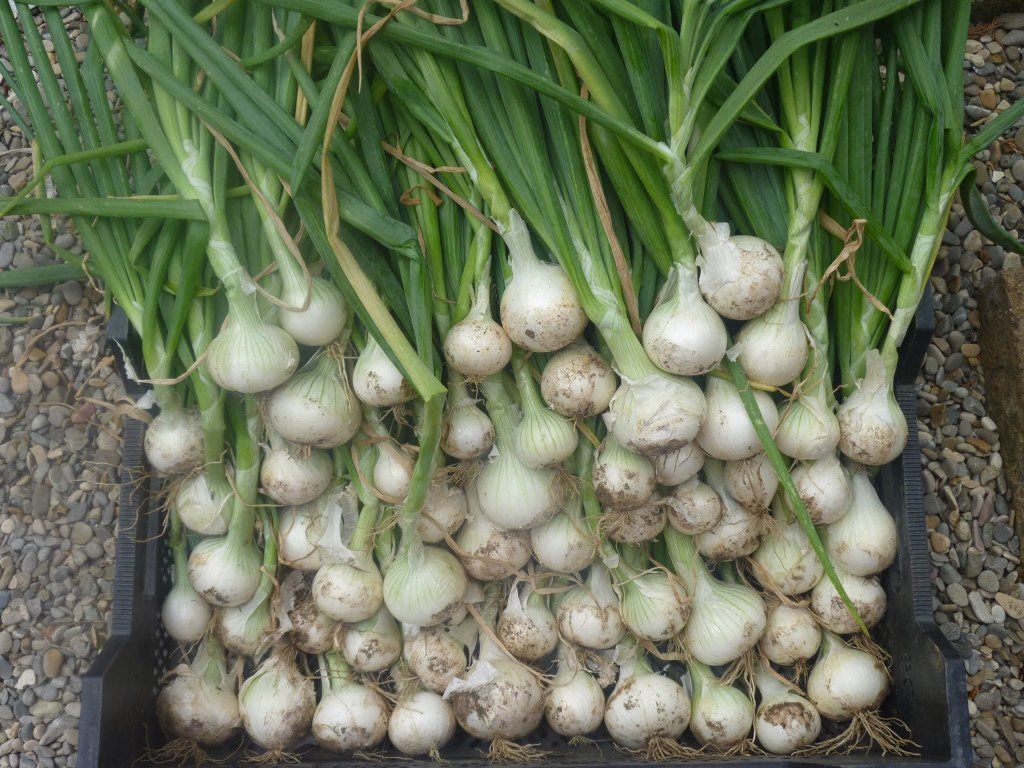 You can still eat around the tough center of the onion bulb, but it will decline in quality and no longer be good for long-term storage.
HOW TO GROW ONIONS FROM SEED
To grow onions from seed, you can either start seeds indoors, sow seeds directly outside, or use the winter sowing method. Planting seeds directly outside is simple. You won’t need to fuss with an indoor seed-starting set-up, or have to transplant seedlings later. However, starting seeds indoors during winter will put you several weeks (to months) ahead of schedule. You’ll have onion seedlings ready to transplant into the garden right away in spring. For northern gardeners with short growing seasons, this is a critical advantage! There, the direct sow method won’t give the onions enough time to mature – so seeds should be started indoors.
Direct sowing onion seeds outside
Plant onion seeds outside in late winter to early spring, once the ground is no longer frozen and can be worked in your area. Read the soil preparation and site selection tips below before you start. Then, sow onion seeds approximately 1/4 to 1/2″ deep and about 4 inches apart. Cover the seeds lightly with soil, and maintain damp to promote germination. Once they sprout, thin to one onion seedling per 4 inches to avoid crowding. (Note that germination rates will be slower and less consistent with this method, and not recommended for northern climates). Check your zone’s planting calendar to see if you can also direct sow onions in the fall.
Starting onion from seed indoors
Start onion seeds indoors about 8 to 10 weeks before the last spring frost date in your area. Follow the common best practices for indoor seed-starting: use a sterile seedling potting medium, keep the soil damp but not soggy, and provide at least 12 hours of bright light per day after germination. You’ll need a few supplies such as seedling trays, small containers or pots, and a grow light or other supplemental light fixture. Onion seeds will sprout most readily in consistently warm soil (70-75°F, a seedling heat mat will help!) but then can be moved to a cooler spot in the 60s.
The warm, comfy indoor conditions will help onion seeds sprout and grow quickly. Once they reach 5 or 6 inches (or taller), trim the tips of their greens down to 3 or 4 inches. This encourages thickening, stronger root development, and prevents them from flopping over. Eat those trimmed bits as green onions!
I do not thin my onion seedlings until I transplant them outside. I allow a handful of seedlings to grow together in one cell or small pot, and then very gently pull them apart to plant separately come transplant time. Onions do well with this treatment, so don’t be afraid to sow several seeds per container!
Please visit our Seed Starting 101 article for more details about starting seeds indoors, and our favorite supplies.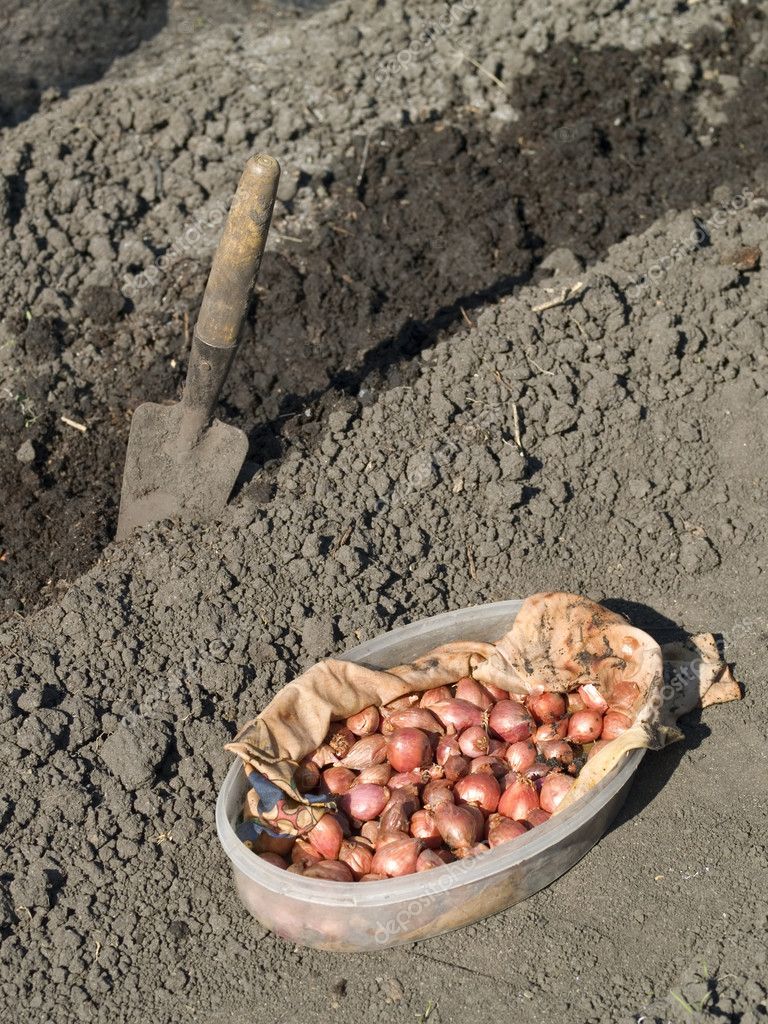
Winter sowing method
A final option to grow onions from seed is with the ‘winter sowing method’. This is when you sow seeds inside a covered container, but do so outside. As the name suggests, start your onion seeds outdoors during the winter – between late December to February in most locations. The seeds will stay dormant in the chilly outdoor conditions, and sprout in spring once the conditions are right. Then you can transplant the already hardened-off seedlings to their final location in the garden. Winter sowing combines the pros and cons of the other options: you won’t get quite the same early advantage as starting indoors, but it’s almost as low-maintenance as directly sowing seeds outside.
To grow onions with the winter sowing method, select a wide shallow container with drainage holes that can be covered with a clear or opaque dome or lid (or, one that already has one).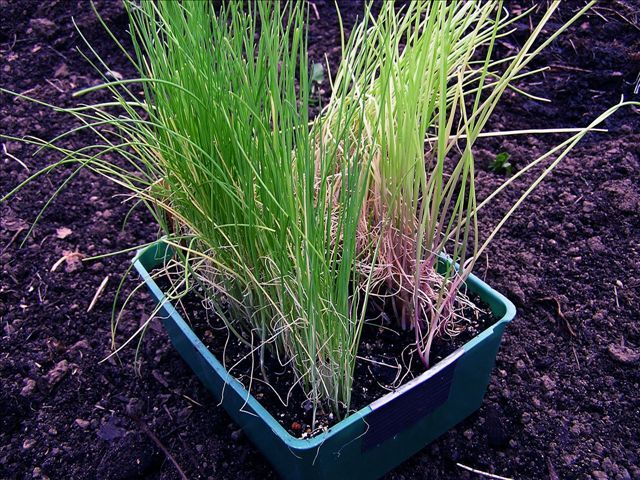 Add at least a couple inches of seed-starting soil to the bottom, evenly sprinkle or sow onion seeds inside, and then lightly cover the seeds with about ¼ to ½ inch of soil. Add at least one or two air holes for ventilation to the cover.
Set the container in a sunny location, water as needed to maintain the soil damp, and wait for the seeds to germinate. Once the seeds sprout, open the container lid on warm days (but close them back up on cold nights). Keep watered as needed. If snow or a hard frost is a threat, move the container to a protected location or cover it with a blanket for insulation.
Old milk jugs, salad green tubs, or similar containers are a popular choice for winter sowing. Image courtesy of Joe Lamp’l.Growing Onions from Sets
Plant onion sets in the garden 2 to 4 weeks before the last frost date in your area. Bury them deep enough that the bulb is mostly under the soil, but with the pointed tip level with the soil surface or just poking out. Space onion sets about 4 to 6 inches apart, depending on the expected mature size of the variety you’re planting. Speaking of variety, don’t assume all onion sets you find in local stores will grow well in your area! Big box garden centers are notorious for selling very zone-inappropriate varieties. Small locally-owned nurseries should offer a much better selection.
We haven’t experimented with growing onions from sets, and I’ve heard mixed reviews from fellow gardeners. While this method is certainly easy, it can lead to underdeveloped or flowering bulbs more often than starting from seed or seedlings. If you do opt to grow onions from sets, choose the smallest bulbs you can find. Sets around a half-inch in diameter or smaller are ideal. Contrary to what you may think, bigger isn’t better! Experts say that larger onion sets are more likely to halt bulb development and bolt (go to seed and flower) sooner than more petite bulbs.
Planting onion sets.
How to Plant Onion Seedlings (transplanting)
Before transplanting, indoor-raised seedlings must be gradually acclimated to outdoor conditions through a process called ‘hardening off’. Even though onion seedlings can tolerate chilly temperatures, hardening them off first will prevent shock or damage from the sudden change in environment. Learn more about hardening off here. (You can skip this step if you are growing onions from seedlings you purchased at a nursery, or if you used the winter sowing method.)
- Transplant homegrown or nursery-bought onion seedlings outdoors about 2 to 3 weeks prior to your areas last spring frost date.
- Gently pull apart or separate any clusters of seedlings, taking care to break as few roots as possible.
- Create a slender hole that is deep enough to accommodate the seedling’s roots, and bury the seedling so the base is about a half-inch to an inch deep.
- Space your onions 4 to 5 inches a part, depending on expected mature size for the given variety.
 Or, plant them closer if you want to harvest them as green onions or small spring onions.
 - If you haven’t already, cut off the tips of the greens with clean scissors, which helps focus energy on growing a large onion bulb. Take the seedlings down to about 5 inches tall. It’s also okay to pull off the outermost seedling leaves; those usually end up looking a bit sad by now.
Onion seedlings that have been hardened off can withstand a light frost, but need to be protected from a hard freeze. If needed, shelter young onion transplants with frost cover, cloches, buckets, or other protective insulation. Learn more about protecting crops from frost here.
Transplanting onion seedlings into the garden. These were seedlings I bought at the local nursery, so they were a tad beat up – and still need to have their tips trimmed. Gently pull apart seedlings, poke their roots down into a hole, and gently pack soil around their base.Planting Location: Sun, Soil, & Amendments
Choose a location in your garden that receives full sun.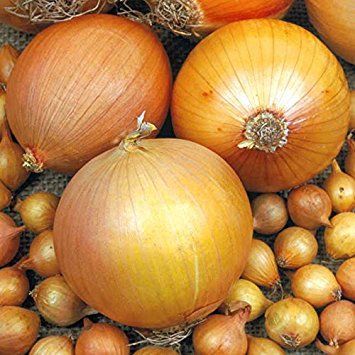 Some varieties of green onions can handle partial shade, but all onions grow best in ample sun. If your garden is on the shady side, choose short day varieties to encourage bulb development. Onions grow most happily in moderately rich, well-draining soil. Amend clay soil with organic matter (e.g. compost) or potting soil to improve drainage.
Before planting, amend the soil with a balanced, mild, slow-release fertilizer such as this organic all-purpose blend. I also recommend lightly working in well-aged compost and/or worm castings to the top couple inches of soil. Avoid high-nitrogen fertilizers. Excess nitrogen will encourage ample green top growth, but at the expense of the bulb. During the growing season, we water our onions at least once with homemade compost tea.
It’s also a great idea to inoculate the soil with mycorrhizae, either by applying some to the soil or watering with a mycorrhizae solution after transplanting. Mycorrhizae are beneficial fungi that promote healthy root development and nutrient uptake for all plants.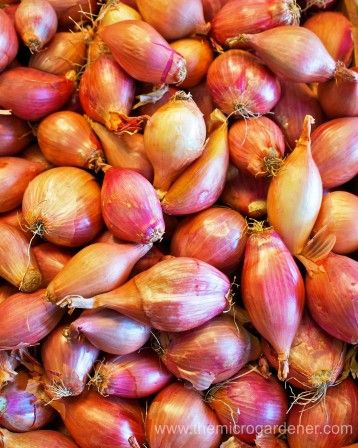 However, onions are especially reliant on root-mycorrhizal partnerships to take up phosphorus that’s essential for their growth!
Water
Onions have shallow root systems, so it is important to keep them well-watered. A lack of consistent water will result in smaller onion bulbs. Adding a layer of mulch around the onions is an excellent way to prevent the soil from easily drying out. We love to use compost as mulch! It is dual purpose since it helps feed the soil as well as retain moisture. Remember, good drainage is crucial too! Soggy soil or standing water increases chances of onions rotting.
Related: The Pros and Cons of 8 Popular Types of Garden Mulch
Here you can see our BPA-free soaker hose irrigation weaving between rows of large onions, and a woody compost mulch on top to help retain moisture.Growing Onions as Companion Plants
Very few pests are attracted to onions.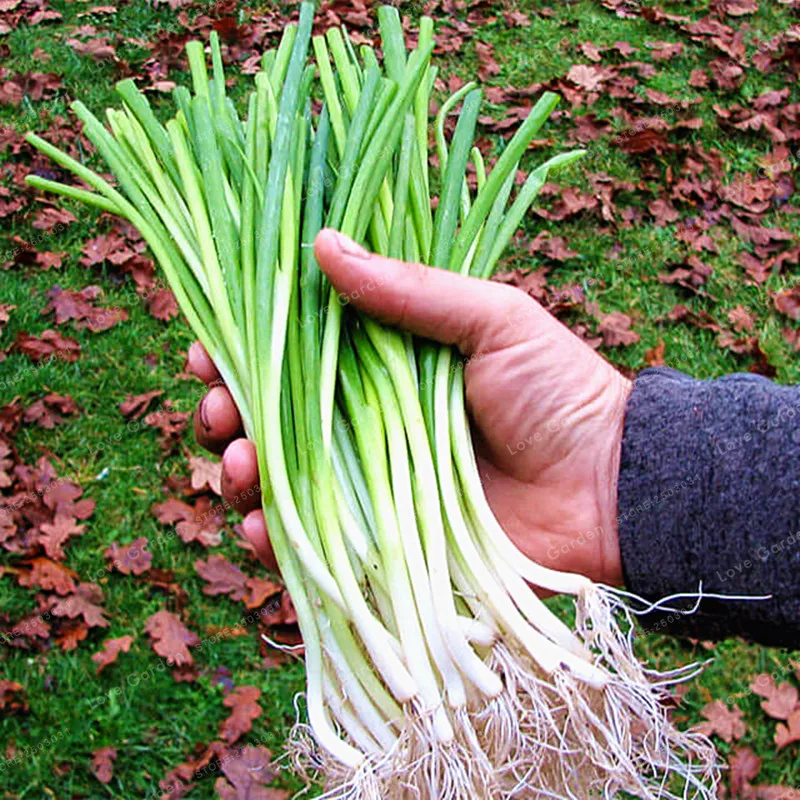 In fact, onions actually repel many pest insects, including aphids, flea beetles, cabbage loopers, ants, carrot rust flies, and more. Therefore, onions make great companion plants in the garden! Onions can be interplanted among other pest-prone crops to help provide natural, organic pest control. Rather than always growing onions in separate designated areas, we’ve had success keeping our Swiss chard plants almost completely aphid-free (usually a big issue) by tucking miscellaneous onions between them. Interested to learn more? Stop by this article, which also includes a handy printable companion planting chart!
Harvesting Onions
To use as green onions or young spring onions, harvest onions any time after they reach the size of a pencil or begin to form bulbs. You can also occasionally cut the tops only to enjoy as green onions, leaving the bulb to continue to grow. To do this, be sure to only harvest a “leaf” or two at time (or just a couple inches from the tips) so there are plenty of greens left behind to photosynthesize and aid in bulb development.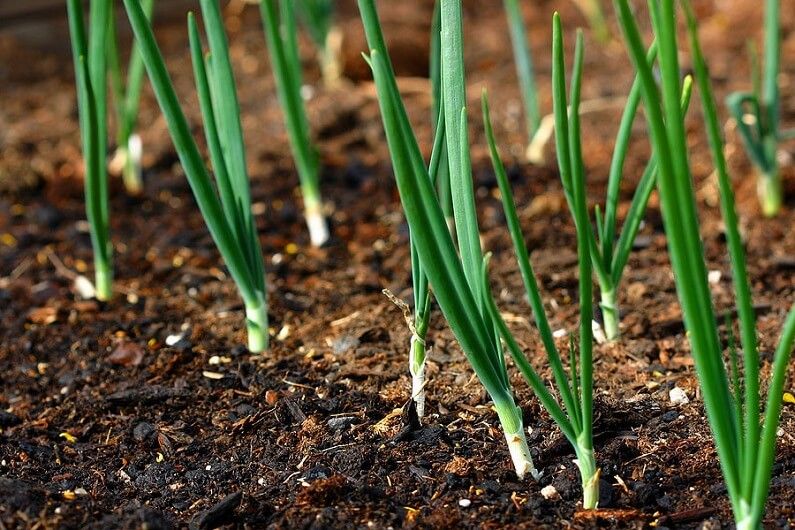
Once the onion bulbs form, you could technically harvest them whenever you’d like to use one. I love popping outside to harvest a fresh onion for dinner as-needed! Yet for maximum storage potential as dry bulbs, you must allow them to grow until they reach full maturity. Onions are mature and ready to harvest once the main stalk gets weak, thin, and starts to flop over. The greens will also start to turn yellow or brown, especially at the tips.
If your onion stalks don’t start to fall over on their own but you want to harvest them soon (e.g. if they’ve reached a mature size, freezing weather is in the forecast, etc) you can also manually bend or push the stalks over a few days prior to harvesting to expedite the process.
When the time is right, pull the plants up but leave them lying on top of the soil to dry for a day or two. Onions are susceptible to bruising, so be gentle when you harvest. Avoid accidentally puncturing the skin or flesh – they won’t hold up in storage if damaged.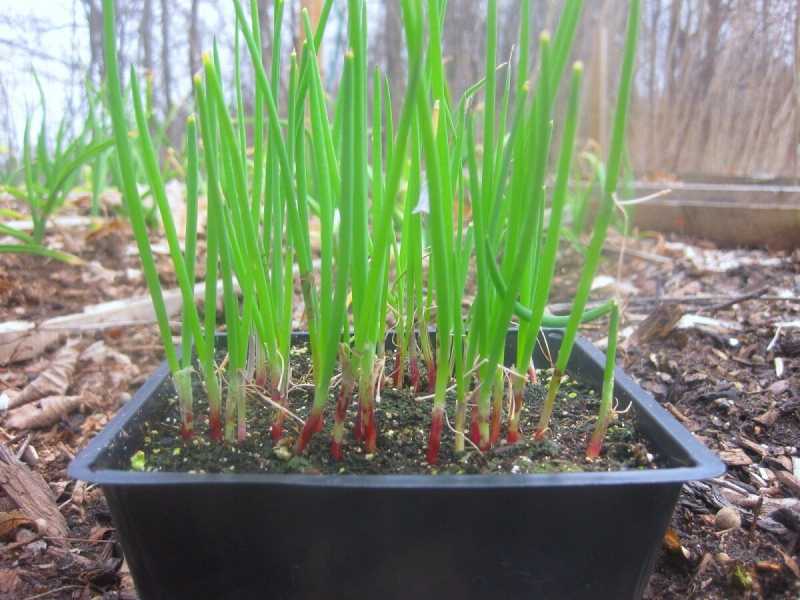
How to Cure Onions
Properly curing your onions will enable you to store them at room temperature (in dry storage) for many months after harvest. In very hot, dry climates, those couple days onions spend lying and drying in the field after harvest may be sufficient curing time. Yet most gardeners further cure their onions by relocating them to a dry and well-ventilated area for 7 to 10 days. Cure your onions in a drafty garage, carport, patio, shed or even right outside (as long as it isn’t too humid).
Hang onions from a homemade drying rack, or lay them out flat on a wire rack or screen. Curing onions on a solid tabletop can also suffice as long as there is ample air circulation. Again, take care not to ding them up in the process. As onions cure the roots will shrivel up, and the greens will dry and form a seal at the top of the onion. When ready, trim off the roots and tops before tucking them away for long-term storage.
Storing and Preserving Onions
Store cured onions in a cool, dark, dry location. For example, in wire baskets or cardboard boxes in a spare closet or cabinet, root cellar, basement, or similar temperate location. Dry onions that were not cured as well (or at all) should keep at room temperature for several weeks, but they’ll last longer in the fridge. Be sure to use up any dinged or bruised ones first. Store immature onions (green, spring, scallions, etc) in an airtight container in the refrigerator for maximum freshness.
In addition to long-term dry storage, there are a number of ways to preserve onions.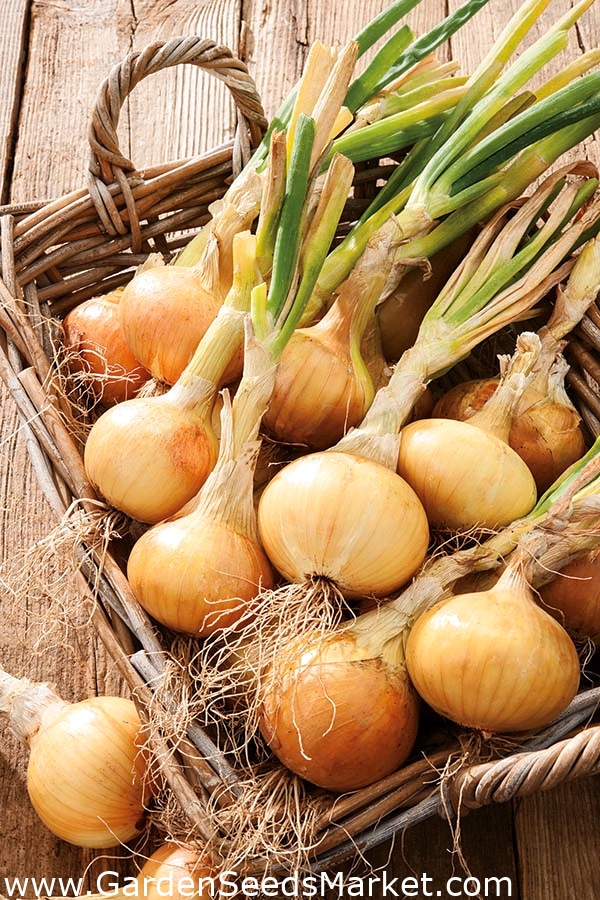 We love to make homemade dried onion powder, especially with immature onions or those that have started to flower and thus can’t be cured. Learn how to make onion powder here – and be sure to use the greens too! Onion powder brings the perfect pop of flavor to sautéed veggies, dips, dressings, sauces, soup, sourdough bread, and more.
Another great option for preserving onions is to roast and freeze them. We use these super-flavorful, lightly caramelized onions in future soup, stew, vegetarian chili, or quiche. You can also use this recipe to make easy refrigerator pickled onions!
Hot tip: Do onions make you cry? Try holding a slice of citrus (lemon or lime) in your mouth while you cut them!
And that is all you need to know to successfully grow onions!
Well friends, I hope you learned a few new tips that will enable you to grow big, beautiful, flavorful onions of your own! In all, they’re quite low-maintenance and fun to grow, especially once you figure out what varieties grow best in your area.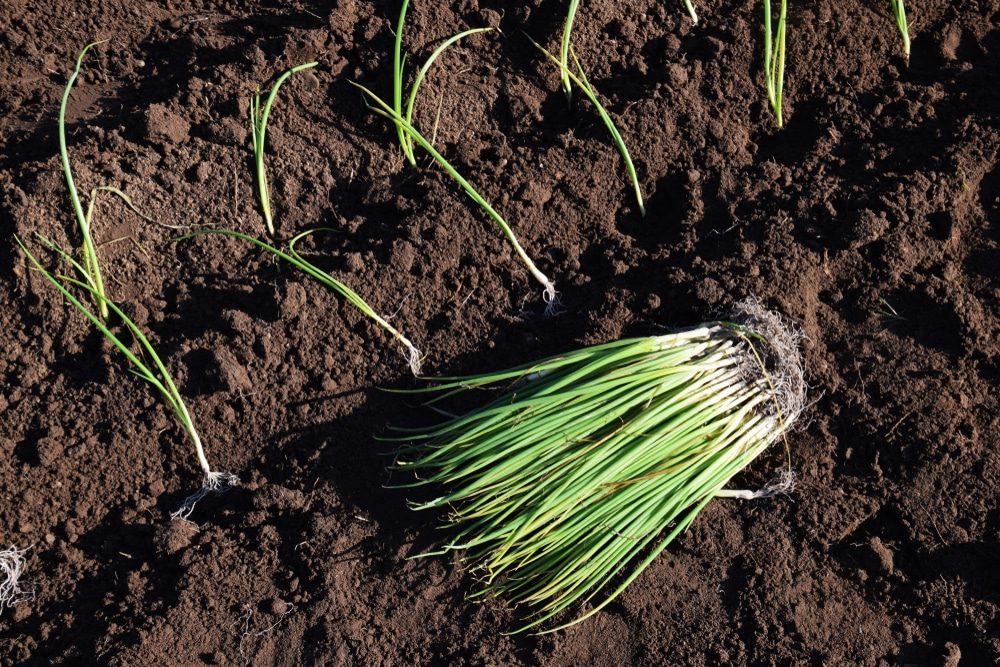 Let me know if you have any questions in the comments below! If you found this information to be valuable, please spread the love by pinning or sharing this article. See ya next time!
Onion secrets. Growing onions from seed. My garden, vegetable garden. Piggy bank of country experience.
Contents of the article
- 1 Growing onion sets
- 2 Onion turnip from seeds in one year
Hello, dear readers!
Let's continue the conversation about growing onions and in this article I want to tell you about growing onions from seeds .
There are three ways to grow onions from seeds :
- the first - we grow onion sets, and from it the next year - turnip onions;
- the second - in one year directly from the seeds we get turnips, planting them either very early in the spring or as seedlings;
- third - winter sowing.
But first of all, before we start sowing seeds, let's decide what varieties we will plant.
Both the method of cultivation and the timing of planting largely depend on this. Now in Russia there are more than 60 varieties of onions, which can be divided into two groups: varieties of northern origin and varieties of southern origin.
Northern varieties need 16-17 hours of daylight to form a full-fledged bulb, while southern varieties need 13-14 hours.
Therefore, if we plant northern varieties in the south, we may not get bulbs. Southern varieties require more heat and have a longer growing season.
Also keep in mind that northern onions taste spicier and keep very well until the next harvest, if the storage rules are followed.
Southern varieties have excellent taste qualities, but they are stored much less time.
Most Russian varieties of onions are long-day onions. These are such varieties as: Strigunovsky, Bessonovsky, Arzamassky, Myachkovsky, Danilovsky, Rostovsky, Odintsovets and others.
Of the varieties of foreign selection I recommend - Stuttgarter Risen, Globo, Densimor, hybrid F1 Bonus .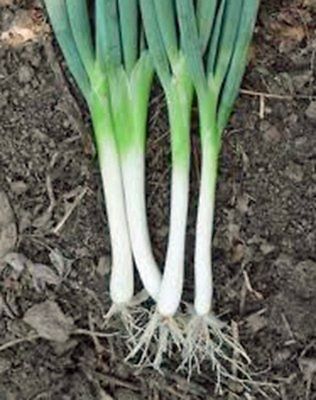
And if you want to grow lettuce onions, then you can plant such southern varieties as: Spanish-313, Karatalsky, Lugansky, Krasnodar G-35, Kabo.
Growing onion sets
In the previous article, the questions about the basic requirements for growing onions and preparing the site for onions were covered, so we will not return to them, but go straight to the pre-sowing preparation of seeds and their planting.
Planting dates. First of all, we determine the date of landing, this is one of the most important moments. Sowing is carried out as soon as the soil allows, because even with a slight (especially in dry years) delay with sowing, both the field germination of seeds and the yield and quality of sowing are reduced. Onion sets in this case ripen very poorly and, most importantly, are not stored for a long time.
In central Russia, landing is best done in the last ten days of April, if the weather does not bring any surprises.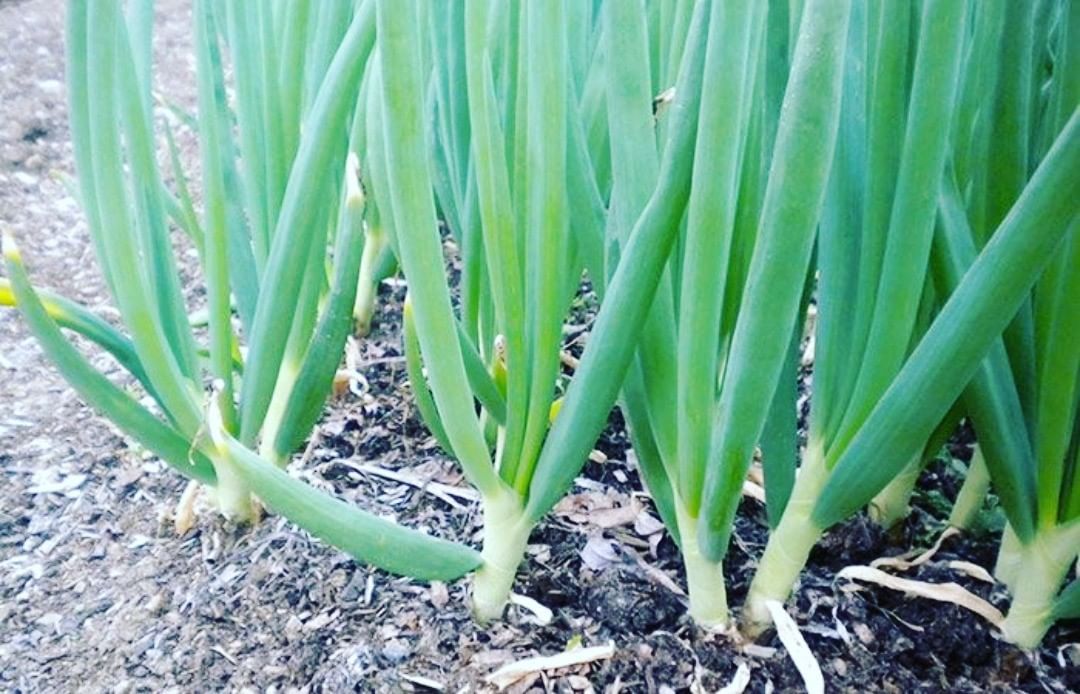
And one more thing, although it is believed that nigella (as onion seeds are also called) retains its germination capacity for 2 years without loss, but I still advise you to use annual seeds.
Seed preparation. First of all, let's check the seeds for germination, for this we place a few pieces of seeds between layers of damp cloth and put them in a warm place. If after a while sprouts appear, then you can begin to prepare for sowing.
Next, we determine whether our seeds need treatment: the seeds that we buy in specialized stores have mostly already been disinfected (although there are exceptions), but it is advisable to treat the seeds that you yourself have grown with some fungicidal protectants.
Or you can use a weak solution of potassium permanganate for this and keep the seeds in it for one day. It is very good to warm the seeds for 30 minutes in hot water with a temperature of about 50 degrees, and also soak them in aloe juice for 30-40 minutes.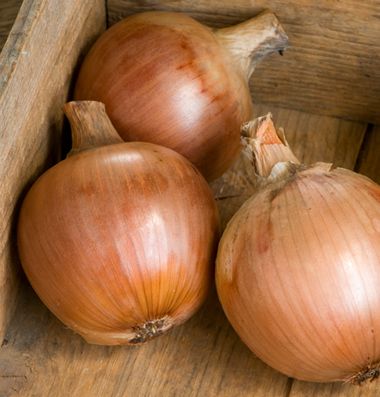
To speed up germination (onion seeds germinate very slowly), soak the seeds in water at room temperature. This must be done 3-4 days before sowing.
Pour the seeds into a cloth bag, fill it halfway, tie it up and put it in water for 30-35 hours. During this period of time, we change the water 3-4 times.
Then spread the already swollen seeds in a thin layer on a damp cloth, cover with a second layer of damp cloth and leave them warm.
After two days, the seeds will begin to hatch and you can start sowing, but after we dry the nigella a little so that it becomes flowable, and mix it with chalk so that the seeds are better visible on dark soil.
Sowing seeds. Sowing is carried out in a band way on a bed about 1 meter wide with very loose soil. Loose soil when sowing nigella is necessary because it will be very difficult for an onion sprout, which has the shape of a loop, to break through to the surface if our soil is dense or if we deeply bury the seeds in the ground.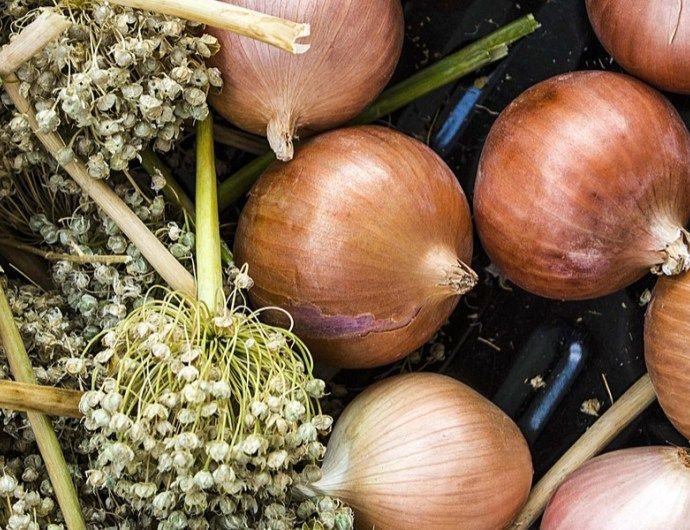
In connection with this sowing seeds in grooves 1.5-2 cm deep. It is desirable to keep the distance between seeds 1-1.5 cm. as well as the quantity and quality of the harvest.
If we sow the seeds rarely, then large sets (selections) will grow, which will not have enough time for ripening.
If we sow the seeds often, we will get an unripened small set (non-standard), which is poorly stored and begins to germinate early.
Then carefully close the grooves, compact the soil so that there are no air chambers between it and the seeds.
We mulch the bed with sown onion seeds with peat or humus with a layer of about 2 cm, and then carefully water it, trying not to wash out the plantings.
After that, it is desirable to cover the bed with plastic wrap in order to create a favorable water and air regime for the early germination of seeds. After the emergence of shoots, the film must be removed.
Care of crops. First of all, it is necessary to carefully monitor that soil crust does not form and remove all weeds in a timely manner.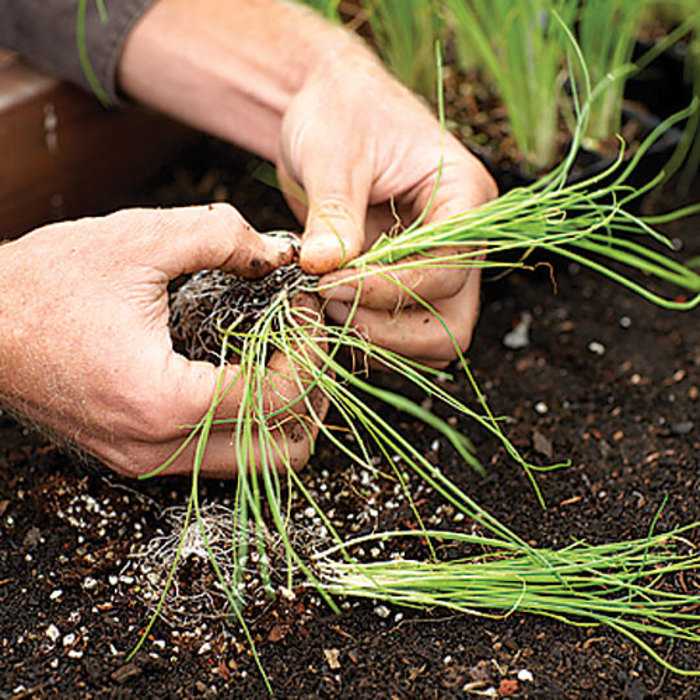 If we have weeds on the crops during the germination period, then the onion yield is reduced to 50%, and the ripening of the bulbs is very noticeably delayed.
When a soil crust is formed, the onion seedlings turn out to be sparse and uneven, which also leads to a decrease in yield and a deterioration in its quality.
Sometimes weeds appear before onion shoots and there may be a danger of destroying onion seedlings during weeding and loosening.
To prevent this, it is very good to add some lettuce or radish seeds to the seeds of Nigella when sowing. They will rise first and show us the location of the onion rows, and after the emergence of onion shoots, beacon plants can be removed.
When the seedlings have 1-2 true leaves, we carry out the first thinning of the crops in very dense places, leaving 1.5-2 cm between plants. The second thinning is carried out after the formation of 3-4 leaves and leave a distance of 4-6 between plants see
I want to draw your attention to the fact that both weeding and thinning should not be late in any case, because otherwise thickening accelerates the formation of bulbs, the plants do not have time to form a sufficient number of leaves and the bulbs turn out small.
We water plantings of onions 1-2 times a week, provided that the weather is dry, and only in the first half of the growing season (May-June). Then we stop watering, as the bulbs are ripening.
And 1 week before harvesting, it is recommended to carry out foliar top dressing of crops with potash fertilizer, as this contributes to a better maturation of the seedlings.
Harvesting, storage preparation and storage features. We start harvesting onion sets in the second half of July-August (depending on the weather), as soon as the leaves turn yellow by a third of their height.
Onion harvesting and preparation for storage can be found in the previous article about onions.
Grown onion sets need to be stored differently depending on their size. Therefore, the first thing we will do is sort it into small ones with a diameter of up to 1.0 cm, medium - 1.5-2.5 cm and large - more than 3 cm.
Seeds are best stored in cloth bags and in a dry, well-ventilated place. For a small set, the optimal storage temperature is 0ºС, because since it is prone to drying out, such an onion can completely die at a higher temperature.
The problem of storing a small set (non-standard) can be solved by planting it before winter, because it does not shoot under any conditions and can give an excellent harvest of turnips.
Medium and large sets keep well at room temperature (up to 18ºC). At higher or lower storage temperatures, the onion sets may go into the arrow after planting.
Onion from seeds in one year
It is quite possible to grow onions from seeds in one year. Our resourceful summer residents have learned to do this very successfully, using two methods: firstly, this is an early spring thickened sowing of seeds; secondly, it is cultivation through seedlings.
The most suitable varieties for this cultivation of onions are Myachkovsky, Strigunovsky and Odintsovets . Also good varieties Russian size and Exhibition , which have very large bulbs (350 g each, and sometimes up to 500 g) of a delicate, sweet taste.
Now let's take a closer look at each method.
Early spring planting. Early varieties are most suitable for growing onions in this way and onions grown in this way will not be stored for so long, so it is best to use it first.
It is recommended to start sowing around April 20-25 (depending on the weather). We warm up the seeds, disinfect, germinate and sow very early on the beds prepared in the fall.
The beds should be covered with plastic wrap in advance so that the earth warms up well before planting the seeds.
On the day of planting, we remove the film from the bed, make grooves and spill them with hot water. Then we lay out the seeds, sprinkle them with humus or compost, compact the soil and again cover the bed with a film.
We remove the film from the bed only when shoots appear.
Further planting care is the same as for onions, which we grow from sets. The only difference is the need for thinning the landings.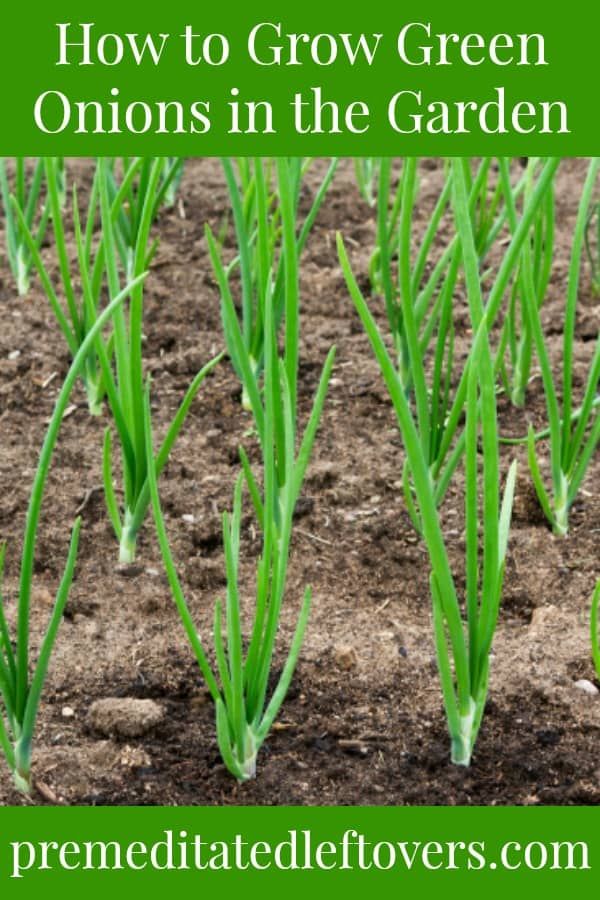
The first time the onions should be thinned when they reach 7-10 cm. The second thinning is carried out after 3 weeks and the third - 2-3 weeks after the second.
As a result, the distance between the bulbs should be about 10 cm. With this method of growing onions, it is very important that the bulbs have time to fully ripen.
To somehow speed up this process, you can do the following:
- Cultivate the bulbs in the second half of the growing season so that they are half above the ground.
- Pull the bulbs a little by the feather, as if lifting them in the ground or lightly cut the roots with a shovel.
With these actions, the process of supply of nutrients from the leaves to the bulbs is significantly accelerated and their maturation is faster.
Some summer residents crush onion leaves to speed up ripening, but this method is dangerous because pathogenic bacteria or pests can get into the neck of the bulb.
With this method of planting, it is quite possible to grow from seeds not only turnips, but also pickled onions and onion sets.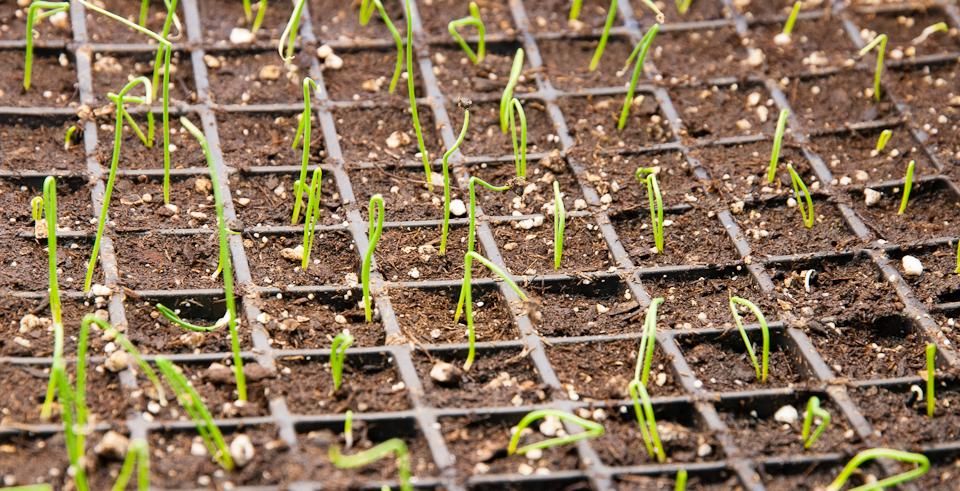 Therefore, after harvesting and drying the onion, it must be sorted into large (more than 4 cm), medium (3-4 cm) and small (up to 3 cm).
Then leave the large bulbs for winter storage; medium onions must be consumed first, they are also suitable for forcing green onions; we leave small bulbs (sevok) for storage for spring plantings.
Onions through seedlings. Growing onions through seedlings is, of course, troublesome, but not difficult. But there are many advantages: firstly, the onion ripens perfectly by autumn, not at all worse than planted sevkom; secondly, in this case, we get a crop twice as large as when sowing seeds immediately in open ground.
We sow seeds for seedlings at the end of February - the first half of March. We grow onion seedlings at home in boxes, seedling pots or other containers with a height of at least 10 cm.
The main condition is that the walls of the containers should not be transparent, as light will interfere with the development of the root system.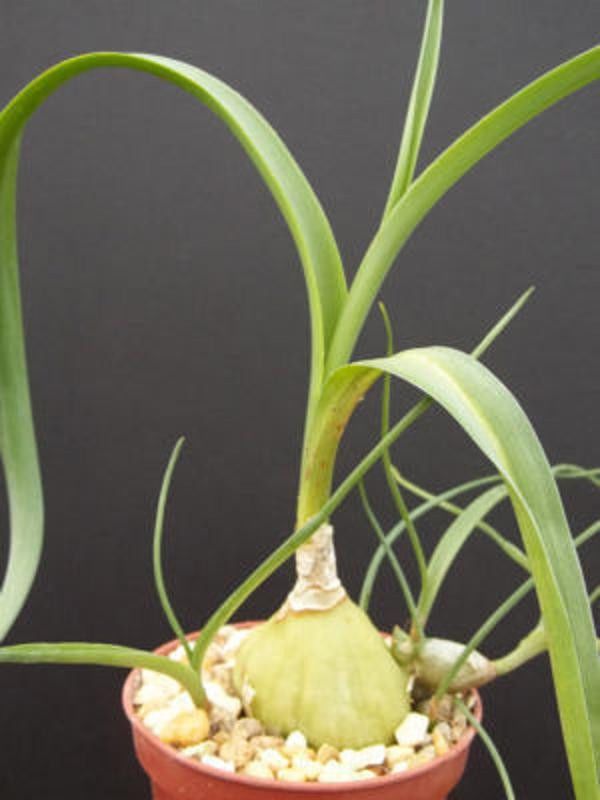
Seeds can be sown in 1 cm deep grooves or simply planted densely over the entire area of the container.
Then we cover them with a layer of earth (1 cm) from above, lightly compact, carefully water (preferably with a spray bottle so as not to wash the seeds out of the soil) with warm water and put the container in a warm place (22-25ºС), covering with a film.
After about 10-15 days, shoots begin to appear and the film is removed. After the appearance of sprouts (looplets), we expose the containers with seedlings to the brightest place, while it is desirable to maintain an air temperature of 9-12ºС for 3-5 days.
Then it is recommended to raise the temperature to 15-20°C during the day and 10-12°C at night. If the air temperature in the room is higher, then regular ventilation is necessary so that the seedlings do not stretch out and do not get sick with a black leg.
In addition, if seedlings grew at elevated temperatures, then later, when planting in the ground, they do not take root well.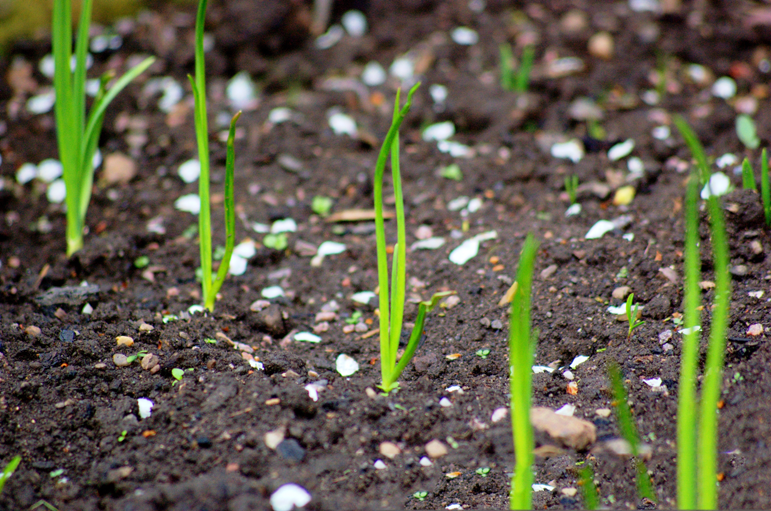
Water the onion seedlings sparingly, do not overmoisten the soil. Before planting seedlings in the ground, we feed it twice, but if it grows strong and healthy, then you can feed it once.
We carry out the first top dressing a week after the emergence of seedlings, and the second - two weeks after the first.
Fertilizing solution can be prepared from both mineral fertilizers and mullein infusion by mixing in water in a ratio of 1:6.
We feed very carefully - little by little.
At about 60 days old, seedlings can already be planted in the garden. By this time, it becomes strong, has a developed root system, 3-4 true leaves and a thickness at the base of 3-4 mm.
Usually, onion seedlings are planted in the garden between May 1 and May 10, depending on the weather in the region and the condition of the soil. She is not afraid of small frosts.
The best time for landing is considered to be the second half of the day, when the air temperature is already starting to drop. Before transplanting, the seedlings are thoroughly watered, then each plant is carefully removed from the ground.
If the roots are long, then they should be shortened a little, by about one third. This is done so that when planting the roots do not bend up, as this reduces the survival rate of plants.
We plant onions in rows with a distance between plants of 8-10 cm, between rows - 20-25 cm. If you plant large varieties of onions, it is better to adhere to the scheme of 30x30 cm. Water the bed well immediately after planting.
In the future, during the first week, until the plants take root, water every day, keeping the soil moist. Then watering should be carried out as the soil dries.
The following agrotechnical measures are no different from those used in the cultivation of onions in other ways, namely: weeding, watering, loosening, top dressing, cleaning.
On this, perhaps, the article will end. In it, I told you about growing onions from seeds in two ways: a biennial crop - we grow onion sets, and from it the next year - turnip onions and an annual - in one year we get turnips directly from seeds, planting them either very early spring, or seedlings.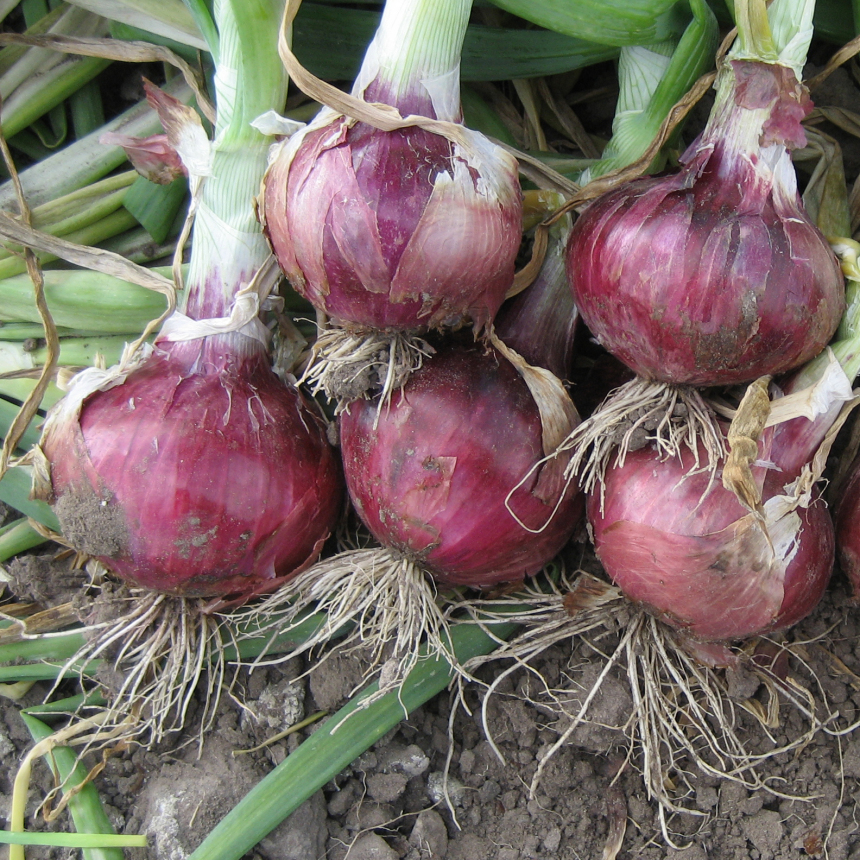
We will talk about the third method - winter sowing - in one of the following articles.
See you soon, dear readers!
Also on this topic you can read:
Tags: onions
Onions are easier and more cost-effective to grow from seeds
It is believed that onions were first domesticated from vegetable crops. He is depicted on the paintings of Egyptian tombs (and the oldest of them dates back to about 2800 BC). And the inscription on the pyramid of Cheops reads: “1,600 talents of silver were paid for radishes, onions and garlic, which are used as food for workers” (one talent is approximately equal to 26 kg of silver). Roman legionnaires believed that the bow increases energy and makes the warrior fearless. In the era of the Crusades, the French knights paid the Saracens 8 onions for each captive compatriot. And the ancient doctors, not without reason, believed that there was not a single disease in which onions would not benefit the patient.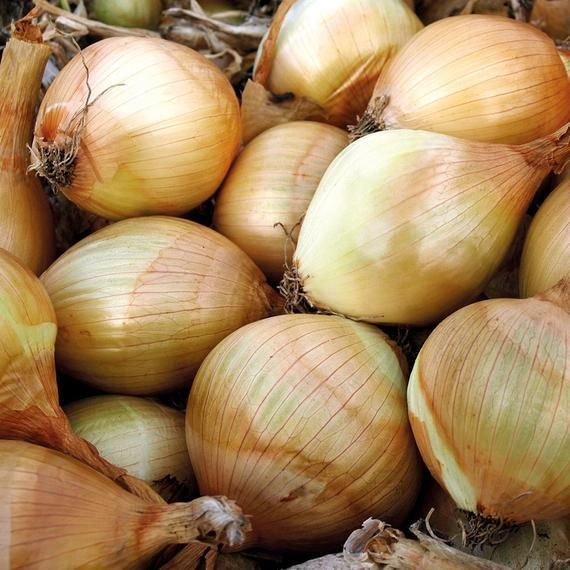
Most likely, onions came to us in Belarus from the Mediterranean countries through Poland. The onion districts were Mostovsky in the Grodno region, Lepelsky in Vitebsk and Stolin in Brest.
Most summer residents are accustomed to growing onions through sets, but they grow well from seeds. A similar technology was developed by RUE "Institute of Vegetable Growing". This is our today's conversation with one of its developers - Nikolay Kupreenko, Candidate of Agricultural Sciences, Head of the Department of Cold-Resistant Crops.
“Onions from seeds are easier and more cost-effective to grow: there is no need to grow sets and then store them, seeds can be sown both in early spring and before winter,” says Nikolai Petrovich. - The main thing is that they do not germinate in the fall. And the seedling method has many advantages: firstly, the onion ripens perfectly by autumn, not at all worse than the planted sevkom. And all because the period of its vegetation increases by 1.5 - 2 months. This allows you to expand the number of varieties and obtain turnip of some lettuce (including large-fruited) mid-ripening varieties. Secondly, we get a crop twice as large as when sowing seeds immediately in open ground.
Seeds for seedlings are sown at the end of February - the first half of March. Before sowing, be sure to check them for germination. Wet a soft cloth, wring it out and put a few onion seeds between its layers, keep warm for a couple of days. If during this time sprouts appear, then you can begin to prepare for sowing.
Soak store-bought or untreated seeds in a weak solution of potassium permanganate for a day. You can also warm the nigella for 30 minutes in hot (plus 50 degrees) water or soak for 30-40 minutes in aloe juice. To make the seeds wake up faster, they can be soaked for a day or two in water, not forgetting to stir occasionally. As soon as the grains begin to hatch, send them for hardening for 5-6 days in the refrigerator.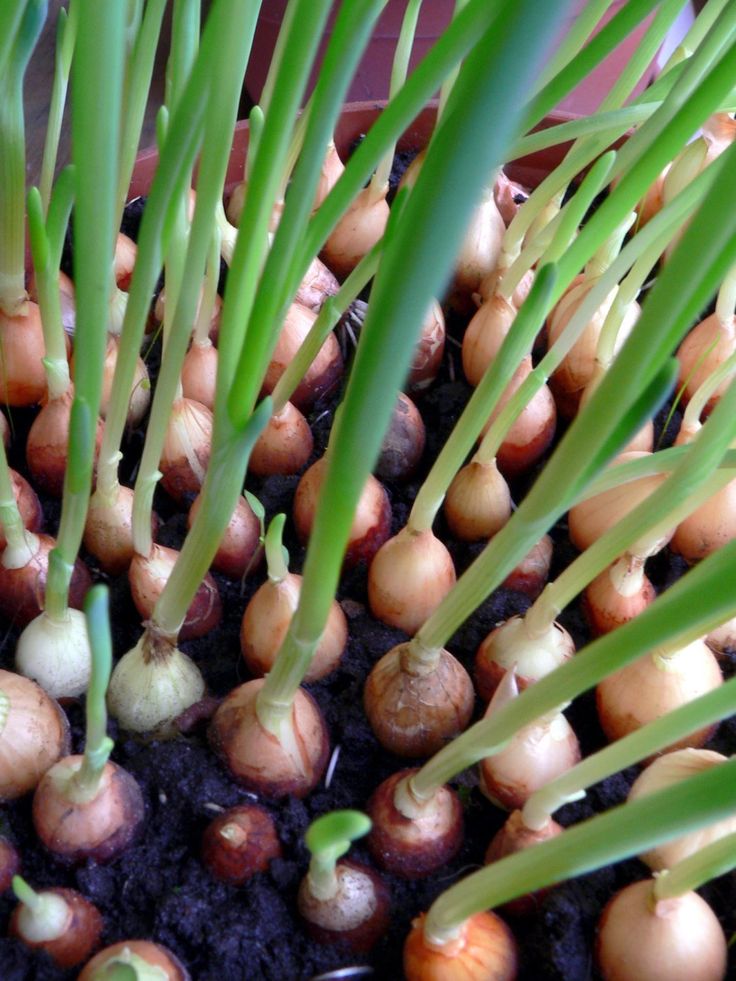 Then lightly dry and sow. Don't want to deal with all this? Then just soak for 12 - 24 hours in a solution of trace elements. Soaked and germinated seeds germinate 6-7 days earlier than sown dry ones.
The soil for onions must be loose and nutritious. It is best to use a mixture (1: 1) of soddy soil and humus. The soil should be airy because it is easier for the onion sprout, which is in the form of a loop, to break through to the surface. We pre-disinfect the earth in any way (calcined in the oven for 30 - 40 minutes; spilled with hot water or a strong solution of potassium permanganate).
We sow the seeds in grooves to a depth of 1 cm. Then we fill them with another 1 cm of soil from above. Lightly compact so that there are no air chambers between the soil and them, mulch with peat or humus with a layer of about 2 cm, and then carefully water (preferably spray from a spray bottle) with warm water, trying not to wash out the plantings. We cover the container with plastic wrap or glass to create favorable greenhouse conditions. We put the mini-greenhouse in a warm (plus 22 - 25 degrees) place. Seedling containers should be at least 10 cm high and opaque: light will interfere with the development of the root system.
After 10-15 days, when shoots appear, remove the film. And after the appearance of sprouts-loops, we put the containers with seedlings in the brightest place, maintaining the temperature at plus 9-12 degrees in the first 3-5 days. Then we raise it to plus 15-20 during the day and plus 10-12 at night. For this, the window sill is the best suited. It is only necessary that it be insulated and sealed, as seedlings can get sick from cold or drafts.
If the room is much warmer, then regular ventilation is necessary so that the seedlings do not stretch and do not get sick with a black leg. It has been noticed that if seedlings grow at elevated temperatures, then after planting in the ground, as a rule, they do not take root well.
Water the onion seedlings moderately, trying not to flood the soil.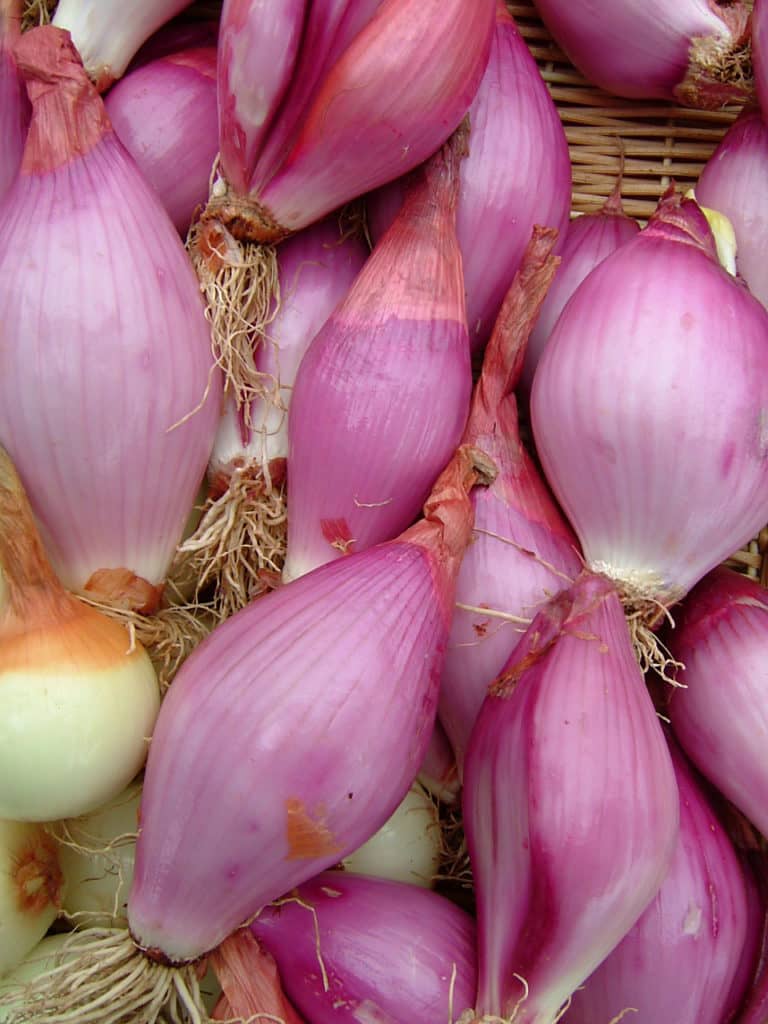 Before planting in the ground, seedlings must be fed twice. The first time - a week after the emergence of shoots, the second - another two weeks later. A solution for top dressing can be prepared both from mineral fertilizers and from mullein infusion (1:6) or slurry (1:10), not forgetting then to pour the seedlings with clean water. Humic fertilizers, as well as EM solutions, are also suitable.
In April, we start hardening seedlings - we take them out to the balcony, leaving them in the fresh air for an increasingly longer time. If the plants have outgrown, they can trim the feather, leaving about 10 cm. We plant the senets in the ground at the same time as the onion sets. By this time, the seedlings should already have 3-4 true leaves and a stem 0.6-0.7 cm thick.
The best time to plant is in the afternoon, when the air temperature begins to drop. First, water the seedlings thoroughly to carefully remove each plant from the ground. Very long roots can be shortened by a third. It is better to cut them than to bend them up. Before planting, dip the roots in a mash of clay and mullein. And make sure that the central part of the plant (growing point) is not covered with soil - otherwise the plant will die.
We plant seedlings, leaving 10-15 cm between plants, and 30-35 cm between rows. You can plant more densely, then in summer you can calmly thin out. Seedlings are deepened by 3 cm, watered abundantly and mulched with peat. In the first week, until the plants take root, water every day so that the soil is slightly moist. And then - as the soil dries.
Justifies itself and sowing onions directly into the ground. Seeds start growing already at plus 2 degrees. Therefore, it is better to sow them in the first decade of April. To sow 1 sq. m, enough 0.5 - 1 g of seeds. We make the grooves deep (2 - 2.5 cm), thus insuring the grains from drying out in early spring. We sow the seeds to a depth of 1.5 - 2 cm, the distance between rows is 20 cm, between plants - 5 - 8 cm.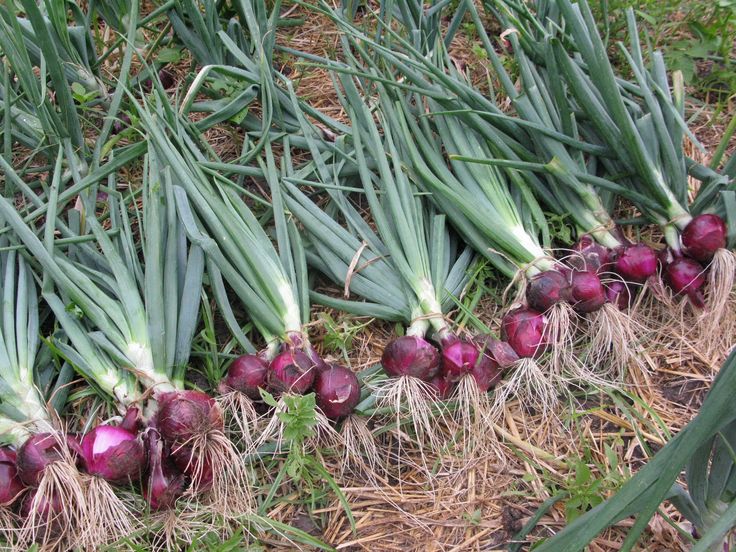 It will not be superfluous to mulch the crops with a 2-centimeter layer of humus or peat. Such a “blanket” will not only warm the soil, but also perfectly protect it from drying out and crusting. As a rule, after 10 - 14 days the first shoots appear.
Onions do not like high concentration of salts, therefore it is better to give fertilizers in several doses. And if you haven’t prepared a bed since the fall, then don’t rush to bring in all the “mineral water” in one fell swoop in the spring. It is better to distribute it into three dressings.
Caring for onions planted with sets or seeds is no different. As soon as shoots appear, feed them with nitrogen fertilizers - 10 - 15 g / sq. m. When one or two true leaves are formed, the crops, if necessary, thin out and fertilize with nitrogen again (but no later than June 20), preferably in liquid form. Or dilute slurry 5-6 times with water by adding 20 g of "Superphosphate" to a bucket of solution.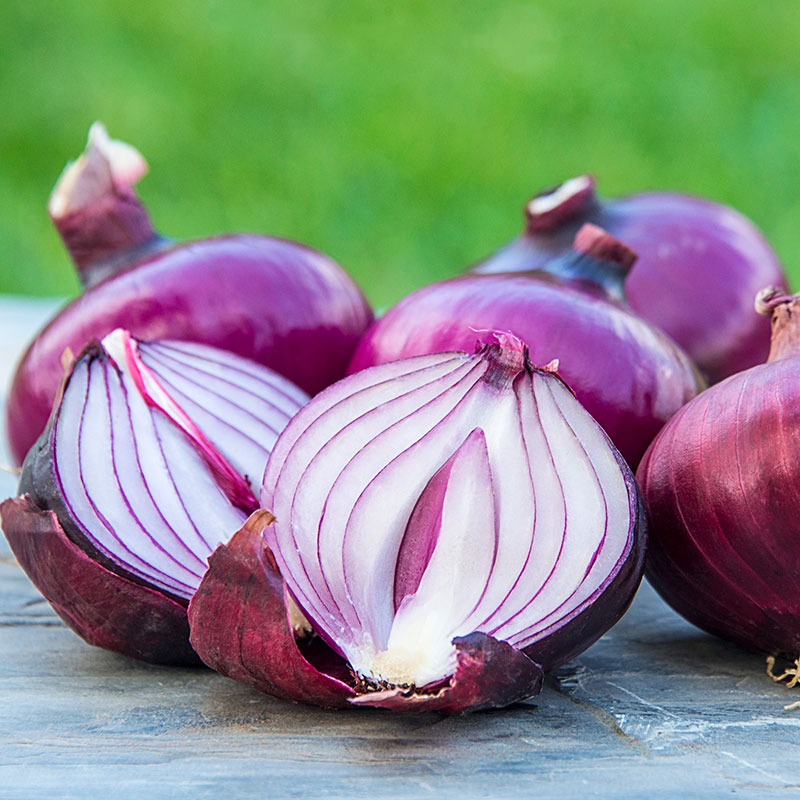 Spend the third top dressing when the bulb itself begins to form: 20 g of Superphosphate and 15 g of Potassium Chloride per bucket of water. During the summer, constantly loosen the bed (especially after watering) and weed.
Foliar fertilizing with liquid soluble fertilizers (ZhKU, UAN, Vitococktail, Ecolist, Basfoliar, etc.) can also be used on onion crops from seeds, as when growing onion from sets.
The giant onion, as it grows, tends to climb to the surface to warm its golden sides in the sun. Therefore, it is not necessary to sprinkle the bulbs with earth, as we do when growing carrots or asparagus.
The most dangerous enemy of the onion is the onion fly. It hibernates in the soil at a depth of 10 - 20 cm. In mid-May, it flies out and begins to lay eggs in the axils of the leaves or under lumps of earth near the plants. After 7-10 days, white larvae appear from them. They bite into the bulb, nullifying the entire crop. After three weeks, they will go into the soil to pupate.![]() And after another 15 - 20 days, a new (already second!) Generation of onion flies appears. If the year is very hot, then a third wave of the pest may also appear.
And after another 15 - 20 days, a new (already second!) Generation of onion flies appears. If the year is very hot, then a third wave of the pest may also appear.
Read also
PhD in Biology told how fungi help plants
Twice during the season when the pest is most active (in late May - early June and early July), water the crops with a solution of table salt: 1 cup per 10 liters of water. Also, a salt shower increases the yield by about a quarter and makes the onion itself much tastier. It is good to plant next to onions and carrots.
Stop all watering as soon as the green feathers begin to set. To make the vegetable ripen better, free the bulbs, rake off part of the earth from the top. If the leaves of more than half of the onions have bowed and turned yellow, start harvesting. But do not be late, otherwise secondary roots will begin to form and the crop will be stored worse. Dig up (rather than pull out) plants in sunny weather, protecting them from blows (where there is a blow, there is a wound).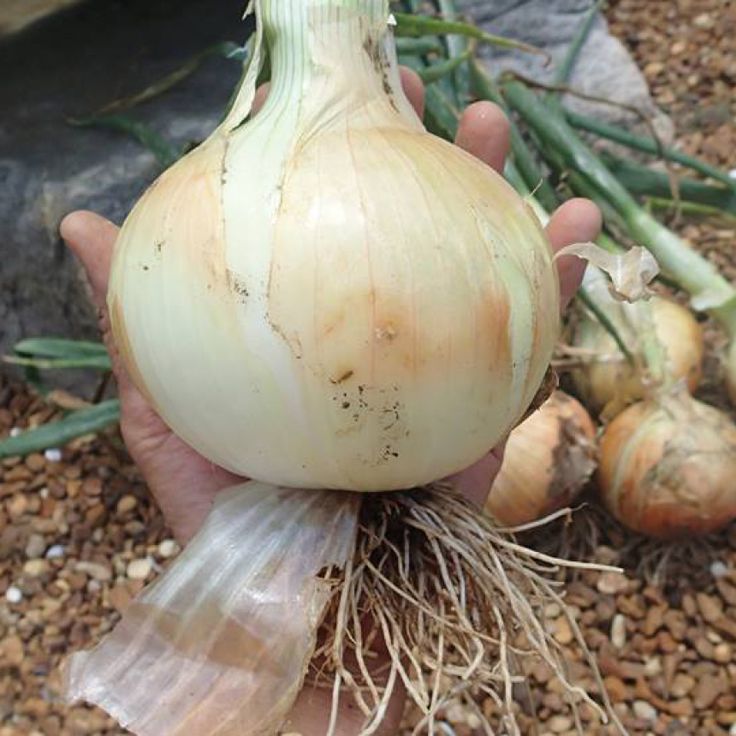
Then dry it. Large lettuce onions should not be kept under the sun for a long time: they very quickly begin to bake and dry in the heat. It is better to dry them under a canopy or on a glazed ventilated veranda in a shaded place.
When sending onions for the winter, create favorable conditions for them: air temperature - from zero to plus 2 degrees, and humidity - 75 - 80%.
INFORMATION "SB"
Today, more than 80 varieties of onions have been released in Belarus, 8 of which are of Belarusian selection. These are Amber, Vetraz, Kryvitsky Ruzhovs, Diyament, Litvinov's belongings, Radimich, Edelweiss and Slutich.
BTW
Onion sets also have their advantages. Firstly, it ripens 25 - 30 days earlier. Secondly, a strong root system ensures a good harvest even in dry years.
FACT
Englishman Mel Edney in 1997 grew the world's largest onion weighing 7.03 kg.
TIP
The onion family has more than 400 (!) relatives.
Learn more
- Plants that attract birds
- Hardy climbing plant

- Black wainscoting ideas

- Boys themed rooms ideas

- Office room colour combination

- Interior decorating styles 2023

- How to color leather couch

- Country rooms ideas

- Ways to decorate small bathrooms

- Best guest bathroom ideas

- Country cottage kitchen
