Paint finish on wood
How to Achieve Smooth Results When Painting Wood
By
Lee Wallender
Lee Wallender
Lee has over two decades of hands-on experience remodeling, fixing, and improving homes, and has been providing home improvement advice for over 13 years.
Learn more about The Spruce's Editorial Process
Updated on 05/29/22
Reviewed by
Johnathan Brewer
Reviewed by Johnathan Brewer
Johnathan Brewer is a home improvement expert with over two decades of professional experience as a licensed general contractor specializing in kitchen and bath. He has been featured on HGTV’s “Super Scapes,” “Curb Appeal the Block,” “Elbow Room,” DIY Network's “House Crashers,” "This Old House," and OWN Network's Emmy award winning show, “Home Made Simple.” Jonathan is also a member of The Spruce Home Improvement Review Board.
Learn more about The Spruce's Review Board
Fact checked by
Alexandra Kay
Fact checked by Alexandra Kay
Alexandra Kay is a writer, fact-checker, researcher, and editor who checks The Spruce articles for accuracy and adds source citations. Alex frequently writes for b2b and b2c publications. When she isn't writing or fact-checking for print or online articles, Alex is an associate professor of English at a community college.
Learn more about The Spruce's Editorial Process
The Spruce / Claire Cohen
Project Overview
Painting wood appears to be such an elemental, foolproof project that many people rush the job along or attempt shortcuts that produce poor results. Plus, with the advent of paint-ready surfaces like drywall or primed trim and casing, wood painting is slowly becoming a lost art.
Mastering the techniques of high-quality painting of wood surfaces is not difficult, but it does take some practice. Within just a few hours, you can transform yourself from an amateur weekend painter to one with professional skills.
Watch Now: How to Paint Wood Smoothly
Warning
Always use a dust mask when sanding. If you believe that the surface was painted with lead-based paint, take precautions to avoid breathing or ingesting the paint dust.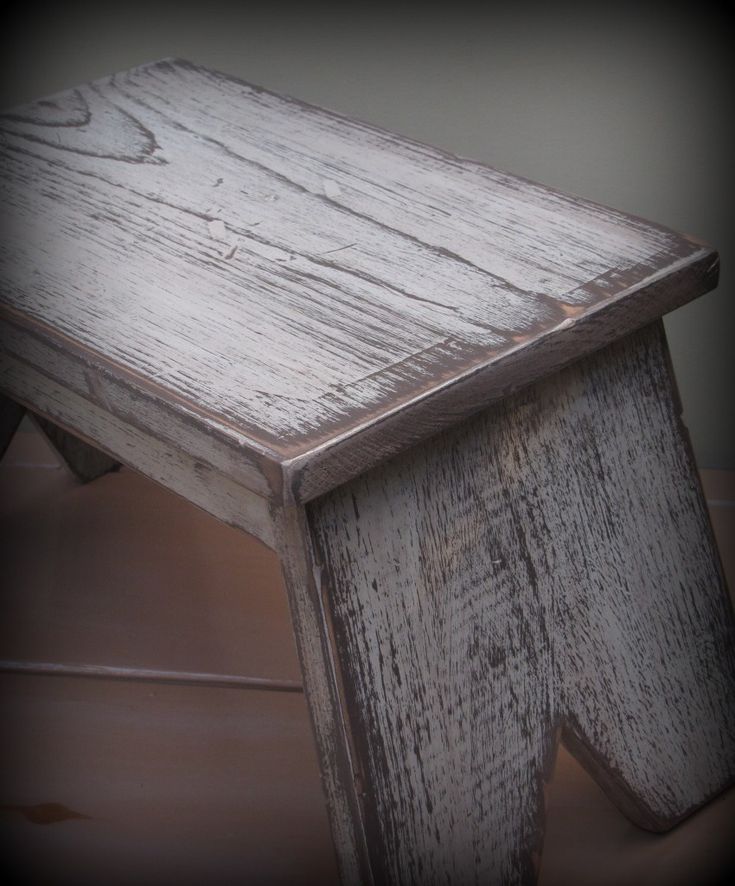 Hearing protection is essential when operating the oscillating sander.
The Spruce / Claire Cohen
Need more help? Talk to a painter near you
Our partners can help you compare quotes from top-rated professionals near you
Get a Quote
Advertiser Disclosure
The offers that appear in this table are from partnerships from which The Spruce receives compensation.
Equipment / Tools
- Plastic sheeting
- Canvas drop cloth
- Eye and hearing protection
- Rubber gloves
- Bucket
- Clean cloths
- Random orbital sander
- Shop vacuum
- 2 1/2-inch paintbrush
- Roller assembly with a high-density foam cover
- Paint tray and liner
Materials
- TSP (tri-sodium phosphate)
- 180-grit and 220-grit sandpaper
- Tack cloth
- Primer
- Interior acrylic-latex paint
- Paint additive such as Penetrol or Floetrol (optional)
-
Cover Your Work Surface
Drape plastic sheeting over the floor or other work surface to protect it from paint spills.
 Lay a canvas drop cloth or contractor's paper over the plastic sheeting. The plastic keeps the paint from soaking through to the floor, while the canvas provides a non-slip surface and helps to contain paint spills.
 The Spruce / Claire Cohen
-
Clean the Wood Surfaces
Put on eye protection and rubber gloves. Mix a solution of TSP with warm water to the proportions recommended by the manufacturer. Dip a cloth in the water, firmly squeeze it dry, then wipe down the wood to remove all oils, dirt, and grime. Rinse the surface with clean, warm water and a clean cloth. Let the wood dry completely.
After the wood is dry, check the piece for large nicks, gouges, and scratches. If necessary, fill them with a wood filler using a flexible putty knife.
About TSP
TSP is a strong cleaner, degreaser, and deglosser that has long been used for cleaning surfaces in preparation for painting. If you would like to avoid using phosphates (which are banned in many communities), use a TSP substitute instead.
The Spruce / Claire Cohen
-
Sand the Flat Areas
Put on a dust mask or respirator, as well as hearing protection. Sand the flat, smooth areas of wood with a random orbital sander and 180-grit sandpaper. The intent is not to strip the wood of all of the coatings and stains but simply to smooth out the surface and provide some "tooth," or slight scratches, to help the paint bond.
The Spruce / Claire Cohen
-
Sand the Corners and Details
If you are sanding furniture that has uneven surfaces, switch to hand-sanding so that the sandpaper can better conform to the shape of the piece.
The Spruce / Claire Cohen
-
Clean Off the Dust
Thoroughly remove the sanding dust from all surfaces. Begin with a shop vacuum outfitted with a brush attachment. Do not use a blower, as this will only redistribute the dust back on the surface. Make sure that the shop vacuum is fitted with a bag and a filter to minimize airborne dust.

After you have removed a majority of the dust with the shop vacuum, use a tack cloth or a cotton rag that has been dipped in water and thoroughly squeezed out to remove the remainder of the dust.
The Spruce / Claire Cohen
-
Prime the Wood
Mix the primer well and apply it with a brush or roller. After drying, if the primer looks transparent or streaky on the wood, prime a second time.
The Spruce / Claire Cohen
-
Apply Primer With a Roller (optional)
For flat surfaces, switch to the roller to speed up the process and provide a smoother finish.
The Spruce / Claire Cohen
-
Sand the Primer
Let the primer dry completely, then sand it down before painting. Use very fine 220-grit sandpaper, and apply light pressure to prevent gouging the primer. Remove the primer dust with a quick brush from the shop vacuum, followed by a light swipe of the tack cloth.
The Spruce / Claire Cohen
-
Paint the Wood With a Brush or Roller
For highly irregular surfaces, such as furniture, crown molding, and trim, it is best to use a paintbrush only.
 For surfaces that have large, flat areas, incorporating a high-density foam roller will help you get the job done more quickly.
 Dab the end of the paintbrush bristles only about 1/3 the length of the brush into the paint each time you load the brush. Transfer the paint to the wood, dragging the brush in short strokes that run parallel to the wood grain. Keep a wet edge at all times to prevent lap marks. Do not add a second coat of paint during this step, as this can cause the paint to tear.
For painting with the roller, insert the paint tray liner in the paint tray, then fill the tray less than halfway. Gently dab the roller into the paint. Roll the paint up and down the slope of the tray a few times to distribute the paint on the roller pad.
Transfer the roller to the wood. Roll the paint onto the wood, beginning with light pressure only. High-density foam roller covers work better with thinner latex paint than with oil-based paints.
For a more professional finish, looking into spraying the object rather than using a brush.
The Spruce / Claire Cohen
-
Sand the First Coat
You can usually achieve an even smoother coat if you opt to sand and paint one final time. Sanding the first paint coat brings down bumps and inconsistencies introduced by the roller or brush. Using 220-grit sandpaper, sand gently by hand, or attach the paper to the orbital sander and run it extremely lightly across the surface. Do not apply pressure to the sander other than the weight of the sander itself.
After sanding, open up the tack cloth, bunch it up but keep it loose, then lightly run it across the surface. Too much pressure on the tack cloth will be counter-productive, as this will press the tack cloth's embedded wax onto the surface.
The Spruce / Claire Cohen
-
Apply a Second Coat of Paint
Apply a final coat of paint, using a brush and/or roller, as desired. Let the paint dry as directed. If possible, let the piece dry overnight or longer before using it.
 Paint becomes more durable after it fully cures.
 The Spruce / Claire Cohen
High-quality results are easy to achieve if you follow a few professional tips:
- Use a brush and a roller: Paintbrushes and rollers have complementary roles. Rollers cover large areas quickly but cannot reach into corners. For smooth surfaces, use a high-density foam roller. Paintbrushes are good at painting corners and edges, but they take a long time when painting large areas. Brushing after rolling to eliminate lines and drips is a professional technique known as back-brushing.
- Primers are important: Primers are formulated to bond to problem surfaces and to give the paint a consistent surface for a smoother finish. Primer also helps prevent flashing, a condition where areas of the final paint job look as if they were painted with different paint glosses. Use a high-quality primer brand, such as Kilz or Zinsser.
- Consider paint additives: Paint can get tacky and create brush-drag if you take too long while painting. You can either pick up the pace or buy an additive that extends your working time. Penetrol and Floetrol are popular additives that help you create smooth brush strokes. Avoid painting underneath a fan or heating vent or in direct sunlight, as all of these will accelerate drying time and lead to tacky paint.
Article Sources
The Spruce uses only high-quality sources, including peer-reviewed studies, to support the facts within our articles. Read our editorial process to learn more about how we fact-check and keep our content accurate, reliable, and trustworthy.
Renovation, Repair and Painting Program: Do-It-Yourselfers. United States Environmental Protection Agency.
Executive Summary of EPA747-R-97-002. United States Environmental Protection Agency.
How to Get a Smooth Professional Paint Finish on Furniture
Learn how to get a smooth paint finish to give your DIY projects a professional look.
Building a new piece of furniture is just one part of the process. You also have to finish your piece. For painted furniture, follow these steps to get a smooth paint finish on your project.
I used these furniture painting steps on the DIY double vanity in our master bathroom. The paint finish turned out amazing! It took the project from DIY to professional.
We have had the vanity in our master bathroom for a couple weeks now, and everyone that comes to visit must go check it out. It has been really awesome to see their reactions. I have heard “You really built this?” and “It looks professional not homemade.”
As much as I want to believe the comments are all about my skills with power tools, I know that the finish on the vanity is what is making people really impressed.
I hate to admit that some of my early building projects didn’t turn out as high-end looking as the bathroom vanity. Even my coffee bar table (which I still absolutely adore) is not as professional as the vanity.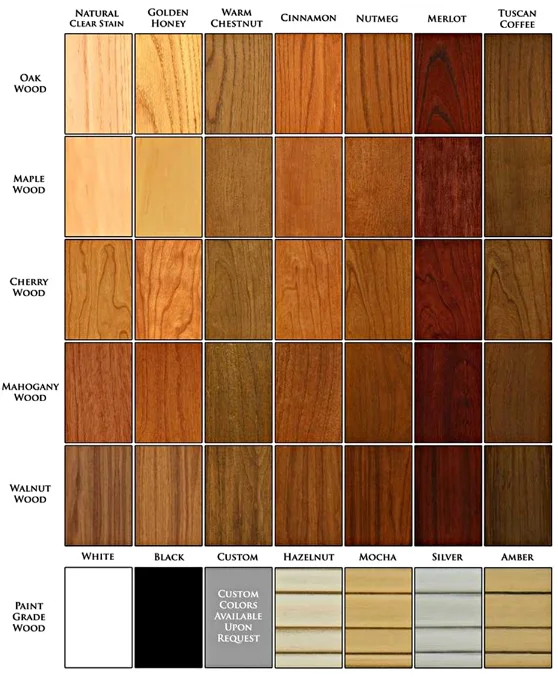
But I have been learning a lot by trial and error over the last few years and I want to share this knowledge with you so you know how to get a smooth professional paint finish on furniture you build too.
Pick the Best Materials for Your Project
Before we get into how to paint the furniture for a smooth finish, I want to take a minute to talk about things that need to be done in the building process to make the painting step much easier!
I hate sanding and I hate painting! But I do it because no one will do it for me and I want to actually be able to use the pieces I build.
So I always take a little extra time in the building to cut down on time spent finishing a piece, starting with the wood I choose. I know it is tempting to make pieces of furniture out of cheap 1x2s and 1x4s, and they definitely have a place in my wood shop.
In the beginning, I used them frequently so it didn’t cost a lot when I messed up. I built a toddler bed for less than $25 and this nautical picnic table for less than $50 because I used these inexpensive building materials.
But these woods are soft and will not hold up over time. So when I build with them I know that they will be pieces that are used for just a few years.
However, using a harder wood will give you a more solid piece that will last for many, many year and the hardwood is much easier to achieve a smooth professional finish on.
Budget Friendly Hardwoods to Build With
Using hardwood can get expensive, but there are more budget friendly options like knotty alder and poplar.
Alder and Knotty Alder
I used knotty alder to make these rustic railings, this dining room hutch, and the double bathroom vanity (and all the supplies for our 8′ double vanity cost less than $350).
It is really easy to work with, but be warned, there are quite a few knots in it. I personally love the knots because my house is full of rustic charm.
If you do not want the knots, use regular alder (which is a bit more expensive but not as expensive as other hardwoods). Or you can fill the knots with epoxy or wood filler before painting.
Poplar
Poplar is a great option for painted furniture. It can have some uneven or greenish tones so if you are not painting, make sure to carefully pick out your boards to match.
I used poplar for all the cabinet doors and face frames in our kitchen remodel and for this mudroom storage locker. I also for this stained TV stand.
Poplar is easy to work with and has no knots.
Select Pine
Another option for a great painted wood on a budget is select pine. It is more expensive than construction lumber or whitewood, but not as expensive as hardwood.
The pine lumber is easy to work with and takes paint beautifully. I used it to for these small console table build plans.
The finish on this console was made to look chippy by adding petroleum jelly to the edges before applying the paint. After the paint dried, the paint wiped off the areas with the jelly to create a farmhouse effect.
Next time you go the hardware store, feel the difference between the hardwoods and inexpensive lumber.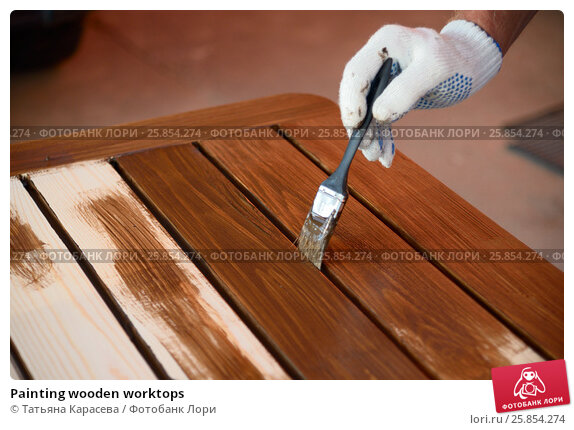 You will notice how much smoother the surface is. And the boards also tend to be much straighter.
All these things will ensure a high-end finish in your building project.
Now on to the painting and finishing!
How to Get a Smooth Paint Finish on Wood
Supplies:
- Sandpaper, multiple grits from medium to ultra fine
- Paint
- I don’t believe there is one paint that is the end-all-be-all for the best results. Use what you love. I use the Behr Interior Paint & Primer in One most often and am very happy with the results. For the bathroom vanity I used the Behr Pot of Cream in Eggshell.
- I have used the newer water based Cabinet Enamel paints for painted cabinets recently. They offer a hard, enamel-like coating for durability. Use the same process as below to get a smooth finish with it.
- Paint sprayer
- A paint sprayer will give you the smoothest finish. I like the budget friendly HomeRight Finish Max sprayer.
- You can still achieve a great paint finish without a paint sprayer. Make sure to use a high quality paint brush and do not over brush the paint.
- A paint sprayer will give you the smoothest finish. I like the budget friendly HomeRight Finish Max sprayer.
- Vacuum
- Tack cloth
- Fine grit sanding sponges
- Polyacrylic or Sealing wax protective finish
1- Prepare for Paint
Proper preparation is the key step to getting a smooth professional paint finish on anything!
Start by sanding your piece very well. All the paint in the world cannot cover up rough wood. This is one of the main reasons I love using quality lumber, it makes sanding so much easier.
If you are starting with rougher lumber, start with a lower grit sandpaper (like 60 or 80 grit). Then step down to a medium grit (100), then a fine grit (150-180) and always end with an extra fine grit (220 grit).
Always sand in the direction of the grain. Pay extra attention to the places where boards connect.
Once the entire piece is sanded down, vacuum it to remove dust, debris, and sawdust. Before I had a shop vacuum I use my household vacuum. If you have a dusting attachment, use it to help loosen anything on the surface of the wood.
After the surface of the wood is vacuumed and appears clean. Use a tack cloth to pick up the fine dust particles from the wood.
This is the first time I used a tack cloth and it is a game changer. It’s super easy to rub all over the furniture piece and it’s amazing how much dust you will get off what looked like a clean surface.
This also helps you see if there are any spots that need additional sanding because the tack cloth will snag on a rough spot.
2- Paint the First Coat
Now you are finally ready to apply paint. I used the HomeRight FinishMax sprayer. Painting the vanity with the sprayer took a fraction of the time it would have taken with a paint brush. Also, it dried quickly so I could complete the project faster.
To use this paint sprayer you need to thin the paint (their new Super FinishMax sprayer does not require it).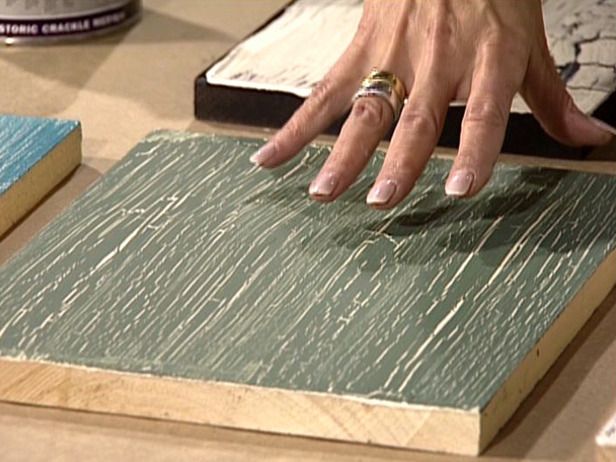 You can determine if your paints needs to be thinned by using a very simple drip test. The paint must pass through the specific container in 25-40 seconds to be ready to use in the sprayer.
For my first coat, since it would ultimately be my primer (my paint had primer included in it), I only thinned it to 40 seconds so it was the thickest it could be for more solid coverage.
If you are using a water based paint, you can thin it with just water (yay!). If you are using an oil based paint you will need to use an oil-based medium that is recommended by the paint you are using.
Completely cover the entire surface of your piece in paint. Be aware that it will be spotty/streaky as the paint will soak into the wood a bit. Do not apply a thicker coat for the first layer to try to achieve a smooth finish or you may get drips.
Multiple coats are necessary and will result in a better final finish.
When to Paint Furniture
It’s worth noting that I painted my vanity in the summer, and it was HOT and DRY! We had temperatures in the 90s that week.
Typically, it is not recommended that you paint in extreme hot or cold temperatures. The paint will dry extremely fast in these high temperatures.
If you are using a paint brush to paint in the heat, it will leave brush strokes and the paint will dry in your brush making a mess of the brush and leaving clumps of paint or brush strokes on your furniture. This will not result in the smooth professional paint finish you are hoping for.
The paint sprayer did not have any issues in the heat though. And it was dry almost immediately after painting so that was an added bonus.
3- Sanding Between Coats of Paint
After the first coat has dried, use a fine grit sandpaper and sand the entire surface by hand.
I use the sanding sponges for this step and love them. They make it easier to get into corners because the sanding surface is on 4 sides of the sponge.
Give it a good sanding to remove any bumps or texture in the paint. Be careful around edges because it is easy to sand them too much and end up with a worn look (or go heavy on the edges if you want the worn look).
To make sure the piece is sanded enough, I run the palm of my hand over it to see if it feels smooth to the touch.
Once everything is sanded, pull out the vacuum again. Vacuum the entire piece of furniture as you did above. Then grab the tack cloth and remove any additional dust from the surface.
4- Paint the Remaining Coats
Now it is time for a second coat of paint.
For the second (and third) coats of paint, I thinned the paint to a thinner consistency. For the drip test, it only took 25 seconds for my paint to pass through the container.
The thinner paint made for a smoother coverage from the paint sprayer. Coat the entire piece of furniture with a second coat of paint. There should be very little to no streaks/spottiness when you finish this coat.
After the second coat has dried, continue sanding between coats of paint, vacuuming and cleaning with tack cloth before adding the next coats.
Now it is time for a third coat. Thin the paint the same as you did for the second coat and cover the entire piece. After this coat the surface should look smooth and uniform.
I stopped at 3 coats for my bathroom vanity, but sometimes a forth coat is needed or desired. Paint, paint color, and wood can all affect if you need more coats.
Add more coats as necessary. Make sure to sand between each coat of paint. Then vacuum and tack cloth the surface before adding paint.
5- Add the Protective Finish
Once you are happy with your paint. Give it a very light hand sanding with the ultra fine sanding sponge. Then it is time to protect it.
This step is optional, but will create a protective finish on your piece of furniture.
If using a water-based paint, you want to use a water-based polyacrylic finish. If using an oil-based paint, use and oil-based finish.
Polyurethane finished will yellow over time and are not recommended for use on painted finishes.
A wax finish will add a matte or low-sheen finish to the paint.
Typically the higher the gloss to a finish, the easier it will be to clean. I usually use a satin/semigloss finish for walls and furniture in the kitchen and bath.
If you are using a sealing wax, buff it on the surface with a brush or rag. Then buff off the extra. Repeat if needed, but typically 1 coat is sufficient for waxes.
If you are using a poly coating, using a high quality paint brush or paint sprayer to apply a coat to the entire piece of furniture. Let it dry.
If a second coat is needed (and I usually advise at least 2 coats for normal furniture and 3 coats for high traffic or areas around water), you will need to sand between coats, then vacuum and tack cloth the piece before adding the polyacrylic.
This will ensure a super smooth finish. However, you do not want to sand the final coat or you will end up with a cloudy finish.
Now you can stand back and admire your beautifully painted piece of furniture that no one will be able to tell was homemade!
A proper paint finish will make all your pieces stand the test of time, and isn’t that what you want from a piece you spend the time to build yourself? I know I do. Maybe I’ll even be able to pass them down as family heirlooms someday.
It may seem like a lot of work for a perfect paint job, but it really is mostly waiting for things to dry. And if you want to take the time to build something you will want to finish it properly too.
Materials
- Sandpaper (multiple grits from medium to ultra fine)
- Paint (use a Paint & Primer in one to eliminate an additional primer step)
- Tack cloth
- Ultra fine sanding sponge
- Polyacrylic or Sealing wax protective finish
Tools
- Sander
- Paint sprayer
- Vacuum
Instructions
- Sand your furniture piece smooth. Start with a lower grit if needed. Step down your grits and finish with an ultra-fine grit. Sand with the grain of the wood.
- Vacuum all the dust from the furniture piece.
 Use a bristled attachment to help loosen the dust as you vacuum.
 - Wipe off any remaining dust with a tack cloth.
- Fill your paint sprayer with paint. Thin the paint if needed.
- Spray the first coat on your furniture. Use a light coat to avoid drips. You may have some spottiness after the first coat.
- After the first coat is dry, lightly sand the entire surface with an ultra fine grit sanding block.
- Vacuum the dust off and clean the surface with a tack cloth.
- Paint the second coat of paint on the piece the same as the first.
- Repeat by sanding between coats of paint. Then vacuum and tack cloth before applying the paint.
- Paint a third coat, then fourth coat if needed.
- Sand, vacuum and clean the piece again.
- Apply a protective finish of polyacrylic or wax.
- If using wax, no need to sand between coats if you want a second coat.
- If using a poly finish, sand, vacuum, and tack cloth between coats. Apply 2-3 coats as desired.

Now I’m off to cross something else off my crazy long to-do list.
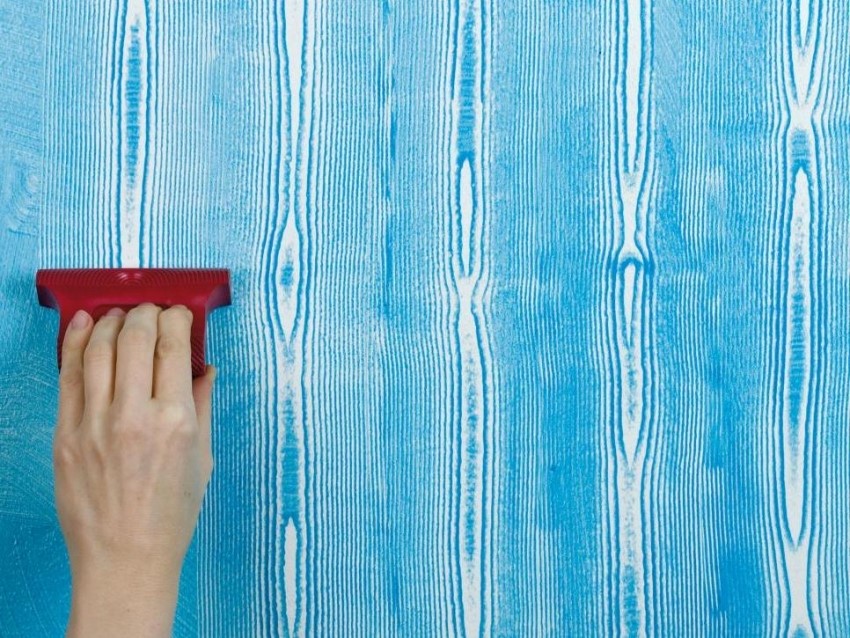
How to paint wood correctly: techniques for painting wood surfaces
Exterior wood painting is not an easy job for non-professionals. Failure to comply with the staining technique, improperly selected materials, inappropriate weather conditions - all this can negate all the work done.
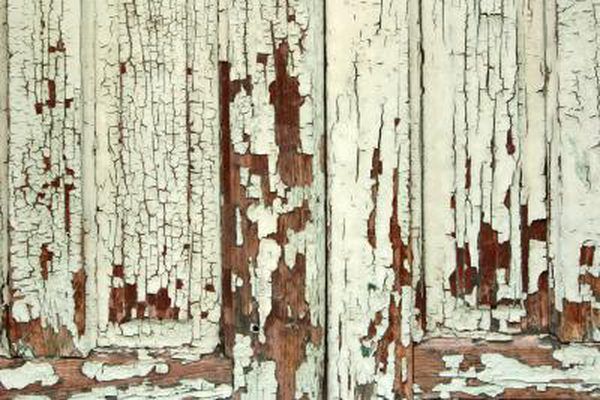
There can be several consequences of technology violation. The most common are cracking and peeling of the decorative layer. Shriveled and falling paint exposes an unprotected decorative surface. As a result, under the influence of sunlight, the tree begins to turn gray. And rain and moisture can lead to rotting of the material.
Incorrect preparation of facades
Often inexperienced builders neglect this stage, in a hurry to finish the job as soon as possible. And absolutely in vain. Unprepared wood behaves unpredictably. With a high probability, we can say that the painting of the facade of the tree will have to be redone after a few years.
No matter how perfect sawing is, microcracks, burrs and other mechanical damages still remain on the surface of the material. At the same time, the processing of wood on machines leads to jamming of its pores. As a result, the penetration of antiseptic and protective compounds is hindered, which leads to a decrease in their concentration in the structure. As a result, the manifestation of processing defects at the finishing stage of staining.
Grinding should be carried out according to the following algorithm:
-
We pass over the surface with a coarse-grained abrasive (P60-80). So we get rid of irregularities and even out the defects of the primary processing.
-
Sanding with grit P120. Fine grain allows you to bring the tree to a perfectly smooth finish.
The depth of penetration of antiseptic solutions depends on how carefully you sand the facade.
No impregnation with protective compounds
This stage is no less important than the previous one. Protective compounds are designed to protect wood from decay, infection by fungi, atmospheric influences. They are sold in the form of oil, antiseptic, priming solutions. When choosing, do not chase the low price tag.
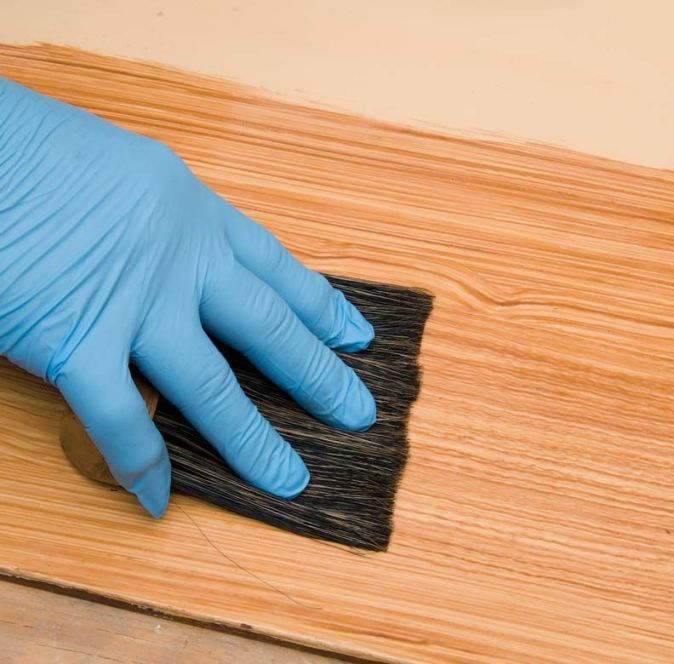
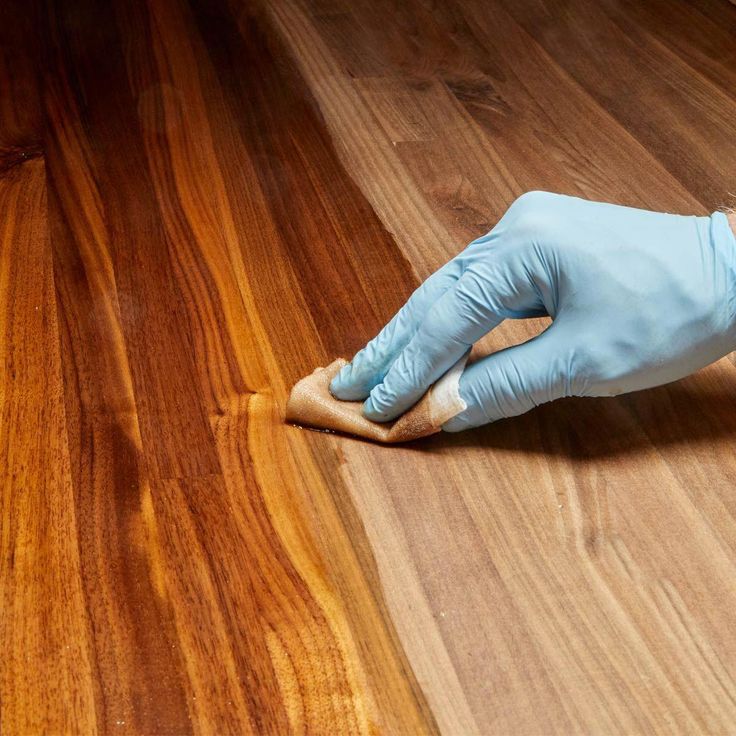
The technique is quite simple. Apply with a brush or roller. Don't forget to squeeze the tool. Excess funds should not drain on the surface. If suddenly the antiseptic gets on the windows, then immediately clean them with Cif spray.
Low-quality paint
Very often, in order to save money, we choose paint from the construction and household line. Unfortunately, its service life is very short - only a few seasons. But then the tree, even pre-sanded and coated with a protective impregnation, will literally start to push the paint away from itself.
Therefore, wood painting should only be carried out by professional outdoor paints. It is better if they are silicone or rubber based. Their service life is 10-15 years.
When doing this, choose densely packed brushes.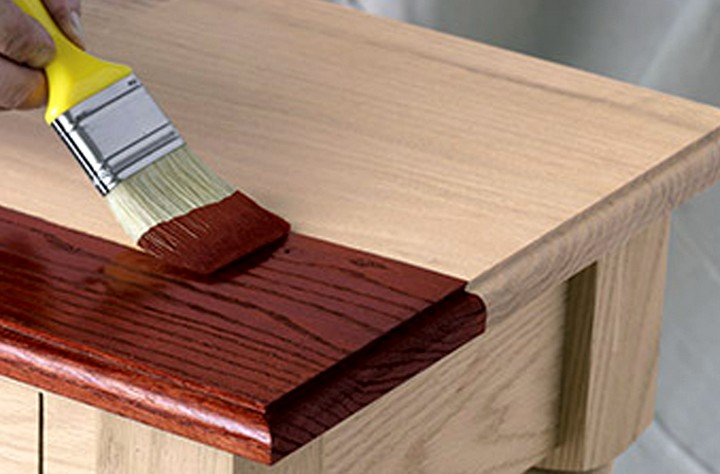 They will ensure a good distribution of the composition. And the cost will be economical.
Inaccurate application
Painting wood on the outside of a house is a lengthy process. The more carefully you apply the layer, the better. This will reduce the risk of paint splatter. At first it will turn out slowly, but then the hand will fill up.
It is better to start painting from the least noticeable places. This is an extra opportunity to practice and choose the most successful hand pressure on the brush.
Please note that when working, you need to move from top to bottom. The fact is that facade coatings are quite “heavy”. Therefore, dripping of paint drops is inevitable. And moving in the right direction, you can control the occurrence of smudges and eliminate them in time.
Always rinse the instruments in water after finishing work.
Non-observance of temperature and humidity conditions
Applying antiseptic and coloring compositions is possible only under certain temperature and humidity conditions.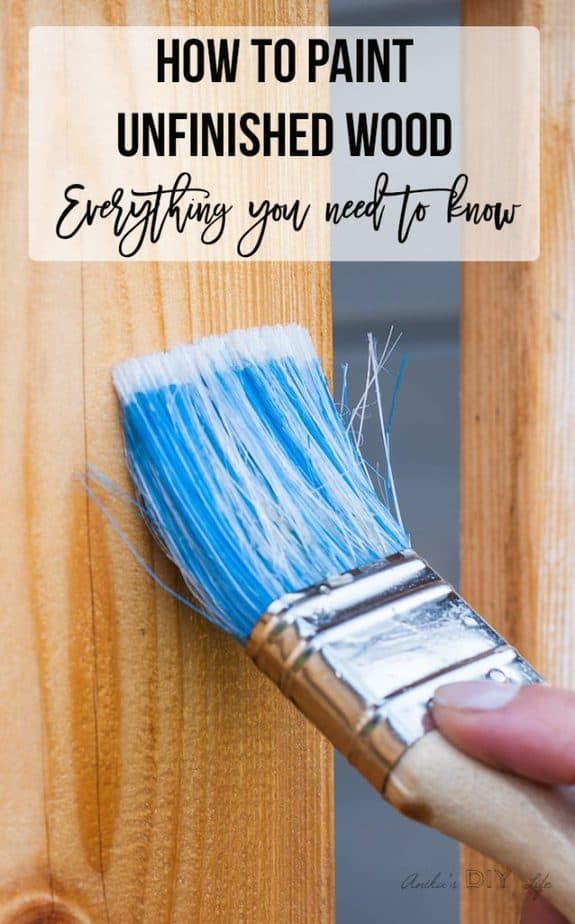 Keep in mind that they all dry differently. Examine the jar carefully and find the optimal temperature regime, which must be observed both during the processing itself and during drying. Many people forget that nighttime temperatures are much lower than daytime temperatures.
Suitable working conditions - overcast dry weather. Too much sun can cause formulations to dry out quickly. In addition, it is not recommended to paint a damp wooden surface. If it has recently been raining or heavy dew, then it is better to postpone painting to allow the tree to dry well.
The technique of painting wood is not so difficult, if you take into account all the nuances. With the right selection of materials and adherence to technology, success is guaranteed.
Wood painting technology - useful information from the Carpentry Workshop "Proxima"
Home → Useful → Wood painting technology
Wood is a natural, environmentally friendly material with high aesthetic and performance characteristics. However, there are also disadvantages, the main of which is exposure to such factors:
- warping as a result of periodic swelling and drying of the layers due to changes in humidity;
- biological attack by various microorganisms at high humidity;
- structural failure due to UV exposure.
All this requires the adoption of special measures, among which the main role is played by varnishing and painting wood. Painting technology largely depends on what kind and type of wood is used for wooden products. Hard rocks are more durable, in some cases do not require preliminary priming and may contain extracts that slow down the drying process. Oak pores, for example, need to be filled, and teak has an oily deposit that needs to be removed with a solvent.
Painting wood furniture starts with choosing the type of paint. The main options are alkyd enamel (oil paint) and acrylic. The first is relatively inexpensive, has good hiding power and weather resistance. But a more aesthetic, reliable and high-quality option is acrylic paints, which often cover real designer furniture. Let's briefly dwell on the main stages of painting a tree.
Preparation for the process
All processing operations must be carried out at a temperature of 18 to 28°C with a relative humidity of 50 to 80%. The moisture content of wood in this case should be 8 - 14%.
Modern wood furniture production involves the use of acrylic primers, varnishes and paints, which are supplied ready-made and do not require any preliminary preparation. It is also possible to independently tint the paint based on general recommendations.
It is essential that the paints be pre-filtered with a filter from 50 to 100 µm before applying the top coat, especially if glossy furniture is required. If filtered paints and varnishes have been stored for more than two weeks, then re-filtration is necessary.![]()
Painting porous wood requires a primer. The wet layer thickness should be between 80 and 120 µm, and drying should take place in the temperature range from 16 to 60°C. If we are talking about varnishing, then the first layer of varnish can play the role of a primer layer.
Painting of wood
Painting of furniture and other products with acrylic paints is carried out by air spraying at a pressure of 2 to 4 atmospheres. The nozzle size of the spray gun should be 1.6 - 2.4 mm. Coloring is carried out in one layer with a wet layer thickness of 80 - 120 microns. The tree can also be placed in a vertical position, but the most convenient option is an angle of 15 - 20 °. Roll application is also possible.
Drying
Maximum productivity and production stability is possible at a drying temperature between 35 and 60°C. Relative air humidity should be 50 - 80% and the process time - from 90 to 120 minutes. The most preferred option is convective drying, that is, using hot air currents.