Kitchen cabinet with breakfast bar
DIY Kitchen Island with Breakfast Bar
When we first bought our new house, we knew we wanted to knock down the wall between the kitchen and living room and replace it with an island. I had originally planned to build the whole thing from scratch, but as I was shopping around I saw that Home Depot sells extra long (5′) kitchen base cabinets (they have them in unfinished oak or unfinished beech – I used beech). Because the island is so big, it was cheaper to purchase the empty base cabinet and build the inside, rather than build the entire thing. And since I DIY to save money, I went the cheaper route.
This post may contain affiliate links. If you make a purchase from one of the links, I may make a small commission at NO EXTRA COST to you. This helps keep the tutorials and plans free here at Bitterroot DIY. Thank you for your support! See my full disclosure here.
Tools & Supplies
- Unfinished Base Cabinet
- Counter Top
- X-acto Knife
- Construction Adhesive
- Stain or Paint of your choice
- Clear Paintable Caulk
- Caulk Gun
- Metal Shelf Brackets (I bought mine off Etsy, but use whatever matches your style)
- Trim
- 2 1/2″ Screws
- Rev-a-Shelf Garbage and Recycling Pullout
Lumber:
- 1 | 4 x 8 Sheet of 3/4 Plywood or Melamine
Cuts:
- 3 | 3/4″ Plywood @ 23″ x 28 (measure for your specific base cabinet to avoid error)
Step 1.
Let’s take it way back to the beginning of the remodel to start.
If you have an existing wall that you’re working with, score the drywall at the desired height of the breakfast bar. I wanted the breakfast bar at standard bar height, so I scored the drywall at 39″ – which is 42″ (bar height) minus the width of a 2×4 (1 1/2″) and thickness of the counter top (about 1 1/2″).
If you do not have an existing wall, build a standard frame for the wall with 2x4s and drywall over it. Here is a great tutorial for building an interior wall. Follow the same process and adjust for your kitchen island/breakfast bar dimensions.
This is what it looked like when we got the drywall down:
As you can see, the 2×4 studs were still taller than the drywall at this point. We marked them at the same height as the drywall and cut them flush with a sawzall.
A view from inside the kitchen:
One of our friends is an electrician, and he helped us re-route all the electrical as necessary before adding the base cabinet.
If you’re not dealing with an existing wall, hopefully you can skip most of that shenanigans and just frame out a wall to start with.
Step 2.
Paint or stain the base cabinet in the color of your choice. I used Sherwin-Williams Debonair (SW 9139) to match the accent wall in the kitchen.
Bring the base cabinet in and attach it to the half wall with 2 1/2 screws through the back of the cabinet into the studs in the wall.
Step 3.
I added a 2×4 cap to finish off the top of the wall frame. If you build from an existing wall, the 2×4 cap will sit above the drywall since there’s no way to cut the 2×4 vertical frames below the drywall without damaging it. The trim will cover this up.
If you build the wall from scratch, make sure the 2×4 cap is under the drywall. It will save you time and make trim a lot easier.
Step 4.
Attach the metal brackets to the studs along the breakfast bar wall. Position the counter top, apply construction adhesive along the 2×4 cap, and attach it to the brackets.
I also put small right angle brackets on the front side of the breakfast bar counter top to make sure it doesn’t wobble at all.
Step 5.
Attach the main counter top with construction adhesive.
I used 1″ thick edge-glued pine from Menards for the counter tops, and so far it’s holding up fine. I stained and sealed it really well before attaching it to the cabinet.
Overall, wood countertops are not as durable as other options – concrete, granite, laminate – but I like how rustic they are. I plan to use butcher block if I ever replace these, so it will still be rustic but more durable. There are a few great options for butcher block countertops from Home Depot – this finished maple one or this unfinished maple. There a few different species of wood you can choose from as well, but the maple is beautiful. I used an unfinished maple top for the kitchen island I built for some friends a couple years ago.
Feel free to use whatever countertops match the rest of your kitchen -the options are endless!
Trim the breakfast bar counter top. I used wood lathe trim (available at Home Depot or Menards) and then sealed all joints with clear paintable caulk.
Once I attached the counter tops and painted the half wall/breakfast bar, it was time to build out the inside.
Step 6.
Dividing the cabinet is completely up to personal preference and how you plan to use it. I’ll share what I did, but make any modifications you need.
First, I added 3/4″ melamine dividers on either side of the large middle cabinet and attached it to the back wall and front face frame with 1 1/4″ pocket hole screws. A sheet of melamine is cheaper than plywood, but 3/4″ plywood would also work.
Next, I added a face frame along the middle of the center cabinet and one more melamine divider. I attached it to the back wall and new middle face frame with 1 1/4″ pocket hole screws.
To finish it up, I sealed all the seams with white caulk.
Caulking the seams is optional. I wanted to seal them off because I put the garbage and recycling in one side of the center cabinet and wanted to contain any bad smells, which brings me to the next step …
Step 7.
The Rev-a-Shelf garbage and recycling pullout. This has been one of my favorite additions to the kitchen. It’s so clean and organized and keeps the garbage nice and hidden. Plus, we’ve started recycling so much more now that it’s right next to the garbage.
There are a wide variety of styles available: bottom mount, top mount, singles, doubles. Just make sure to select one that fits your cabinet dimensions exactly so the drawer slides work smoothly.
Step 8.
The last special addition to the island was my DIY Pots & Pans organizer.
Head over to check out the full tutorial and plans to make one of your own.
And the best part?
It’s completely customizable to fit whatever cabinet space you have … or don’t have, as is usually the case with kitchen cabinets 😉
What started as an empty base cabinet is now my #1 favorite part of the kitchen! It would be simple to build the whole thing from scratch, but I’m so happy I decided to purchase the base cabinet.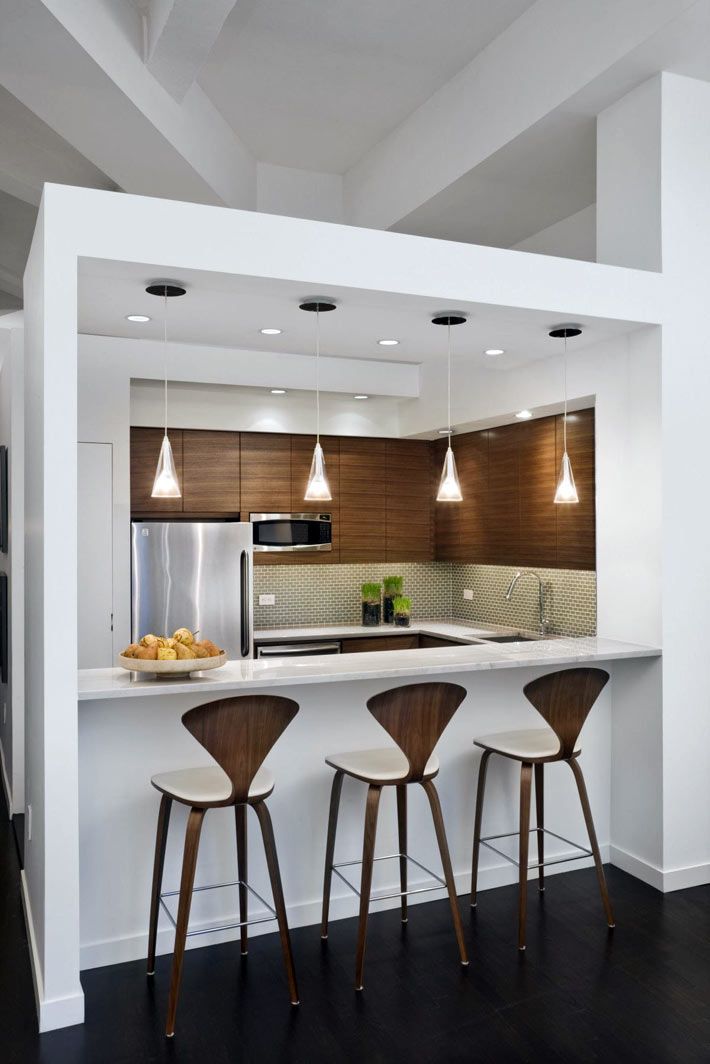 It left me some extra time and money to be able customize the whole thing.
Please let me know if you have any questions and I’ll get back to you as soon as possible.
And good luck with your new kitchen island!
Thanks for stopping by!
For more project ideas, you can find me on Pinterest. And to stay up to date with the latest shenanigans, follow me on Instagram.
Breakfast bar ideas to make your kitchen more flexible
(Image credit: Future PLC/Rachael Smith)
The best breakfast bar ideas are all about maximising the functionality of your kitchen. Making your island or peninsula work harder, you'll have a new found spot for chatting with the cook, taking a coffee break or enjoying a casual family supper.
Like with kitchen diner ideas, breakfast bars are a sociable addition to the space. 'For some people it’s all about sociability – perching at the breakfast bar and chatting to whoever is cooking dinner, or where the family can come together for a casual breakfast and catch up on the day ahead.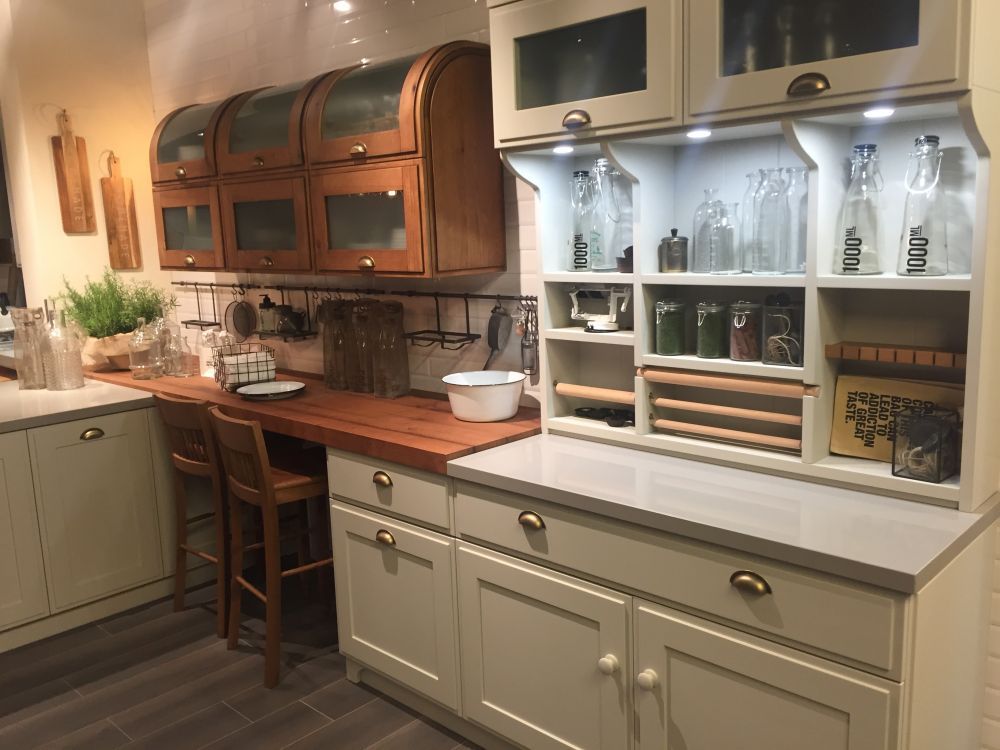 ' agrees Charlie Smallbone, Fonder, Ledbury Studio .
But depending on your needs, breakfast bar ideas can offer more than just creating a social hub. 'It’s a great space saver; breakfast bars tend to be smaller and narrower than a dining table, with stools that can tuck underneath the bar when not in use,' says Charlie.
'Plus, they are so much more than somewhere to sit or dine. A breakfast bar on kitchen island ideas also serve as additional prep space, as well as somewhere to catch up on emails or for the kids to do their homework.'
Breakfast bar ideas
Before you get carried away with Insta-worthy breakfast bar ideas in your kitchen, decide how many stools you would like to accommodate. If you’re just seeking a quiet spot to check TikTok with your morning brew, then a single stool tucked in a corner is ideal. But if you want to enjoy breakfast together as a family, each member will need a seat.
Allow at least 50cm width per stool, plus about 15cm either side for easy access.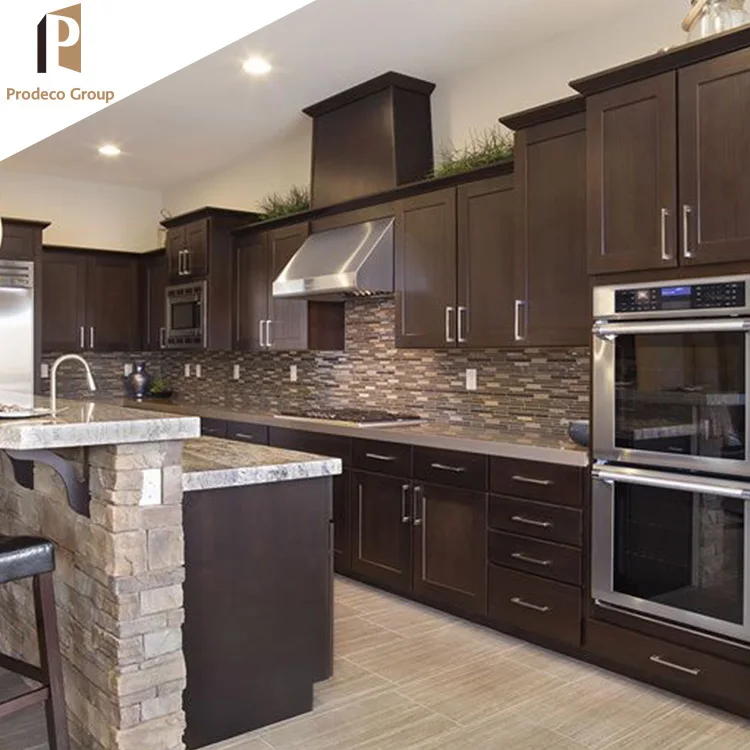 ‘Don’t forget to consider how much space the stools will take up in the room when in use,’ adds George Forsyth, Director, Drew Forsyth & Co . ‘You’ll need to allow sufficient space behind seated guests for others to pass by without getting stuck!’
1. Make use of an island wrap
(Image credit: Future PLC/Lizzie Orme)
An extended wrap around island covering essentially creates a perfect spot to utilise for your breakfast bar ideas. The effect of the top and sides of one side of the island extending, even if just by a couple of inches, delineates a zone which can be used as your new seating area.
Co-ordinating the material used on the wrap to that on the kitchen island seating will ensure a cohesive and considered look.
2. Keep things spick and span
(Image credit: Future PLC/Eddie Waltham)
'One of the advantages of breakfast bar ideas is its size – freestanding breakfast bars take up much less space than a dining table, particularly considering it’s usually styled with stools that will be tucked underneath,' notes Melissa Kink, Creative Director, Harvey Jones .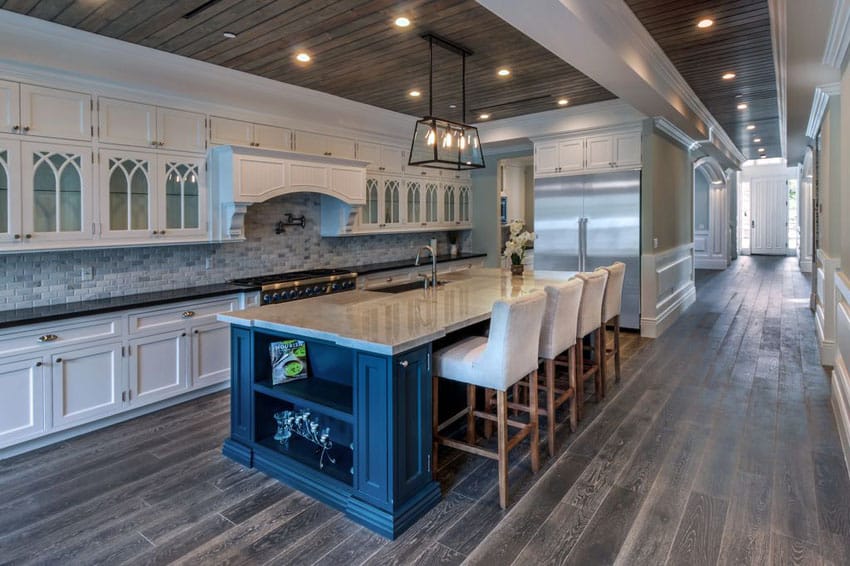 'If it’s incorporated into an island, there really is no need for a dining table, unless you have the space for it'
Leave enough space under the bar to tuck in bar stools to not only save on space, but to make the whole room feel neater and more sleek.
3. Use to add a pop of colour
(Image credit: Future PLC/Barbara Egan)
As well as being a way to add extra seating and utilise space cleverly in a kitchen, breakfast bar ideas can also work as an opportunity to add a splash of colour to an otherwise neutral space.
Using kitchen island paint ideas in the section where the seating is works well, as does choosing brightly coloured bar stools. Both of these options are easily changed if you decide to update your colour scheme.
4. Add interest with mismatching stools
(Image credit: Future PLC/Rachael Smith)
Where's the tule that says your kitchen seating all has to match? Exactly. Mixing and matching bar stools adds interest and personality to your breakfast bar ideas, and actually makes the space even more flexible.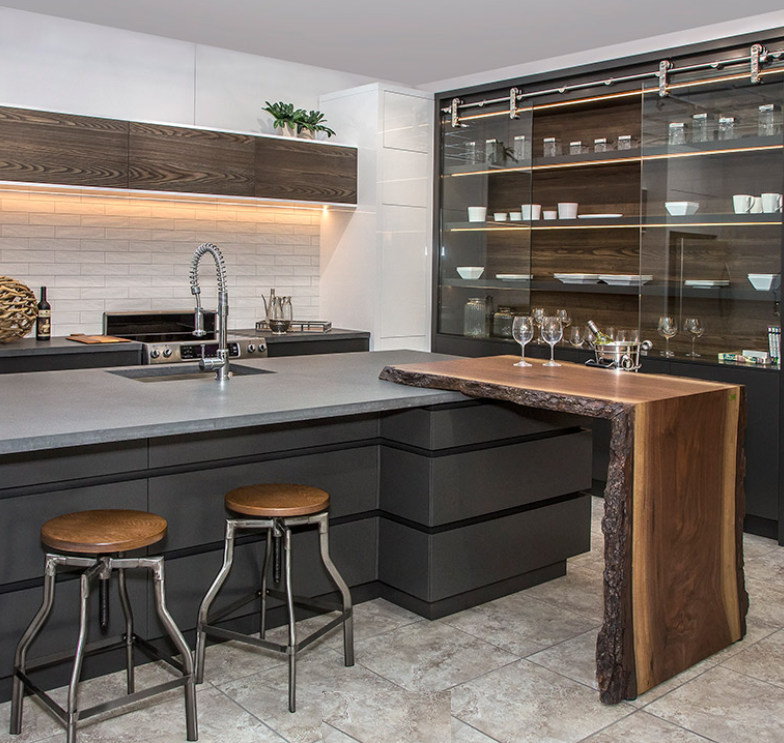
Different types of seating will suit various friends and family members better, so you can ensure everyone will be sitting as comfortably. Additionally, it's a nifty tip for keeping within budget as you don't need to worry about buying full sets. Stick to a general material to keep things cohesive, ie metal or wood, but aside from that, mix and match to your liking!
5. Work with a narrower space
(Image credit: Future PLC/Rachael Smith)
In narrow and small kitchens, you can still have a breakfast bar at your island, but you'll need to rethink how this should sit. Place the chairs at the end rather than the side of the structure to save on space and to not intrude on already limited walkways.
6. Opt for wall-mounted
(Image credit: Future PLC)
No island? No problem. A section of kitchen worktop installed shelf-style at the end of a run of units can provide a quiet spot for your morning coffee. Yes, you will have your back to the room, but that’s not always a bad thing, especially if you’re busy at a laptop or children are beavering over their homework.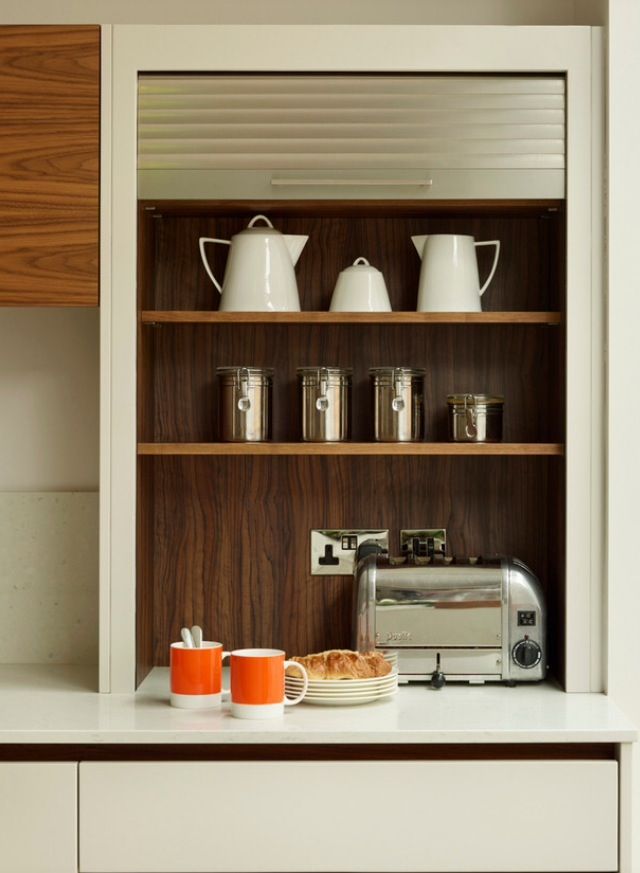
Be as generous as possible with space so the area doesn’t feel compromised or cramped. Aim for at least 1m-width of worktop for two stools, 1.5m for three if possible.
7. Tuck into the corner
(Image credit: Future PLC)
If you don’t have an island or other kitchen surface to spare, consider building a standalone breakfast bar in a quiet corner away from any busy entrance or exit routes. Bring it away from the corner to accommodate extra stools and create a more sociable experience without sitting with your back to the room.
Make it super functional with storage above and below for breakfast supplies and tableware. Using the same worktop as the kitchen will achieve a sense of cohesion and prove practical in terms of easy cleaning and stain resistance.
8. Raise the bar
(Image credit: Future PLC)
High-level breakfast bars have a host of benefits. In terms of design, it enables a switch in surface materials that can create a striking feature and allows something a little more forgiving to rest your arms on than cold stone or quartz.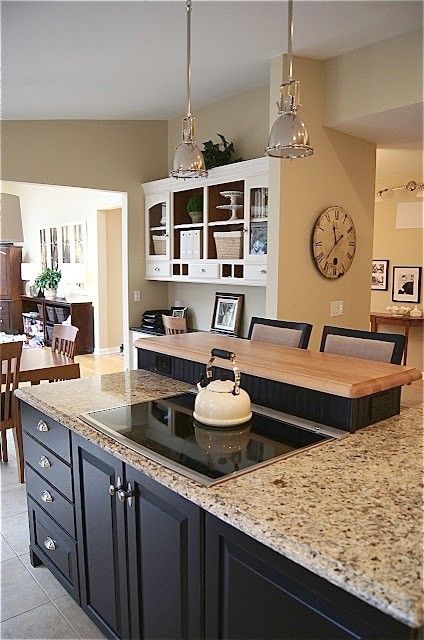
From a safety point, a raised bar can provide a level of protection from hot oil splashes if there’s a hob on the island and keeps children away from sharp knives when you’re prepping. Don’t be tempted to go too high though, ideally no more than 106cm/42in, or you’ll struggle to source stools that are tall enough to sit comfortably.
9. Add a simple island overhang
(Image credit: Future PLC)
In smaller kitchen one of the simplest ways to add bar-style seating is to overhang the worktop on the front or ends of an island. If you’re overhanging worktop without any additional corner supports, don’t go deeper than 30cm/12in to avoid load-bearing issues when guests inevitably lean on the bar.
Two or three standard 60cm/24in base units with a 90cm/35in-deep worktop above is an easy, off-the-shelf solution that won’t break the bank. Choose backless bar stools that can be tucked underneath when not in use.
10. Add in a bench
(Image credit: Future PLC)
Use benches instead of bar stools to accommodate more guests – perfect for children’s parties, and it looks great, too. This chic design idea requires a lower-level breakfast bar for ease when it comes to getting on and off the benches as those sat in the middle will need to slide along.
Add cushions and faux fur to boost comfort levels and create a cosy Scandi kitchen look. Make sure the benches you buy are solidly built and heavy, so they won’t tip backwards when loaded up with kids!
11. Impress with a floating surface
(Image credit: Woodstock Furniture/Nichola Yarsley)
A cantilevered breakfast bar is hard to beat on the wow-factor front. This structural bar also offers plenty of leg space beneath for seating comfort.
‘A floating breakfast bar requires careful engineering for stability – usually a steel frame is concealed under the worktop and bolted to the floor under the island,’ explains Andrew Hall, Director, Woodstock Furniture . ‘But the results are well worth it. Not only is it guaranteed to impress, but it also leaves more flooring visible, which boosts the sense of space.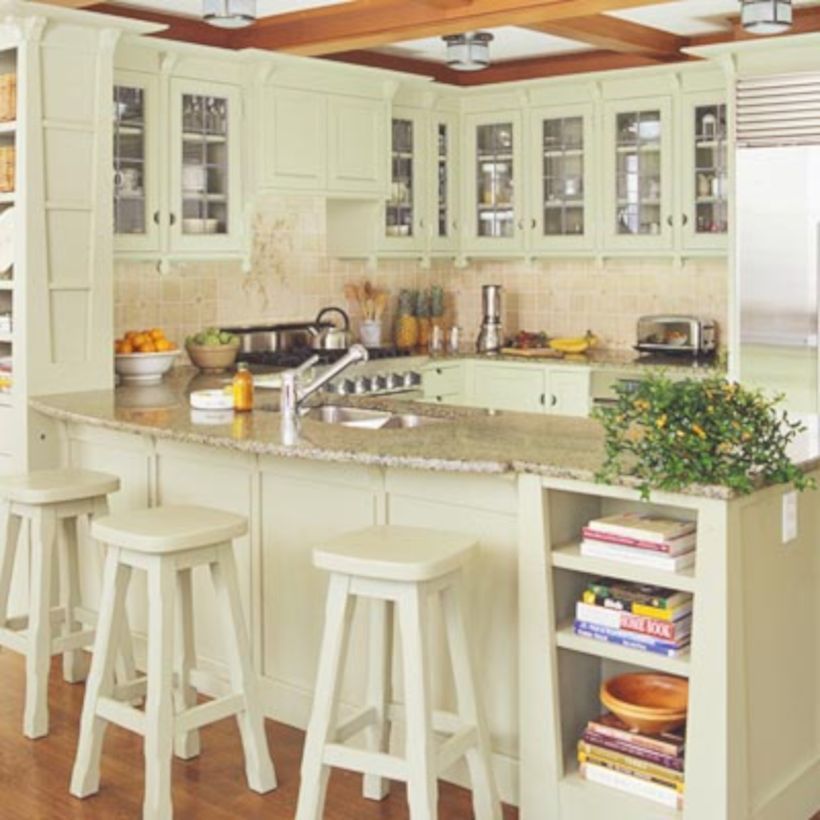 ’
’
12. Consider stools on two sides
(Image credit: Future PLC)
A linear line of bar stools may be one of the most popular breakfast bar ideas for an island but it’s not the most sociable way to sit. If you’d prefer to make eye-contact while quaffing that wine, go for an L-shape configuration.
Containing the breakfast bar in one corner of an island will also leave more worktop space clear, leaving room for a generous hob. Use kitchen island lighting to define the bar area – a low slung pendant on a separate light switch will illuminate the bar by night, while throwing the rest of the kitchen into darkness.
13. Drop down to dining level
(Image credit: Future PLC)
Perching on a bar stool is no problem for short periods, such as a quick lunch stop or coffee break, but if you’re lingering for longer dining chairs are undoubtedly comfier. Go for chairs with cushioned seating and high backs for maximum support.
Dropping a breakfast bar down to dining height (76cm/30in) will also provide a small splashback area to install electrical sockets – perfect for plugging in a laptop or charging devices when working from home.
14. Save space with a slimline bar
(Image credit: Future PLC/Chris Snook)
Experts recommend leaving a walkway of at least 90cm-1m wide around an island or dining table to prevent obstructing the flow of movement when cooking. One of the advantages of a breakfast bar is it can be made much narrower, without effecting functionality.
'The smallest kitchen island I’d recommend is 900mm wide by 1500mm to 2300mm long with at least a metre of space between the island and the wall run,' advises Charlie from Ledbury Studio. 'This allows room to manoeuvre and takes into account the depth of doors and drawers when they are open.'
15. Take a decorative approach
(Image credit: The Main Company)
The empty void beneath a breakfast bar is ripe for an injection of colour and pattern. As the surface often comes under fire from flailing feet, especially those of small children, choosing finishes that are scuff-resistant and easy to clean.
Patterned tiles can look particularly striking and can be matched to a kitchen splashback idea for a coordinated scheme.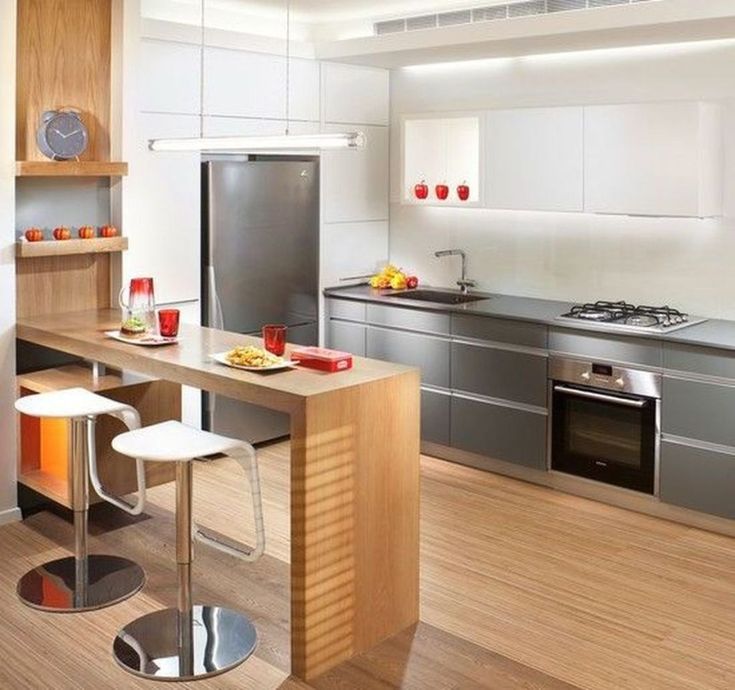 We also love metal cladding like aged bronze or copper sheets, which can be made-to-measure and attached using adhesive.
What is a breakfast bar?
A breakfast bar is essentially a casual spot to pull up a stool in your kitchen. It can run the full length of an island, complete with four-to-six stools, or be little more than a shelf in the corner, or a short overhang at one end of an island.
'Breakfast bars are highly versatile and practical,' says Neil McDonald, Design Manager, Moores . 'If you have a busy household, a breakfast bar can be a great addition to the home, creating a more relaxed dining area. They are a fantastic solution for kitchens which are tight on space, where it is not practical to have a separate dining area or even a small kitchen table and chairs.'
‘A breakfast bar is a great way to get more out of your kitchen,’ says Graeme Smith, Head of Retail and Commercial Design at Life Kitchens . ‘Breakfast bars keep everyone socially connected in the space and can make it easy for hosts to cook away while guests chat.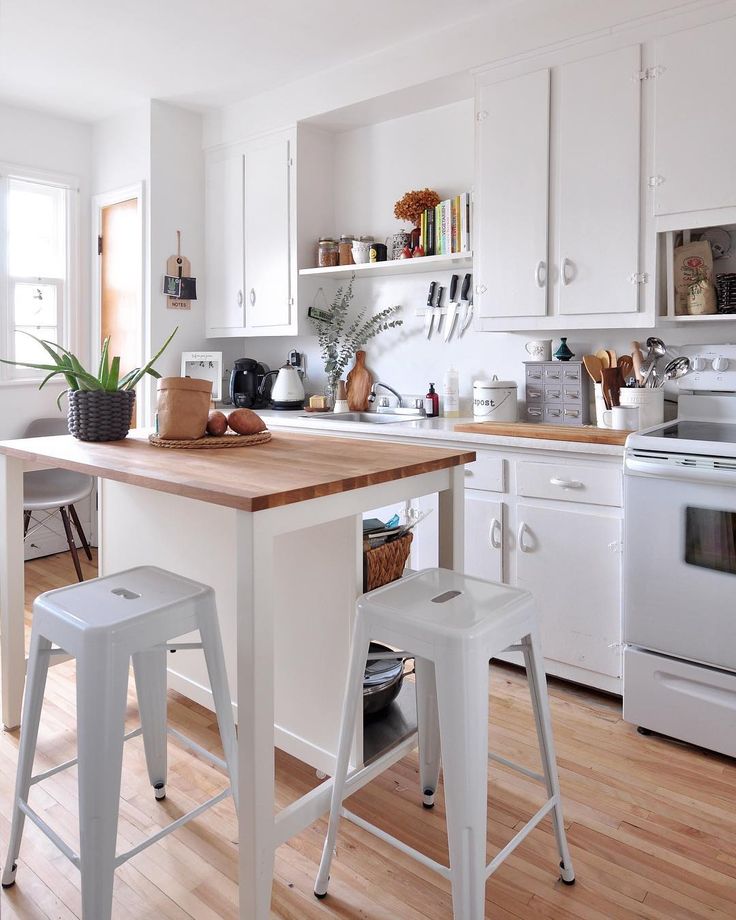 ’ In more recent years, breakfast bar ideas for kitchen life include another place to work from home – one where you’ll never be too far from the coffee machine!
What should you consider when planning a breakfast bar?
Location is likely to be your first consideration. Some layouts, for example one with an island or peninsula, lend themselves more readily to a breakfast bar.
'When considering the dimensions of your island, keep in mind that it should be in proportion to the overall size of your space,' advises Charlie from Ledbury Studio. 'Don’t go too big or too small or your island will look disproportionate. And don’t try to squeeze in an island where there simply isn’t space (regardless of how much you want one). It won't look right, and it will make your kitchen feel very cramped, particularly if more than one person is trying to use it at a time.'
The keys thing to think about location-wise is whether there is enough space behind the breakfast bar for people to pass by – allow at least 60cm, but ideally 90cm.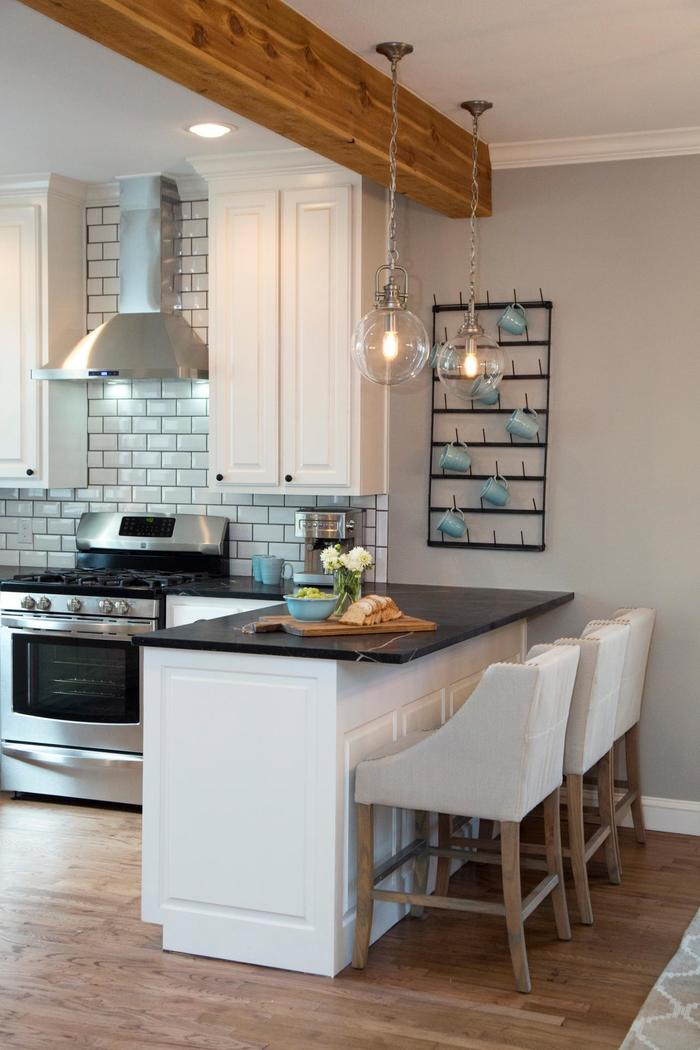 It should never cause an obstruction.
‘In terms of materials, any surface used for a breakfast bar should be easy to wipe clean, durable and ideally resistant to scratches and stains too,’ says Simon Boocock, Managing Director, CRL Stone . 'Quartz and stones are very low maintenance but can be unforgiving on glassware, not to mention cold on your arms. Switching from quartz on your main kitchen surfaces to a warmer surface like wood for the breakfast bar is a great solution.'
What height should a breakfast bar be?
There are no set rules on what height a breakfast bar should be, but you’ll make stool shopping easier if you plan the height according to the dimensions of the two most popular stool options, which are counter stools or bar stools.
A counter stool, sometimes called kitchen stool, is aimed at breakfast bars that sit at standard kitchen worktop height. This is around 90-95cm/35-37in from the floor, with the stools ranging from 60-75cm/24-30in high (to seat height).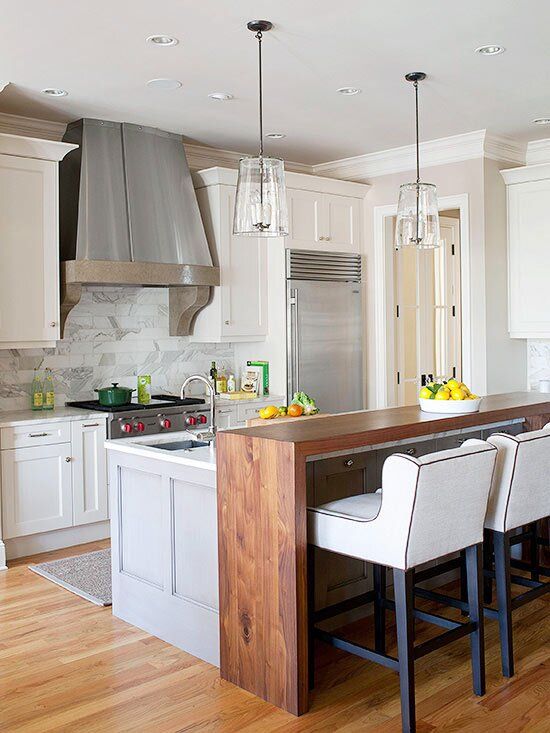
A bar stool is aimed at higher breakfast bars, be that a standalone bar or a raised section on an island or peninsula unit. If this is your preference, go for a height of about 100-106cm/39-42in, and buy bar stools with a seat height of 75cm/30in or above. You can take the stress out of bar stool shopping by choosing a height adjustable design that can be made higher for children and lower for adults.
Linda Clayton is a professionally trained journalist, and has specialised in product design, interiors and fitness for more than two decades. Linda has written for a wide range of publications, from the Daily Telegraph and Guardian to Homes & Gardens and Livingetc. She has been freelancing for Ideal Home Magazine since 2008, covering design trends, home makeovers, product reviews and much more.
Kitchen set with a breakfast bar (51 photos): layout for a kitchen-studio
Stylish furniture set is an attribute of many modern kitchens. Today, it is difficult to surprise anyone with such a detail. It is very practical and combines several functional areas at once - rest, cooking and eating.
A practical bar counter allows you to combine business with pleasure - after all, it will serve as a place for dinner and lunch, and as a relaxation area with your friends or loved ones. nine0003
Advantages and disadvantages
In the days of the Soviet Union, kitchens, and even apartments, were equipped in such a way that people spent a minimum of time there. The tiny kitchens were designed to motivate you to go to the canteen and eat in the company of other Soviet workers.
Unusual kitchens with bar counters in those days could not be found in Soviet apartments. But now society is moving away from the remnants of the past and many designers are using headsets with a rack in kitchen design. nine0003
If we talk about the advantages of racks, then first of all, it is worth noting that they help to zone the kitchen space.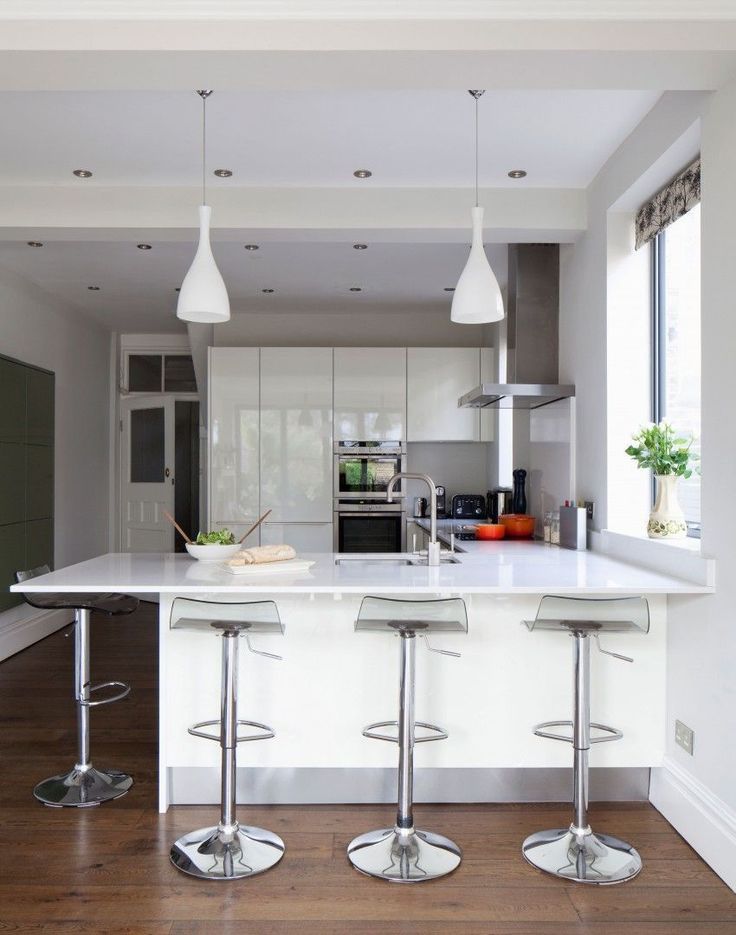 This is especially suitable for studios where the kitchen space connects to the living room.
A wide bar counter can easily replace even the usual dining table. This is very practical, because the tables are too bulky, and modern young people are trying to find some more compact option. Such a storage place is much more convenient than a balcony or pantry. nine0003
The disadvantages include the fact that the set with a bar counter does not fit in a small kitchen. Although here you can beat everything by picking up a compact bar counter, which will not take up much space. Such racks are usually attached to the floor or ceiling with a strong steel pipe. Such a support at the same time may well serve as a holder for glasses.
Another significant drawback of such a kitchen is that bar counters should not be installed in apartments where elderly people and small children live. But for young people, a bar counter with high chairs is quite capable of replacing traditional kitchen furniture.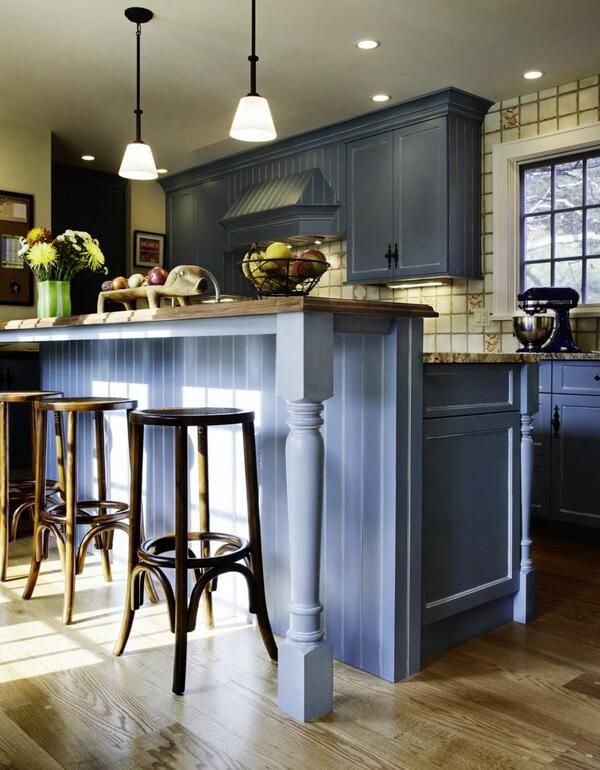 nine0003
Which kitchen suits
Bar counters are not suitable for all types of cuisine. First of all, as already mentioned, it is difficult to imagine a small Khrushchev with a bar counter.
For the studio
The perfect bar counter to complement the studio. It divides the apartment into several functional areas. It's very practical. On the other hand, studios are most often filmed by young people. Therefore, bar counters in their homes are very relevant, because there you can not only store alcoholic drinks and drink light cocktails, but also spend evenings with a cup of tea or coffee. nine0003
For a small kitchen
Many people think that in a kitchen that is too small, a set with a counter would definitely be too out of place and take up a lot of space. But for this purpose, you can find small bar counters. The best option is a corner stand. Such a practical option is very convenient for cooking and for eating or drinking another glass of wine at the counter.
For a modern kitchen
If we talk about the interior, the bar counter fits best in the modern style. At the same time, the rack itself should be without any unnecessary details. The best option is a bar counter made of metal. A modern kitchen should not be too cluttered, so only the most functional things should decorate the bar counter. nine0003
In a Provence style kitchen
Bar counters look good in a Provence style interior. But in this case, it is desirable that the base of your rack be made of wood. In combination with light curtains and pastel colors of the walls, such an element will look appropriate and organic.
The bar counter is not the most typical addition to a Provence style kitchen. But, if you want to experiment with modern French style and customize it a little for yourself, then choosing the right bar counter will definitely come in handy. nine0003
What should be the layout
If you decide that you should still install a bar counter in your kitchen, then you should think about choosing the headset itself.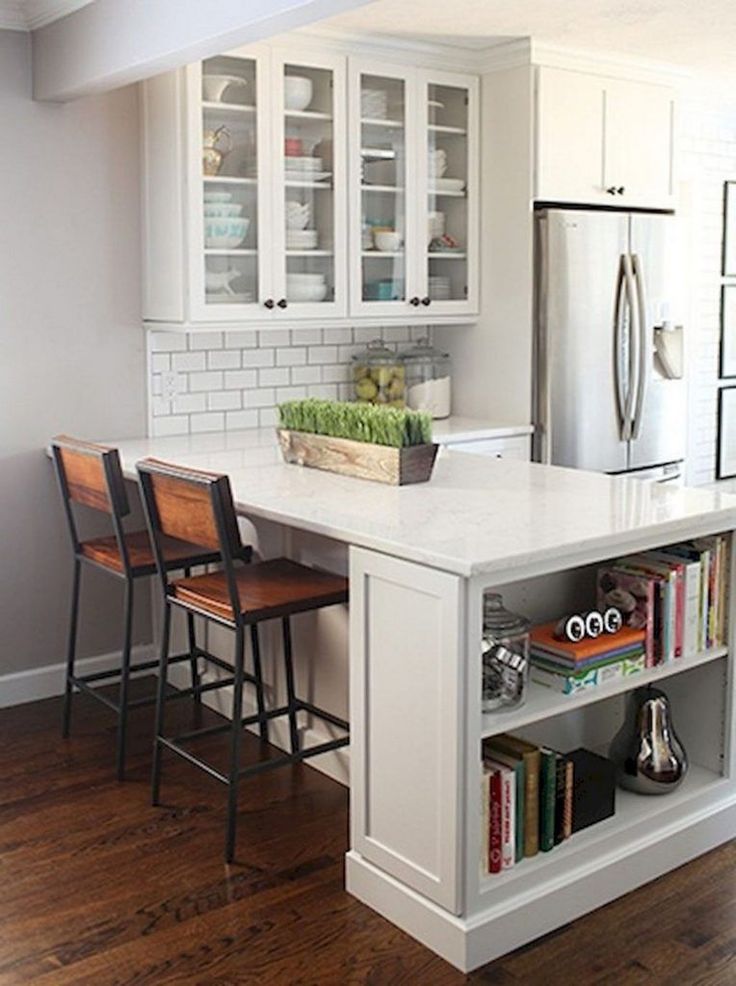 A well-chosen set with a bar counter can significantly save space and make the kitchen more functional and modern.
With island
One of the most stylish options is a kitchen with an island set. In the case of such a set, all the things necessary for cooking and dinner are transferred to the center of the room on the so-called island. nine0003
If desired, in addition to the bar itself, you can place a stove, table and sink there. This approach makes it possible to collect in one zone all the most necessary things. But already near the walls, all kinds of closed shelves, cabinets and other places for storing dishes and various utensils for cooking and eating food are installed. So, while cooking, you will not need to constantly run back and forth and look for the right things - everything important has already been collected for you in one place.
On the “island”, the bar counter can be installed in different ways at once. First of all, it can be a separate central element of the room. In this case, only the bar counter is in the center of the kitchen space. In this case, it does not interfere with the cooking process, and while someone is busy preparing food, others can already start dinner. nine0003
Corner
For small kitchens, the most popular options are the corner set with breakfast bar. It is this element of interior design that allows you to make the most of every centimeter of your kitchen. With such a bar you will not feel the lack of space. And under the bar, by the way, you can place a lot of necessary things, which is also very good for a small kitchen.
Straight
Straight kitchen units can be used in both small and large kitchens. In a tiny kitchen, this type of bar counter will help save space. And in a large one, it will help to ideally zone the space, dividing it into a place for rest and cooking. nine0003
Straight set is good because it is located directly under the wall. It looks very neat and attractive. A set of this type, complemented by a bar counter, does not take up so much space. In addition, if you place several shelves or cabinets above the counter, this will allow you to place even more things in a small area. By the way, these cabinets or shelves can reach almost to the ceiling.
The bar counter on a straight set can also be positioned in several ways at once. One of the most common options is to place the bar counter parallel to the headset. In this case, it is attached directly to the wall. Thus, there will be available space between the main headset and the rack. nine0003
Another option is to place the bar counter perpendicular to the main set. This option is relevant for small kitchens. This is especially good if the kitchen is in some way a walk-through part of the apartment. This will separate the kitchen space from the corridor.
In addition, this design allows you to additionally attach a lid to it, where your glasses will be placed.
U-shaped
Another option popular among owners of small kitchens is placing the bar counter in a U-shaped set. It covers three walls at the same time and gives access to all the necessary things at once. Choosing such a layout, you will not feel constrained and all the necessary things will always be at your fingertips. nine0003
When choosing such a set, you can safely refuse to buy a bulky dining table. All your family dinners or meetings with friends can be spent at the bar. It can be located in several zones of such a headset at once.
First of all, it can be used instead of a table top on one side of the set. In this case, the entire kitchen set of furniture looks harmonious and holistic. This option is ideal for modern studios or fairly large rooms. You can also place the rack across the countertop. In this case, a completely normal passage remains in the room. nine0003
All in all, a breakfast bar with an adjacent kitchen is a practical option for any modern home. Even if visiting a bar is not a very typical way of spending time for you, it will still be useful to install a bar counter in your place. Choose the option that best suits the interior of your room, and you will be comfortable spending your yesterdays in your new modern kitchenette.
Photo of a kitchen with a breakfast bar
Kitchens with a breakfast bar
Headings: All about furniture 2 , Kitchens 88 , Living rooms 2 , Bedrooms 3 , Hallways 2
-
It's hard to say where the first bar counter of our usual type appeared. Whether in an English pub, or in an American saloon. Its appearance was undoubtedly caused by the need to place as many people as possible at one long table. And only then the idea was taken up by the owners of farm houses, owners of mansions with spacious kitchens, and, finally, interior designers who introduced a bar counter in almost every apartment. The bar counter, or breakfast counter, is valuable for its versatility. nine0003
Breakfast bar kitchens are found in small and large apartments, with regular or open layout, with classic or modern interiors.
 The versatility of the stand is also striking. If necessary, this is an additional work surface or storage system, a place for a buffet, an almost full-fledged dining table and just a dedicated area for leisurely and pleasant communication with a glass in hand.
However, there are drawbacks to this wonderful piece of furniture. With an improperly designed rack and kitchen interior as a whole, the countertop may restrict access to individual parts of the kitchen set: cabinets, refrigerator, etc. Poorly chosen height of the countertop and bar stools leads to inconvenience when sitting. All these problems are more likely associated with incorrect or inept design, which is why "Kitchen-NSK" advises contacting professional designers and will be happy to help you choose the right kitchen set with a bar counter or develop a design for specific room sizes. nine0003
White custom-made kitchen set with a bar counter from the KUHNI-NSK portfolio
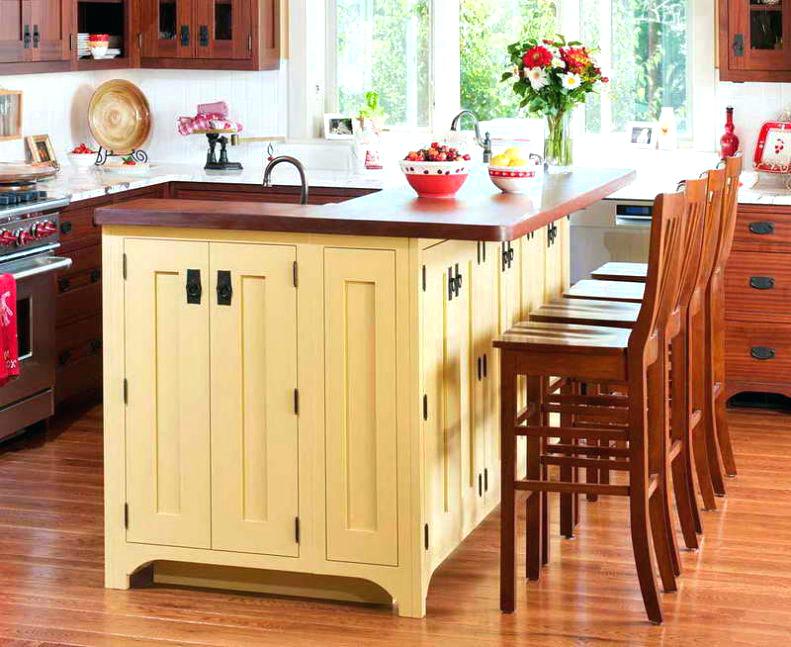
dining table. If the breakfast counter should not stand out against the background of the headset, then its dimensions, material and color will completely match the lower part of the working area.
 If the design is intended to divert attention from the size of the kitchen, add a “zest” to the interior or zoning the studio apartment, then the emphasis is placed using a shade that contrasts with the main set in the color scheme (for example, the bar counter in the kitchen, the photo of which is located below, proves that the combination of red facades and a white rack looks very stylish). nine0003
 Today, kitchens with a breakfast bar are no longer a tribute to fashion, as before, but the choice of practical people. The design may look different, a simple tabletop on a support leg or a massive console with shelves, but it always remains the optimal combination of versatility and showiness.
See photos of kitchen sets with a breakfast bar from our catalog:
-
Lada-77
nine0099 -
Lada-238 Turquoise
-
Lada-122
-
Lada-36
-
Lada-679
nine0099 -
Lada-290
-
Lada-74
-
Lada-607
-
Lada-39
9009nine -
Lada-89
-
Lada-625
-
Lada-375
-
Lada-596
nine0099 -
Lada-503
-
Lada-458
-
Lada-395
-
Lada-366
9009nine -
Lada-432
-
Lada-428
-
Lada-387
-
Lada-385
Lada-336
Lada-243
Lada-291
Lada-241 Good
Lada-40
Lada-618
Articles about kitchens with breakfast bars:
- Learn more