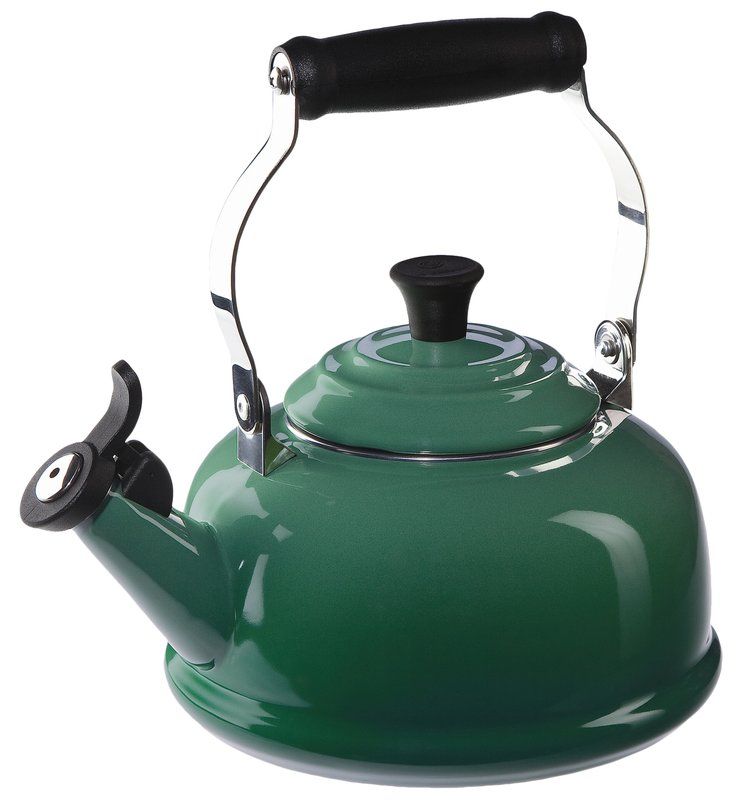
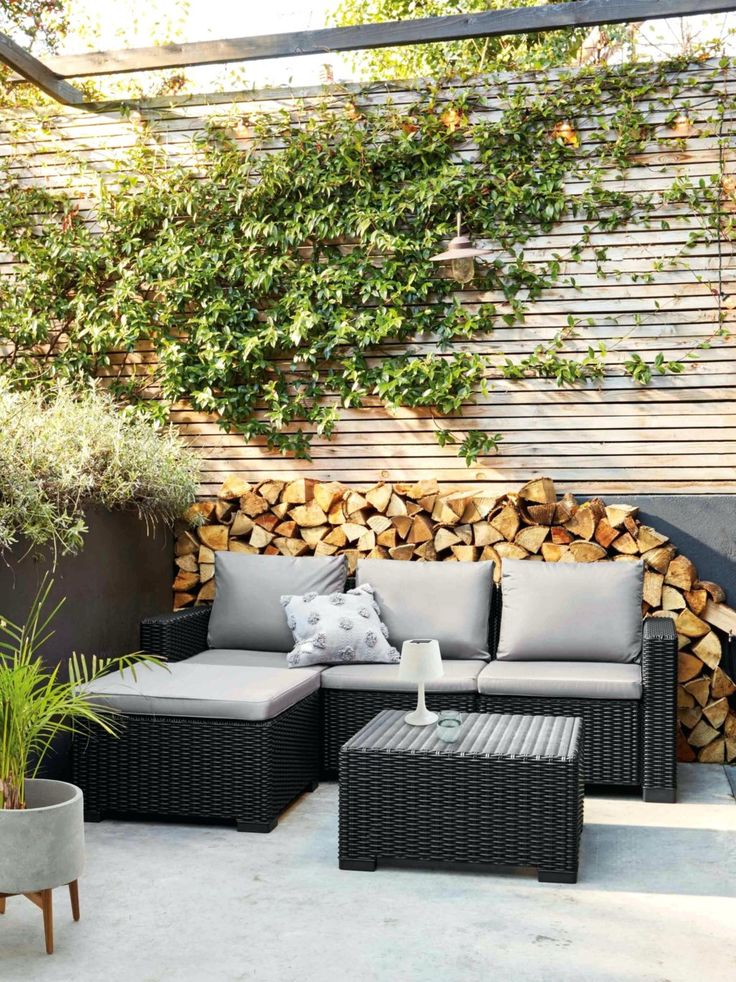
Hunter green tea kettle
Green Tea Kettle - Etsy.de
Etsy is no longer supporting older versions of your web browser in order to ensure that user data remains secure. Please update to the latest version.
Take full advantage of our site features by enabling JavaScript.
Find something memorable, join a community doing good.
( 741 relevant results, with Ads Sellers looking to grow their business and reach more interested buyers can use Etsy’s advertising platform to promote their items. You’ll see ad results based on factors like relevancy, and the amount sellers pay per click. Learn more. )
Shop Green Teas | Loose Leaf Green Tea for Sale
Shop Green Teas | Loose Leaf Green Tea for Sale | The Whistling KettleHome » Shop Green Teas | Loose Leaf Green Tea for Sale | The Whistling Kettle
This collection of green tea are single-source varieties with no added flavors. There are many types and styles of green tea each with very unique characteristics. Hailing from Japan and China, green tea is one of the healthiest beverages you can drink. While its widely studied health benefits are alone enough to brew up, green tea's subtle and complex flavor profile will delight tea-drinkers of all varieties
We recommend trying different varieties in sample form to find out your favorites.
Shop For The Finest Loose Leaf Green Teas
Quick add to bag
Cloud and Mist (Yun Wu)
$3.00 - $50.00
Quick add to bag
Decaf Sencha
$3.00 - $52.00
Quick add to bag
Dragonwell Longjing
$3.00 - $77.00
Quick add to bag
Genmaicha
$4.00 - $79.00
Quick add to bag
Gyokuro
$6.00 - $94.00
Quick add to bag
Kukicha
$4. multipleSellingPlan}}
{{{singleSellingPlanDisplayText}}}
{{/multipleSellingPlan}}
Subscription Details
{{{toolTipDescription}}}
{{companyName}}
{% endraw %}`, "bundle": {}, "labels": "{\"appstle.subscription.wg.yearsFrequencyTextV2\":\"Years\",\"appstle.subscription.wg.weekFrequencyTextV2\":\"Week\",\"appstle.subscription.wg.oneTimePurchaseTextV2\":\"One Time Purchase\",\"appstle.subscription.wg.unsubscribeFrequencyTextV2\":\"unsubscribe\",\"appstle.subscription.wg.weeksFrequencyTextV2\":\"Weeks\",\"appstle.subscription.wg.oneTimeFrequencyTextV2\":\"One Time\",\"appstle.subscription.wg.dayFrequencyTextV2\":\"day\",\"appstle.subscription.wg.monthsFrequencyTextV2\":\"Months\",\"appstle.subscription.wg.subscribeAndSaveInitalV2\":\"Subscribe & save\",\"appstle.subscription.wg.deliveryEveryFrequencyTextV2\":\"Delivery Every\",\"appstle. subscription.wg.offFrequencyTextV2\":\"Off\",\"appstle.subscription.wg.daysFrequencyTextV2\":\"Days\",\"appstle.subscription.wg.yearFrequencyTextV2\":\"Year\",\"appstle.subscription.wg.subscribeAndSaveSuccessV2\":\"Subscribe success\",\"appstle.subscription.wg.monthFrequencyTextV2\":\"Month\",\"appstle.subscription.wg.selectDeliverOptionV2\":\"select deliver option\"}", "css": { "appstle_subscription_widget": { "margin-top": "" , "margin-bottom": "", }, "appstle_subscription_wrapper": { "border-width": "", "border-color": "#ff9c04", }, "appstle_circle": { "border-color": "#ff9c04", }, "appstle_dot": { "background-color": "#ff9c04", }, "appstle_select": { "padding-top": "", "padding-bottom": "", "padding-left": "", "padding-right": "", "border-width": "", "border-style": "", "border-color": "", "border-radius": "", }, "tooltip_subscription_svg": { "fill": "", }, "appstle_tooltip": { "color": "", "background-color": "", }, "appstle_tooltip_border_top_color": { "border-top-color": "", }, "appstle_subscription_final_price": { "color": "", }, "appstle_widget_text_color": { "color": "", }, "appstle_selected_background": { "background": "transparent", }, "customCSS": ".
 appstle_sub_widget label {\n line-height: 1.5 !important;\nfloat: unset;\n}", "customerPortalCss": "", } }; var _RSConfig = _RSConfig || {}; _RSConfig.shop = 'thewhistlingkettle.myshopify.com'; _RSConfig.shopMoneyFormat = '${{amount}}'; _RSConfig.shopMoneyFormatWithCurrencyFormat = '${{amount}} USD'; }
 Snark Hunters 2: Full Steam
Wise Geek
Snark Hunters. On all pairs. The article describes a complete and detailed walkthrough of the game with pictures. An overview of all the secrets, tips, tactics and features of game mechanics from start to finish is given.
Download the full licensed version of this game from Alawar from this link. And enjoy high-quality translation, lack of bugs, ads and viruses in the game. Be wiser!
Content of article
- General tips
- 1st level
- Level 2
- Level 3
- Level 4
- Level 5
- Level 6
General Tips
You will need to collect all the hidden Items in the scene in order to collect usable items.
The inventory bar (I) at the bottom of the screen will show you what items you have available and what items you still need to find.
If a part of an item is displayed in red, it is not yet available.
If an inventory item appears in the far left corner (K), it can be used elsewhere.
You don't have to wait until you're done with a list of scenes or items to use an inventory item and/or change scenes.
If the cursor changes to a hand or a magnifying glass, this indicates that an action is required.
Your cursor switching to gears indicates the need to use an inventory item.
Press the Menu button (M) in the top left corner to exit, pause or resume the game. You can also adjust settings (sound, music, and screen size).
The hint button (H) will show you where the hidden object is or show you the next step.
When playing a mini-game, you can use the skip button (S) when it is full.
Each time you play a mini-puzzle, the solutions may change. The screenshots in this walkthrough show solutions during the game.
1st level
Skip tutorial.
Move the newspaper (B).
Click on the girl's handle (C) to open the garage.
Pick up all the ITEM PARTS marked in green in the screenshot.
Click on the robot dog (A) and take the PIECE OF MATCHES marked in green.
Drag the completed AIR PUMP (D) onto the car tire (E) and take the PARTS PIECE (green).
Click on the pump handle (J).
Enter the shop through the open door (F).
Take all available ITEM PARTS (green).
Drag the completed CHAIN to the pendant light (G) and take the last KEY PIECE (green).
Look at the keys on the table (H).
We match pairs (color on the screenshot).
Open the cabinet (I) with the KEY RING and take the BUCKET (green).
Fill the BUCKET with water from the sink (K) and go outside.
Open the mailbox (L).
Clean the car with the BUCKET OF WATER.
Pick up two PIECES (green).
PAINTING the car.
You can click on the screen to move around the dialog box.
After the dialogue ends, the last two PARTS will be available. Pick them up (green).
Click on the dog robot, drag the DOG HEAD onto it and light the fire (M) with the matches.
Click through the dialogue, then on the machine.
You can watch, pause or fast forward the video using the buttons at the bottom of the screen.
Take the available HOOK PARTS (green).
Open the car door (N) and select the envelope (O).
When the video ends, take the KEY (green) and the last HOOK PIECE that is behind the KEY (green).
Place the HOOK on the rope (P) at the base of the garage door.
Enter the store.
Take all available ITEM PARTS (green).
Use the prepared HORN on the cat (T), then take the last WHEEL PIECE (green) and the now available PURSE FEED PIECE (blue).
Put the WHEEL on the tire cart (U) and move it.
Pick up the last of the LETTERS (green).
Use the CLEANING KITS on the mirror (V) to open another portal and go through it.
Take all available ITEM PARTS (green).
Place the COMPLETE HANDLE on the window (W).
Take all available ITEM PARTS (green).
Use the WRENCH to remove the FISH (X) from the wall.
Cut the grate (Y) with the FISH and take the PART (green).
Look at the board (Z) and use the PLANE to find the number. (Note: The number may change with each game until the end. Use the number shown during the game to solve the puzzle later).
Go back to the shop and click on the abacus (1).
Place the BEADS on the abacus.
Solve the puzzle by moving the corresponding number of marbles to the left by clicking on them, as in the quantity in the upper left corner (same as on the tree). During my game, the number was 4124. I clicked on the fourth bead on the top row, the first bead on the second, the second bead on the third row, and the fourth bead on the bottom.
Pick up the last PIECE OF WATER (green) and press the Fly (2).
Go back through the mirror and pour the FLY on the spider (3).
Pick up the last GEAR PIECE (green) and click on the gears on the table (4).
Drop the gears on the pins.
Move the gears by clicking on each and then clicking on the right (A) and left (B) arrows that appear.
Move the yellow gear (C) once to the right (A).
Move the fender (D) five times to the right.
Move the green gear (E) two times to the left (B).
Move the yellow gear (C) once to the right (A).
Pick up the BUCKET PIECE (green) and fill it with snow from the sink (5).
Pour the BUCKET OF SNOW over the safe (6) and take the PHOENIX (green).
Return to the garage.
Click on the green door (7) inside the garage and open the KEY to open the portal.
Click on the portal door (8) and place the PHOENIX in the center and go through the door.
Level 2
Open the red curtains (A).
Move the rocking chair (B).
Take all available ITEM PARTS (green).
Feed the cooked NUTS to the squirrel (C) and take the PIECE (blue).
Go through the portal (D).
Take all available ITEM PARTS (green).
Cut the cocoon (E) with the completed KNIFE and take the PIECE (green).
Look at the bike (F).
OIL the chain (G) and take the last PIECE OF CHAIN (green).
Lower the CHAIN onto the bike.
Take the two, now available, PARTS (green).
Place the OWL HEAD on the owl (H) and take the PIECE (green).
Collect the four FIRES (green) with the grid and place one in each glass jar above the portal (G).
Go through the portal.
Pick up the last four ITEM PARTS (green) located in the circles above the portal.
Place the items in the circles in the following order from left to right: BIRD (1), BUTTERFLY (2), LEAF (3) and SUN (4).
Go through the door where the portal should have entered the entrance.
Open drawers (J).
Take all available ITEM PARTS (green).
Light the candles (H) with the LIGHTER and take the PIECE (blue).
Place the ANTLER on the moose (I) and take the PIECE (blue).
Place the BEAR HEAD on the bear (K) and take the last PIECE OF ARROWS (with green ones).
Click on the tree (L) and cut it.
Pick up the PIECE (green).
Go through the mirror (M) to the way back.
Take all available ITEM PARTS (green).
Examine the pickled doll (N) and CHANGE it.
Pick up the ITEM PIECE (green) from his hand.
Place the FLOWER on the window (O) and take the extra ITEM PARTS (green).
Want to be the best in the game? Visit our site WiseGeek.ru often! In our articles, we summarize the tips of experienced players, recommendations from developers, official guides and our secrets of passing games.
Place the completed HELMET on the armor (P) and take the last ITEM PIECE (green).
Place the FRUIT in the juicer (Q) and take the PAINTS (green).
Look at the painting (R) and place the BRUSHES and PAINTS on it.
Take the brush (S), dip it in different colors and click on the colorless flower to paint it. Reflect the other side of the painting as shown in the screenshot.
Go up the stairs to the kitchen.
Take all available ITEM PARTS (green).
Look at the table (U) and take the PIECE (green).
Zoom into the pantry (V) and take the PARTS (green).
Open the fridge (W) and take the PIECE (green).
Fill the fire (X) with BILLS and take the WOODEN PIECE (green).
Place wood on fire.
Go to the mirror.
Take all available ITEM PARTS (green).
Click on the birdcage (Y) and rearrange the flowers to match the order as shown in the upper left. Starting positions can be different in every game and there are many solutions.
I solved mine by first moving the yellow flower (A) to the middle, then the green (B) and both purple flowers (C, D) along the top line. I moved the yellow flower again, then the pink one (E) to the middle. Then I moved the yellow flower to the left and the first purple flower C to the end, moving the pink flower from the middle to the line.
Pick up the now present PIECE (green).
Look at the organ (1), READ it and take the PARTS (green).
Place the NOTES on the key panel (2) and close the window.
Place the BIRD in the cage and take the PIECE (green) where the other bird was.
Zoom into the organ and place the KEYS over it.
Play music on the keypad using the key in the upper left corner (3). During my game it was C, C, E, D and G, as seen in the screenshot.
Pick up the last PIECE (green).
Place the COLUMN on the edge of the doorway (4) and exit the room through the mirror.
Pick up the now accessible CHARGE PIECE (blue) and click on the oven.
Put the vegetables on the grater (5) and place them in the saucepan (6) along with salt and pepper.
Take the mushrooms (green) and HERBS (green) and place in the pot.
Dip the LADDLE into the saucepan.
Pick up the now available CORKSCREW (blue) and go down the stairs (7).
Go to the mirror and open the wine barrel (9) with the CORKSCREW.
Pick up the last BALL PIECE (green).
Click on the pool table (10) and throw the balls there, then go through the mirror.
Click on the cue ball stand (11) and solve the puzzle. Each game can be different and there are many solutions. I started at the top corner and put 2 first, then 4 and 5 on the second line and finished with the bottom line.
I followed the following sequence of pressing each button (AF) the next number of times as shown in the screenshot. B-2 times, A-1, C-2, B-1, C-1, B-1, D-1, E-1, D-1, E-2, F-2, E-1 time before finish,
Pick up the MOON PIECE (green) and go up the stairs.
Place the MOON on the solar tablet (14), take the CLOCK HAND and note the time it says.
Look at the clock (13) and place the CLOCK HAND there. My watch automatically sets its time, or you may have to move the hour hand to set the time, as seen on the sun and moon plate.
After the clock melts, take the mammoth (green).
Go back downstairs and exit through the green door (15).
Click on the portal door (16), place the MAMMOTH on it and go through the portal.
Level 3
Take all available ITEM PARTS (green).
Look at the fountain (A) and feed the frog (B) with the prepared can of fire lights, then look at the fountain.
Take the last MAGNET PIECE (green) and use it to collect all the coins. When there is a clear in the fish, press the MAGNET so that it falls down and picks up the coins.
Go down the path (C).
Take all available ITEM PARTS (green).
Place the PENGUIN on the ice cream cart (D) and take the two PARTS (blue).
Look at the ferris wheel (E) and enchant the cobra (F) with the RECORD.
Pick up the PIECE (green).
Cut the chain (G) on the crate to open the portal and take the PIECE (green).
Look at the control panel (H) and use the GLASS CUTTER on the window.
Look at the cabin and the panel (I), press the corresponding buttons to display the symbols on the balls (J) in the first scene.
Pick up the IGNITION KEY (green) and place it in the ignition switch.
Move the lever (L) to position 2.
Look at the Ferris wheel and take the PIECE (green).
Move the lever to position 3.
Click on the Ferris wheel and take the PIECE (green).
Place the ELECTRIC TAPE on the cut wires (M) and click on the panel (N).
Pick up the fuses and place them in the empty slots so you don't have duplicate numbers in the same row or column.
My solution was as follows (lines from top to bottom and numbers from left to right): first row - 4, 1, 2, 3. second row - 2, 3, 1, 4. third row - 3, 2, 4, 1. Bottom row - 1, 4, 3, 2.
You can now enter the dragon cave; however, you won't be able to complete this scene yet, so in this walkthrough we're going to go back down the path to the first scene.
Pick up the now accessible HAMMER PIECE and throw the coins into the machine (P).
Hit the target (Q) with the HAMMER and take the PIECE you already have.
Look at the play booth (R), place the JOKE on the lock and enter the booth.
Take the last PIECE OF SHOT (green) and throw the DROSES on the table and the COINS in the slot (A).
When the dart (1) is under the clown's head, (2) click on it to stop it. Then, when the needle is in green (3), click on it to hit the clown. Repeat two more times.
Pick up the horseshoe (green).
Go down the path and go through the mirror.
Take all available ITEM PARTS (green).
Examine the camera (S).
Take the last PIECE OF THE CANDLE (green), then place the CANDLE on the shelf (T) and take the PART (green).
Press the red button (U) and take the photos (green).
Close the window and select the canister (V).
Place the GLUE on the letter in the upper left (W) and place the PHOTO there, then drag the HANDLE over the letter.
Pick up the now accessible PIECE (green) and move down the path.
Take all available ITEM PARTS (green).
Place the HOOK on the faucet (Z) and take the PIECE (green).
Place the horseshoe on the wheel (1) and click on the slot machine (2).
Lower the figurine onto the empty pedestal (3) and arrange the figurines, animals and vehicles using the diagram in the background (4).
My solution was as follows (as seen in the screenshot): Green House (D) = A man in a gray room, a dog and a green car. Red house (A) = clown, horse and red car. Blue House (B) = Lady, Cat and Trike. Yellow house (C) = cellist, parrot and red motorcycle.
Once you have solved the puzzle, take the PIECE (green) and close the window.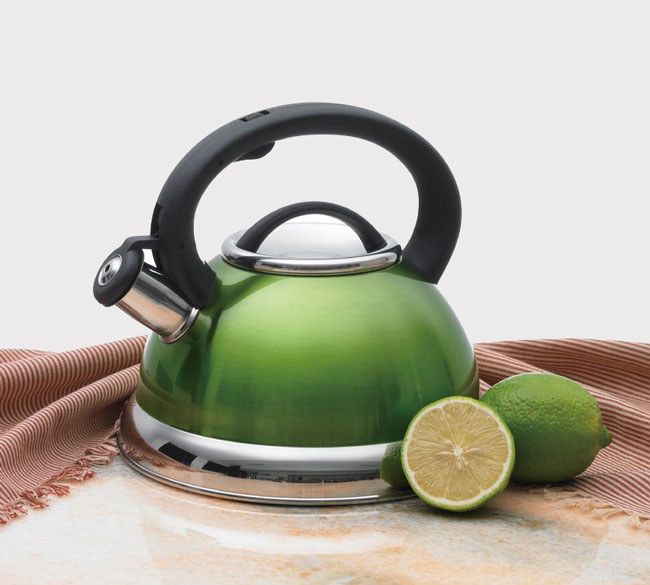
Place the frog on the wheel and click on the playhouse (5) on the right.
Drop DART'S WEAPON on the counter.
Shoot ducks by hovering over them and clicking. (Hint: if the duck is moving up, shoot a little hello).
Pick up the last GLASS PIECE (green).
Zoom into the fountain and give the fish the goggles, then click on the box (6).
Solve the puzzle by moving the pegs (marked in pink) to match the symbols shown in the top left corner. (Hint: the top symbol is the top row, not the leftmost).
When the box opens, take the SCARAB (green).
Place the SCARABEL on the wheel and move down the path.
The cloud above the gnome will spit out the last UMBRELLA PIECE (green).
Pick it up and give the UMBRELLA to the Leprechaun (7).
When the cloud moves, take the last PIECE OF THE SPADE (green) and dig at the bottom of the rainbow (8).
Pick up the CLOVER and move back along the path.
Place the CLOVER on the wheel and take the SKULL (green).
Go down the path and go through the mirror.
Enter the dragon cave (9).
Take all available ITEM PARTS (green).
Place the CANDLE on the pumpkin (10) and take the last JACK-LIGHT PIECE (green).
Put the JACK LANTERN under the arm (11) and take the two PIECES (green).
Place the BONE on the xylophone (A) and then on the CARDS.
Take the last SKULL PIECE (green) and place the SKULL on each skeleton (12, 13).
Zoom into the scene and take all available ITEM PARTS (green).
Place the completed SWITCH into the slots (14) on the ground and press it.
Pick up the PIECE (pink) from the TV man (15).
Give the TRIDENT to the monster (16) and take the PIECE (green) from its tongue.
Place the CORN in the monster's mouth and take the GREAT CORN (green).
Place the POPPED CORN on the TV's lap and take the key (green).
Open the box (17) with the KEY and select the grim reaper, then take the HAMMER.
The box becomes a portal to other levels.
Zoom into the ghost (18) and use the HAMMERS on the five ghosts, then collect the Bones (green).
Return to the wheel and place the Bones there.
Zoom in and take the Little Mermaid (green), then return to the box and go through the portal.
Zoom into the next door (19) and throw the Mermaid in the middle and go through the portal.
Level 4
Pick up all the KEY PARTS (green).
Open the door (A) with the keys and go up to the deck.
Take all available ITEM PARTS (green).
Fix the sail (B) with the NEEDLE and THREAD, then take the last PIECE (green).
Place the VALVE HANDLE on the hatch door (C) and go down to the engine room.
Take all available ITEM PARTS (green).
Use the prepared SHOVEL on the coals (D) and take the last PLIER PIECE (blue).
Cut the fence (E) with the PLIERS and take the last HOSE PIECE (blue).
Replace the missing HOSE on the engine (F) and take the last PRESSURE VALVE PIECE (green).
Place the VALVE on the engine (G) and turn the handle (H), then click on the table (I).
Pick up the last LAMP PIECE (green) and replace the LAMP (J).
Return to the deck and take all available ITEM PARTS (green).
Place the finished HANDLE on the handle (K) and turn it.
Pick up the PIECE (green) on the package.
Place the TOOLBOX on the broken screw (L), then take the PIECE (green).
Click on the hook (M) then the HANDLE to move the metal in front of the door, then take the PIECE (green).
Click on the door, replace the missing wheel and go through the door.
Take all available ITEM PARTS (green).
Spin the ball (1) and take the PIECE.
Place the completed BUTTERFLY and GRASS on the sliding doors (N).
Pick up the STAND PIECE (green).
Look at the periscope (O) and take the PIECE (green), then click the right arrow (blue) three times until you see a wooden sign.
Pick up the last MECHANISM PIECE (green) and close the window.
Move the doors and place the hat on the mannequin (1).
Take the two PIECES (green).
Move the doors and examine the middle shelf (2).
Place the GEARS on the spot (P), KEY and keyhole (Q).
Look at the book (R) and take the punched card (green).
Exit the bridge and go down to the engine room.
Zoom into the table, move the lever (2) and place the ITEM CARD in the slot (S).
Move the colored pegs (yellow) to match the corresponding color numbers (blue) shown on the dial.
Go back upstairs to the deck and take the last two PIECES (now green).
Place the CLEANER on the mirror (T), then cut the bag (U) with the KNIFE to get the CLOTH.
Clean the mirror with the CLOTH and go through it.
Take all available ITEM PARTS (green).
Clean up the broken mess (V) with the BROOM and DUSTPAN and take the PIECE (green).
Place the LAMP on the vase (W) and take the PIECE (green) that was under the bees.
Open the drawer (X) with the crowbar and click.
Pick up the CLEANING PRODUCTS (green), zoom into the book (Y) and close the window.
Take all the PARTS OF PAPER (green) and zoom into the drawer.
Place the MANULE papers in the book and flip through it to match the labels to the correct medicine. Every game is different.
Click on the bottle and place the matching tag over it as shown in the screenshot to get SLEEPING PILLS.
Feed the SLEEPING PILLS to the tiger (Z) and take the last piece of scissors (green).
REVERSE THE VENICE FLYTRAP (1) and use it to pick up the glowing orbs (pink) one at a time.
Click on the car (2) and place the assembled ORBS, one at a time, into the corresponding color slots as shown in the screenshot.
Pick up the last PIECE OF WIRES (green) and place on top of the machine (3).
Click on the flower.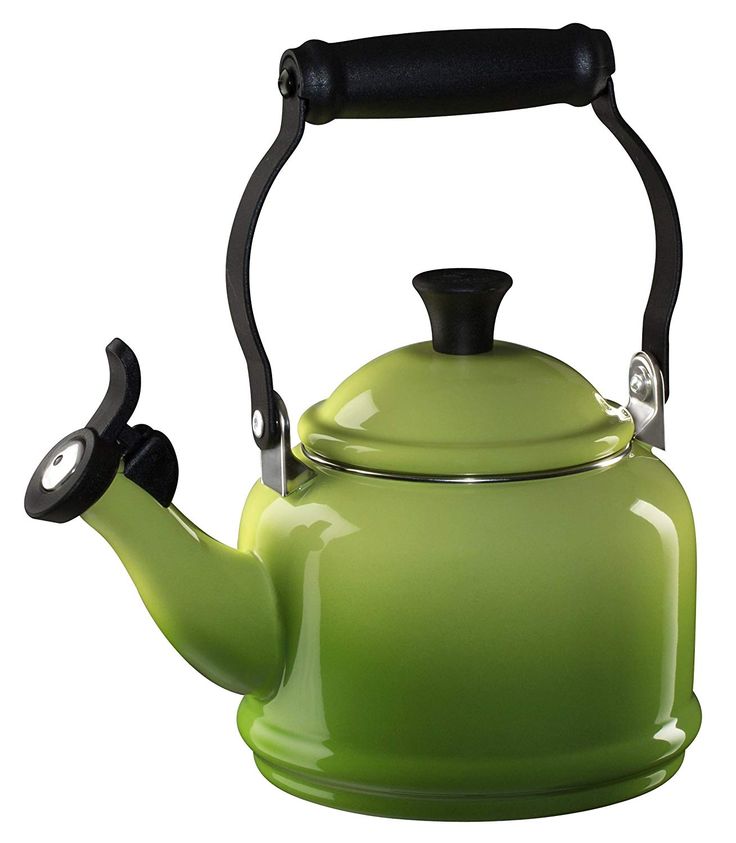
Return through the mirror (4) and go down the stairs.
Move the cushion (A).
Take all available ITEM PARTS (green).
Click on the aquarium panel (5).
Replace missing batteries.
Using the arrows (6), move the scissors along the rope (7) and press the red button (8).
Open the drawer (9) and take the OSTOPUS (green).
Look at the table (A) and place the octopus in the slot.
Pick up the PIECE (green) and close the window.
Go through the portal in the coffee table (B).
Open the cabinet (2).
Take all available ITEM PARTS (green).
Place the completed SCOPE on the microscope (1) and zoom in.
Pick up the two PIECES (green) and close the pop-up window.
Place the MOLECULE on the panel (C) to open it and take the PIECE (green).
Clean the window (D) with the CLEANERS and zoom in.
Attach the mouse patch from the cage to the drawer by clicking on the individual pieces to change their orientation as shown in the screenshot.
Take the last PIECE OF CHEESE (green), place it in the drawer (E) and close it.
Once the mouse reaches the drawer, open it to get the KEY.
Look at the table (F) and open it with the KEY.
Take the lighter and the fairy, both marked in green.
Close the window and click on the door (G) and place the FAIRY in the cutout.
Solve the puzzle by getting the balls of the correct color into the correct slots. The key is to get the ball in every place at the same time. Once you get the ball to the right place, it will stay there until another ball falls on it until you match up with the rest. Once you have the matching ball in the hole, block it.
Pick up the now present PIECE (green), place it under the panel and go through the coffee table.
Look at the box (H) on the chair and light the candle (I) and take the last CRYSTAL (green).
Drag the CRYSTALS onto the box and arrange them in the following order: from the top left corner, moving clockwise - green, red, green, blue, red, empty, blue.
Take the last PIECE OF KEYS (green) and close the pop-up window.
Place the KEYS on the panel (J) and take the last two PIECES (green).
Put the LEMONS on the juicer (K), then take the jug (green).
Look at the table (M) and pour the LEMON JUICE into the small jar (N), then place the BRUSH in the jar and drag it through the paper (O).
Go through the coffee table.
Pick up the last PIECE (green) that is now available.
Place the flask on the panel (R) to receive the NEUTRALIZING AGENT and return to the deck.
Climb up to the deck and select the scroll (P).
Set the orbs (Q) by clicking on them to match the symbols on the scroll.
Pour the NUTRITIONAL AGENT on the opened package (S) and zoom in.
Place the pegs (pink) in the holes that match the code you got when arranging the balls according to the scroll. You can close the window and return to it (T) if you need to refresh your memory. The code may change with each game.
My solution started with a snowflake and a 5. I found the snowflake in the top row and drew a line down until I found a 5. At this intersection, I put a peg. Continue until all the pegs are in the correct positions.
Take the GRIFFIN (green) and go downstairs.
Go through the coffee table and through the portal door.
Look at the next door (U) and place the GRIFFIN on the door and go through.
Level 5
Take all available ITEM PARTS (green).
Place the completed RECORD on the jukebox (A).
Pick up the detected PART (green).
Place the KETTLE on the table (B) and once it is full, take the PIECE (green).
Pull the bag (C) out of the doorway with the UMBERELLA and click.
Move the items and take the two PIECES (green).
Open the door (D) and enter the office.
Press the light switch (E), move the chair (F) and take all the items (green).
Replace bulb (G) and press switch again.
Go through the curtain to enter the darkroom.
Take all available ITEM PARTS (green).
Attach the TAPE (H) and hang the PHOTOGRAPHY PAPER on the wall (I).
Go back to the fountain and go through the mirror (J).
Take all available ITEM PARTS (green).
Throw the ice cream on the fire (K) in the door and take the PIECE (blue) and FEATHER (blue).
Look at the door (L), place the hat on the cutout and go through it.
Press the red button (M) on the table and take all available ARTICLE PARTS (green).
Place the WHEAT on the floor (N) in front of the mouse holes, then take the HAMST.
Place the Hamster on the wheel (O).
Take the ITEM PARTS now available on the stage.
Place the finished SNAKE in the magicians box (P) and take the HOSE (blue) once it changes and place it in the balloon pump (Q).
Take the HAMMER (green) from the pump and break the hourglass (R) to get the last PIECE OF MATCHES (green).
Place the MATCHES on the box to turn it into a SUN (2).
Place the SUN on the panel (S) under the scene and take the last PIECE OF LEAVES (green).
Place the LEAVES on the box to get the BOOKS (green).
Take the last CRAB PIECE (green) that is now available above the green door and place it in the box to get the PLIERS.
Look at the moon (T) and place the PAGES on the book. Take a look at the filmmaking process.
Go to the mirror (U).
Take all available ITEM PARTS (green).
Click on the panel and solve the puzzle by moving all the buttons down at the same time. My solution was as follows: 1, 2, 3, 4, 2, 5 and 6 as shown in the screenshot.
Pick up the PARTS (green) now available on the stage fire.
Look at the table and smash all the cockroaches with the SHOE, then COUNT them to get the last MOVIE PIECE (green).
Place the drum on the chamber (W) and pull the lever (V).
Take the last available PIECE (green) and exit the scene below to return to the fountain.
Use the TONGS to cut the screen (X) on the fountain and collect the last PIECE OF MAGNIFICATION GLASS (green).
Turn the red knobs in the following order: (from left to right) No. 2, No. 4, and then No. 1 to turn on the fountain.
Look at the table (Y) in the back of the room and place the GLASS GLASS on the paper and take the last HAMMER PIECE (green).
Break the vase (Z) with the HAMMER and take the ring (green).
Return to the darkroom room and cut the glass (1) with the RING.
Pick up the CLEANER PIECE (green) and TV ANTENNA.
Use the CLEANERS on the tub (2), take the last PIECE OF CLOTHES (green) and hang it on the rope (3).
Return to the room and turn on the TV (4).
Place the ANTENNA on the TV and take the last KEY PIECE (green).
Press the light switch and open the cabinet (5) with the KEY.
Pick up the PARTS (green) and GLUE (green).
Pour the ACID on the lock (6), open the doors and take the FILM PIECE (green).
Look at the shelf (7), place the SHIP in the BOTTLE on the stand and take the last MOVIE PIECE (green) from the panel.
Look at the table and place the FILM PARTS on it.
Arrange the FILM PARTS as shown in the screenshot.
Fill the dish (8) with GLUE and drag the brush onto the MOVIE, then pick it up.
Press the light switch and enter the darkroom.
Place the FILM on the back of the CAMERA.
Use the two dials (pink) on the side of the camera to focus the photo and pull the trigger (9). It may take you a couple of tries to get it right, use the red line as a guide.
Pour the BLUE BOTTLE (A) and PINK BOTTLE (B) on the left side of the tray (C).
Pour the GREEN BOTTLE (D) and YELLOW BOTTLE (E) into the right side of the tray (F).
Pick up the PHOTO and drop it on the left side of the tray and then on the right side.
Turn on the faucet (10) and place the PHOTO in the tub, then hang it on the CLOTHES.
Pick up the existing FAN PIECE (green) from the tub and place it on the stand (11).
Pay attention to the order of the figurines in the photo.
From the fountain, go through the doorway on the right to enter the stage.
Look at the panel (A) and place the FIGURINES on the stands. Arrange them in the order shown in the photo. The order is different in each game.
Pick up the last PIECE OF CORD (green) and place it in the chamber (B).
Pay attention to the number that is on the big screen, it is different from each game to the end.
Go back to the fountain and click on the box (C) on the table and set the clock face to match the number on the big screen.
Once the box is open, take the TAPE (green) and go through the mirror.
Take the last PIECE (green) and drag the BAG over the flower (D).
Look at the table (E) and drag all the items onto the stick (F).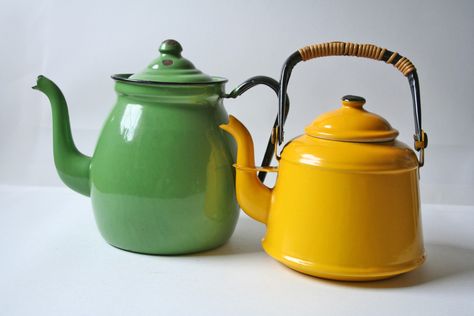
Once the wand is ready, take it and go through the doorway on the left.
Place the wand on top of the cylinder (G) and take the RABBIT.
Go through the green door (H) and zoom into the next door (I).
Place the RABBIT in the slot and go through the door.
Level 6
Take all available ITEM PARTS (green).
Place the finished SHIELD on the pillar (A), then take the last TOOL PIECE (green).
Use the TOOLS to open the drawer (B) and take the last FLOWER PIECE (green).
Give the FLOWERS to the little boy figurine (C), then take the PIECE (green).
Break five vases (pink) as marked on the screenshot. Each will have a number that you will need later and the other will have a PIECE (green).
Click on the fireplace (D) to get the PIECE (green) and you can enlarge the scroll (E), which you will need later.
Go through the portal to the right of the fireplace.
Take all available ITEM PARTS (green).
Click on the volcano (F), then pour the CHAMPAGNE on it to cool the PIECE (green) and take it.
Place the HAMMER in the caveman's hand (G), then take the PIECE (green).
Look at the shielded cage (H) and use the FISHING LINE to take the HANDLE (green).
Go back one room and click on the base of the bookcase (I).
Place the HANDLE in the hole, then take the two PIECES (green) from the doorway.
Look at the fireplace and place the HANDLE on the pin (J) and turn it green, then light the fire with the matches.
Go back through the portal and take the last piece of DINOSAUR (green) and place it on the pillar (K).
Take the last piece of COINS (green) and place them on the big dinosaurs in the back (L), then take the TICKET (green).
Look at the door (M) at the top of the stairs and place the TICKET in the slot (N).
Enter the exhibition room through the door and take all available ARTICLE PARTS (green).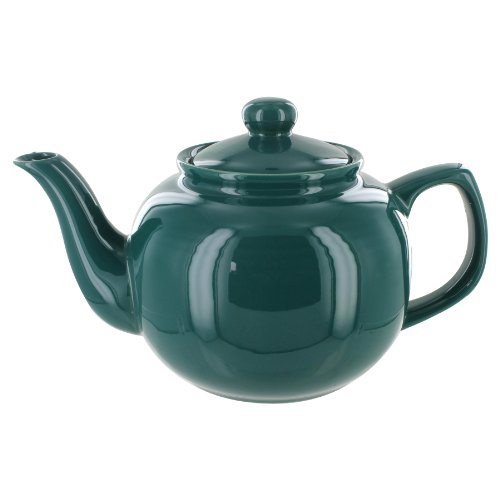
Look at the book (O) and turn the page to take the PIECE (green).
PAINT the big cat (P), then take the PIECE (green).
Look at the center shelf (Q) and place the FEATHER on the boxes, then take the PIECE (green).
Place the TAIL and SKULL on the partial dinosaur skeleton.
Adjust the HEAD, LEGS and TAIL to match the fireplace scroll, then take the RIBBON (green) from the jaws.
Return to the first room, then go downstairs (R).
Take all available ITEM PARTS (green).
READ the chair (S) and take the last SCALPEL PIECE (green).
Cut the back of the chair with the SCALPEL and take the last KEY KEY (green).
Look at the table (T) and place the KEYS on it, then go back.
Pick up the PIECE (pink) then place the MAKEUP on the coffee cup (U).
Place the RIBBON on the print and place it on the fingertip (V).
Click on the safe (W) and open it. The first number in the combination is the number that was on the scrap of paper from the broken vases. If you need to go back to the first room and check it out, because it changes every game until the end.
The second number is what the spider (X) has on its back. Finally, the third number, however, is a lot of screens above the table.
Look at the safe and take the last PIECE (green). Drag the pencils to the solution paper to turn off the power.
Look at the table and press the buttons (yellow) according to the diagram from the safe.
Return to the exhibition room, click on the EGG and take the last PIECE OF THE RING (green).
Cut the glass (Y) with the RING, then take the EGG.
Return to the main room and place the egg in the fireplace.
Pick up the DINOSAUR (green) and click on the door (Z) at the top of the stairs.
Move the chain through the maze as shown in the screenshot and go through the door.
(Black Tea. China)
• Original Bergamot
(black with bergamot)
• Hawaiian Dance
(black - mango and maracuya)
• Chocolate Delight
(black and cup )
• Moon Valley
(black with thyme)
• Morning Sun
(Green Tea. China)
• Fresh Fantasy
(Green with Maracuya and Application)
• 9000 •0815 Romantic Jasmine
(green with jasmine)
• Winds' VALSE
(green with peach and strawberries)
• Melody of Herbs
(grass-yabobo-il-il-il-ilbush)
• 9000.
(Herbal. Rooibos with Blueberry)
• STRAWBERRY CHIC
(Fruit. Hibiscus-Strawberry-Kiwi)
Svay tea for Horeca - large leaf tea in silk sachets and pyramids. Not supplied to stores and individuals to maintain the exclusivity of cafes and restaurants
The SVAY Selective tea blends premium collection was created especially for exquisite tea service in cafes and restaurants. The collection represents a wide range of portioned teas for restaurants and hotels. Luxurious combinations of selected large-leaf tea, pieces of fruit and flower petals, a unique transparent material through which the brewing process is visible, and an unusual shape of bags will please the guests of the establishment and will create vivid and unforgettable impressions of excellent tea drinking.
SVAY tea is available in two versions - for the Cup and for the Teapot. Tastes are completely duplicated.
SVAY for Cup.
Pack of 20 bags in a foil envelope (sachet). The recommended brewing volume for 1 sachet is 180-250 ml. Net weight 2 g.
SVAY for Kettle.
Pack of 20 pyramids + 20 teapot holders.
Recommended infusion volume for 1 pyramid: 400-600 ml.
Net weight 4-5 g.
SACHET BAR - Assorted 6 flavors of 10 sachets.
• Highgrown Bouquet - Black.Ceylon.
• Original Bergamot - Black with bergamot.
• Chocolate Delight - Black with chocolate, strawberry and vanilla.
• Morning Sun - Green. China.
• Fresh Fantasy - Green with Passion Fruit and Orange and Lemon.
• Charming Africa - Rooibos with Blueberries.
The new composition of SVAY Sachets Bar was created specifically for the exquisite serving of tea in restaurants and buffets. A well-chosen collection of flavors will satisfy the wishes of visitors to the greatest extent, and the service process will become simple and convenient.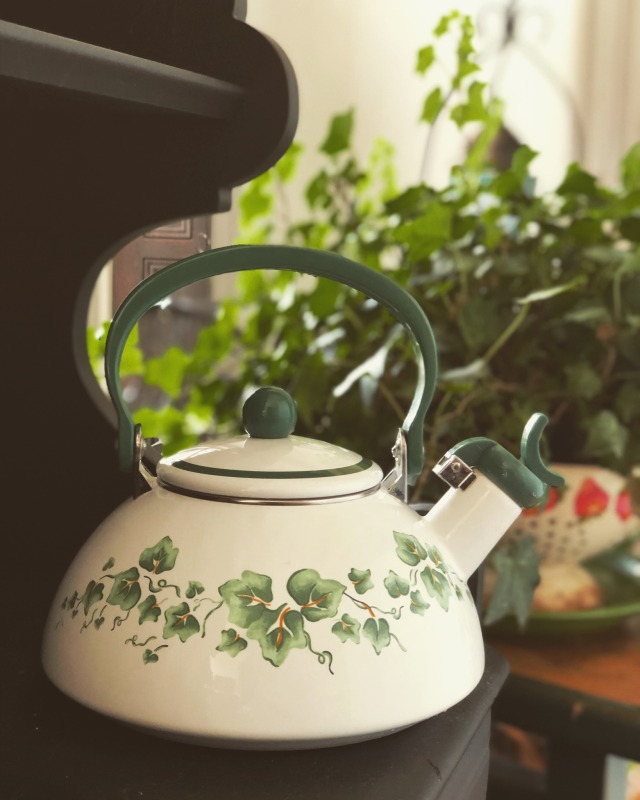
•••••••••••••••••••••••••••••••••••••••••••••• •••••••••••••••••••••••••••••••••••••••••
WHITE TIGER - Milk Oolong
Combination delightful tenderness of heaven and an amazing range of milky aroma, emphasized by the taste of real oolong. Like the most delicate flower in the oolong family, it evokes the most wonderful emotions and lofty thoughts with its unique taste.
For a cup - 20 sachets. For teapot - 20 pyramids with holders .
HEAVENLY PRISONER - Mint Oolong
The crystal clear taste of Oolong green tea is subtly accentuated with fresh mint, adding a special note of coolness and lightness. The aroma of the tea drink is rainbow-like in spring, bright as fresh grass and gentle as the bottomless blue sky.
For a cup - 20 sachets. For teapot - 20 pyramids with holders .
WILD HANTER - Pu-erh Wild hunter
Pu-erh has amazing properties and has a healing effect on the human body. And the exquisite taste of this noble drink will not leave indifferent both true connoisseurs and those who are just starting to look for "their" flavor. At the same time, young pu-erh is distinguished by a light fruity aftertaste and woody aroma.
For a cup - 20 sachets. For teapot - 20 pyramids with holders .
HIGHGROWN BOUQUET - Black tea. Ceylon.
Genuine Ceylon black tea with a multifaceted taste with fruity notes, a bright golden color of the infusion and a rich aroma, perfectly tones and invigorates.
For a cup - 20 sachets. For teapot - 20 pyramids with holders .
YUNNAN LEGENDS - Black tea. China.
Yunnan tea is popular among gourmets all over the world due to its unique, very refined taste with hints of dried fruits and mountain honey. Spicy, magical aroma gives a feeling of a unique journey to the East.
For a cup - 20 sachets. For teapot - 20 pyramids with holders .
ORIGINAL BERGAMOT - Black with Bergamot.
Black tea with bergamot, orange blossom and apple slice. Luxurious, tonic, with pleasant citrus notes - this drink will fill you with new strength and desires.
For a cup - 20 sachets. For teapot - 20 pyramids with holders .
HAWAIIAN DANCE - Black - Mango and Passion Fruit
Black tea with flower petals, mango and passion fruit. The sweetness of tropical fruits and the delicate aroma of delicate flower petals give black tea a special taste and exquisite aroma. This extraordinary tea is uplifting and energizing.
For a cup - 20 sachets. For teapot - 20 pyramids with holders .
CHOCOLATE DELIGHT - Black with Chocolate and Strawberry.
The smooth taste of black tea perfectly complements the magical combination of gourmet chocolate pieces, vanilla and fragrant strawberries, creating an extraordinary drink for true enjoyment.
For a cup - 20 sachets. For teapot - 20 pyramids with holders .
MOON VALLEY - Black with Thyme.
The composition of thyme and mint is underlined by citrus notes that open up in the aftertaste. Exquisite blend, enchanting freshness of mountain herbs and delicious taste of tea fascinate and give pleasure.
For a cup - 20 sachets. For teapot - 20 pyramids with holders .
MORNING SUN - Green tea. China.
Delicate Chinese green tea with an incredibly light fresh aroma and delicate taste brings harmony and helps to restore strength.
For a cup - 20 sachets. For teapot - 20 pyramids with holders .
FRESH FANTASY - Green with Passion Fruit and Orange.
Traditional Japanese green sencha tea, combined with the captivating aroma of exotic passion fruit, refreshing orange and lemon slices, creates a fresh, deliciously invigorating taste and gives a sense of celebration.
For a cup - 20 sachets. For teapot - 20 pyramids with holders .
ROMANTIC JASMINE - Green with Jasmine.
The combination of noble green teas and jasmine flowers, which has become a classic, creates a magical drink: light, multifaceted, fresh like a spring morning, setting you in a romantic mood and meditation.
For a cup - 20 sachets.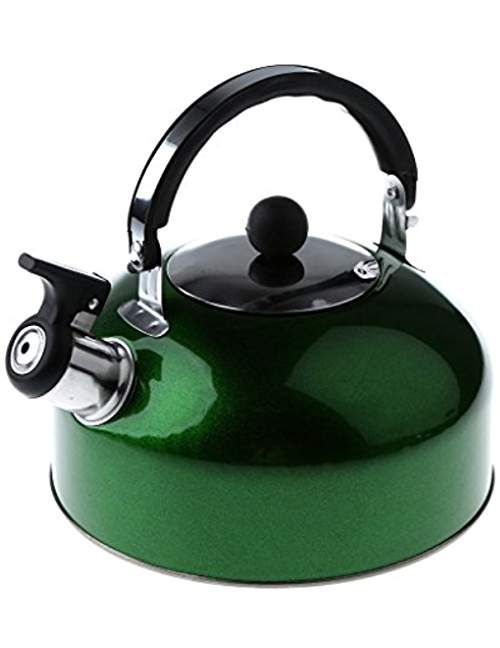 For teapot - 20 pyramids with holders .
WINDS’ VALSE - Green with Peach and Strawberry.
Soft and delicate tea infusion envelops with a sweet and mysterious aroma from the first sip. The taste of strawberries is delicately tinted with a slightly perceptible taste of ripe peach, which gives the drink an extraordinary sensuality.
For a cup - 20 sachets. For teapot - 20 pyramids with holders .
MELODY OF HERBS - Herbal Mint-Apple-Rooibos.
Intense green rooibos combined with soft meadow herbs for a balanced taste and aroma. And the subtle sourness of a green apple takes you to a world of harmony and warmth.
For a cup - 20 sachets. For teapot - 20 pyramids with holders .
CHARMING AFRICA - Herbal. Rooibos with Blueberries.
Rooibos, an exotic drink grown exclusively in the Cedar Mountains of South Africa, with a delicate nutty aroma, perfectly combines with the extraordinary taste of blueberries, which gives the drink a special magic and splendor.