How to touch up leather
Leather Repair: Fix Tears & Punctures in Leather Furniture
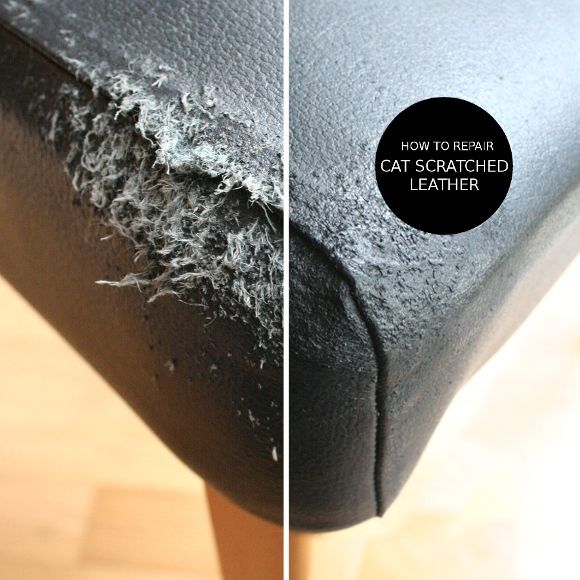
Maybe your favorite cat used your leather chair arm as a scratching post. Or the leather has ripped on your treasured recliner, leaving a nice slice that threatens to expand. If the cost of replacing your leather furniture is more than you can bear right now, take heart. Repair it yourself and no one will be the wiser.
Before beginning, make sure your piece of furniture is genuine leather. Genuine leather is the whole skin of an animal. Bonded leather is created by bonding together scraps of leather to form a seamless piece of material. These repair techniques won’t work on bonded leather.
How to tell if your furniture is genuine leather:
- Read the label if there is one. It’ll say “Genuine Leather” if it is.
- Look for imperfections in the grain. The texture of bonded leather is mechanically produced with a repeating pattern.
- If possible, pinch the material between your fingers.
Genuine leather lightens in color where it’s folded over.
- Does it have that natural leather smell? Synthetic materials have a faint chemical odor.
- Finally, look at the edges of the
To fix a full-thickness hole or cut, gather the following materials (or purchase a complete leather repair kit):
- Vinyl or fabric adhesive that dries flexible
- Soft leather filler
- Denatured alcohol
- Iron-on denim patch for substrate
- Palette knife
- Toothpick
- Smoothing card
- Tweezers
- Scissors
- Glove for texturing
- One sheet each 220-, 320-, 500-grit wet-or-dry sandpaper
- Cellulose sponge
- Scrap of cardboard to use as a palette
- Leather dye to match your piece
How to Repair Minor Scratches or Small Tears in a Leather Chair
- For minor scratches or tears that don’t puncture the full thickness, clean your chair with a quality leather cleaner.
- Once dry, apply a thin layer of leather conditioner and rub it in using a circular motion.
- Continue to apply the conditioner until the leather no longer absorbs it, allowing the final coat to sit for a few hours before rubbing it in.
- Cleaning and conditioning the leather this way removes a lot of scratches.
How to Fix Punctures & Cuts in a Leather Chair
If the leather is cut all the way through, follow these steps to repair it:
- Cut a piece of denim patch a little larger than the cut’s opening.
- Even the edges with scissors to help them lie flat.
- Using tweezers, insert the denim piece, shiny side up, into the opening. This acts as the substrate for the filler. Feel to make sure it lie flat without any wrinkles.
- Squirt a bit of glue on the cardboard. Use a toothpick to apply glue along the edges of the hole, adhering the patch to the leather. Press it down gently with your fingers. Only use glue that dries flexible.
 Do not use Super Glue.
 - Immediately apply firm pressure with a piece of 2x4 or another hard, flat object. Hold for a minute or two.
- Once dry, clean the surface with denatured alcohol to remove any glue, wax, or oil that will prevent the filler from adhering.
- Use the palette knife to fill the opening with the soft filler. Work it into the edges along the perimeter of the tear in case you missed any spots with the glue. Hold the smoothing card at an angle and grade over the fill to smooth it out. Feather the edges outward with your fingers.
- Allow to dry for 20-40 minutes. To hasten the process, suspend an incandescent bulb close enough to warm the area but not so close that it would burn your hand. If the filler gets too hot, it’ll bubble and then shrink, requiring a redo. When dry, the color becomes translucent and the area feels solid when you press on it with your finger.
- Smooth uneven or rough areas with 220-grit sandpaper. Wipe with a damp rag to remove any dust.

- And another layer of filler, swipe with the smoothing card, and allow to dry. Apply as many layers as you think are necessary for a good fill, allowing each one to dry completely before adding the next. Sand a final time and wipe with a damp cloth.
For Leather That Is Worn-Out and Rough to Touch
If the leather is worn-out, follow these steps to repair it:
- If you have a large area of worn, rough leather, spread the filler over it, smooth with the card, and then, with your hand inside a plastic glove, pat the filler to texturize it so you don’t end up with a large, noticeably smooth area.
- Once dry, gently sand with 500-grit paper. Wipe with a damp cloth before applying dye.
- Use a damp sponge to apply the leather dye to the area you repaired. Allow to dry. If you aren’t happy with the color, repeat the dye steps until you achieve your desired color.
- If the area is too rough after applying the dye, sand again and apply more filler, working it until you’re happy with the result.
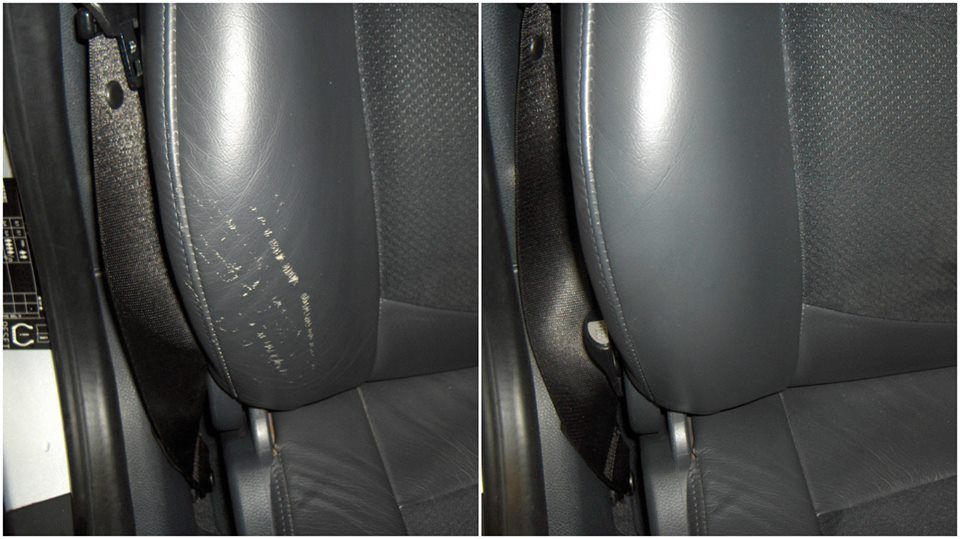
Final Leather Repair Results
When done, the repaired area should feel soft and flexible, and unnoticeable to the casual observer. Congratulations! You now can enjoy your genuine leather chair for years to come.
How to Fix Leather Couch Scuffs | Home Guides
By Kathy Adams Updated February 02, 2022
Your leather couch is prone to wear and tear, such as scuffs, scratches and scrapes, especially if you have pets or children who play on it. Some scuffs or scruffs may be so minor that a simple touch-up with shoe polish hides the damage, while others may require a treatment with a leather repair kit.
Specialty Product Solutions
For light leather scuffs, a leather-hydrating cream sometimes moisturizes the area enough to bring the damaged area's color back to near its original shade. The cream also helps protect the leather from drying, which may cause brittleness or cracking. A clear leather scratch repair liquid rubbed into the area smooths rough scuff spots; some methods require sanding between thin coats with fine sandpaper, which is often included with the filler. Shops selling leather upholstered furniture or even clothing and handbags carry leather care products.
Helpful Household Products
According to the Mahil Leather website, shoe polish wiped over the scuffs hides discolored scuff marks. Use a polish closely matching the couch color for best results, applying a little at a time and working it into the surrounding area. In a pinch, a permanent marker matching the couch color masks a discolored leather scuff, scrape or scratch. Rub the area with a soft white cloth while the marker line is still fresh to help blend it into the surrounding finish and make it less obvious.
Aniline Leather Scuff Repair
Slight scuffs in aniline leather – those barely more than a discoloration – sometimes require only a blow dryer to repair. Apply hot air with a low-heat setting while rubbing the damaged area gently with your fingers, or use a microfiber cloth to warm the leather enough to manipulate the scuff so it seems to disappear.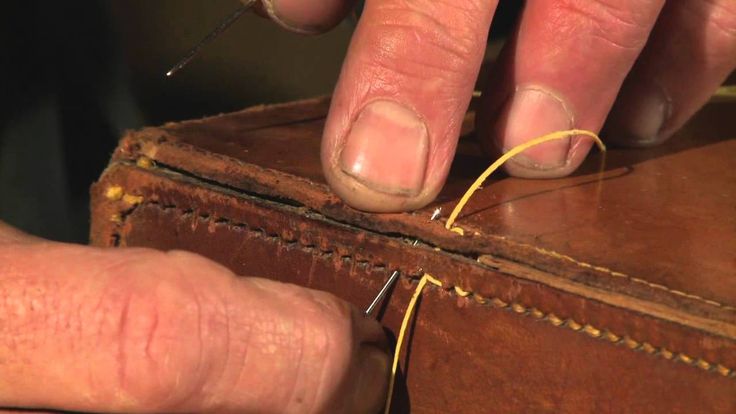 Apply an aniline leather hydrating cream afterwards to help protect the upholstery. If the scuffs are deep or the area is discolored enough that a dye is needed, apply aniline leather hydrating cream, then wipe the area with thin layers of aniline dye matching the couch color, using a white cloth or rag to apply the dye.
The Austin Furniture Repair website recommends using aniline dye only on an aniline leather piece; if the leather is aniline, the dye soaks into the leather, much like dyeing a plain fabric. Other types of leather use a pigment-based dye, which is more like a painted-on protective coating.
Leather Repair Kit for Damage Control
If the leather appears damaged – bits of the leather stick up while other sections are missing, or a scrape from a pet's claw ends with a puncture – you need a leather repair kit. A kit containing several tints allows you to mix up a match for the couch color. Trim loose frays or fibers with the edge of a razor blade or craft knife, returning the sofa to its original texture as closely as possible.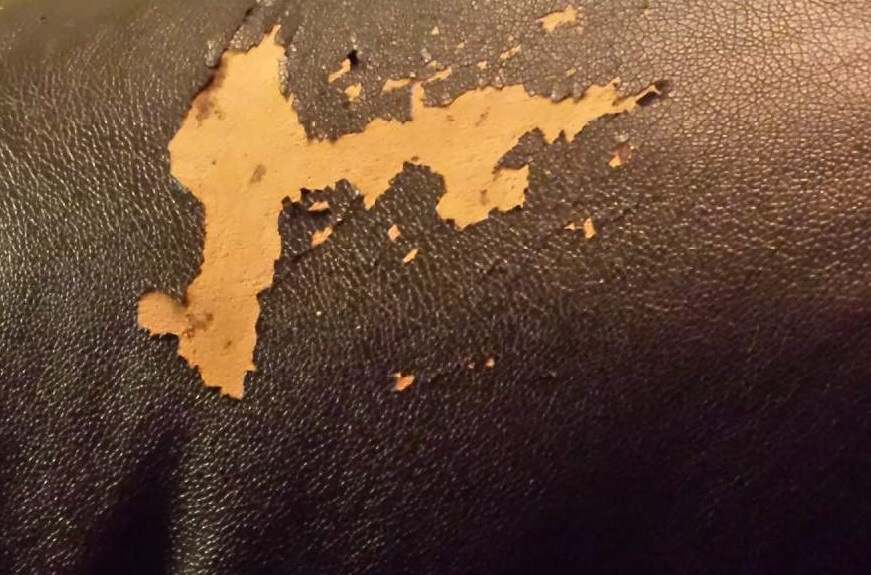
Mix the repair solution and tint together, then apply it over the damage with the tiny spatula enclosed in the kit. Place leather-grain paper, also from the kit, grain-side down over the repair, then iron the paper with a clothes iron set to low heat without steam. Avoid touching the hot iron to the leather itself, which may cause discoloration.
References
- Austin Furniture Repair: Ultimate Guide to Leather Furniture Repair
- Mahil Leather: A Guide to Leather Scratch Repair
Writer Bio
Kathy Adams is an award-winning writer. She is an avid DIYer that is equally at home repurposing random objects into new, useful creations as she is at supporting community gardening efforts and writing about healthy alternatives to household chemicals. She has also written many pieces on landlord and tenant concerns. She's written numerous DIY articles for paint and decor companies, as well as for Black + Decker, Hunker, Kroger and Landlordology, among others.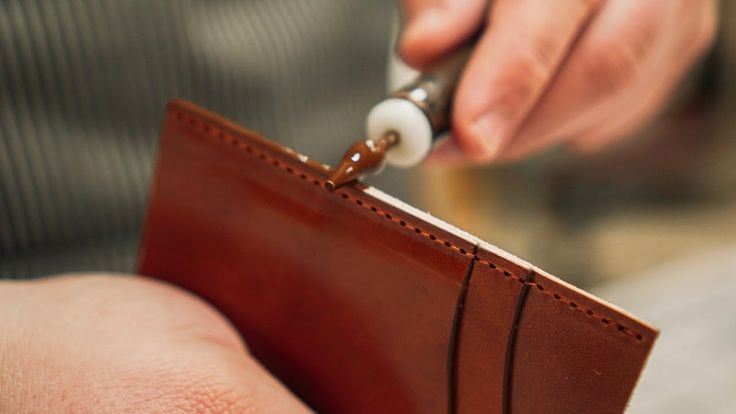
DIY leather painting
Even the most expensive and high-quality processed leather loses its presentable appearance over time. Scuffs appear, the paint in places of greatest load is erased. And sometimes you just want to stand out and create a unique gradient on a leather bag, belt or purse.
Painting would be a great option. It attracts a large selection of colors and the opportunity to get involved in the creative process. We will tell you how and how to dye leather at home in order to transform your product. nine0003
Colors for leather
There are two main types of leather paint: penetrating and covering.
1. Penetrating
The name is due to the fact that the coloring pigments in the composition penetrate the skin structure. They do not deform it, retain the surface relief and do not form a dense film. Ideal for dyeing nubuck, embossed smooth leathers and suede. The paint retains all microscopic villi, skin irregularities, without violating its authenticity.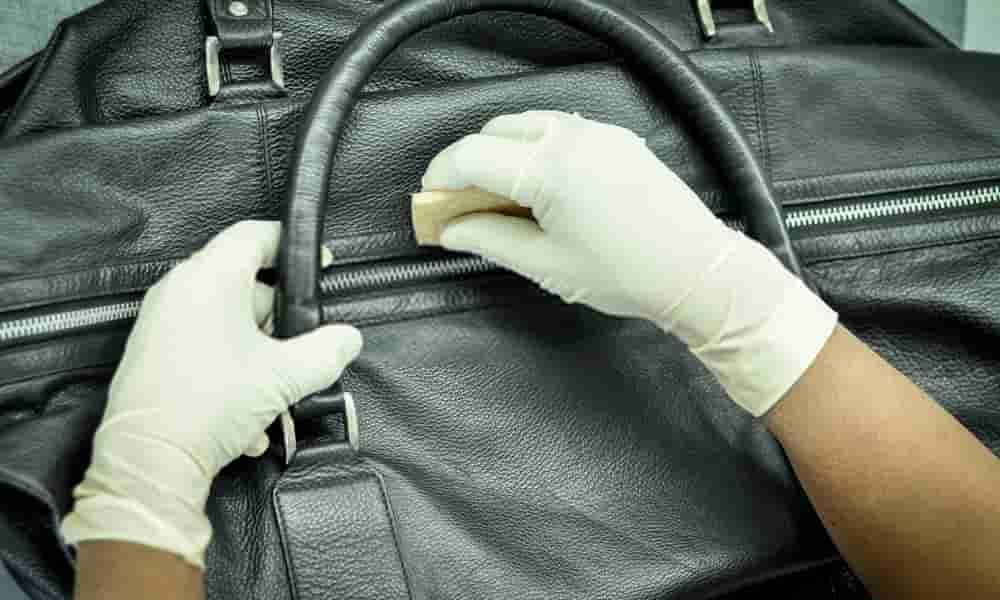 nine0003
Dyes with a penetrating effect are well suited for coloring bright suede and leather shoes.
Staining with such a dye can only be carried out from a light color to a dark one. It will not work to paint a dark product with light paint.
Penetrating paint bases
The industry produces 3 types of penetrating paints for leather:
- water based;
- alcohol based. nine0023 based on organic solvents
Water-based paints change tone a little as they dry, so they are often used when you need to create gradation, fuzzy contours on the material being painted. Alcohol-based paints also have this color-changing effect, but less pronounced.
All types of penetrating dyes require a top coat to close the pores on the skin after coloring.
Brands
We sell paints of our own production under the Tavro brand and aniline paints on a water-alcohol basis by the Italian company IEXI, Fibing, Kenda, Vlotno, Toledo, Tarrago and others are also represented on the Russian market. In addition, we offer adhesives, finish coatings and much more. In stock - high-quality cosmetics of European production. nine0003
2. Top coats
What paint to paint the skin to completely cover the original tone? To do this, choose topcoat paints for leather. Dyes of this category lie on the surface in the form of the thinnest film. They cover the natural texture of the material. They are used to mask serious damage, deep cracks, etc. They can also be used to update smooth leather products. nine0003
They are also widely used for customization - painting leather products according to the requests of a particular customer. This can be painting in a bright color, applying inscriptions or logos, etc.
Dye bases
More often on sale are surface dyes based on the following bases:
- polyurethane;
- acrylic.
When needlework, one of the most frequently asked questions is whether it is possible to paint the skin with acrylic.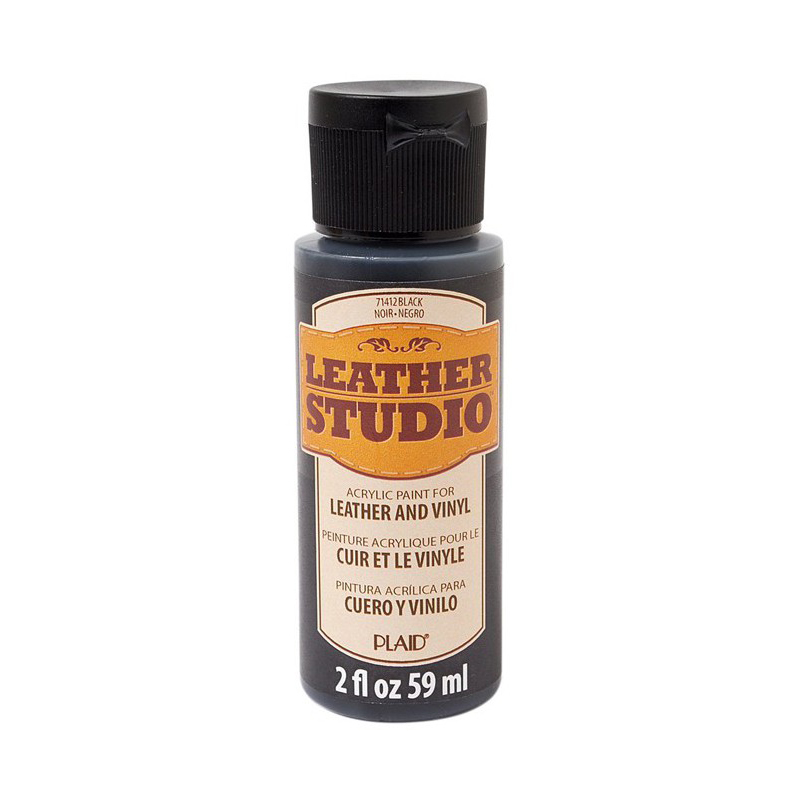 Yes, you can, but in places that are least susceptible to scuffs or folds. More often, topcoat acrylic paints are used for creative moments: drawing a picture on a selected area, and not for completely coloring the product. nine0003
Features
These dyes can be applied with a brush, sponge or spray. Due to the high degree of coverage, they are good to use as a masking agent for severe damage to the surface of the leather product.
The top coat is applied in several layers. When dried, it almost does not change its shade, unlike penetrating. Differs in resistance to wiping and mechanical damage. It has good adhesion, that is, it “sticks” well to the base. nine0003
At the final stage of painting with top paints, it is recommended to apply a layer of wax or other water-repellent composition.
Brands
Top coats are available under the brands IEXI, Pingo, Crab Apple, Fibing, Vlotno, Toledo, Kenda, Tarrago, etc. From Russian companies, polyurethane paint "Tavro" can be distinguished
Our online store offers high-quality German and Italian dyes for suede, nubuck and smooth leather.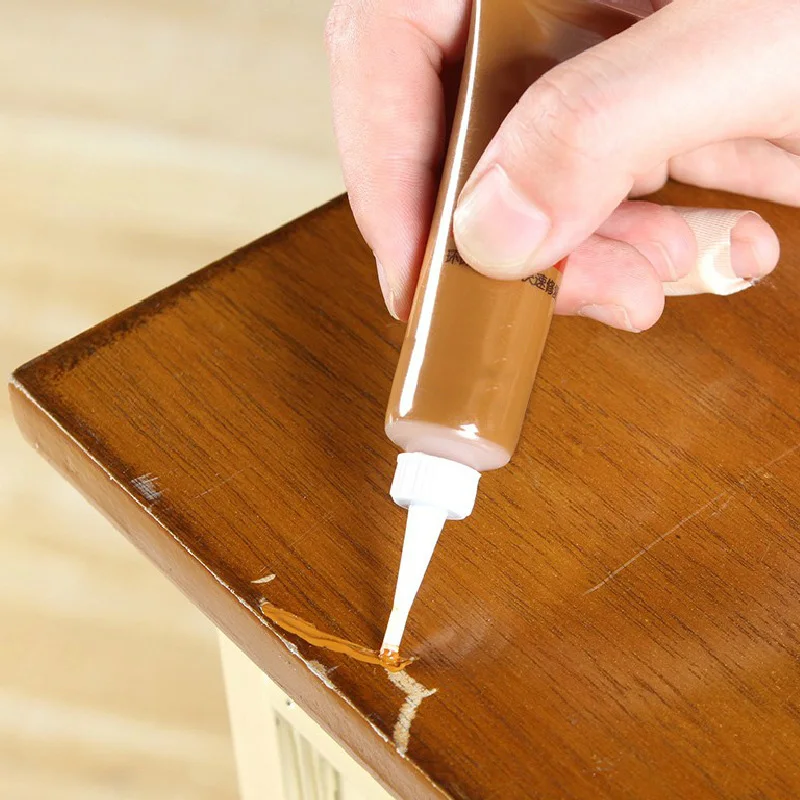 nine0003
Other chemicals that might be useful
When working with leather, not only dyes are used. Properly selected composition for cleaning, preparation and final processing of the product is the key to the quality of painting.
Cleaners
Cleaners will help restore the product to its original appearance or prepare it for painting. They contain fast-acting chemicals. They are able to penetrate deeply into the material, get rid of dust and dirt while moisturizing things. Return and enhance the lost natural shine and shade. nine0003
Cleaning products are selected, starting from the weakest in action. In jackets and bags, places that come into contact with hands and on the folds of products are most often salted. Clean them with VELVET SHAMPOO for suede and nubuck or CLEANER LPN for smooth leathers. They will effectively cope with the "fresh" traces of dirt.
If the stain has not cleared, you can try more “strong”, like CLEANER L.G.R, options. It is also necessary to test products in an inconspicuous area so as not to accidentally damage the product. nine0003
Before painting, it is necessary to clean and degrease the surface. It is important to wait until it is completely dry and only then proceed to the next step.
Primers
Apply to previously unpainted leather surfaces before painting. The primer opens the pores, removes excess dust from the surface of the product. On the primed surface, the paint will lie more evenly and will not “wet” the product through (for example, if there is a lining). We begin to paint after the primer has dried (after a couple of minutes). The aforementioned CLEANER LPN is also a primer nine0003
Finishing compounds
After painting, you need to fix the color. To do this, use the so-called "finishes". Their task is to improve the appearance of the product, protect it from moisture and other negative influences during operation. Finishing Benefits:
- prevents untimely wiping of material;
- retains color brightness longer;
- is water repellent;
- adds life to leather.
 nine0024
Fixatives are applied in a thin layer to the painted areas.
A popular auxiliary composition for finishing finished products is dressing. It is a liquid product based on water or alcohol. It contains various film formers - polymers, wax, resin, and other additives.
Many finishing formulations are designed for smooth natural leather to give it an extra sheen. There are also means to give a matte effect. Their main purpose is to hide minor surface imperfections or level out slight uneven coloring. And there are a lot of fans of things with a matte surface. nine0003
After complete drying of the finish, the painting is completed with polishing. Polish the top coat with a soft cloth or natural bristle brush.
Other aids
Auxiliary chemicals also include:
- various fixatives and fixatives;
- surface restoration products;
- impact enhancers;
- preparation agents for the application of protective polymers; nine0024
- natural skin lightening and whitening products.
Painting tools
Before painting a leather item at home, you should prepare the following tools:
- brushes;
- tampons, sponges - applicators in the form of squares, rectangles, balls;
- toothpicks;
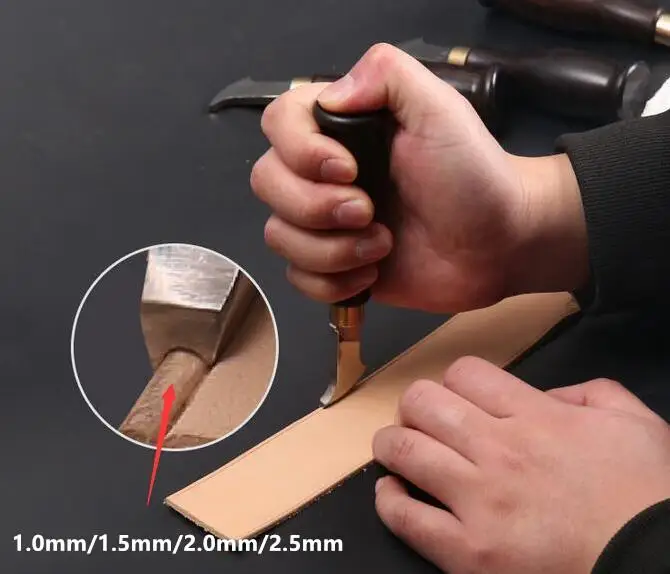
- device for painting the edge;
- edge painting pens. nine0029
- ventilate the premises;
- at any of the stages (cleaning, painting, finishing) work only with gloves; nine0024
- handle away from children, animals and food.
- Methods products for dyeing leather
- Handy products for dyeing eco-leather
- Ready-made paints
- Making vegetable dyes
- Tips for dyeing leather
- put on gloves, lay the jacket on a flat hard surface, good lighting is necessary; nine0024
- scratches, cracks, tears are removed with liquid leather;
- paint is poured into a separate container, the brush is immersed in it;
- make even stripes from top to bottom with strokes, the dye is applied evenly;
- start at the collar, then move to the sleeves, move to the front and back of the jacket;
- a slightly damp jacket should be oiled, the fat and the thing should be warm, the fatty substance deepens the color;
- grease is applied with a sponge in a circular motion, if there is a lot of fat, then crushed chalk should be rubbed; nine0024
- after 5-6 hours knead the jacket with hands;
- additionally lubricate the surface with shoe cream with silicone, use only good quality products, if the desired color is not available, take a colorless cream.
- 100 g of bark is poured into 2 cups of water;
- boil for at least 30-40 minutes;
- allow to cool, filter off the liquid;
- immerse the product for 2 hours, the time depends on what tone is needed, the longer they keep it in the broth, the darker the color; nine0024
- rinse, grease and cream.
- 4 spoons of bark and 2 spoons of coffee are poured into the dish;
- pour 0.5 l of boiling water;
- boil over low heat for 20 minutes;
- is filtered, the dye is ready.
- Be sure to use protective equipment: rubber gloves, respirator.
- Sponges, brushes, spray gun, thinner, oil mixture, paint are prepared in advance.
Learn more
It is convenient to use tools with long handles - this allows you not to get your hands dirty. After painting, all reusable tools should be washed in warm water and soap until completely clean and left to dry in a natural environment.
Penetrating paint work
Preparation
First you need to make sure that the material is natural. It is also desirable that the dye be darker than the base.
Before applying the dye, unpainted skin can be treated with a special primer CLEANER LPN, this will degrease and clean the skin, get a more uniform tone. Painted is also pre-degreased with an alcohol-containing composition. nine0003
Application
First, pay attention to the composition. Penetrating paints can be water or alcohol based. Alcohol is better to use on already painted things. They have excellent penetrating power, and on unpainted material the declared shade loses its saturation. This is due to the fact that the pigment penetrates deep into the material and remains there. You can easily dye the leather black if the base has already been dyed, for example dark brown. And if you have raw leather in front of you, it is better to take a top coat or apply several layers of penetrating until you get the desired shade. nine0003
Finishing
After staining, the leather surface must dry completely, it will take from 1 hour to a day, depending on the thickness of the material. Then the surface can be treated with a fat-and-wax mixture. Leather cream MELTONIAN P1This will improve the protective and organoleptic properties of the product.
Topcoat work
Preparation
The surface must be cleaned with a brush from dust. Degrease with Cleaner L.G.R. After that, apply the paint, evenly distributing it over the surface. When working from a spray bottle, the can must be kept at a distance specified in the instructions. Otherwise, streaks may form instead of a uniform layer. nine0003
When using alcohol paints, it is better to work in a ventilated area, as intensive evaporation occurs and health may worsen.
Application
The paint is applied with brushes, swabs on long handles or from spray guns. If there is a minor repair of the product or drawing a picture, the remaining areas must be closed so as not to get dirty. This can be done with gauze, cloth, film, and secure the edges with masking tape. After work, the tools must be washed in running water with soap. Let dry naturally. nine0003
Finishing
The product needs to dry for several hours, then finish polishing.
Leather restoration
Quite often, products made of genuine leather are damaged. It can be cracks, scratches or cuts. Deep tears are not easy to repair, but scratches can be repaired.
You can restore the product with a special composition called “liquid skin” or restoration paste. This material must be applied manually using a small spatula or with your own hands. Liquid skin is squeezed onto a sheet of paper and applied in small portions to the damage. nine0003
For example, the repair of a leather jacket is as follows. The damaged surface is wiped with a dry cloth, then a small portion of liquid leather is applied to the scratches. After that, the paint is pressed by hand using polyethylene gloves. Only the composition does not stick to such gloves during operation.
Then the liquid skin is dried with a hair dryer and pressed again by hand. Layers are applied until the defect is eliminated. After each application, the layer must be heated with a hair dryer and pressed manually. nine0003
If an influx forms, it can be easily removed with a fine sandpaper after the layer has dried. Then it is painted over with top paints and polished with rags. Separate finishes are not used,
Safety regulations
In order for the painting to pass without consequences for the body, the following recommendations must be observed:
Now you know how to color the skin at home. Don't throw away your favorite jacket or bag. Try to return things to their original appearance on your own, and we will select high-quality paint for leather goods.
How and with what to dye leather at home
Leather is the most wear-resistant material, it can be worn for decades. If a thing is loved, then a hand will not rise to throw it away, and the price of a new purchase can bite. There is only one way out - to try to update and transform leather products with your own hands.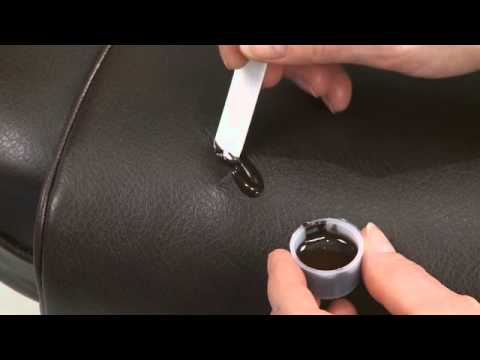 Things will get a new life, but the effect as with factory painting will not work. nine0003
Content Exvert
Methods for dyeing leather
There are 2 methods for dyeing leather. With deep staining, the product is immersed completely in the dye solution. Leave the thing for a few hours, then take it out. The dye covers both parts - front and back.
For surface painting, the dye is applied with a brush, sponge or spray paint. Apply the dye with a brush from top to bottom with a brush. Such staining allows you to paint only the face of the product. To carry out the work, you need a dye, a large container of water, as well as salt and vinegar essence. Leather must be clean before painting. nine0003
How to dye a leather jacket
Dyeing leather at home is easy. Before work, you need to find out in what condition the product is, and how it was tanned. If the cut is pink-white, then vegetable tanning. With a gray-blue cut, chrome plating took place at the factory. The front side of the skin is covered with a protective film to repel moisture. When painting a house, such a film will not paint over the material well. It is removed with a solvent. It is important that the item is cleaned and washed. It is easier to apply paint on a clean jacket, it will be painted better. Wet, but not wet, wipe the thing with a cloth, pre-moisten the cloth in soapy water. The jacket is wiped thoroughly, the entire surface. nine0003
See also
Surface staining
For degreasing, the cloth is moistened in an alcohol solution and the material is wiped. After cleaning, wipe the entire surface with a clean, damp cloth to remove soap residue.
Important!
Before painting, the product is moistened, if dry spots remain, they will not be painted over.
Surface painting in stages:
To avoid streaks, rub the paint with quick movements without stopping. After this procedure, the dye lasts much longer.
Deep dyeing
If the dyeing is deep, then take a large basin or pan to fit the thing. Pour water and pour the dye into it in accordance with the instructions. The composition is put on gas and allowed to boil, removed from the stove, cooled to 40-45 degrees. nine0003
The wet jacket is dipped into the dye mixture. Periodically, the thing is turned over for uniform staining. After a few hours (the time is indicated in the product instructions), the jacket is wrung out and rinsed in warm, then in cold water.
To fix the result, prepare a solution: for 4 liters of water, 3 cups of vinegar and 2 tablespoons of salt. The jacket is left in the composition for half an hour, taken out, wrung out, allowed to drain and laid out to dry. Do not dry the material on the radiator or near any heating device. The skin will warp and become stiff. It is better to dry on a wooden surface, the jacket is placed face up. nine0003
Attention!
After drying, the color becomes 2-3 shades lighter, so you need to choose a paint darker than the intended color.
To change the color, paint the product in three layers, after each dyeing, allow the jacket to dry. Leather polishes give a glossy or matte effect.
Dyeing leather at home
You can dye leather with affordable and cheap aniline dyes, they are used to dye fabrics. Choose paints for woolen fabric or universal. Coloring mixtures for cotton are less saturated, the effect will be worse. If there are paints of the same company, but different tones, they can be mixed for the desired shade. nine0003
Deep application uses acid dyes that penetrate deep into the skin. Vegetable paints and those that can be prepared at home from improvised substances are widely used.
Aerosols are used for surface painting. The product is placed outdoors. Be sure to wear a respirator, protective clothing and gloves and spray the substance. Nitro-paints are used on dry skin, using a brush or sponge.
Natural dyes that give a brown color: apple and oak bark, ground acorns, walnut shells. Leaves and stems of celandine, alder bark, buckthorn, henna give reddish colors. For green shades choose willow bark, bird cherry, aspen wood, nettle. Golden tones are obtained using onion husks, large-leaf tea, horse chestnut rhizomes. Basma colors the material from gray-black to dark green. nine0003
Pharmacies sell medicines that can color the skin: potassium permanganate or iodine (brown), brilliant green (green), fukortsin (raspberry). The stain helps to get a light brown tone. Gray tones are obtained using iron sulphate. Soda with potash gives a red-brown color.
Important!
Before applying any dye, first check its effect on an inconspicuous area of the skin, and then dye the whole thing.
Homemade paints
At home, rusty nails, coffee, tea, potassium permanganate, iodine, berry juices and other household substances are used for painting. In order for the experiment to be successful, the proportions of substances and the time of painting must be observed.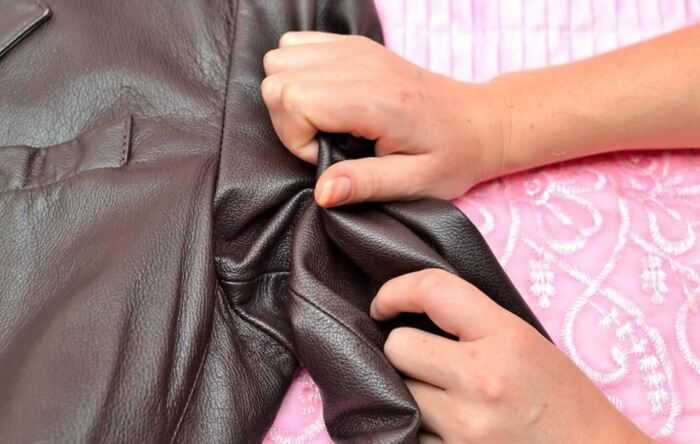
Nails and vinegar
Leather is painted black with vinegar and rusty nails. Hot vinegar is poured into a plastic basin (the dose depends on the density of the color). For 2 liters of vinegar essence, at least 40 large rusty nails or any rusty items of the same amount are required. Before the procedure, the iron is washed in an alcohol solution for degreasing. The agent is left for 15 days. If the metal is not rusty, then the solution is infused for 3 weeks. The composition will be ready when the smell of vinegar disappears. The coloring mixture is filtered several times. nine0003
See also
A clean leather product is moistened with water, then dipped into the prepared product. At the beginning, a gray-brown tone will appear. Wash the skin under running water, transfer to a soda solution (3 tablespoons of soda per 1 liter of water) to neutralize the vinegar. Apply then glycerin or petroleum jelly. After applying the oil, the canvas will turn black.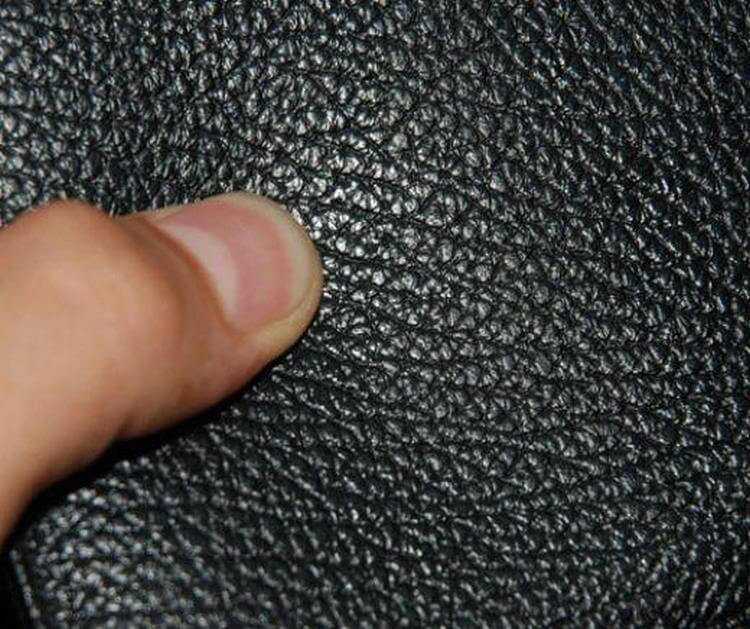
Tea or ground coffee
Ground coffee for one product you need 1 cup or 30 black tea bags. Add tea to 4 liters of boiling water, boil for 3 hours. When the liquid is evaporated, water is added to the original volume. The thing is left in the broth for 2 days, after which it is taken out and dried. Lubricate with odorless vegetable oil. nine0003
You can create smooth color transitions. A clean natural fabric is soaked in a strong broth and applied to the places of tinting. Hibiscus tea colors the material in burgundy tones.
Other leather dyes
Onion peel. For 2 liters of water you will need 400 g of onion peel. The broth is boiled for 2 hours. When it cools down and infuses, the skin is left in the solution and kept in it for a day.
Berry juices are used to color natural products. The thing is completely lowered into the juice for 24-36 hours. Raspberry juice gives a rich red color, lingonberry - bright red, blackberry - lilac hue, blueberries - blue. But the juice is suitable only fresh, otherwise the thing can be spoiled. nine0003
Suitable stamp ink, ink black, red, purple. If there is no ink, use a ballpoint pen. Mink oil is used to slightly change the tone. It also protects the skin from salt, moisture, mold and cracking.
Attention!
It is better to color the skin with a lighter tone in several steps than with a highly concentrated dark solution once.
Eco-leather dyeing tools at hand
Eco-leather differs from genuine leather in that it is based on polyurethane. The rest of the ingredients are natural. The material is used for the manufacture of furniture upholstery, accessories, clothing, shoes. As for the skin, natural dyes, aniline paints, silicone spray are used. nine0003
Silicone spray helps spread the paint evenly over the entire surface of the material.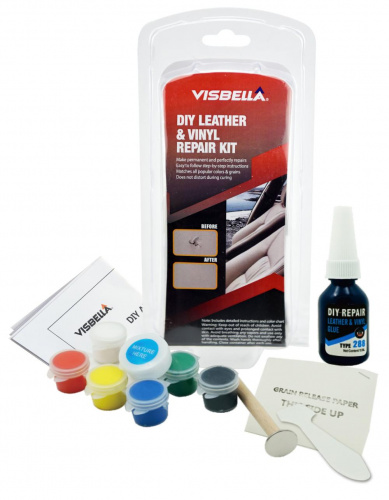 A protective film is formed, which gives eco-leather additional resistance. Means are colored and colorless. They color eco-leather, serve as additional protection, give shine, increase wear resistance. The dyeing process is the same as that of genuine leather.
Ready-to-use paints
For leather products they produce paint "Extra", nitro enamel, NTs-36 Enamel, Viva Color Up. Also used ink "Rainbow". Castor oil is added to any nitro paint. The first layer is primed with paint diluted in a solvent 1:3. The next two layers are stained with undiluted dye. Allow 60 minutes for the material to dry between coats, but do not dry completely. nine0003
Well-known companies that produce high-quality paints and skin care products: Salamander, Silver, Cavallo, Platinum, Twist, Selton.
If you need an exotic color or pattern, you can use oil paints for painting. They are not applied in places of kinks, they crack. Means dry for 3 days.
To obtain a shade, creams for leather items are used: Sochi, Karat, Polish and others.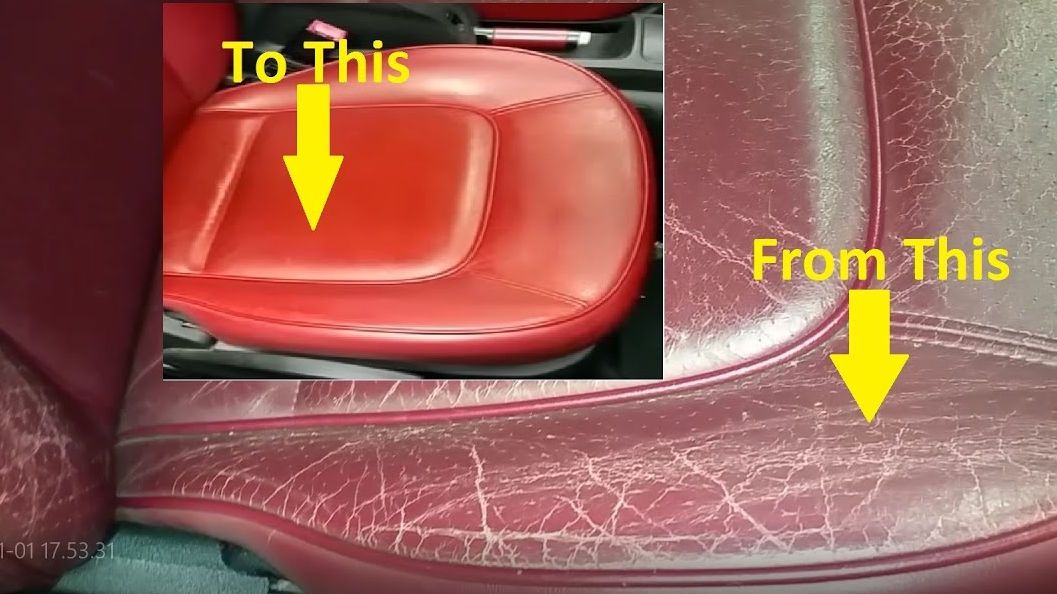 Natural suede is dyed in a surface way with a dissolved aniline dye. Water must be used purified, distilled. With a stiff brush pass over the suede surface. nine0003
Creation of vegetable dyes
If you combine oak bark with onion peel, tea or coffee, you can get different shades: golden, nutty, chestnut, brown with a reddish tint. It all depends on the concentration of the substance - the more bark, the darker the tone.
Oak decoction:
Oak with coffee:
Oak bark tea is prepared in the same way as the previous recipe. For 2 tablespoons of bark, a spoonful of large-leaf black tea and 200 ml of water. For onion broth, you will need 4 tablespoons of bark, 2 tablespoons of onion peel and 400 ml of water. nine0003
Oak bark with henna (2:1) gives red tones, henna is often used as an independent dye. To get a fiery shade, elderberries, beetroot juice, wolf berries, and buckthorn are added to henna. Red with purple gives a combination of henna and red marshmallow flowers. Golden shades are obtained with the addition of chamomile, rhubarb, saffron.
Tips for dyeing leather
Choose a room with good ventilation for dyeing, many formulations have a pungent odor. Before work, the place of work must be covered with polyethylene or paper. The leather material is fixed with adhesive tape. nine0003
Tips: