How to repair leaking faucets
How to Fix a Leaky Faucet Step-by-Step
There are few things more annoying than a leaky faucet. It's a constant reminder that you're wasting water, plus the drip, drip, dripping sound is beyond irritating. Don't put up with it—fix it! Repairing a leaky faucet is an easy and inexpensive project. The key is in knowing how to fix your particular type of faucet.
What Causes a Faucet to Drip?
There are four kinds of faucets: cartridge, compression, ceramic disk, and ball type. A compression faucet relies on rubber washers to seal the valve seat, which can wear out and need to be replaced. With the other three types of faucets, either the O-ring or neoprene seal that's causing the leak needs to be replaced. We’ll go over each of these fixes in more detail below.
How Do You Fix a Dripping Faucet?
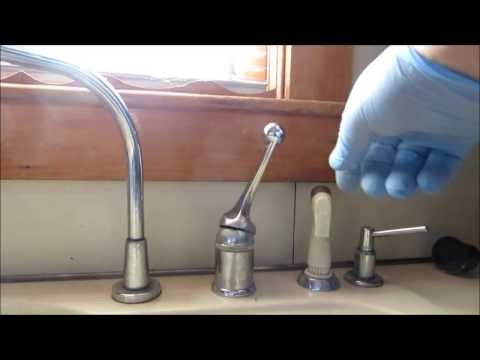
Before you start, shut off the water under the sink. Cover the drain with a rag to catch dropped parts, and establish a spot nearby to lay out the parts in the order of their removal. Tape the jaws of your wrench with a layer of duct tape to avoid scratching the fixture, and have some distilled white vinegar and a soft scouring pad ready for removing any mineral deposits found on the parts.
Faucet Cartridge
How To Fix a Leaky Cartridge Faucet:
- Pry off the decorative cap on the handle, remove the handle screw, tilt the handle back, and pull it off.
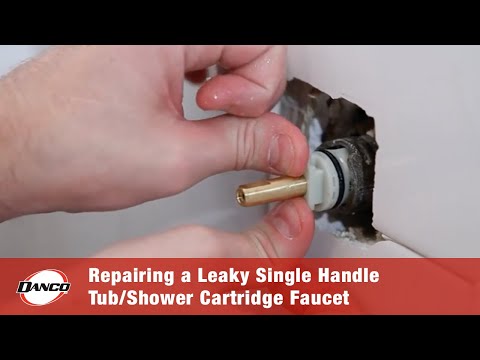
- If there’s a threaded retaining clip holding the cartridge in place, use needle-nose pliers to remove it, then pull the cartridge straight up.
- Remove the spout and cut off the old O-rings using a utility knife. Coat the new O-rings with nontoxic, heat-proof plumber’s grease.
- To replace the entire cartridge, match the length of the old cartridge with the length of the replacement. Also match the stem end where the handle attaches.
Compression Faucet
How To Fix a Leaky Compression Faucet:
- Most leaky compression faucets need new seat washers.
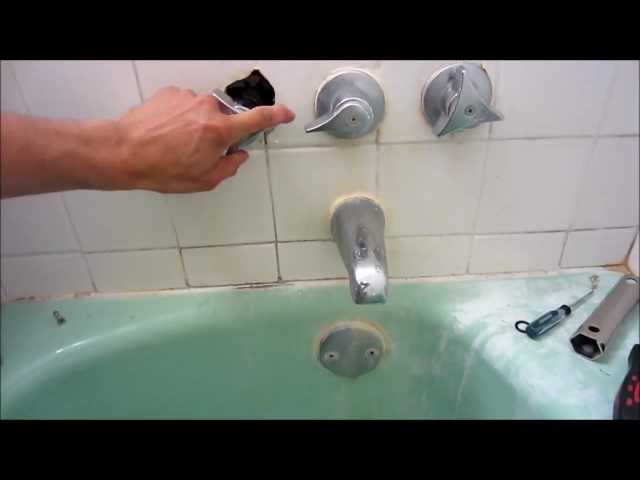
 Use a small slotted screwdriver or utility knife to pry off the decorative cap on the handle, exposing the attachment screws.
 - Use a screwdriver to remove the handle screw, then pull off the handle.
- Use a crescent wrench to unscrew the packing nut and an adjustable wrench to loosen the stem from the faucet body.
- Unscrew the rubber washer from the bottom end of the stem to remove and replace the seat washer.
- Coat the washers with nontoxic, heat-proof plumber’s grease.
- Pop the stem out of the packing nut and replace the O-ring, the culprit for leaky handles. O-rings range in size from 3/8 to 5/8 inch, so it’s crucial to match the exact size of your faucet. Coat the new O-ring with plumber’s grease.
- The washer sits in a round, recessed disk called a retainer. If the original retainer is damaged, grind it flush and install a replacement retainer ring. If your faucet continues to leak, the seat may be pitted.
- Remove the stem and sand the top end of the seat with emery cloth to smooth it out.
- If you can’t repair the original seat, replace it with a new one.
Ceramic-disk Faucet
How To Fix a Leaky Ceramic Disk Faucet:
- Push the handle back to access the set screw. Remove the screw and lift off the handle.
- Remove the escutcheon cap, unscrew the disk cylinder mounting screws, and lift out the cylinder.
- With a blunt screwdriver, lift out the neoprene seals from the cylinder. If the seals are damaged, replace them.
- Use distilled white vinegar and a soft scouring pad to clean the cylinder openings, then rinse them thoroughly.
- Replace the seals and reassemble the faucet.
- Move the handle to the “on” position and turn the water back on slowly—the force of the returning water can fracture the ceramic disk.
- If you’re replacing the entire cylinder (usually not necessary), set it in place and secure it with the new mounting screws.
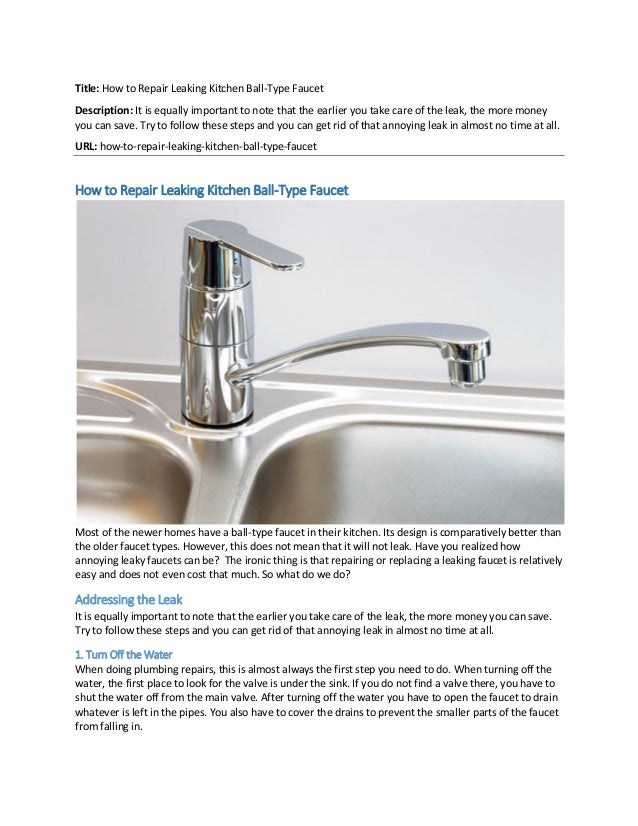
Ball-type Faucet
How to Fix a Leaky Faucet Ball-Type:
This type of faucet contains a lot of parts, which often makes it difficult to find the cause of the leak.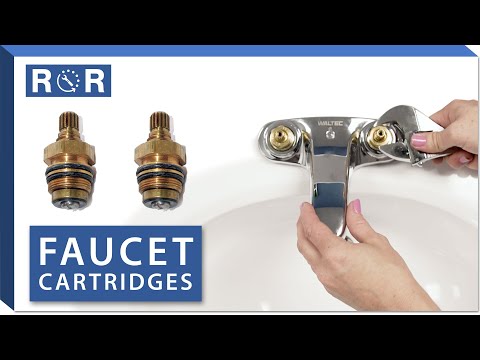 You can avoid the aggravation by buying a replacement kit and putting in all new parts.
- Use a pocketknife to pry off the small index cover from the side of the faucet and reveal the hex-head screw.
- Loosen the screw with a hex-key wrench and pull off the faucet handle.
- Use adjustable pliers to remove the cap and collar.
- Using the special tool included in the faucet-repair kit, loosen the faucet cam and lift it out, along with the cam washer and the rotating ball.
- Reach into the faucet body with needle-nose pliers and remove the rubber seats and springs.
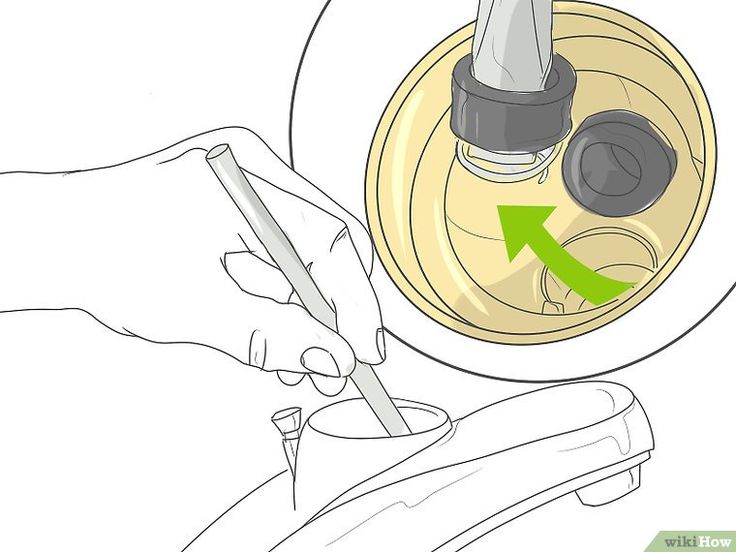
- Slip a new spring and rubber seat onto the tip of a pencil and lower it down into the faucet.
- Repeat to install the second seat and spring.
- Reinstall the stainless-steel ball, making sure to align its keyway with the corresponding tab inside the faucet body.
- On top of the stainless-steel ball, install a new rubber gasket and cam cap.
- Align the keyway on the cap with the corresponding slot.
- Hand-tighten the top cap assembly back onto the faucet.
- Use a spanner wrench to tighten the nut to provide the proper tension against the stainless-steel ball.
Looking for help with repairs around your home? A home warranty may help. Check out these in-depth guides from the This Old House Reviews Team:
- Best home warranty companies
- American Home Shield reviews
- AFC Home Club reviews
- Select Home Warranty reviews
- Choice Home Warranty reviews
How to Fix a Leaky Faucet — Step-by-Step Guides for Both Washerless and Compression Faucets
Photo: istockphoto.com
A faucet—whether it’s in the kitchen, bathroom, or behind the bar—acts like a mini dam, holding back a pressurized stream of water until you lift or twist the handle.
According to the National Association of Home Builders, it’s safe to expect the average faucet to last about 15 years.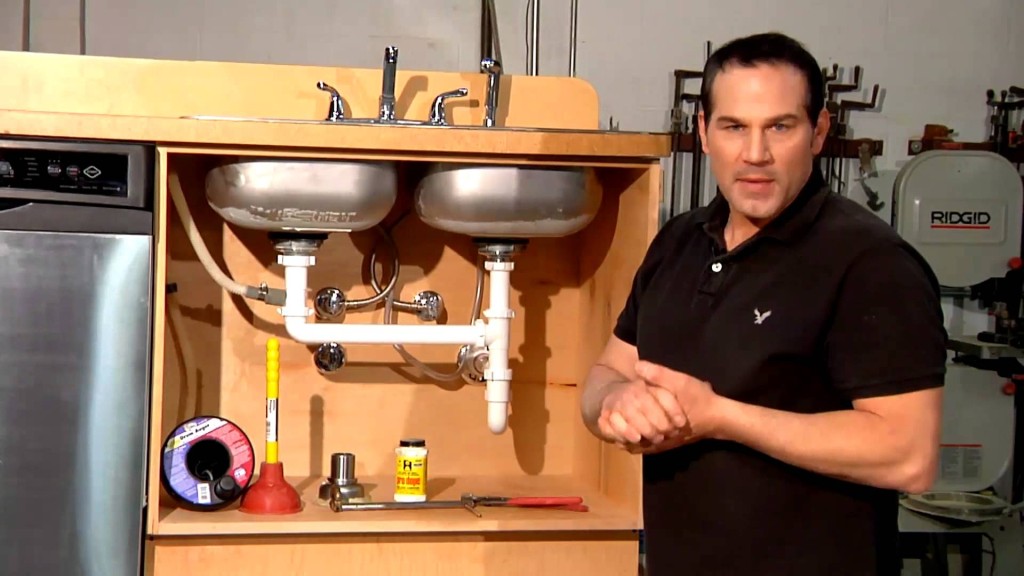 Even before then, yours may start to leak, either from the nozzle or at the base of the fixture, so it’s important to know how to fix a leaky faucet.
As soon as you notice that a faucet is dripping, try to make the repair immediately. Stopping the dripping as soon as you can saves money and resources. After all, the leaky faucet calculator provided by the U.S. Geological Survey reminds us that one drip every minute wastes 34 gallons per year.
Before You BeginThe first step to repairing a leaky faucet involves preparing the faucet and sink. Start by turning off the water to the sink. Usually, the valves are below the sink basin, close to the wall. There should be one for hot and one for cold. Turn both clockwise.
Next, open the faucet to release any water left behind in the line, and then close the drain. If you don’t have a good drain cover, simply place a kitchen towel over the drain to prevent small parts from falling in. (Click here for plumbing tips everyone needs to know.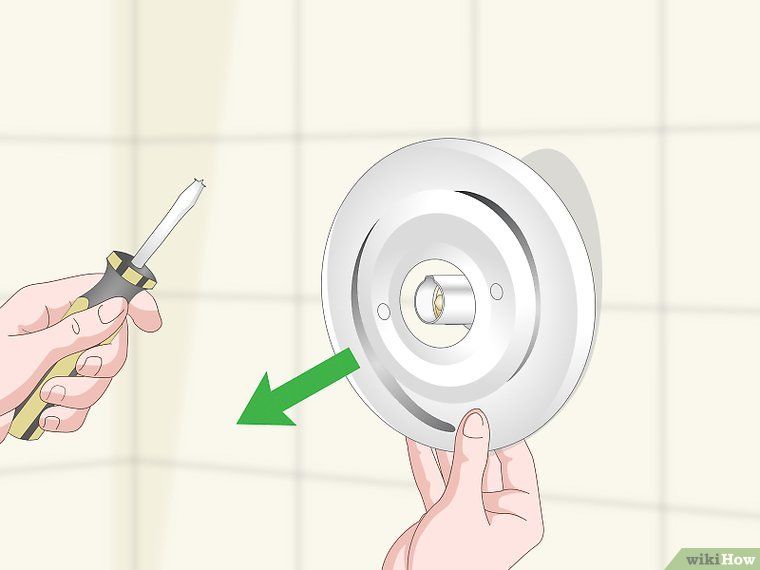 )
)
Repairing a leaky faucet is a relatively straightforward plumbing project, but there are different ways to fix different kinds of faucets. Before you begin the repair, determine the type of faucet.
There are two basic categories: those with washers and those without. Faucets with washers are known as compression faucets. Faucets without washers are known as washerless faucets, and they include cartridge, ceramic-disk, and ball-type faucets. Find the section below that describes how to fix your type of faucet.
Advertisement
How to Fix a Leaky Compression FaucetPhoto: acehardware.com
A compression faucet holds back water in the plumbing system with a small rubber washer that tightens in the valve seat. It’s similar to how a bottle cap screws onto the top of a plastic soda container.
SUPPLIES
- Towel
- Flathead screwdriver
- Hex wrench or hex screwdriver
- Penetrating oil
- Toothless wrench
- O-ring
- Seat washer
STEP 1: Remove the cap from each handle.
In order to fix a leaky faucet, you will need to gain access to the internal components of the faucet, so the first step is to remove the decorative cap from the top of each handle.
Make sure the drain is closed, then look for a small circle on the top of the handle that may have an “H” for hot or a “C” for cold. Use a flathead screwdriver to gently lift up the decorative cap, exposing the screwhead underneath.
As you proceed, it’s a good idea to place the parts in order of removal so that they are already organized in the correct order when you need to reinstall the parts.
STEP 2: Unscrew and remove the handles.
Check the type of screw that is currently securing the handles and use a compatible screwdriver to loosen the screws. These screws are usually standard flathead screws, but sometimes the faucet handle is secure with a hex set screw, so you will need to have a hex wrench or hex screwdriver ready if this is the case.
With these screws removed, the handles should lift off easily.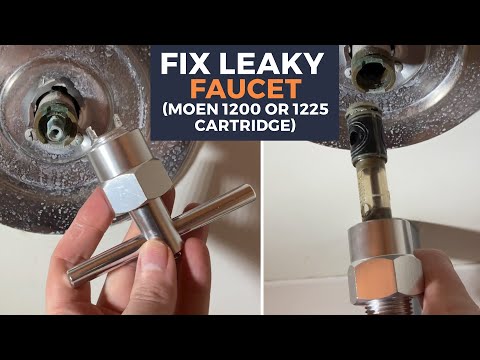 However, if the screws or the handles seem to be seized, try using penetrating oil to help loosen the fittings.
STEP 3: Take off the stem nut.
With the handles removed, you should see the stem and the stem nut, which holds the stem in place. Use a wrench to carefully loosen and remove the stem nut.
Advertisement
Keep in mind that plumbing parts can be damaged by a wrench with overly aggressive teeth, so consider using a toothless wrench to avoid doing damage to the parts of the faucet.
STEP 4: Pull out the stem and inspect the O-ring.
The stem should now be free so that you can simply pull it out, exposing the O-ring and seat washer. The O-ring is responsible for preventing leaks from the actual handles of the faucet.
If it appears worn or if you have had issues with the handles leaking, then you may need to replace the O-ring while the faucet is disassembled. These parts are relatively inexpensive, so you don’t need to worry about dipping into your home emergency fund.
STEP 5: Remove and replace the seat washer.
The washer at the bottom of the stem is called a seat washer. This is the part of the faucet that gets compressed by the handles to close the flow of water through the faucet. It is the part that is typically responsible for a leaking faucet. Check to see if the washer is being held in place by a screw before attempting to remove it. If it has a screw, then remove it first before taking out the seat washer.
Once the seat washer has been taken out of the faucet, replace it with a new seat washer. If you aren’t sure about the exact O-ring or seat washer replacement, then take the old, worn parts to a local hardware store. It’s important that you get a perfect replacement in order to avoid future problems after assembly.
STEP 6: Reassemble the faucet.
The new seat washer should now be in place and the rest of the parts should be close at hand in the order that they were removed, so all that’s left is to carefully reassemble the faucet. The order of reassembly for each handle should be seat washer, O-ring, stem, stem nut, handle, handle screw, and decorative cap.
Advertisement
STEP 7: Test the faucet.
Never conclude a project without testing the finished work, especially when it comes to plumbing. The slightest error or misalignment can cause a big problem, so now that the faucet is reassembled, go ahead and open the cold and hot water valves located under the sink. The water should quickly flow through the faucet, expelling a small amount of air.
When all of the air has been pushed out of the system, turn off the faucet and check the handles and the tap for leaks. A leak indicates that a part of the faucet was not assembled correctly or that a part is worn out and needs to be replaced.
How to Fix a Leaky Washerless FaucetPhoto: acehardware.com
Unlike a compression faucet that has a washer to control the flow of water, a washerless faucet relies on a disc, ball, or cartridge for the job.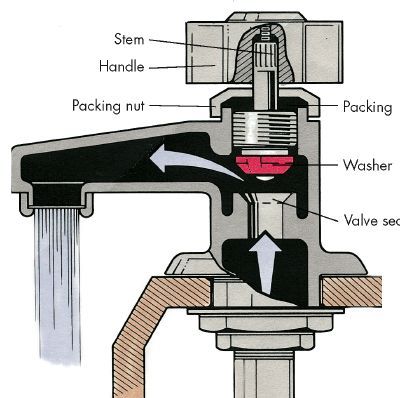 Less prone to leaks, this type of faucet usually has one handle rather than dual knobs.
SUPPLIES
To fix all types of washerless faucets, you’ll need the following:
- Towel
- Flathead screwdriver
- Hex wrench or hex screwdriver
- Penetrating oil
- Needle-nose pliers
If you’re repairing a cartridge faucet, you’ll also need:
- Cartridge (choose the right part for your faucet model)
- O-rings
If you’re repairing a ball faucet, you’ll also need:
- Channel locks or a toothless wrench
- Springs and valve seat set (choose the set for your faucet model)
- Cam washer
If you’re repairing a ceramic-disk faucet, you’ll also need:
- Neoprene seals
STEP 1: Remove the cap from the handle.
Just as you do when fixing a compression faucet, start by removing any decorative caps that are covering the handle screw. Look for a circular plastic or metal cap that may have a hot or cold pattern to denote the direction to turn the handle for hot or cold water.
Advertisement
Use a flathead screwdriver to gently lift up the decorative cap and expose the screw underneath. Place the parts in order as they are removed, so they are already organized when it comes time to reassemble the faucet.
STEP 2: Unscrew and remove the handle.
Verify that you have the correct screwdriver to loosen and remove the handle screw, then proceed to unscrew the handle. After taking off this screw, the handle should lift off easily, but if there are any issues with the screw becoming seized, use penetrating oil to break up rust or sediment in the threads.
STEP 3: Disassemble and remove the internal components according to the faucet type.
Depending on whether the faucet is a cartridge, ball, or ceramic-disk type, the parts that are exposed after removing the handle will be slightly different.
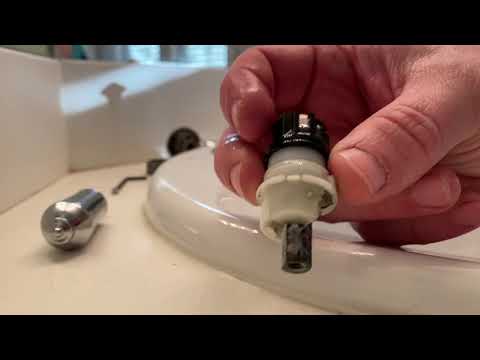
- Cartridge: Take out the small, circular threaded piece (called a retaining clip) to get access to the cartridge.
 Needle nose pliers may help to carefully take out this piece without damaging it.
 - Ball: Use channel locks or a toothless wrench to take off the cap and collar of the faucet, then remove the faucet cam, cam washer, and ball to reveal the inlet seal and springs below.
- Ceramic-disk: Remove the escutcheon cap or bonnet, which is a piece of rounded metal that covers the disk cylinder.
Photo: istockphoto.com
STEP 4: Inspect the parts for wear and damage.
The next step in this process depends on whether the type of faucet is a cartridge, ball, or ceramic-disk.
- Cartridge: Lift the cartridge out of the assembly and locate the O-rings. Inspect the O-rings and the cartridge. Typically, cutting off the existing O-rings and replacing them will fix the leak, but consider replacing the entire cartridge if you aren’t confident.
- Ball: Use needle-nose pliers to take out the inlet seal and springs, then inspect each component to determine if it needs to be replaced.
- Ceramic-disk: Unscrew and remove the disk cylinder, then pry out the neoprene seals that are on the underside of the cylinder. Inspect the seals to determine if replacing is necessary or if cleaning away the accumulated debris would return them to an almost-new state.
Photo: istockphoto.com
STEP 5: Replace any worn or damaged parts.
Cartridge, ball, or ceramic-disk faucets will require different parts to fix the leak.
- Cartridge: Replace the O-rings on the cartridge or replace the cartridge entirely. If you are just replacing the O-rings, it’s a good idea to coat them in plumber’s grease before installing them.
- Ball: Install new springs, valve seats, and cam washers. These parts can be bought separately or purchased in a premade kit from a local hardware store. Just make sure that any new parts are compatible with the existing faucet.
- Ceramic-disk: Either reinstall cleaned neoprene seals or install new neoprene seals in the base of the ceramic-disk cylinder.
 It’s a good idea to bring the seal or even the entire cylinder to a local store to make sure you get the exact replacement.
STEP 6: Reassemble the faucet.
The new parts should now be in place and the rest of the faucet assembly should be in the order that they were removed, so all that’s left is to carefully reassemble the faucet. The order of reassembly for each faucet will depend on whether it is a cartridge, ball, or ceramic-disk faucet.
Advertisement
- Cartridge: The order of reassembly for a cartridge faucet should be cartridge, retaining clip, handle, handle screw, and decorative cap.
- Ball: The order of reassembly for a ball faucet should be springs, inlet seal, ball, cam washer, faucet cam, collar, cap, handle, handle screw, and decorative cap.
- Ceramic-disk: The order of reassembly for a ceramic-disk faucet should be neoprene seals, ceramic-disk cylinder, cylinder mounting screws, escutcheon cap, handle, handle screw, and decorative cap.

STEP 7: Test the faucet.
Always make sure to test the faucet after a repair. Go ahead and turn the faucet to the open position, then turn on the cold and hot water valves located under the sink. The water should quickly flow through the faucet, expelling a small amount of air.
When all of the air has been pushed out of the system, turn off the faucet and check the handle and the tap for leaks. A leak indicates that a part of the faucet was not assembled correctly or that a part is worn out and needs to be replaced.
Photo: istockphoto.com
FAQs About How to Fix a Leaking FaucetQ. Is it easy to fix a leaky faucet?
Like most DIY projects around the home, fixing a leaking faucet isn’t difficult, it just takes time and patience to ensure that each step in the process is properly completed and that all the parts are reassembled in the correct order.
Q. What causes a faucet to drip?
A leaky shower head, bathtub faucet, or sink faucet is typically caused by defective or worn parts inside the assembly, including O-rings, washers, and gaskets.:no_upscale()/cdn.vox-cdn.com/uploads/chorus_asset/file/19494526/cartridge_faucet_00_x.jpg) Making a quick fix by replacing these parts is usually easier and more affordable, instead of replacing kitchen faucets entirely.
Making a quick fix by replacing these parts is usually easier and more affordable, instead of replacing kitchen faucets entirely.
Q. Is a dripping faucet dangerous?
Having a dripping faucet in the home won’t generally cause the sink to overflow unless the drain is plugged, but the constant moisture in the air and inside the sink can cause mold to develop. Mold growth is dangerous, especially to young children who can actually develop asthma from prolonged exposure to mold.
Advertisement
Q. How do you stop a dripping faucet temporarily?
You can attempt to tighten the handles or find a ‘sweet spot’ that may stop the dripping, but this is in no way a foolproof or permanent method. It’s better to use a small piece of hose that can fit over the spout of the faucet. Secure the hose to the faucet with a hose clamp, then close the other end of the hose with an additional hose clamp. This will trap the dripping water in the small piece of hose until you are ready to fix the leaky faucet.
Q. Can you fix a leaky faucet without turning off the water?
No, the water needs to be off. Either turn the water off to the entire home or just to the faucet you are repairing. Otherwise, you will be attempting to work with small parts that are easy to lose while water is spraying up and out of the faucet into the bathroom. This uncontrollable spray causes flooding and water damage, not to mention the likelihood of mold growth in the following days.
So, no, do not attempt to fix a leaky faucet without turning off the water unless you are replacing outdoor faucets and you don’t mind the full-pressure spray that will slowly soak the ground.
Photo: istockphoto.com
Final Thoughts
Leaky faucets are annoying, costly, and can lead to mold growth and health problems, so it’s important to repair or replace a dripping faucet as soon as possible. Making the repair is typically as easy as taking apart and reassembling a puzzle, as long as you know what you’re doing.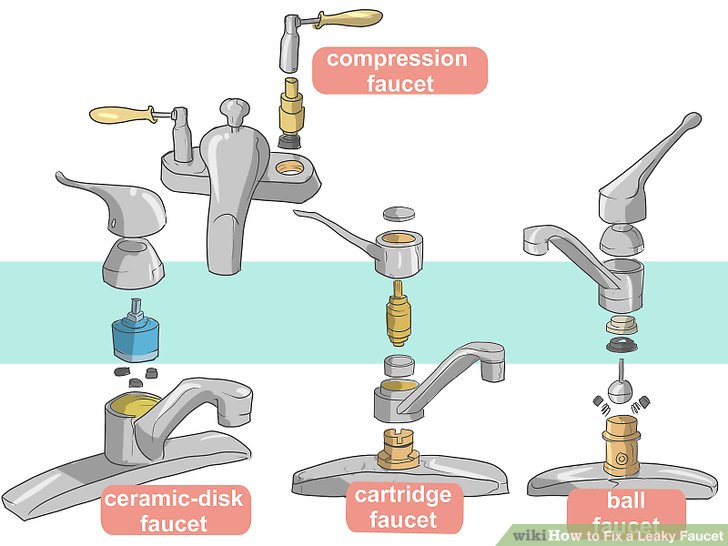 Make sure to lay out the parts in the order in which they were removed, so that they can be returned to their original position without an issue.
Advertisement
Also, keep in mind that while most leaky faucet problems can be fixed by replacing rubber or neoprene seals, washers, and O-rings, sometimes the issue isn’t as simple. Don’t hesitate to call a trained professional if you aren’t quite sure why the problem hasn’t been resolved.
Some jobs are better left to the pros
Get free, no-commitment estimates from licensed plumbers near you.
Find Pros Now
+How to fix a leaky faucet: useful tips
Tired of listening to a dripping faucet? The Edilnet blog explains how to fix a leaky faucet!
A leaking faucet is a nuisance that can occur in any bathroom. Whether it's a shower, bidet, or sink faucet, losing a drop of water on a regular basis can result in significant wastage.
Also, when a faucet fails to close properly, the continuous flow of water can damage the faucet's internal parts or seal.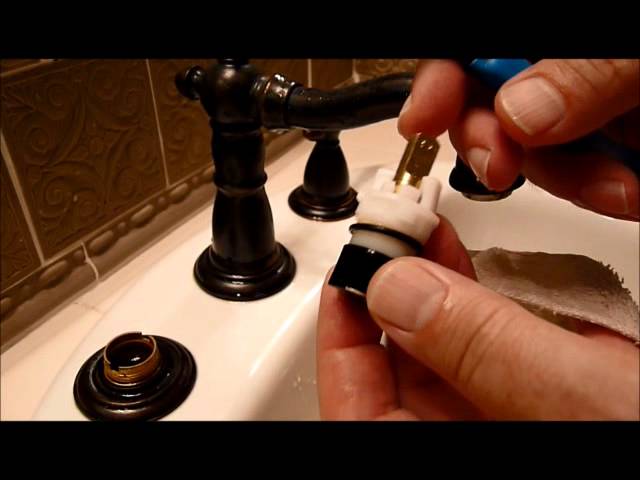 Therefore, having noticed a leak, you must make a decision: either repair the faucet or change it. nine0005
How to remove the faucet?
If it's one of those wall-mounted faucets with handles, it's easy. All you have to do is first unscrew the knobs, then get to the screw that holds the faucet closed. After unscrewing the screw, it will be very easy to get to the core of the faucet and unscrew the union nut between the faucet and the pipe. To unscrew the latter, you need a parrot wrench.
In the case of sink or bidet taps, on the other hand, it is important to drain the remaining water inside the pipe. It is recommended to empty the siphon at the bottom of the sink or bidet, making sure to always close the main water switch before each operation. nine0005
Once the water has been eliminated, the tap can be dismantled. Having removed the movable part, which is usually blocked, it is necessary to unscrew the nut and remove the screw connecting the valve to the connecting elements.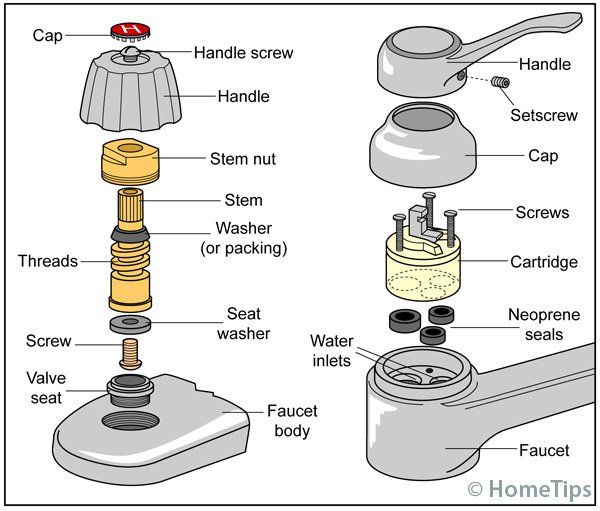 In short, it doesn't take a degree to fix a leaky faucet!
How do I replace the seals?
Replacing gaskets is not a difficult operation. Also in this case, be sure to close the general water tap. When disassembling the faucet, you will see a rubber gasket held in place by a central screw. Unscrewing the nut holding the faucet together reveals a gasket that needs to be replaced: if the gasket starts to break or fall apart when unscrewed, it's obviously time to replace it. nine0005
When replacing a faucet, which model should I buy?
It's hard to choose between so many models available and you need to weigh your needs well. Here are some of the best faucet models (on offer) most viewed and bought online
M Mehoom Bathroom Waterfall Faucet, Basin Faucet, Ceramic Valve, Hot and Cold Water, Chrome Finish, Modern Style
GAVAER Bathroom washbasin faucet, high quality glass washbasin faucet, modern style, chrome finish, prevent corrosion and rust.
Inchant Plumbing, Single Handle Wall Mount Installations Diffusion Waterfall Bathroom Vanity Sink Mixer Tap Polished Chrome Brass Sink Mixer Tap
ZREE Waterfall Bathroom Basin Faucet, Single Handle Basin Faucet, Ceramic, Valve, Hot and Cold Water Adjustment modern style, stainless steel faucet, chrome plated brass
Lonheo Tall kitchen faucet with hand shower in black stainless steel, 2 modes, 360° swivel, modern kitchen sink mixer 8″, waterfall basin faucet with ceramic valve
Kelelife Waterfall basin faucet in the bathroom, wall-mounted bathroom faucet, chrome-plated brass (wall mounting)
Waterfall Washbasin Faucet Brass Bathroom Faucet Large Water Hole Washbasin Faucet Single Handle Hot Cold Water Washbasin Faucet
ZOOYUE Waterfall Bathroom Faucet Sink Faucet with PEX Pipe , contemporary style brass single handle bathroom faucets, hot and cold water adjustment, lifetime warranty.
Modern kitchen faucet, elegant single lever basin mixer, 360° kitchen faucet, hot cold water, kitchen accessory with fittings
Here we put some technical sheets and descriptions of crane models that we can find for sale and which have received positive feedback from our readers. We insert them in an attempt to summarize everything in a clear and understandable way and in the hope that they will be useful for a more informed final choice.
Fans of elegant and minimalist faucets can opt for the Auram Single Lever Glass Basin Mixer. This faucet is very refined and ideal for rooms furnished in a modern style. The advantage of this faucet is that it cascades the water, thus ensuring a good flow of water at all times. nine0005
Faucet The elegant single-lever faucet from Auralum, on the other hand, is one of the best kitchen faucets to match the décor that highlights the chrome details. The square section of the shaft is combined with a very thin rectangular spout that allows water to flow out elegantly. The single-lever lever also allows for the correct mixing of cold and hot water.
Among the bathroom faucets, a solution that customers really like is the solution offered by Auralum Auralum with waterfall faucet. Very clear lines made of chrome-plated brass allow a spout with a rectangular cross section, from which the water exits at the bottom. This bathroom faucet is ideal for very spacious and deep sinks. Similar to it is also an elegant and modern model with one appliance and lever mixer. Both of these bathroom faucets are easy to clean thanks to the water and stain resistant chrome finish. nine0005
Outad, on the other hand, is the perfect shower or bath faucet for those who want to see the flow of water. Its spout is open at the top, which creates a very elegant sliding effect. Massive brass with a chrome finish is combined with a slow flow of water, almost a trickle. Ideal for small sinks or relaxing baths.
Auralum single-lever faucet separated from the basin body, ideal for spaces such as the kitchen. A tall straight square shaft stands alone and allows water to pass directly into the sink, from which it is clearly separated. It is suitable for rustic kitchens as well as modern kitchens, not least thanks to the powerful water jet. nine0005
Fans of designer sanitary ware should consider installing a faucet like the Gimili chrome-plated curved faucet, which is ideal for both the kitchen sink and washbasin. Its "C" shape accompanies the water as it exits and matches perfectly with the dark stone washbasins used, for example, in representative bathrooms.
Among the latest generation of faucets for lovers of home automation is the Auralum RGB Led glass faucet, which can be used both in the bathroom and in the kitchen. The top of the spout is open and allows you to see the water. The spout itself is made of tempered glass, inside of which there are LED lights in three colors. When water passes through it, it glows, creating a sensory environment. nine0005
If you still want to change your bathroom faucet in a minimalist and unusual style, you can choose the Auralum single-lever basin mixer.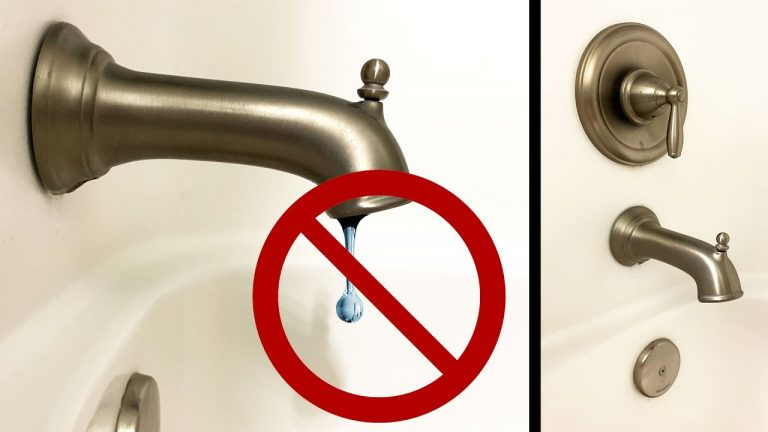 The spout is also made of glass and is open at the top, but has a semicircular cross section. It looks like a small slide, on which water can flow smoothly until it falls into the sink. The stem and faucet are square, which contrasts with the curve of the spout.
The bidet also needs its own special mixer, eg Kinse Kinse with single lever mixer. The square section of the stem and lever contrasts with the round section of the spout. The latter is suspended and allows you to use the bidet in any way, without the need to fill it. nine0005
Without departing from the bidet, you can choose the Start Eco Grohe faucet, which has a very classic and rounded shape. Despite its modern chrome finish, this faucet blends in with any decor. Grohe also offers the Eurosmart Eurosmart with single-lever faucet and Ecojoy technology. The latter saves water and avoids unnecessary waste.
If you want to replace your bidet faucet, you can think of a solution with faucet and waste, like Paffoni's Blu model.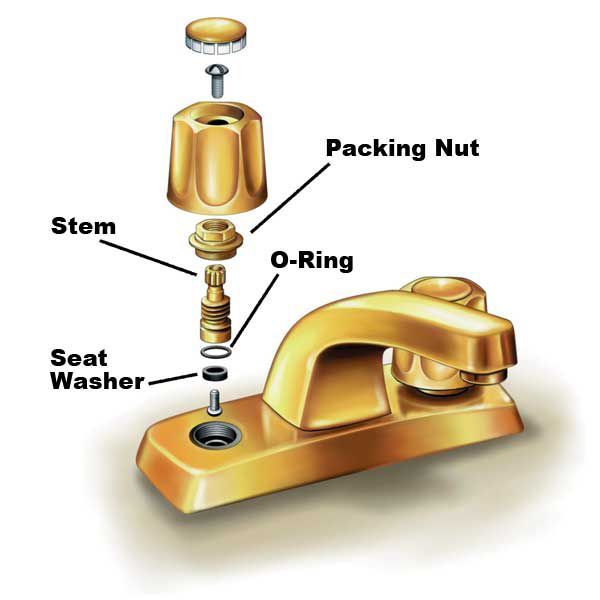 The square section of the leg leaves room for a movable spout that can be directed to a position that suits you. The faucet of the Enter series is very similar, useful for its water-saving spout. nine0005
The crane in the bathroom flows: how to fix
Content of Article
- 1 The main causes of tap leaks
- 2 Repair of mixers with one lever
- 2.1 Messages
901 3 Two two -wil 3.1 Replacing the half-turn faucet bushing
- 3.2 Repairing the valve bushing
- 4.1 Malfunction or leakage of the switch from the gooseneck to the shower
- 4.1.1 Replacement of the pendulum switch
- 4.1.2 Repair of the switch-button
- water pipe
- 4.4.1 Leakage at the junction of inlet pipes
- 4.4.2 Leakage of flexible inlet hoses
- 4.5 If the water pressure drops
Over time, any faucet, even a well-known and reliable brand, begins to leak.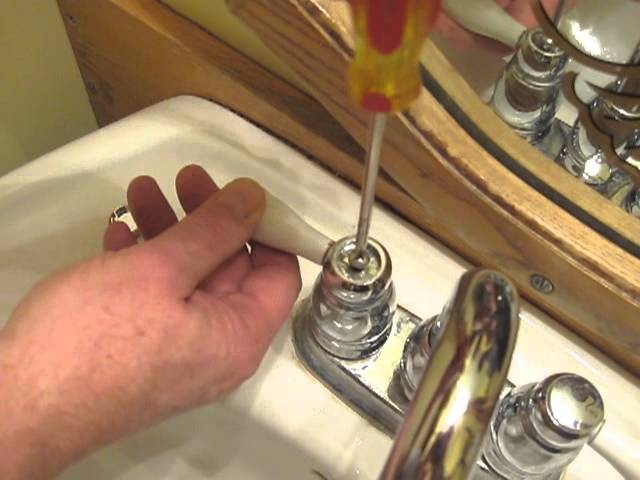 The reason for this is the mechanical wear of gaskets and moving parts. The working life of shut-off valves depends on the quality of the product, as well as the composition and degree of water purification.
The main causes of faucet leaks
Breakdowns that cause the mixer to drip are different, but the main ones are as follows:
- Wear of the rubbing parts of the mixer: gaskets or stuffing box.
- Wear of the locking element: faucet box or cartridge.
The method and technology of repair depends not only on the place where the faucet is leaking, but also on its type. According to the type of construction, cranes are two-valve and single-lever. The latter are also subdivided into cartridge or ball models.
Single Lever Faucet Repair
These models have one control knob, by turning which you can easily adjust the strength and temperature of the water flow. nine0005
Single lever cartridge
Disc cartridge faucets are the most common.
The cartridge is made in the form of a barrel, with rotary ceramic plates blocking the flow of water. The main breakdowns of this type of device are as follows:
- Leak from under the control rod.
- The comfort water temperature cannot be set.
- The handle has become very tight or completely wedged.
- Incomplete opening / closing of water.
Plastic cartridges do not have replaceable elements, therefore, in the case of the problems described, the entire consumable element is replaced. This is done in the following order:
- The plug is removed from the tap lever, which provides moisture protection for the handle lock.
The colored plug is removed to unscrew the lever.
- Use a thin flathead screwdriver to loosen this screw 1.5 to 2 turns and then remove the handle.
The handle to the cartridge stem is fixed with a screw, which is enough to loosen a little. nine0005
- Then unscrew the domed cover covering the fixing nut.
- The wrench unscrews the nut holding the cartridge in the faucet body.
- The broken cartridge is removed and a new part is installed.
- The remaining parts are assembled in reverse order.
Step-by-step algorithm for replacing the cartridge.Before buying a new cartridge, unscrew the old one and take it to the store as a sample, as cartridges differ in diameter and design from different manufacturers. nine0005
Please note! At the bottom of the cartridge are protrusions that must fit into the grooves located in the faucet body. If the protrusions do not align with the grooves, water will run from under the cartridge, and if you try to tighten the fixing nut harder, the barrel may crack.
Repair of ball mixers
If a ball mixer is installed and leaking in the bathroom, it can be repaired.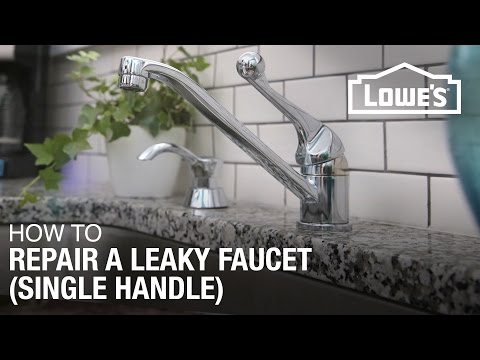 The function of the locking mechanism is performed by a small ball made of stainless alloys. The locking ball, when the control lever is turned, moves in the mixer body and opens or closes the holes for supplying cold and hot water. Corrosion-resistant metal springs are used to hold the check ball in the neutral position. nine0005
Ball valves are very reliable and leak resistant. To disassemble the ball mixer in the event of a leak, proceed as follows:
- The lever is removed. To do this, a decorative plug is pryed off and the screw located under it is loosened.
- Unscrew the tap cap.
- There is a nut under the cover, which also needs to be unscrewed.
- Once the nut is removed, the cam washer, the plastic seal that holds the check ball, is carefully removed from the body. If the washer is worn out, it must be replaced. nine0104
- The next step is to remove the check ball from the body. It is cleaned of rust and plaque with a soft cloth and inspected to determine the degree of wear.
 If the production of the ball is insignificant, the ball is polished with a soft rag using cleaning agents in the form of an aerosol or paste (abrasives are not allowed), after which the valve is assembled. If the check ball is damaged, deep pitted or gouged, it should be replaced.
Please note! When assembling the ball valve, it is necessary to correctly install the springs in the special recesses intended for this. nine0005
Two-valve mixers
In mixers with two valves, the locking mechanism is called a faucet box, which is either half-turn or valve type. Consider methods for repairing both types of cranes.
Replacing the half-turn faucet bushing
Breakage of the half-turn bushings is the main reason why the faucet drips in the bathroom. These mechanisms are similar in design to single-lever cartridges: inside they have tightly fitted ceramic plates that act as valves and shut off the water. When these plates are worn out or damaged, the faucet stops holding, it may start to drip, and then water will flow. Most often, half-turn mechanisms change completely. Consider the algorithm of actions:
- The decorative cap is removed from the valve. In some models, it can be pry off with a thin screwdriver, and in some it can be threaded and unscrewed.
- There is a fixing screw under the plug - this must be completely unscrewed. Care must be taken here, as these screws often turn sour or rusty, so you can easily lick the screw head.
- When the valve handle is removed, use a suitable wrench to unscrew the faucet box counterclockwise. nine0104
- After that, a new bushing is screwed in and the handle is installed.
Tip! When assembling the valve, the axle box should not be tightened too much, as it will be difficult to unscrew it the next time it is replaced.
Valve box repair
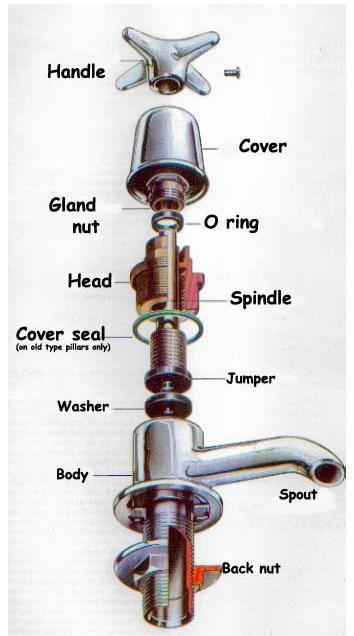
Valve or wing faucet box regulates the water supply by moving a rising stem with a rubber gasket at the end using a worm gear. If this gasket is worn out, the faucet stops holding water and starts to flow when closed. The advantage of the valve box is its maintainability. The gasket is replaced in the following order:
- The valve handle is removed.
- The crane box is unscrewed with a key.
- The gasket is removed from the underside of the bushing and a new consumable is installed.
If a leak occurs between the clamp nut and the valve stem, the worn gland must be replaced. With the axle box removed, the stem of the valve mechanism is unscrewed and the stuffing box is replaced - a thin rubber band (sometimes double) inserted into the groove of the stem. If there is no new gland, then a sealing tape can be wound around the rod, which will act as a gland and prevent leakage when the valve is opened. nine0005 Gasket replacement scheme.
Other leaks, regardless of design
After we have learned how to replace the valves of various types of faucets, let's look at other reasons why a bathroom faucet leaks, regardless of its design.
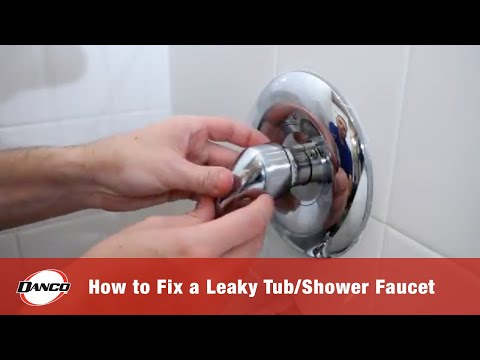
Faulty or leaking gander to shower switch
Bathroom faucets have a switch that allows you to redirect the flow of water from the gander to the flexible shower hose and vice versa. The most common failure of such switches is that water flows from both the gander and the shower at the same time. The two most common types of switches are:
- Flag or pendulum type. Are established on valve mixers.
Mixer with flag type diverter.
- Push button or pull type. Most often they are installed in the body of cartridge taps, but they can also be mounted on valve devices.
Push button switch.
Consider how to repair these types of switches.
Pendulum switch replacement
The rotary switch is a brass spool or cartridge that is replaced with a new one in the same way as the bushing:
- The decorative plug on the lever is pulled out to expose the screw.
- The screw is removed, the lever is removed.
- The switch is unscrewed with a wrench of suitable diameter.
- A new spool is screwed in, the lever is put on and fixed.
Button Switch Repair
In this design, the most vulnerable element is the gasket, which is subject to wear, deformation and hardening, due to which it ceases to hold water.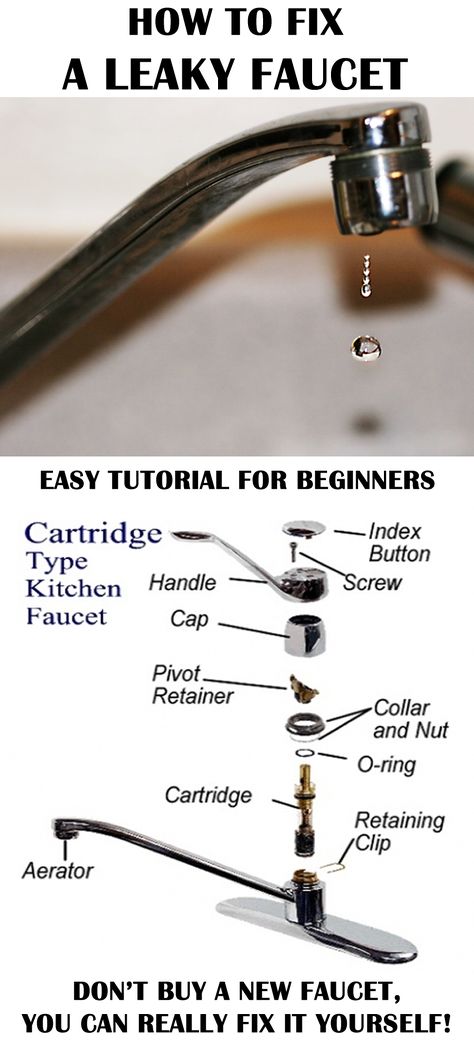 If the button has ceased to redirect the flow of water, it is necessary to replace the gasket, which is done in the following sequence:
- The button is unscrewed with an adjustable wrench. It must be carefully removed from the case so as not to damage other structural elements.
- Rubber seals are placed on the metal stem - they must be replaced with new ones.
- After changing the gaskets, the button is inserted into the housing and screwed on.
Please note! Another failure of the push-button switch is a jamming in the raised (upper) state, as a result of which water flows only through the shower. Such a malfunction means that the spring that returns the stem to its original position has become unusable. This part is not replaceable, so the switch changes completely. nine0005
Leak at the connection of the gooseneck to the mixer body
One of the most common leaks is the connection between the gooseneck and the mixer. Such a connection is sealed with a ring of dense rubber, which is put on the gander's body. When turning the gander, the gasket gradually wears out and a leak forms. To fix this problem, you need to replace the gooseneck O-ring. This is done in this order:
Tip! In order for the goose with a new O-ring to easily enter the mixer body, the ring must be lightly lubricated with silicone grease or sealant, which will ensure easy sliding. nine0005
Leak at the connection of the shower hose and the shower head
Even during the operation of the faucet, leaks often occur at the points of connection of the flexible hose to the faucet and the shower head. In these places, gaskets are installed, which eventually deform and sink. In the event of a leak, disconnect the hose and replace the gaskets.
The hose is connected to the faucet with a hexagon wrench nut. You need to unscrew it and change the gasket.
A wrench is required to replace the gasket where the shower hose connects to the faucet. nine0002 The connection of the hose and the shower head is made using a conical relief nut, which can be unscrewed without a tool and even a girl can do it. There is a gasket on the pressure hose, which must be replaced with a new one.
Please note! The hex and flare nuts for connecting the shower hose are very thin, so do not use much force when tightening them, as they may burst.
Leaks at tap connection points
There are situations when the faucet begins to leak at the connection points to the water supply. The procedure for eliminating leaks depends on the installation location and the method of connecting the mixer.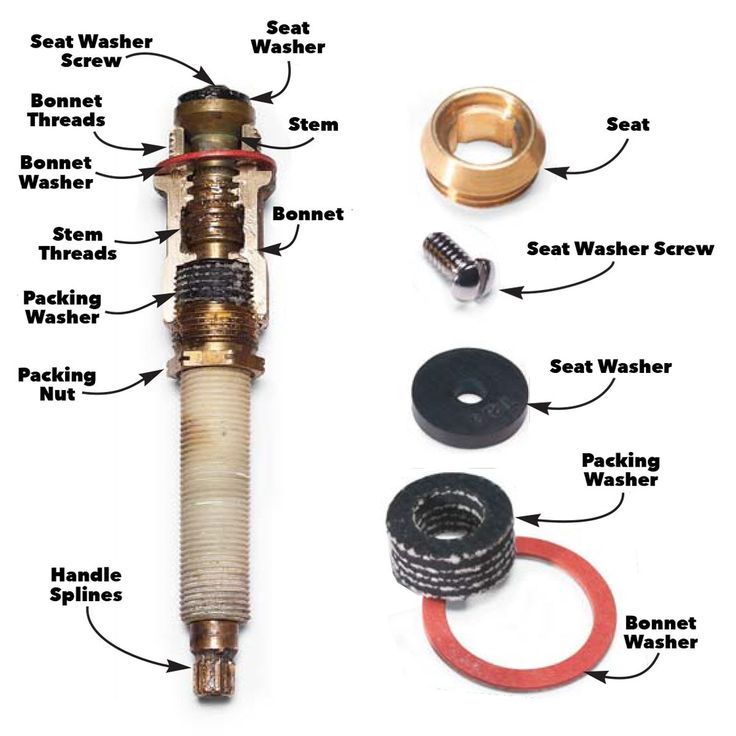
Leakage at the junction of the inlet pipes
The cause of the leak at the connection point of the wall-mounted mixer at the connection points to the pipes coming out of the wall is a sinking or distortion of the gasket. To eliminate this malfunction, unscrew the fixing nuts, disconnect the mixer and replace the gaskets with new ones. nine0005
Leakage of inlet flexible hoses
Faucets installed on the side of the bathtub or sink are connected to the water supply using flexible hoses. The formation of a leak at the junction is the result of wear or chafing of the seals worn on the thin end of the hose.
The O-rings on the thin end of the hose can wear out, causing leakage. To replace the rings, it is necessary to remove the faucet from the sink, as it is difficult, and sometimes impossible, to do this from the bottom of the plumbing fixture. After removing the mixer, the hoses are unscrewed in turn with a wrench, rubber rings are replaced with them, after which all elements are installed in place.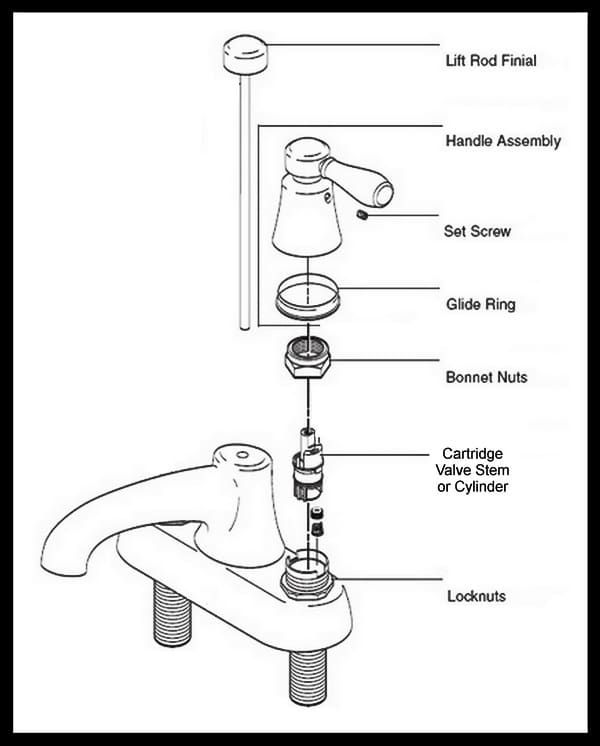 nine0005 To replace the O-rings on the flexible hose, the mixer must be dismantled.
If the water pressure drops
There are situations when the water pressure in one of the taps is significantly reduced. The reason for this problem is an aerator clogged with scale and other debris - a strainer screwed into the end of the gander. To eliminate this problem, it is enough to unscrew the aerator, rinse with water and clean the filter mesh with a needle or a thin awl, and then screw it into place.
Clogged mesh filter - the reason for the decrease in water pressure. nine0002 The considered malfunctions and methods for eliminating various leaks will allow you to repair taps with your own hands without calling a plumber. As practice shows, many types of leaks and breakdowns can be avoided if you take care of plumbing. The quality of the mixers and the degree of mechanical water purification also play an important role, so the installation of coarse and fine filters is sometimes simply necessary.