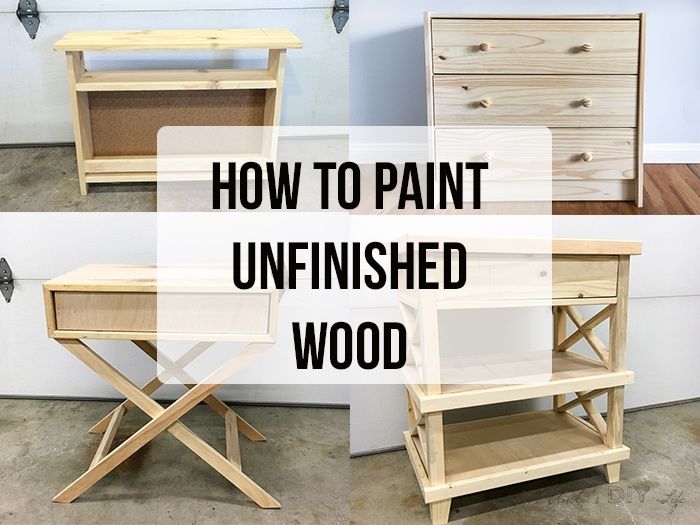
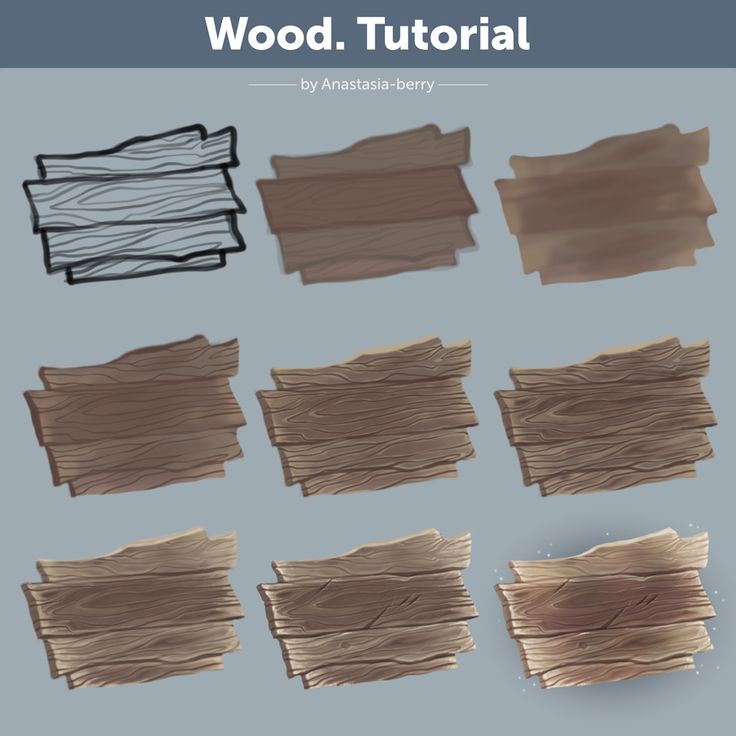
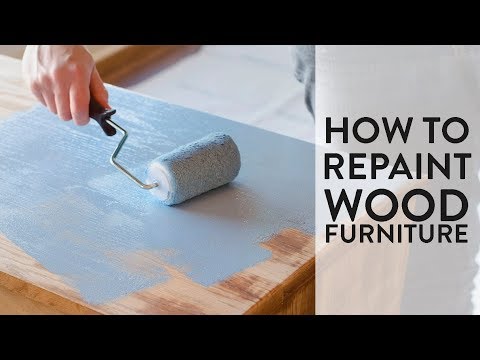
How to repaint wood
How to Achieve Smooth Results When Painting Wood
By
Lee Wallender
Lee Wallender
Lee has over two decades of hands-on experience remodeling, fixing, and improving homes, and has been providing home improvement advice for over 13 years.
Learn more about The Spruce's Editorial Process
Updated on 05/29/22
Reviewed by
Johnathan Brewer
Reviewed by Johnathan Brewer
Johnathan Brewer is a home improvement expert with over two decades of professional experience as a licensed general contractor specializing in kitchen and bath. He has been featured on HGTV’s “Super Scapes,” “Curb Appeal the Block,” “Elbow Room,” DIY Network's “House Crashers,” "This Old House," and OWN Network's Emmy award winning show, “Home Made Simple.” Jonathan is also a member of The Spruce Home Improvement Review Board.
Learn more about The Spruce's Review Board
Fact checked by
Alexandra Kay
Fact checked by Alexandra Kay
Alexandra Kay is a writer, fact-checker, researcher, and editor who checks The Spruce articles for accuracy and adds source citations. Alex frequently writes for b2b and b2c publications. When she isn't writing or fact-checking for print or online articles, Alex is an associate professor of English at a community college.
Learn more about The Spruce's Editorial Process
The Spruce / Claire Cohen
Project Overview
Painting wood appears to be such an elemental, foolproof project that many people rush the job along or attempt shortcuts that produce poor results. Plus, with the advent of paint-ready surfaces like drywall or primed trim and casing, wood painting is slowly becoming a lost art.
Mastering the techniques of high-quality painting of wood surfaces is not difficult, but it does take some practice. Within just a few hours, you can transform yourself from an amateur weekend painter to one with professional skills.
Watch Now: How to Paint Wood Smoothly
Warning
Always use a dust mask when sanding. If you believe that the surface was painted with lead-based paint, take precautions to avoid breathing or ingesting the paint dust.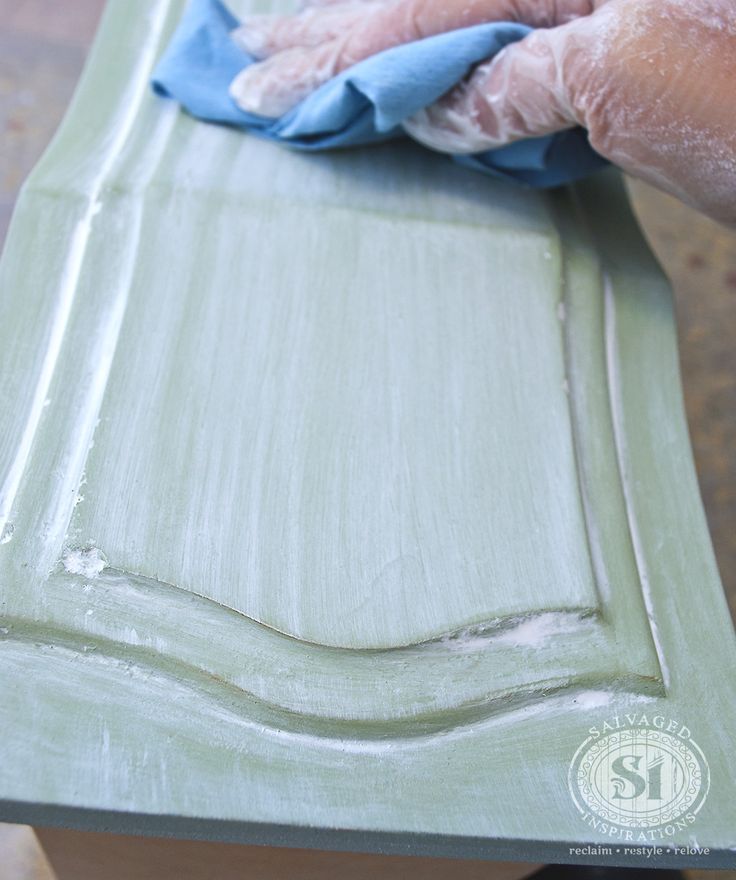 Hearing protection is essential when operating the oscillating sander.
The Spruce / Claire Cohen
Need more help? Talk to a painter near you
Our partners can help you compare quotes from top-rated professionals near you
Get a Quote
Advertiser Disclosure
The offers that appear in this table are from partnerships from which The Spruce receives compensation.
Equipment / Tools
- Plastic sheeting
- Canvas drop cloth
- Eye and hearing protection
- Rubber gloves
- Bucket
- Clean cloths
- Random orbital sander
- Shop vacuum
- 2 1/2-inch paintbrush
- Roller assembly with a high-density foam cover
- Paint tray and liner
Materials
- TSP (tri-sodium phosphate)
- 180-grit and 220-grit sandpaper
- Tack cloth
- Primer
- Interior acrylic-latex paint
- Paint additive such as Penetrol or Floetrol (optional)
-
Cover Your Work Surface
Drape plastic sheeting over the floor or other work surface to protect it from paint spills.
 Lay a canvas drop cloth or contractor's paper over the plastic sheeting. The plastic keeps the paint from soaking through to the floor, while the canvas provides a non-slip surface and helps to contain paint spills.
 The Spruce / Claire Cohen
-
Clean the Wood Surfaces
Put on eye protection and rubber gloves. Mix a solution of TSP with warm water to the proportions recommended by the manufacturer. Dip a cloth in the water, firmly squeeze it dry, then wipe down the wood to remove all oils, dirt, and grime. Rinse the surface with clean, warm water and a clean cloth. Let the wood dry completely.
After the wood is dry, check the piece for large nicks, gouges, and scratches. If necessary, fill them with a wood filler using a flexible putty knife.
About TSP
TSP is a strong cleaner, degreaser, and deglosser that has long been used for cleaning surfaces in preparation for painting. If you would like to avoid using phosphates (which are banned in many communities), use a TSP substitute instead.
The Spruce / Claire Cohen
-
Sand the Flat Areas
Put on a dust mask or respirator, as well as hearing protection. Sand the flat, smooth areas of wood with a random orbital sander and 180-grit sandpaper. The intent is not to strip the wood of all of the coatings and stains but simply to smooth out the surface and provide some "tooth," or slight scratches, to help the paint bond.
The Spruce / Claire Cohen
-
Sand the Corners and Details
If you are sanding furniture that has uneven surfaces, switch to hand-sanding so that the sandpaper can better conform to the shape of the piece.
The Spruce / Claire Cohen
-
Clean Off the Dust
Thoroughly remove the sanding dust from all surfaces. Begin with a shop vacuum outfitted with a brush attachment. Do not use a blower, as this will only redistribute the dust back on the surface. Make sure that the shop vacuum is fitted with a bag and a filter to minimize airborne dust.
After you have removed a majority of the dust with the shop vacuum, use a tack cloth or a cotton rag that has been dipped in water and thoroughly squeezed out to remove the remainder of the dust.
The Spruce / Claire Cohen
-
Prime the Wood
Mix the primer well and apply it with a brush or roller. After drying, if the primer looks transparent or streaky on the wood, prime a second time.
The Spruce / Claire Cohen
-
Apply Primer With a Roller (optional)
For flat surfaces, switch to the roller to speed up the process and provide a smoother finish.
The Spruce / Claire Cohen
-
Sand the Primer
Let the primer dry completely, then sand it down before painting. Use very fine 220-grit sandpaper, and apply light pressure to prevent gouging the primer. Remove the primer dust with a quick brush from the shop vacuum, followed by a light swipe of the tack cloth.
The Spruce / Claire Cohen
-
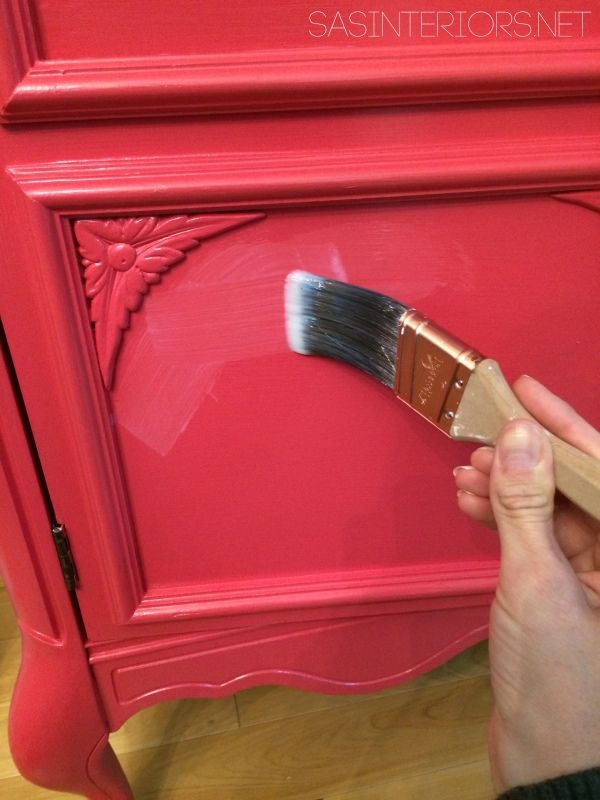
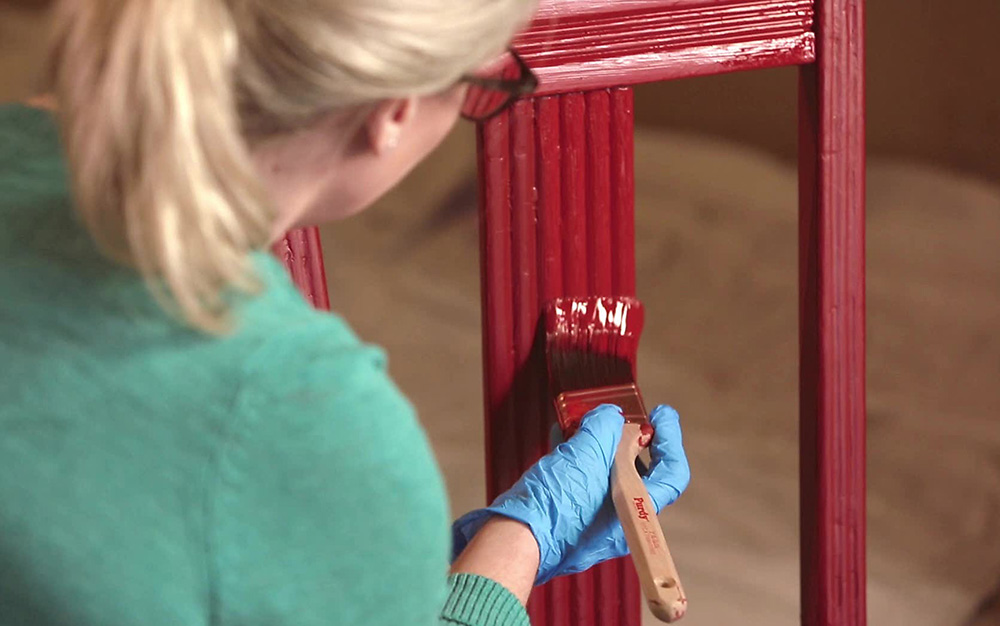
Paint the Wood With a Brush or Roller
For highly irregular surfaces, such as furniture, crown molding, and trim, it is best to use a paintbrush only.
 For surfaces that have large, flat areas, incorporating a high-density foam roller will help you get the job done more quickly.
 Dab the end of the paintbrush bristles only about 1/3 the length of the brush into the paint each time you load the brush. Transfer the paint to the wood, dragging the brush in short strokes that run parallel to the wood grain. Keep a wet edge at all times to prevent lap marks. Do not add a second coat of paint during this step, as this can cause the paint to tear.
For painting with the roller, insert the paint tray liner in the paint tray, then fill the tray less than halfway. Gently dab the roller into the paint. Roll the paint up and down the slope of the tray a few times to distribute the paint on the roller pad.
Transfer the roller to the wood. Roll the paint onto the wood, beginning with light pressure only. High-density foam roller covers work better with thinner latex paint than with oil-based paints.
For a more professional finish, looking into spraying the object rather than using a brush.

The Spruce / Claire Cohen
-
Sand the First Coat
You can usually achieve an even smoother coat if you opt to sand and paint one final time. Sanding the first paint coat brings down bumps and inconsistencies introduced by the roller or brush. Using 220-grit sandpaper, sand gently by hand, or attach the paper to the orbital sander and run it extremely lightly across the surface. Do not apply pressure to the sander other than the weight of the sander itself.
After sanding, open up the tack cloth, bunch it up but keep it loose, then lightly run it across the surface. Too much pressure on the tack cloth will be counter-productive, as this will press the tack cloth's embedded wax onto the surface.
The Spruce / Claire Cohen
-
Apply a Second Coat of Paint
Apply a final coat of paint, using a brush and/or roller, as desired. Let the paint dry as directed. If possible, let the piece dry overnight or longer before using it.
 Paint becomes more durable after it fully cures.
 The Spruce / Claire Cohen
High-quality results are easy to achieve if you follow a few professional tips:
- Use a brush and a roller: Paintbrushes and rollers have complementary roles. Rollers cover large areas quickly but cannot reach into corners. For smooth surfaces, use a high-density foam roller. Paintbrushes are good at painting corners and edges, but they take a long time when painting large areas. Brushing after rolling to eliminate lines and drips is a professional technique known as back-brushing.
- Primers are important: Primers are formulated to bond to problem surfaces and to give the paint a consistent surface for a smoother finish. Primer also helps prevent flashing, a condition where areas of the final paint job look as if they were painted with different paint glosses. Use a high-quality primer brand, such as Kilz or Zinsser.
- Consider paint additives: Paint can get tacky and create brush-drag if you take too long while painting. You can either pick up the pace or buy an additive that extends your working time. Penetrol and Floetrol are popular additives that help you create smooth brush strokes. Avoid painting underneath a fan or heating vent or in direct sunlight, as all of these will accelerate drying time and lead to tacky paint.
Article Sources
The Spruce uses only high-quality sources, including peer-reviewed studies, to support the facts within our articles. Read our editorial process to learn more about how we fact-check and keep our content accurate, reliable, and trustworthy.
Renovation, Repair and Painting Program: Do-It-Yourselfers. United States Environmental Protection Agency.
Executive Summary of EPA747-R-97-002. United States Environmental Protection Agency.
How To Paint Already Painted Wood
By: Author Erin
Posted on - Last updated:
4 shares
- Share
- Tweet
Do you want to change up painted wood in your home? But don’t want the hassle of completely stripping the paint? Here is how we painted over already painted wood in our home.
Table of Contents
Can I paint over old paint on wood?
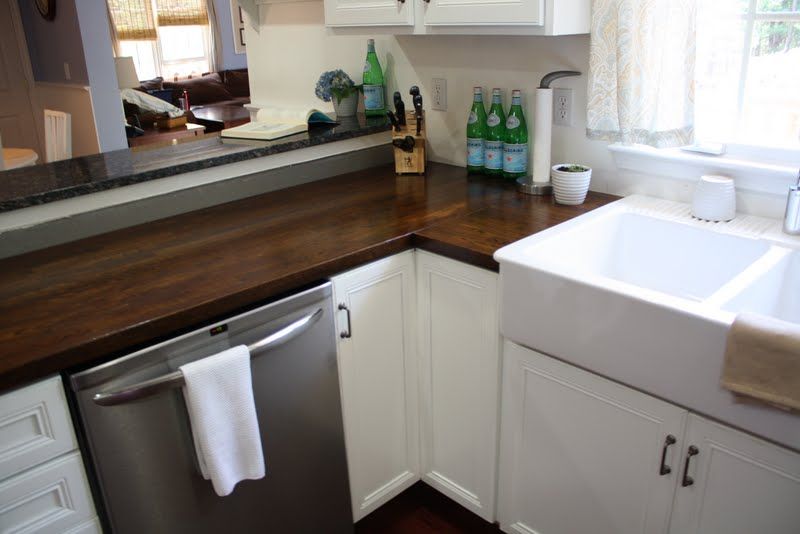
We will show you how we repainted our mudroom cubby and kitchen cabinets using these painting steps. If your original paint job was done well (and the wood was properly primed) you don’t need to strip and sand the old paint off. Make sure to inspect the surface you are painting fully.
In our house, we have had several wood-painted projects that we have decided to change up the color or refresh with a new color.
*Disclosure: I only recommend products I would use myself and all opinions expressed here are our own. This post may contain affiliate links that at no additional cost to you, I may earn a small commission. Read our full privacy policy.
When do you need to prime already painted wood?
You don’t always need to prime already painted wood. If the old paint is in great shape, doesn’t have chipping, and seems to adhere to the surface then you should be able to get away with following the steps we used to repaint our wood cubby.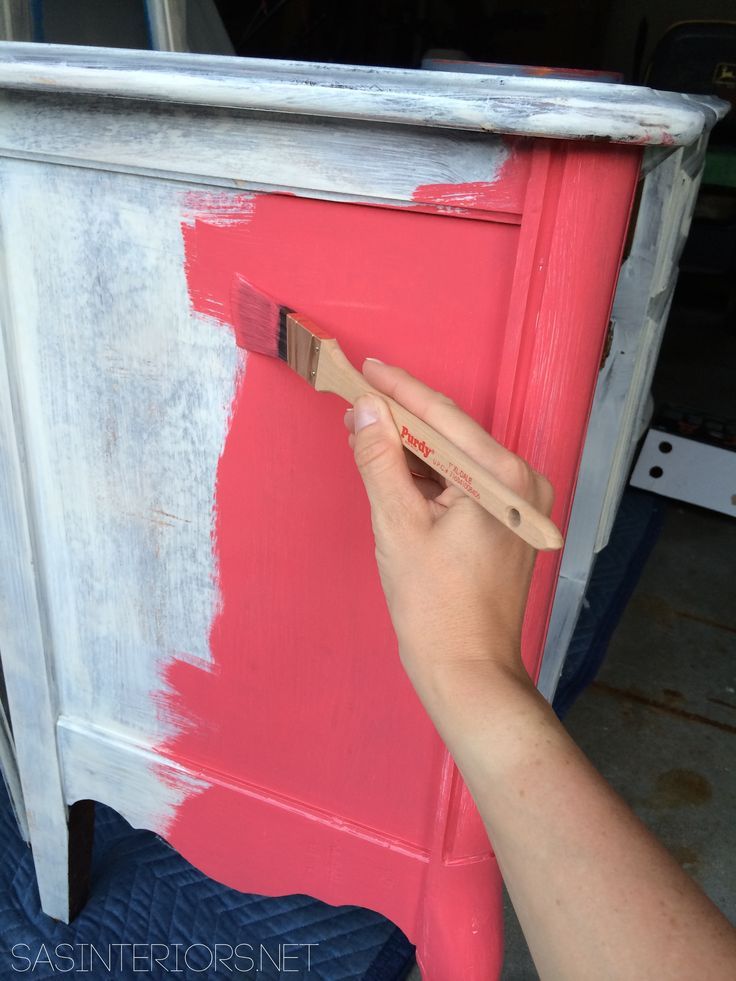
If you are unsure of the type of paint used, finish or how it was sealed, you may want to consider using an adhesion primer (like water-based Kilz or Zinsser Bin). Just note, if we can avoid using oil-based primers and paints we normally do.
What paint not to use?
There are also primers and paints in one. We don’t recommend those for painting wood. For walls, we think certain brands work just fine. But with wood, I would always air on the side of caution.
Can you paint latex over oil-based paint?
Some people will say as long as the paint is fully cured you should be okay. However, if you know you are painting over oil-based paint then I would use a primer so that you don’t end up with chipping and peeling paint.
Also, one thing to note is that you need to make sure that your paint is fully cured no matter what paint you are using. Fully cured paint can take up to thirty days. A good test is when you are able to scrub or clean the wood without ruining the paint job.
Not sure if you have oil paint on your original woodwork? Glidden shares how to do an oil paint test here. You can test a small area of the paint by rubbing denatured alcohol on a cotton ball to see if the paint comes off.
Do you need to strip paint before painting?
If you have peeling paint, you will need to scrape off paint and possibly use a paint stripper like Citri Peel. Sanding the surface before painting will also allow your primer and paint to start fresh. Just note that not all painted surfaces will need this to happen, but don’t skimp on prep if you have areas that are not in the best shape.
When You May Want To Sand And Use A Primer
- The original surface is too glossy
- The quality of the original paint job is sloppy
- Going from a dark color to a very light one-priming may save you on the coats of paint you need
- New paint does not seem to adhere to the surface. You can test a small area as we did when we painted backsplash tile.
Recommended Supplies
Make sure that your wood and previous paint job are in good shape before starting this project.
- 220 Sandpaper
- Deglosser
- Old Rag
- Enamel Paint meant for wood such as Sherwin Willams Urethane Trim Enamel Paint
- Small Foam Roller & handle (here is why we think a small foam roller is best for cabinet painting and more)
- Synthetic Paintbrush
- Small paint tray
- Optional: Wood filler and/or painter’s tape
New Paint Color Used
For reference, the following painting project was painting over Sherwin Williams Proclassic in semi-gloss with Sherwin Williams Emerald Urethane Trim Enamel in Semi-gloss. The blue-green paint color is Rookwood Sash Green.
White Painted Wood Cubby
Here is our closet mudroom closet painted with SW Proclassic Pure White after 6+ years of use.
A Little Wear and Tear Is Okay
As you can see this cubby has definitely had a little wear from a real family using it as their drop-off point. The paint job itself was in decent shape. The edges of some of the wood had worn off a little due to pulling baskets in and out. And the one shelf was definitely super dirty from shoes being there.
Can you use this method to also repaint painted cabinets?
Yes!! We also did this method to repaint painted kitchen cabinets and I absolutely love the outcome! A year later, we haven’t had any chipping or peeling. The self-leveling paint (Emerald) is honestly amazing!
How to Paint Already Painted Wood
Step 1: Before you begin, remove hardware and/or fill holes with wood filler if you are not replacing with the same size hardware.
Step 2: Use 220 sandpaper to lightly scuff up the old paint job and surface.
Step 3: Remove dust and dirt with a handheld vacuum.
Step 4: Use a rag and a deglosser to wipe down all surfaces needing to be painted.
Step 5: Tape out any areas and add a drop cloth.
Step 6: Use a brush to trim out areas that are hard to reach. Since this is beadboard here, we had to also go into the creases of the board.
Step 7: Use our favorite type of foam roller and mini paint trays to apply a thin layer of the Emerald paint in semi-gloss. Don’t worry if the first coat of paint is splotchy.
Step 8: Let each layer dry completely before repeating the painting steps.
Step 9: Let paint fully cure before adding back hardware and other accessories. You can even spray paint your hardware for a fresh look before adding it back on. We love trying to wait a week to not mess up our smooth new paint job.
Notes About Our Wood Repainting
- At our local paint store, they actually said we could just scuff up the paint surface with a green Scotchbrite sponge and not even sand since our original paint job was in such good shape.
- We only lightly scuff the surface with sandpaper and really didn’t think it was that much extra work.
- We always suggest taking pictures of your project to the actual paint store in order to discuss the project with them.
 Once you find a few places you trust, you will always go back to them for advice.
 - Don’t just buy the cheapest paint. Make sure you are purchasing and using paint that is meant for wood.
- If you are unsure of the type of paint used originally, add a little extra prep with priming.
The “Before” and “After” Painted Wood Cubby
Here is our finished repainted cubby. The paint really was all the space needed to feel fresh again.
How-To FAQs
Can you paint over painted wood without sanding?
Yes, if you are using the same type of paint (latex over latex) and as long as the paint is in good shape. Some people will say that you can even paint latex over fully cured oil-based paint.
If you are unsure, I would test an area first or use a primer.
How do you prepare painted wood for painting?
If the wood has been painted before, you will need to use fine sandpaper (220) or a green Scotch-Brite pad to roughen the surface. We then recommended removing dust with a vacuum and wiping it down with a deglosser before painting your new layer.
Is primer necessary for repainting?
Most repainting projects will not require a primer. You may need a primer if the original surface is too glossy, the quality of the original paint job is sloppy, are going from a dark color to a very light one, or the new paint does not seem to adhere to the surface.
Related Posts
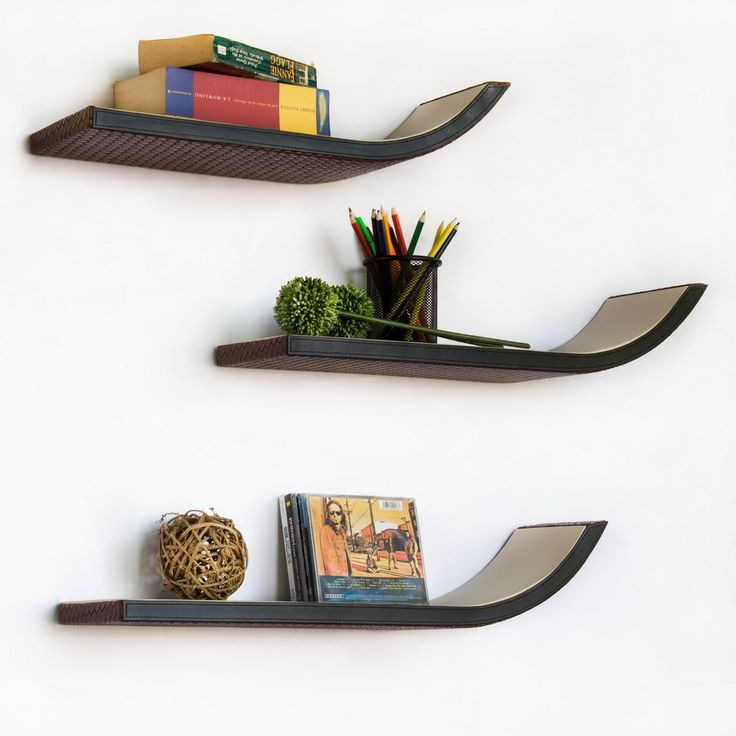
- 40+ Homemade Shelving Ideas
- Best Light Green Paint Colors
- 25+ Things To Spray Paint
- Easy DIY Paint Project Ideas
Follow us on Pinterest, Youtube or Facebook for more DIY inspiration!
We are so happy that we chose to just repaint the painted wood cubby.
- ▢ Deglosser
- ▢ 220 Sandpaper
- ▢ Small Paint Tray
- ▢ Emerald Trim Enamel Paint in the finish of your choice
Use 220 sandpaper to lightly scuff up the old paint job and surface.
Remove dust and dirt with a handheld vacuum.
Use a rag and a deglosser to wipe down all surfaces needing to be painted.
Tape out any areas and add a drop cloth.
Use a brush to trim out areas that are hard to reach.
Use a small foam roller and mini paint trays to apply a thin layer of the Emerald paint in semi-gloss.
Let each layer dry completely before repeating the painting steps.
Let paint fully cure before adding back hardware and other accessories. We love trying to wait a week to not mess up our smooth new paint job.
- Make sure to properly clean and degloss paint. You do not want dust and dirt in your fresh layer of paint.
- You can use a green Scothbrite pad instead of sandpaper to lightly scuff the surface.
- If areas of wood are showing through, you can prime those before painting.
- Avoid bubbles with a small foam roller by doing light coats.
- Always check for drips as you are working. If you see a drip after it has dried, you can lightly sand and repaint that area.
Tried this Tutorial? Tag me Today!Mention @theDIYNuts or tag #thediynuts!
Posted on - Last updated:
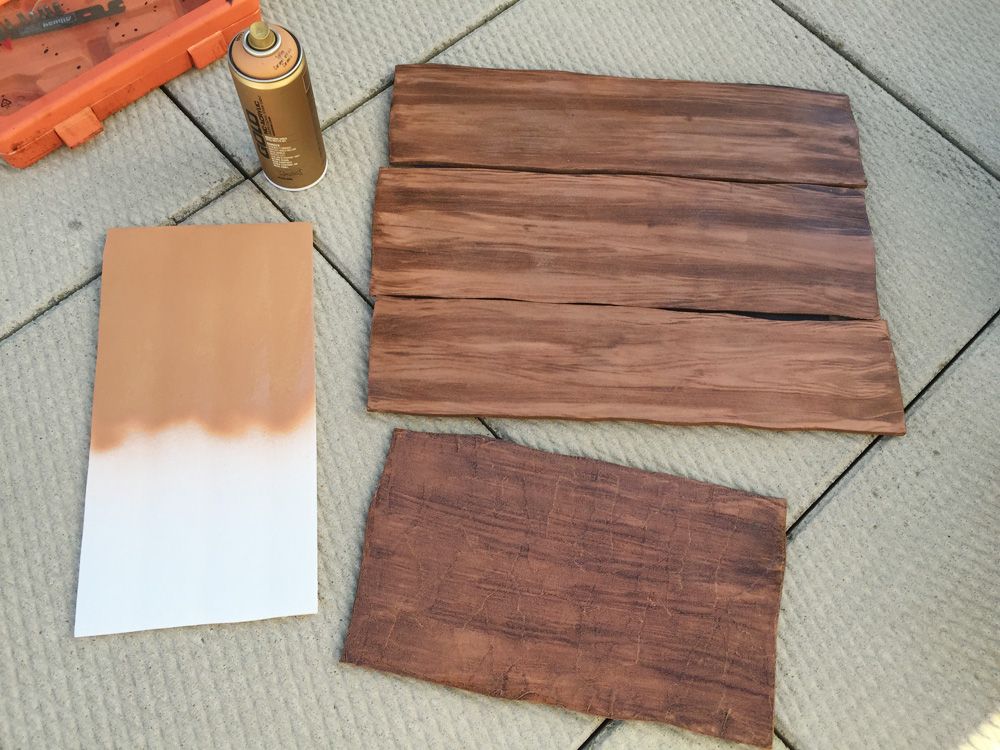
How to paint wood correctly: techniques for painting wood surfaces
Exterior wood painting is not an easy job for non-professionals. Failure to comply with the staining technique, improperly selected materials, inappropriate weather conditions - all this can negate all the work done.
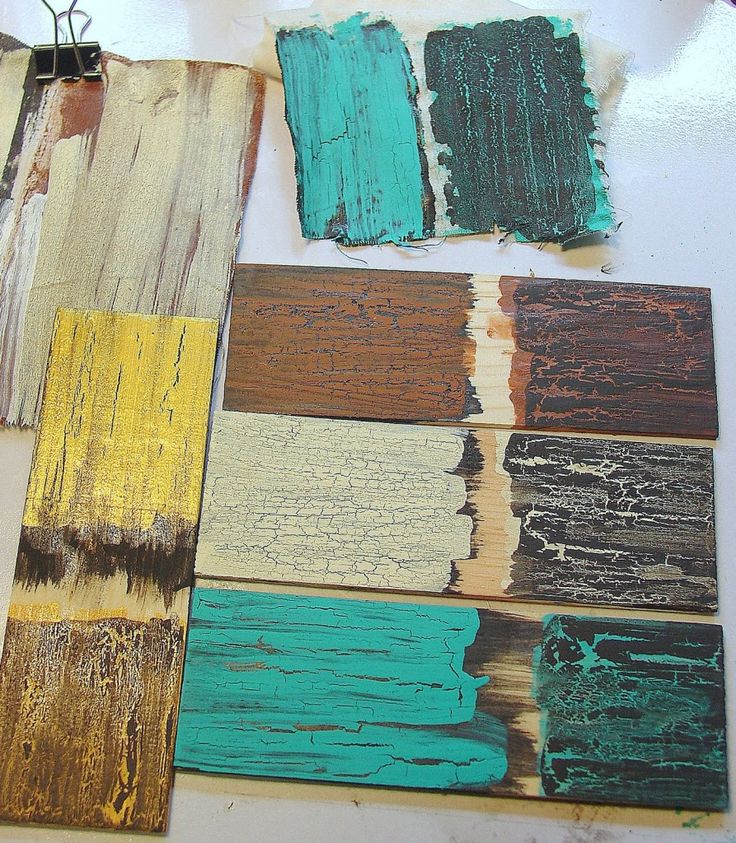
There can be several consequences of technology violation. The most common are cracking and peeling of the decorative layer. Shriveled and falling paint exposes an unprotected decorative surface. As a result, under the influence of sunlight, the tree begins to turn gray. And rain and moisture can lead to rotting of the material. nine0003
Incorrect preparation of facades
Often inexperienced builders neglect this stage, in a hurry to finish the job as soon as possible. And absolutely in vain. Unprepared wood behaves unpredictably. With a high probability, we can say that the painting of the facade of the tree will have to be redone after a few years.
No matter how perfect sawing is, microcracks, burrs and other mechanical damages still remain on the surface of the material. At the same time, the processing of wood on machines leads to jamming of its pores. As a result, the penetration of antiseptic and protective compounds is hindered, which leads to a decrease in their concentration in the structure. As a result, the manifestation of processing defects at the finishing stage of staining. nine0003
Grinding should be carried out according to the following algorithm:
-
We pass over the surface with a coarse-grained abrasive (P60-80).
 So we get rid of irregularities and even out the defects of the primary processing.
 -
Sanding with grit P120. Fine grain allows you to bring the tree to a perfectly smooth finish.
The depth of penetration of antiseptic solutions depends on how carefully you sand the facade. nine0003
No impregnation with protective compounds
This stage is no less important than the previous one. Protective compounds are designed to protect wood from decay, infection by fungi, atmospheric influences. They are sold in the form of oil, antiseptic, priming solutions. When choosing, do not chase the low price tag.
The technique is quite simple. Apply with a brush or roller. Don't forget to squeeze the tool. Excess funds should not drain on the surface. If suddenly the antiseptic gets on the windows, then immediately clean them with Cif spray. nine0003
Low-quality paint
Very often, in order to save money, we choose paint from the construction and household line.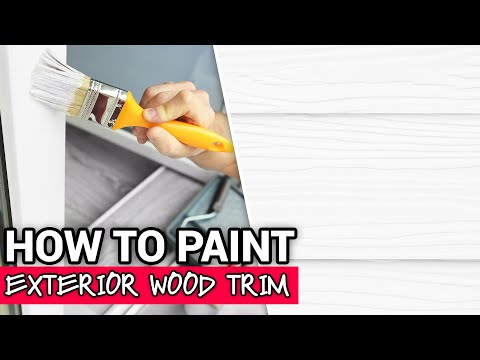 Unfortunately, its service life is very short - only a few seasons. But then the tree, even pre-sanded and coated with a protective impregnation, will literally start to push the paint away from itself.
Therefore, wood painting should only be carried out by professional outdoor paints. It is better if they are silicone or rubber based. Their service life is 10-15 years. nine0003
When doing this, choose densely packed brushes. They will ensure a good distribution of the composition. And the cost will be economical.
Inaccurate application
Painting wood on the outside of a house is a lengthy process. The more carefully you apply the layer, the better. This will reduce the risk of paint splatter. At first it will turn out slowly, but then the hand will fill up.
It is better to start painting from the least noticeable places. This is an extra opportunity to practice and choose the most successful hand pressure on the brush. nine0003
Please note that when working, you need to move from top to bottom. The fact is that facade coatings are quite “heavy”. Therefore, dripping of paint drops is inevitable. And moving in the right direction, you can control the occurrence of smudges and eliminate them in time.
Always rinse the instruments in water after finishing work.
Non-observance of temperature and humidity conditions
Applying antiseptic and coloring compositions is possible only under certain temperature and humidity conditions. Keep in mind that they all dry differently. Examine the jar carefully and find the optimal temperature regime, which must be observed both during the processing itself and during drying. Many people forget that nighttime temperatures are much lower than daytime temperatures. nine0003
Suitable working conditions - overcast dry weather. Too much sun can cause formulations to dry out quickly. In addition, it is not recommended to paint a damp wooden surface. If it has recently been raining or heavy dew, then it is better to postpone painting to allow the tree to dry well.
The technique of painting wood is not so difficult, if you take into account all the nuances. With the right selection of materials and adherence to technology, success is guaranteed.
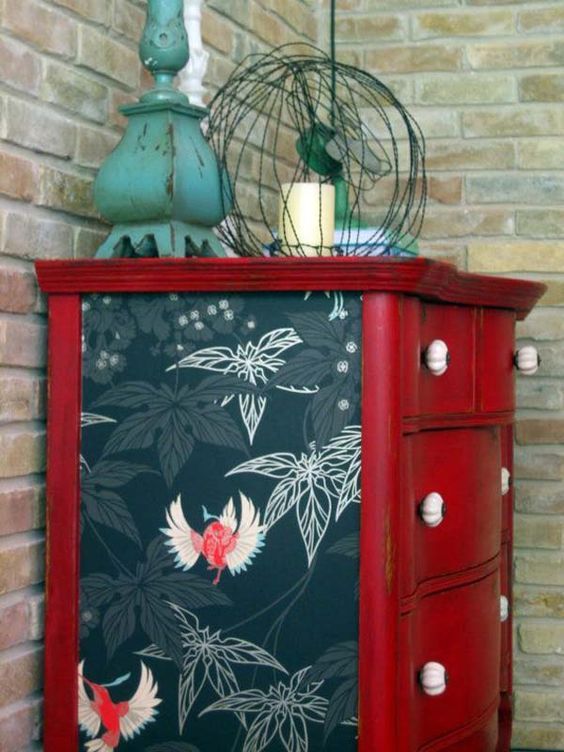
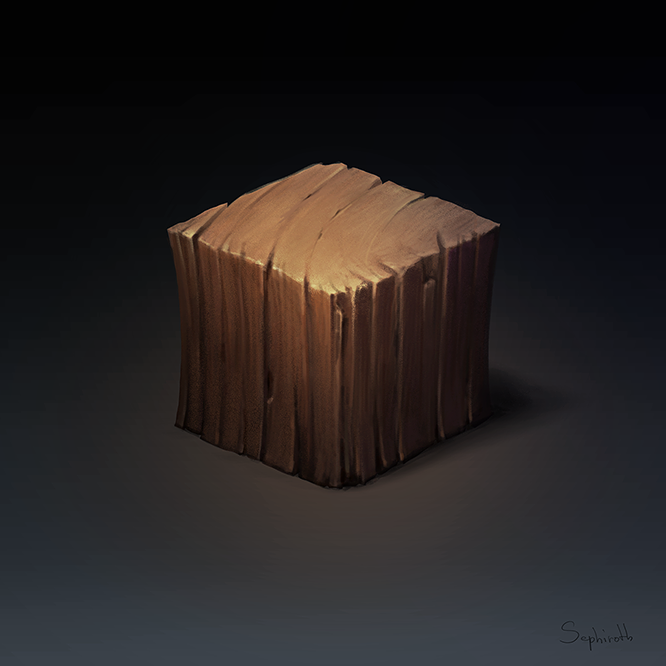
How to paint wood - What paint to cover the tree to protect it for a long time
Despite the fact that new and perfect options appear in the assortment of manufacturers of building materials, the fashion for natural wood does not decrease. The fact is that in a private house made of any material there is still a feeling of being in a city apartment, but a wooden cottage is a special unique microclimate that attracts lovers of country life so much.
With all the charms of wood, it has one significant drawback - an unprotected tree, provided it is improperly harvested and dried, is vulnerable to rain, sunlight and temperature extremes. Everyone knows how quickly mold and fungus can ruin even the highest quality lumber, and changing the geometry of the walls and cracking under the influence of temperature changes is simply dangerous for living. nine0003
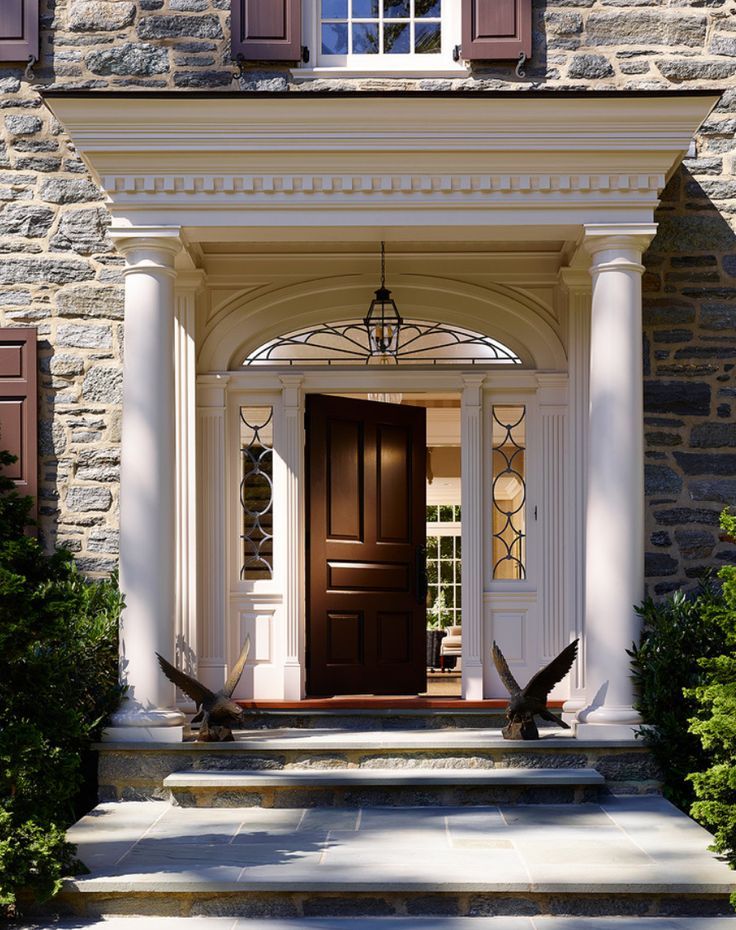
Pay attention to the wooden architectural monuments that have survived to this day: some were built a couple of centuries ago and practically did not change their appearance and look modern. The fact is that wood for construction was harvested, as a rule, in the winter, when the natural moisture content of the tree is at a minimum level, and then the harvested wood was subjected to long-term and, most importantly, natural drying. In addition, all the old buildings were chopped with an ax, saws were practically not used, remember the well-established expression “chopped hut” ... With this type of processing, the resin tubules located in the body of a tree are crushed with an ax and “sealed”, and resin is the best natural antiseptic. nine0003
In modern conditions, old technologies are practically not used, but the need to preserve wood remains. The method of staining is the most widely used, but how and with what to paint wood in order to protect it for a long time? What material is best suited and how to apply it correctly? How to choose a coloring composition so as not to overpay and not lose quality? We will answer these and other questions together with experienced specialists in paint and varnish coatings. nine0003
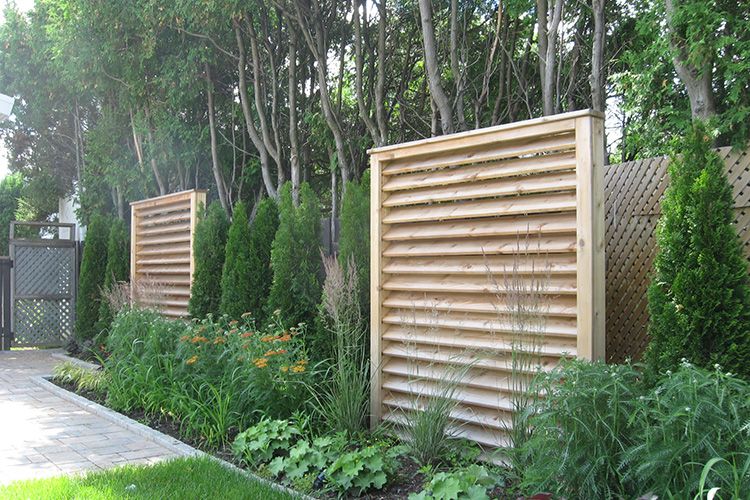
How to protect a wooden house for a long time?
In recent decades, the approaches and technologies for protecting wooden facades by painting have changed very seriously. Of course, today no one uses tar, in the assortment of manufacturers there are many high-quality compounds that are suitable for use in any conditions: from rainy regions to sunny republics.
There is a misconception that climate has a key influence on the durability and appearance of wood. And that it is not worth building wooden buildings in regions with an unstable climate and high humidity. In fact, the factors that ensure reliability and attractive appearance are completely different. All of them are controlled by: nine0003
- Raw material quality.
- Structural features of the building.
- The quality of surface preparation prior to painting.
- The correct choice of paint and varnish material for solving the task.
The key rule is to make sure that the wood is not wet before painting. Painting a wet tree is a waste of money, because even the most expensive and high-quality paint will peel off the coating over time. At worst, this can lead to cracking of the wood and fatal consequences affecting safety. nine0003
When processing a wooden surface, you need to pay close attention to the humidity and temperature of the surrounding air. For each type of wood and each paintwork there are requirements and restrictions, but if you are not an expert, you can be guided by universal rules: painting wooden materials is only permissible at temperatures above +10 degrees (we must also take into account night weather conditions) and ambient air humidity in the range of 40 % to 80%.
Choosing a quality material for painting a wooden surface
To protect wood, you can use both classic covering paints and translucent antiseptics or azures. Translucent (glazing) material is able to preserve the original pattern and structure of natural wood. Covering paint, on the contrary, forms an even and opaque coating that covers the pattern. This finishing option is very popular in Northern and Western Europe, where multi-colored facades have long been in vogue.
The conclusion is simple: choose based on the tasks. If you want to emphasize the structure of the tree, use antiseptics. If you hide - covering paints. The materials have a different service life, pigmented coloring coatings are able to reliably protect against ultraviolet radiation. Under such a coating, the tree lasts much longer. Glazing analogues emphasize a beautiful natural pattern, but quickly fade in the sun, so you will have to periodically renew the coating. Some tinted translucent materials are suitable not only for application to solid wood, but also for cheaper analogues: they qualitatively imitate valuable wood species and look interesting. With their help, you can quickly and easily translate into reality the most daring design solutions. nine0003
It is difficult to call any option the best, it all depends on the personal wishes of the owners, design trends, and the style of the building facade. For example, denim and gray colors, classic shades of wood are always relevant. Sometimes trends change and the classic finish is replaced by underlining and highlighting the ends of the house with a different color.
Let's move on to the analysis of the main materials for painting wood:
- Alkyd paints. In these compositions, the main binder is alkyd resin, which is mixed with a solvent and fillers in a certain proportion. It is important to understand that the solvents used are in the white spirit category, so they emit a distinct odor and are considered moderately toxic. But alkyd paints are easily applied to the surface, dry very quickly and form a reliable, dense and resistant to natural irritants coating. It is not afraid of moisture, moderately - sunlight and temperature changes. The disadvantage is the minimum permeability, due to which the wood loses its ability to "breathe", in addition, due to the growing internal stresses inside the paint film (the so-called cross-linking of alkyd resins occurs constantly), the coating begins to crack and collapse after 3-4 years .
 Alkyd paints have very good adhesion, therefore, in order to renew the coating and repaint the facade, you will have to spend a lot of time and physical effort. The conclusion is this: as an option for several years, alkyd paints look very advantageous, because they provide good hiding power of wood and are affordable. nine0020
 - Acrylic paints. By chemical composition, these are water-soluble emulsions and dispersions, which include acrylic resins, fillers and various adhesive additives - marble chips, wax. Manufacturers do not use organic solvents, so the materials do not emit a sharp unpleasant odor and are not toxic. In comparison with alkyd counterparts, the covering power is lower, but the paint resists UV radiation better, and is also able to penetrate deep into the layers of wood, which provides a more stable and durable vapor-permeable coating. Conclusions: acrylic paint seems to be an almost ideal option for a wooden facade, it guarantees perfect durability and decorative effect.
 Re-treatment will not be needed within the next 10-12 years. Of the minuses, it is worth noting the high price, but if you take into account a longer operational resource, then the costs will more than pay for themselves. nine0020
 - Tinted varnishes - based on acrylic, alkyd or alkyd-urethane. They retain the appearance of wood texture, but have a number of significant drawbacks, like classic enamels.
- Tinted wood protection compounds. These are universal coatings based on alkyd, silicone or acrylic. The texture and pattern of the wood remain visible. Vapor permeability is maintained, due to which the tree breathes freely: this prevents decay, cracking and other unpleasant consequences of operation. nine0020
Features of preparing wood for painting
Any specialist in paint and varnish compositions will confidently say: without observing the regulations for exterior finishing, it is impossible to create a high-quality and durable coating. This is a professional approach, but in domestic use, many ignore the control of wood moisture, choose the wrong brushes, save time on painting the surface.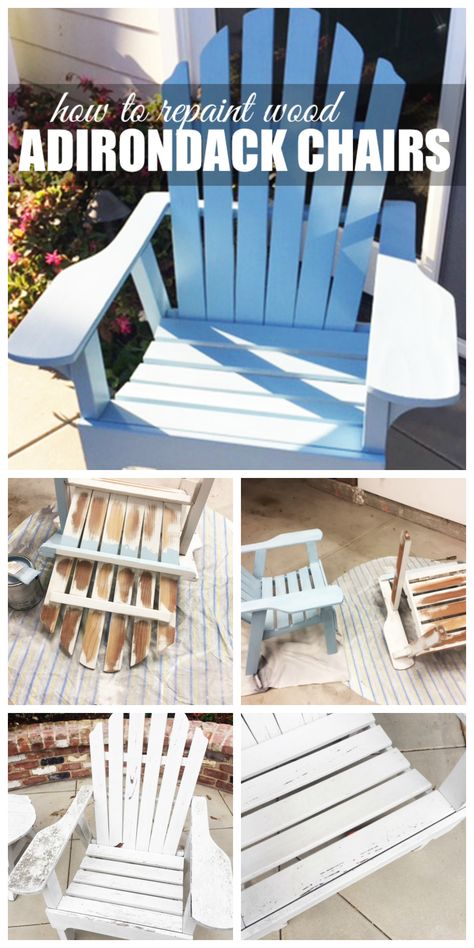 Reason: It's a common myth that quality paint will provide a perfect surface and there's no need to waste time and effort on some extra preparation. In practice, this can be described by an example: take a garden sprayer, pour paint into it, spray the log house in two hours and go about your business. With all the perfection of coatings production technologies, this is still impossible. nine0003
Even before the start of painting, it is necessary to check that the surface remains dry and clean, there should be no resin smudges on it that can be removed with a mechanical tool, then a solvent and a clean rag. Grinding is a time-consuming process that allows you to achieve maximum hiding power and reduce paint consumption, you cannot do without it.
Painting steps
Usually a detailed list can be taken from the manufacturer's instructions, but whichever coating you use, standard painting includes several general steps: nine0003
- Surface pre-treatment with a grinder.
- Application of an antiseptic composition.
- Regrinding.
- Applying the first coat of paint.
- Removing fluff with a sanding sponge.
- Application of a second coat of paint, oil or varnish.
Let's consider these steps in more detail.
Sanding a wooden surface is a mandatory stage of work, which directly affects the elimination of minor defects - roughness and chips. The better the wood is polished, the deeper the paint, varnish and antiseptic will penetrate into the structure. The operation is usually carried out in two stages: at the first, an abrasive with a grain size of 60-80 is used, and at the second - 120. We remind you that the higher this figure, the finer the grain size. As a result, all the flaws are leveled and we get a quality comparable to the furniture industry. nine0003
The use of an antiseptic is necessary to protect against biological processes - mold, fungus, pathogens. Before applying it to the surface, it must be vacuumed or at least thoroughly cleaned with a brush.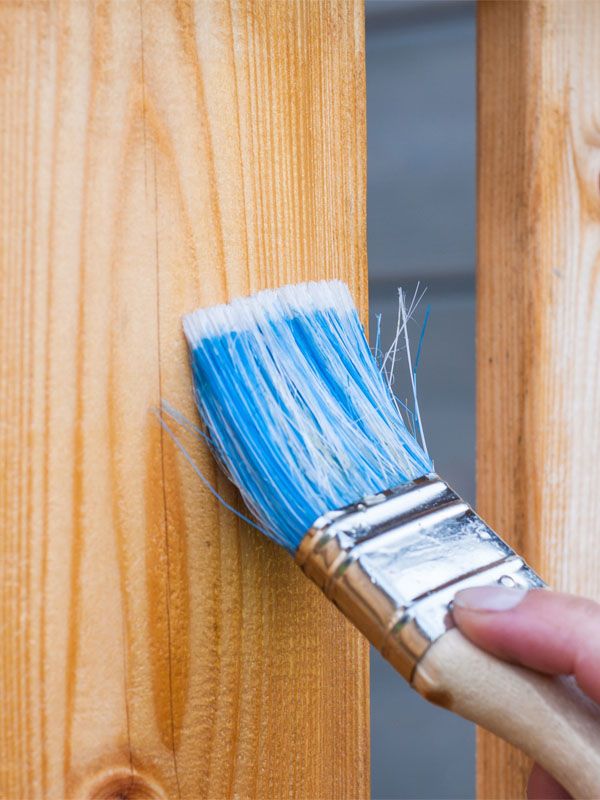 The use of modern antiseptic impregnations can protect the tree from fungus, mold and insects, but does not affect the resistance to natural irritants - the sun, humidity, temperature changes.
Important! If you use products from the 3 in 1 category (primer, antiseptic and top coat), you can skip the antiseptic treatment step. nine0003
Intermediate grinding is very important when applying tinted translucent compounds. The fact is that the use of an antiseptic or oil impregnation leads to the fact that thin hairs of wood begin to bristle unevenly, the pigment that is part of the color scheme accumulates on them. Under such circumstances, achieving a uniform and attractive translucent coating is unrealistic. It is for this reason that intermediate sanding is always performed after applying a layer of antiseptic. nine0003
The application of layers of paint is carried out in the direction from top to bottom, painting over each crown from beginning to end. It is important to follow the technology and avoid overlaps and smudges. After applying the first layer, treat the ends of the wood with a sealant that will reliably clog the pores. This procedure cannot be ignored: otherwise, the raw ends will begin to absorb moisture and collapse over time.
Expert advice
When choosing a specific product from the range of manufacturers, we advise you to pay attention to: nine0003
- Scope of application.
- Visual effect of staining. Some need to emphasize the natural texture of wood, others need to hide errors from a low-quality base and get rich colors.
- Practicality, functionality and durability.
When protecting a wooden surface, you can use various materials, the main thing is to correctly take into account their features:
- Glazing (translucent) compositions are updated more often than covering ones, but they are much easier to apply. nine0020
- The richer the shade, the more effectively the coating protects the facade of the building from ultraviolet radiation, especially when it comes to sunny regions.