How to patch hole in drywall ceiling
How to Patch a Hole in the Ceiling | Home Guides
By Mona Culberson Updated December 27, 2018
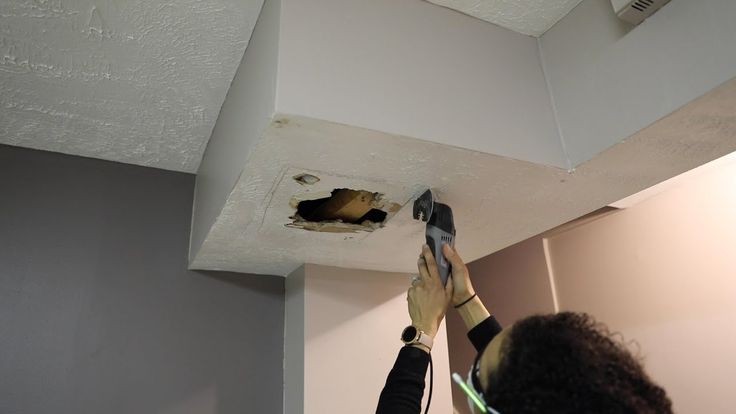
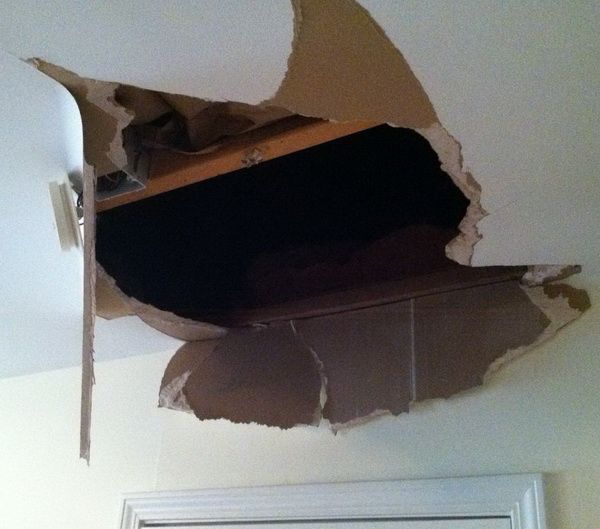
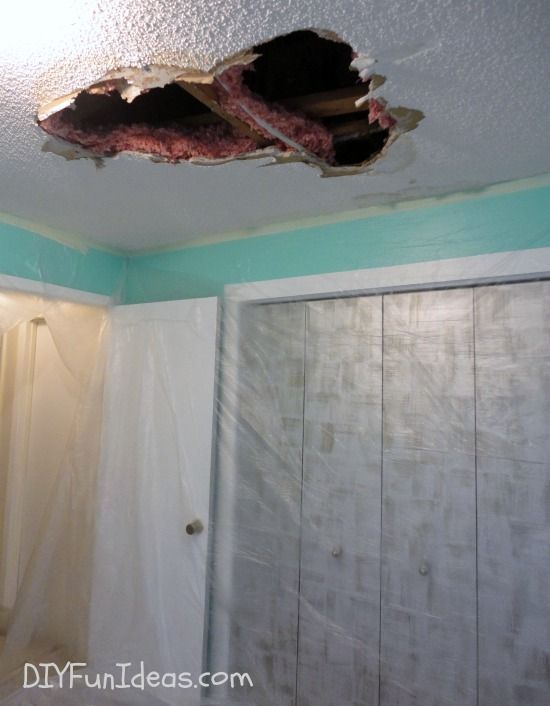
So you missed the rafter and stepped through the ceiling... don't call a handyman to patch the gaping hole. You can make the repair yourself and save a ton of money on labor cost. All you need to get the ceiling back into good shape is a sheet of drywall and a few tools found at the local hardware store or home center. After the hole has been repaired, use a can of spray texture to get this job finished like a professional.
Larger Than 12 Inches Wide
-
1.
Go into the attic and inspect the area around the hole for electrical wiring. Move wires away from the hole, or call a professional, but don't cut into the ceiling if wires could be disturbed in the process. Proceed to Step 2 if the area is clear of wiring.
-
2.
Locate two joist beams nearest the hole, one on each side. Use a cordless drill with a long bit to make two small holes through the ceiling, marking the location of the two beams.
-
3.
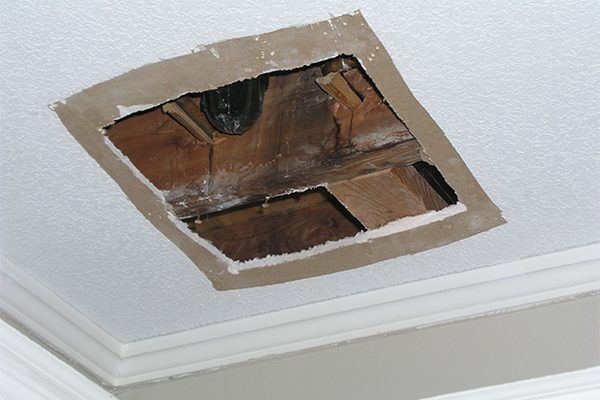
Go back down and use a drywall knife to cut and remove the damaged piece of drywall from the ceiling. Cut a square beginning at one mark and extending to the opposite mark. Remove the piece of drywall from the ceiling, exposing the beams.
-
4.
Measure the piece of drywall that you removed from the ceiling. Cut a replacement piece, slightly smaller than the hole, from a new sheet of drywall.
-
5.
Place the replacement piece of drywall into the hole. Position the screws about 1 inch from the edge of the drywall to avoid crumbling. Secure the drywall to the joist beams, using the drill.
-
6.
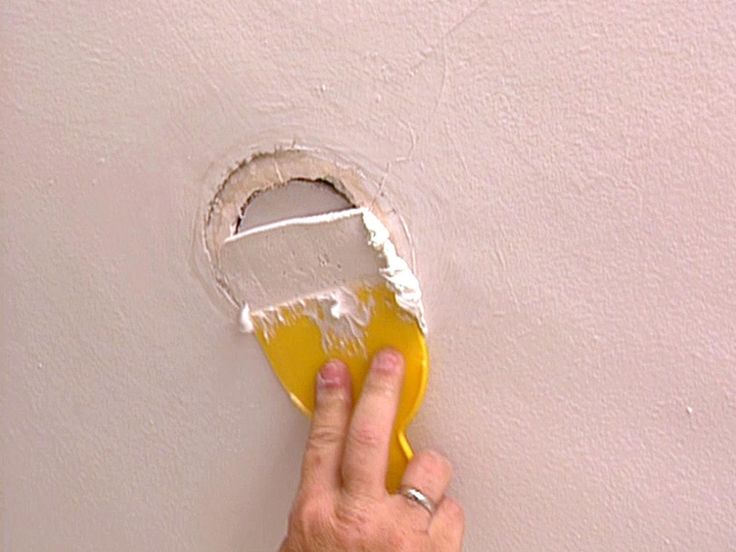
Apply a thin layer of drywall joint compound (often called "mud" by professional installers) to the seam around the perimeter of the replacement piece, using a drywall taping knife. Cut mesh drywall tape to fit the length of the seams and press the tape into the wet compound. Apply a thin layer of compound over the tape, embedding it into the seam, and allow to dry completely.
-
7.
Sand the patched seams smooth to the ceiling, using a fine-grit sanding block. Apply more compound to recessed seams, allow to dry, and sand the seams again. Remove the sanding dust with a clean cloth.
-
8.
Apply ceiling texture to the patched area, using a spray can of texture. Follow the manufacturer's instructions for applying the texture and allow it to dry completely.
-
9.
Apply primer to the patched area with a paint roller. Allow the primer to dry completely and apply two coats of ceiling paint.
Larger Than 1 Inch, but Less Than 12 Inches Wide
-
1.
Scrape off the ceiling texture 2 inches beyond the perimeter of the hole with a putty knife.
-
2.
Apply drywall compound around the hole with a putty knife. Use scissors to cut a piece of plastic mesh patching material to fit over the hole, sizing the patch to extend 1 inch beyond the hole.
 Place the patch over the hole and press the edges firmly into the wet compound. Use the putty knife to apply a thin layer of compound over the entire patch. Allow the patch to dry completely.
 -
3.
Sand the patched area smooth to the surface, using a fine-grit sanding block. Apply an additional layer of compound to any recessed patches, allow to dry, and sand the area again. Wipe sanding dust with a clean cloth.
-
4.
Apply ceiling texture to the patched area, using a spray can of texture. Follow the manufacturer's instructions for applying the texture and allow it to dry completely.
-
5.
Apply primer to the patched area, using a spray can. Allow the primer to dry completely and apply two coats of ceiling paint.
Less Than 1 Inch Wide
-
1.
Fill the hole with vinyl spackling, using a putty knife. Wipe excess spackling with a clean cloth. Allow the spackling to dry completely.

-
2.
Sand the patched hole smooth to the surface of the ceiling with a fine-grit sanding block. Wipe the sanding dust with a clean cloth.
-
3.
Apply ceiling paint to the patched hole with a small paintbrush.
Things You Will Need
Cordless drill
Long drill bit
Drywall knife
Tape measure
Drywall sheet
Drywall screws
Drywall joint compound
Drywall taping knife
Mesh drywall tape
Fine-grit sanding block
Clean cloths
Can of spray ceiling texture
Primer
Paint pan
Paint roller
Ceiling paint
Putty knife
Scissors
Plastic mesh patching material
Spray primer
Paintbrush
Tip
You can also secure a support board to the support joist beams and attach the drywall to the board.
Warning
Wear gloves and eye protection when you use tools.
Don't disturb ceiling texture applied before 1977 as it may contain asbestos.
Writer Bio
Mona Culberson began working on the assembly line at a large manufacturing company in 1983, where she worked her way up into several positions of business responsibility. In 2005, she began a career in roofing, interior design and remodeling. She works daily as a professional painter/home remodeler/handywoman while lending her husband's roofing business a helping hand in her spare time.
an easy guide for DIYers |
When you purchase through links on our site, we may earn an affiliate commission. Here’s how it works.
(Image credit: Alamy )
Learning how to patch a drywall ceiling is a handy piece of knowledge that can save you thousands of pounds in repair costs over a lifetime.
Your drywall ceiling may get damaged through ceiling leaks or wear and tear, and it's a relatively easy fix for a seasoned DIYer.
If you can learn how to hang drywall ceiling or have accomplished removing a popcorn ceiling, you can certainly turn your talents to patching a drywall ceiling. We asked Nick Cryer, founder of high-end residential construction company Berkeley Place , to share his top tips for patching a drywall ceiling below.
How to patch a drywall ceiling for a pro-worthy finish
A drywall ceiling might need patching after fixing a ceiling leak as part of repairing a ceiling with water damage. These top tips will ensure you’re prepared to take on those repairs yourself for a fresh new ceiling that’s as good as new.
You will need:
- Drywall saw
- Joint compound
- Battery or electric screwdriver
- Putty knife
- Framing square
- Ruler or tape measure
- Sandpaper
- Drywall primer
1. Cut a new section of drywall
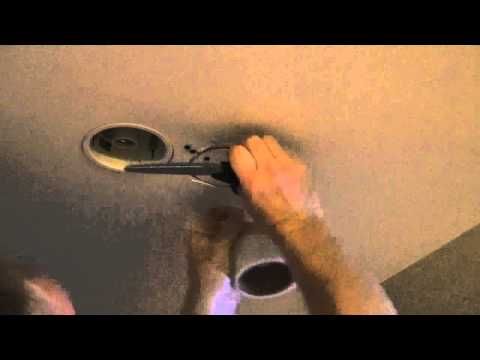
Try cutting an ‘inspection hole’ before removing the damaged section of drywall. If you cut the hole and see electrical wires, plumbing, or gas lines you may need to hire a professional to replace your ceiling.
Otherwise, draw a box around your damaged area with a framing square, then cut this size out of the existing drywall around the hole.
‘Measure the thickness of the drywall (most likely 12mm), and cut a new replacement section to size to cover the hole or damaged area you want to patch,’ says Nick.
You can use a tape measure or ruler to measure the cutout section to get the exact dimensions for the new piece.
Place two slabs of wood inside the hole to support the new section and screw in. Then screw the new section of drywall into place.
2. Apply drywall compound and tape
Taping the edges of the new patch of drywall to make it invisible is the trickiest part of the 'how to patch drywall ceiling' job, according to Nick.
He says: ‘You will need drywall compound and a roll of paper tape. You can use mesh tape, but it isn’t as strong. You can also create a perfect corner and crisp edge with paper tape that mesh cannot equal.’
He adds: ‘Drywall compound hardens quickly and doesn’t shrink, so it’s ideal for filling cracks, gaps and joints before applying the joint tape.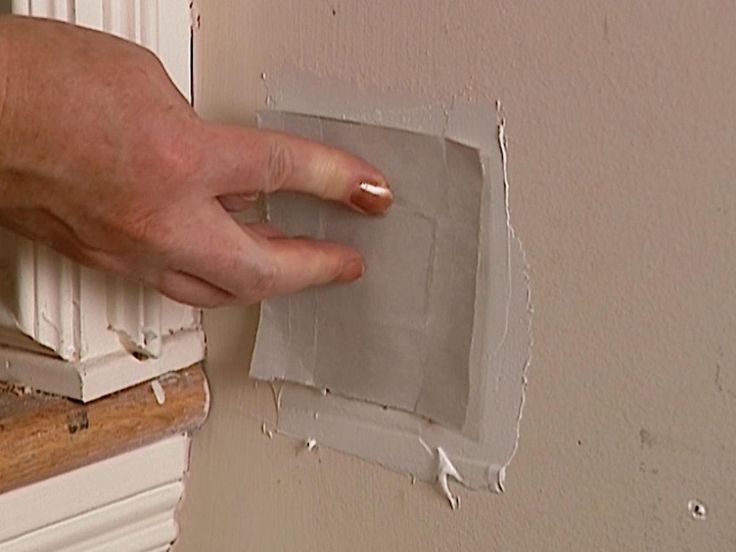 ’
’
Apply a layer of drywall compound over the new patch and then press your paper tape over the seams, running over it with your putty knife to smooth.
Then cover the whole patched area and paper tape with a layer of drywall compound to hide the tape and seams.
You will want to apply up to three coats, and it’s a good idea to sand the area between each coat to make sure it's smooth and doesn't have any 'high spots'.
Using a large 12in putty knife makes the job easier.
3. Sand and clean
After the third coat of compound, sand the area until super-smooth and then clean with a damp cloth to remove dust.
4. Apply your primer
You will then need to prime the ceiling with a drywall primer and paint the patch to match the rest of the ceiling for a seamless finish. Your drywall ceiling patch repair is complete.
Can you patch plaster ceiling with drywall?
Yes, you can patch a plaster ceiling with drywall. Cut out the damaged area of plaster, then use drywall to patch it, securing it in place with drywall screws.
Ruth Doherty is an experienced digital writer and editor specializing in interiors, travel and lifestyle. With 20 years of writing for national sites under her belt, she’s worked for the likes of Livingetc.com, Standard, Ideal Home, Stylist and Marie Claire as well as Homes & Gardens.
How to fix a hole in the drywall on the ceiling?
WikiPotolok
Now it is difficult to find a material more popular for interior finishing work than drywall. It is good in almost everything except mechanical strength. Despite this drawback, structures on ceilings are often made from GKL and they look very beautiful. However, in case of damage, it is necessary to find the best option for repairing such a surface, and therefore, we will continue to talk about how to repair a hole in drywall on the ceiling - a phenomenon not as rare as it might seem.
Where to start
In order to qualitatively repair a surface that is always in sight - the ceilings are one of the most open and largest planes available to the eye, it is necessary to determine the nature of the forthcoming repair.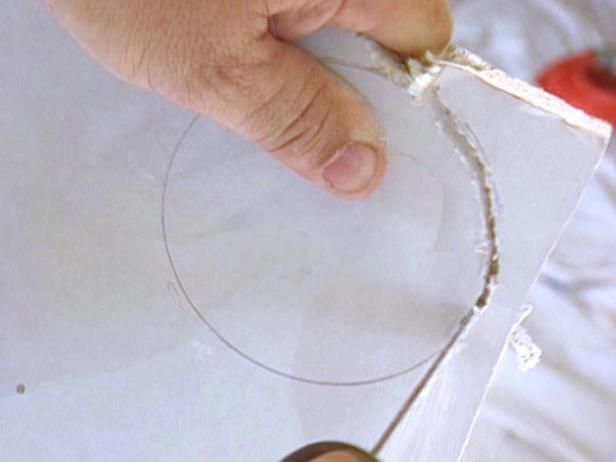 This will determine how exactly the hole in the drywall on the ceiling is to be repaired - using simple puttying or using a more radical method.
- Small holes, up to half a centimeter in diameter, can simply be puttied.
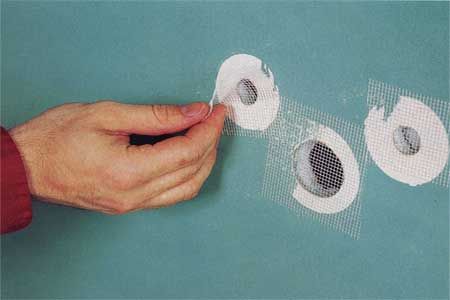
- If the hole is through and has a diameter of more than a centimeter, but less than three, you need to prepare a small piece of a special mesh and putty with preliminary gluing it to the damaged area.
- When the hole is already large enough, you will have to find something to fill it with, and then repeat the operation with putty on the grid. You can fill the holes with pieces of drywall or sealant - according to the circumstances.
- For large holes, simple filling will not be enough. Here it will be necessary to partially dismantle the section of the structure and replace it with a new one, followed by the application of putty.
The hardest part is figuring out how to fix a large enough hole in the plasterboard on the ceiling - there will be much more work here and it will be more difficult to complete them. Therefore, we will not analyze cases with minor defects - everything is quite clear there. Let's take a closer look at situations with major damage.
What needs to be done
Each case of repair is individual, but, nevertheless, the method of repair and getting rid of defects in the ceiling structure in the case of plasterboard is always the same. In general, there are a number of quite simple operations to be performed:
- Determine the size of the damaged area.
- If possible, find the places where the guides pass, on which the drywall sheet or other structural elements of the frame are held.
- Expand the hole, if necessary, to such an extent that the “patch” can be attached to the frame.
- Prepare a patch of the desired shape and size.
Tip: if you need to make a part exactly matching the shape and size of the hole, you can first cut it out, and then outline it on the surface and cut a hole of the ideal configuration according to the drawing.
- Fix it in place with self-tapping screws.
- Fill and sand the repaired area.
You can get an insert that fits perfectly under the cut opening not only by tracing it along the contour. If the hole is small, the insert can be drilled into the surface with an ordinary “crown” - a drill nozzle. A cut circle will remain inside the nozzle, and the hole itself will be round. Combining these two parts will be easy.
If it is not possible to determine where the frame parts are, then it is possible to carry out repairs without attaching a patch to it. In this case, in order to close a hole in a plasterboard ceiling, you will need two or more wooden bars or slats that are slightly larger than the hole made. They will become the basis for fixing the piece of hl installed in the hole. The principle of mounting the repair piece of the surface is very simple:
- First, the hole or hole needs to be made a little larger and give them a rectangular or square shape.
- Blocks of wood or slats must be attached along the long side of the cut hole. They should be slightly longer than the hole to be patched.
- Bars or slats are fixed with self-tapping screws through drywall along the edges of the hole.
- Next, you need to carefully try on the patch to the cutout - its shape and size should fit very well. It is best to cut the inner edges of the insert at an angle, which will increase the bonding area and allow you to more accurately fit the edges of the workpiece to the opening to be sealed.
- If all is well, then fix the patch by attaching it to the edges of the previously mounted bars.
- It remains only to putty everything again and sand the repaired area after the putty has dried.
In this way, it is possible to restore the integrity of both a small area of a few centimeters, and to carry out a more global surface repair on large areas. Do not forget about one more thing: it is always necessary to treat the repaired areas and the areas adjacent to them with primers.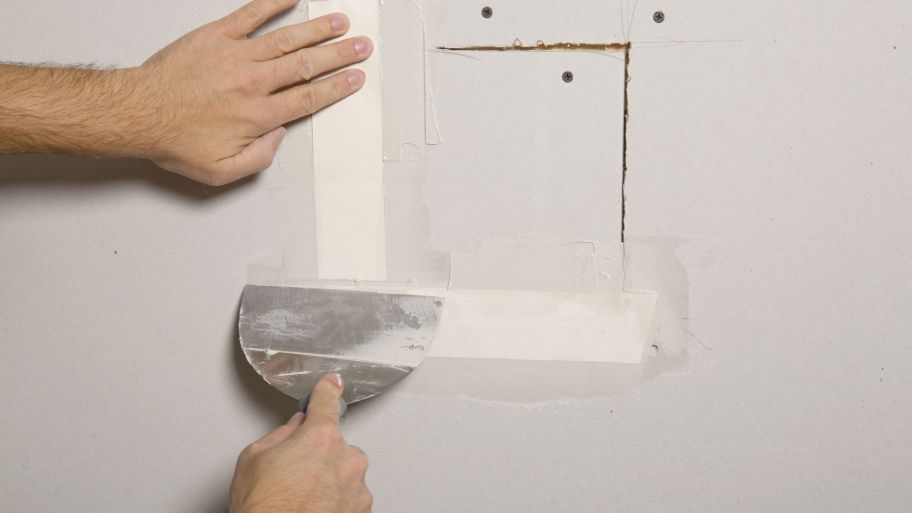 This will improve the adhesion of the materials to each other and the putty will lie down better.
WikiPotolok
How to repair holes in plasterboard on walls and ceilings: video
Today, plasterboard has become commonplace in interior decoration. With its help, drywall walls and partitions, furniture and cabinets from drywall and other drywall design elements in the apartment are assembled. But, the material has one drawback, and it is likely that holes in the drywall may form with careless handling.
Drywall cracking example
Such damage can occur from accidental impacts during the transport of drywall, heavy objects and repairs. And also, do not exclude the wetting of a certain section of the wall, the need to gain access to communications under the skin. In any case, repairs will be required to restore the original state.
How to fix a hole in drywall without resorting to high costs, let alone changing the entire skin?
Back to index
Full content of material
- 1 What is needed for repair
- 2 How to fill a hole in a drywall on the wall
- 2.
 1 Preparatory work
 - 2.2 Measurement and fitting of the workpiece
- 2.3 Settling of the opening
- 2.4 Decoration of the damaged section
- 2.
Repair does not require special and highly specialized equipment or material.
There must have been pieces of drywall and plaster with reinforcing tape left in the household. It is these materials that will be needed when you need to seal holes in drywall for wall or ceiling cladding.
And you also need long self-tapping screws for drywall or wood (at least 40 mm long) and, importantly, a wooden beam or rail.
Filling a hole in drywall with wood
The wood can be sized to fit on a wall or 40mm thick for fixing to the back of a drywall sheathing.
Scheme for sealing holes in drywall
Plaster is used the same as for all wall or ceiling decoration. But, if there are no residues left, you can purchase a small amount of universal putty.
The tool kit is also very simple. You definitely need a drywall or stationery knife, or a piece of hacksaw blade for metal. They will cut drywall and fit it.
Self-tapping screws can be screwed in with either a screwdriver or a conventional Phillips screwdriver.
For finishing, you will need plastering trowels or a straight trowel to work with putty and level all surfaces.
Back to index
How to repair a hole in drywall on a wall
When everything is ready, work begins on the restoration of damage. Watch the video on how to fix a hole in drywall.
Preparatory work
Removing even a fairly large hole is not so difficult. Moreover, you do not need to incur large expenses in terms of financial expenditure. In such a situation, one of the features of drywall plays into the hands, its easy and simple workability without special equipment and tools.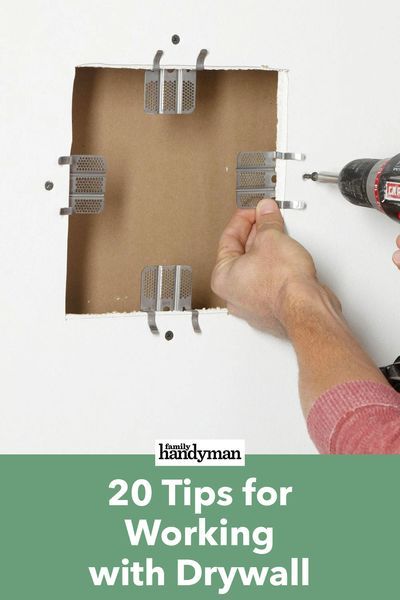 To prepare the restoration of a damaged surface, you only need a regular clerical or construction knife. It is necessary to cut the material at a distance of 40-50 millimeters from the hole.
Step-by-step process for patching a hole in drywall
This is done to remove drywall that is of poor quality in structure, as it becomes brittle due to getting wet or hit.
The cut is made in several passes, after which the resulting edges are inspected and, if necessary, the hole is expanded to a solid material. Do it as follows:
- Draw a rectangle around the resulting damage with the specified parameters.
- Using a knife (you can also use a hacksaw blade), make cuts and remove the damaged part.
- After that, you need to remove and trim all the irregularities on the resulting edges, slightly trimming the edges with a blade.
At this preparatory work can be considered completed.
Measuring and Fitting the Workpiece
All repairing the hole comes down to installing a precisely sized plasterboard patch in place of the cut, which simply covers the damaged area.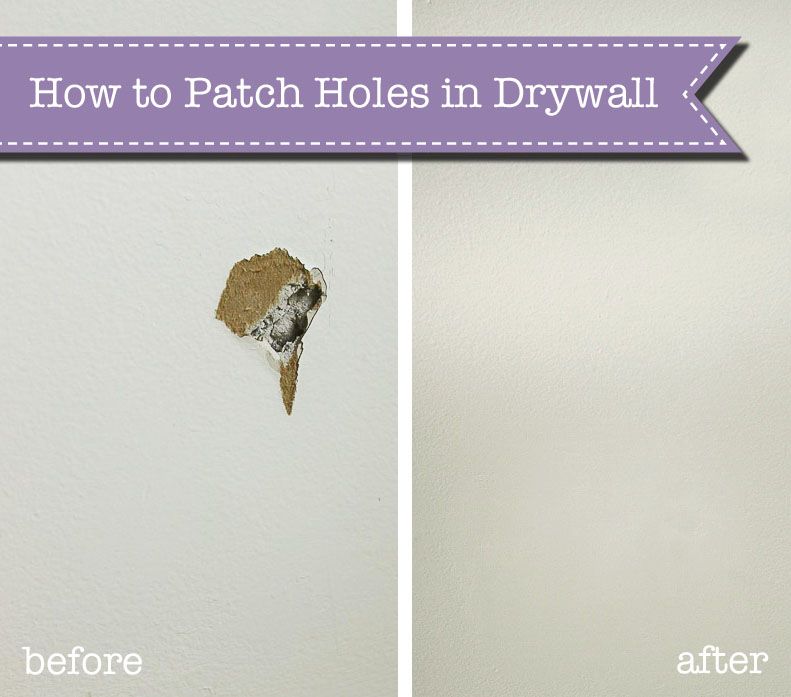 It is desirable that the slot has even and uniform edges, then it will be much easier to fit the workpiece.
Step-by-step instructions for patching a hole in a drywall sheet
The dimensions of the sides are taken with a tape measure or ruler and transferred to a piece of gypsum board used as a donor.
For a more precise fit, the cut-out patch can be applied to the hole and circled with a pencil around the excess edges, which, having hemmed, can most accurately fit the resulting opening without gaps.
When the workpiece is ready, proceed to its direct fastening, closing up the hole.
Closing the opening
First, a final check is made by comparing the prepared piece with the cut hole, after which the fixing material must be prepared.
The next step is to prepare a piece of wood or batten that will serve as a base for fixing the patch in the opening. It is best that the section corresponds to the distance of the rear edge of the sheathing sheet from the wall.
The timber must be slightly larger than the size of the holes itself, exceeding its dimensions by 50 mm on each side. And also you need to apply at least some kind of paint and varnish coating on the wood so that it does not swell from moisture and does not squeeze out the patch.
Stages of sealing the opening in drywall
The lath is inserted with its ends under the drywall sheathing and fixed with long self-tapping screws directly through the sheet. Even if the rail does not reach the wall, it can be tightly “pulled” with screws to the exterior finish.
If the gap in the gypsum board is too large, then 2-3 strips or even more can be used to seal it, the main thing is to create sufficient support so that the patch is securely held in the cut opening.
Example of using a strip to seal an opening in drywall
After preparing the support base, the cut opening must be closed with a previously prepared patch, everything must be checked using the building level.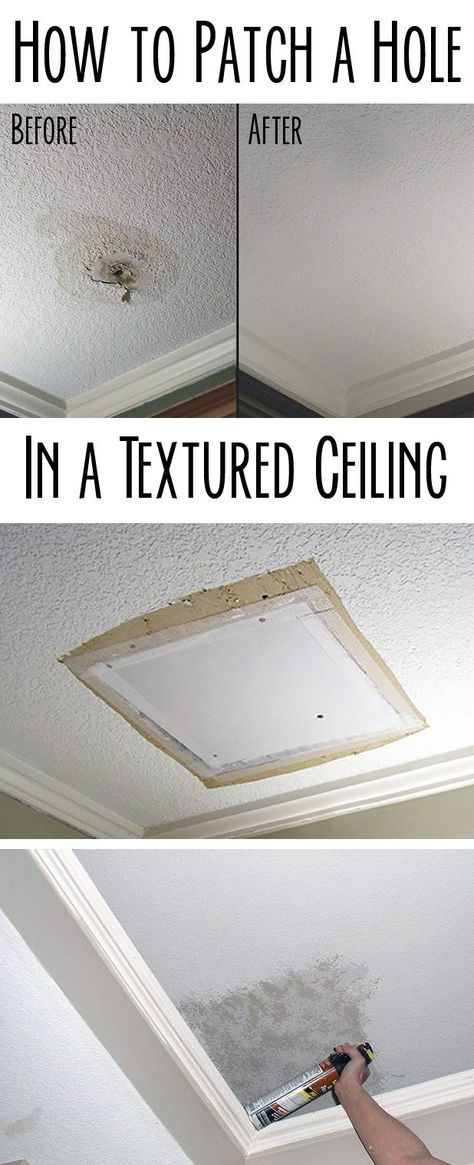 If the location is quite satisfactory, then you can fix the workpiece using self-tapping screws of the appropriate length.
When everything is ready, you need to move on to finishing and plaster all joints of drywall.
Finishing the damaged area
To remove all kinds of gaps, universal gypsum putty, reinforcing sickle tape and plastering spatulas are used. The perimeter, along which the patch is joined to the plasterboard sheathing, is carefully covered with putty and a sickle is glued on top. From above, all surfaces are covered with another layer of plaster on the GKL, carefully leveling the mixture over drywall.
The process of mounting sickle on a patch
The process of grouting a puttied patch
When the putty dries, (when it dries completely, it acquires a snow-white color) it is rubbed with sandpaper with fine grain (120-160) on a grater.