How to paint old wood furniture
How to paint wood furniture: an expert guide |
(Image credit: Polly Wreford/Sally Denning / Jon Day / Annie Sloan )
Knowing how to paint wooden furniture is a useful skill that can help to breathe new life into old furniture. Whether you want to refresh a family heirloom, change your home's scheme for less, or want to reinvigorate a second-hand piece, painting wooden furniture is easy.
Painted furniture ideas are endless, however, the process is a lot different from painting wood trims around your home. Preparation is key to ensuring a lasting, flawless finish so patience and a steady hand are required when tackling a furniture project. If the process is rushed, you risk marring the piece – something you will hope you avoid.
Here, we have spoken to experts to learn their top tips for painting wooden furniture, from picking the right piece through to finishing a project, so that you can achieve the best finish every time.
How to paint wood furniture
(Image credit: Getty Images)
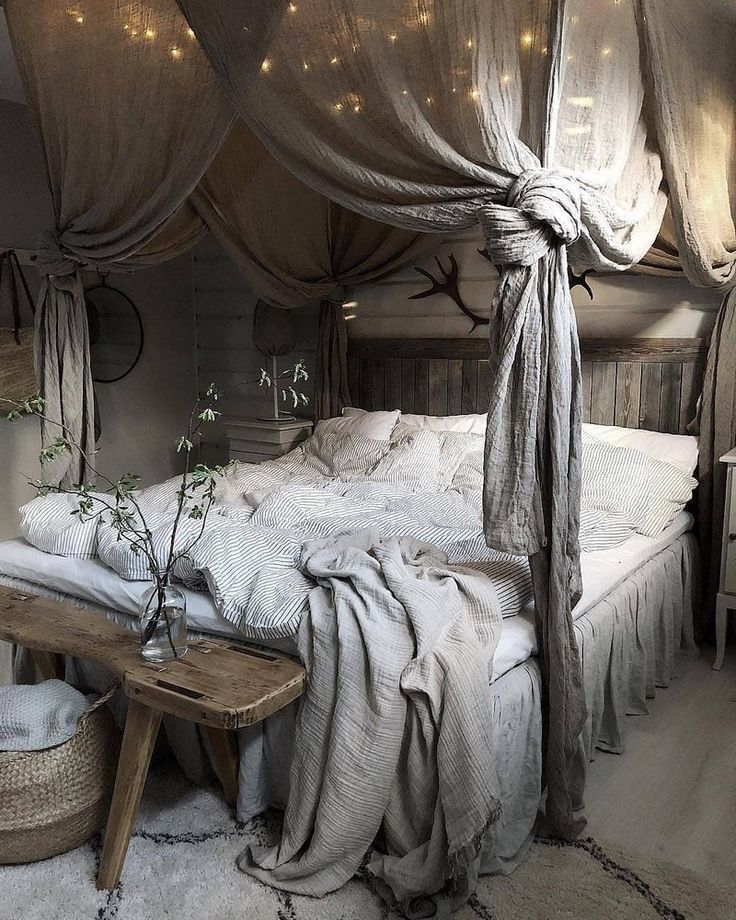
Gone are the days of hastily assembled flatpack and cookie-cutter interiors. Today, interior design is all about personality and character. Antique and vintage stores are a treasure trove of beautiful pieces of furniture that you won't find anywhere else. However, these vintage gems often need a little TLC to bring them up to scratch or sometimes need a change of color to suit your look.
'Colorful furniture has made a huge resurgence over the last few years, but it has been hard to find exciting colored cabinetry outside of the bespoke sector,' says Claire Hornby, head of creative at Barker and Stonehouse . Learning how to paint wood furniture gives you the opportunity to create a piece full of color and character that perfectly complements your interior scheme.
That’s where the painted furniture revolution comes to the fore. Learning how to paint wood furniture can transform a boring brown dresser that's otherwise destined for landfill into the hero of your sustainable kitchen ideas.
In addition to creating characterful pieces for your home, learning how to paint wooden furniture will also save you money as lots of these antiques sell for a song, and also know that you’re doing your bit for the planet, repurposing rather than buying new.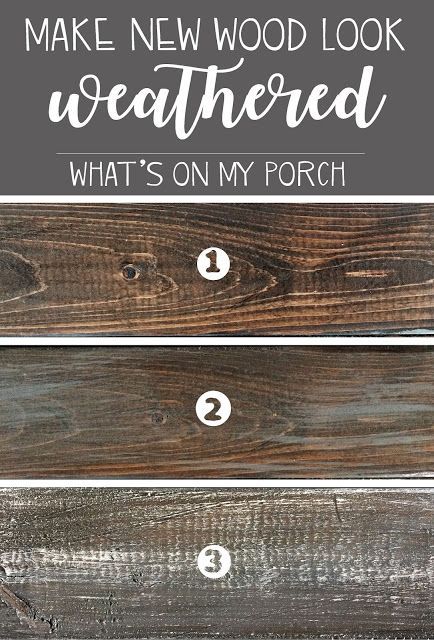
1. Prepare your space
As with any painting project such as how to paint a wall or how to paint a door, you need to ensure you ventilate the area. For painted furniture projects this is easier, as the piece can often be moved outside into the open air or into a shed or garage. If the furniture cannot be moved outside, open up windows and internal doors to allow for a through-draft to help clear the air in your home.
When painting wooden furniture, make sure you lay out a dust sheet to catch any dripping paint. This is especially important if you are painting inside or on outside deck ideas.
2. Prepare your furniture
Remove any hardware, doors, and drawers and dismantle any sections of the furniture that is easily removable to allow for even coverage across the entire piece.
Sanding is key before any repainting project. ‘It is always important to prepare the surface as outlined on the tin, even if previously painted,’ adds Hanna Ellis. If a piece has previously been painted, sand with coarse sandpaper to remove the previous color and leave an even surface, and vacuum or wipe away any dust. Wash unpainted furniture with sugar soap (available on Amazon) and then lightly sand. Wipe with methylated spirits to remove any dust or grease.
If you are looking to repaint a painted or glossed piece of furniture, it is important to remove this layer first. To achieve this sand the surfaces with coarse sandpaper, (between 60 and 80 grit). If your piece has intricate carving and detailing, treat it with a stripper to remove paint and gloss. If you're unsure of where to start then be sure to find out how to strip paint from wood.
For an unpainted piece, 'start with a good scrub with sugar soap to remove dirt, grease, old polish/wax or nicotine, rinse thoroughly and allow to dry,’ says Hanna Ellis of Frenchic Paints . Then follow by sanding with a light sandpaper (between 180 and 220 grit) to create a key to help the paint to adhere. Once having sanded your piece, wiped the surface with methylated spirits to remove any grease or dust. Then leave to dry for a few moments before painting.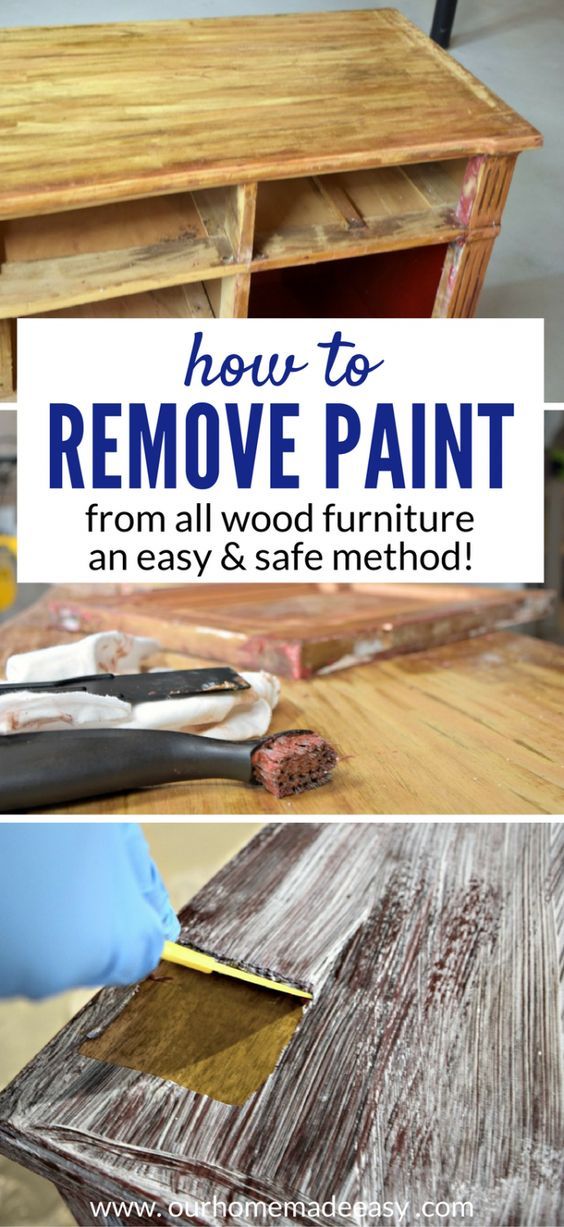
3. Prime wooden furniture
Knowing how to open a paint can is also essential – yes, there is a right way to do it. While you often only have to prime certain surfaces, adding a coat or two of suitable prime to any project will allow for a more even layer of paint. Prime your furniture and allow it to dry for the recommended time as stipulated in the tin. Drying time is key to ensuring that your finished piece isn't streaky or patchy.
4. Start painting
Once your primer has dried or if your paint includes a primer then you can start painting. Opt for a round brush and apply your first coat of paint, ensuring all details are painted thoroughly. You may need to change to a smaller, finer brush if your furniture as particularly intricate details that a larger brush cannot reach. Then allow to dry for the recommended time.
5. Apply a second coat
When this is dry then apply your second coat. If using milk paint, brush along the direction of the grain, while chalk and mineral paint looks best if painted in different directions.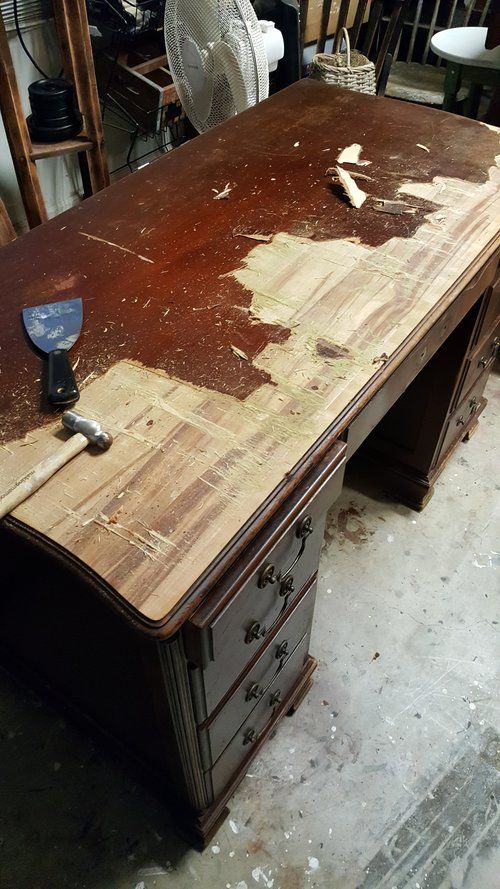
6. Finish the piece
Finishes are key if you don’t want all your hard work to go to waste. Some paints, especially milk paints, are self-sealing meaning that after a few days of curing it will be incredibly durable. However, other paints such as chalk paints will need a wax or lacquer to prevent them from being marked or scuffed.
'Water could damage chalk paint if left unprotected. Opt for a specific chalk paint wax to protect your furniture while also giving a beautiful mellow sheen,' says Annie Sloan. 'Alternatively, you can use matt or gloss chalk paint lacquer. Matt will give a slightly clouded finish whereas gloss chalk paint lacquer will give a high-end sheen.'
Finding wood furniture to paint
(Image credit: Jon Day Photography)
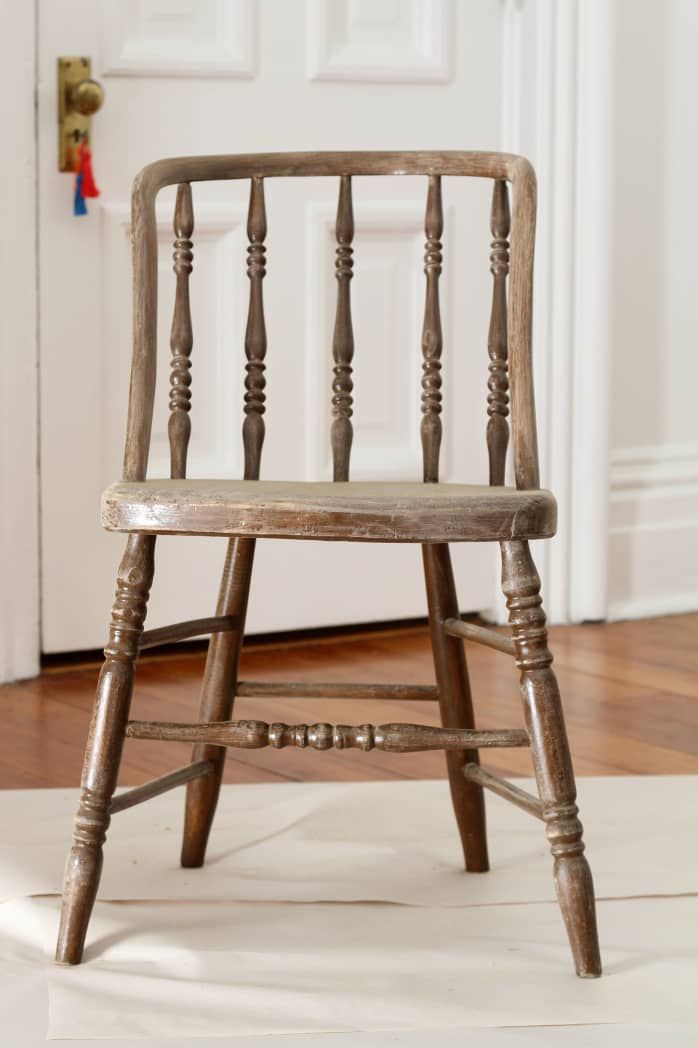
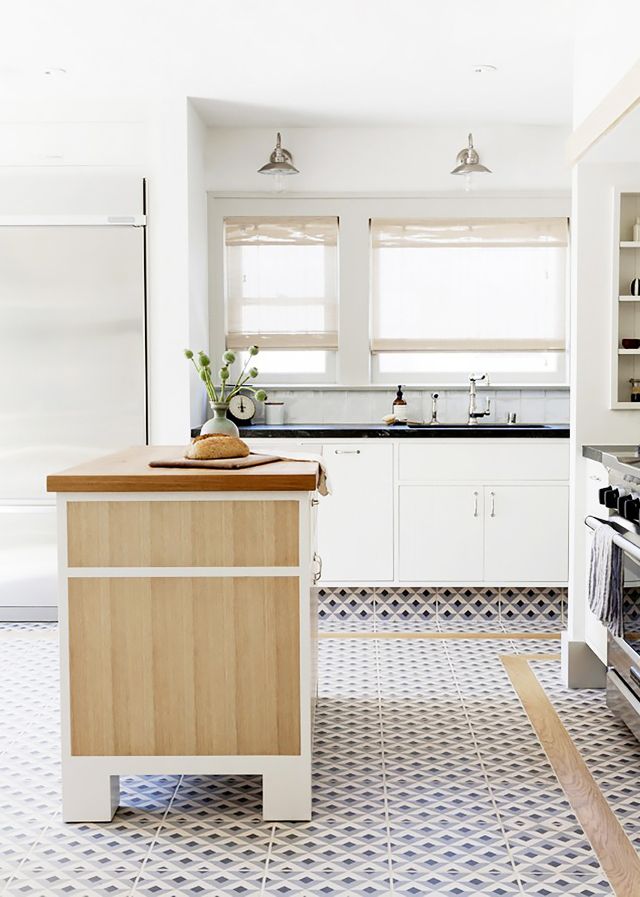
The secret to finding a good piece of wood furniture to paint is to look for good bones. Look past ironmongery, colors and any scratches and instead look at the piece's silhouette. Ensure that it is well made, look for solid wood and dovetail joints. Check all mechanisms are working well and that the piece stands strongly and doesn’t rock or wobble.
'I hate the thought of well-built, carefully crafted furniture going to landfill. And while from an aesthetic point of view they might have seen better days, there is still plenty of life left in these old pieces,' says Claire Manton, founder of Claire's CraftHouse . 'With the interiors market looking to become more sustainable, upcycling is a great way to reuse pre-loved pieces, while unleashing your own creativity.'
Choosing the right brush for painting wood furniture
(Image credit: Cornish Milk Mineral Paint)
An often overlooked element, the right brush can make or break your project. When starting to research how to paint wood furniture, brushes are a key consideration.
‘There are different schools of thought on brushes, and it really depends on the type of paint you are using. For milk paint, which is water based and quite thin, synthetic bristles or a blend is better as they absorb less water meaning more paint ends up on the surface being painted, and stops the paint drying out too much on the brush.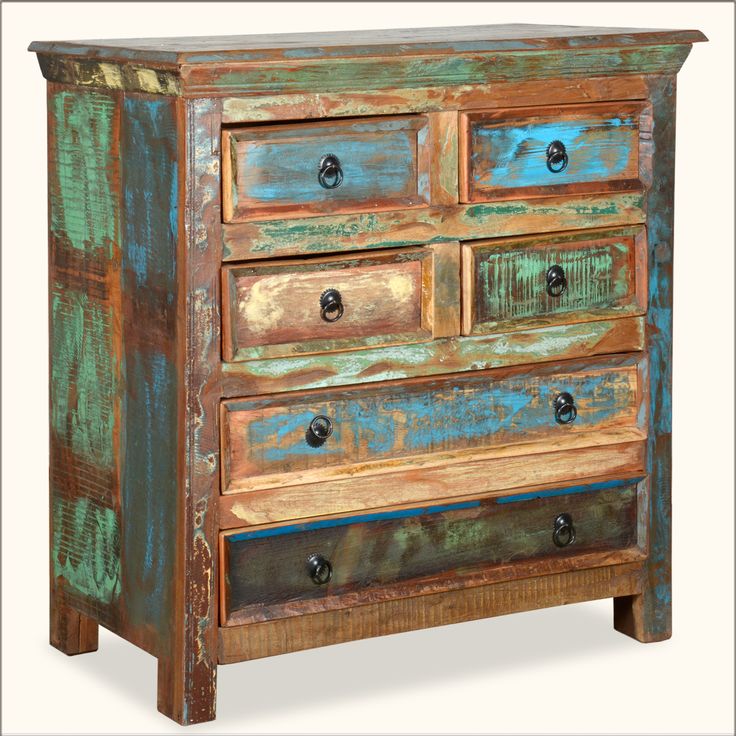 A slanted synthetic brush will give a great finish with milk paint or any thin water based paint,' says Carolyn Moore, owner of Old Fashioned Milk Paint .
'However, some of the thicker mineral/chalk paints will work better with a thicker natural bristle brush, even a round brush often used for waxing, as they hold more paint, meaning fewer dips in the paint and therefore fewer brush marks. If you are planning a lot of painting, look for a good quality brush – the best you can afford, to avoid annoying bristle shedding and ensure they stay in shape following repeated uses.'
The best paint to use on wood furniture
(Image credit: Annie Sloan)
There are lots of different paint finishes to choose from when finding out how to paint wood furniture. Your choice will predominately depend on the look you want to achieve, though it will also be guided by whether you are happy to use a primer and sealant or are looking for an all-in-one product. Also consider selecting eco-friendly paints to keep your project kind to the planet.
- Chalk paint is the most common choice of paint for wooden furniture and gets its name from the luxurious chalky finish it creates. ‘It’s a multi-purpose paint that applies to just about any surface, without the need for priming or sanding,’ says Annie Sloan, founder of Annie Sloan Paints .
- Mineral paint is crafted from mineral pigments combined with a binder, typically acrylic resin. 'Unlike milk and chalk paint, which need to be sealed with a wax or varnish to prevent absorption of grease or moisture, mineral paint is waterproof and washable rather like an eggshell or satin paint,' says Carolyn.
- Milk paint is quickly becoming a favorite for furniture restoration. 'Traditional powdered milk paints achieve a finish that is flat back to the grain and produces no brushstrokes,’ explains Joe and Reece Daden-Tapp of Cornish Milk Mineral Paint .
- 'It is perfectly possible to use a normal eggshell, satin or spray paint on furniture too, if you want a contemporary, sleek, full cover paint finish, as long as you prepare it well!' adds Carolyn.
How to avoid streaks when painting wooden furniture
(Image credit: Annie Sloan)
Avoiding streaks when painting wooden furniture, all comes down to your paint finish and your direction. ‘With milk paint it’s always best to brush along the direction of the grain, but there’s no need to worry too much about brush marks, (especially on raw wood as it sinks in like a stain), milk paint is very forgiving – it dries really fast, but with a light sanding using a super fine sanding sponge after each coat, it leaves a rich, buttery smooth finish and no brush marks. However with chalk and mineral paint, it is recommended to paint in different directions to avoid brush marks, and fat round brushes work better,’ explains Carolyn.
‘When applying the paint, try not to overload your brush as this can lead to overworking the paint which tends to cause dragging marks and unwanted texture. The other tip is to make sure you leave the correct amount of hours between coats,’ adds Hanna Ellis.
Do you need to prime wood furniture before painting?
You don't necessarily need to prime wood furniture before painting. This slightly differs from how to paint a wall where priming is vital to achieving a high-end finish.
Lots of chalk and mineral paints feature an integrated primer meaning that after a light sanding and a wipe down, you can apply the paint and still achieve a flawless finish. Some furniture paints will require a primer before use, be sure to check the tin before starting your project.
However, even if you do not need to use a primer, it is essential that you prepare the wood before you start painting.
Should I paint the interior of wooden furniture?
Whether you decide to paint the interior of your wood furniture is utterly up to you. 'Sometimes a thorough clean and some hemp oil or wax is sufficient to tidy them up,' says Claire Manton. 'It’s worth remembering that if an old piece has a musty smell to it, painting the interior can sometimes help by sealing odours into the wood, thereby reducing any unpleasant smells. Scented furniture waxes and salves are also a good way to freshen things up.'
Why does paint peel off wood?
Paint can peel off of wood for a number of reasons, however incorrect preparation such as the lack of cleaning, a primer, or the correct paint is often one of the main causes of peeling paint on painted wood furniture.
To prevent paint from peeling from wooden furniture make sure you follow through with the correct prep work and do not rush the process. While it may be tempting to rush through to complete the project, patience is needed to ensure the best finish. What's more, consider adding a protective finishing coat or wax to seal the paint in and prevent it from peeling due to every day use. This may be especially important on pieces you touch or move every day such as drawers, cabinets, or chairs.
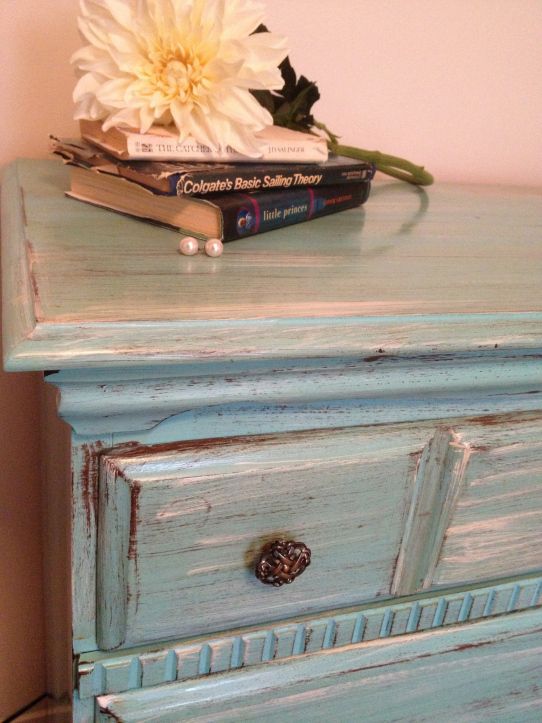
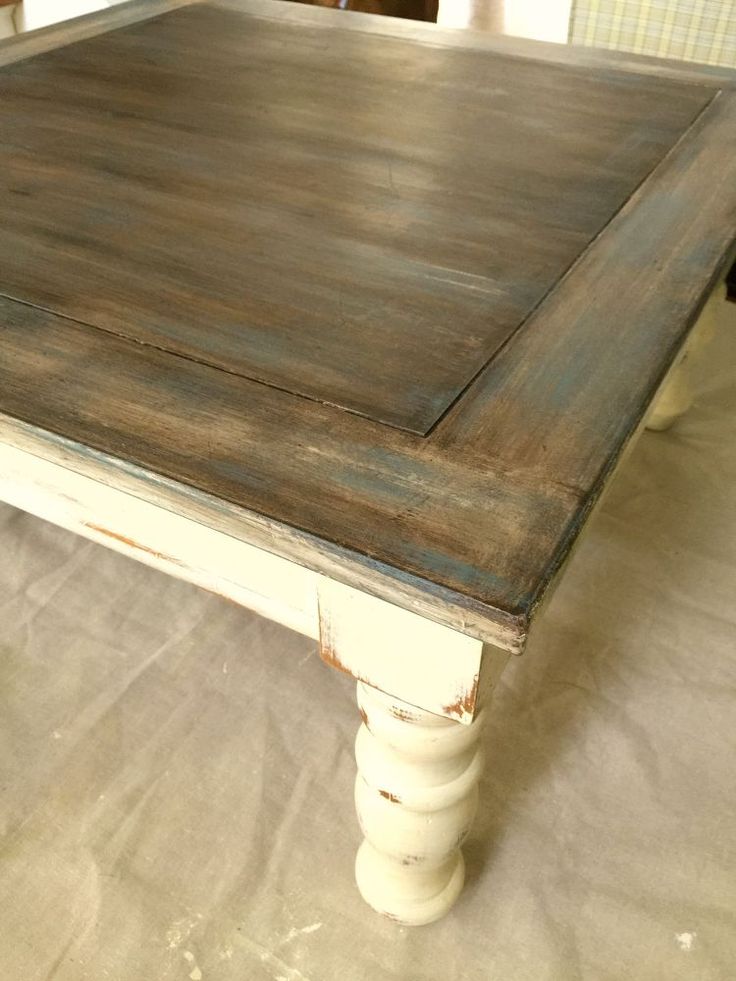
How do you create a vintage finish on wood?
The easiest way to make a vintage finish on wood is to use an antique-style glaze. There are myriad crackled glazes from which to use.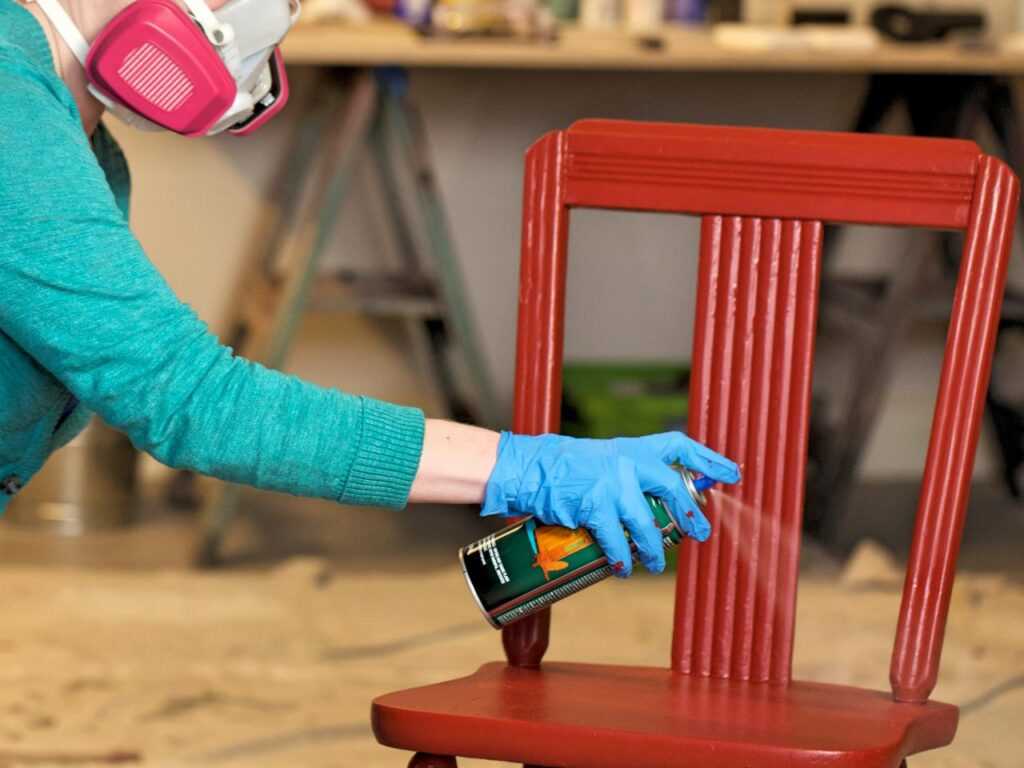 Simply apply between coats of paint to create the distressed effect. 'If you are applying a crackle glaze, always choose a period style paint such as milk paint, which will result in a rich, matt finish as would find on older pieces,' recommends Carolyn.
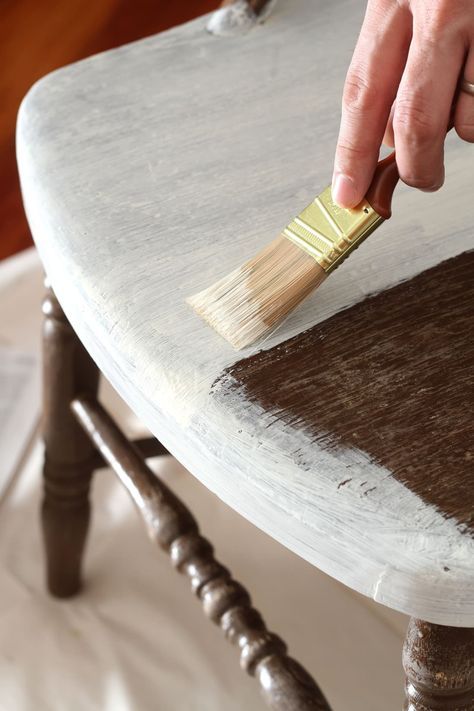
However, for a traditional distressed look, then hand-distressing is the way to go. This is achieved by painting a piece of furniture a solid color and then buffing the corners and edges with a fine sandpaper to reveal the wood beneath. 'Begin by painting a piece of furniture one color and then, once it’s dry, paint over it with a completely different second color. Sand back through to the first color and in some areas go back as far as the original wood. With the right color combination, it looks beautiful,' says Annie Sloan.
'You can make the process easier with any type of paint by applying wax to the corners/edges before painting, so the paint flakes in those areas,' recommends Carolyn. 'Any distressing works best when the wood beneath is darker – bright new pine showing through doesn’t look aged, so in that case it is a good idea to stain the wood before painting/distressing. You can even layer paint colors by using a darker color first and a lighter color on top, then distressing back to let the darker color show through – this creates a wonderful effect.'
What happens if you don't sand before painting?
If you don't sand before painting wooden furniture you will not achieve a smooth painted finish as paint will gather in any scratches or scrapes. It will also highlight any other natural flaws in the wood grain. Furthermore, if you don't sand before painting, your paint may not stick to the surface resulting in it peeling off once dry. This is because even a light sand provides a key onto which the paint can adhere.
Having graduated with a first class degree in English Literature four years ago, Holly started her career as a features writer and sub-editor at Period Living magazine, Homes & Gardens' sister title. Working on Period Living brought with it insight into the complexities of owning and caring for period homes, from interior decorating through to choosing the right windows and the challenges of extending.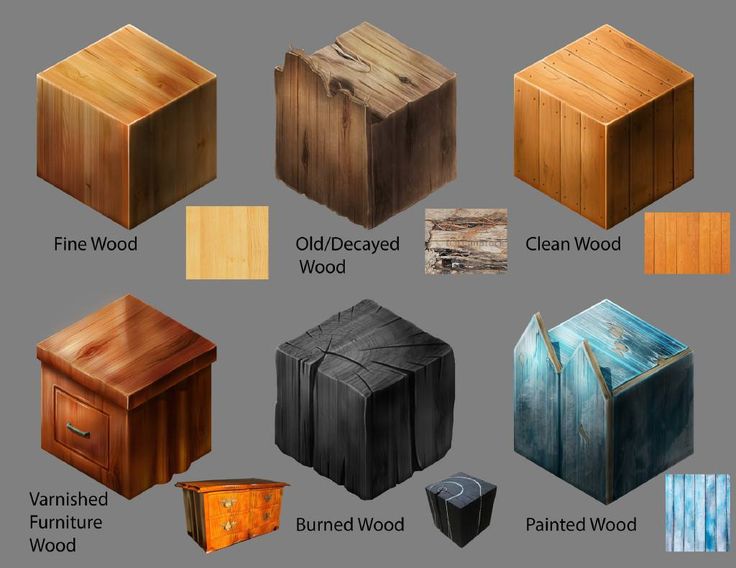 This has led to a passion for traditional interiors, particularly the country-look. Writing for the Homes & Gardens website as a content editor, alongside regular features for Period Living and Country Homes & Interiors magazines, has enabled her to broaden her writing to incorporate her interests in gardening, wildlife and nature.
How to Paint Furniture Step-by-Step To Avoid Biggest Mistakes
Looking to bring new life to an older piece of wood furniture? A new coat of paint is an easy way to refresh its look and make it into your own custom piece. Whether you have white paint or a fun color in mind, chalk paint or semi-gloss, you'll want to make sure your project looks as professional as it can by the end to sit pretty on your patio or indoors.
40+ Easy & Inspiring Updates for Every Room of Your Home
40+ Easy & Inspiring Updates for Every Room of Your Home
$10 at Country Living
Credit: .It's easy for a paint project to not go according to plan though.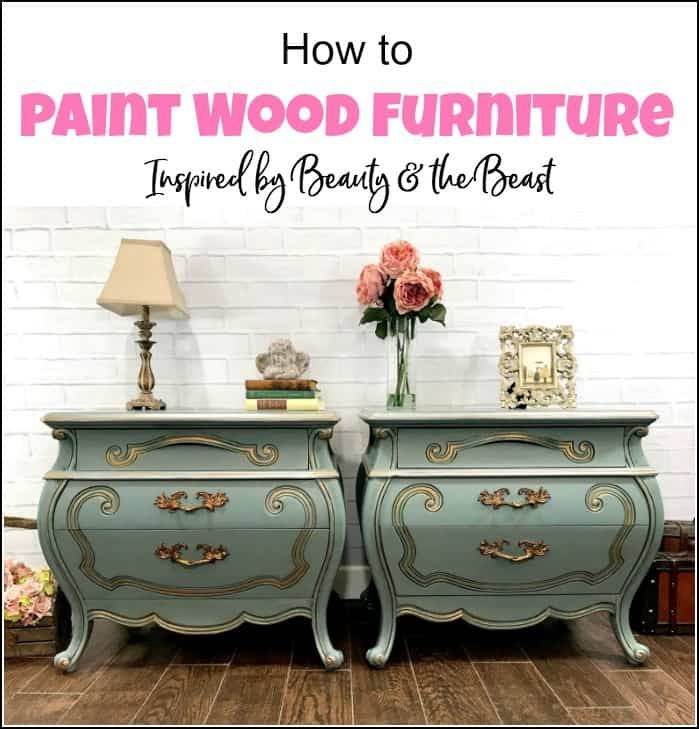 You might find that the paint quickly chips and feels off, or that the finish doesn't look as smooth as you'd envisioned. Worse case scenario, a project gone awry could have you starting back from the beginning. So how do you avoid that? And what's the best paint to use on wood furniture to do so?
We have answers for you! After compiling all of the most common mistakes witnessed over the years, we are sharing this helpful guide to painting furniture—the way that actually, truly works.
BOSCH Palm Sander
BOSCH Palm Sander
Now 24% Off
$59 at Amazon
1. Start by sanding.
You'll often find tutorials out there that claim you don't need to sand, and there are also lots of primers and paints promising that no sanding is necessary. But from what I've learned over the years, sanding is a must. Be sure to start any painting project by sanding your surfaces with 150-grit sandpaper.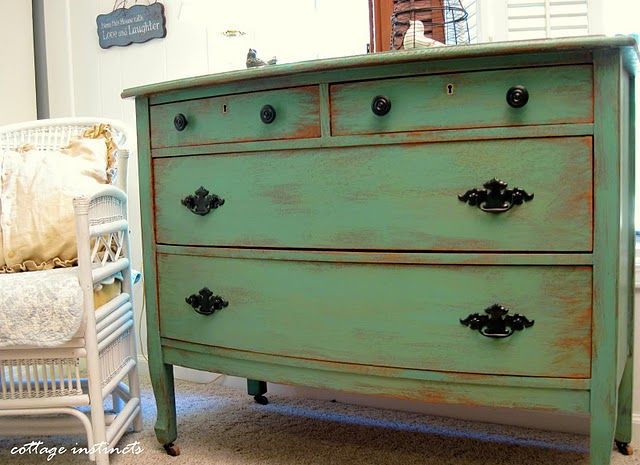 (I use this orbital sander with variable speeds.) Be careful not to gouge the surface though: You're just looking to rough it up a little so the primer has something to adhere to; you're not trying to strip the surface.
Tip: Use 80-grit if you are sanding a furnishing with an existing varnish.
2. Remove any residue.
Once you've sanded, be sure to wipe down the surface with a tack cloth to remove any residue. Trust me: Do not use a paper towel, and don't speculate on whether it might be better to use a lint-free cloth. Just use the tack cloth!
3. Prime it.
If you're priming laminate furniture, use Zinsser B-I-N Shellac-Base Primer. Otherwise, use Zinsser Bulls Eye 1-2-3 Primer. Prime using a mini foam roller, and use a foam brush to get into any hard-to-reach areas. Let the primer dry according to the instructions on the can of primer. Once it's fully dry, sand away any drips with a 220-grit sanding block, and wipe your piece down with a tack cloth.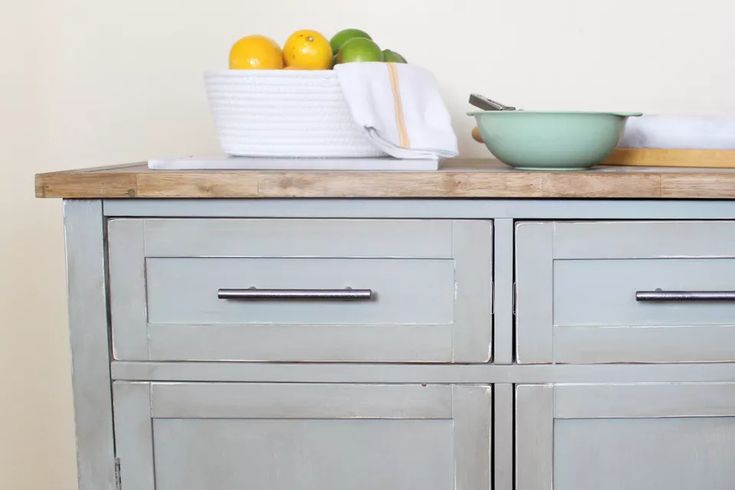
Everything You Need to Start the Job
Bosch Orbit Sander
Now 24% Off
$59 at Amazon
150-Grit Sandpaper
$15 at Amazon
Galaxy Tack Cloth
$20 at Amazon
Zinsser Shellac Primer-Sealer
Now 31% Off
$27 at Walmart
Zinsser 1-2-3 Primer
Now 14% Off
$15 at Amazon
4. Paint it!
Finally: It's painting time! Use a mini foam roller to apply three thin coats of semi-gloss latex paint. Allow six to eight hours in between coats. It's important that you sand in between coats if you have any drips or residue on the piece. Use the same sanding block and a new tack cloth. The new tack cloth is very important here: You need to remove every speck of lint and dust before applying the Polycrylic Protective Finish in the next step. It's clear, so everything shows. I've blamed everything from the dog to the paint for the tiny pieces of fuzz I've found when applying the Polycrylic, but it's really because I didn't remove everything with the tack cloth.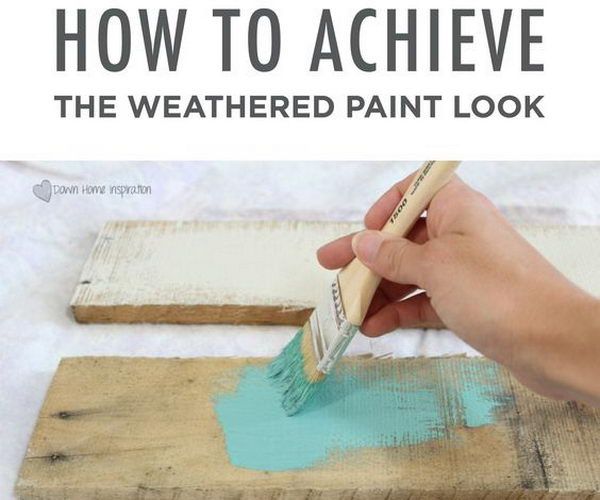
5. Protect it.
Finally, use a new mini foam roller to apply a thin coat of Polycrylic Protective Finish water-based protectant in gloss. You want to make sure you go over this coat very lightly with the foam roller to smooth any bubbles that can occur with the foam roller. Allow 72 hours for it to dry before using; otherwise, it can get sticky.
Everything You Need to Finish the Job
Sure-Grip Mini Roller
Now 37% Off
$6 at Amazon
Sanding Sponges
$8 at Amazon
Polycrylic Protective Finish
Now 30% Off
$13 at Amazon
Semi Gloss Latex Paint
$19 at Amazon
Matte Interior Chalked Paint
Now 28% Off
$23 at Amazon
what kind of paint is better than repainting, instruction, video and photo
No one will argue with the fact that the preserved old furniture made of natural wood is of a fairly high quality. But if the array itself is often in good condition, then the lining, as a rule, leaves much to be desired. It’s a good thing, it’s a pity to throw it away, and the owners of grandmother’s wardrobes, chests of drawers or tables have a reasonable interest - how to repaint wooden furniture and how difficult it is to do it yourself. nine0003
Photo of old furniture.
Let's hasten to reassure you right away, the proposed instruction is not difficult. But you will have to work hard, for which the whole process is divided into several important stages. First of all, you need to choose what paint to paint wooden furniture, then prepare the surface itself, and finally, the process of painting and drying itself. Now we will analyze everything in more detail.
Choosing a paint
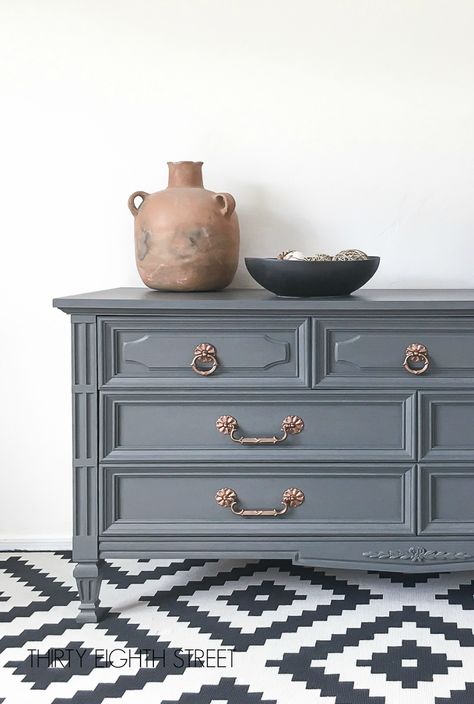
- Before choosing which paint is best for painting wooden furniture, you need to clearly understand for yourself what you want to see at the finish. The surface can be made glossy or matte. If you want to harmoniously fit a thing into an existing interior, then it is better to use covering paints and paint it, for example, in white.
 nine0013
 - If you like the look of natural wood, you want to highlight and emphasize the texture, then you should pay attention to transparent or translucent varnishes, enamels, stains and, of course, impregnations.
Painted white.
Tip: it often makes sense to first clean and prepare the item well so that the condition and texture of the wood can be seen. After that, it will be much easier for you to decide what type of composition to use.
- Compounds are best used specifically for furniture, if you take yacht or parquet varnish, this does not mean at all that the surface will be stronger and more beautiful, but washing them off, in case of an unsatisfactory result, will be problematic. nine0013
- When choosing which paint to paint wooden furniture, we advise you to pay attention to acrylic compositions. They have a water-based base and, when wet, are easily washed off with water. But on the other hand, after complete drying, these surfaces can be washed up to 500 times, without damage to their appearance.
- An important factor is the vapor permeability of acrylic, air exchange for natural wood is very important. Your furniture will be reliably protected from pests and mold. Plus, acrylic formulations are practically odorless. For work, you do not need to take the children out of the house or carry things to the garage - the paint is harmless to health. nine0013
Stained wood.
- The second most popular are alkyd paints and varnishes. In quality, they are absolutely not inferior to acrylic, the price here is also approximately the same, but they are made on the basis of an organic solvent. Therefore, alkyd compounds, during drying, can release toxic compounds.
- A big plus here is the possibility of using such furniture in wet rooms (acrylic cannot boast of this). Therefore, when it comes to sitting a stool, it is better to use alkyd compounds. nine0013
- Oil and nitro paints for wood are less suitable. Polyurethane or PVC compounds are more suitable for professionals, so amateurs are better off not taking them.
Covering paints.
Advice: when purchasing the composition in the store, ask the consultant to select the primer for it. Each manufacturer produces an appropriate primer for their paint, and it is better to use this particular primer. Otherwise, the compositions may be rejected.
The video in this article shows varieties of wood paints.
Workflow
If you choose what paint to paint wooden furniture and just apply it on top, you will not be able to get the proper quality. Painting is preceded by a number of preparatory steps (see also how to paint the ceiling with acrylic paint).
Art painting on old furniture.
Preparing the surface
- It is better to paint furniture in unassembled form. First of all, remove the locks and fittings. Perhaps it makes sense to change them altogether, according to the new image.
 It happens that in old things there is no way to dismantle fittings, stained glass windows or some details. In this case, they are wrapped in foil or sealed with masking tape. nine0013
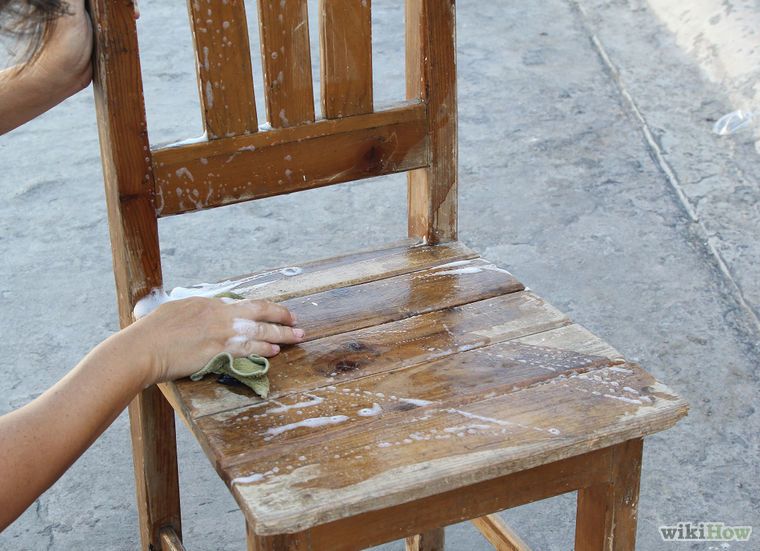
 - Next, you need to completely remove all the old coating. This can be done in several ways. The most affordable, but time-consuming way out is to use a medium grit sandpaper. On flat surfaces, you can use a grinder; in hard-to-reach places, you will have to erase the old layer manually.
- In the distribution network there are round metal brushes that are inserted into an electric drill, it is convenient to work with them, but you should be careful not to remove only the top layer and not damage the wood. Be careful when cleaning veneer, it rubs easily. nine0013
Wire brush cleaning.
- You can use chemically active mixtures, which are sold in abundance in the construction markets. A liquid or gel is applied to the wood and after a certain time it is scraped off, together with old layers, using a metal spatula or scraper.
 But this method is applicable only in well-ventilated, non-residential premises.
 - It is convenient and fast to work with a building dryer. The surface is heated, after which the paint peels off and scrapes off with a spatula. The use of a blowtorch is possible, but you should work carefully, because if you hold the lamp in one place, the wood will darken and tan will form, which will be problematic to eliminate. nine0013
Using a building dryer.
- After removing the old layer, the surface is leveled with fine emery cloth. Dust should be removed with a dry brush or vacuum cleaner. We do not recommend using wet rags, as small cracks and pores of the wood are open and dust clogs back.
- Carefully inspect your furniture, large cracks or chips are filled with a composition suitable for this type of paint. After that, you need to sand the putty surface again with a fine emery cloth and remove dust. nine0013
Delimitation with masking tape.
Priming and painting
- Regular flat brushes are fine for this purpose, just fluff them up and remove loose bristles. If you like to work with a roller, then take a roller with a small nap.
- Before painting wood furniture, a primer must be applied. As already mentioned, a special primer is used, specifically for this type of paint. Acrylic compositions are preferably applied to a slightly damp surface, so you do not need to wait until the primer is completely dry. Alkyd, on the contrary, are applied exclusively on a dry basis. nine0013
Tip: When applying covering compounds, a little paint can be added to the primer. Thus, the base will acquire the desired shade and it will not be necessary to apply many layers.
- Coloring is done at least 2 times . In this case, all layers, in turn, must lie down on a dry surface. The number of layers is determined visually, to achieve the desired effect.
 Intermediate layers can be alternated, but the top must be applied exclusively in the direction of the wood fibers. nine0013
An old bedside table as a highlight of the interior.
Conclusion
After painting, your furniture will not only change its appearance, it will become a highlight of the interior and will serve faithfully for many years to come, and if you get bored, then you already know how to repaint wooden furniture with your own hands (find out here how to paint wooden door by yourself).
Artistic cabinetry.
Add to favorites print version nine0004
Share:
Article rating:
Related articles
All related content
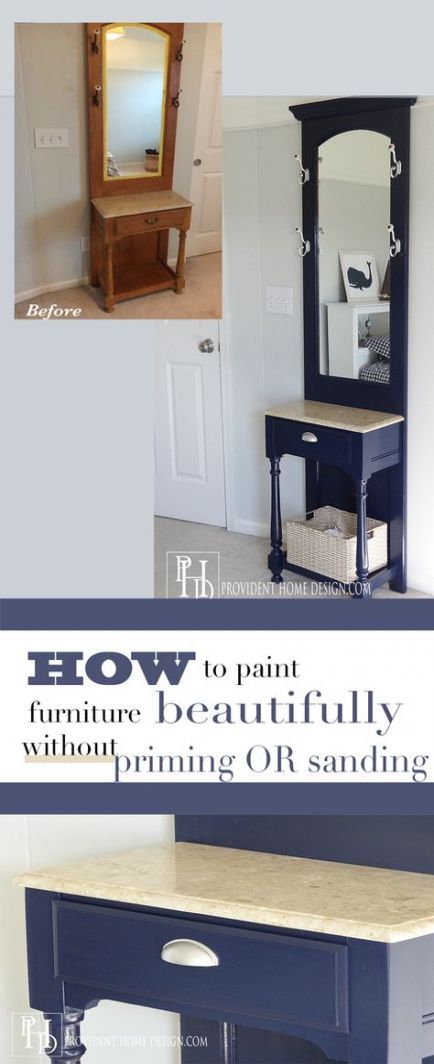
INMYROOM furniture and doors easy way to repaint
DIY
You can repaint everything - even varnished doors. It would be a wish!
Often, in order to change the interior, repairs are not necessary.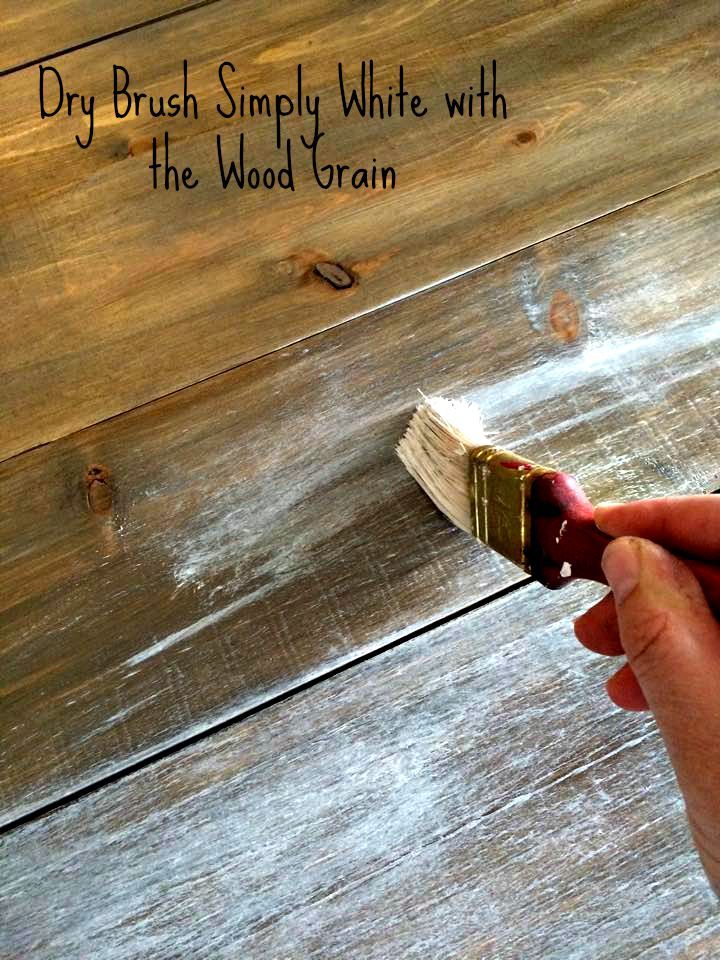 It is enough to refresh the textiles, decorate one accent wall with wallpaper, change the carpet and do something with the furniture. But what? Really buy a new one? Do-it-yourself repair expert Kristina Nikiforova shared tips that will help save time and nerves if you decide to repaint an Ikea table or an old grandfather chair yourself. nine0004
Kristina Nikiforova
craftsman and blogger
Made a budget repair in Khrushchev, maintains a blog about self-repair remont_devochki
I won’t tell you the easiest way to repaint, everywhere you need to make an effort. But if there is a desire and a mood, then everything will work out. I have the following sequence of actions: wash, sand a little, remove dust, degrease, cover with primer in 1-2 layers, cover with paint in 2-3 layers, then wax. I'll tell you more!
What can be painted:
- furniture made of chipboard in foil;
- MDF in a film, for example, a kitchen;
- lacquered furniture;
- doors, both made of wood and film;
- tables, cabinets, beds, cabinets.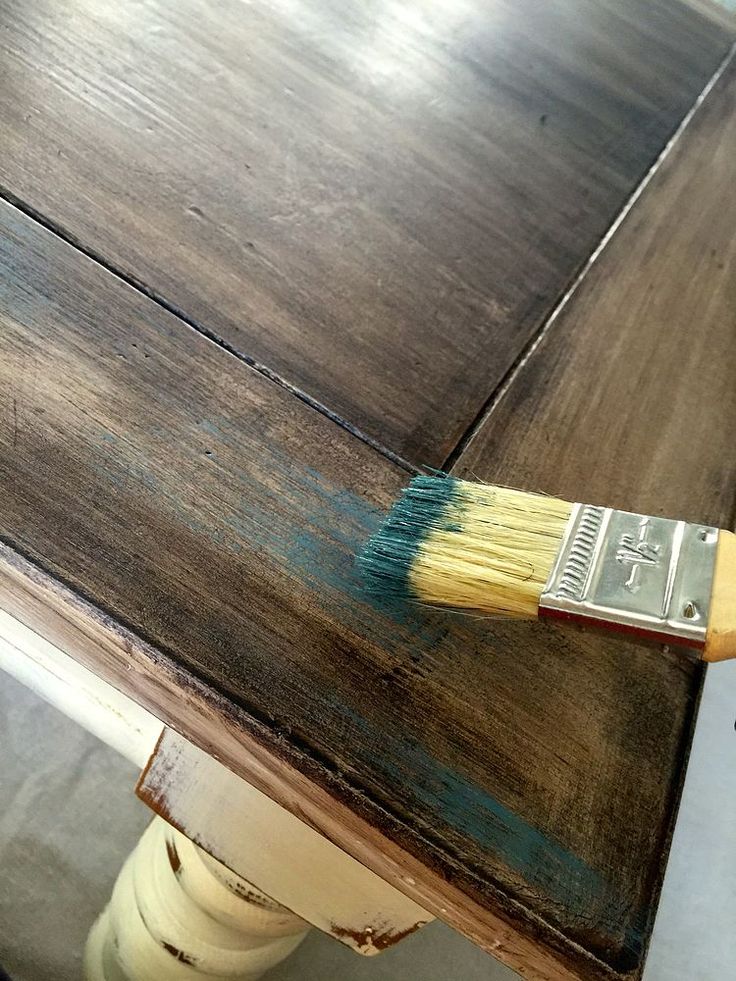
Where to start?
Wash first! Thoroughly remove stains, grease, dirt, and odors—anything that makes old furniture look old. To do this, move the furniture away from the wall, cover the walls and floor with a protective film, prepare a soapy solution and wipe your product with a sponge soaked in it. Try to remove hardly soluble stains with vinegar, alcohol, white spirit or acetone. Don't forget to wear gloves and a protective mask! nine0004
If you want to get rid of the film, heat it up with a heat gun: it will come off easily. If the film is glued too tightly and does not come off, it is better to paint over it, after sanding it.
View this post on Instagram
A post shared by . To do this, use fine sandpaper, but if one of your friends has a grinder, it's time to remind these friends about yourself.
nine0003
Prepare for painting
To do this, dedust and degrease the surface: wipe it with a damp cloth, and then with a cloth with a degreaser or alcohol. The remaining adhesive from the film will also have to be sanded and degreased. After that, you need to putty products: remove all holes from old handles, shelves and fixtures, cracks and bumps. After that, sand and degrease the surface again.
View this post on Instagram
A post shared by0182 Aug 5, 2019 at 1:29am PDT
Apply primer
To make the paint adhere to the surface, prime the surface. Choose an unscented primer like Tikkurila's Otex Akva, it doesn't smell! Liquid, water-based, dries quickly. Primer in two layers, each layer should dry.
Paintable!
Latex matt paint in different colors, such as Luxens, is suitable for painting furniture and doors.