How to make raised garden
Raised Bed Garden from A - Z | What to Know
Are you building a raised bed garden, or are you looking to improve your raised bed crops? You have come to the right place.
Earlier this year, I invited my email group to send me any questions they would like me to answer on the topic of raised bed gardening. Little did I expect the flood of responses I received.
As a long-time raised bed gardener, I am thrilled to see how many of you are looking to start your raised beds for the very first time – and want to make sure you get off on the right foot. So many of you, too, have experience with raised bed gardening but have questions on how to improve your results. One thing is certain, the information available on the internet regarding materials, methods, risks, etc. – well, let’s just say it’s conflicting at best.
Joe Lamp’l is enjoying time (and a comfortable raised bed perch) on his GardenFarm.
My hope with this raised bed gardening series (and yes, so many questions to answer it’s morphed from one podcast to a series!) is to put that conflicting information, well, to bed for you. It’s my goal to answer all your questions from A to Z, planning to harvest and maintenance, starting with this first episode in this raised bed gardening series.
If you would like to join the conversation and contribute to future topics, click the red “Get Free Updates” button at the top of this page.
My Raised Bed Gardening Background
You might be feeling intimidated by the idea of building a raised bed garden. Believe me, I understand. I had been gardening all my life when, several years ago, I was selected to host the DIY Network television series, Fresh from the Garden.
Joe Lamp’l on the set of Fresh from the Garden in 2005.
The focus of the show was backyard food production in raised beds from seed to harvest. I was given free range on design, gardening methods – the whole deal. The only catch? Failure was not an option. Three years, two different locations, 52 episodes, and zero failures later, I attribute my gardening success in large part to all the practices that I will share with you in this series.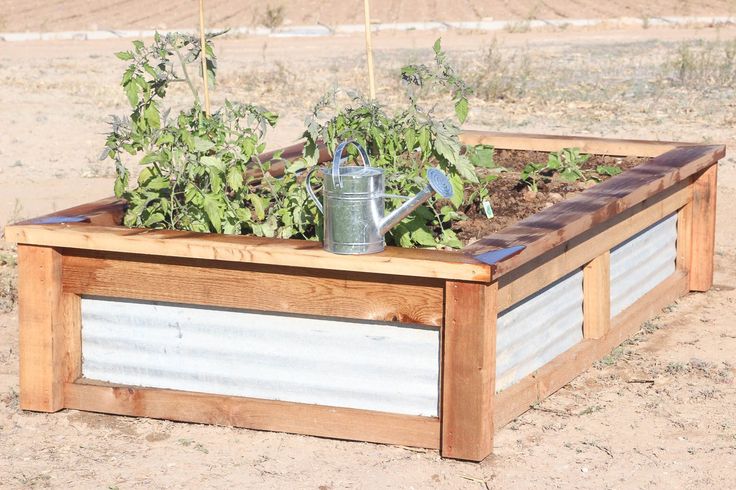
About 14 years have passed since Fresh from the Garden. Since then, I’ve designed and overseen many raised bed installations. My Growing a Greener World team and I have traveled all over the country and seen many raised bed garden setups. We’ve seen beds over concrete, lots of community gardens, just about everything. We’ve seen what works and what didn’t.
As part of the Growing a Greener World series, I built my GardenFarm and turned what was five acres of overgrown brush into a large, productive raised bed garden and developing landscape. Six seasons ago, I built the raised beds I now see from my office window. If you’re interested, I invite you to watch the episode on construction and see details of the design instructions I used for building raised beds at my GardenFarm, plus the raised bed diagram.
Six seasons later, the gardens are beautiful, incredibly productive and a little easier to keep in “television-ready” shape.
Layout sketch of the GardenFarm raised bed set up during early planning.
The truth is, I feel that all these years televising my gardening techniques – regardless of the location – my garden has been … everybody’s garden. I’ve just been in charge of building and maintaining it. I’ve made plenty of mistakes and, like you, I never stop learning. I hope this series helps you get a head start.
Why Use Raised Garden Beds?
Raised beds provide you control over the health of the soil in which you are growing your plants. A raised garden bed is simply mounded soil or a contained bed of soil above the surrounding grade. The goal is to create a deep, wide growing area that encourages plant roots to grow down and outward.
Challenging native soil conditions can be overcome through the use of raised bed gardens.
Raised beds can put plants at eye level for better observation of pest issues. When the bed is contained in a structure, you are better able to really get in there and work your bed without impacting the overall shape.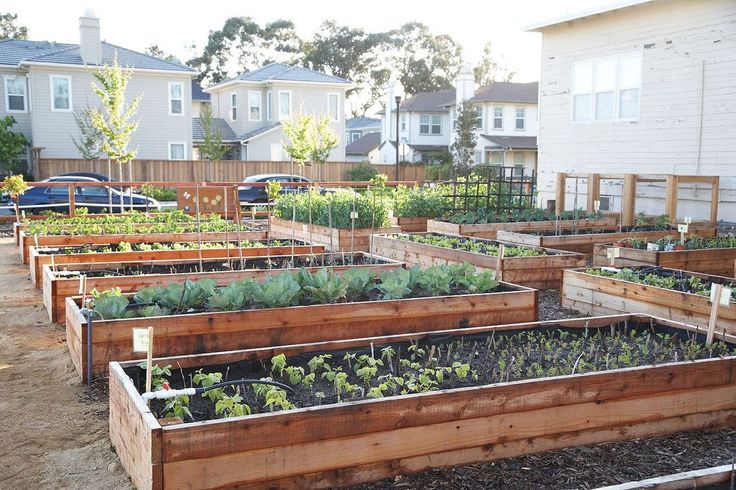
I also prefer not having to bend over to maintain the beds. Just that little bit of added convenience makes it easier to work in the garden, even on those days where I might be tempted to just kick back with a cold beverage. Believe me; I have those days too.
Do you live in an area with hardpack dirt, heavy clay (like my red Atlanta clay), fine-grained sand, or maybe your home is surrounded by concrete? Perhaps, you’ve done a soil test and discovered lead or some other contaminants in your native soil?
Raising the garden surface raises your plants above problem soil and can prevent plant roots from reaching those contaminants. By using raised beds, there really aren’t any surface issues that should hold you back from gardening.
When your soil bed is elevated above the surrounding terrain, you control its health and drainage. So, no matter how bad the ground you’re starting with, anyone anywhere can grow a productive raised bed garden.
Frankly, I also just love the look of raised beds. I find their aesthetic value to be a great benefit to my property. Given the options, I can’t imagine not gardening in raised beds.
Do the Benefits of Raised Beds Outweigh the Costs?
There are lots of variables to determine if raised beds are your best garden option. Some great gardeners prefer in-ground gardening. A frequent guest of these podcasts gardens in-ground with mounded beds, and he wouldn’t have it any other way.
Mounded, in-bed garden rows thrive at the Lee Reich gardens.
Building raised beds can be expensive. It doesn’t need to be, but it can be. In 2009, I was challenged to build an entire garden (including plants) for $25 or less and was fortunate to find 110-year-old barn wood to use for my raised bed structure. It may be worth checking sites like Freecycle.org or Craigslist.org for materials you can repurpose.
Some other potential downsides to raised beds:
- Their permanence. For most, this is a benefit, but if there’s a possibility you will need to relocate your garden in coming years, a permanent raised bed structure will need to be deconstructed.

- The raised soil is more exposed to heat and cold than surface soil. If the sidewalls of your bed aren’t very thick, the bordering soil and plants could be impacted by extreme conditions.
- Raised soil can dry out more quickly than surface soil. During this series, I’ll cover some ways to significantly reduce this downside, but the fact remains.
- Raised beds require space between the beds for movement, pathways through the garden. If you have a very limited real estate, losing some of it to walking space might be a dealbreaker for you.
Garden Area Planning
There is a myriad of raised bed designs and variations out there. We’ll get to that more next week, but first, consider your space. Bear in mind that these guidelines and principles apply most to an edible garden – growing fruits and vegetables.
You don’t need to have a lot of space to build a raised bed garden. What you do need is a spot that receives full sun for most of the day – at least 6 hours. Those edible plants require lots of sun to mature fully and set fruit for your harvest. So, the sunniest area on your property will be the best garden spot.
If your property is shaded by lots of trees, you may want to consider some selective pruning to allow the sun to reach your garden spot. Be sure to check out the Growing a Greener World blog on that topic and the considerations on this.
The GardenFarm raised beds during harvest time. Their 18″ height makes for easy picking!
It’s best if the garden area is relatively level. Many of you are starting with hilly terrain, so I recommend digging into the hill, if possible. Get that area as level as you can before you build.
If your spot isn’t level, and you don’t have the ability to level the ground, just bear in mind that your raised bed surfaces will need to be level once complete. So, starting with an uneven surface will need to be taken into account in your overall design.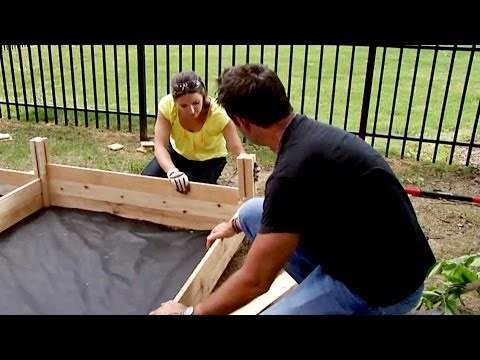
Be sure the raised bed area will have easy access to water. Is there a spigot nearby? If not, will it be practical to lay a garden hose from the spigot to the garden area?
It’s easy to forget that a strung-out garden hose will need to be pulled back in regularly (if not daily) to mow, use the hose elsewhere, prevent it from being chewed up by the dog, etc. Water is key to gardening success, so you want to be sure your method will be practical for you.
Consider proximity to your home too. I am a strong advocate for getting out into the garden every day. Take at least a few moments to enjoy the beauty of what you’ve built. Spending some time each day also helps you catch pests and disease in early stages.
Let’s be realistic. If your garden is tucked away on the other end of your yard, and that distance feels like a trek after a long day; you might be inclined to have a seat on your favorite chair instead. And don’t forget, you want those garden edibles to be as close to the kitchen as possible for a quick dinner. Why grow it if you’re too busy to harvest and eat it?
A spot located too far away from your home may be inconvenient and impractical.
What are your environmental conditions? Is there anything else which might impact your finished beds? For example, is the selected spot in an area that receives some runoff in heavy rain? Take into consideration how the runoff will impact your bed structure, or incorporate a way (like a French drain) for that runoff to go around the garden area.
If at all possible, don’t site your garden in an area where water tends to pool on your property. Even though the beds will be raised up, pooled water can still wick up into the beds and drown your plants over time.
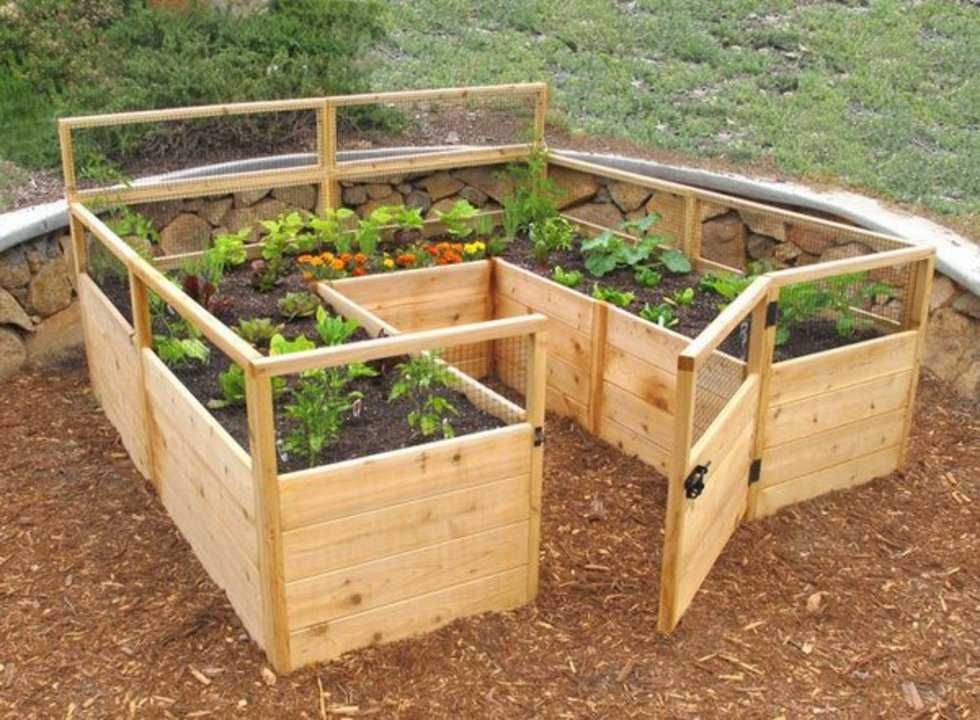
Will you be battling predators? If you are in a rural area and subject to visitation by frequent furry nibblers, like deer or raccoons; incorporate fence planning into your overall design. Keeping the garden nearer to your home may also help to discourage predators from visiting your garden in the first place. No sense taking the trouble to grow all that produce, only to lose it to your wildlife neighbors.
While you’re planning, know that how you orient your raised beds just doesn’t matter. It won’t matter if their length runs north-to-south or east-to-west. What will matter is the placement of your plants, and I’ll cover that further later in the series.
Orient your tall plants on the north side of your raised bed gardens. Planting them on the north or west side prevents their shading smaller plants from the sun.
Raised Bed Size Considerations
No doubt you’ve already been looking at dozens, if not hundreds, of images of other gardens. So, you know that bed sizes and shapes vary widely. I’ve seen just about everything too – even plants inserted directly into bags of garden soil (not something I recommend). Here are the guidelines I do recommend:
1. Height: 12-18” is ideal, however even as low as 6” can work and be productive. Most feeder roots are in the first 6”, but the deeper the roots, the taller the shoots.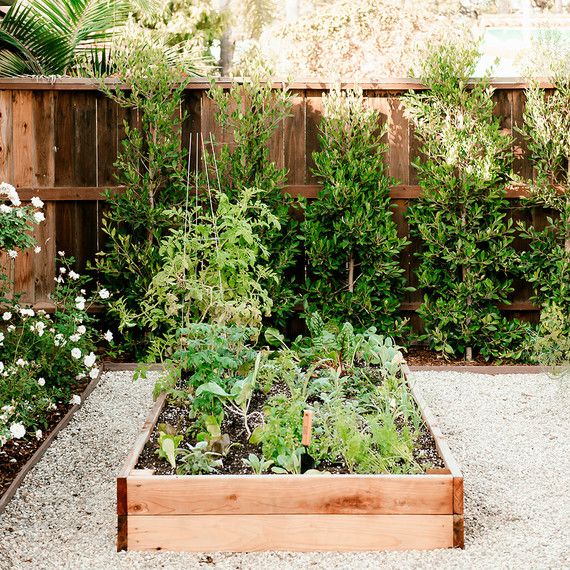 Going higher than 18” can potentially cause more structural issues down the road – due to the weight and pressure of all that soil.
Think about what types of crops you want to grow (root vegetables which require more space, herbs which require less, etc.). Think too about the foundation on which you will be building. Will the surface allow the soil to erode out the bottom (go higher), or might it be impacted by the weight of the bed (don’t go too high)?
Provide as much room as possible – and practical – for your plant roots to grow. (If you checked out last week’s podcast, you’d know that an 18” depth is also the perfect seating height.)
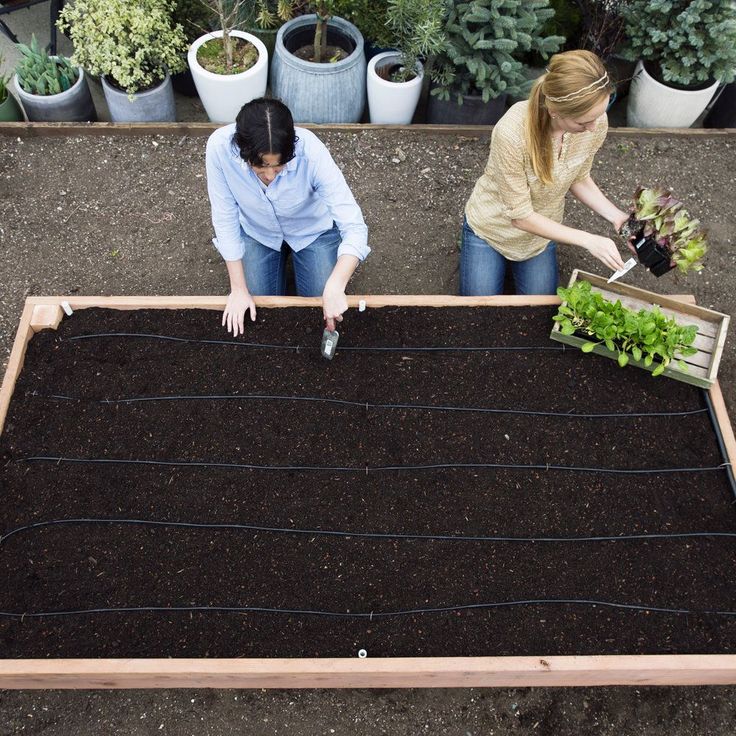
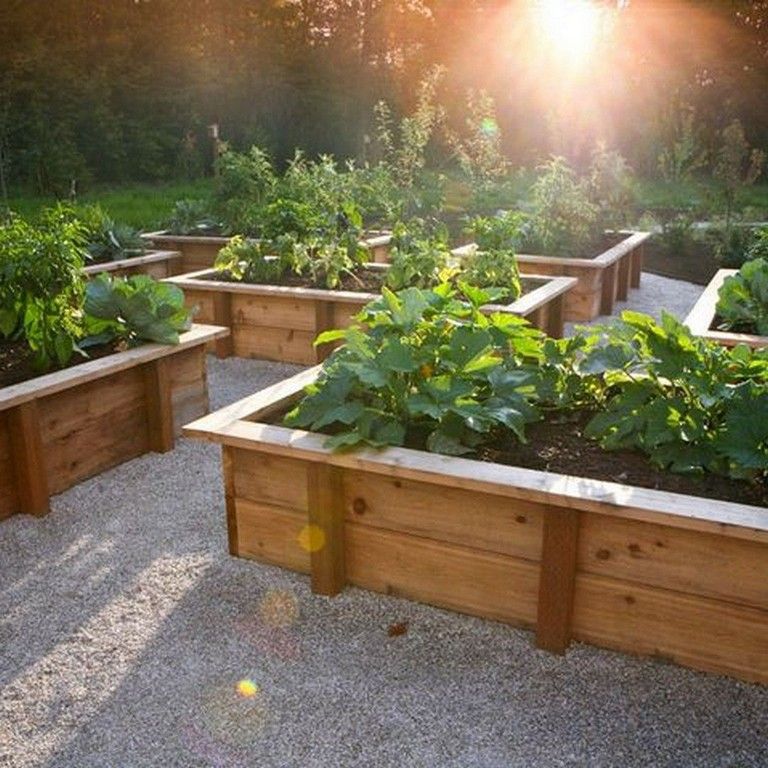
The GardenFarm raised beds, ready for planting. Built of 6″x6″ cedar beam, each bed is 18″ tall, 3′ or 4′ wide, and 12′ long.
2. Width: Four feet is perfect, but three feet can also work. Four feet allows more flexibility for spacing rows, but more importantly, not building beyond that width will allow you to easily reach the center from either side of the bed. It’s important that you don’t have to step into the bed to weed, plant, etc., as that will compact the soil and affect drainage and overall health.
3. Length: Whatever fits your needs. You could build 4’x4’ squares. You could build 4’x20’ rows. As long as you stick within a four-foot maximum width, your length is only limited by your space and budget.
4. Shape: As mentioned, you can build squares, rectangles, T’s, circles, ovals, etc. As long as you can reach all areas of the bed from the edge (staying within that four-foot width), you’re all set.
Preparing the Garden Bed Area
Maybe you are truly blessed and have bare, level, beautiful earth just waiting for you to come along and plunk some beds down. No? Then, you are like the rest of us who have (or had) to put a little blood, sweat, and tears into claiming our garden spot from turf or shrub or weeds.
If your Space is Currently Lawn:
- Rent a sod cutter to remove that turf pretty quickly and easily – but be forewarned, this will involve a hit to your budget.
- Dig up the sod the old-fashioned way. Hello, shovel, my old friend.
- Smother and compost that high-maintenance grass away. If you are willing to wait a little while, (a few months) this method will provide a nutrient-plentiful base for your garden bed. I have listed the steps for this “no-till method” in my no-till gardening video blog
If your Space is Currently Weed-Infested:
- Solarize the area. Solarizing will take some time (4-8 weeks), but it is a great way to kill much of the weed growth and seeds for 2-3” below the soil surface. Solarization utilizes trapped moisture and heat and is best done in the hottest months of the summer.
- To solarize, mow the area as low to the ground as possible, then thoroughly wet it down – really soak it well. Then, cover the area with clear plastic sheeting (clear plastic allows more heat from the sun to penetrate to the soil surface than black or cloudy plastic).
- The key to solarization is ensuring a tight seal of the plastic edges.
 Your goal is to trap all that moisture underneath and not provide pockets for heat to escape. It’s best to bury the edges of the plastic under an inch or so of dirt.
 - Periodically, check over the area throughout the summer to be sure the plastic is still well-sealed. If any holes are poked into the plastic at any point during the solarization process, cover them with duct tape.
- Don’t leave the plastic on for longer than eight weeks, at most. Solarization will kill some of the beneficial microorganisms in your soil, but they will quickly repopulate the area. Remember that this process kills the weeds down to about 3” of soil, so if you dig after solarization, you’ll be bringing those deeper weed seeds back to the surface to cause you more grief.
- One drawback to solarization is the ultimate disposal of the plastic sheeting. Recycle that plastic, if at all possible.
How you orient your raised beds isn’t important. What does matter is how you orient your plants.
- Bermuda grass. If you are contending with this adversary, solarization is your best weapon. Bermuda grass is grown intentionally in some areas, but it can also become a very persistent, invasive weed. It grows above ground – using runners – and below ground – using rhizomes.
- The good news is that solarization can kill Bermuda grass runners as well as some of the rhizomes. However, those rhizomes can run very deep (six inches or more), beyond the reach of the heat of solarization. So while solarization can be effective against Bermuda grass, be prepared to continue this battle for many years to come.
- Bermuda grass is so persistent; it is the only time I might consider placing a layer of landscape cloth under my raised bed structures. Alternatively, I might lay down several layers of cardboard.
- I strongly encourage you to build some sort of border around the edge of your bed to prevent Bermuda grass creeping in from the perimeter. Bermuda grass needs plenty of sunlight, so when buried under layers of soil, it’s not as likely to sprout up from underneath.
 More likely, any sprouts in your garden will be due to seeds blown in.
If your Space is Currently Shrubbed:
- In some cases, it might be necessary to grind out or dig out a stump or two. Fortunately though, raised beds prevent the necessity to remove most of the stumps and roots left behind. Much of the remaining woody material will be buried in your garden beds and will break down over time, adding a few nutrients to the soil.
You may also opt to till the garden area to tear up existing roots, weeds, etc. and as a means to level the spot. There is some drawback to tilling your soil that I discuss at length in the video blog mentioned earlier.
Tilling can save time and create a surface that is easier to level. Just understand the drawbacks to tilling before you take that step. There are important soil structure elements which can be lost due to tilling. As with all these decisions, once you are educated on the benefits and risks, you can take the direction that best suits you.
The GardenFarm raised beds provide structure, beauty, and a healthy growing environment.
Notice that I did not recommend the use of any topical lawn or weed killing products – either commercial or home-made. If you use a topical product, that product will remain in the soil and will affect your garden bed. It doesn’t take much to kill a season or more of garden crop, so think twice before deciding to take this particular shortcut.
If your Location is Hardscape:
- I’ve received lots of questions about building raised beds on this. I have seen many home and community gardens built on parking lots, sidewalks, etc. If this is what you have to work with, then go for it! These can be productive garden locations too.
The key to building on hardscape would also be drainage ability. Water should be able to flow out of the bottom of your raised bed onto the concrete. Some people layer cardboard beneath the bed structure to help with water retention, but that cardboard will break down so quickly, it’s not a worthwhile step.
If your only area is gravel, know that gravel might impede drainage. Studies have shown that water doesn’t move as freely from a dense to a less-dense layer. You can check out a video demonstration to get a better understanding. The deeper you build your beds, the less likely this will be a problem, and again if this is the best area you have to work with, don’t let that hold you back!
The GardenFarm raised bed height of 18″ allows Joe Lamp’l to better observe growth and early problem warning signs.
Which Materials are Safe for Containing your Beds?
Size and shape will likely also be dependent on your materials. More importantly, many of you expressed concerns and had questions about which materials are safe. Here’s where things can really go sideways. There are so much conflicting information and surprisingly few studies on the various materials available for use.
Why do materials matter? First of all, the materials you use will be in close quarters to your food crop. In all likelihood, the roots and foliage will be regularly making contact with your material surface.
Secondly, the soil you place in your bed will need to remain fairly moist, and the exterior surfaces of your bed will be spending a lot of time in the hot sun. Most materials degrade when exposed to constant moisture and sunlight.
I used 16’ lengths of 6”x6” untreated cedar at the GardenFarm but living in the heavily-populated Atlanta area offers me a better supply of wood materials than will be available for many of you.
Regardless, here are pros and cons to the materials you may be considering:
Raw Wood:
The best types of untreated wood are black walnut, cypress, cedar, redwood, oak, black locust, or osage orange. These are known for their rot-resistant properties and last for many years, even under moist conditions.
These woods can be difficult to find available for purchase in some areas. They are also expensive. Untreated pine is a less expensive untreated option, but it will also have a shorter lifespan.
Another consideration: Aside from pine, these woods are not as sustainable as other materials. Often, these woods are harvested from old-growth forest. If you choose to use one of these woods, check that it is coming from a sustainable source. Look for the Forest Stewardship Council (FSC) certification on any wood you buy. The FSC is an international organization that has developed standards for responsible forest management.
All types untreated wood will need to be replaced at some point. The lifespan of your wood will depend on wood type and your environment. If you live in an arid climate, untreated wood can last for several years. If you live in a hot and muggy area, untreated wood may only see you through a couple of years.
A robust raised bed garden form built with wooden structures.
Replacing your wood does not signify failure. The untreated wood is decomposing and even adding some nutrients to your garden bed in the process. It’s more a matter of maintenance and realistically assessing what will work best for you and your family.
Wood Stains & Paint:
You may opt to extend the life of your untreated wood by staining or painting it. I recommend using a natural treatment like raw linseed oil or raw tung oil.
It’s important to look for the raw form of these, as those not marked “raw” will likely include other chemicals. The chemicals are added to speed up the oil drying process, so by using the raw versions, allow for additional drying time.
Another thing to bear in mind is that linseed oil is a food source for mildew, so if mildew is a problem in your area, that may not be a good choice for you.
There haven’t been many studies on the impact of using paints or stains for garden bed structure. Paint and stain ingredients vary, and overall, the impact is relatively unknown. But common sense should remind you that these all include chemicals of some nature, and those chemicals may impact your crop.
I recommend against painting the exterior only of your raised bed structure. The wood exposed to the moist soil will wick up moisture, but the exterior paint won’t allow the wood to fully “breathe.” So by painting the exterior only, you will be trapping the moisture inside and shortening the lifespan of your wood.
Treated Wood:
Treated wood has been infused with chemical elements to preserve the wood. CCA (Chromated Copper Arsenate) wood used to be the most commonly available. The primary concern with treated wood is that those infused elements leach out of the wood. The arsenic in CCA led manufacturers of CCA-treated wood to discontinue its availability for residential applications in 2003.
Although you may find older CCA-treated wood, today’s retail options will more likely be ACQ (Ammoniacal Copper Quat) or MCA (Micronized Copper Azole). They have a higher concentration of copper but don’t have the arsenic.
Leaching occurs at the highest levels under the following conditions:
- Smaller surfaces – i.e., the ends and – especially, the sawdust
- More recently treated (although CCA-treated wood is shown to retain uniformly-high levels of CCA)
- Moist conditions – i.
 e., after rain or in a muggy environment
 - In unhealthy soil
Raised bed garden structures being built of treated wood and ready to be filled.
So to put this into an interesting perspective, studies exploring the impact of treated wood when used for raised beds have shown that the greatest risk is actually in touching the exterior of the bed. When you (or especially, your kids) sit on or lean on treated wood, your skin or clothing is most likely to absorb the copper or arsenic leaching out of the wood to remain on the surface.
If you currently have beds made of the older CCA-treated wood, don’t be alarmed. If you’re using lots of compost, you should be fine, since plants don’t even take up arsenic unless the soil is deficient in phosphorus. And that’s likely not the case since phosphorus tends to be immobile and ongoing amendments of compost just add to the overall volume.
In other words, really healthy soil with lots of organic matter does not take up arsenic by plant roots. Yet the more acidic or alkaline your soil, the more likelihood of those elements being taken up by your plants. So, just another reason for getting a soil test to get your soil closer to a neutral pH (6.5-7.0 – also the ideal range for vegetable growth). Ditto for soil with a low amount of organic matter, so make sure your soil analysis tests for organic matter percentage as well.
As for the newer ACQ and MCA treated wood (which have higher copper levels), plants in your food garden won’t be able to tolerate high levels of copper, and studies show that healthy soil also prevents uptake of copper.
Even if copper levels are high and being taken up, the plants will die before you ever have a chance to think about eating them. At any rate, that would be a good indicator of a potential problem – in which case you might want to think about having your soil tested for metal concentrations.
While we’re on the subject, root vegetables are at greatest risk of being impacted by leaching, as most metals (when taken up) remain in plant roots. Studies further show that those root vegetables are impacted most on their surface. So by thoroughly washing all the impacted soil off and peeling the skin off your potatoes, beets, etc.; you will be eliminating potential contamination.
Your tomatoes and your eggplant could absorb copper or arsenic into their roots, but it is generally not shown to affect the fruit. Leafy greens are an exception and can take up arsenic in their leaves.
In short: Keep your soil near neutral and add lots of compost (more on both of these later), thoroughly wash off the soil and peel the skin from your root vegetables, and avoid contact with the exterior surface of the treated wood. As an extra precaution, grow leafy greens and root vegetables more toward the center of your bed (12” from the perimeter if possible), furthest from the treated wood.
A final note: When building treated wood beds, make your cuts somewhere that allows you to contain the sawdust. Wear a dust mask and gloves, and remove and dispose of the sawdust promptly.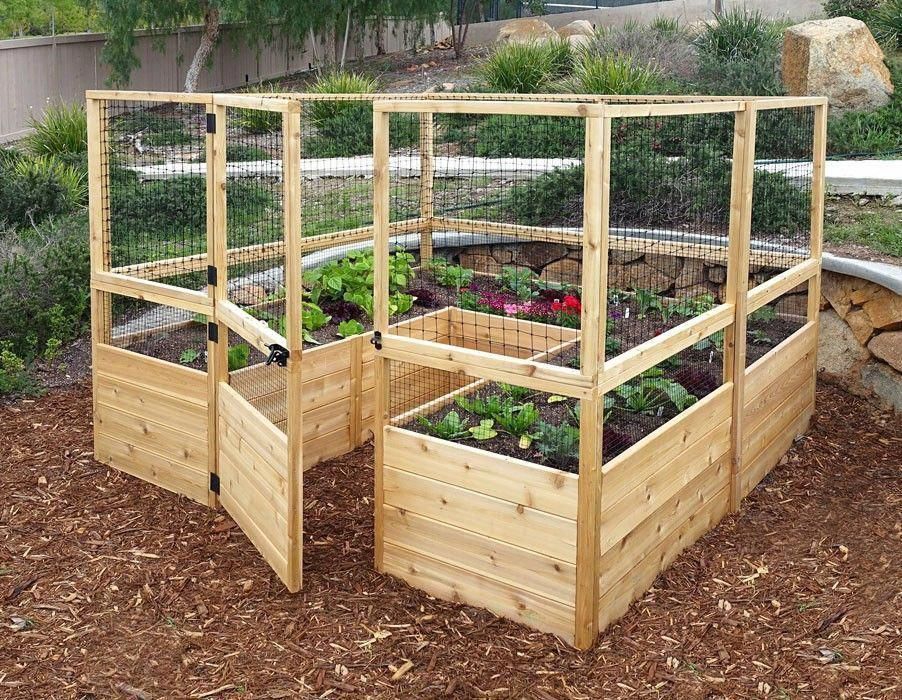 Don’t add it to your compost.
Cinder or Concrete Blocks:
The truth is, these days the terms are used interchangeably. If your “cinder” blocks are decades old, they may actually be cinder blocks, but only concrete blocks have been in production for the past 50+ years.
What are your concrete blocks made from? That depends somewhat on your area, but there are consistencies. Virtually all concrete blocks are made of what’s called Portland cement as well as aggregate, like sand or gravel.
One of the ingredients of Portland cement is fly ash (ranging from 15% to 25%). It’s used to make concrete blocks lighter yet stronger. Fly ash is a fine powder byproduct of coal burning, so In other words, it’s a petroleum byproduct.
And here’s the real rub: fly ash contains various amounts of toxic metals; including arsenic, lead, and mercury. So, yes, those metals are in the concrete blocks that line your vegetable garden too.
A concrete block raised garden bed under construction. (photo: Joan DiSante)
While that might sound scary, the risk of those metals becoming available in the soil only happens if part of the concrete block is pulverized. Then, it’s a matter of several factors that determine the potential risk to what you are growing.
First, the proximity of plant roots to the damaged area. Next, soils higher in organic matter are always beneficial but especially in this case, because they help chemically bind the metals – making them unavailable for absorption into the plant. Just as with CCA-treated wood, root crops and leafy greens are most susceptible when exposed to higher concentrations.
So, how much fly ash is absorbed by soil held within a concrete block structure? Well, if the block is intact, little to none. But not much research has been done on this specific subject.
If you have beds made from concrete blocks, just avoid anything that would cause them to break to the point that the dust from pulverized pieces can come in contact with plant roots.
And if you really want to “do something,” seal the interior lining with a polymer paint (the most practical option), or line the interior side with PE plastic. It’s up to you to decide if it’s really worth the trouble.
If building raised beds over a concrete surface, the same risks and preventions would apply.
A raised bed garden built on a concrete area.
The bottom line: It’s not a huge risk, and there are many other ways you are likely taking unintended and harmful materials into your body, far beyond the risk posed by these blocks. That’s my opinion, but I do encourage you to do your own research on this if you’d like to learn more. There is so much information out there on the subject, and it will quickly take you in many directions. So, just be mindful of the reliability of the sources of these articles.
Composite Wood:
Composite wood is made of recycled materials and can last for years. Some composite material, when used in long side walls can buckle a bit. Here again, there hasn’t been much research on the use of composite wood in proximity to edibles.
Are there any chemicals or elements released by the composite material? It appears to be a benign product for garden use, but there isn’t much information out there to make a solid determination.
Railroad Ties:
Railroad ties are made with creosote, an oil distilled from coal tar. Creosote is used as a wood preservative for industrial use and is the black, oily stuff you see oozing from the sides of the ties.
The heft of railroad ties has made them a popular choice for raised beds and garden retaining walls. While there have been few studies on the impact of using them to contain edible plants, I’ll take the advice provided directly from the EPA on creosote:
“…Creosote is not approved to treat wood for residential use, including landscaping timbers or garden borders…. Creosote is a possible human carcinogen and has no registered residential use. ”
”
Galvanized Metal:
There’s little scientific information available examining the effect of galvanized metal in the use of raised beds. What I can tell you is that the galvanization process typically involves dipping the metal in molten zinc or zinc-based coating.
While dangerous if consumed in large quantities, zinc is a micronutrient that plants and humans actually need in small quantities. If too much zinc were leached into the soil, it would probably reflect in dying plants, before it would ever pose a health risk.
Also, galvanized metal has been used to hold or transport water for humans and livestock for many years. All that to say: I can’t guarantee there’s not a negative health impact, but the risk is certainly low.
A galvanized tub raised bed garden provides a home for herbs and vegetables. (photo: Dennis Huckabay)
One thing you should bear in mind, however, is heat and drainage. Livestock troughs are a popular option, but it’s critical to provide lots of drainage holes in the bottom of the trough. That moisture will need a place to escape, so you don’t inadvertently drown your plant roots.
Whether you use metal sheeting or a trough, that metal will absorb and reflect heat from the sun – more than other materials. As a result, your soil will tend to dry out more quickly, and foliage in the line of that reflective power might suffer. The soil nearest to the sun-facing metal will also warm up more than the rest of the bed.
It might be wise to plant those tender vegetables – like lettuce – toward the center of the bed where soil temperature will remain most constant.
Tires:
Just don’t. Don’t do it. If you must do it, do it only for a season or two at most. Tires are a petroleum-based product. Their rubber degrades in the heat and moisture, and the chemicals incorporate into your soil. They may be convenient or look kitschy and fun. It may keep a tire out of the landfill, sure. But there are more drawbacks to using tires than there are benefits.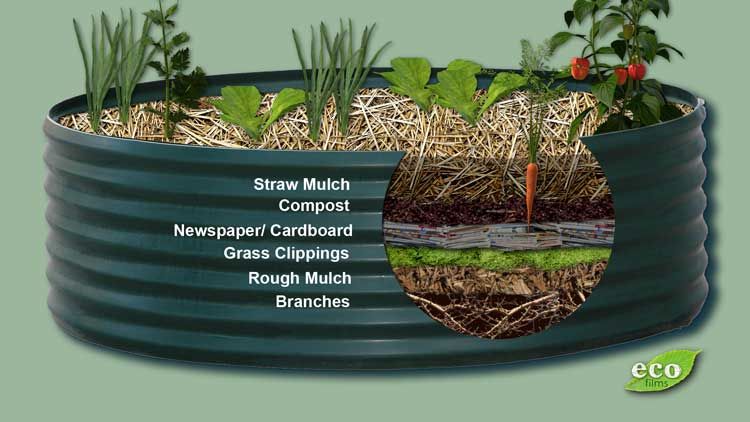
There’s a reason that most landfills prohibit tires. If garbage shouldn’t be subjected to decomposing tire rubber, neither should your family’s food.
Most landfills prohibit tires. If garbage shouldn’t be subjected to decomposing tire rubber, neither should your family’s food.
Pre-Made Kits:
It doesn’t get much easier than one of the many raised bed kits available for purchase today. These can be used with composite wood and can be cut to varying lengths. Some can be expensive, and the material with which they are made can vary widely. I recently built raised beds on an episode of Growing a Greener World, so check that out.
Liners:
If you use any of the above materials with the potential of leaching, you might be inclined to line the bed with plastic. Yes, this will provide a barrier between the bed material and your soil. But don’t lose sight of the plastic material itself.
There are so many plastics out there, and they are of widely-diverse safety grades.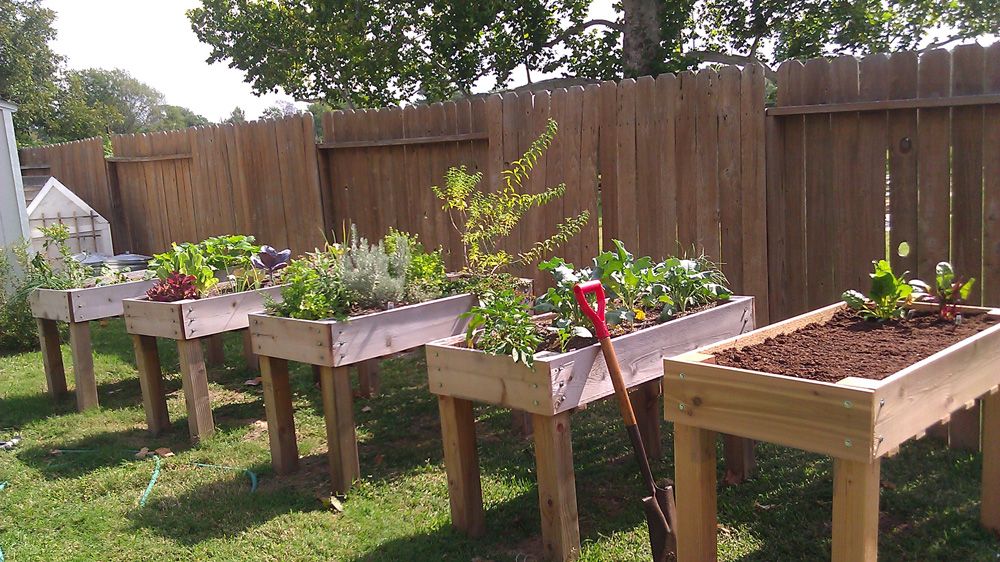 If you use plastic, look for food-grade polyethylene. This is considered one of the most food-safe plastics. Line only the outer perimeter of the bed – not the bottom surface. Don’t block drainage with plastic.
With all of these products, I recommend you do your own research to feel comfortable in your choice. There are many reputable and not-so-reputable resources out there, so always be mindful of your information resource.
Raised bed kits, similar to the parts being used here, make it easy to build a bed at any size and in any location. Seen here are widely-available builder blocks with composite wood, which can be cut to any size.
Be sure to watch for next week’s podcast when I’ll continue the raised bed journey, discussing two of the raised bed topics that generated the most questions – structure material and soil. There is a lot to cover there, so I encourage you to listen in and read up.
Speaking of listening in, if you haven’t already done so, I recommend listening to this podcast recording (linked at the top of the page). I include a few anecdotes and other tidbits that I think you will find enlightening and entertaining.
Links & Resources
Podcast Episode 006: Weedless Gardening with Lee Reich
Episode 041: Small Space Garden Design joegardener Blog: No-Till Gardening: If You Love Your Soil, Ditch the Tiller
Episode 043: Raised Bed Gardening, Pt. 2: Perfect Soil Recipe
Episode 044: Raised Bed Gardening, Pt. 3: Animal Control & More
joegardenerTV: How to Get the Best Drainage for Your Container – Why What You’ve Been Taught Is All Wrong
Growing a Greener World
GGW Blog: Limbing up Trees
GGW Blog: Salvaging 110-year old wood – My Quest for a Twenty-five Dollar Organic Victory Garden
GGW: GardenFarm Raised Bed Instructions
GGW: GardenFarm Raised Bed Garden Diagram
GGW Episode 406: Setting Up a Garden
GGW: Episode 804 Gardening for Butterflies & Other Beneficial Insects
EPA: Creosote
PennState Extension: Environmental Soil Issues: Garden Use of Treated
Craigslist. org
org
Freecycle.org
Milorganite® – Our podcast episode sponsor and Brand Partner of joegardener.com
About Joe Lamp’l
Joe Lamp’l is the creator and “joe” behind joe gardener®. His lifetime passion and devotion to all things horticulture has led him to a long-time career as one of the country’s most recognized and trusted personalities in organic gardening and sustainability. That is most evident in his role as host and creator of Growing a Greener World®, a national green-living lifestyle series on PBS currently in production of its ninth season. When he’s not working in his large, raised bed vegetable garden, he’s likely planting or digging something up, or spending time with his family on their organic farm, just north of Atlanta, GA.
Creative Vegetable Gardener:How to make an easy raised garden bed for your vegetables
After almost 20 years of growing my own food and designing gardens, I passionately believe that growing vegetables in raised garden beds is the best route for most gardeners.
In this style of gardening, you work to establish permanent beds and paths in your garden. This is in contrast to the flat or farm style of gardening, in which you till up a large square or rectangle in your yard and start planting.
When you design your garden to include raised garden beds and established paths, you’ll find that the benefits far outweigh the drawbacks. Let’s explore the pros and cons and learn how to make easy raised garden beds.
Benefits & Drawbacks of Raised Garden Beds
Less work in spring. When you have a permanent garden design, you don’t have to start over from scratch every year. In contrast, when you grow food in the flat style, every spring you have to wait until the soil dries out, get out your tiller, and then lay out your planting beds again.
With a raised garden bed there’s not much prep you need to do to start planting in spring. If you cleared out and mulched your garden in fall, all you have to do is wait for the soil to warm up, and then walk out and start planting.
There’s no wrestling with machinery, digging or flipping over soil, or really any backbreaking work at all!
Better for your soil health. Having a permanent garden design means it’s very clear where your beds and paths are located. That encourages you to stay on the paths when walking and working, and you’ll be less likely to step into the garden beds.
Walking and stepping on the soil you’re growing food in will compact it over the long term. Keeping yourself in permanent aisles will help maintain loose soil, which will make it easier to plant seeds and plants, remove weeds, and provide space and air for your plants’ roots to grow.
You can also concentrate fertility on those garden beds by consistently adding mulch, compost, cover crop, organic garden fertilizer, and manure to increase the nutrients available to your plants.
In almost 20 years of gardening, I’ve never tilled my soil and you shouldn’t either. Read more about why you should have a no-till garden.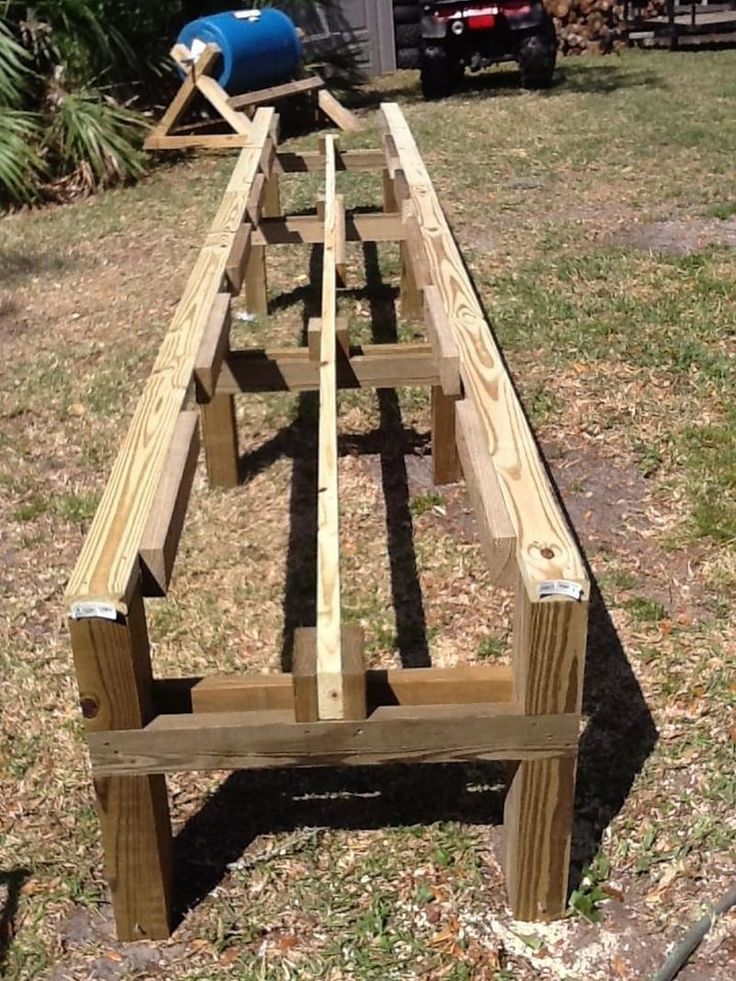
Less maintenance over the long term. One of the great things about having permanent beds and paths is you can easily keep the beds and paths mulched all year round, which will go a long way towards reducing the amount of weeds that grow.
And that means many less hours you need to spend weeding in your garden. We’ll talk more about mulch later in the post, and you can read my passionate plea to keep your soil covered with vegetable garden mulch.
Creates a more attractive garden. Permanent raised garden beds create organization and structure in your garden. These are not bad things to have in a vegetable garden because they lend to the overall attractiveness of your garden.
I like to think of the raised garden beds as the canvas. Once they’re constructed, you can take that blank canvas and use the vegetable plants and flowers to “paint” on it to create beautiful and interesting combinations of colors, textures, and heights.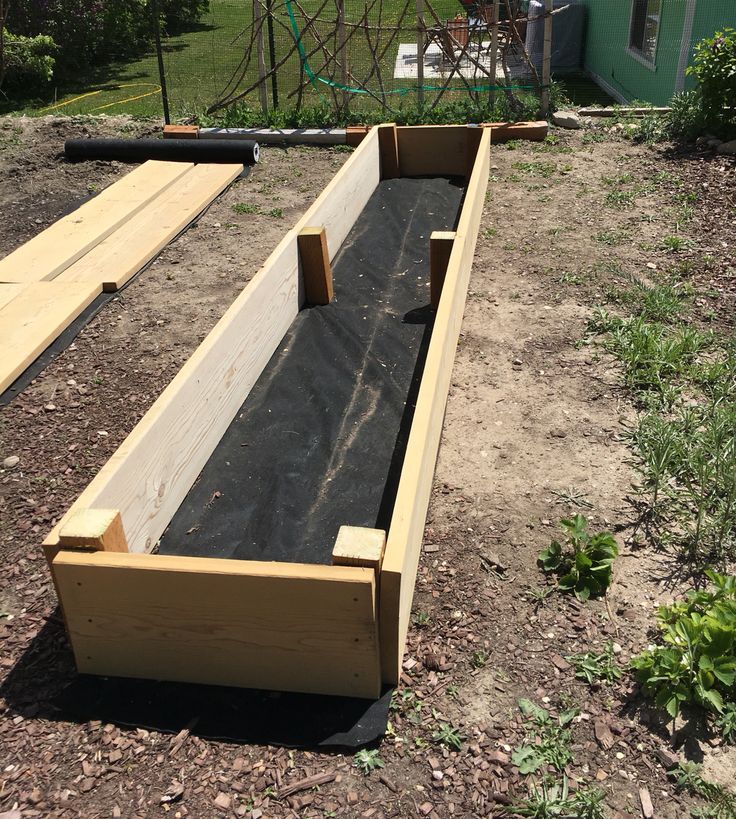
Two common complaints about vegetable gardens are that they’re ugly and it takes a lot of work to grow your own food.
I can guarantee that taking the time to build several easy raised garden beds this season will drastically reduce your labor each year, and create a healthier and more beautiful garden.
In this blog post I’m going to walk you through the process I used to build my current garden from scratch the year we purchased the house and moved in.
I’ll show you three different options for creating easy raised garden beds, discuss the pros and cons of each style, and share the supplies you’ll need.
Let’s get started!
Things to Think About Before You Begin
Before you start building your raised beds, there are some site assessments that should be taken to make sure you’re planning to put your garden in the right place.
Sun
You should be putting your garden in the sunniest possible place on your property. Although you can grow vegetables in partial sun, all vegetables do best in full sun.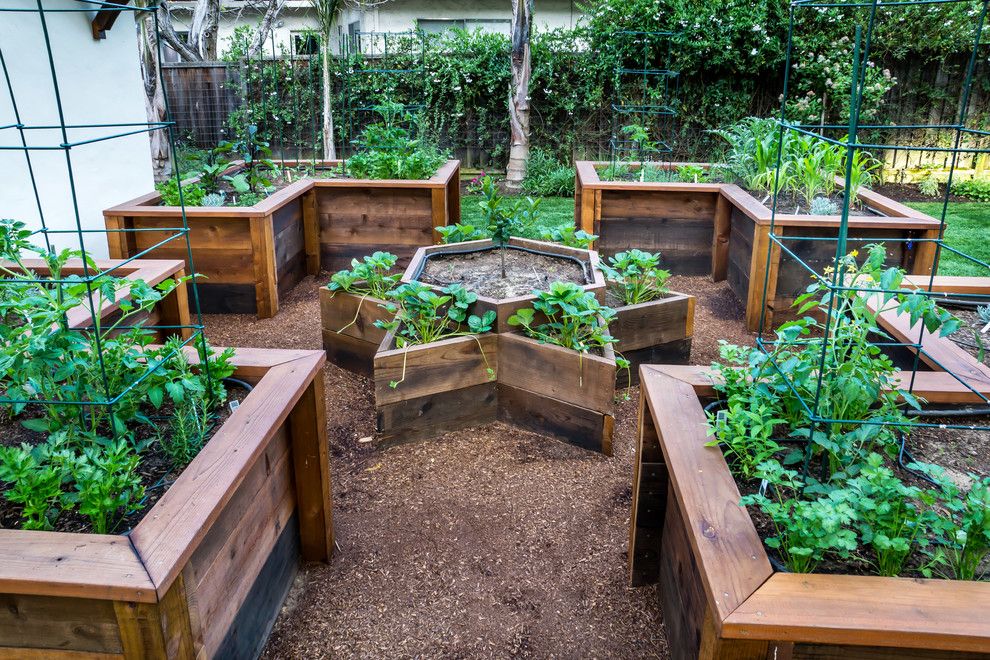
Ideally, your garden will get at least 8 hours of sun in the height of summer. And more is better unless you live in an extremely hot or southern climate where vegetables can struggle in the full summer sun. Only then you would benefit from some shade.
Soil
Sun exposure and soil health are the two most important factors in the success of your garden. There is a complex web of life that lives under the soil surface, along with the nutrients your plants need to grow and flourish.
A soil npk test is an easy way to get a fuller picture of what exactly lies beneath your grass. For most soil tests you’ll collect samples from various locations in your yard and send them away to a local lab to be analyzed.
Within a few weeks, they’ll mail or email you the results.
Most soil tests measure the levels of nitrogen, potassium, phosphorus, organic matter and soil pH. They’ll also give you recommendations on what to add to your soil based on the results of your test.
If you live in an older house where lead paint was used on the exterior or have concerns that you may have heavy metals in your soil (you live near a manufacturing plant, or on an old site of a gas station, auto repair shop, landfill or dry cleaners) it is imperative that you get your soil tested.
You should be able to add on a test for lead and heavy metals to the regular nutrient soil test.
Learn all of the options for soil npk tests.
Size
Keep in mind that gardening requires an investment of time and work. It’s joyful and fun work, but it’s still a commitment all the same. Think about how much time you really want to spend in your garden each week.
The smaller the garden, the less time you’ll have to spend in it.
Start small! That’s my advice to most new gardeners. It is better to have a small garden that’s manageable than one that gets out of control during the season.
If you have fun and feel successful you are much more likely to continue gardening year after year. Once you build your skills and get a handle on your smaller garden you can always add on to create a larger garden in the years to come.
If you’re new to gardening, I’d suggest starting with two or three raised garden beds. This should be enough space to give you a real taste of gardening and what things you enjoy growing, but not too big that you’ll become overwhelmed.
Keep in mind while you’re reading this post that I’ve been gardening for almost 20 years. And it’s been my job for many of those years.
As you’ll see, the garden I built at my house is about 1600 square feet with 19 different raised beds.
This is a size I’d only recommend if you have many years of gardening under your belt.
Even if you think you might want a garden this big in the future, I still suggest starting small and expanding your garden over the years as you start to master all of the details and techniques involved growing your own food.
Location
When you’re deciding where on your property to locate your new garden, putting it as close to your house as possible is the best option. Sticking your garden in the back corner of your yard is not advisable.
If you’re not walking by your garden every day you’ll have the tendency to forget about it. That’s not good!
Plus, if you focus on creating a beautiful garden, having it close to your house is going to bring an added layer of joy to your life because you’ll be able to see if from your deck, patio, or windows in your house.
You’ll be interacting with it a lot more, which makes the work all the more worth it.
Another location consideration, besides choosing the sunniest spot closest to your house, installing your garden on the most level spot in your yard. This will make installation much more simple and straightforward.
3 Options for Building Easy Raised Garden Beds
I’m a minimalist when it comes to gardening, so I don’t like anything that’s too complicated or feels like a lot of unnecessary work. That’s why I’m sharing three simple designs for easy raised garden beds for your home vegetable garden.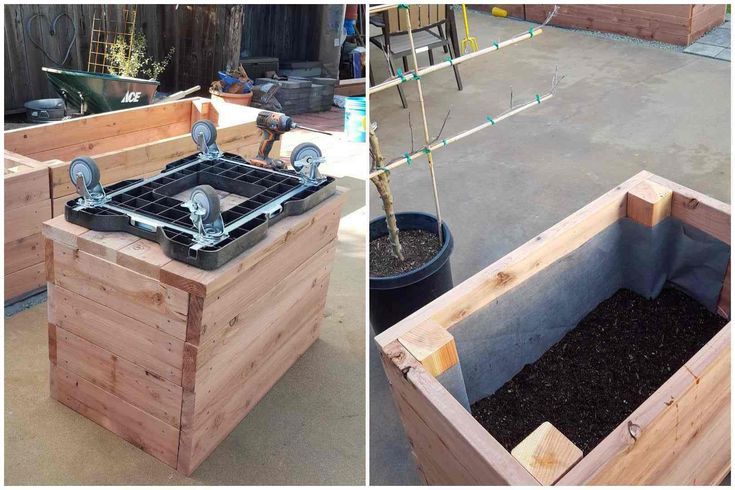
As you’ll see in this post, I built all three styles in my own garden the year I purchased my house.
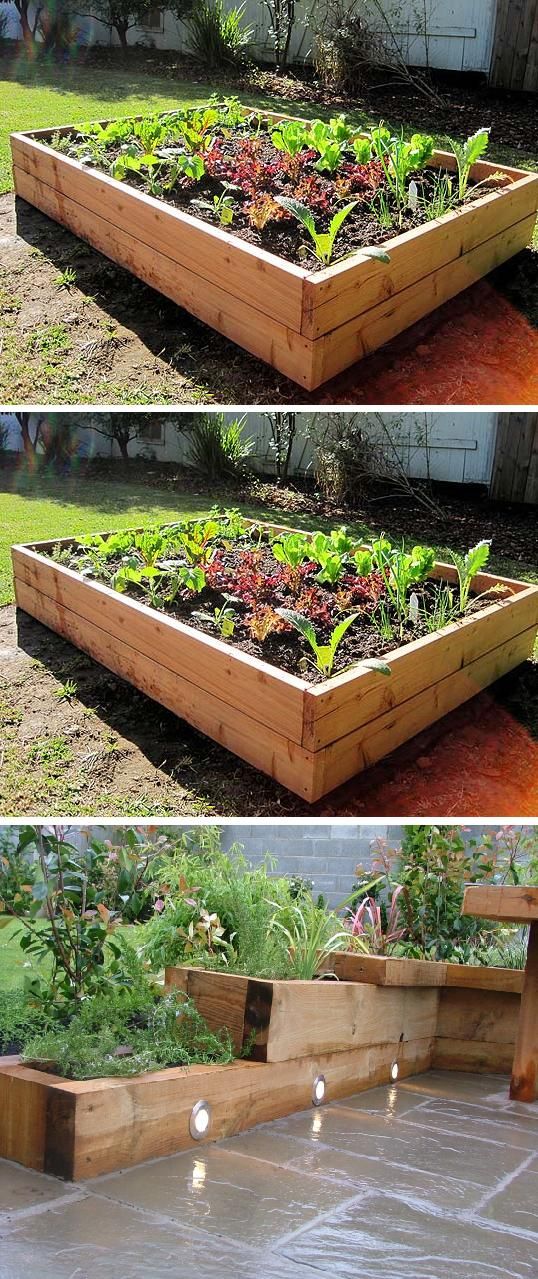
Easy Raised Garden Bed Option #1: Wood Raised Beds
Wood raised beds are most commonly built out of dimensional lumber you find at your local home improvement store. They’re not necessarily the easiest beds to build, but they are straightforward.
The pros of wood raised beds are:
Height: You can build the bed as high as you’d like, so if you have physical limitations they might be easier on your body.
Longevity: As long as you buy rot-resistant wood they should last a long time and won’t require much maintenance.
Shape: I think the limited shape options can be a benefit. A garden filled with rectangular beds all the same size can be a beautifully organized garden.
The cons of wood raised beds are:
Cost: The upfront cost involved in purchasing supplies can be a hardship if you don’t have a big budget.
Shape: If you’re not skilled at carpentry, you’ll probably need to stick to creating rectangular or square beds in your garden. Fancy shapes will be too advanced!
If you prefer more organic shapes in your garden, the linear nature of these beds probably aren’t for you. But, stay tuned for more options!
Design & Supplies Needed
Size options: The most common sizes of wood raised beds are 4 feet wide and then various lengths between 4 feet long and 10 feet long. You don’t have to stick all to one size if you don’t want to. The raised beds in my garden vary in size.
Sometimes I wish all of my beds were the same size for ease of rotation and calculating how much I can plant in each bed, but I also like the variety and options different sized beds provide me.
Height: Remember that the taller your beds the more soil you’ll need to purchase to fill them. I suggest building them between 6 inches and 1 foot tall unless you have physical limitations that would benefit from taller beds.
I gathered several suggestions from reputable companies in my Amazon storefront here. You can read more about organic fertilizer and what you should look for when selecting one to purchase in this article.
Wood: If you have the budget, you’ll want to purchase the most rot-resistant wood possible so your garden beds last a long time. In my garden, some of my beds are made from black locust (difficult to find) and the rest are constructed of cedar, which is much more common.
Soil: Once you settle on bed size and length, you can use this soil calculator to figure out how much soil you’ll need to order to create your beds. Make sure you’re ordering a mix that’s appropriate for growing food. I like mixes that are 1/2 compost and 1/2 topsoil.
Organic fertilizer: I recommend adding an organic garden fertilizer to all of your new garden beds before planting. I’ve had mixed experiences with soil I’ve ordered for my garden. Often it’s lacking the nutrients vegetable plants need to grow.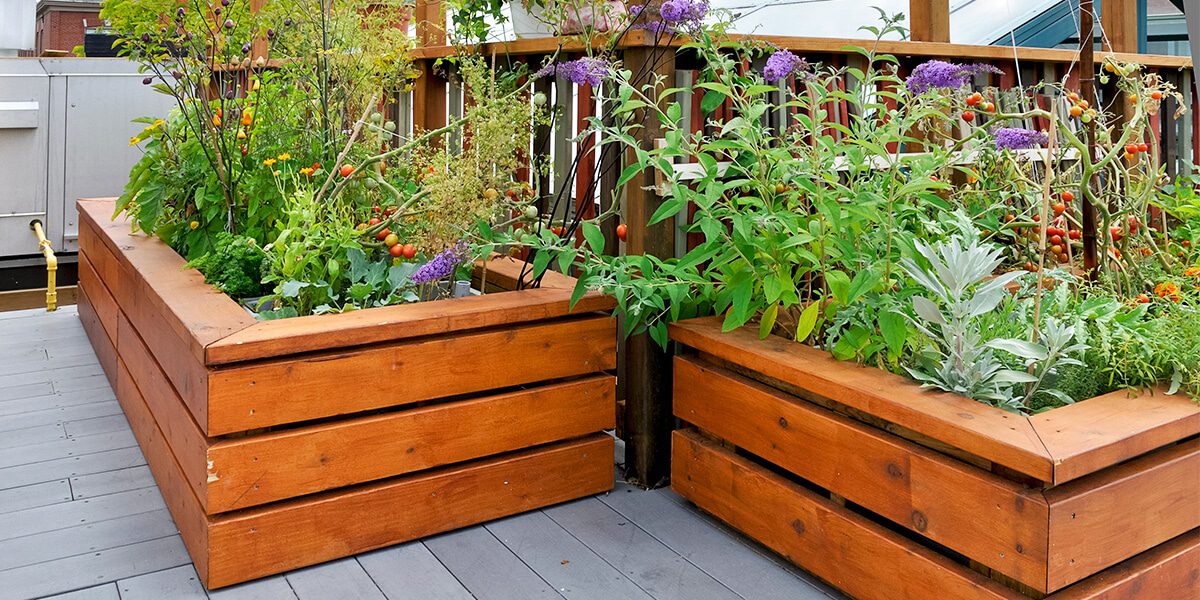
I gathered several suggestions from reputable companies in my Amazon storefront here. You can read more about organic garden fertilizer and what you should look for when selecting one to purchase.
Mulch for garden paths: I use a thick layer of woodchips for all of my garden paths because they last a long time. I usually add a new layer once a year in spring. You can really use whatever material you want for your paths, stones, gravel, pavers, bricks, and more.
Again, being married to an arborist has its advantages, including an unlimited supply of woodchips. If you have a tree pruning or removal scheduled for your property, ask the tree care company to leave behind the woodchips.
There’s also a website called Chip Drop where you can sign up to receive free woodchips from local tree care companies.
Woodchips can be expensive to buy when you need large quantities and this will be an expense you’ll need to expect every spring.
Mulch for garden beds: You don’t want to use woodchips on your garden beds as mulch. They’re very carbonaceous, so often when they get mixed into the soil they steal nitrogen from the surrounding plants to aid them in breaking down. Vegetable plants need a lot of nitrogen, so this could affect their health.
Instead, opt for straw, hay, leaves, grass clippings or other organic matter. You can read more about my love of vegetable garden mulch.
Construction: There are so many complicated plans online for creating wooden raised beds. It doesn’t have to be that difficult!
Depending on how high I want my beds, I use one or two 2″ x 6″ boards on the sides and ends, and then a small 2″ x 2″ piece in each corner.
If it’s a long bed, like 10 ft., I might tack another 2″ x 2″ piece (or 2″ x 4″) in the middle of the long sides to pin the boards together.
You can see the design I use in the photo below.
I also built the bed below for a client one season. It’s only one 2″ x 6″ board high. She didn’t need the extra height.
Now for some pictures of me and my husband installing the first raised beds of our current garden.
There were overgrown shrubs taking over the sunniest part of the lot. You couldn’t even see the house from the street. We cut most of them down and turned them into woodchips with my husband’s chipper.
He’s been an arborist for over 15 years and this is the first time I got to learn how to use the chipper and be the ground gal.
I had a bunch of random raised beds leftover from selling them one year through my business. Once we sorted out the sizes and put them together we laid them out into a design.
My goal was to design the garden on paper first, but we didn’t have time. So this first phase was a design on the fly!
If you’re more of a planner, you can plot out your design on graph paper or right in the garden with stakes and twine using this method.
Here’s an example of how I used stakes and twine to lay out a garden design for a client.
The next step was to level and fill the beds. I don’t recommend installing your beds right on the grass.
It will be an absolute pain to mow and the grass sometimes moves into the space between the bed and the soil in the bed. Then you’ll never get rid of it.
Our installation area was mostly bare soil left after the shrubs were removed, so we were able to install right onto a clean slate. Where there was a bit of grass we dug it out only at the spot where the beds touch the ground.
The areas in and around the beds got a layer of cardboard to smother the grass. It breaks down throughout the season.
We leveled, filled and then mulched each bed with marsh hay. Then we covered the areas around the beds with cardboard and eventually woodchips.
We also installed a bermed perennial garden between the street and the vegetable garden for a visual buffer and a way to add some additional texture and color to our front yard.
We simply layered cardboard over the grass, made a berm with the soil we ordered, and planted perennials we brought over from our old house.
I planted the vegetables right after the installation of the beds since it was already early June. We continued to lay down cardboard and woodchips over all the grass areas we wanted to kill.
The grass will be smothered under all that mass. Much easier than sod stripping!
Later that summer I ended up adding three more raised beds to expand the garden on the right of the above photo for a total of seven wood raised beds. Two beds are 4 ft.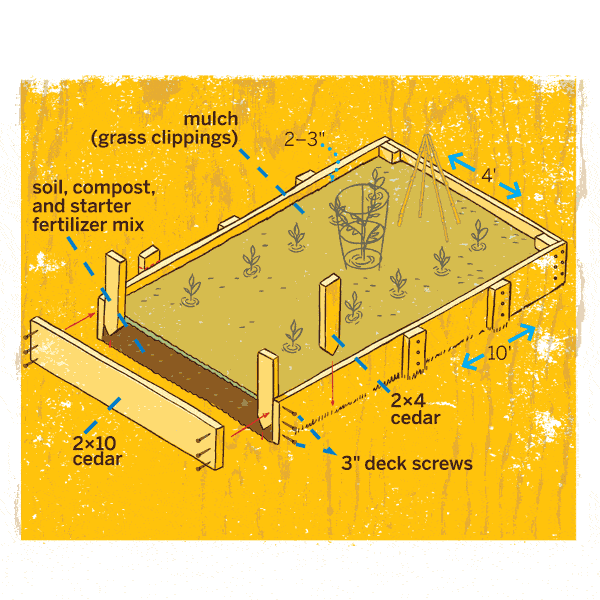 x 6 ft., four beds are 4 ft. x 8 ft. and one bed is 4 ft. x 10 ft.
Six years later all of the beds are still looking great and I haven’t had to repair or replace any of them.
Removing the Grass for Installation
It’s likely you won’t be installing your garden on a flat site with bare soil like I did. Most of the time there’s grass where you’ll want to create a garden.
If you don’t have a flat site, the presence of grass can make it difficult to level your beds. But, it’s not necessary to remove all of the grass, just some small portions to give you more wiggle room in leveling.
If you have the ability to plan ahead, you can cover the entire footprint of your future garden with something that doesn’t let light through to kill the grass – tarp, black plastic, old billboard, etc.
If you’re installing over grass, one trick I’ve learned is to simply remove the grass where the bed is going to lay on the ground. I do this using a manual sod stripper I rent from a local hardware store.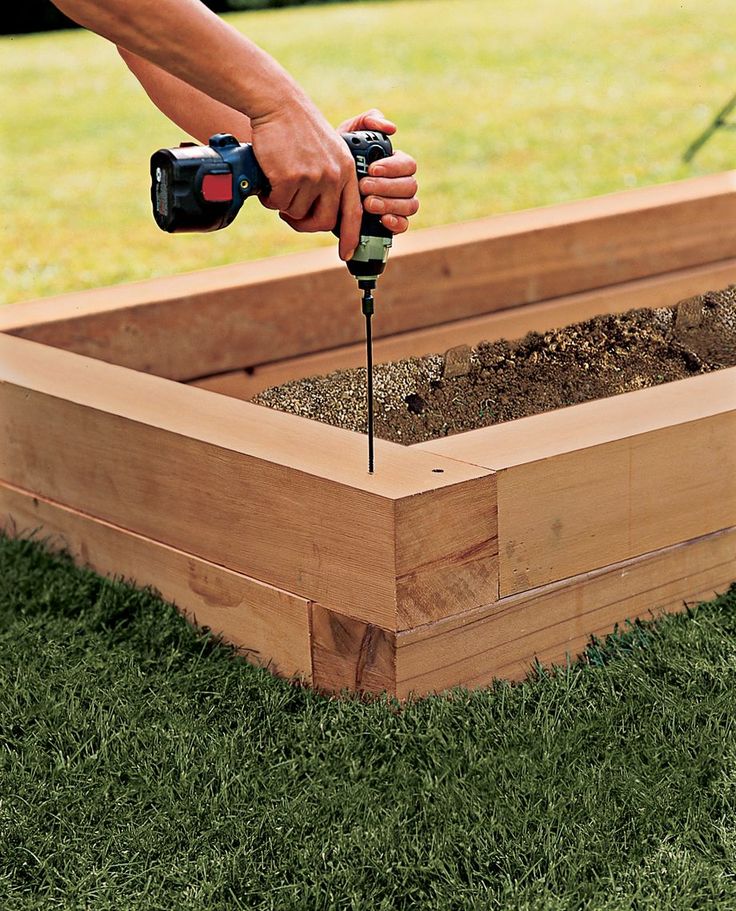
In my article about planting raspberry canes, I talk more about how to use it and link to a video about it.
In the below photo you can see that I’ve only removed the grass in the footprint of the bed so I can dig in the soil to help me level it.
This may not be necessary if you’re not picky about how level your beds are. After I installed my current raised beds a neighbor who works as an engineer stopped by and complimented me on my precision!
After I removed the sod I threw it in the center of the bed and later covered it with about a foot of soil.
Okay, I think that’s all you need to know for easy raised bed option numero uno. Leave a comment below this post if you have additional questions.
Easy Raised Garden Bed Option #2: Mounded Beds
Mounded beds are garden beds that are formed using your existing or imported soil so the bed rises above the surrounding paths, but there’s no wood frame. It’s like a wooden raised bed without the wood!
The pros of mounded raised beds are:
Quick: These beds don’t require lumber, tools, or building skills. You can easily construct several in an afternoon work session.
Inexpensive: There is an option of not buying any additional soil, although you’ll have to plan ahead. If you end up building them over the existing grass, you’ll only have to purchase soil and organic fertilizer.
Longevity: Because you’re not using any wood in their construction, these beds will last indefinitely. There’s nothing to rot or replace over the years.
Shape: You can create mounded beds in lots of different shapes and sizes and even add curves to make them more interesting. These would be a good choice if you’re turned off by the linear nature of wooden raised beds.
The drawback of mounded beds are:
Form: Because they don’t have wood reinforcements keeping the soil in place, mounded beds tend to slump and spread out a bit over time, losing their initial form. They may need to be reshaped periodically to get them back into their original footprint.
Design & Supplies Needed
Size options: Similar to the wooden raised bed, you want your mounded beds to be 4 ft. wide or less. Anything wider starts to make it difficult to reach into the middle of the bed. You’re less restricted by length with these beds, so you can make them as long as you want.
Height: The taller your beds the more soil you’ll need to purchase to fill them. I suggest building them between 4-8 inches tall.
Soil: Once you settle on bed size and length, you can use this soil calculator to figure out how much soil you’ll need to order to create your beds. Make sure you’re ordering a soil mix that’s appropriate for growing food. I like garden mixes that are 1/2 compost and 1/2 topsoil.
Organic fertilizer: I recommend adding an organic garden fertilizer to all of your new garden beds before planting. I’ve had mixed experiences with soil I’ve ordered for my garden. Often it’s lacking the nutrients vegetable plants need to grow.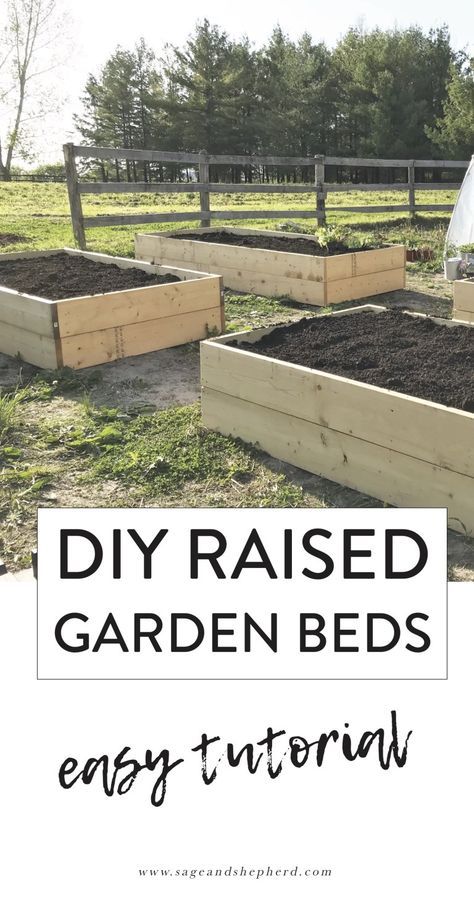
I gathered several suggestions from reputable companies in my Amazon storefront here. You can read more about organic garden fertilizer and what you should look for when selecting one to purchase.
Mulch for garden paths: I use a thick layer of woodchips for all of my garden paths because they last a long time. I usually add a new layer once a year in spring. You can really use whatever material you want for your paths, stones, gravel, pavers, bricks, and more.
Again, being married to an arborist has its advantages, including an unlimited supply of woodchips. If you have a tree pruning or removal scheduled for your property, ask the tree care company to leave behind the woodchips.
There’s also a website called Chip Drop where you can sign up to receive free woodchips from local tree care companies.
Woodchips can be expensive to buy when you need large quantities and this will be an expense you’ll need to expect every spring.
Mulch for garden beds: You don’t want to use woodchips on your garden beds as mulch. They’re very carbonaceous, so often when they get mixed into the soil they steal nitrogen from the surrounding plants to aid them in breaking down. Vegetable plants need a lot of nitrogen, so this could affect their health.
Instead, opt for straw, hay, leaves, grass clippings or other organic matter. You can read more about my love affair with vegetable garden mulch.
Cardboard: If you’re going with installation option one below, you’ll need to source a big pile of cardboard. This is your excuse to go dumpster diving if you’ve never done so!
Where I live most businesses have a cardboard recycling dumpster behind their stores that are clean and dry and only contain cardboard.
If you need large pieces go to a bike or appliance store, smaller pieces can be found at restaurants, craft stores, and liquor stores. I like to pick a strip mall nearby and cruise in my car behind the stores and peek in the dumpsters until I find cardboard.
Construction Options:
Option 1: Cardboard over grass with imported soil.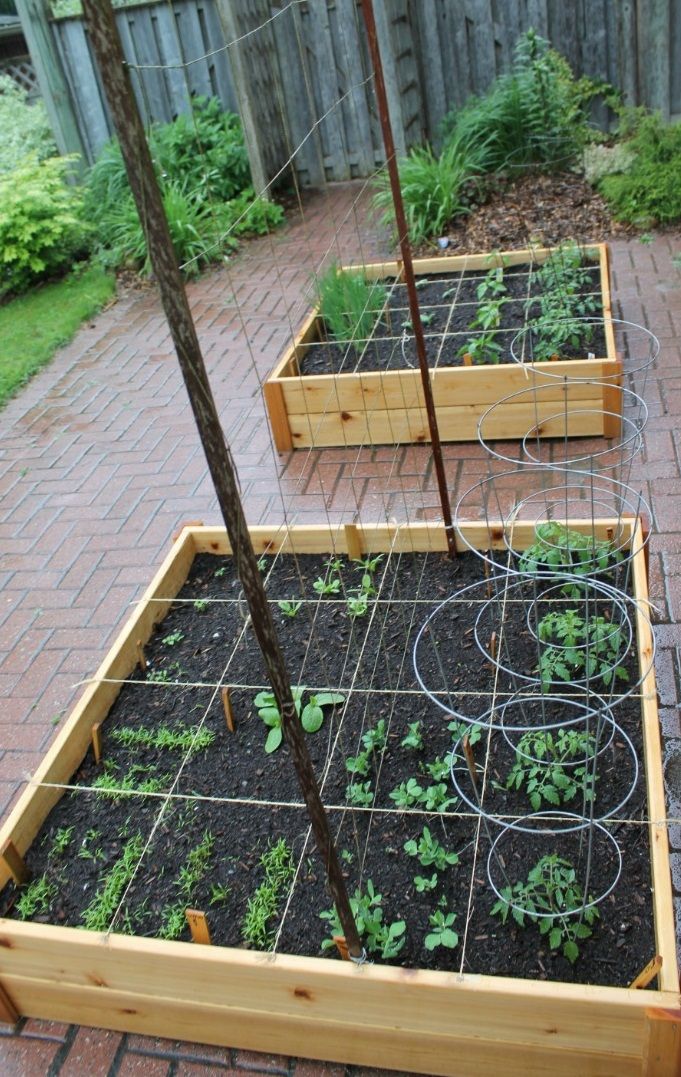
If you didn’t plan ahead you can simply install mounded beds over your grass. I like to completely cover the grass with cardboard to make extra sure it’s going to die a quick death and not grow into my new garden bed.
I don’t recommend having grass in your garden aisles, so you should cover the entire area – beds and paths.
If you opt for this method, you’ll need to order soil to construct the beds. This is the method I used in my garden.
Option 2: Kill the grass ahead of time and use your own soil
If you’re planning ahead, you could try to get away with building the beds out of your own soil. But, in order to get to the soil, you’ll need to kill the grass first.
If you’d like to try this option, you’ll need to smother and kill the grass over the course of several months before you can get started. You can use tarps, cardboard, black plastic or anything that doesn’t let any light through.
Ideally, you’d cover your future garden area in late summer or fall and let the grass die over the winter and early spring.
I don’t have any photos of gardens with smothered soil, but the installation method after the grass is dead is the same as the next option.
Option 3: Remove the grass and use your own soil
When I was installing gardens for other people, I used this method during the first few years. I would rent a manual sod stripper from a local hardware store and remove all of the grass in the garden area. Then I would use a shovel to loosen the soil and form the beds.
I’ve moved away from this method because stripping the sod can be a lot of work and you need somewhere to put it once you remove it. If you have a big compost bin you can cart it there and then add it back to your garden again once it’s broken down.
But, sod is heavy and takes a lot of work to move, so I don’t necessarily recommend this method. You also end up removing a lot of your topsoil.
It would be a good choice if you have a limited budget and don’t want to order soil, and you weren’t able to kill the grass ahead of time.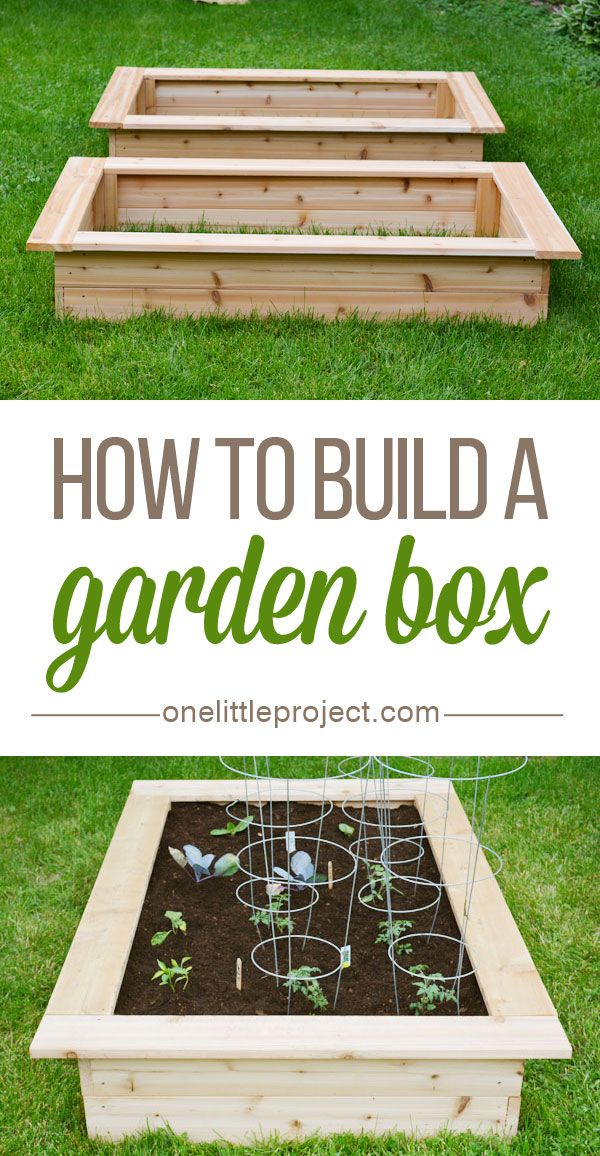
First, I’ll show you how I used installation option #1 to create my garden, then I’ll share photos from previous clients’ gardens demonstrating installation options #2 and #3.
Mounded Raised Bed Installation Option #1
After installing the seven wooden raised beds in my front garden, which you saw above, that fall I expanded the garden back towards my house by creating six mounded raised beds and an herb spiral.
The first thing I did was use a long measuring tape to figure out my design. You can do this right in the garden or on a piece of paper or graph paper depending on how your mind works.
I wanted to break up the linear design of this garden by creating a focal point and I chose to build an herb spiral out of reclaimed bricks. You can learn how to build your own herb spiral.
This is the finished herb spiral. The next step was using my favorite trick of stakes and twine to lay out the design in real-time to see what it looked like and make any final tweaks.
I’m a visual person, so I like to see how it’s all going to look before I start.
Next, I laid cardboard over the grass in the footprint of the garden bed. Then I used a wheelbarrow to transport soil to form my mounded beds.
I made them about 6-8 inches high. They’ll settle over time, so you should make them higher than you want if possible.
You can see I added a slight curve to the bed design to add a little more interest and contrast with the wood raised beds.
After I filled and shaped the beds, I covered the aisles in cardboard and woodchips, took a few photos, and then mulched the beds with hay.
I was constructing this garden at the end of October and wasn’t planning on using the beds until the next spring. I didn’t want the soil to erode, get compacted by wind and rain, or be inoculated with weed seeds, so I mulched them thickly for the winter.
These six mounded beds are all slightly curved, 3.5 ft. wide, and of varying lengths between 6. 5 – 13.5 ft. long.
Below is an illustration of my final garden design for my front yard vegetable garden. The next spring I extended the fence around the entire garden.
I installed this garden in October 2014 and it’s still the same layout six years later as I’m writing this article.
Mounded Raised Bed Installation Options #2 & #3
If you don’t want to order soil, you can follow this installation method. I used it for many years when I designed and installed vegetable gardens for clients. Although this was the last time I used it because removing the sod is way too much work.
After this job, I switched to the cardboard over grass method above.
To remove the grass you’ll either need to smother and kill it, like we discussed above in installation option #2, or remove it with a sod stripper.
During this job we used a gas sod stripper since it was such a huge installation. We had to load the sod into a trailer and haul it to the city compost site since the client didn’t have a large enough space to compost it.
Our first step was to remove the grass. You wouldn’t have to do this if you completely killed it.
Then, I laid out the design with stakes and twine. We created the beds by digging the existing soil to loosen and fluff the soil in the bed. Sometimes you can also dig out some of the soil in the aisles and flip it into the beds to create more loft.
Although I don’t recommend tilling long term, you could also till within the bed just this once to loosen the soil.
I did order a load of compost to add to the top of the beds. If you’re going to plant immediately you should also add a balanced organic fertilizer, which we’ll talk about later in the post.
As with every installation in this article, we mulched all the beds and paths once we formed all of the garden beds.
This was a huge installation job and it was a ton of work. But, when the season progressed it really blossomed into a magnificent front yard vegetable garden!
You can read more about this project and lots of photos in this article.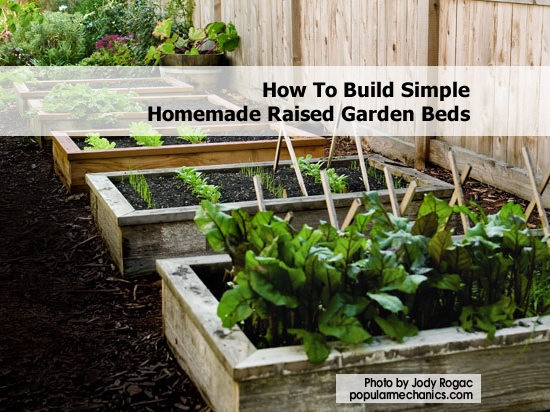
I have to admit, even after adding six additional beds to my front yard garden, I still had another spot on my property that had full sun and was just begging for a garden.
So, the following month I recruited my husband to help me install the third phase of my vegetable garden in my side yard – five more raised garden beds.
For this expansion, I chose another style of easy raised garden bed to construct. This was the style of beds we used at our previous house and in our long-time community garden plot. We call it our signature style! And it’s all about logs and rocks.
It’s like a more organic style of the wooden raised beds in option one.
The benefits of this style of raised beds are:
Quick: These beds don’t require tools or building skills. They’re more assembled than constructed. You can easily make several in an afternoon work session.
Inexpensive: My husband is an arborist, so he was able to source the logs for free.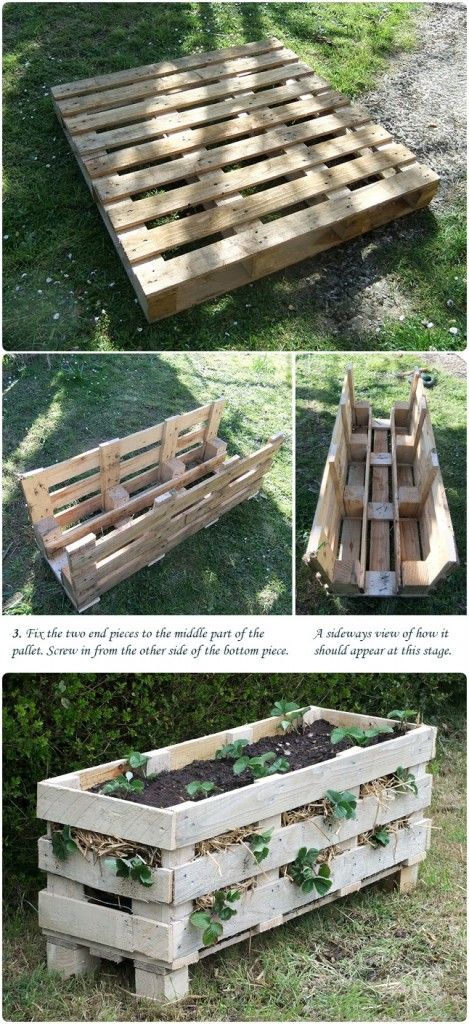 In fact, he had been saving cedar logs from various jobs throughout the season for just this purpose.
If you don’t have access to logs, you can purchase inexpensive landscape timbers from your local home improvement store. Although try to find something that’s untreated.
Shape: The shape of these beds are between the linear style of the wooden raised bed and the organic style of mounded beds. You can arrange the logs and stones into curving shapes and if you use rocks for the ends you’ll have a more organic feel.
The drawback of these garden beds are:
Cost: If you don’t have access to free wood and stones, you might have to source some locally and get them delivered. You’ll also need soil to fill the beds.
Design & Supplies Needed
Size options: Similar to the other two styles of raised beds, your log beds should be 4 ft. wide or less. Anything wider starts to make it difficult to reach into the middle of the bed. And as with mounded beds, you’re less restricted by length, you can make them as long as you want.
Height: The taller your beds the more soil you’ll need to purchase to fill them. I suggest building them between 4-8 inches tall.
Wood: We primarily used cedar logs for our beds. They were of various diameters, which we didn’t really mind. We tried to arrange similar wood in the same beds. They all ended up slightly different, which I like!
If you aren’t married to an arborist like me, you could try to source free logs from a tree being removed on your property or a friend or neighbor’s house. You could also contact some tree care companies to see if they have extra logs laying around their shop they’d want to sell.
If not, you can purchase non-treated timbers from your local home improvement store.
Stone: We scavenged a lot of stone over the years for our community garden plot. We took some stone from there to construct these beds and also got some from friends and neighbors.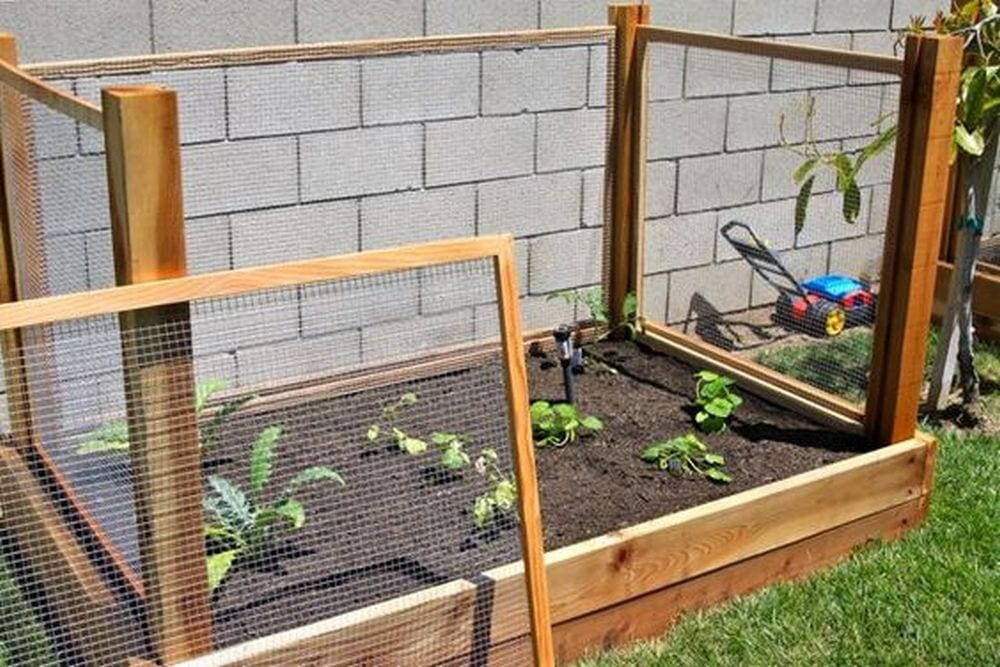
I’d suggest looking on Craigslist in your area. People often give away and sell leftover stones from various projects.
If you can’t find any through those sources, you can order stone to be delivered from a local landscape supply store in your area.
Soil: Once you settle on bed size and length, you can use this soil calculator to figure out how much soil you’ll need to order to create your beds. Make sure you’re ordering a mix that’s appropriate for growing food. I like mixes that are 1/2 compost and 1/2 topsoil.
Organic fertilizer: I recommend adding a balanced organic garden fertilizer to all of your new garden beds before planting. I’ve had mixed experiences with soil I’ve ordered for my garden. Often it’s lacking the nutrients vegetable plants need to grow.
I gathered several suggestions from reputable companies in my Amazon storefront here. You can read more about organic garden fertilizer and what you should look for when selecting one to purchase.
Mulch for garden paths: I use a thick layer of woodchips for all of my garden paths because they last a long time. I usually add a new layer once a year in spring. You can really use whatever material you want for your paths, stones, gravel, pavers, bricks, and more.
Again, being married to an arborist has its advantages, including an unlimited supply of woodchips. If you have a tree pruning or removal scheduled for your property, ask the tree care company to leave behind the woodchips.
There’s also a website called Chip Drop where you can sign up to receive free woodchips from local tree care companies.
Woochips can be expensive to buy when you need large quantities and this will be an expense you’ll need to expect every spring.
Mulch for garden beds: You don’t want to use woodchips on your garden beds as mulch. They’re very carbonaceous, so often when they get mixed into the soil they steal nitrogen from the surrounding plants to aid them in breaking down.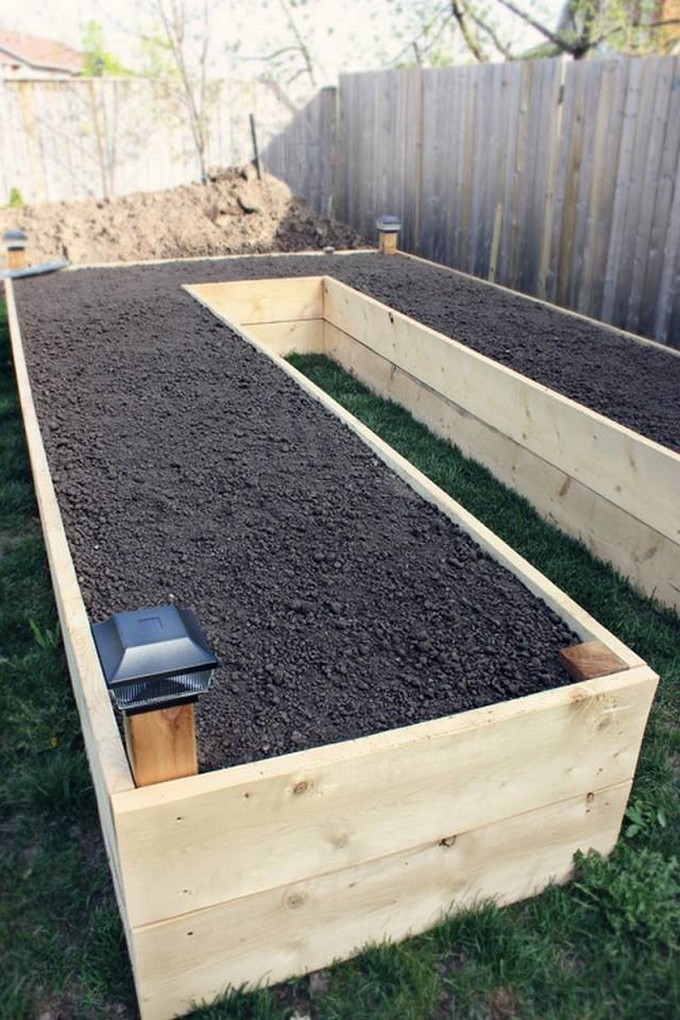 Vegetable plants need a lot of nitrogen, so this could affect their health.
Instead, opt for straw, hay, leaves, grass clippings or other organic matter. You can read more about how I sing the praised of vegetable garden mulch.
Cardboard: If you’re installing over grass, you’ll need to source a big pile of cardboard. This is your excuse to go dumpster diving if you’ve never done so! Where I live most businesses have a cardboard recycling dumpster behind their stores that are clean and dry and just contain cardboard.
If you need large pieces go to a bike or appliance store, smaller pieces can be found at restaurants, craft stores, and liquor stores. I like to pick a strip mall nearby and cruise my car behind the stores and peek in the dumpsters until I find cardboard.
Now that you have all of your supplies, let’s walk through the installation process.
Similar to option two, I used a measuring tape and stakes to figure out how we wanted to lay out the beds. Our property slopes down towards the garage in this part of the yard, so we decided to build the beds perpendicular to the house going down the slope.
As you can see above, we were also able to place the logs approximately where we wanted them to help us visualize how it would look.
We built each bed with logs running down the two sides, then we picked through our pile of landscape rocks to create the ends of the garden beds.
Sometimes we used a curved piece of log and a few stones to form the edge of the bed, as you can see in the photo above, and sometimes we used all rocks as in the photo below.
After we got all of the beds built, we laid down cardboard in each bed and filled it with soil. Then we covered the rest of the garden with cardboard and woodchips to kill the grass in the aisles.
We were so tired at the end of this project that I forgot to take the final photos! But, similar to the other two raised bed options our final step was to mulch the beds with hay for the winter.
In this final garden expansion, I added five additional raised garden beds to my yard, for a total of 18 and an herb spiral. That’s a big garden! The sizes of the beds in this phase were between 3.5 – 4 ft. wide and between 11 – 14 ft. long.
Additional Notes & Resources for Easy Raised Garden Beds
If you don’t want to build your own raised beds, there are lots of ready-made options to choose from online. While I haven’t tried any of them yet, I gathered some designs in my Amazon storefront here.
Make sure you read the reviews and the descriptions carefully. Oftentimes the wood isn’t as thick and the beds aren’t a big as you’d get with a DIY garden bed.
Pinterest is a great source of ideas for garden design and layout and raised bed construction. I have a board devoted to Easy Raised Bed Design and one for Vegetable Garden Design.
When you’re trying to get your creative juices flowing, purchasing or borrowing a few garden books can really kickstart your enthusiasm. Here are some of my favorites for design inspiration.
Before & After Garden Photos
Before and after photos are so much fun to see! And they inspire excitement about the possibilities in your own yard.
So, let’s end this post with some photos from my home vegetable garden installation!
I hope I’ve given you all the resources you need to design and build your own attractive and easy raised garden bed this season! If there’s anything you’re still wondering about, leave a question in the comments!
And if you want to see my garden in a more three dimensional way, come on over to my Youtube channel where I have several video tours of my gardens throughout the season.
Read more about designing and planning your garden:
- 15 Purple Vegetables You Need to Grow in Your Garden
- How to Grow More Food with a Custom Planting Schedule
- Beautiful photos of creative and colorful vegetable gardens
SHARE IT ON PINTEREST
Authorization
MO, Odintsovo
- Delivery across Russia
- MO, Odintsovo Moscow region, Odintsovo, st.
 East, 19 How to get there
 - MO, Shchelkovo Moscow region, Schelkovo, Proletarsky avenue, 20 How to get there
- Moscow, Shcherbinka Moscow, Shcherbinka, st. Vostochnaya, d. 8 How to get there
- Krasnodar Krasnodar, st. Highway Neftchinikov, 40 How to get there
- Rostov-on-Don Rostov-on-Don, st.
 Malinovsky, d. 23 D How to get there
 - Permian Perm, st. 2nd Kazantsevskaya, 11 How to get there
- Voronezh Voronezh, Patriotov Ave., 45g How to get there
- Nizhny Novgorod Nizhny Novgorod, st. Betancura, d. 1 SEC "Seventh Heaven" How to get there
- Chelyabinsk Chelyabinsk, st.
 Labor, d. 203, TRC Rodnik How to get there
 - Yekaterinburg Yekaterinburg, st. Shefskaya, 107 How to get there
- Saratov Saratov, Volsky tract, 2, shopping center "Happy Mall" How to get there
- Orenburg Orenburg, Sharlykskoe highway, 1, "Armada" mall How to get there
Please log in
Forgot your password?
If you are new to the site, please fill out the registration form.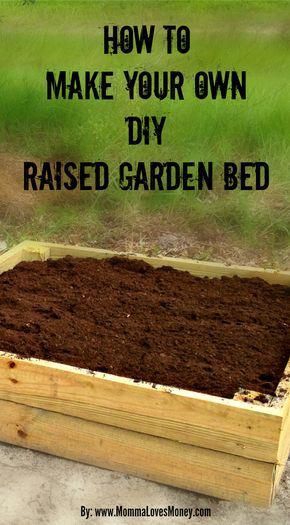
Register
How to make a thriving garden on a site with wet soil - AgroXXI
If the soil in your garden is always wet for one reason or another, then you can rightly be afraid of fungal diseases, the spread of pests and loss of yield. Especially if the rainy weather has been established for a long time. However, wet soil should not be a disaster - many plants thrive in such conditions, you just need to help them a little
1. Improving drainage
Adding coarse expanded clay before planting in the base of the hole will help improve drainage and will be a good help to plants in rainy summers, when cold and wet soil can seriously stop their growth.
2. We plant moisture-loving plants
All cabbages (white, cauliflower, kohlrabi, Beijing), currants, viburnum, cranberries feel great on wet soils. Hydrangea, lobelia, irises, asters, decorative ferns and primrose bloom in lush color. In such areas, other, less moisture-loving crops can be planted, but using certain tricks.
3. Making raised beds
But cabbage and viburnum alone won't satisfy you, so you should make raised beds for growing other less moisture-loving crops. This has a definite advantage. Firstly, you can fill such beds with any soil mixture of your choice, and secondly, they can easily turn into mini-greenhouses, provided that you make holes for attaching arcs to the corners of the box. Thirdly, raised beds become a barrier to snails and slugs, which feel at ease in wet conditions. For better protection of plants from slugs and snails, add expanded clay granules to the root zone.
Fruit trees (it is better to take dwarf varieties) are also planted on mounds, where again we lay expanded clay for drainage.
4. Add organic matter and stock up on liquid foliar fertilizer
Adding organic matter, such as well-rotted manure or garden compost, to the soil can help improve soil structure and make it more nutritious for plants.
But, remember that the very first prolonged rains will wash out the main supply of nutrients from your beds.
There is a way out - we use liquid foliar fertilizers Folirus. Regardless of the quality and condition of the soil, they will provide plants with a full range of nutrients as quickly as possible, absorbing through the leaf.
In the event that you have planted not moisture-loving crops, carefully observe the color of the leaves. For example, if the leaves begin to turn red at the edges, this indicates that excessive moisture has led to nutritional deficiencies. Then we urgently take Folirus and correct the situation. Using modern liquid fertilizers Folirus, you can grow even sweet and strawberries on raised beds, regardless of weather conditions.
5. Keep the forks ready
After heavy rains, we take the forks out of the shed and go to pierce the soil so that excess moisture quickly goes to the lower layers. At the same time, we try not to step on the beds once again, in order to avoid compaction, but we pass along the wooden boards laid in the aisles between the beds.