How to keep outside spigot from freezing
How to Prevent a Frozen Outdoor Faucet
Winterizing your outdoor faucet, also known as a hose bib or water spigot, is a simple project. If it’s not done correctly, the consequences could be serious. A frozen outdoor faucet can cause serious water damage to your home and property. Luckily it is easy to prevent a frozen faucet if you follow these tips.
Why Do I Need to Winterize my Outdoor Faucets?
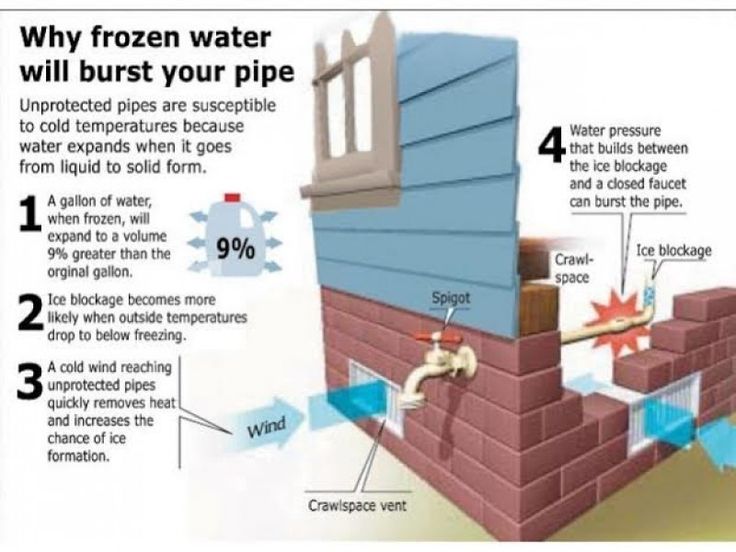
Water expands as it freezes, so if water is inside your pipes when the temperature drops below freezing, the ice can grow too large and burst the pipe. While the problem may not be immediately obvious (especially if the leak is inside the wall), a clear indicator that there’s an issue is if there’s water spraying outside.
If you see water around the spigot or inside your house, call your local plumber immediately! Waiting too long to fix the issue can result in extensive damage to your home.
Thankfully, avoiding a frozen outdoor faucet is easy. Winterizing is not expensive and you can do it yourself. A few minutes now can save you time, money & frustration.
3 Steps to Avoid a Frozen Faucet During Winter
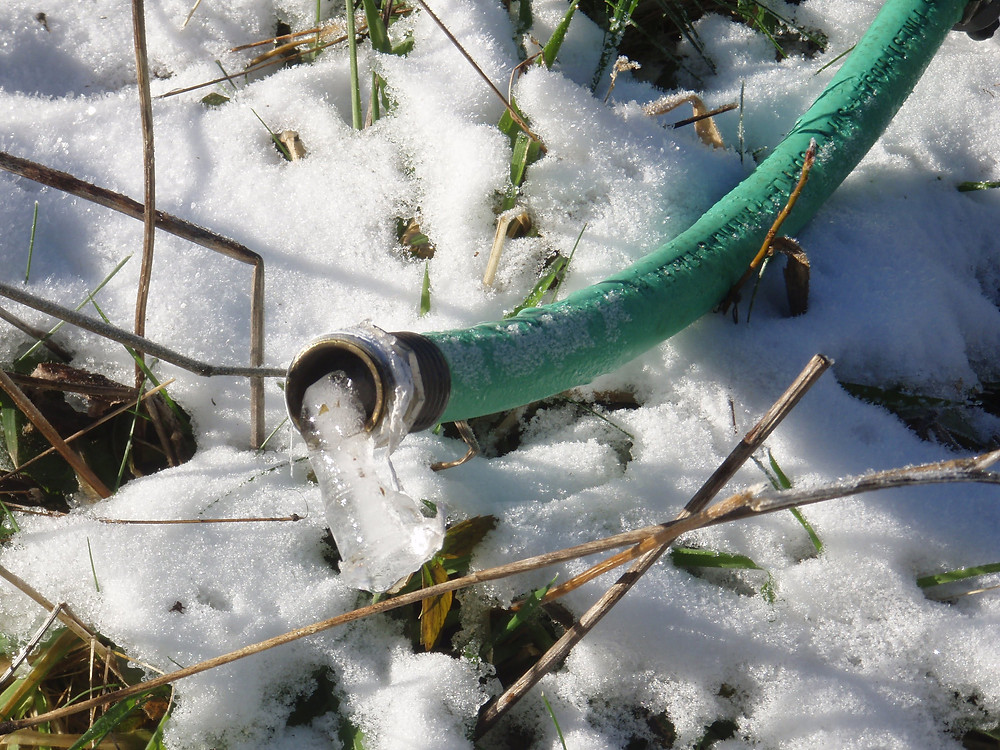
1. Disconnect Your Hoses in Fall
This step is important because a connected hose holds water even when the faucet is turned off. When the temperature drops, the water freezes inside of the hose and pipe and can burst. We often see instances where the break happens in winter but people don’t notice until spring when they turn on the outdoor faucet. Depending on where the break is you can get water spraying inside or outside your home when you turn the water on.
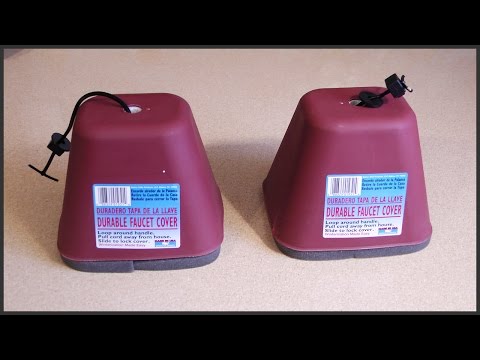
Outdoor faucet covers are easy to install and protect from freezing during winter.
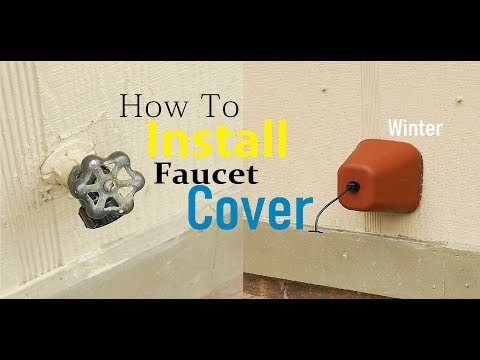
2. Use an Outdoor Faucet Cover
Disconnecting the hose is important, but doesn’t completely solve the problem – you also need a faucet cover. Luckily, most hardware stores carry inexpensive Styrofoam covers that keep your faucets isolated and protected from the winter elements.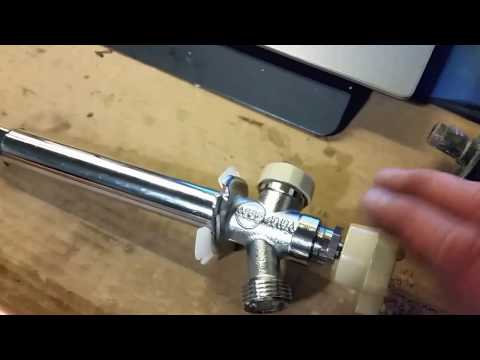
Simply purchase and install based on the manufacturer’s instructions, making sure to secure it tightly in place. This little step can save you a lot of frustration and potential water damage.
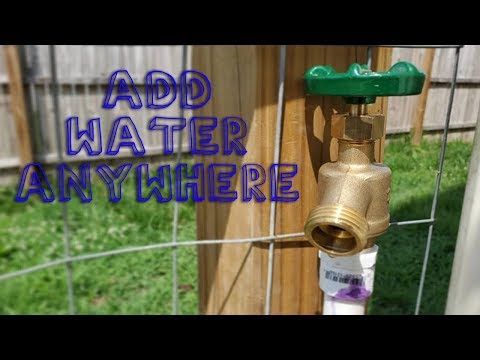
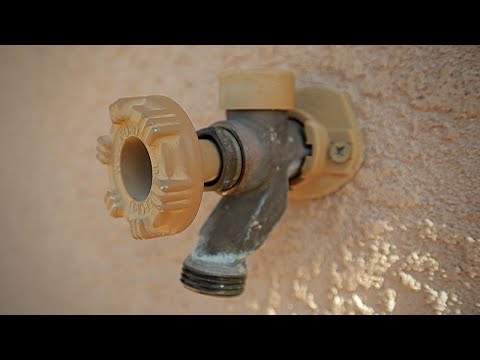
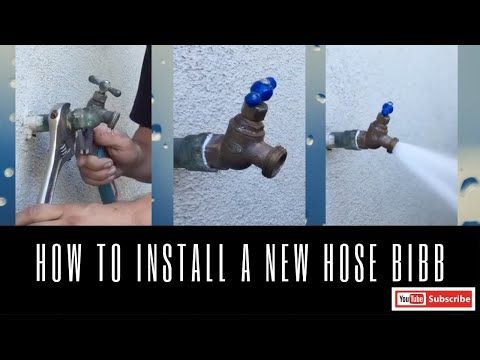
3. Install a Frost-Free Faucet
If you have already experienced problems or are looking for a more permanent solution, you can talk to your plumber about replacing your faucet with a frost-free spigot. This is an outdoor faucet designed to operate in freezing temperatures. You still need to disconnect the hose in the winter. A frost-free faucet can break if the hose is left connected because the water stays trapped in the faucet head and pipe. You won’t notice you have a problem until spring when you turn on the faucet.
A few preventative steps today can save you time, money and effort in the future. Call a trusted plumber right away if you suspect that your faucet is broken or you need help winterizing it. They will help you decide what works best for you, your family and your home. You can also check out our article on 10 ways to prevent frozen pipes for more things you can do to protect your home this winter.
How to Prevent Outdoor Spigots From Freezing
By
Bob Formisano
Bob Formisano
Bob Formisano is a licensed architect and builder with nearly 40 years of experience building new homes and restoring older homes. One of his specialties is repairing old systems dating back to the 1920s, including galvanized water pipes, knob-and-tube wiring, and more. His home repair articles for The Spruce span more than 10 years.
Learn more about The Spruce's Editorial Process
Updated on 08/02/22
Reviewed by
Richard Epstein
Reviewed by Richard Epstein
Richard Epstein is a licensed master plumber with over 40 years experience in residential and commercial plumbing. He specializes in estimating as well as design and engineering for plumbing systems, and he works for one of New York's largest union plumbing construction companies.
Learn more about The Spruce's Review Board
Fact checked by
Jessica Wrubel
Fact checked by Jessica Wrubel
Jessica Wrubel has an accomplished background as a writer and copy editor, working for various publications, newspapers and in public libraries assisting with reference, research and special projects. In addition to her journalism experience, she has been educating on health and wellness topics for over 15 years in and outside of the classroom.
Learn more about The Spruce's Editorial Process
The Spruce / Sarah Lee
Project Overview
Worrying about outdoor spigots freezing every winter is something that most homeowners can relate to. But this doesn't have to be such a perennial problem.
If you have a standard spigot, there are simple winterizing steps you can take that make it unlikely you'll have a problem with freezing. You can also go a step further and replace a standard faucet with a frost-proof faucet.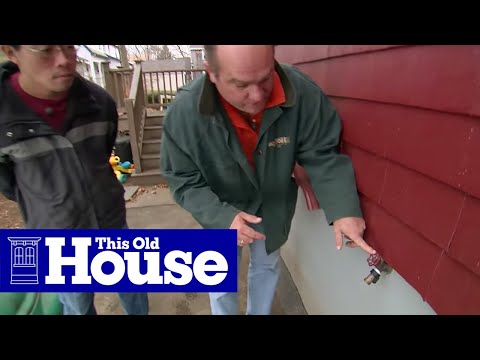
What Is a Frost-Proof Faucet?
A frost-proof (also called "freezeproof" or "frost-free") faucet provides better protection against freezing and eliminates the need to winterize the faucet—other than removing the hose.
Keep reading for two ways to prevent your outdoor spigots from freezing during the wintertime.
Equipment / Tools
Winterizing a Standard Spigot
- Bucket
- Channel-lock pliers (if needed)
Installing a Frost-Proof Faucet
- Screwdriver
- Channel-lock pliers
- Tape measure
- Tubing cutter or hacksaw
- Caulk gun
Materials
Winterizing a Standard Spigot
- Insulated faucet cover
Installing a Frost-Proof Faucet
- Frost-proof faucet with push-fit connector
- Sandpaper or emery cloth
- Corrosion-resistant screws (if needed)
- Exterior caulk
The Spruce / Sarah Lee
How to Winterize a Standard Spigot
-
Remove the Hose
If there is still a garden hose connected to the outdoor faucet, remove it from the spigot, drain any residual water in the hose, coil it up, and store it in a dry location.
The Spruce / Sarah Lee
-
Shut off the Water
Locate the control valve on the water supply pipe leading to the outdoor spigot. If you have metal water pipes, this is usually a brass ball valve located several feet from the outside wall. Turn the handle on the control valve clockwise until it stops. If the valve has a lever-type handle, turn the lever so it is perpendicular to the pipe.
Tip
As you can see, preventing a standard (not frost-proof) spigot from freezing requires a shutoff valve on the supply pipe leading to the faucet. If your spigot does not have this kind of shutoff valve, it's best to install one to simplify annual winterizing tasks.
The Spruce / Sarah Lee
-
Drain the Spigot
Fully open the outdoor spigot and let all residual water drain out of the pipe. If the water trickles and never fully stops, the indoor shutoff valve is faulty and must be replaced. Close the spigot valve.
Hold a bucket under the shutoff valve and remove the bleeder cap on the valve, if it is equipped with one. You may need pliers to loosen the cap. Let all residual water in the line drain into the bucket. Reinstall the bleeder cap, and tighten it snugly.
The Spruce / Sarah Lee
-
Install an Insulated Faucet Cover
Add an insulated faucet sock or faucet cover to the faucet, if desired. Although these covers don't create any heat of their own, they do trap a small amount of heat radiating from the house, and this is usually enough to prevent the faucet from freezing and bursting—especially if you have also followed the recommended steps for draining the pipes.
The Spruce / Sarah Lee
How to Install a Frost-Proof Faucet
The surest way to prevent an outside faucet from freezing is to replace a standard faucet with a frost-proof one known as a sill-cock. These faucets are controlled with a long rod that extends into the home, where a cartridge or compression valve controls the flow of water. Since the valve itself is located within the safe warmth of the home, it is almost impossible for it to freeze.
A frost-proof faucet is a 6- to 20-inch unit with a hose spigot and control handle at one end and a connector on the other end of the tube for attaching to the indoor water pipe. As a further safety measure, these faucets are designed to be self-draining; when you shut off the faucet handle, any residual water in the long stem will drain out of the tube.
These faucets can be attached to the plumbing pipe with a compression, soldered, PEX, or push-fit connection. For most people, it's best to buy a faucet with a push-fit style of connector, such as the SharkBite brand. This will be the easiest install, as it requires no soldering and can be used with any type of water supply pipe.
If you have trouble finding a frost-proof faucet with a push-fit connector, you can use a standard threaded type, and then use a female threaded-to-push-fit transition fitting to join it to the water pipe. If you have PEX tubing in your home, there are also frost-free faucets that are fitted with PEX-type connectors.
Warning
A project of this scale is best left only to professionals or experienced DIYers: Do not attempt this unless you are confident in your plumbing skills.
-
Shut off and Drain the Water
Turn off the water to the supply pipe leading to the outdoor spigot. If the water pipe does not have its own control valve, you must turn off the water to the entire house, using the home's main shutoff valve.
Open the outdoor spigot and drain the remaining water from the supply pipe.
The Spruce / Sarah Lee
-
Remove the Old Spigot
To remove the outdoor faucet spout, start by removing any mounting screws, then turn the spout counterclockwise to unscrew it from the end of the pipe. You may need to use a pair of channel-lock pliers to twist the faucet spout. Pull the faucet out from the wall on the exterior side.
 Purchase a new frost-free faucet of the same size. It is important that the length and diameter of the pipe match the old faucet.
 The Spruce / Kevin Norris
-
Prepare the Water Supply Pipe
Because of the long valve stem on a frost-proof faucet, it is usually necessary to cut the water supply pipe where the tube of the faucet will connect to it. Use a tubing cutter (for copper pipe), a hacksaw (for galvanized steel or PVC pipe), or a PEX tubing cutter for PEX pipe. Remove and discard the cut-off section of pipe running to the outside of the house.
Debur the inside and outside of the cut end of the water supply pipe with sandpaper or emery cloth. Make sure the outside of the pipe is clean and smooth so it can accept the connection fitting on the new frost-proof faucet.
Mark the end of the pipe at the push-in distance specified by the manufacturer (usually about 1 inch from the cut end of the pipe).
The Spruce / Kevin Norris
-
Attach the Frost-Proof Faucet
Insert the frost-proof faucet through the wall from the outside and position the spout so it is right-side-up.
 Go inside and push the faucet's fitting end straight onto the pipe, pushing as far as the fitting will go. It should reach the push-in mark on the pipe, indicating the pipe is fully inserted into the fitting.
 If you are using a standard threaded-type faucet, screw on the push-fit transition fitting to the faucet's tube first, before attaching it to the water pipe.
From the outside of the house, secure the faucet flange to the wall surface using corrosion-resistant screws, which are usually provided with the faucet.
The Spruce / Kevin Norris
-
Test the Faucet
Open the valve on the faucet, then turn the water back on at the shutoff valve and allow water to run freely out of the faucet spigot. Open and close the faucet spigot several times to confirm that it is working properly and that there is no leaking where the faucet tube connects to the water pipe.
When satisfied that the faucet works correctly, seal the joint between the faucet flange and the house wall with exterior caulk.

The Spruce / Kevin Norris
Why the tubes of the air conditioner of the outdoor unit are frosted over
When buying an air conditioner and using it, we usually do not pay attention to the outdoor unit of the air conditioner. For the user, the internal and external state of the indoor unit is most often important. Although the effective operation of the entire climate system depends on the outdoor unit. Often problems with the outdoor unit can occur during the cold season when working for heating.
In 99% of cases, freezing of pipes is a consequence of the lack of regular service maintenance of air conditioners.
The outdoor unit consists of several elements. Of these, the following components can freeze over:
- Thin tube of the air conditioner with a tap on it. Also called "pressure", "liquid" or "low pressure" tubing;
- Thick tube with stopcock on it.
 Also called "gas", "suction" and "low pressure" tubing;
 - Both tubes. In this case, the outdoor unit itself may also freeze.
When frost appears on some parts of the outdoor unit, do not sound the alarm. In some cases, this is the standard situation. These cases include:
- A small layer of frost on the pipes will not interfere with the full operation of the climate system. Because it turns into a small condensate on the tubes during the “rest” of the air conditioner. If, when you turn on the air conditioner, it functions without problems, then you don’t have to worry;
- Air conditioning operation after the end of the cold season. When starting the air conditioner for the first time after winter or a long period of inactivity, the pipes often freeze up. Then they will thaw and will not freeze.
If a very large amount of ice has formed on the pipes, then this symbolizes problems in the system.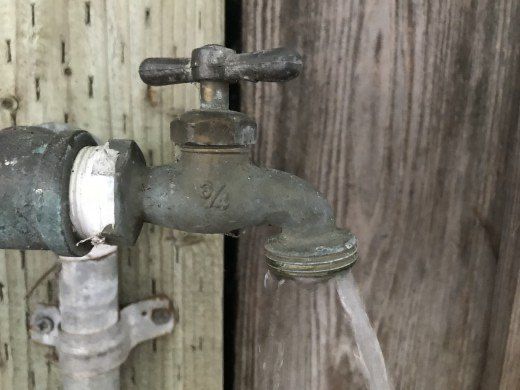
Why does the thick pipe of the air conditioner of the outdoor unit freeze over
Frost on the thick pipe and its nut is formed due to the fact that the freon does not completely boil away in the evaporator. The process of cooling to the end takes place outside the indoor unit, while the "boiling" of the refrigerant occurs in the gas tube. That is why freezing occurs.
Often, the main problem of frosting is not in any breakdown of the system, but in improper installation, unprofessional repairs or improper service.
The main causes of suction pipe freezing are: If the air conditioner is installed incorrectly, inexperienced installers can bend the tube too much. This may lead to a violation of the circulation of the refrigerant. In the future, it will partially boil in a large tube, and it will freeze over. If at the moment the air conditioner began to work worse, the indoor unit began to leak, although it used to work fine and it was not refilled, everything indicates a breakdown. In this table, we will display the breakdown options and the possibility of their solution. 
Why is the thin pipe of the outdoor unit air conditioner frosted over? This problem is due to the fact that the refrigerant boils before entering the evaporator.
Frost on a thin tube may occur due to incorrect installation, maintenance or repair. Therefore, it is very important to contact the experts in their field.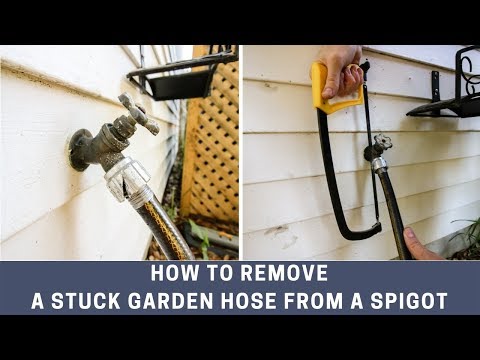 The main mistakes in the work of masters that lead to icing of a thin tube:
- Path length too long.
- Moisture in the cooling circuit. This may be due to the fact that the freon leak was incorrectly eliminated or the wrong refueling was made.
- Partial closure of the valve on the liquid tube. In this case, freon boils before the evaporator, so freezing occurs.
If freezing and problems with the operation of the air conditioner appear after some time after normal operation, most likely some kind of breakdown has occurred. In this table, we will display the breakdown options and the possibility of their solution.
Why are the tubes of the outdoor unit air conditioner frosted over? But it is very important to remember that the air conditioner must be used according to its characteristics. If you do not have an inverter model, then the lowest temperature at which it can function for heat is not lower than 7 ° C.
 There are also inverter ones, but they have their limits, there are different models that can operate down to -15°C, up to -20°C and even -30°C. If you ignore this rule, it can lead to damage to the climate system. Also, if you want to protect yourself and your device, install winter kit for air conditioner to prevent freezing of the outdoor unit.
We can solve any problems with your air conditioner, and if necessary, replace it with a new and modern one with a turnkey installation.
Order regular maintenance and cleaning of air conditioners to ensure their long life at a discount of -33%.
Tank and tank heating with heating cable
More about the project
Heating RGS - horizontal steel tank
This type of tank usually has a large capacity. Can store various types of process fluids used in production and industrial facilities. The temperature of maintaining the wall by the electric heating system is determined by the type of process fluid stored. For these purposes, a self-regulating heating cable of various temperature classes is widely used, which is laid in the lower part of the tank.
Tank heating cable: SAMREG 16-2CR, SAMREG 24-2CR, SAMREG 30-2CR, SAMREG 40-2CR
Free project calculation
Heating system for steel tank 100 m3 for drinking water storage
$69,716 / PC
Steel tank heating system 5 m3 with condensate
45 630 rubles / PC
Steel tank heating system 31 m3
$57,898 / PC
To section
More about the project
VST heating - vertical steel tank
This type of tank is also made for a large internal volume, usually from 100m3. They store various process fluids, but most often they are used to store water, formation water, industrial water, oil products. The storage temperature of liquids is usually carried out at the level of +5…+30С, which is achieved using a heating system based on a low-temperature heating cable, which is usually installed at 1/3 of the total height of the tank.
Tank heating cable: SAMREG 16-2CR, SAMREG 24-2CR, SAMREG 30-2CR, SAMREG 40-2CR
Free project calculation
More about the project
VEE, VKK, VPP heating - vertical tank with elliptical, conical or flat bottoms
This type of tank is usually small in capacity (up to 100m3) and is used in many industries for the storage of process fluids. Very often equipped with support-racks. The heating system based on a self-regulating cable allows you to maintain the required process temperature, which can reach more than 100C. The cable is mounted to a height of not more than half of the total height of the container.
Tank heating cable: SAMREG 16-2CR, SAMREG 24-2CR, SAMREG 30-2CR, SAMREG 40-2CR
Free project calculation
More about the project
Heating of horizontal tanks with conical bottoms GKK
This type of tanks is also widely used in many industries for the storage of liquid working media, toxic, explosive and flammable products. They are often used in production lines. Heating of containers of this type is associated with the use of a self-regulating cable of various temperature classes, which is due to the working environment and the technological process in which the container is used. The cable is mounted at the bottom of the container along its entire length.
Tank heating cable: SAMREG 16-2CR, SAMREG 24-2CR, SAMREG 30-2CR, SAMREG 40-2CR
Free project calculation
More about the project
Underground tank heating EP
Underground tanks are very often used for storage of oil products and industrial wastewater, process liquids. In the heating system for such containers, increased requirements for reliability are applied, because. its maintenance presents considerable difficulties. For heating, a heating cable of various temperature classes is used.
Tank heating cable: SAMREG 16-2CR, SAMREG 24-2CR, SAMREG 30-2CR, SAMREG 40-2CR
Free project calculation
More
Tank heating on sled
This type of tank, usually horizontal, is mounted on skids and is designed to move the product stored in them from one object to another. The transported product is usually drinking water for household needs at construction sites. The purpose of heating such containers is to protect the stored product from freezing. This is achieved by using a low-temperature heating cable.
Tank heating cable: SAMREG 16-2CR, SAMREG 24-2CR, SAMREG 30-2CR, SAMREG 40-2CR
Free project calculation
More
Silo heating
Silos are cone-shaped containers used in many industries for the storage of bulk solids such as sand, cement, lime, crushed stone, grain, etc.
The task of the heating system for this type of vessel is to maintain the required process temperature for trouble-free operation as part of the process. A low-temperature heating cable is used for heating.
Tank heating cable: SAMREG 16-2CR, SAMREG 24-2CR, SAMREG 30-2CR, SAMREG 40-2CR
Free project calculation
More about the project
Separator heating
These tanks are designed for cleaning non-aggressive gases from mechanical impurities and liquid phase in gas distribution stations and gas treatment plants. Are issued as a rule of horizontal execution. The electric heating system of such tanks performs the function of maintaining the required process temperature for normal operation as part of the process line.
Tank heating cable: SAMREG 16-2CR, SAMREG 24-2CR, SAMREG 30-2CR, SAMREG 40-2CR
Free project calculation
More
Heating of air receivers and receivers
Air receivers are intended for storage of compressed air and inert gases. They are used in heating systems, on compressor installations, maintain a constant pressure. During operation, condensation forms in the lower part, which freezes when exposed to low temperatures. The task of heating is to maintain a positive temperature in the lower part of the tank to ensure unhindered removal (draining) of condensate.
Tank heating cable: SAMREG 16-2CR, SAMREG 24-2CR, SAMREG 30-2CR, SAMREG 40-2CR
Free project calculation
More about the project
Tanker heating
These are tanks, usually horizontal, designed to store and transport process fluids. The heating system is used to maintain the required process temperature or to protect the stored product from freezing. A feature of using the heating system is the use of universal quick-disconnect electrical connections for quick connection / disconnection from the power source in parking lots.
Tank heating cable: SAMREG 16-2CR, SAMREG 24-2CR, SAMREG 30-2CR, SAMREG 40-2CR
Free project calculation
Hydrocyclone heating
These are vertical cone-shaped tanks designed for separating (separation) of heavier fractions in the incoming primary product, ore, etc. using the aquatic environment. It is used for thickening flotation products, desliming, treatment of circulating water in the mining industry, filtration of formation water from solid particles and suspensions in the oil industry, etc. For these containers heating is used on the basis of a self-regulating cable in order to protect the aqueous solution of the initial product from freezing. The cable is usually installed along the entire height of the hydrocyclone.
Tank heating cable: SAMREG 16-2CR, SAMREG 24-2CR, SAMREG 30-2CR, SAMREG 40-2CR
Free project calculation
More about the project
Heating SPS
These are special hydraulic structures designed for pumping industrial and domestic wastewater. The task of heating is to protect against freezing in order to ensure the smooth operation of process equipment.
Cable for tank heating: SAMREG 16-2CR, SAMREG 24-2CR, SAMREG 30-2CR, SAMREG 40-2CR
Free project calculation
The heating cable is mainly used for heating tanks where temperature maintenance, frost protection and anti-condensation heating are required.
Free tank heating calculation in 2 hours
Thank you, our manager will contact you shortly
Fill in the required fields
By submitting the form, you consent to the processing of personal data.
Calculations will be sent to your e-mail, carefully check the data when sending.
Tank heating cable
ChooseSelf-regulating cable SAMREG 24-2CR
280 r. / m
Self-regulating cable ALPHATRACE ATMI-CP17
705 r. / m
Heating cable Heat Trace 11FSM2-CT
To section
Composition of tank heating system
Heating part
This is the direct heating element of the system. Such an element can be industrial heating elements, industrial mortise electric heaters, plate heaters or a heating cable. Coupling kits are used together with the heating cable to ensure hermetic sealing of the ends of the heating cable.
Cable fixing system
These are special elements that secure the heating cable to the tank. An important task of the fastening system is the tightest fit of the heating cable to the surface of the tank to ensure good heat removal of the cable. The mount is made mostly of metal.
Power supply system
Power junction boxes, in which the heating and power parts are switched, and control boxes, in which the control cable and temperature sensors are connected.
Distribution network
These are power and control cable lines that provide power to the junction boxes, as well as elements for laying these cable lines.
Heating control system - consists of a temperature controller or thermostat, temperature sensors, power, control and start-up equipment. The temperature sensor is installed, as a rule, directly on the tank wall and measures the temperature of its surface.
The controller controls the temperature of the heated object and, based on the information received, turns on or off the sections of the heating cable. The temperature controller is usually installed in the electrical heating control cabinet.
The thermostat is installed mainly on the surface of the tank and locally controls the operation of the heating system. Thermostats are used to control the operation of small heating systems. the load power connected to it is limited.
Electric heating control cabinet provides power supply to the heating sections, protection of the power and heating parts in case of an emergency, overheating or short circuit, signaling the state of the heating system, reducing the peak load on the supply network and other tasks. The electric heating control cabinet is developed individually for a specific object, taking into account the wishes of the Customer. It is used for heating systems of tanks of medium and large capacity, where the use of thermostats is difficult. The use of a control system as part of a heating system can significantly save energy and protect the heated product from overheating.
Features of installation of the tank heating system
The sequence of installation of the system depends on the composition of the system, the presence of previously installed elements of the heating system, and other factors. In general, installation should include the following steps:
- preparatory work;
- manufacturing and installation of heating sections with simultaneous placement and installation of junction boxes;
- protection of heated objects with thermal insulation;
- installation of control cabinets;
- installation of power supply and control system;
- Trial activation of the system.
Depending on the design of the tank, several ways of mounting the heating cable are used:
Heating of the vertical tank
Tape clamps are installed horizontally along the circumference of the tank at a certain distance from each other. The installation height of band clamps is usually from 1m to 1/3 of the total height of the tank. A perforated mounting tape is attached to the clamps vertically with a certain step along the entire circumference of the tank, to which, in turn, a heating cable is attached. The cable is laid in a spiral or snake.
Large vertical tank heating
Welded metal mesh is installed on 1/3 of the total height of the tank, which is pulled together with pipe sections and studs. A heating cable is attached to the metal mesh using a knitting wire or metal tape. This mounting method is used for vertical tanks over 500m3.
Horizontal tank heating
Tape clamps are installed vertically along the circumference of the tank at a certain distance from each other. Tape clamps are installed along the entire length of the tank. A perforated mounting tape is attached to the clamps horizontally along the entire length of the tank with a certain step to a height of 1 m to 1/3 of the total height of the tank, to which, in turn, a heating cable is attached. The cable is serpentine along the bottom of the tank to the heating height determined by the project documentation.
Vertical tank bottom heating
The band clamp is installed horizontally along the circumference of the tank, and if there is a nozzle on the bottom of the tank, also on the nozzle. A perforated mounting tape with a certain pitch is installed vertically along the bottom of the tank and converges at the point of welding of the branch pipe on the bottom of the tank. If there is no branch pipe, then the mounting tape runs along the length of the bottom arc and is fixed on the opposite side of the cylindrical part of the tank. The heating cable is laid in a spiral on the bottom of the tank and fixed on the mounting tape. The end of the heating cable is usually at the lowest point of the bottom of the tank, the beginning is wound into a junction box placed on the cylindrical part of the tank.
Heating sections are manufactured on site to the actual dimensions of the objects to be heated, using standard heating tape termination kits. After fixing the heating sections, it is necessary to glue them along the entire length with aluminum tape to ensure better contact between the heating cable and the heated surface.
The junction boxes are installed on the surface of the tank using the device for introducing the heating cable under the thermal insulation, which is part of the box, which are fixed with tape clamps.
The temperature sensor is mounted on the surface to be heated in accordance with the installation drawing and fixed with a self-adhesive aluminum tape.
Control cabinets are usually installed in a dedicated dry heated room (+5…+40*С) in accordance with the requirements of the PUE. The installation location of the control cabinet is agreed with the Customer.
Tank heating video
Mount
ChooseMounting tape
PVC-insulated cable
Mounting tape LAMS
To section
How to save money on the heating system?
The cost of operation depends on the quality of the project development - heat loss calculation, cable selection, installation scheme, etc. Describe your facility and we will calculate the approximate cost of system operation.
Thank you, our manager will contact you shortly
Fill in the required fields
By submitting the form, you consent to the processing of personal data.
Calculations will be sent to your e-mail, carefully check the data when sending.
Stages of calculation of tank heating system
- The customer fills out a questionnaire for tank heating on his own or with the help of our manager by phone, which indicates the initial data about the object: geometric parameters, type and thickness of tank insulation, minimum ambient temperature, required temperature maintenance of the tank wall, information about the stored product, data on the steaming of the tank (if required), etc.
- Based on the completed questionnaire and the received initial data on the object, a heat engineering calculation is performed, the results of which determine the required power of the heating system to meet the requirements of the questionnaire.

- Further, based on the required heating power, a heating cable of the optimal length and power is selected, taking into account the requirements for steaming the object and its location area. The power of the cable and its length are chosen in such a way as to ensure uniform distribution of the heating cable in the heating zone without the formation of a "thermal zebra" when there is uneven heating of the tank surface, as well as the required thermal regime.
- After selecting the type and quantity of cable, the entire cable is divided into zones-sections, the length of which is determined by the maximum allowable length for this type of cable, as well as the features of their installation on the tank. This determines the number of cable termination kits.
- Next, the heating cable fastening system is selected and the quantity of each element of the fastening system is calculated.
- Then the number of junction boxes is determined, the temperature sensor and controller are selected, and the cost of the heating control cabinet is calculated.
- Finally, the parameters of the heating system are calculated: operating and starting power, operating and starting current of the system. This information is important in the initial assessment of the cost of supplying power to the heating system.
Tank heating design
Our company designs tank heating systems of any size and complexity and is ready to develop a project for a specific facility in the shortest possible time. In the course of designing, we take into account the wishes of the Customer, offer our solutions and coordinate them with the customer.
To section
When designing tank heating systems, we are guided by the requirements of regulatory documents such as:
- PUE ed.7,
- SNiP 3.05.06-85,
- SNiP 23-01-99,
- GOST R 50.57125-2001,
- GOST R IEC 62086-2-2005,
- Technical data, instructions, and manufacturer's recommendations for equipment and materials.

Learn more